How to Deep Clean Your Fridge Like a Pro (And Why It Matters)
Over the years, I’ve seen the inside of more refrigerators than I can count. I’m talking about everything from sad bachelor-pad fridges holding just condiments and beer to the bustling command centers of big family kitchens. And here’s what I’ve learned: a refrigerator isn’t just a cold box. It’s a hard-working machine that needs specific care to keep your food safe, save you money on electricity, and, frankly, last longer.
In this article
Most people think ‘cleaning the fridge’ just means wiping up a sticky spill. But a true, professional-level clean goes way deeper. It’s about understanding how the appliance actually works, applying food safety rules the pros use, and using techniques that prevent problems down the line. This isn’t just about making it look nice for a photo; it’s about creating a safe and efficient system for your food. So, let’s walk through the exact method I use, breaking down not just the ‘how,’ but the ‘why’ behind each step.

First, Why This Actually Matters
Before you even think about grabbing a sponge, you need to get what your fridge is doing. It’s not just making things cold; it’s an active system that pulls heat out of an insulated space. A whole cycle of refrigerant, compressors, and coils is constantly at work. A little fan circulates the cold air to keep the temperature even.
Knowing this makes you realize why organization is so critical. Different spots in your fridge have different temperatures. The door? It’s easily the warmest spot because it gets hit with room-temperature air every time you open it. The coldest area is usually near the cooling element, often at the back or bottom.
And this is where food safety comes in. Food safety agencies have what they call the ‘Temperature Danger Zone’—it’s between 40°F (4°C) and 140°F (60°C). This is the range where nasty bacteria can multiply like crazy. Your fridge absolutely must stay at or below 40°F (4°C). A quick tip: Don’t trust the built-in dial. I always recommend spending $5-$10 on a standalone refrigerator thermometer. I’ve seen built-in settings be off by as much as 10 degrees, which is a huge deal.
Finally, a dirty, overstuffed fridge is a power-hungry one. When air vents are blocked, the fan can’t do its job, creating warm spots where food spoils faster. When the condenser coils in the back are caked with dust, they can’t release heat efficiently. This forces the whole system to work overtime, hiking up your electricity bill and shortening the life of your appliance. Seriously, just cleaning the coils can cut energy use by 5% or more.
Getting Ready: Your Game Plan for a Proper Clean
A good job starts with good prep. Rushing this is how you end up frustrated and with a half-done job. The best time to do this is right before a big grocery run when the fridge is naturally emptier.
For your first real deep clean, set aside about 2 to 3 hours. It sounds like a lot, but once you get the system down, you’ll be able to knock it out in 90 minutes on future cleans.

Your Shopping & Tool List
Here’s what you’ll want to have on hand. No need to spend a ton of money, but the right tools make all the difference.
- A Cooler with Ice Packs: This is non-negotiable for keeping your perishables (dairy, meat, etc.) safe while you work. Even a cheap styrofoam one will do the trick.
- Microfiber Cloths (at least 3): One for washing, one for rinsing, and a dry one for the final polish. They don’t leave lint behind, which is key. A pack of these is usually around $10.
- A Food-Safe Cleaner: Please, don’t use harsh chemicals! Ammonia can damage the plastic, and bleach can leave behind residues you don’t want near your food. My go-to is a simple spray bottle with one part white vinegar and three parts water. For really stubborn grime, a few drops of unscented dish soap in a bucket of warm water is perfect.
- A Soft-Bristled Brush: An old toothbrush works great for getting into tight spots like shelf tracks and seals.
- Vacuum with Attachments: You’ll need the crevice and brush attachments for the coils and door seals.
- Refrigerator Coil Brush: This is a game-changer. It’s a long, skinny, flexible brush that costs about $8-$15 at any hardware store or online. It’s the only way to properly clean the condenser coils and it pays for itself in energy savings.
- Trash & Compost Bins: Have them right beside you. It makes the sorting process so much faster.
Emptying and Sorting Like a Pro
First thing’s first—and I can’t say this enough—unplug the refrigerator or switch it off at the breaker. It’s a simple safety step that also protects the compressor. Plus, it lets the inside warm up just a little, making stuck-on gunk easier to remove.
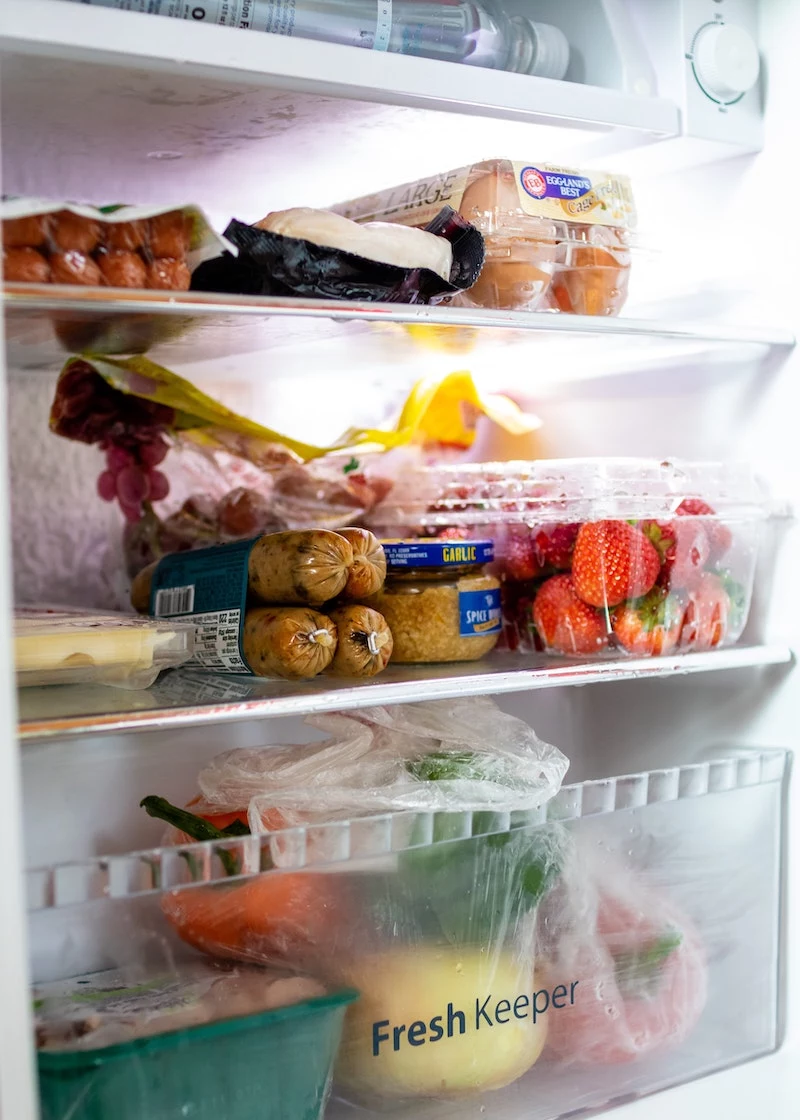
Work one shelf at a time. As you take each item out, decide its fate:
- Keep: If it’s fresh and you’re going to use it, great. Put perishables straight into your cooler.
- Toss: Go beyond the expiration date and trust your senses. If a sauce looks discolored, a jar lid is bulging, or something just smells off, it’s gotta go. A common mistake is not checking the underside of jar lids for mold!
- Combine: Got three jars of mustard with just a little bit left in each? Combine them into one and free up some valuable real estate.
By the way, this is the perfect time to take a mental inventory. I once worked with a client who had—I’m not kidding—four unopened jars of capers hiding in the back. That’s just wasted money and space.

The Deep Clean: Step-by-Step Techniques
Okay, the fridge is empty. Now the real work begins. We’re going to be methodical about this.
Step 1: The Shelves and Drawers
Take out all the shelves, drawers, and any other removable parts. And here’s a critical tip learned the hard way: if a glass shelf is ice-cold, do not plunge it into hot water. It can crack from the temperature shock. I’ll admit, the first time I cleaned one straight from a cold fridge, I used water that was too hot and heard a faint crack. Learn from my mistake! Let them sit on the counter for 15 minutes to come to room temperature first.
I wash these by hand in the sink with warm, soapy water. Use your little brush to scrub the grooves where the glass meets the plastic frame—you’d be disgusted by what collects in there. Rinse everything well and let them air dry completely on a towel. Putting them back wet is a recipe for mildew.

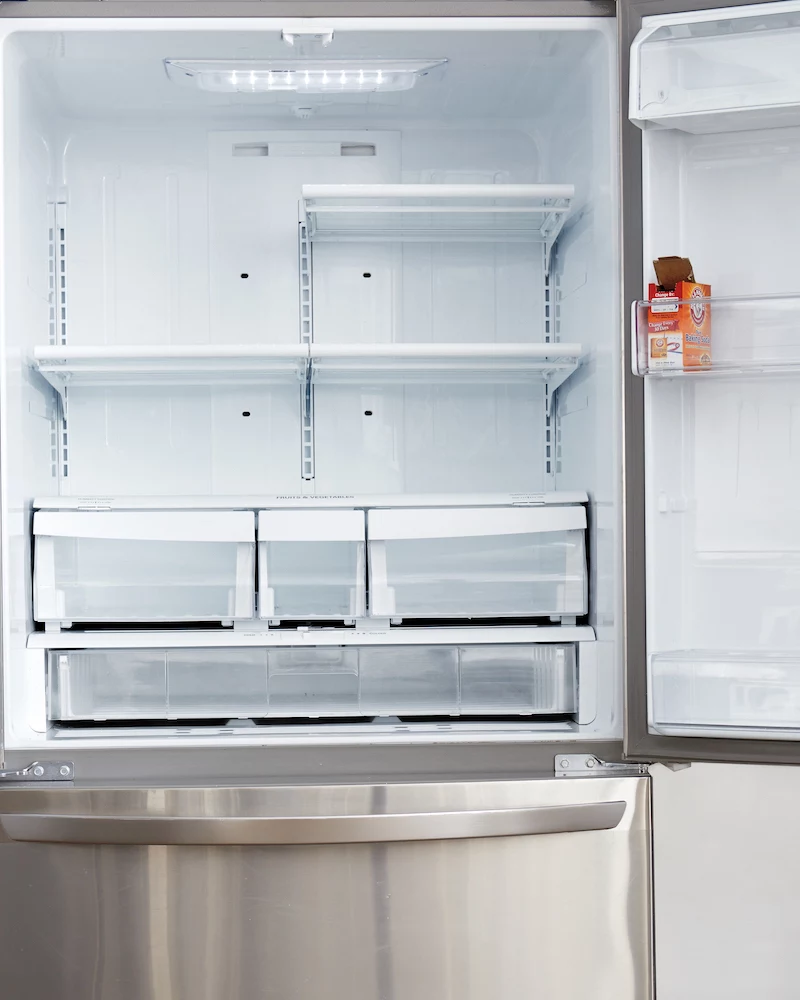
Step 2: The Fridge Interior
Always work from the top down. That way, crumbs and drips fall onto areas you haven’t cleaned yet. Spray the walls, ceiling, and floor with your vinegar solution (or use a soapy cloth) and wipe it all down.
Heads up! One of the most forgotten spots is the tiny condensation drain hole, usually at the bottom of the back wall. If this gets clogged with food bits, water will pool in your fridge or leak onto the floor. I use a simple pipe cleaner to gently clear it. Never force anything in there that could get stuck.
After washing, go over everything with a cloth dampened with clean water to rinse off any residue. Then, dry the entire interior with a clean, dry cloth. A dry interior cools down faster and prevents ice from forming.
Step 3: The Door Seals (Gaskets)
The rubbery seals around the door are a magnet for crumbs and mold. If the seal is compromised, cold air leaks out, and your fridge runs constantly. Dip your brush in soapy water and gently scrub inside all the folds. Wipe it clean and dry it thoroughly. To check your seal, close the door on a dollar bill. If you can pull it out with zero resistance, your seal is weak and might need replacing.
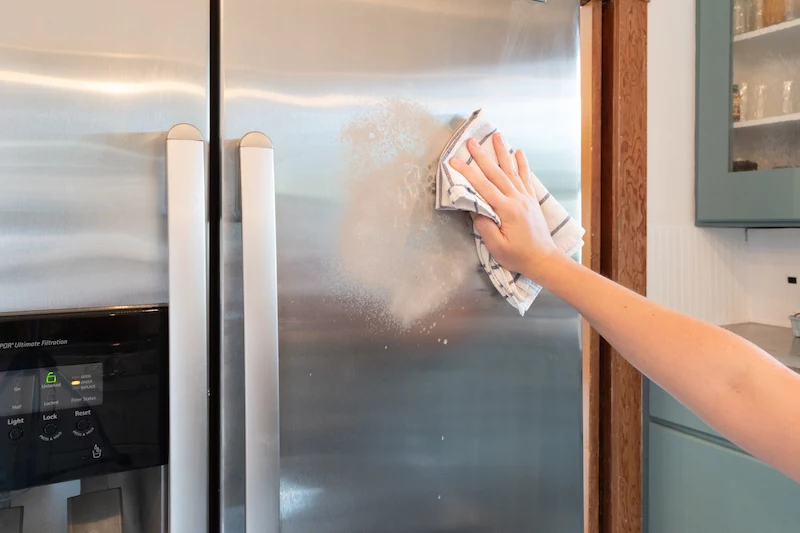
Step 4: The Exterior and Coils
This is the step everyone skips, and it’s so important for your fridge’s health. Carefully pull the fridge away from the wall. You’ll probably be horrified by the dust bunnies. Wipe down the top and sides. For stainless steel, always wipe with the grain to avoid scratches.
Now for the coils, which are usually on the back or underneath behind a grille. When these are coated in dust and pet hair, the fridge can’t get rid of heat. Use your vacuum’s brush attachment to get the worst of it off, then use that special coil brush to get in between the fins. Vacuum up all the debris you loosened. While you’re back there, find the drip pan (usually near the bottom). It can collect some truly nasty, slimy water. Carefully remove it, wash it with soap, and put it back. That lingering bad smell you can’t find? It’s probably a decade’s worth of funk in the drip pan.
Putting It All Back: A System for Success
Don’t just shove everything back in randomly! A little strategy here will keep food fresh longer and prevent cross-contamination.
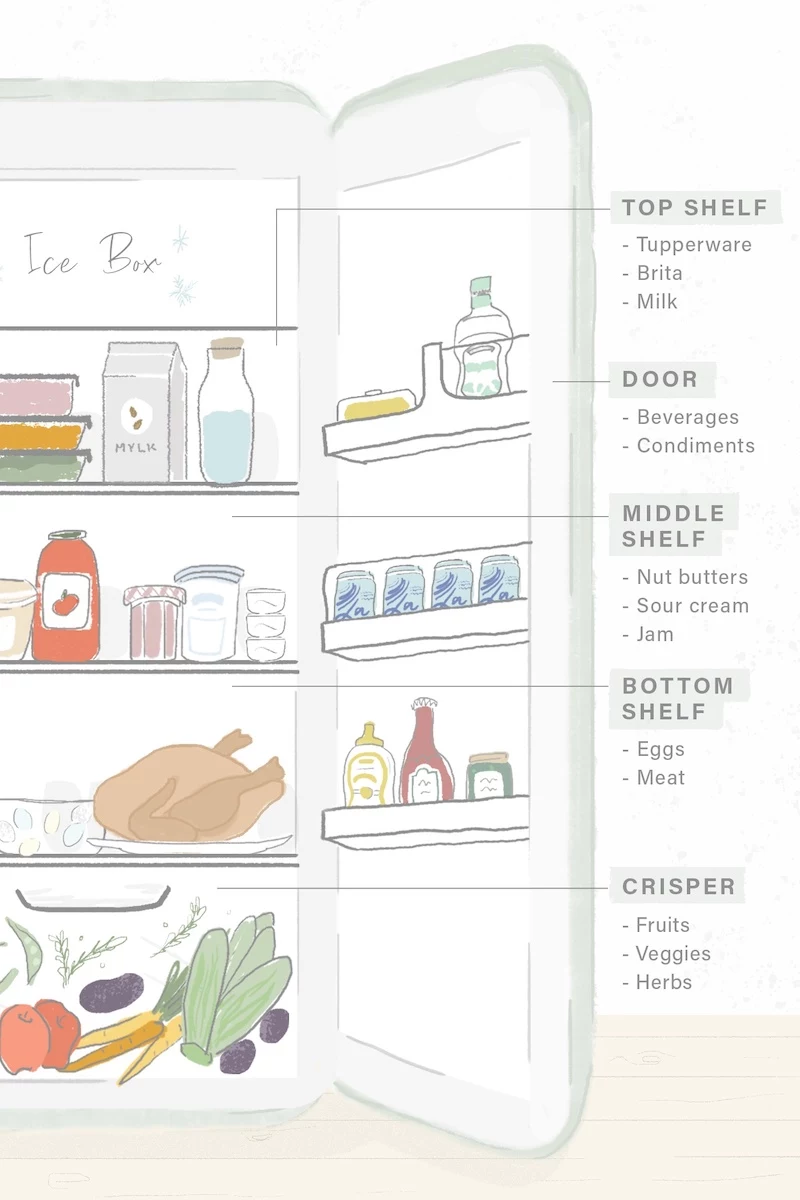
Think of your fridge in zones:
- The Door (Warmest Zone): This area is for condiments, pickles, and other items that can handle temperature swings. Never, ever store milk or eggs in the door.
- Upper Shelves (Consistent Zone): Perfect for leftovers, drinks, yogurt, and ready-to-eat foods like hummus.
- Lower Shelves (Cold Zone): This is where your milk and eggs should live. The temperature is colder and more stable here.
- Bottom Shelf (Coldest Zone): Raw meat, poultry, and fish go here, and only here. This keeps them at the safest temperature and prevents their juices from dripping down and contaminating everything else. Pro-tip: Always place raw meat packages on a plate or in a container as a backup.
- Crisper Drawers (Humidity Zones): These are amazing if you use them right. Use one drawer set to high humidity (slide closed) for leafy greens and things that wilt, like spinach and carrots. Use the other for low humidity (slide open) for fruits that release ethylene gas, like apples and pears. And another pro-tip: I always tell my clients to line their crisper drawers with a few paper towels. It absorbs excess moisture and makes the next cleanup so much easier.
Once everything is clean and organized, you can plug the fridge back in. But wait! Let it run for about 10-15 minutes to stabilize and start cooling properly before you load all your food back in.

No Time for a Deep Clean? Try the 15-Minute Fridge Rescue
Look, I get it. Sometimes a 3-hour project is just not happening. If you’re overwhelmed, just do this quick rescue mission:
- Toss Five Things: Grab a trash bag. Find five things that are expired, science experiments, or you know you’ll never eat. Out they go.
- Wipe One Shelf: Pick the stickiest, most offensive shelf. Quickly pull everything off, give it a wipe with a damp cloth, and put things back.
- Consolidate One Item: Find those three half-empty jars of salsa or pickles and combine them into one.
It’s not a deep clean, but it’s amazing what a difference 15 minutes can make.
Battling Stubborn Odors and When to Call for Help
If a smell lingers after all that cleaning, you’ve got a tougher problem. Baking soda or activated charcoal can absorb mild odors. But for a truly awful smell, like from spoiled meat, you need a stronger tactic. A lesser-known trick is to unplug the fridge, leave the door open, and stuff it with crumpled newspaper and a few bowls of activated charcoal for a day or two. The carbon in the newspaper ink and the porous paper itself work wonders to pull stubborn smells out of the plastic.

When You Need a Real Pro
My job is cleaning and organizing, not appliance repair. Call a qualified technician if you notice these red flags:
- The fridge runs constantly and never seems to shut off.
- There’s a lot of frost buildup in a frost-free model.
- The unit just isn’t staying cold (consistently above 40°F/4°C).
- You hear loud or weird noises like buzzing, clicking, or grinding.
Honestly, taking an afternoon every few months to properly care for your refrigerator is one of the best investments you can make in your home. It protects your health, saves you money, and makes daily life in the kitchen just a little bit better.
Inspirational Gallery

According to appliance manufacturer GE, dirty condenser coils can cause a refrigerator to use up to 35% more energy.
That’s a huge waste of electricity for a part most people forget exists. At least twice a year, unplug your fridge and gently pull it away from the wall. Use a long, flexible condenser coil brush (available at any hardware store) to remove all the dust, pet hair, and debris that has accumulated. This single step not only cuts your energy bill but also extends the life of your appliance by allowing it to cool down efficiently.
What’s the secret to a truly odour-free fridge, even after storing pungent leftovers?
While baking soda is a classic, activated charcoal is the professional’s choice. Unlike baking soda, which primarily neutralizes acidic odours, activated charcoal adsorbs a much wider range of organic compounds. You can find specially designed charcoal deodorizers from brands like Moso Natural or simply place a few briquettes (without lighter fluid!) in a breathable bag on a back shelf. It’s a game-changer for absorbing stubborn smells from things like fish, cheese, or garlic.

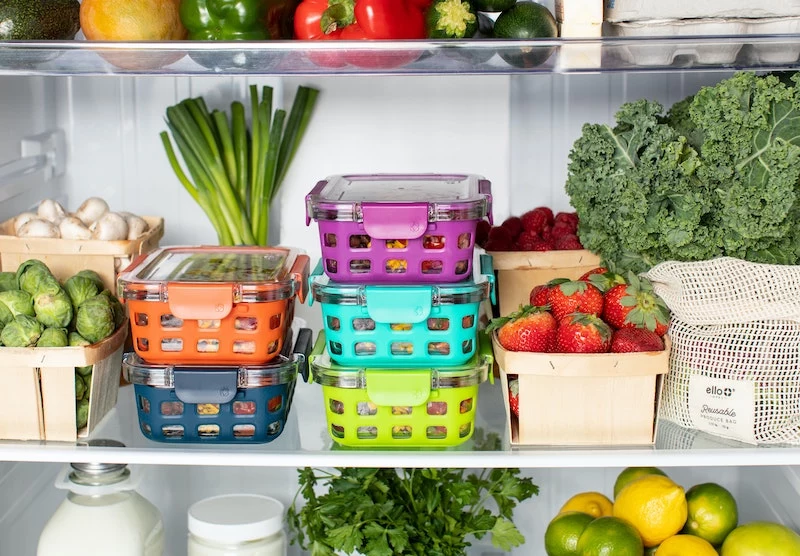
Achieving that picture-perfect organized fridge isn’t just about aesthetics; it’s about creating a functional system. The key is ‘zoning’ with clear containers so you can see everything at a glance. Think about creating dedicated areas:
- Raw Meat Zone: Always on the bottom shelf, in a lipped container (like a clear iDesign bin) to catch any potential drips and prevent cross-contamination.
- Grab-and-Go Bin: A designated container for yogurts, fruit cups, and snacks. Perfect for busy mornings and preventing kids from rummaging through everything.
- Deli Drawer: If your fridge lacks one, use a stackable, clear drawer for sliced cheeses and cured meats.
The Wrong Tool: Using abrasive sponges, steel wool, or harsh chemical cleaners like bleach or ammonia-based sprays on the interior plastics.
The Right Tool: A simple solution of one part white vinegar to three parts warm water in a spray bottle, used with a soft microfiber cloth.
Why does it matter? The plastics and seals inside your fridge are delicate. Abrasives create micro-scratches that trap bacteria and grime, while harsh chemicals can make the plastic brittle over time, leading to cracks.


