Thinking About a Hair Transplant in Turkey? Read This Insider’s Guide First.
So, you’re thinking about a hair transplant. I get it. I’ve spent more than a decade in the world of hair restoration, and I’ve talked to thousands of people who are exactly where you are right now. You notice the thinning, you try a few things that don’t quite work, and then you start looking for a permanent solution. The internet, of course, throws a million things at you, especially those tempting, all-inclusive packages from places like Istanbul.
In this article
It can be tough to tell what’s real and what’s just slick marketing. My goal here is to cut through the noise. We’re going to go way beyond the flashy ads and look at this from an insider’s perspective. We’ll talk about the science, the real differences in techniques, and most importantly, the critical questions you need to ask to protect yourself. Making a decision about surgery is a big deal, and you deserve to have the straight scoop from someone who’s been in the room where it happens, not just a sales office.

First Off, Why Does This Even Work?
To really get hair restoration, you first have to understand hair loss. For most guys, it’s a classic case of male pattern baldness. This boils down to a pesky hormone, DHT, that some of your hair follicles are genetically programmed to hate. Over time, DHT shrinks the follicles on the top and front of your head until they just give up and stop growing hair.
But here’s the cool part: the hair on the back and sides of your head is built differently. Those follicles are genetically resistant to DHT and are basically programmed to stick around for life. This is the magic behind the whole procedure, a principle called donor dominance. It simply means that when we move a healthy, DHT-proof hair follicle from the back of your head to a bald spot on top, it doesn’t suddenly change its mind. It remembers where it came from and keeps on growing, completely unbothered by the DHT in its new neighborhood. This is the bedrock that makes hair transplants possible.

It’s All About ‘Follicular Units’
When we talk about a transplant, we’re not moving single, individual hairs. We’re moving what are called ‘follicular units’ (or FUs). If you look really closely at your scalp, you’ll see hairs naturally growing in little groups of one to four. These are follicular units.
The whole game is to extract these tiny units perfectly intact and move them to their new home. Think of it like being a gardener. We’re not just yanking plants out of the ground; we’re carefully digging up saplings from a dense part of the forest, making sure to keep the root ball (the follicle) completely safe. Then, we replant them in a clearing, ensuring we don’t damage the original forest in the process. The number and health of these units in your donor area determine how much we have to work with.
The Big Acronyms: FUE vs. DHI
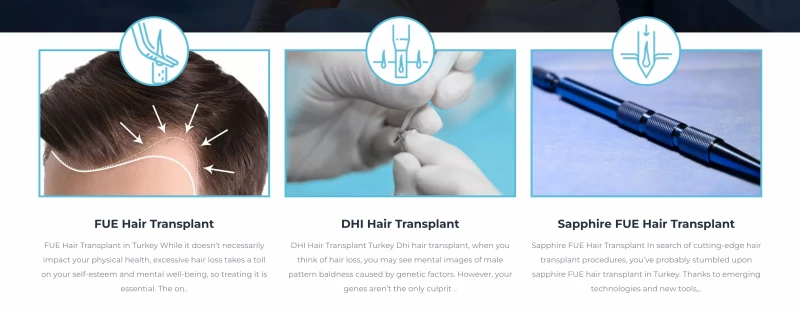
You’re going to see two terms everywhere: FUE and DHI. Clinics love to market one as a revolutionary new technology that’s way better than the other. Let’s be honest, they are both methods to achieve the same goal. The skill of the person holding the tool is infinitely more important than the tool itself. I’ve used both for years, so here’s the practical breakdown.

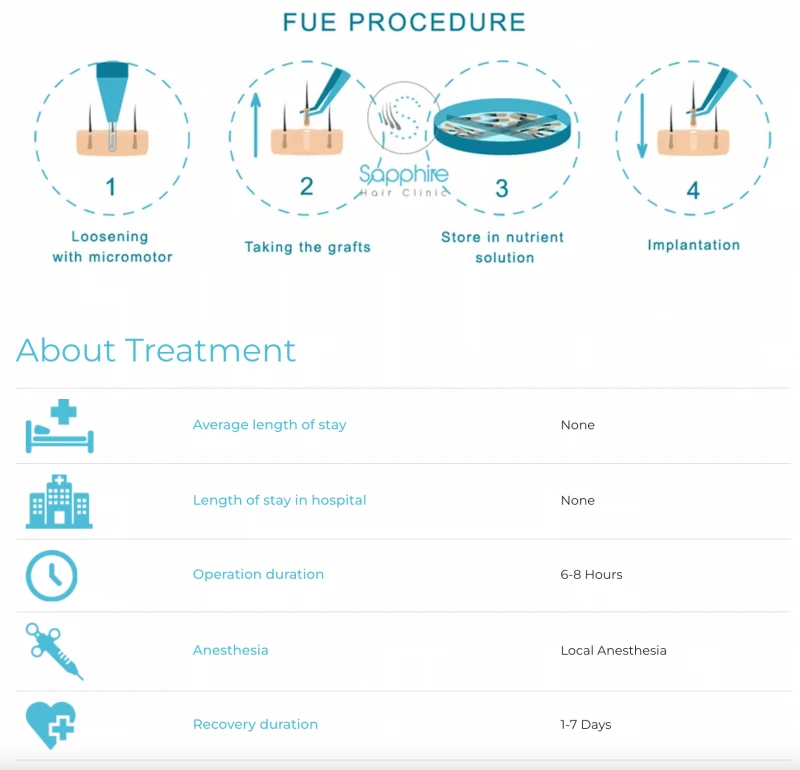
Follicular Unit Extraction (FUE)
FUE is the gold standard and the most common method you’ll find. It’s a meticulous process that takes a ton of skill to get right.
1. The Extraction: First, the donor area on the back of your head is shaved. After numbing you up, the team uses a tiny hollow needle, called a micropunch, to carefully core out each follicular unit. The size of this punch is super important—we’re talking 0.7mm to 1.0mm. A smaller punch means less visible scarring, but it’s trickier to use without cutting the graft. A good practitioner knows exactly which size to use based on your hair type. The little grafts are then whisked away into a special holding solution to keep them healthy.
2. Making the Sites (Channel Creation): This is where the real artistry comes in. The lead surgeon makes tiny incisions in the recipient area where the new hair will go. They control the angle, direction, and density to make it look completely natural. Hair doesn’t just grow straight up; it has patterns, like the forward-swooping angle at the hairline and the swirl on the crown. Nailing this step is what separates a great result from an obvious, plug-like one. A lot of top-tier clinics use super-sharp sapphire blades for this, which can create cleaner incisions and might help with healing.

3. Planting the Grafts: Finally, a team of skilled technicians uses fine forceps to gently place the grafts into the channels the surgeon created. It’s a race against the clock, as grafts need to be replanted within a few hours. Typically, single-hair grafts are used right at the front for a soft, natural hairline, with the thicker 2, 3, and 4-hair grafts placed behind them to build density.
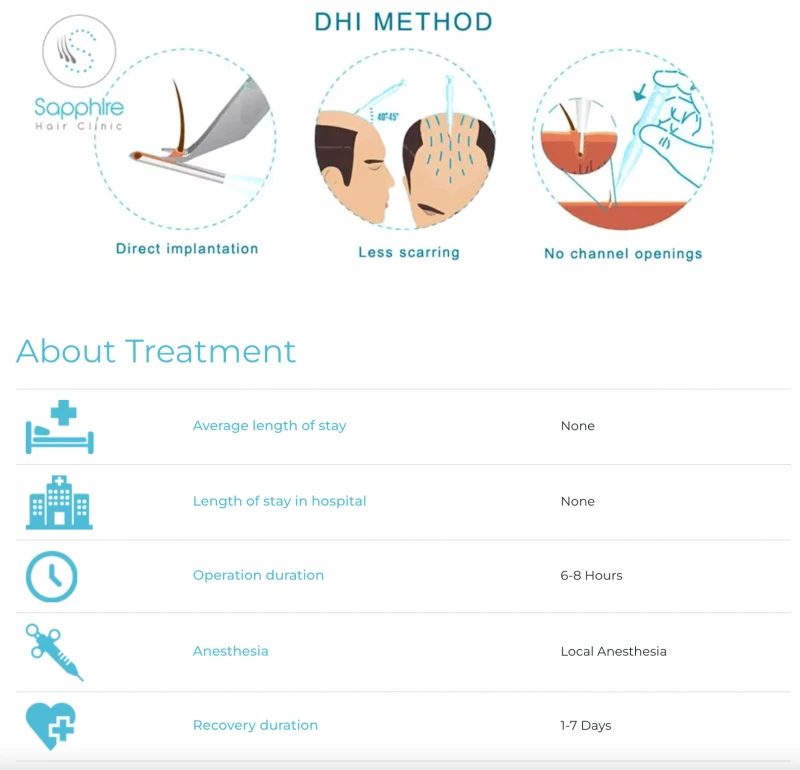
Direct Hair Implantation (DHI)
DHI isn’t a totally different procedure; it’s more like a different method for that last step, the implantation. The extraction part is the same as FUE.
The key difference is a tool called the Choi Implanter Pen. Instead of making the incisions first and placing grafts later, the DHI method does both at once. A technician loads a graft into the pen. The surgeon then presses the pen into the scalp, and with a click, it makes the incision and deposits the graft at the same time.

So, which one is better? Honestly, it’s like asking if a masterpiece was painted with a sable or a synthetic brush. A master surgeon can deliver an incredible result with either FUE or DHI. DHI offers amazing control, which can be great for density, but it’s often slower and requires more highly trained staff, which is why it usually costs more. Don’t choose a clinic based on an acronym. Choose it based on the proven, consistent results of the surgeon.
The ‘Istanbul Model’: What You Need to Know
Istanbul is the hair transplant capital of the world for a reason: government support for medical tourism and lower costs create a high-volume environment. This is both a good and a bad thing.
A typical all-inclusive package might sound amazing. For a single price, you often get the surgery, a stay in a nice hotel, all your airport and clinic transfers, and even your post-op medications and first hair wash. It’s incredibly convenient. But what it usually doesn’t cover are your flights, food, and any extra spending money. You have to budget for that separately.

And let’s talk about the elephant in the room: cost. The main draw to Turkey is the price. So, what should you expect to pay?
Heads up! Be extremely wary of clinics advertising full procedures for under $2,500. Quality facilities, experienced surgeons, and proper sterile protocols have real costs. A reputable, doctor-led clinic in Istanbul will more likely be in the $3,500 to $7,000 range, depending on the number of grafts and the surgeon’s direct involvement. If a price seems too good to be true, it almost certainly is.
The Most Important Question: Who’s Actually Doing the Surgery?
This is the single most critical factor. You need to figure out if you’re booking a ‘doctor-led’ or a ‘technician-led’ procedure.
- A Doctor-Led Clinic means the surgeon is in the room, hands-on, for the critical parts. They will design your hairline and, most importantly, they will personally make all the incisions (the channels) in the recipient area. This is a surgical act that dictates the final aesthetic result.
- A Technician-Led Clinic is a riskier model. Here, a doctor might draw the hairline and then disappear, leaving the entire extraction and implantation process to technicians. While many of these techs are experienced, they are not surgeons. This model is often what allows for those rock-bottom prices.

Your Game Plan: How to Actually Research a Clinic
Okay, everyone says “do your research,” but what does that actually mean? Here’s a practical roadmap.
1. Become a Forum Lurker. Spend time on independent communities like the Hair Restoration Network and others. Real patients post their unfiltered journeys, photos, and reviews there. You’ll learn who the consistently good surgeons are and which clinics to avoid.
2. Scrutinize Before-and-After Photos. Don’t just look at the final result. Look for high-quality photos with consistent lighting. Do they show the hairline up close? Do they have photos with the hair wet, which reveals the true density? Are there photos from all angles? A good clinic is proud to show everything.
3. Spot Fake Reviews. If a clinic’s website or social media is nothing but 5-star reviews that say generic things like “Great experience, best team!” be skeptical. Real reviews often mention small, specific details, both good and bad.

4. Ask the Hard Questions. Don’t be shy. This is your head we’re talking about. Before you even think about putting down a deposit, get on a video call and ask them this stuff directly. Here’s a checklist you can literally copy and paste:
“Will the main surgeon be making 100% of the channel incisions for my procedure?” “Can I have a video consultation with the actual surgeon who will be operating on me, not just a sales consultant?” “How many procedures does the surgeon oversee or perform in a single day?” “What is your clinic’s policy if the growth rate is poor or I’m unhappy with the result?” “What size punch do you typically use for extraction?” “Who performs the extractions and the implantations, the doctor or technicians?”
If you get vague, evasive answers to these questions, that’s a massive red flag. Walk away.
From Prep to Payoff: The Full Journey
A successful transplant is more than just the 8 hours in the chair. Here’s what to expect.
Before You Go
You’ll get pre-op instructions. Follow them to the letter! This usually means stopping blood thinners (like aspirin), alcohol, and smoking for about a week beforehand.
Quick tip on packing: Pack a few button-down or zip-up shirts. You won’t want to be pulling a t-shirt over your fragile new grafts. A good travel neck pillow is a lifesaver for sleeping upright, and some protein bars are great to have on surgery day, which can be long.
The First Week is Critical
After the procedure, you have to be SO careful. You’ll sleep with your head propped up on pillows to manage swelling. The clinic will give you a sterile saline spray to spritz on your scalp constantly to keep the grafts hydrated. Don’t touch, scratch, or bump your head!
You’ll go back to the clinic for your first wash, where they’ll show you how to gently clean your head. After about 10 days, the scabs will come off, and the grafts will be secure.
Brace Yourself for the ‘Shock Loss’
Alright, let’s talk about the part that freaks everyone out. Between weeks 2 and 8, most of the tiny transplanted hairs will fall out. It’s called shock loss, and it’s completely normal. I’ve seen it time and again, and this is when patients panic, thinking they’ve made a huge mistake. The follicle is safe and sound under the skin; it’s just gone into a temporary sleep mode from the trauma of moving. Trust the process and maybe keep a hat handy for a few months!
New hair will start to sprout around month 3 or 4. You’ll see significant improvement by months 6 to 9, and the full, final result is usually visible by the 12 to 18-month mark.
The Biggest Risk You Must Avoid: Over-Harvesting
If you remember one thing from this guide, make it this. The most dangerous thing in the high-volume, budget-clinic world is over-harvesting. Some places compete by promising insane graft numbers—5,000, 6,000, even more in one go.
Here’s the thing: your donor area is a finite resource. You can’t just take an unlimited supply. A safe limit is generally around 25-30% of the hair from your permanent donor zone. Taking more than that is over-harvesting, and it’s catastrophic. It creates a see-through, patchy, moth-eaten look on the back and sides of your head, which is impossible to hide, especially with a short haircut.
And the worst part? It’s permanent. You can’t fix it. You’ve not only damaged your look, but you’ve also used up all your reserves for any potential hair loss in the future. An ethical surgeon’s primary duty is to ‘do no harm,’ and that includes protecting your donor area for the long haul. They will refuse to take too many grafts, even if you ask for it.
Choosing the right clinic is everything. When it’s done right, a hair transplant can be a genuinely life-changing, confidence-boosting experience. It all starts with you being an informed, careful, and empowered patient. Do your homework, trust your gut, and you’ll set yourself up for success.
Inspirational Gallery with Photos
Who is actually performing the surgery: the doctor or a team of technicians?
This is the single most important question you can ask. In many high-volume Turkish clinics, a doctor may design the hairline and oversee the process, but technicians with varying levels of experience perform the crucial steps of extraction and implantation. An experienced, doctor-led procedure ensures consistency and artistry. Don’t be shy: ask for the lead surgeon’s name, their credentials (look for ISHRS membership), and clarification on their direct involvement throughout the entire procedure, not just at the start.
A natural hairline is never a perfectly straight line. It’s a carefully orchestrated transition zone with softer, finer single-hair grafts at the very front, followed by multi-hair grafts for density. A top-tier surgeon is an artist who studies the natural irregularities of your original hairline to recreate something that looks completely undetectable, even up close. Ask to see close-up photos of their healed hairline work, not just impressive before-and-after shots from a distance.
- A button-up or zip-up hoodie to wear home from the clinic. You won’t be able to pull a t-shirt over your head.
- A travel neck pillow. It’s essential for sleeping upright for the first week to minimize swelling.
- Saline spray (like Sterimar). Gently misting the grafts helps with healing and scabbing.
- Low-sodium snacks. Reducing salt intake can help manage post-operative facial swelling.
Important point: Your donor area on the back and sides of your head is a finite resource. Once a follicle is extracted, it does not grow back there. An overly aggressive clinic might ‘overharvest’ this area to achieve maximum density upfront, but this can leave the donor zone looking thin, patchy, and visibly scarred (‘moth-eaten’). A responsible surgeon prioritizes the long-term health and appearance of your donor area, planning for potential future hair loss.
Sapphire FUE: This technique uses blades made from synthetic sapphire to create the recipient channels where grafts are placed. The blades are extremely sharp and can create smaller, more precise incisions, potentially leading to faster healing and denser packing.
DHI (Direct Hair Implantation): This method uses a pen-like implanter tool (a Choi Pen) that creates the incision and places the graft in a single motion. It offers excellent control over the angle and direction of implantation and avoids the need for pre-made incisions.
Both are excellent when performed by a skilled team; the choice often comes down to the clinic’s specialization and your specific hair characteristics.
- Maintain and even improve density behind the transplanted zone.
- Strengthen existing native hairs that were miniaturizing.
- Prevent the need for a second procedure for many years.
The secret? Your doctor will almost certainly recommend a long-term plan involving Finasteride and/or Minoxidil (Rogaine). A transplant restores what’s lost, but these medical treatments are key to keeping what you still have.
According to the International Society of Hair Restoration Surgery (ISHRS), 91.5% of male hair transplant patients reported feeling it was a worthwhile investment.
Many clinics offer packages that include a translator. While helpful, remember that this person is employed by the clinic. For complex medical questions or if you feel a communication gap, don’t hesitate to use a translation app on your phone, like Google Translate’s conversation mode, to ensure your precise questions are being understood and answered directly by the medical staff.


