Solid Wood Secrets: What a Pro Wishes You Knew Before You Start
I’ve spent more years than I can count in a workshop that always smells like fresh-cut wood. Honestly, I could probably tell you the difference between oak and cherry just with my eyes closed. My hands are rough from wrestling lumber, and I’ve learned more from my own mistakes than any book could ever teach me. Building with solid wood isn’t just a matter of cutting boards and sticking them together; it’s about getting to know a material that’s still alive, in a way. It breathes, it moves, and every single piece has its own personality.
In this article
So, let’s get into it. This isn’t one of those five-minute speed-reads. We’re going to take a real look at what it means to build furniture that doesn’t just look good, but actually lasts for generations.
The #1 Rule: Wood Always Moves
So many people get this wrong right out of the gate. They see a thick plank of wood and think of it as a totally stable, unchanging block. That’s the biggest myth in woodworking. The truth is, wood is more like a super-tight bundle of microscopic straws. And just like straws, these wood fibers soak up moisture from the air and release it when the air gets dry.
If you don’t plan for this movement, your project is doomed. It’s not a question of ‘if’ it will fail, but ‘when’.
I once had a young guy in my shop build this gorgeous maple tabletop. He was so proud of it. He went and fastened it to the base with screws all the way around the edge. Fast forward a few months to the humid summer, and I get a frantic call. The top had a massive crack right down the center. The wood tried to expand, the screws wouldn’t let it, and the pressure just tore the wood apart. A tough lesson, for sure, but he never made that mistake again. The wood wasn’t faulty; the design was.
Why Moisture Content Is Everything
The pros don’t guess about this stuff. We use a tool called a moisture meter to see exactly how much water is in the wood. Typically, the lumber you buy has been kiln-dried to a moisture content (MC) of about 6% to 8%. This is the sweet spot for wood that will live inside a climate-controlled home.
Good to know: If you build with wood that’s too wet, say 12% MC, it’s going to shrink when you bring it inside, and your joints will open up. Build with wood that’s too dry, and it will expand and could literally break itself apart.
This is why every board I buy sits in my shop for a few weeks to acclimate before I touch it. It needs time to get used to its new environment. Oh, and about that moisture meter? You don’t need a fancy one. You can get a reliable pin meter for between $40 and $60 online or at woodworking stores like Rockler. It’s the best money you’ll spend, period.
The Real Work: From Rough Board to Finished Part
Top-tier furniture isn’t about having the most expensive tools. It’s about following a methodical process to make sure every single piece is flat, straight, and square. It all starts with milling your lumber.
Milling: The Four-Step Dance
You can’t just buy perfectly straight wood. Even the best-looking boards have subtle tensions and twists. The goal is to create our own perfect reference surfaces using a few key machines: a jointer, a planer, and a table saw.
- Face Jointing: First, you use the jointer to create one perfectly flat face.
- Edge Jointing: Then, you press that flat face against the jointer’s fence to make one edge perfectly square to it.
- Planing: After that, you head to the thickness planer. With the flat face down, the planer makes the top face perfectly parallel to it.
- Ripping: Finally, at the table saw, you put the jointed edge against the fence to rip the board to its final width. Now you have a perfect piece of stock.
But what if you don’t have a giant workshop with thousands of dollars in machinery? I get it. Most people don’t. You’ve still got options!

- For the traditionalist: A good set of hand planes can do everything a jointer and planer can. It takes more time and skill, but it’s quiet, satisfying work.
- For the clever DIYer: You can build a router sled. It’s a simple jig that lets you use your router to flatten wide slabs and boards with surprising accuracy. Lots of tutorials for this online.
- For convenience: You can buy lumber that’s already been pre-milled (often called S4S, or surfaced four sides). It costs more, but it saves a ton of time. Heads up, though! Always check it with a good straightedge when you get it home. Wood moves during shipping, so you want to make sure you’re getting what you paid for.
Joinery: The Skeleton That Holds It All Together
Glue is strong, but the real strength of a piece comes from its joinery. This is where you can really spot true craftsmanship.
- The Mortise and Tenon: This is the undisputed king of joints, a classic for a reason. It’s the go-to for building tables and chairs. A well-made mortise and tenon joint should slide together with firm hand pressure—not so loose that it rattles, but not so tight you need a sledgehammer. The mechanical fit provides the strength; the glue just keeps it from coming apart.
- Dovetails: When you’re making boxes or drawers, nothing beats the dovetail. Its interlocking shape makes it incredibly strong and, let’s be honest, beautiful. When you see hand-cut dovetails, you’ll notice tiny, charming imperfections. That’s not a flaw; it’s the signature of the human hand.
- What About Pocket Screws? Look, they have their place. I use them for shop cabinets or maybe an internal support that will never be seen or stressed. But for a dining table you want your kids to inherit? They just won’t hold up over time. A table made with pocket screws will eventually get wobbly. A table with mortise and tenons will outlive you.

Finishing Touches: Bringing Out the Beauty
The finish is the first thing people see and touch, and a bad finish can totally ruin a great build. The secret? It’s not what’s in the can; it’s the prep work.
I probably spend 90% of my finishing time just sanding. I work my way up through the grits—usually 120, then 150, 180, and ending with 220. Never skip a grit! If you jump from 120 to 220, you’ll leave deep scratches that the finer grit can’t erase. By the way, a lesser-known trick for wood with tricky grain that keeps tearing out is a simple card scraper. It’s a cheap hand tool that shaves the wood instead of sanding it, leaving a glass-smooth surface.
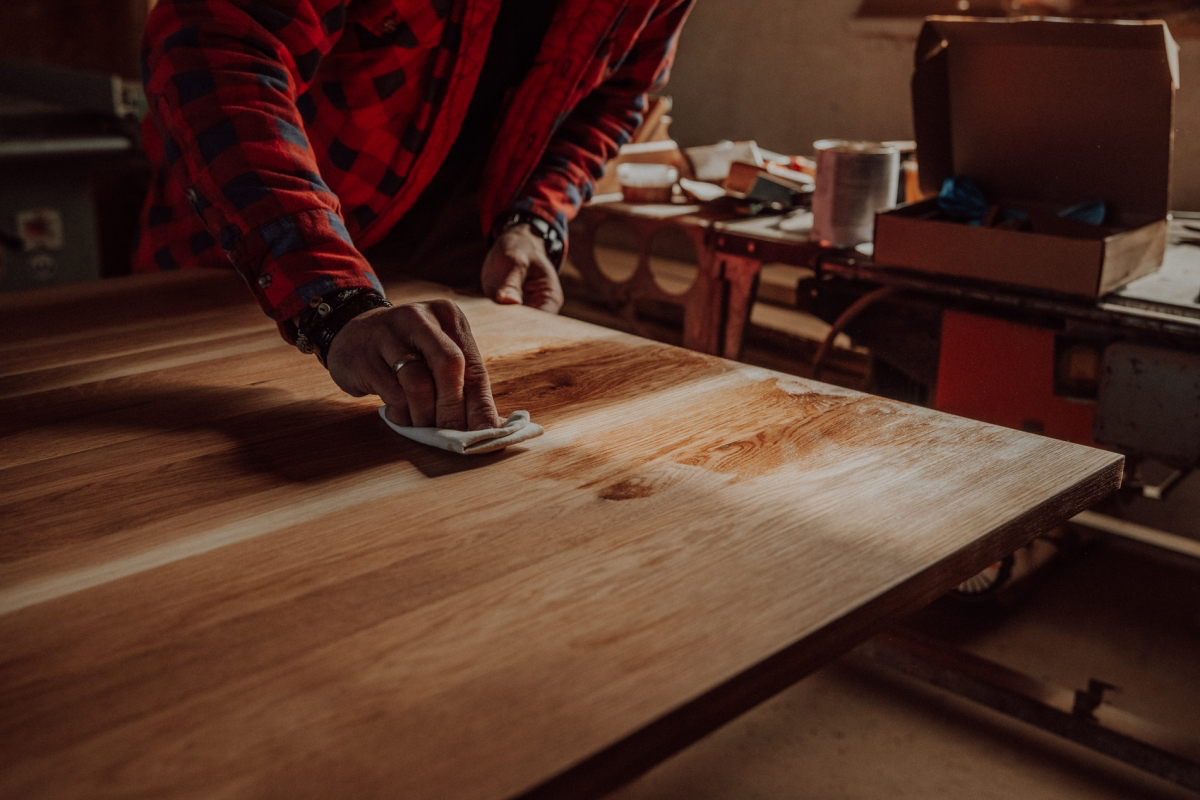
Quick tip: After final sanding, I wipe the whole piece down with a rag dampened with mineral spirits. This cleans off all the dust and also gives you a sneak peek of what the grain will look like, revealing any glue smudges or scratches you missed while they’re still easy to fix.
Choosing Your Armor: Film vs. Oil
There are two big families of finishes, and the one you choose depends on how the piece will be used.
Film finishes, like polyurethane or lacquer, create a hard, protective shell on top of the wood. Think of it like a thin layer of plastic. This is your best bet for high-wear surfaces like dining tables or desks that need maximum protection from spills and scratches. They can be a little tricky to apply without getting dust nibs, but the durability is worth it.
On the other hand, you have penetrating finishes, like tung oil or hardwax-oils. These soak into the wood fibers and harden from within, so you can still feel the natural texture of the wood grain. The look is incredibly warm and natural. It’s my favorite for things that won’t see a ton of abuse, like a bookshelf or a side table. Application is super forgiving, but there’s one critical rule: you have to wipe off ALL the excess. If you leave a thick coat on the surface, it will turn into a sticky, gummy mess that never, ever dries. I once had to completely strip a table a client tried to “help” by adding another thick coat of oil. Oof.
Ready to Start? A Realistic First Project
It’s easy to get ambitious, but for your first project, start small and build your confidence. A simple box is perfect. A set of six dining chairs? Maybe save that for year three.
To prove how accessible this is, here’s a real shopping list for a small first project. You can get started for less than the cost of a fancy dinner.
- Wood: One board foot of Poplar. It’s easy to work with and affordable, probably about $5.
- Glue: A bottle of Titebond II or III wood glue will run you about $8.
- Finish: A small can of wipe-on polyurethane is about $15 and is very beginner-friendly.
See? You’re in for under $30. No excuses!
Safety First. Always. (No, Seriously)
I’m saving the most important part for last. I can’t overstate this: workshops are dangerous. The tools we use are made to slice through hard maple like it’s butter, and they will do the same to your fingers without a second thought. I still have all of mine because I am obsessively respectful of my tools.
- Table Saws: This machine demands your full attention. Always use the riving knife that comes with your saw to prevent kickback—that’s when the wood gets violently thrown back at you. Use push sticks, and keep your hands far away from the blade.
- Dust and Fumes: Wood dust is no joke. Wear a good respirator when you’re sanding. And when using any oil-based finishes, make sure your space is well-ventilated.
- Oily Rags: This is the silent killer. Rags soaked in oil finishes generate heat as they cure. If you leave them wadded up in a trash can, they can—and do—spontaneously combust and burn down entire shops. NEVER LEAVE OILY RAGS IN A PILE. Spread them out flat on a concrete floor to dry completely, or soak them in a bucket of water before you throw them out. This is non-negotiable.
Building with wood is a journey, not a race. It teaches you patience and a deep appreciation for things made with care. So take your time, respect the material, and enjoy the incredible satisfaction of making something strong and beautiful with your own two hands.
Inspirational Gallery with Photos
- Flawless, crisp joinery.
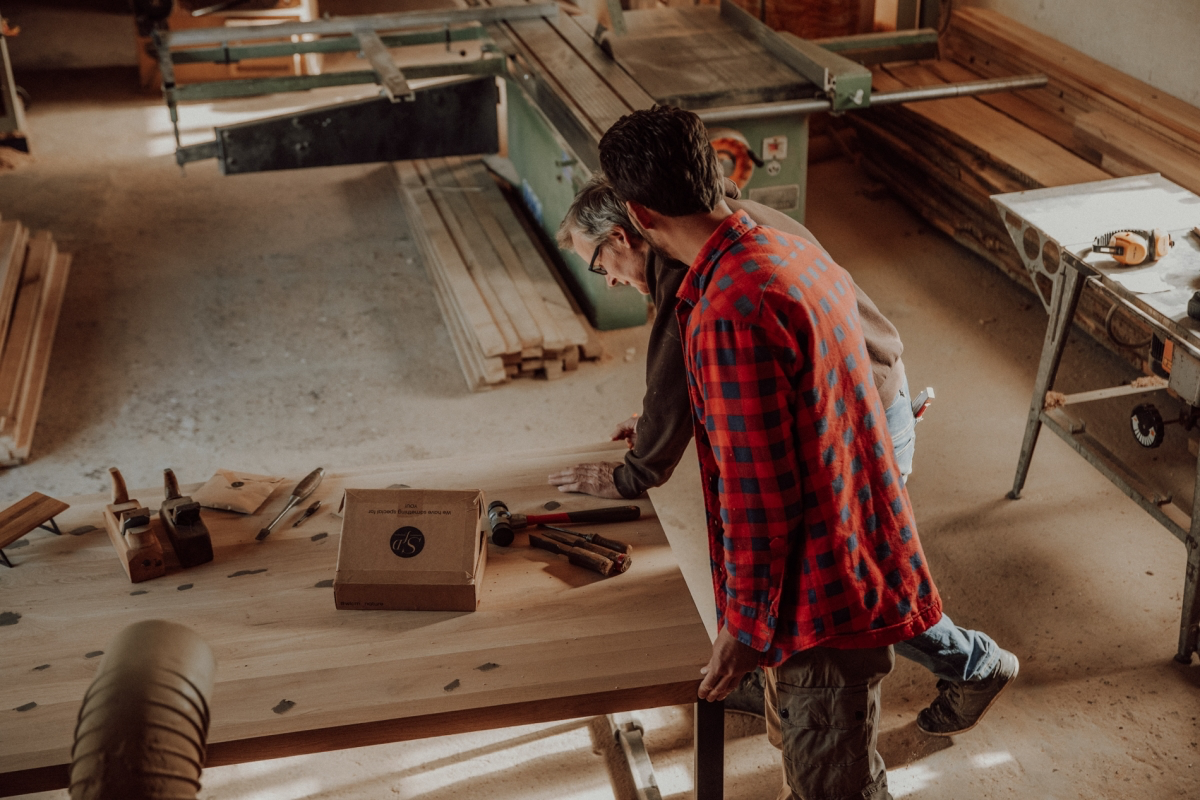
- A whisper-quiet workshop, free from the roar of machinery.
- Shavings that curl like delicate ribbons, not choking clouds of fine dust.
The secret? The intimate connection you build with the material. Using a hand plane or a sharp chisel isn’t just about removing wood; it’s about reading the grain and feeling its response directly through your hands, a dialogue no power tool can replicate.
Don’t rush the first step: The single most common rookie mistake, after ignoring wood movement, is starting a project the day you bring the lumber home. Let the wood acclimate to your workshop’s environment for at least a week, sometimes two. Stack it with spacers (‘stickers’) between boards to allow air to circulate evenly. This lets the wood stabilize its moisture content to match your shop, preventing nasty surprises after assembly.
The Janka hardness test, which measures the force required to embed a 0.444-inch steel ball into a piece of wood, isn’t just an abstract number.
It’s a practical guide for durability. A soft wood like Poplar (540 lbf) is easy to work but dents easily, making it a poor choice for a dining table. A tough North American species like Hard Maple (1,450 lbf) or a dense exotic like Brazilian Cherry (2,350 lbf) will stand up to decades of use and abuse, ensuring your hard work truly lasts.
What’s the best all-around glue for solid wood furniture?
For the vast majority of indoor projects, you simply can’t go wrong with a quality PVA (polyvinyl acetate) glue. Brands like Titebond (specifically Titebond II for its water resistance and Titebond III for longer assembly time) are industry standards for a reason. They create a bond that is, quite literally, stronger than the wood fibers themselves, are non-toxic, and clean up easily with a damp cloth before they cure.
Let the grain sing. Forget thick, plastic-like film finishes that sit on the surface. To truly honor the material, consider a penetrating hardwax oil. Finishes like Rubio Monocoat or Osmo Polyx-Oil nourish the wood from within, hardening the fibers while leaving a natural, satin feel that’s incredible to the touch. They’re also much easier to repair down the line—a simple spot-sand and re-application is all it takes to fix a scratch.
Plain Sawn: This is the most common and affordable cut, showcasing the classic wavy or ‘cathedral’ grain pattern. However, it’s the least dimensionally stable and most prone to cupping.
Quarter Sawn: Milled at a 90-degree angle to the growth rings, this cut reveals a straight, linear grain pattern, often with beautiful flecks in species like oak. It’s far more stable than plain sawn wood.
For projects where stability is paramount, like frame-and-panel doors, the extra cost of quarter sawn lumber is a wise investment.
Building something to last for generations starts with sourcing wood responsibly. Before you buy, ask your lumberyard about the origin of their stock.
- Look for official certifications, primarily from the FSC (Forest Stewardship Council).
- Consider locally salvaged urban lumber from arborists removing city trees.
- Explore reclaimed wood from old barns or industrial buildings; it’s incredibly stable and full of unmatched character.
The grain of a board is a map of its life—a story of sunny seasons, dry spells, and its fight for light in the forest. No two are ever truly identical.
Look to the Shakers for the ultimate inspiration in honest design. This 19th-century community perfected furniture that was light, incredibly strong, and devoid of any ornamentation that didn’t serve a purpose. Their masterful use of local woods like cherry and maple, combined with elegant joinery like their iconic ‘swallowtail’ drawer joints, was a masterclass in letting the wood’s natural beauty and functional form take center stage.


