Your Guide to Actually Awesome Summer Outings (Without the Headaches)
Over a couple of decades guiding people outdoors, I’ve seen it all. Families pumped for a perfect summer day, and families whose perfect day falls apart in, like, an hour. A trip to the beach that ends with a soggy, tide-soaked blanket. A hike where the wrong socks create killer blisters miles from the parking lot. Honestly, the gap between a cherished memory and a day you’d rather forget is usually just a little bit of planning. It’s the kind of stuff you learn from experience, not a glossy brochure.
In this article
This isn’t about creating some crazy, minute-by-minute itinerary. It’s about getting the fundamentals right. It’s about understanding why you pack certain things, what to look for in the weather forecast besides the temperature, and how to keep everyone in your crew safe and happy. I want to share some of that hard-won knowledge—the tips and tricks picked up from countless hours out in the field. Let’s get beyond a simple to-do list and talk about how to do things the right way.

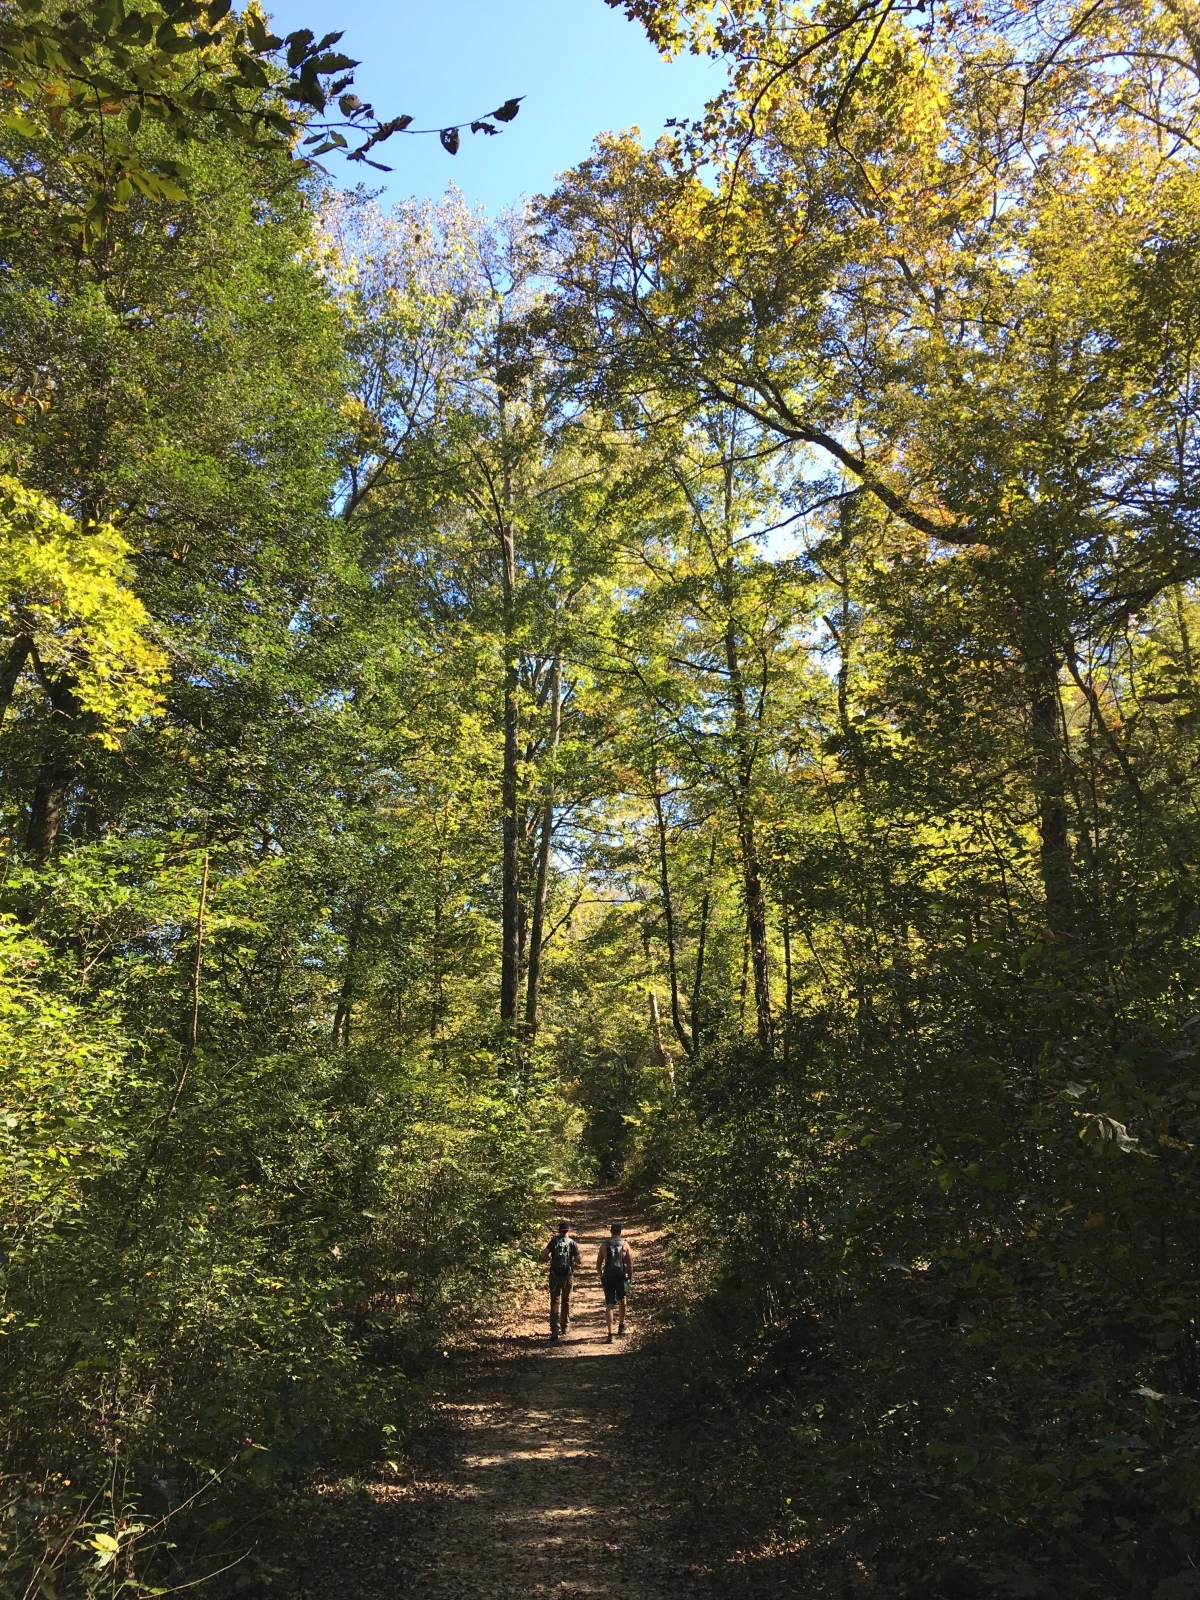
Woodland Hiking: Beyond Just a Walk in the Woods
A hike seems pretty straightforward, right? But a truly great one means respecting the trail and being honest about what you can handle. Whether I was leading a group of kids or seasoned hikers, the core idea was always the same: good prep work nips most problems in the bud.
Let’s Talk About Your Feet
Your feet are, without a doubt, the most important gear you have on the trail. Get the shoes or socks wrong, and your day is done. So many people starting out grab the thickest cotton socks they can find, thinking more padding equals more comfort. This is a huge mistake. As you sweat, cotton acts like a sponge, holding all that moisture right against your skin. This makes your skin soft and incredibly prone to blisters. The first rule we teach any new guide is simple and easy to remember: “cotton is rotten.”

So, what’s the fix? Look for socks made from merino wool or a good synthetic blend. You can find a solid pair for between $15 and $30 at any outdoor store, and trust me, they are worth every penny. These materials are designed to pull sweat away from your skin, keeping your feet drier and happier. As for shoes, you don’t always need those massive, heavy-duty hiking boots. For most well-maintained trails, a good pair of trail runners gives you fantastic grip and flexibility. Boots are really for when you need serious ankle support, are lugging a heavy pack, or tackling really rough, rocky ground.
Oh, and a crucial tip: NEVER wear brand-new boots on a real hike. Break them in first! Wear them around the house for a couple of days, then for short walks on the pavement. Your feet will thank you.
Packing Your Daypack Like a Pro
What’s in your backpack is your support system. This isn’t just a random list; it’s a system that balances being prepared with not carrying a bunch of useless weight.

Here’s what I always have for any hike over an hour:
- Water: The rule of thumb is at least 1 liter per person for every two hours of hiking. If it’s hot out, bring more. I’m a big fan of hydration reservoirs (like a CamelBak) because they make it easy to sip water constantly, but good old-fashioned bottles work just fine.
- Food: Always pack more snacks than you think you’ll need. You burn a lot of energy out there. Things like nuts, dried fruit, jerky, and granola bars are perfect because they provide lasting energy, not a quick sugar crash.
- Navigation: Your phone’s GPS is great, but it can’t be your only tool. Batteries die, screens crack, and you might lose signal. I always bring a physical map and a simple compass, and I actually know how to use them. At the very least, download the trail map to your phone for offline use before you leave home. Apps like AllTrails are great for finding trails and offer this feature.
- First-Aid Kit: You can buy a pre-made kit for about $20, but I always add a few things. My personal kit always includes extra blister treatment (moleskin is a lifesaver), antiseptic wipes, a variety of bandages, some pain reliever like ibuprofen, an antihistamine for surprise allergic reactions, and a small roll of medical tape. A small problem can become a big one when you’re miles from anywhere.
- Headlamp: Yes, even on a day hike. I can’t stress this enough. A simple twisted ankle could delay you by hours, and a trail that’s a piece of cake in daylight becomes a confusing maze after sunset. A headlamp keeps your hands free and is probably the most important $25 safety item you can own. Quick win: Go put one in your car’s glove box right now. Seriously.
- Sun Protection: A hat, sunglasses, and sunscreen (at least SPF 30) are non-negotiable.
- Layers: The weather can flip in an instant in the mountains or deep woods. I always pack a lightweight rain jacket, even if the sky is clear blue. It also works as a windbreaker and can provide crucial warmth if the temperature drops. A light fleece is a great idea, too.

Trail Manners and Leaving Things Better Than You Found Them
Being on a trail is a shared experience, and a little courtesy goes a long way. The general rule is that hikers heading uphill have the right of way. They’re working harder, and it’s tougher to stop and restart on an incline, so just step aside and let them pass.
The guiding principle for any time spent outdoors is to leave no trace. This means more than just packing out your trash. It’s about leaving everything exactly as you found it. Don’t pick the wildflowers or pocket cool-looking rocks. Stay on the designated path to prevent erosion. Even tossing an apple core is a bad idea—it can take ages to decompose and teaches wildlife to hang around people for food, which is dangerous for everyone.
Coastal Adventures: How to Master Your Beach Day
A day at the beach is one of life’s simple pleasures, but the coast is a powerful, ever-changing place. Understanding its natural rhythms is the key to a stress-free day. I’ve seen firsthand how a little lack of awareness can lead to trouble, from losing all your gear to the tide to getting caught in a scary current.

Understanding Tides and Currents
The single most important thing you need to check before a beach trip is the tide chart. It’s easy to find online—just search for “tide chart” and the name of your beach. This will tell you the times for high and low tide. When you get to the shore, look for the high-tide line, which is usually a damp line of seaweed and other debris. Set up your towels and gear well above that line. I once watched an entire family’s setup—cooler, chairs, the works—get completely swamped by a rising tide because they settled on that perfectly flat, wet sand near the water. Don’t be them.
Rip currents are another serious hazard. They’re like powerful rivers of water pulling away from the shore and are the cause of most lifeguard rescues. You can learn to spot them: look for a channel of choppy, churning water, a line of foam moving out to sea, or a weird break in the pattern of the incoming waves. If you ever get caught in one, the number one rule is don’t panic. And don’t try to swim straight back to shore against the current—you’ll just exhaust yourself. Instead, swim parallel to the beach until you’re out of the current’s pull, and then you can head back to shore.

Smart Packing for the Shore
Beach packing is a totally different game than hike packing. Here, you’re managing sand, sun, and water.
- Shelter: A good beach umbrella or a pop-up tent is a must. You need a reliable patch of shade to escape the sun’s rays throughout the day.
- Cooler Smarts: Pre-chill everything before you pack it. A great trick is to use frozen water bottles instead of ice packs. They’ll keep your food cold, and as they thaw, you’ll have ice-cold water to drink.
- The Bag System: I swear by a three-bag approach. The first is a big mesh bag for towels and sandy toys; the sand just falls right through on your walk back to the car. The second is your cooler. The third is a small, waterproof dry bag (you can get one for $15-$25) for your phone, keys, and wallet. It keeps the important stuff safe from both sand and water.
- Sand-Free Living: This might sound weird, but a fitted bed sheet is a game-changer. Place your cooler and bags in the four corners to pull the sides up, creating a little sand-free zone. Another fantastic trick? Baby powder. Sprinkle it on wet, sandy skin, and the sand brushes right off. It’s like magic.
The Art of the Picnic: More Than Just a Meal Outside
A great picnic is a deliberate act of creating a wonderful meal in a beautiful place. But I’ve seen plenty of them get ruined by warm drinks, soggy sandwiches, and pests—both the crawling and microscopic kinds.
Location and Logistics
Where you lay down your blanket makes a huge difference. Look for a spot that has a good mix of sun and shade so you can adjust as the day goes on. Before you fully commit, do a quick scan of the ground for ant hills. A gentle breeze is your friend; it helps keep the flying bugs away. I keep a dedicated picnic kit in my car all summer, which makes spontaneous trips easy. It just has a durable, waterproof-backed blanket (about $40 online or at a big box store), a small cutting board, a knife, a bottle opener, and some trash bags.

Let’s Get Real About Food Safety
This is probably the most critical part of picnic planning. The “temperature danger zone” for food is between 40°F and 140°F (or 4°C and 60°C). This is the range where bacteria multiply like crazy. Food safety experts say that perishable food shouldn’t be left in this zone for more than two hours. And if it’s over 90°F (32°C) outside, that window shrinks to just one hour.
So, choose your menu with that in mind. Grain-based salads with quinoa or farro hold up much better than leafy greens. I learned the hard way years ago to avoid anything with a traditional mayo base, like potato salad or coleslaw, unless you are 100% positive you can keep it ice-cold. After a bad experience at a company picnic, I developed a go-to vinaigrette-based potato salad that’s way safer and, frankly, more delicious. For a quick version, just boil some new potatoes until tender, then toss them with a dressing made of olive oil, red wine vinegar, dijon mustard, and a bunch of fresh herbs like dill and parsley. It’s fantastic warm or at room temp.

Inspirational Gallery
Hard Cooler vs. Soft Cooler: A classic hard-sided cooler like a Yeti Tundra is unbeatable for multi-day trips or keeping ice frozen for a full weekend, but it’s heavy and bulky. For a day trip to the beach or park, a high-quality soft cooler like the Hopper Flip from Yeti or an RTIC Soft Pack is far more practical. It’s lighter to carry, easier to store, and chills everything you need for 8-10 hours perfectly.
A single orange peel can take more than two years to decompose in the wild. Even “natural” food scraps can harm wildlife and disrupt ecosystems.
This is the core of the
- Keep bugs away from your drink by placing a cupcake liner over your cup and poking a straw through.
- Freeze water bottles overnight. They’ll act as ice packs in your cooler and provide ice-cold water as they melt.
- Dusting baby powder on sandy feet and legs makes the sand fall right off before getting in the car.
The best tricks are often the simplest, turning potential annoyances into non-issues.
The ultimate beach challenge: how do you keep food, towels, and bags from becoming a sandy mess?
The secret is elevation and containment. Use a fitted sheet, placing your cooler or bag in each of the four corners to prop up the edges, creating a mini-wall that keeps sand from blowing in. For valuables like phones and keys, a high-quality dry bag or even a large Ziploc bag is non-negotiable. It provides a sand-free, waterproof sanctuary for your most important items.
A key to a successful outing: Don’t underestimate the power of a simple picnic blanket. But not all are created equal. Look for one with a waterproof backing, like those from Little Unicorn or the popular JJ Cole Outdoor Blanket. This layer prevents dampness from the ground from seeping through, keeping you comfortable even on dewy morning grass. It’s a small detail that makes a world of difference.
Did you know that by the time you feel thirsty, you could already be 1-2% dehydrated? For a 150-pound person, that’s a loss of nearly 2 pounds in water weight.
This is why guides always insist on “proactive sipping.” Don’t wait until your mouth is dry. Make a habit of taking a few sips of water every 15-20 minutes during any activity, especially in the sun. For extra credit, add an electrolyte tab from brands like Nuun or Liquid I.V. to your water to replenish the salts you lose through sweat.
That magical time just before sunset, often called the “golden hour,” isn’t just for photographers. Planning the end of your outing to coincide with it can transform the entire experience. The light is softer, the temperature drops, and the world takes on a warm, peaceful glow. It’s the perfect, serene ending to a day at the lake or a picnic in a field, creating a lasting, beautiful memory.
- Dries in a fraction of the time of a traditional terrycloth towel.
- Repels sand naturally, a quick shake and it’s clean.
- Incredibly lightweight and compact, taking up minimal space in your bag.
- Versatile enough to be a towel, a sun wrap, or even a makeshift picnic blanket.
The hero? A Turkish towel, or peshtemal. It’s one of the best upgrades you can make to your beach or pool bag.
Expert Tip: When choosing a sunscreen, look for the words “broad-spectrum” and “reef-safe” or “reef-friendly.” Broad-spectrum protects against both UVA (aging) and UVB (burning) rays. Reef-safe formulas, like those from Thinksport or Badger, avoid oxybenzone and octinoxate, two chemicals known to be harmful to coral reefs and marine life. It’s an easy switch that helps protect the very environments we love to explore.
Beyond the typical bandages and antiseptic wipes, a truly great outing “comfort kit” anticipates the minor miseries of a day outdoors. Include a small tube of hydrocortisone cream for surprise insect bites or itchy plant encounters. Pack a travel-sized aloe vera gel for immediate sun relief. A few antihistamine pills can be a lifesaver for sudden allergy flare-ups. And don’t forget blister-specific bandages like Compeed—they’re far superior to a standard band-aid for saving a hike.


