Your Complete Guide to a Happy Bird of Paradise Plant
I’ve been working with plants for a long, long time. I started out in huge commercial greenhouses, surrounded by what felt like millions of tiny seedlings, and later moved on to designing and caring for the massive plantscapes you see in office buildings and hotel atriums. And through all of that, the Bird of Paradise, or Strelitzia, has always been a standout favorite.
In this article
There’s just a presence it has, you know? The huge, paddle-shaped leaves create a bold, tropical structure that most other indoor plants just can’t compete with. And the flower, if you’re patient enough to earn one, is an absolutely incredible reward for your efforts.
Over the years, I’ve seen these beautiful plants suffer from simple neglect, but I’ve also seen them loved to death with way too much water. So my goal here isn’t to just give you a boring checklist. It’s to help you actually understand how this plant thinks and works. Once you get its nature, caring for it becomes second nature. We’re going to cover the exact same practical knowledge I share with my own team—from mixing the perfect soil to knowing what to do when things look like they’re going wrong.
Understanding Your Plant’s DNA
Before we even think about touching a bag of soil, let’s get inside the plant’s head. All successful plant care comes from one simple idea: trying to mimic a plant’s natural home. The Bird of Paradise originally comes from the coastal regions of southern Africa. But here’s the key: they aren’t deep-jungle plants hiding in the shade. They grow out in the open, in coastal bush and along riverbanks.
This tells us everything we need to know. It means they’re built for bright light, but maybe not the scorching all-day sun of a desert. They can handle a bit of a dry spell, but they also appreciate the regular moisture that comes with being near a river. Simple, right?
Let There Be Light (The Right Kind)
Think of those giant leaves as massive solar panels. Their one and only job is to soak up light, water, and carbon dioxide to create sugars—the plant’s food. For this to happen efficiently, they need a ton of bright, indirect light. A plant stuck in a dark corner is like a solar panel in a closet; it might survive for a little while on its battery reserves, but it will never, ever grow. And it definitely won’t have the spare energy to create a wild, exotic flower.
So, what does “bright, indirect light” actually mean inside a house? It’s the light you’d find a few feet back from a south or west-facing window. An east-facing window that gets some gentle, direct morning sun is also a fantastic spot. The only thing to really watch out for is intense, direct afternoon sun, which can literally sunburn the leaves, leaving brown, scorched patches.
A Look at the Roots
If you were to gently unpot a healthy Bird of Paradise, you’d see thick, fleshy, almost carrot-like roots. They look very different from the fine, hair-like roots of many other houseplants. These roots are designed to store water and nutrients, which is how they survive dry periods in their native habitat. It also means they are incredibly sensitive to sitting in soggy, waterlogged soil.
Honestly, root rot is the number one killer of these plants. It happens when the soil stays soaking wet for too long, pushing all the oxygen out. Roots need to breathe, and without air, they suffocate and die. The first sign you’ll see up top is probably yellowing leaves, but by then, the damage below ground can be pretty bad. This is why good drainage isn’t just a friendly suggestion—it’s non-negotiable.
Setting Your Plant Up for Success
Your journey to a thriving plant begins the moment you pick one out. The right pot and the right soil mix will lay the foundation for years of healthy growth and save you a world of headaches down the line.
How to Pick a Winner at the Nursery
When you’re at the garden center, be picky! Look for a plant with vibrant, deep green leaves that stand mostly upright. A few split leaves are totally normal, but pass on any plant with a lot of yellowing or sad, brown, crispy edges. Check the base of the stems to make sure they’re firm, not mushy. Price-wise, you can expect to pay anywhere from $25 for a small starter plant to over $150 for a large, mature specimen at a specialty nursery.
The Pot: A Simple but Crucial Choice
I once killed a beautiful plant because I put it directly into a fancy ceramic pot that had no drainage hole. Never again! That’s why I’m a fanatic about this: your pot MUST have a drainage hole. If you fall in love with a decorative pot that doesn’t have one, just use it as a cachepot. That means you keep the plant in its cheap plastic nursery pot, and simply place that inside the pretty one. When you water, you can pull the inner pot out, let it drain completely in the sink, and then pop it back in. Easy.

As for material, terracotta is a great choice if you have a heavy hand with the watering can. It’s porous and lets the soil breathe, helping it dry out faster. Standard plastic pots are cheaper and hold moisture longer, which can be helpful if you live in a dry climate or tend to be a bit forgetful. Either works if you just pay attention.
My Go-To Professional Potting Mix
That all-purpose potting soil you buy in a giant bag is usually too dense and heavy for a Bird of Paradise. It holds way too much water and can compact over time, choking the roots. Mixing your own is super easy and makes a world of difference.
Here’s a foolproof recipe:
- 2 parts high-quality potting mix: This is your base. Something like FoxFarm Ocean Forest is great, but any good indoor mix works.
- 1 part perlite: These are the little white, lightweight rocks. They’re all about creating air pockets for the roots to breathe.
- 1 part orchid bark: The chunky bark pieces improve drainage and prevent the soil from getting packed down.
You can find perlite and orchid bark in the houseplant section of places like Home Depot or Lowe’s, usually for under $10 a bag. Just mix it all up in a bucket or on a tarp. The final result should feel light and chunky, not like heavy, wet mud.
How to Repot Without the Stress
About every 18 to 24 months, or when you see roots coming out the bottom, it’s time to repot. Don’t go crazy with the pot size! Choose a new one that’s only 2-3 inches wider than the old one. A pot that’s too big holds excess soil that stays wet forever, which is a perfect recipe for root rot.
Here’s the step-by-step:
- Gently slide the plant out of its current pot. Squeeze the sides of a plastic pot to loosen it up.
- Take a look at the roots. Trim off any that are black, mushy, or smell funky using a clean, sharp pair of snips.
- Put a layer of your new chunky soil mix in the bottom of the new pot.
- Set the plant inside, making sure the top of the root ball is about an inch below the rim of the pot.
- Fill in around the sides with your new soil, gently pressing it down to get rid of any major air pockets.
- Give it a thorough watering until you see water running out of the drainage hole. You’re all set!
The Rhythm of Daily Care
Once your plant is happily potted, it’s all about finding a good rhythm. This isn’t about a strict calendar schedule, but more about learning to read your plant’s signals.
How to Water the Right Way
The most common mistake I see is people watering on a schedule, like every single Saturday. A plant’s thirst changes with the seasons, light, and temperature. So, ditch the calendar and use your finger instead. Stick it two inches deep into the soil. If it feels dry, it’s time to water. If you feel any moisture at all, wait a few more days and check again.
When it is time to water, do it thoroughly. Take the plant to a sink or tub (or use a large tray underneath) and pour water over the soil until it flows freely out the bottom. This flushes out any salt buildup and makes sure all the roots get a drink. Let it drain for a good 15-20 minutes. And whatever you do, never let the pot sit in a saucer full of water.

Quick Tip: If you’re worried about making a mess with a giant plant, a turkey baster is a fantastic tool for sucking excess water out of the decorative pot’s saucer. No lifting required!
Humidity Isn’t a Luxury
These plants love humidity, and most of our homes are as dry as a desert, especially in the winter. This can lead to those annoying brown, crispy leaf edges. While misting your plant feels nice, the effect is gone in minutes. A much better solution is to run a small humidifier nearby. You can also group your plants together, which creates a little humid microclimate. A pebble tray (a shallow dish filled with pebbles and water that sits under the pot) also works wonders by letting water evaporate up around the leaves.
Feeding Your Plant
To build those massive leaves, a Bird of Paradise needs food, especially in the spring and summer. A good balanced liquid fertilizer is perfect. Look for one where the three N-P-K numbers on the label are roughly equal, like a 10-10-10 or 20-20-20. A brand like Dyna-Gro is a solid, reliable choice.
During the growing season, feed it every 2-4 weeks, but—and this is important—always dilute the fertilizer to half the strength recommended on the bottle. It’s much safer to under-feed than to over-feed. Too much fertilizer can burn the roots. Oh yeah, and always water the plant before you fertilize. Never add it to bone-dry soil.
Going from Good to Great
With the basics down, your plant will be happy. But to get it to really thrive—and maybe even bloom—here are a few extra pro tips.
Pruning and Tidying Up
Pruning is super simple. It’s normal for the oldest, outermost leaves to yellow and die off over time. Once a leaf is mostly yellow or brown, you can cut it off. Use a clean, sharp knife and follow the stalk all the way down to the base of the plant, cutting as close as you can. This keeps the plant looking neat and directs energy to new growth. You might also notice the leaves splitting. This is a completely natural feature that helps them handle wind in their native environment, so don’t worry about it!
The Quest for a Flower
Getting a Bird of Paradise to bloom indoors is the holy grail for many owners, but it takes patience. First, the plant needs to be mature—at least 4-5 years old. Second, it needs a LOT of that bright light we talked about. You might even need to add a grow light. A simple full-spectrum LED bulb in a floor lamp or a dedicated T5 light bar running for 10-12 hours a day can make all the difference. Finally, they often bloom best when they are slightly root-bound, as this mild stress can trigger the plant to focus on flowering instead of just making more leaves.
Orange or White? How to Tell Your Birds Apart
It’s really helpful to know which type of Bird of Paradise you have, because their habits are worlds apart. The nursery tag might be missing, so here’s how to tell:
-
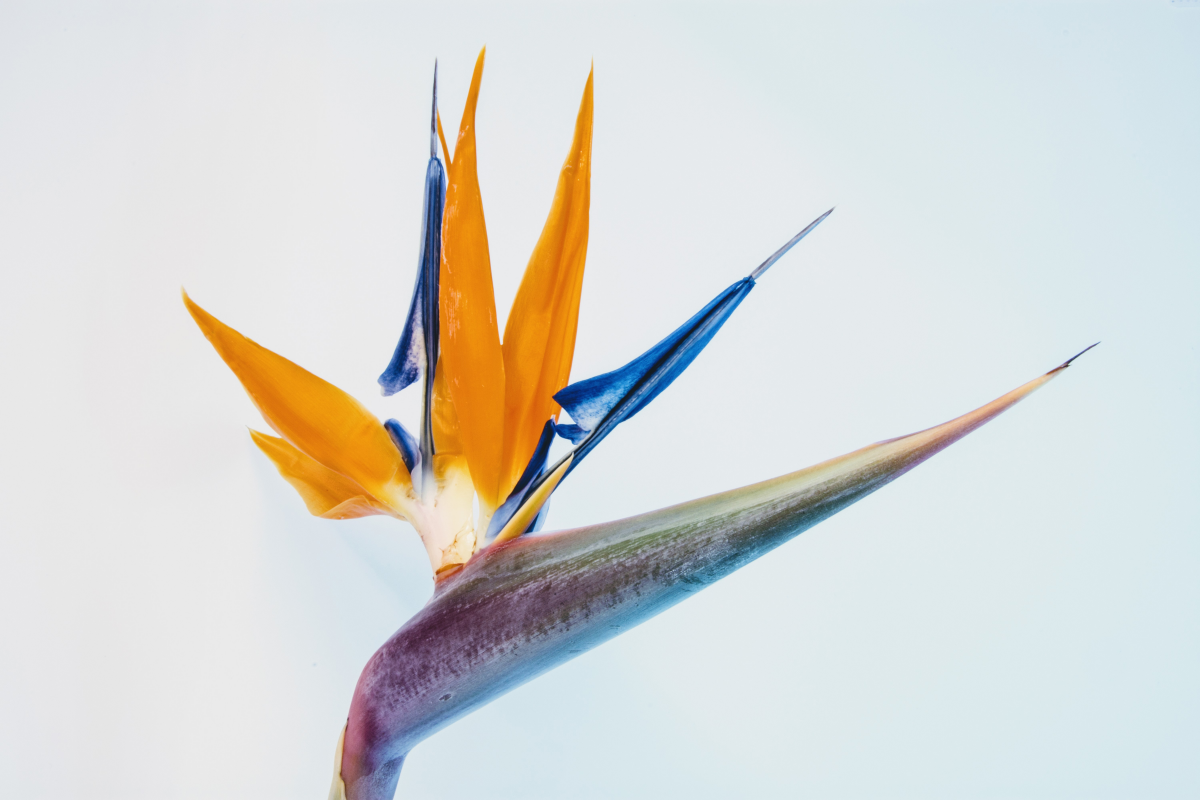
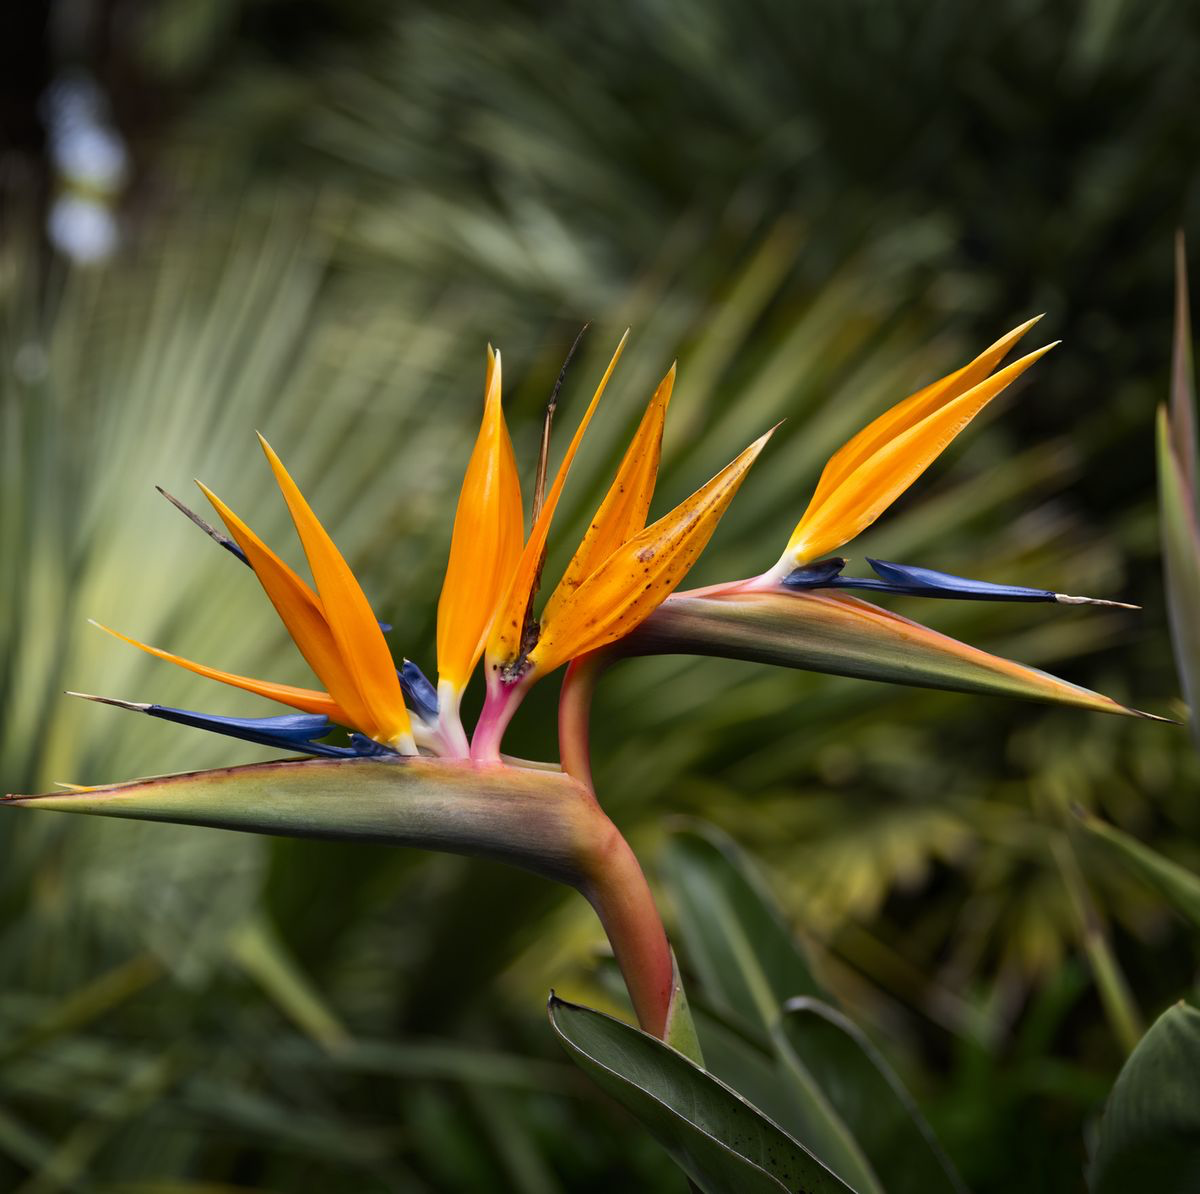
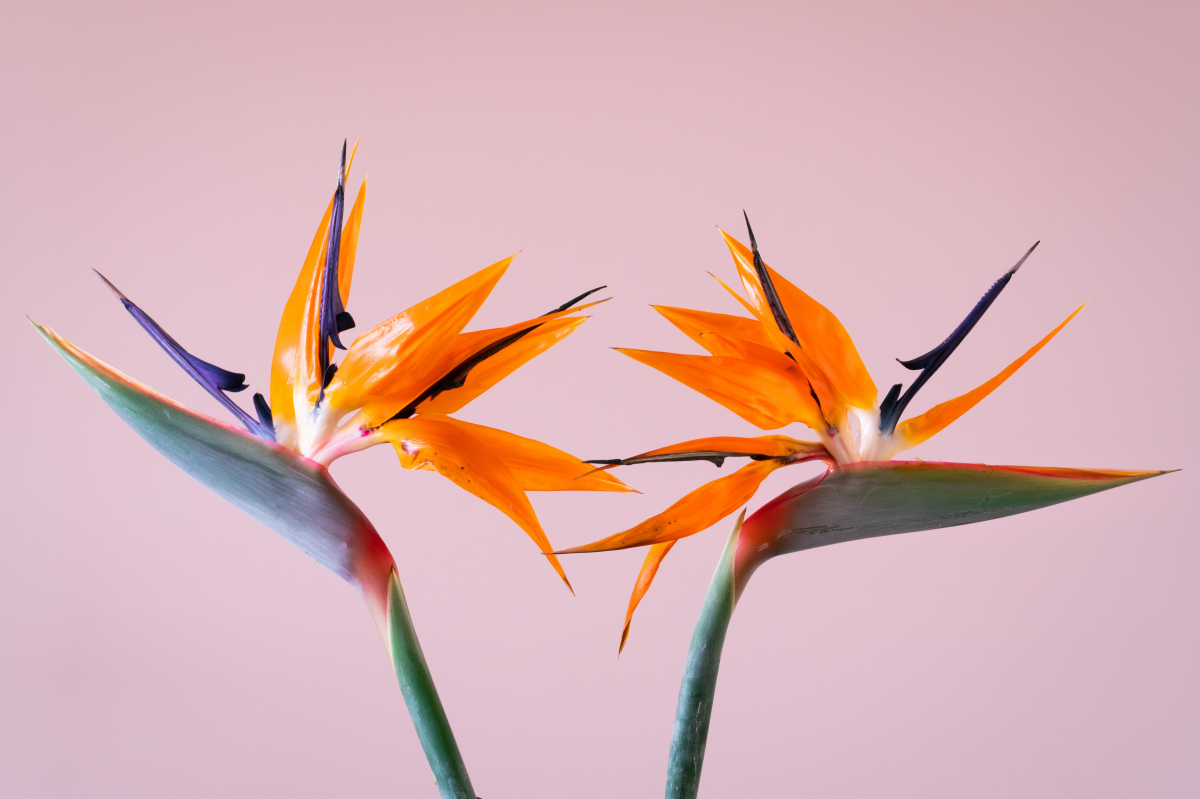
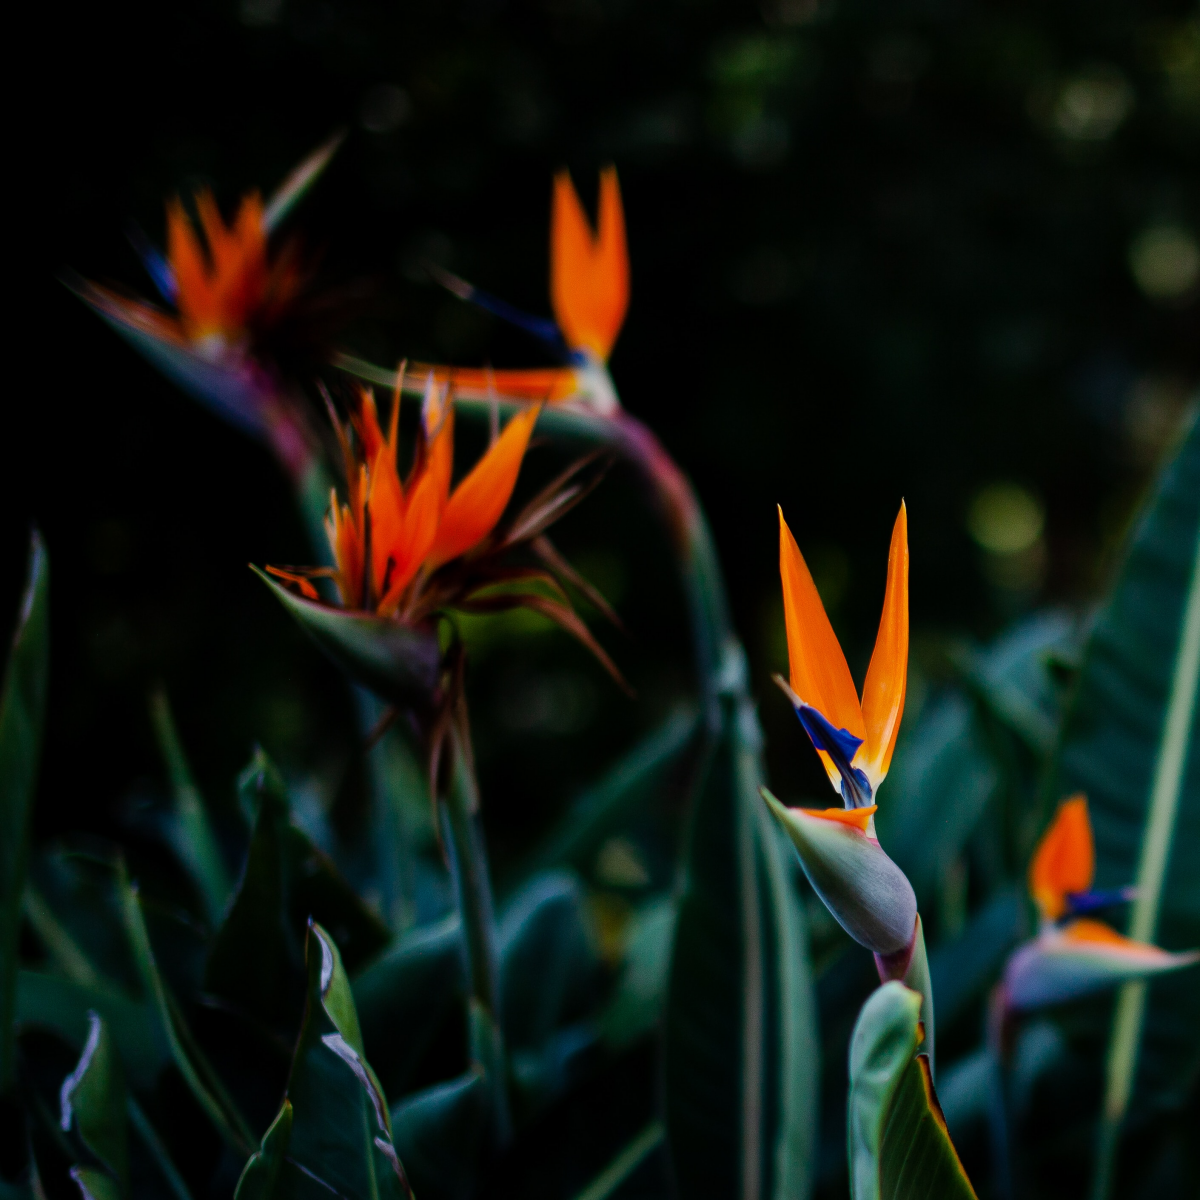
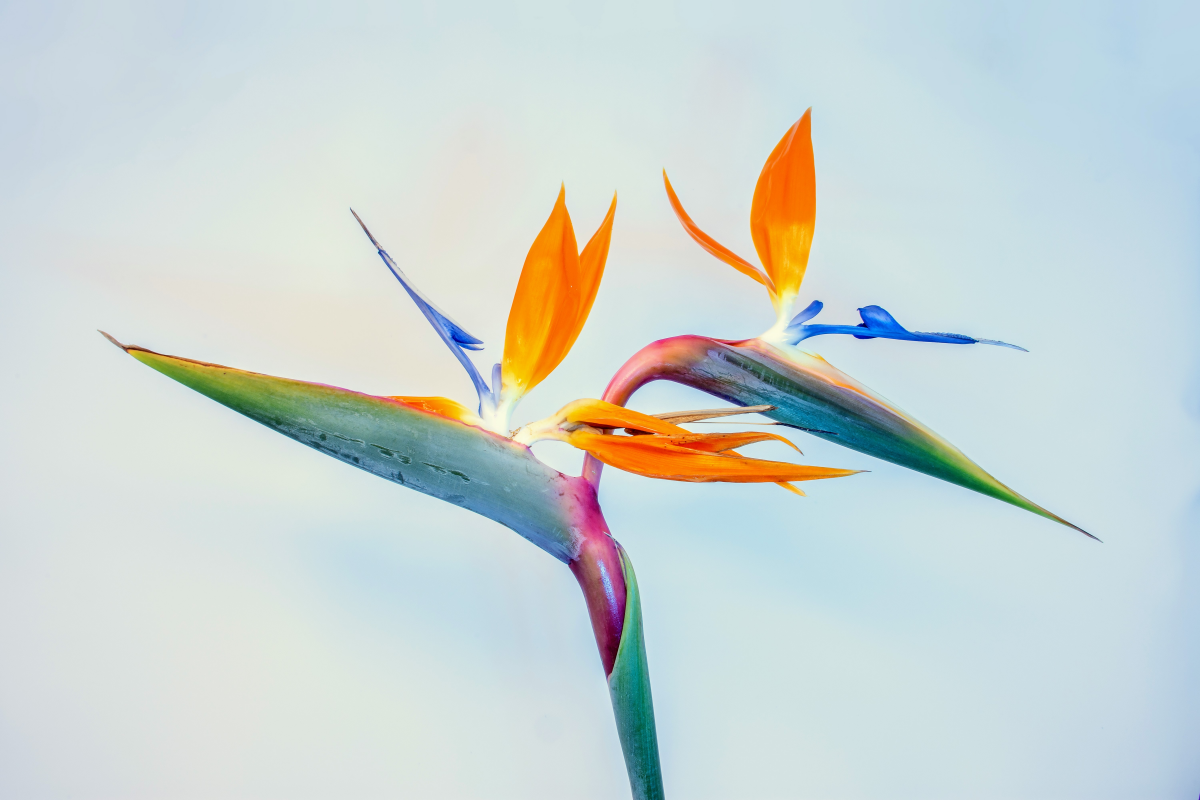
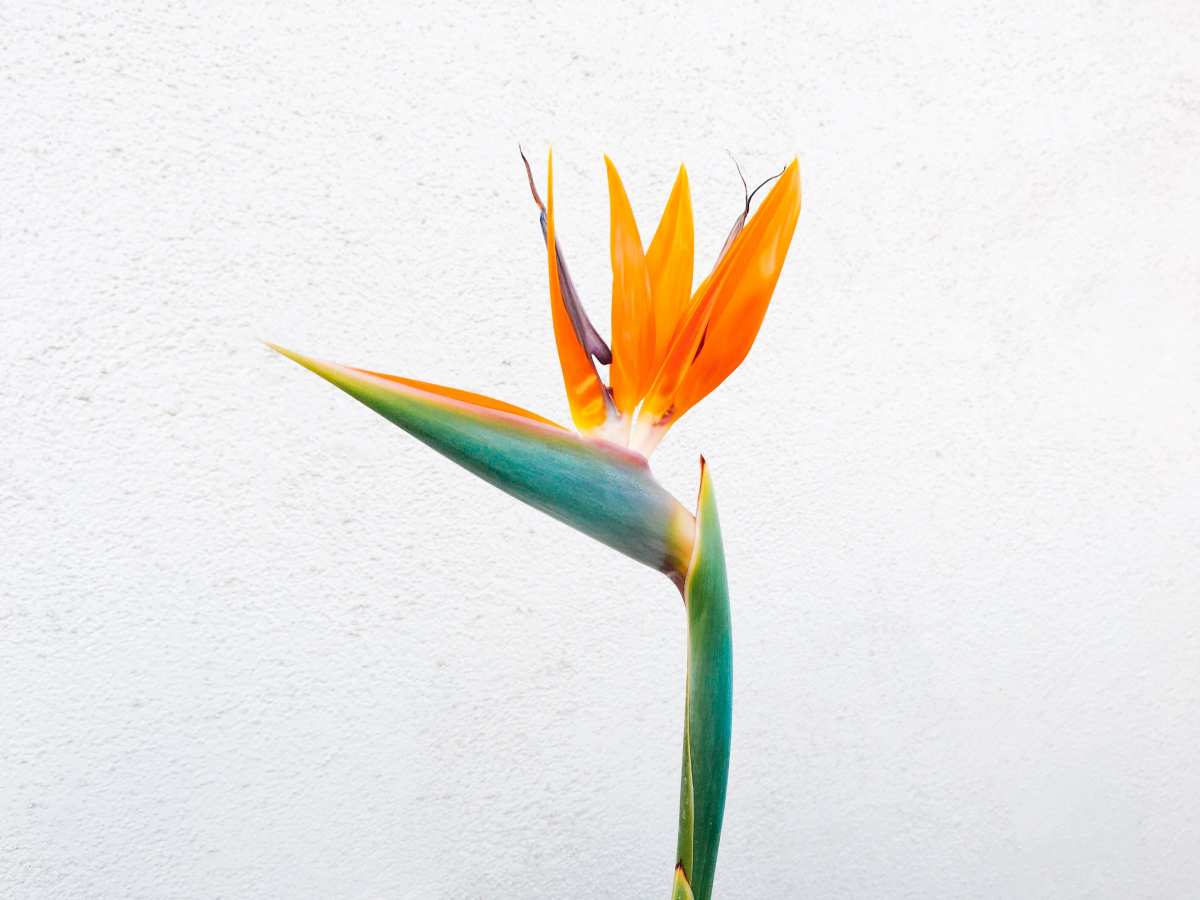
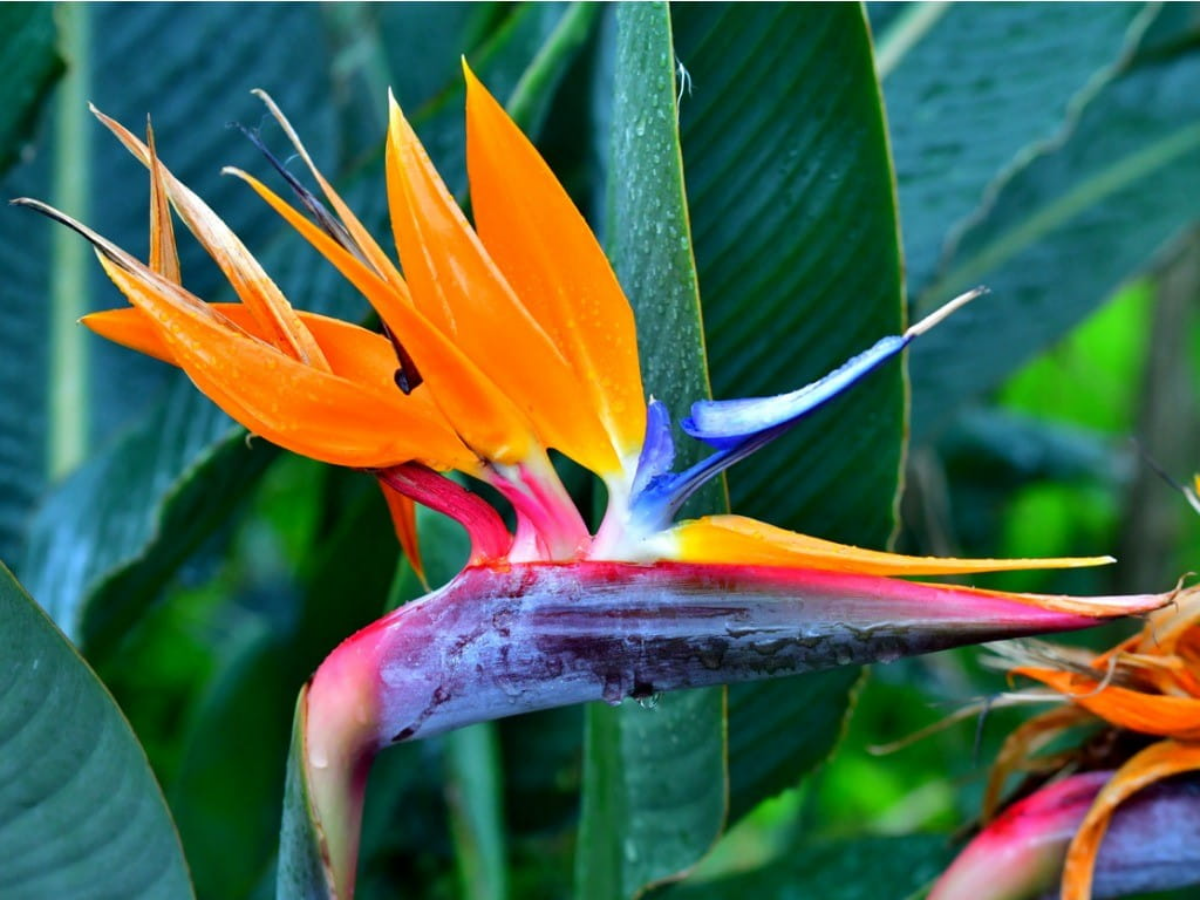
The Orange Bird (Strelitzia reginae): This is the classic variety with the iconic orange and blue flowers. It grows in a dense, fountain-like clump of leaves and typically maxes out at around 5-6 feet tall. This is the one you want for most indoor situations and the one most likely to actually bloom inside.
-
The White Bird (Strelitzia nicolai): This one is often sold as a houseplant when it’s young, but it’s a totally different beast. It grows more like a tree, with a hardening, trunk-like stem and leaves that are more spaced out along it. Be warned: this plant wants to be 20-30 feet tall. It’s a magnificent landscape plant for warm climates but will quickly outgrow most indoor spaces.
Troubleshooting Common Problems
Even with great care, things happen. Here’s a quick cheat sheet:
- Yellowing Lower Leaves: If it’s just the oldest, outermost leaf, that’s just normal aging. If multiple leaves are yellowing, it’s almost always a sign of overwatering. Check your soil and let it dry out!
- Brown, Crispy Edges: This points to low humidity or letting the soil get too dry between waterings.
- Curling Leaves: Usually a sign of thirst. The plant is trying to conserve moisture. Give it a good drink.
- Pests: The usual suspects are spider mites (look for fine webbing on leaf undersides) and mealybugs (look for white, cottony fluff). The first step is to wipe them off with a damp cloth. If they persist, a spray with insecticidal soap or neem oil will usually do the trick.
A Quick Word on Safety
Heads up for pet owners and parents: Bird of Paradise plants are toxic to cats, dogs, and humans if chewed on or eaten. It’s best to keep them out of reach of curious pets and small children to be safe.
Caring for a Bird of Paradise is a long-term relationship. It’s a plant that can grow with you for decades. Don’t be afraid to observe it and adjust your care. Give it a solid foundation, and it will reward you with its stunning tropical vibe for years to come.
Inspirational Gallery
The verticality of the Bird of Paradise is its secret weapon in interior design. Use the tall, elegant form of a Strelitzia nicolai to draw the eye upward, creating an illusion of height even in rooms with standard ceilings. It acts as a living sculpture, adding drama and a touch of the tropics without occupying a large footprint.
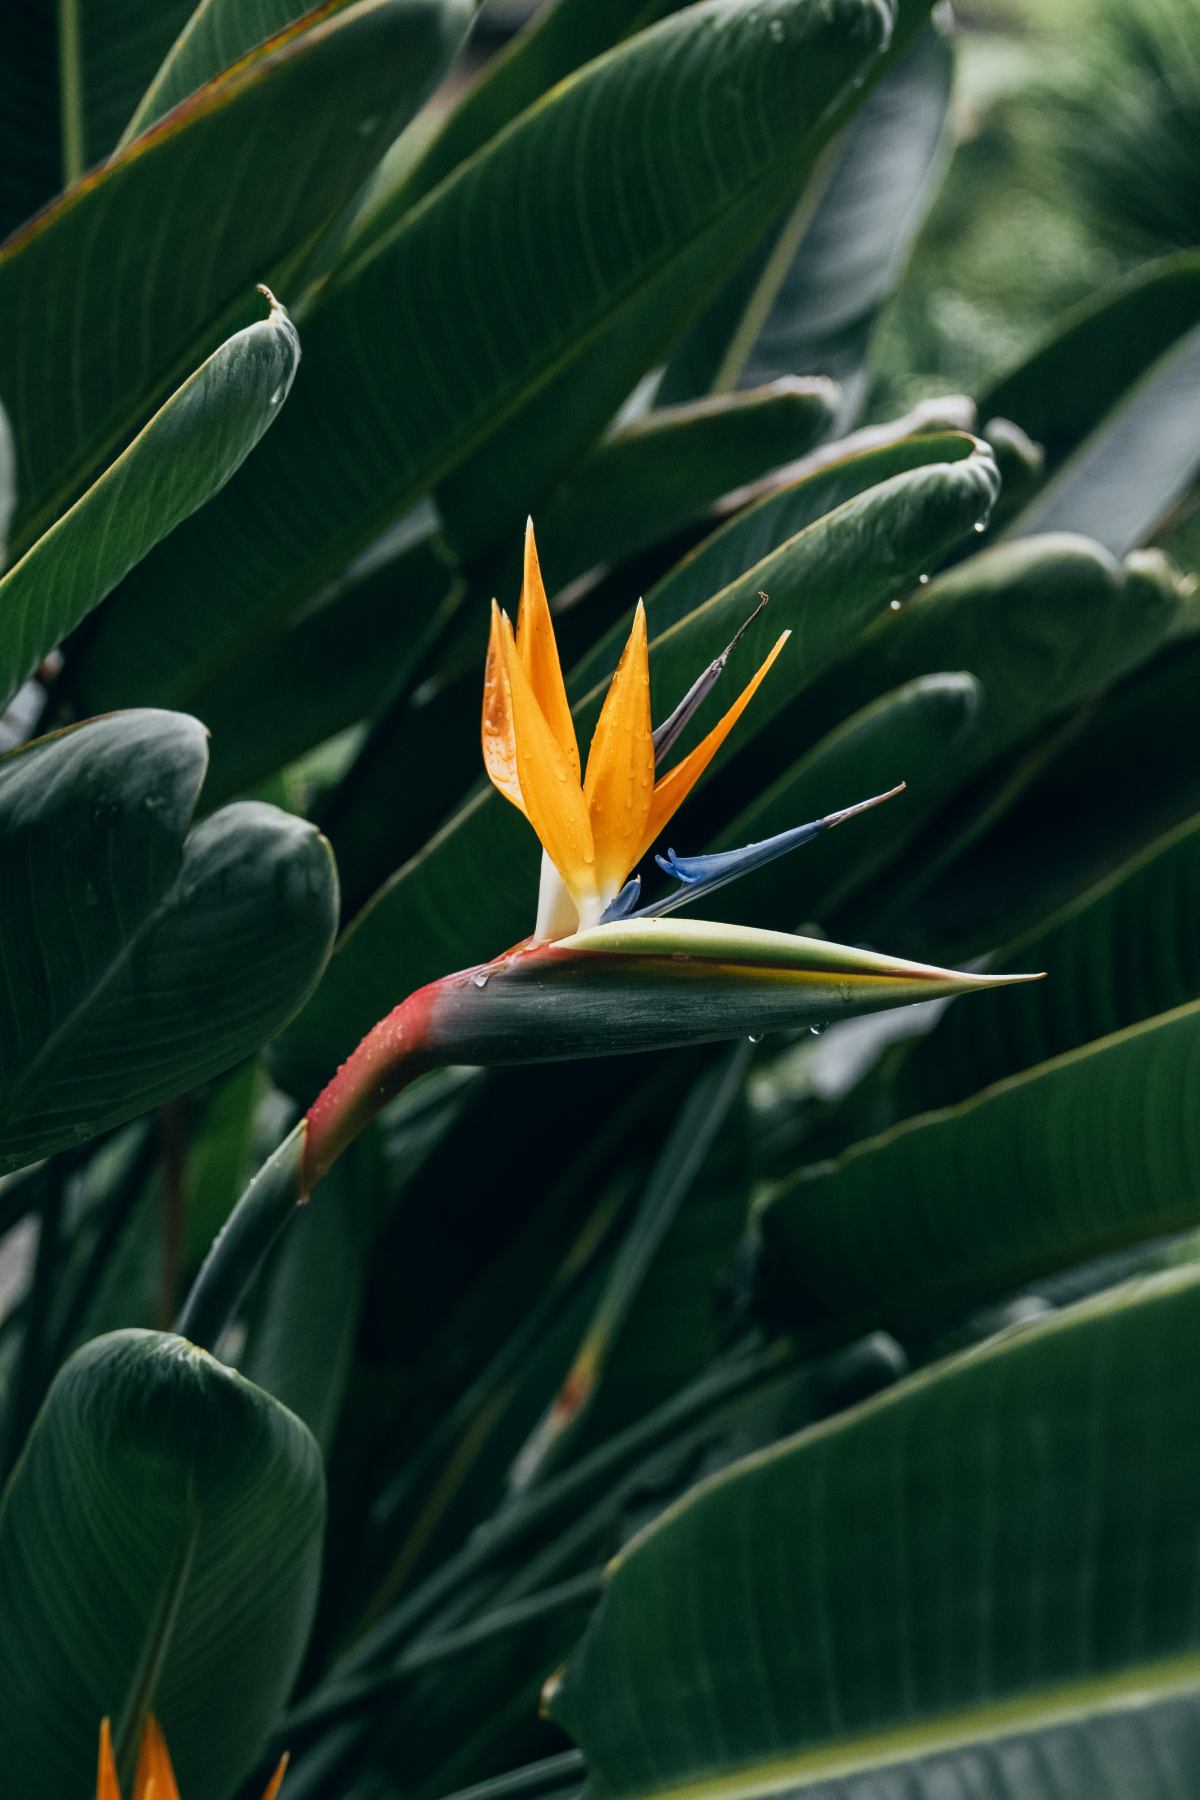
In its native habitat, the Strelitzia flower is pollinated by sunbirds, which perch on the blue spathe to access the nectar. The bird’s weight opens the flower, dusting its feet with pollen.
Seeing yellow leaves at the base of your plant?
Don’t worry, this is often a natural process. As the plant grows and pushes out new, larger leaves from the center, it sheds its oldest, outermost leaves. They will turn yellow and eventually brown. As long as the new growth looks healthy and green, you can simply snip off the old leaves at their base with clean shears to keep the plant looking tidy.
Keeping those magnificent leaves clean is crucial for health and beauty. Dust can block light and hinder photosynthesis. Here’s a simple routine:
- Gently wipe both the top and underside of each leaf with a soft, damp microfiber cloth.
- For extra shine and pest prevention, add a few drops of neem oil to your water.
- Support the leaf with one hand from underneath while you wipe with the other to avoid accidental tears.
Terracotta Pot: Highly breathable, it allows soil to dry out evenly and reduces the risk of root rot. Perfect for growers who tend to overwater. However, a large plant will need more frequent watering.
Glazed Ceramic or Plastic Pot: Retains moisture for much longer, ideal for those who forget to water or live in dry climates. Ensure it has excellent drainage holes to prevent waterlogging.
For a thirsty plant like the Bird of Paradise, a high-quality plastic pot is often a practical, lightweight choice.
- Vibrant, deep green foliage.
- A strong, upright posture.
- Consistent new growth during spring and summer.
The secret? A consistent feeding schedule. During the growing season, a Bird of Paradise is a heavy feeder. Use a balanced liquid fertilizer like Schultz All Purpose 10-15-10 diluted to half-strength every two weeks to provide the energy it needs for those giant leaves.
Important point: Split leaves are not a sign of sickness! In the wild, the leaves of a Bird of Paradise split naturally along their lateral veins. This is an evolutionary adaptation that allows strong coastal winds to pass through without tearing the entire leaf from the stalk. While very low humidity can make it worse, a few elegant splits are part of the plant’s authentic charm.
A single mature Bird of Paradise plant can be divided every 3-5 years, turning one oversized specimen into two or three perfectly sized plants.
Propagation by division is the best way to manage an overgrown Strelitzia and share it with friends. In early spring, carefully remove the plant from its pot and use a clean, sharp knife to separate a section with at least three stems and its own root system. Repot the new division in fresh soil, water it lightly, and give it a few weeks to recover from the shock.
Beyond the visual, consider the soundscape. The large, leathery leaves of a Strelitzia create a soft, soothing rustle with the slightest air movement from an open window or fan. It’s a subtle but powerful way to bring the calming, multisensory experience of a tropical resort right into your living room.
During the winter months, your plant’s growth will naturally slow down. This is its rest period. It’s crucial to adapt your care routine:
- Reduce Watering: Allow the top 2-3 inches of soil to dry out completely before watering again. The plant is using much less water when it’s not actively growing.
- Pause Fertilizing: Stop feeding entirely from late fall until early spring. Fertilizing a dormant plant can burn its roots.


