Which Video Editing Software Should You Actually Use? A Pro’s Honest Guide
I still remember the feeling of walking into my first real edit suite. It was in a chilly basement, the old CRT monitors buzzed, and the computer tower roared like a jet engine. My mentor, a seriously talented editor, just pointed at the screen and said something that’s stuck with me forever: “That box doesn’t make you an editor. Your choices do. The box is just a hammer. Learn how to build the house first.”
In this article
Honestly, even with today’s ridiculously fast and affordable tools, that advice is more true than ever. You can cut a whole movie on a laptop now, which is just wild. But people still ask the wrong question: “What’s the BEST video editing software?”
A better question is, “What’s the right tool for the job I need to do?” You wouldn’t use a sledgehammer to hang a picture frame, right? Same idea.
Picking your video editor, or Non-Linear Editor (NLE), is a big deal. It sets up your entire workflow. So instead of a boring top-five list, let’s walk through this the way a pro thinks. We’ll look at the big names, what they’re genuinely good at, and why you’d pick one over the other. No fluff, just the hard-won lessons that usually come from expensive mistakes.
First, Let’s Talk Guts: Codecs and Your Computer
Before you even dream of fancy transitions, we have to cover the stuff that makes or breaks an edit. This is the #1 hurdle for new editors. You can have amazing software, but if you feed it the wrong kind of file or run it on a weak machine, it’s going to choke. It’s like putting regular gas in a Formula 1 car.
The Deal with Codecs
So, your video file—that .MP4 or .MOV—is really just a box. Inside that box, the video is squished down by something called a codec to save space. Your camera probably uses a codec like H.264 or H.265 to pack hours of footage onto a tiny card.
Here’s the catch: those codecs are built for recording, not editing. They use a clever trick where most frames aren’t full pictures. Instead, the codec saves one full frame, then for the next bunch of frames, it only records what changed. To show you a single frame, your computer has to do a ton of math, looking back and calculating all the changes. This absolutely hammers your computer’s processor (CPU).
Pro editing software prefers codecs like Apple ProRes or Avid DNxHD. With these, every single frame is a complete picture. The files are way, way bigger, but your computer loves it. To put it in perspective, a 10-minute 4K clip from your camera might be 2GB. That same clip converted to ProRes for editing could be 20GB! That’s the trade-off for buttery-smooth performance.
Your Computer Is on the Team
Your editing software is only as good as the hardware it’s running on. Here’s what actually matters:
- CPU (The Brain): This handles the software itself and decoding those tricky camera files. A modern CPU like an Intel i7/i9 or an AMD Ryzen 7/9 with more cores makes everything feel snappier.
- GPU (The Muscle): Your graphics card handles the visual stuff—color grading, effects, and smooth playback. DaVinci Resolve, in particular, lives and dies by the GPU. A card like an NVIDIA RTX 3060 or 4060 is a fantastic sweet spot for 4K editing without completely emptying your wallet.
- RAM (Short-Term Memory): This holds all the bits of video you’re actively working on. For HD video, 16GB is the bare minimum. For 4K, don’t even think about it with less than 32GB. 64GB is even better if you can swing it. Not enough RAM is a recipe for slow performance and frustrating crashes.
- Storage (The Filing Cabinet): The speed of your hard drive is crucial. Editing off a slow external drive will create a bottleneck. You want your active projects on a fast Solid State Drive (SSD), preferably an NVMe drive. A 1TB NVMe SSD for your projects and software costs around $100-$150 and is one of the best upgrades you can make.
Quick tip: For a solid starter PC that can handle Premiere or Resolve smoothly, you’re probably looking at a budget of around $1,200 to $1,500. For hardware benchmarks tailored to this kind of work, the folks at Puget Systems have some amazing, free reports on their website.

The Main Contenders: An Honest Breakdown
Okay, let’s get into the software. Each of these has its own personality and purpose. I’ve used all of them for paid gigs, so I know where they shine and where they fall apart.
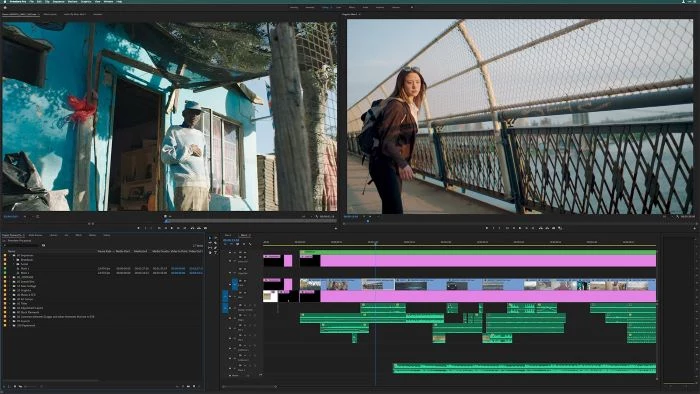
1. Adobe Premiere Pro: The Swiss Army Knife
Who it’s for: Premiere is the jack-of-all-trades. It’s used by everyone from YouTubers and marketing teams to news stations and some TV shows. If you need to do a bit of everything, this is your tool.
Why you’d pick it: Its superpower is the tight integration with other Adobe apps like After Effects (for motion graphics) and Audition (for audio). It’s an incredible time-saver.
My take: I’ve cut hundreds of projects on Premiere. Being able to send a clip to After Effects, add a title, and see it update instantly in my timeline without exporting is a workflow dream. But heads up: it’s a subscription, so you’re paying around $21/month (for just Premiere) or $55/month (for the whole suite). It also has a reputation for getting a bit unstable on massive, feature-film-sized projects.
Pro Tip: Turn on Auto-Save and set it to save a new version every 15 minutes. A crash once cost me hours of work on a tight deadline. Never again. My auto-save folder is my safety net.
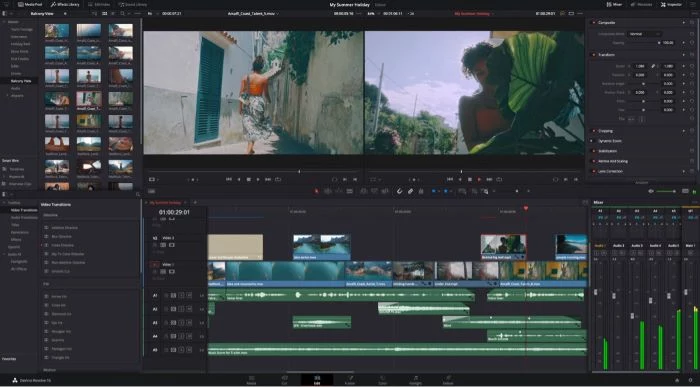
2. DaVinci Resolve: The Colorist’s Dream Turned Editing Beast
Who it’s for: Resolve began as the gold standard for color grading and has evolved into a full-blown NLE. It’s perfect for indie filmmakers and commercial creators who are serious about color.
Why you’d pick it: The FREE version is unbelievably powerful. It’s not a trial. You get pro-level editing, color, audio, and visual effects tools and can export in 4K, all for zero dollars. It’s insane value.
My take: I learned Resolve for its color tools, which are simply the best out there. The node-based system is way more flexible than traditional layers. But be warned, the learning curve is real, especially for the advanced pages like Fusion (effects) and Fairlight (audio). It also demands a strong GPU. Don’t even try 4K work on a laptop with integrated graphics unless you plan on using proxies.
Good to know: The paid Studio version is a one-time purchase of about $295. If you want to dive deep, look up channels like Casey Faris on YouTube for amazing Resolve tutorials.
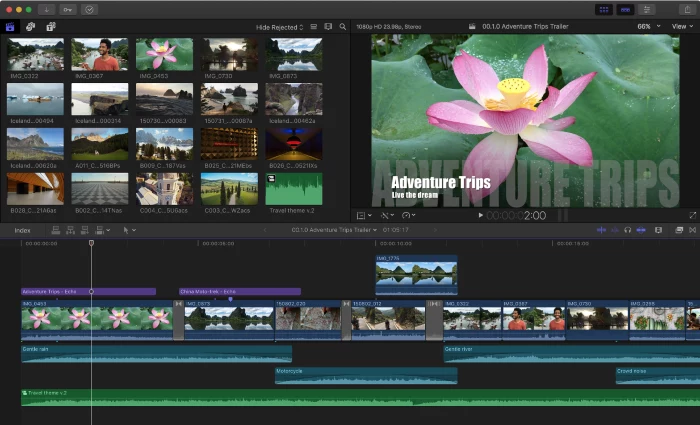
3. Final Cut Pro: The Apple Fan’s Speedy Companion
Who it’s for: This is exclusively for Mac users. It’s a huge hit with YouTubers and solo creators who live in the Apple ecosystem and prioritize speed.
Why you’d pick it: Performance. It is optimized to an insane degree for Apple’s M-series chips. Playback of 4K and even 8K footage is incredibly smooth, even on a MacBook Air. It’s a one-time cost of about $299.
My take: The Magnetic Timeline is its most debated feature. Clips snap together, and everything moves as a block. For quickly assembling a story for a social media video, it’s brilliant. But for complex edits where I need precise control over every track, it can sometimes feel like it’s fighting me. It’s a different way of thinking that some traditional editors don’t love.
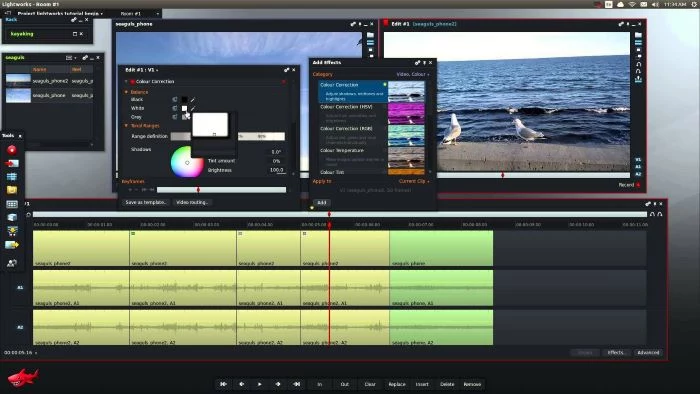
4. Avid Media Composer: The Undisputed King of Hollywood
Who it’s for: You won’t find this on a YouTuber’s laptop. This is the industry standard for feature films and big-budget TV shows. It’s built for huge teams working on the same project for months.
Why you’d pick it: Rock-solid media management and collaboration. Its bin-locking feature, which prevents two editors from accidentally overwriting each other’s work, is legendary. Studios trust it with their hundred-million-dollar movies for this reason.
My take: I got certified in Avid because, for certain jobs, you simply have to know it. But for a solo freelancer, it’s total overkill. The interface feels dated, the learning curve is a cliff, and its best features are designed for teams. It’s a specialized tool for a very specific job.
What About the Simpler Stuff?
By the way, not every project needs one of these beasts! The “right tool for the job” might be something way simpler. For quick social media videos, an app like CapCut is incredibly fast and intuitive. If you’re just putting together family vacation videos on a Mac, iMovie is already there and does a great job. Don’t overcomplicate things if you don’t have to!
Your Workflow Is Everything: How Not to Lose Your Mind
The software is just one part of the puzzle. A pro builds a reliable workflow to prevent disaster. Expect to spend about 20 hours to get basically comfortable in a pro NLE, but mastering it is a lifelong journey.
The 3-2-1 Backup Rule (This is NOT Optional)
I’m begging you, please listen to this. I once had a hard drive fail halfway through a big project. I lost everything. I had to re-edit from scratch. It was a nightmare. The 3-2-1 rule will save you from this pain:
- Have 3 copies of all your files.
- On 2 different types of storage (like an SSD and a separate external hard drive).
- With 1 copy kept off-site (in the cloud or at a different physical location).
This protects you from drive failure, theft, fire… everything. It’s your professional insurance policy.
The Magic of Proxies
Remember how those big ProRes files are easier to edit? What if you could have that smoothness without the huge file sizes during your edit? That’s what a proxy workflow does. You create small, low-resolution copies (proxies) of your footage to edit with. Playback is super fast. When you’re done, you just tell the software to swap in the original high-quality files for the final export.
Quick guide to proxies in Resolve: 1. Go to the Media Pool. 2. Select your high-res clips. 3. Right-click and choose ‘Generate Proxy Media.’ Boom. Headache gone.
Your Pro Move for Today
Even if you don’t have a project, do this right now. It takes two minutes and is the foundation of every professional edit. Create this folder structure somewhere on your computer:
PROJECT_MASTER_FOLDER
- 01_Footage
- 02_Audio
- 03_Graphics
- 04_Project_Files
- 05_Exports
Always copy your files from camera cards into these folders before you import them into your NLE. This keeps every project neat, organized, and easy to back up.
So, Which Hammer Should You Choose?
Let’s bring it all home. My advice is simple and depends entirely on you.
- For absolute beginners who want to learn the craft: Download the free version of DaVinci Resolve. It costs nothing, teaches you professional concepts from day one, and you can grow with it for years.
- For content creators and freelancers who need flexibility: Adobe Premiere Pro is a fantastic choice, especially if you’re already in the Adobe world. The integration is its killer app.
- For dedicated Mac users who value speed above all else: Final Cut Pro is literally made for you. For a solo creator on a Mac, the performance is just unbeatable.
- For anyone aiming for a career in high-end film or TV: You will eventually have to learn Avid Media Composer. It’s simply the language that part of the industry speaks.
Remember what my mentor said. The software is just the tool. A great editor can tell an amazing story with basic software, while a new editor can make a mess with the most expensive tools on the planet. Focus on the craft first—pacing, storytelling, sound design. Once you know how to build the house, any hammer will feel right in your hand.
Inspirational Gallery
My high-resolution footage stutters during playback. Do I need a new computer?
Not necessarily. You’re likely fighting a codec issue, as the article mentions. The professional solution is a proxy workflow. Your software creates low-resolution copies (proxies) of your original files. You edit with these smooth, lightweight files, and when you’re ready to export, the software automatically links back to the high-quality originals for the final render. It’s a standard practice in Hollywood and a complete game-changer for any editor.
SSD (Solid-State Drive): Offers lightning-fast read/write speeds, meaning your timeline is more responsive and footage loads instantly. Perfect for your active project files and cache. The Samsung T7 Shield is a popular, durable choice.
HDD (Hard-Disk Drive): Slower, but offers much more storage for your money. Ideal for long-term archiving of completed projects and raw footage you don’t need to access instantly. A brand like LaCie or G-Technology is a common sight in edit bays.
For an optimal setup, use an SSD for your current work and an HDD for your archives.
Don’t get lost in a sea of plugins and effects. Before you start downloading every free transition pack, master the fundamentals of pacing and rhythm. A simple, well-timed cut can have more emotional impact than the most elaborate animated wipe. The ‘J-cut’ and ‘L-cut’—where the audio from the next clip starts before the video, or vice-versa—are two of the most powerful and seamless editing techniques in your arsenal.
- Dramatically smoother playback, even with 4K or 6K files.
- Faster export times for your final video.
- Less risk of your editing software crashing under pressure.
The secret? Transcoding your footage. Before you even start editing, use a tool like DaVinci Resolve (even the free version) or Adobe Media Encoder to convert your camera’s H.264/H.265 files into an editing-friendly codec like Apple ProRes or Avid DNxHD. The files will be larger, but your CPU will thank you.
A quote widely attributed to legendary editor Walter Murch:
While Adobe Premiere Pro and Final Cut Pro dominate the conversation, don’t overlook Blackmagic Design’s DaVinci Resolve. What started as a high-end color grading tool has evolved into a full-fledged NLE that is astonishingly capable, even in its free version. It gives you access to:
- Professional editing tools very similar to other major NLEs.
- The world’s most advanced color correction and grading panel.
- ‘Fairlight’, a powerful audio post-production suite.
- ‘Fusion’, a node-based visual effects and motion graphics environment.
For beginners or those on a tight budget, it’s an incredibly powerful and risk-free way to learn the craft.
The essential shortcuts: Learn these three keys and you’ll instantly speed up your workflow in almost any software. ‘J’ plays backward, ‘K’ pauses, and ‘L’ plays forward. Tapping ‘L’ or ‘J’ multiple times increases the playback speed. It’s the universal language of video editing.
The latest trend shaking up the industry is AI-powered editing. This isn’t about robots taking over; it’s about automating tedious tasks. Features like Adobe Premiere Pro’s ‘Text-Based Editing’ (which transcribes your video so you can edit it like a text document) or DaVinci Resolve’s ‘Magic Mask’ (which isolates subjects with a single click) are saving editors countless hours, letting them focus more on creative storytelling.
- In, Out, and Insert: Mark the start (‘I’) and end (‘O’) of a clip you like, then drop it into your timeline with a single key (‘comma’ or ‘period’ in most NLEs).
- Ripple Delete: Deletes a clip and automatically closes the gap, keeping your timeline tidy.
- Razor Tool: The simple ‘cut’ tool. Learn its keyboard shortcut (often ‘C’ or ‘B’) to make quick cuts without reaching for the mouse.


