The Real Deal on Aura Nails: Your Guide to Getting That Perfect Glow
I’ve spent more years behind a nail desk than I can count, and I’ve seen trends come and go. Seriously, from the razor-sharp French manicure to wild encapsulated art, I’ve done it all. But the one style that everyone is asking for right now is the “aura nail.” It’s that gorgeous, soft-focus look where color seems to magically radiate from the center of the nail.
In this article
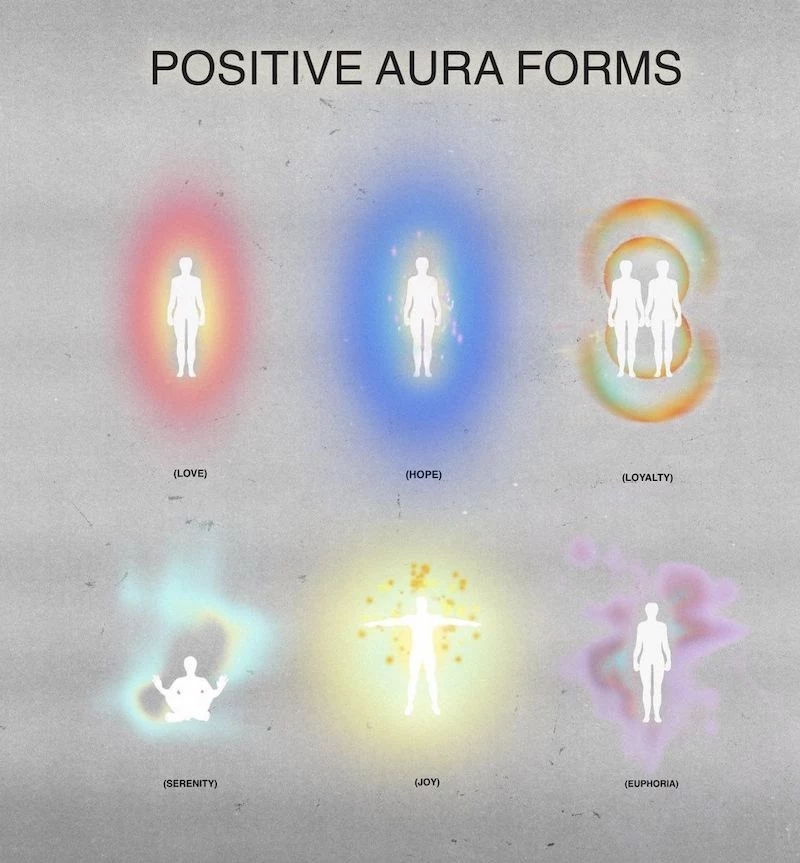
For some, it’s about channeling a certain energy, but for a nail tech, it’s a masterclass in blending color. Think of it as a modern, cooler cousin to the ombré. It’s a look that feels incredibly personal because you can mix colors to match a mood, an outfit, or just a vibe. But getting that seamless, lit-from-within glow? That’s not as easy as it looks on social media. The professional finish you see is all about using the right tools and techniques—it’s what separates a salon-quality manicure from a messy DIY attempt.
So, let’s pull back the curtain. I’m going to walk you through the exact methods we use in the salon to create flawless aura nails. We’ll get into the why behind it all, from how an airbrush works its magic to the clever chemistry of blooming gel. And yes, I’ll even share a killer at-home hack for those of you without all the pro gear. Let’s get into it.
The Science Behind the Glow: It’s All About Diffusion
To really nail the aura effect, you have to understand one thing: you’re not just painting a circle. You’re creating a perfect, edgeless gradient. The secret sauce in the pro techniques is simply controlling how pigments spread out, using a bit of physics and chemistry to do the heavy lifting.
The Airbrush Method: The Physics of a Fine Mist
Honestly, the most ethereal, flawless aura nails are almost always done with an airbrush. The magic here is a process called atomization. The airbrush gun uses compressed air to blast liquid paint into a cloud of microscopic droplets. This fine mist coats the nail so delicately that you get pure color without any brush strokes. It’s a game-changer.
As a tech, you’re constantly balancing a few key things:
- Air Pressure (PSI): We use a compressor to control the airflow. For nails, the sweet spot is usually between 15 and 20 PSI. If you go too high, the paint splatters and looks wet. Too low, and you get a gritty, inconsistent spray.
- Distance: This is crucial. Holding the nozzle about 2-3 inches from the nail gives you that soft, wide fade. Want a smaller, more intense center? You move in just a tiny bit. It’s a subtle dance that takes a lot of practice.
- Trigger Control: Most pro airbrushes are dual-action. Pushing down releases air, and pulling back releases paint. For an aura, you start with just air, then gently pull back to introduce a whisper of color, building it up slowly in the center.
This level of control creates a gradient that’s pretty much impossible to get with a regular brush.
The Blooming Gel Method: The Chemistry of Spread
For salons (or home pros) who haven’t invested in an airbrush setup, blooming gel is an amazing alternative. It’s a clear gel polish that’s super thin and runny—what we call low viscosity. Think of it like this: regular gel polish is like honey (it stays put), while blooming gel is more like water (it wants to spread out).
It’s designed to do one thing: make other gels move. You paint on a thin, uncured layer of blooming gel, then add a dot of colored gel on top. Because the colored gel is thicker, its pigments start to disperse into the thinner blooming gel, creating that soft, ‘blooming’ circle. The key here is timing. You have to watch the bloom happen in real time and then cure it under the lamp the second it looks perfect. Every brand is different; some bloom in 15 seconds, others take a full minute. You really have to get to know your products.

The Pro Methods: Airbrush vs. Blooming Gel
In a salon, it’s all about consistency and quality. So, which method is better? Well, they both have their place.
The airbrush is the undisputed champion for a flawless, photo-ready finish. It delivers a perfectly smooth, diffused look every single time. Once you’re set up, it’s also incredibly fast—I can knock out a full set of aura designs in under 15 minutes. The downside? The investment. A good starter kit with a compressor and a decent airbrush (like an Iwata Neo) can run you about $150, and high-end pro models can be over $300. But for speed and perfection, it’s worth it.
On the other hand, blooming gel is the more accessible and budget-friendly choice. A single bottle from a quality brand like Kokoist or The Gel Bottle Inc. will only set you back about $20-$25. It doesn’t require any extra hardware besides your standard gel lamp. The trade-off is the skill and time involved. It requires a patient hand, and the effect is a bit less predictable than an airbrush. The final look is more of a soft, watercolor-like bloom rather than a misty, air-like glow.
Technique
1: The Airbrush (The Gold Standard)
For that true, heavenly aura, the airbrush is my go-to. It offers total control and produces a perfect gradient that makes clients gasp. Here’s how it’s done.
Tools and Materials:
- A dual-action, gravity-feed airbrush with a small nozzle (0.2mm or 0.3mm is perfect).
- An air compressor with a moisture trap and pressure regulator.
- Cosmetic-grade, water-based airbrush paints. And I have to stress this: NEVER use craft or acrylic paints. They aren’t tested for skin safety. Stick to pro brands like Createx.
- Airbrush cleaner (an absolute must).
- Your usual gel manicure supplies: file, buffer, dehydrator, primer, base coat, base color, and a high-shine top coat.
Step-by-Step Airbrush Process:
- Prep is Everything: Start with a flawless manicure. Shape the nail, clean up the cuticles, and gently buff the nail plate. Cleanse with 99% isopropyl alcohol, then apply your bonder and primer for gel.
- Build Your Base: Apply a thin layer of gel base coat and cure for 30-60 seconds in an LED lamp. Follow with one or two coats of your background color. A sheer nude or milky white is a classic choice. Cure each layer fully.
- Get Ready to Spray: Add a few drops of airbrush paint into the gun’s cup. Do a quick test spray on a paper towel to make sure the flow is smooth.
- Create the Aura: Hold the finger steady and aim the airbrush at the center of the nail from 2-3 inches away. Press the trigger for air, then gently ease back to release the color. Use short, controlled bursts instead of one long spray to avoid pooling. Build up the color in the center until it’s opaque, letting the overspray create the soft edges.
- Clean Between Colors: If you’re doing a multi-color aura, you have to clean the gun between each color. Run airbrush cleaner through it until it sprays clear. Don’t skip this, or your colors will turn to mud.
- Seal the Deal: Let the water-based paint air dry for about 30-60 seconds. Then, carefully float a layer of gel top coat over the design, making sure to cap the free edge. Cure, and you’re done!
Quick Tip: A common mistake is getting splatters. This is usually caused by two things: your air pressure is too high, or your paint is too thick. Lower the PSI a bit, or add a drop of water or airbrush thinner to your paint cup and mix it well.

Technique
2: Blooming Gel (The Clever Alternative)
No airbrush? No problem. Blooming gel is a fantastic way to get a similar vibe with a more artistic, free-flowing feel.
Step-by-Step Blooming Gel Process:
- Prep & Base: Just like the airbrush method, start with a perfectly prepped nail and two coats of your cured base color.
- Apply the Blooming Gel: Apply a thin, even layer of blooming gel over the entire nail. Do not cure it! This is the magic layer.
- Add Your Color: Using the brush from a colored gel polish (or a detail brush), place a small dot of color in the center of the nail.
- Watch and Wait: Now for the fun part. You’ll see the color start to slowly expand and soften. This can take anywhere from 15 to 60 seconds. You have to babysit it!
- Freeze It!: The moment the bloom reaches the size and softness you want, immediately put the hand into your LED lamp to cure. Curing stops the blooming process in its tracks.
- Top Coat: Finish with a layer of high-shine top coat and cure one last time.
Heads Up! Common Blooming Gel Pitfalls:
- Problem: The gel is running into the sidewalls.
Solution: You used way too much blooming gel! The layer should be paper-thin. Less is always more with this stuff. - Problem: The bloom is too small or didn’t spread much.
Solution: Either your layer of blooming gel was too thin, or the colored gel you used was too thick. You can also try waiting a little longer before curing.
The At-Home Hack: The Makeup Sponge Method
Okay, so you don’t have an airbrush or blooming gel, but you still want that aura look. I got you. This method uses tools you probably already have and gives a surprisingly good result.
What You’ll Need:
- Your gel polish basics (base, color, top coat).
- A small piece of a makeup sponge (the pointy tip of a triangle wedge or beauty blender works great).
- Loose cosmetic pigment powder or even a highly-pigmented eyeshadow.
Here’s How You Do It:
- Prep and Base: Do your nail prep and apply two coats of your chosen base color, curing each one.
- Create a Tacky Surface: This is key. Apply a thin layer of your gel top coat, but DO NOT CURE IT. This uncured layer is sticky and will grab onto the powder. (Alternatively, the natural tacky layer of your cured color gel might be enough).
- Dab the Color: Dip the tip of your sponge into a tiny bit of the pigment powder. A little goes a long way!
- Build the Aura: Gently dab the sponge onto the center of the nail. Start soft and build the color up to the opacity you want. Use a clean part of the sponge to softly tap around the edges to help blend them out.
- Finish Up: Carefully dust off any loose powder with a soft brush. Seal everything in with another layer of top coat, and cure completely.
The finish from this method is a little more textured and sparkly than the pro methods, but it’s a fantastic and easy way to get the look at home.
A Quick Word on Colors
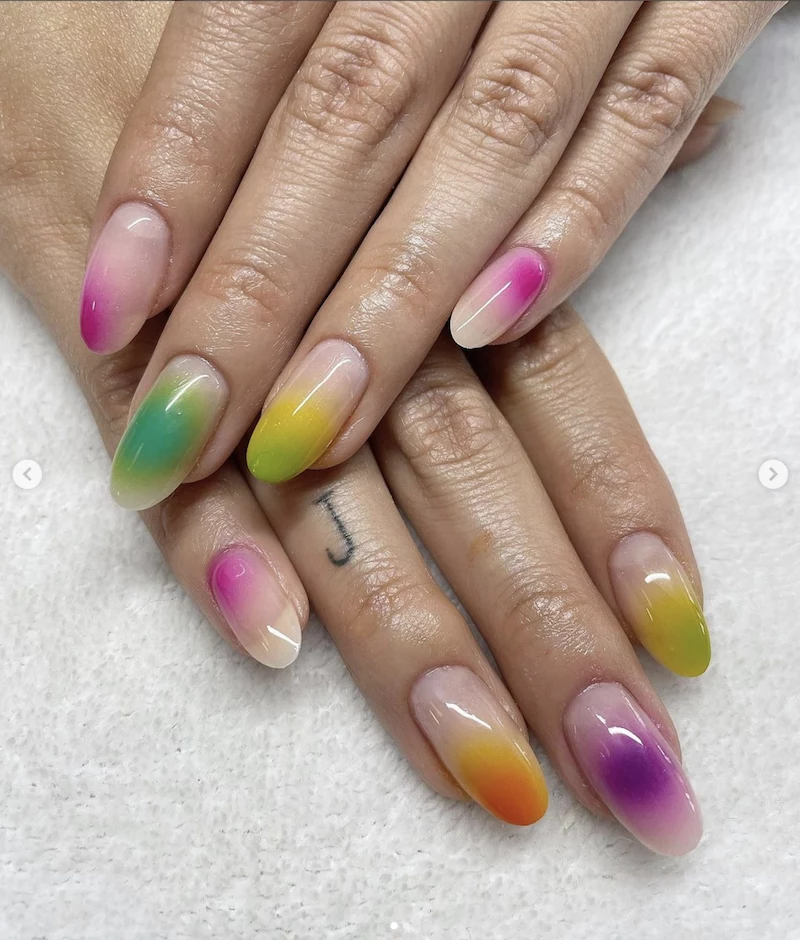
The right color combo is what makes an aura manicure truly special. Don’t be afraid to play around! Here are some combos that are always a hit:
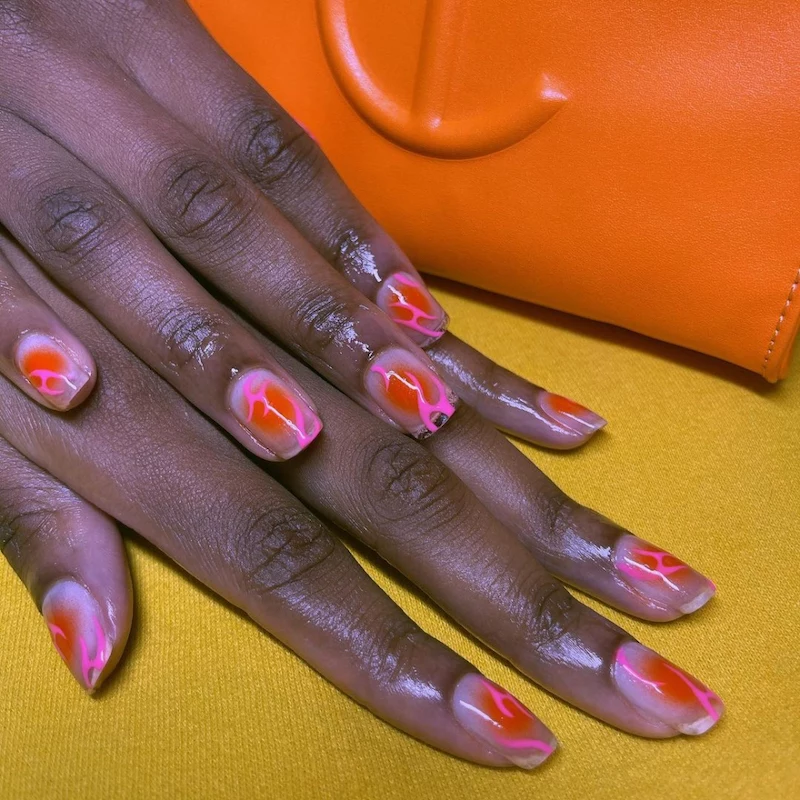
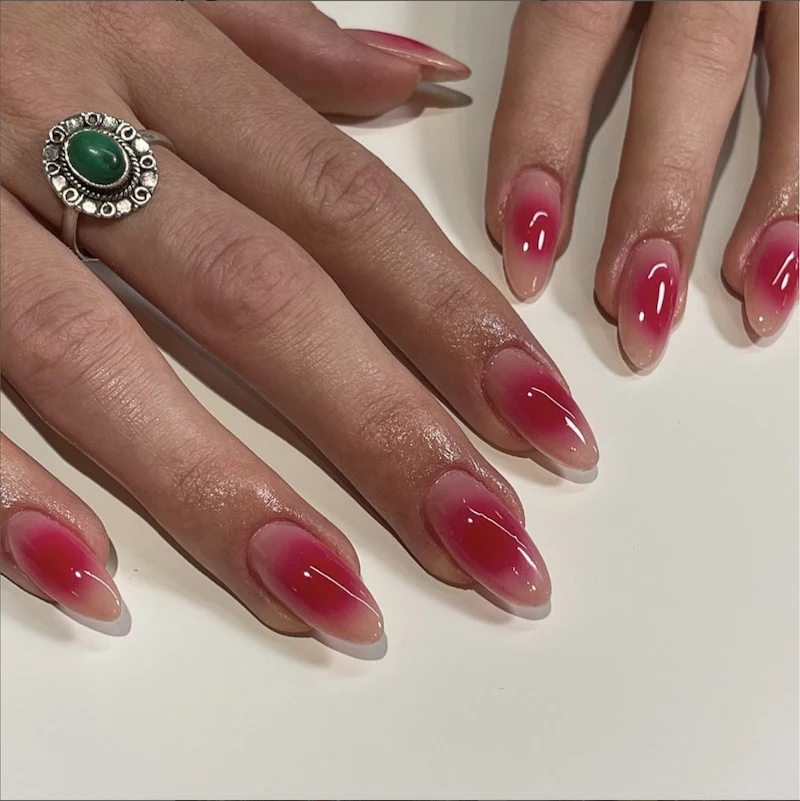
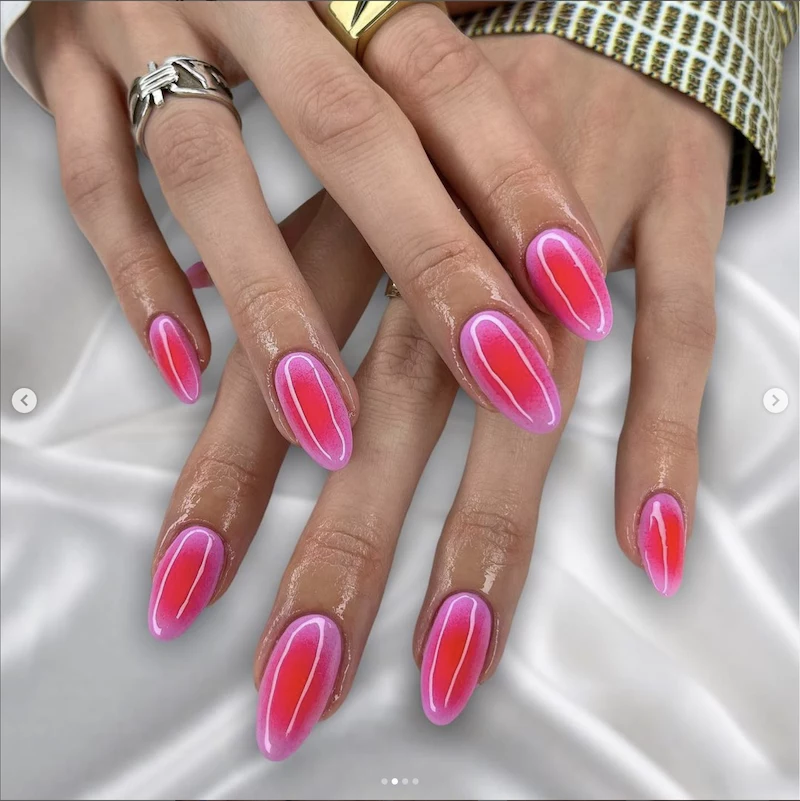
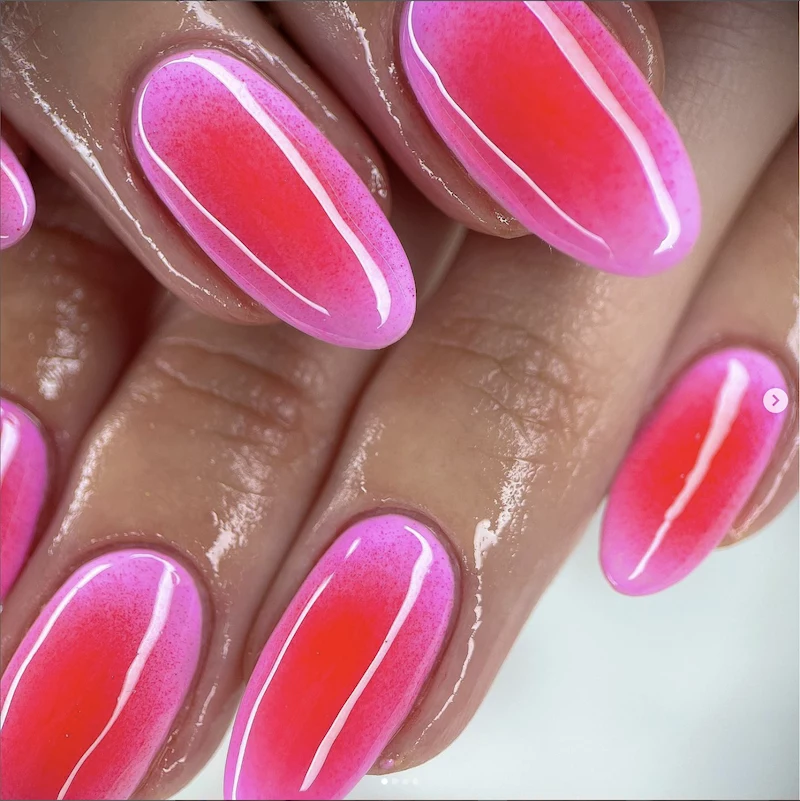
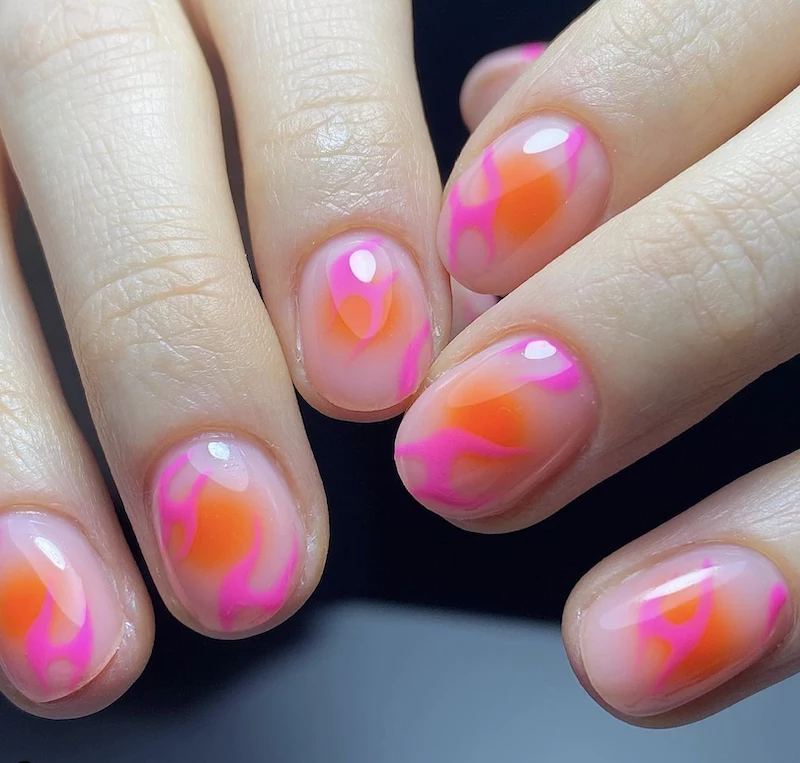
- Sunset Aura: A hot pink or orange center on a soft peach or nude base.
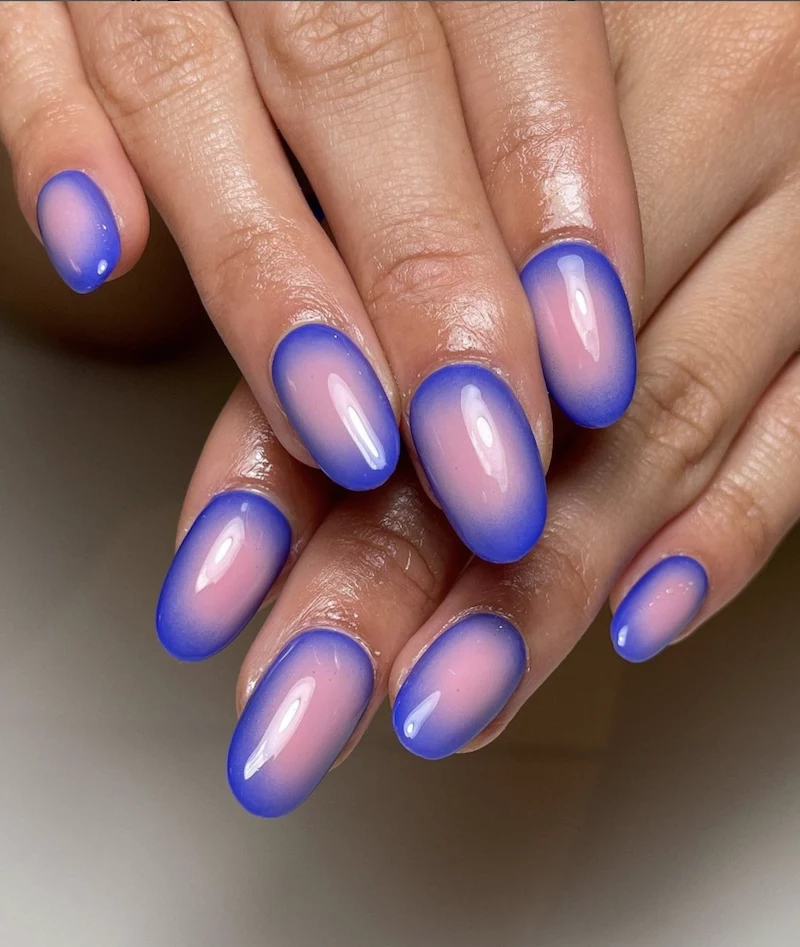
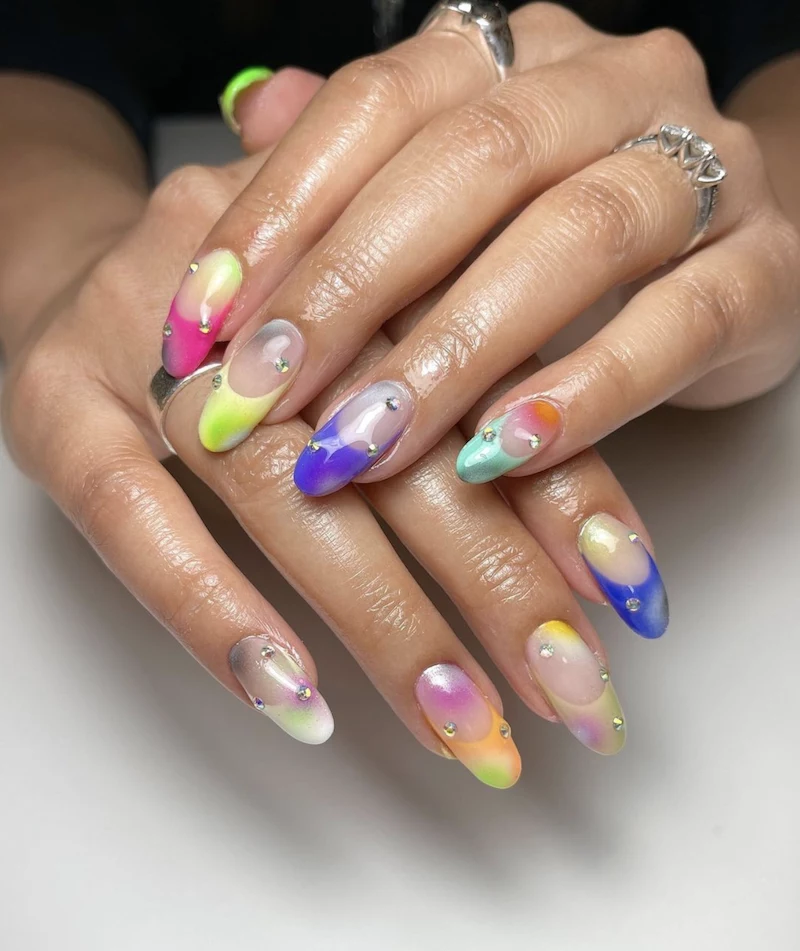
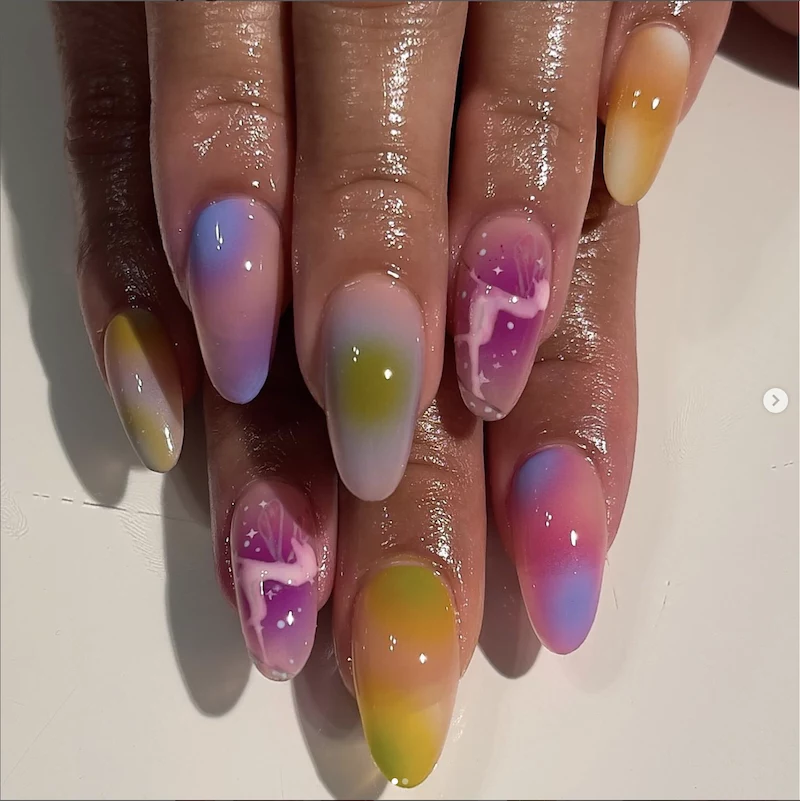
- Cosmic Aura: A deep blue or vibrant purple center on a milky white or black base.
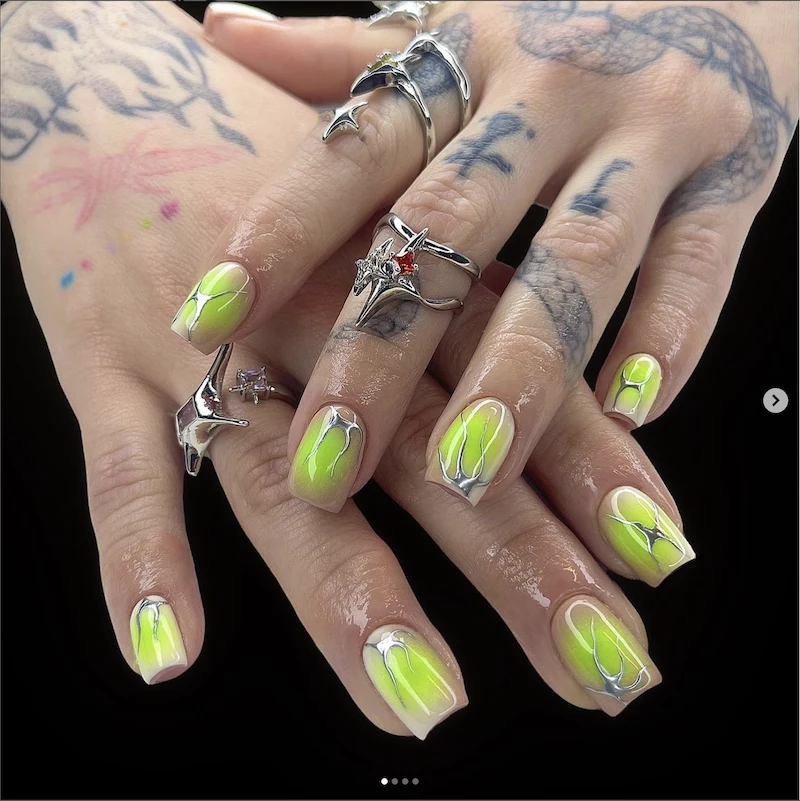
- Citrus Aura: A bright yellow center on a pale green or sheer white base.
Pro Tip: For that signature “glowing” look, always try to use a lighter, brighter color for the center and a more muted or sheer color for the background. It creates an illusion of light that really pops.
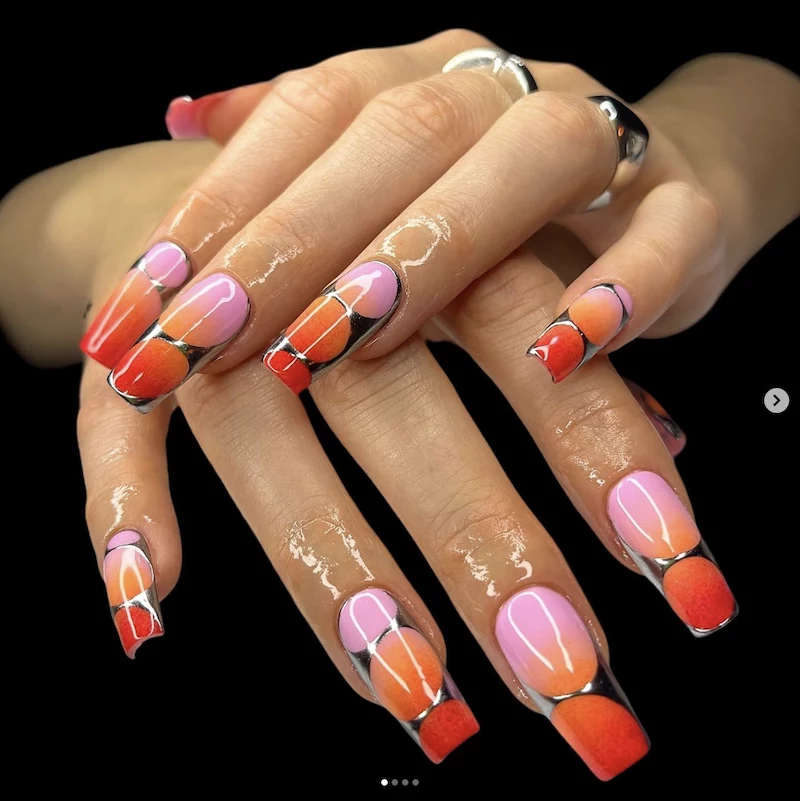
Inspirational Gallery
Beyond the mystical, think of aura nails as a mood ring for your fingertips. A fiery red-orange center on a soft pink base can channel sunset energy for a vacation, while a deep indigo radiating into a lavender haze feels more cosmic and dreamy. It’s less about your spiritual aura and more about the aesthetic you want to embody today.
Can I really get this look without an airbrush?
Absolutely. You can mimic the effect with a simple eyeshadow applicator or a tiny piece of makeup sponge. After your base color is cured, apply a small dot of your chosen aura color to the center. Then, using the sponge, gently tap and dab around the edges of the dot to blur it outwards. Build the color slowly and finish with a quality top coat to smooth it all out. It takes patience, but the result is surprisingly soft!
The #AuraNails hashtag has amassed over 500 million views on TikTok.
This isn’t just a fleeting trend; it’s a full-blown aesthetic movement. The incredible number of views shows how a visually satisfying technique can captivate a massive audience, driven by both pro artists and DIYers. This cements its place as a defining nail art look of the decade.
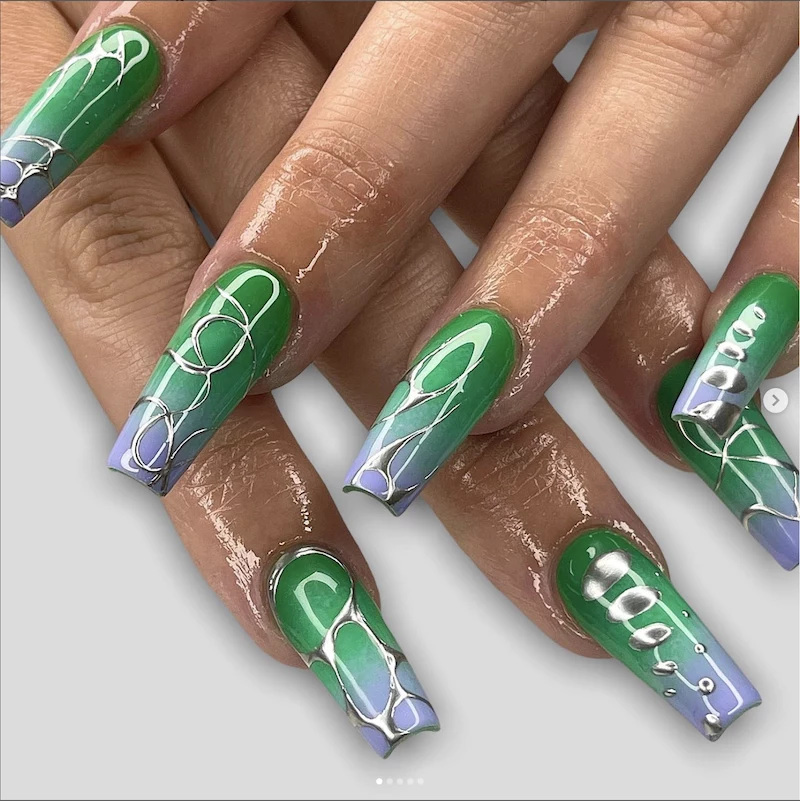
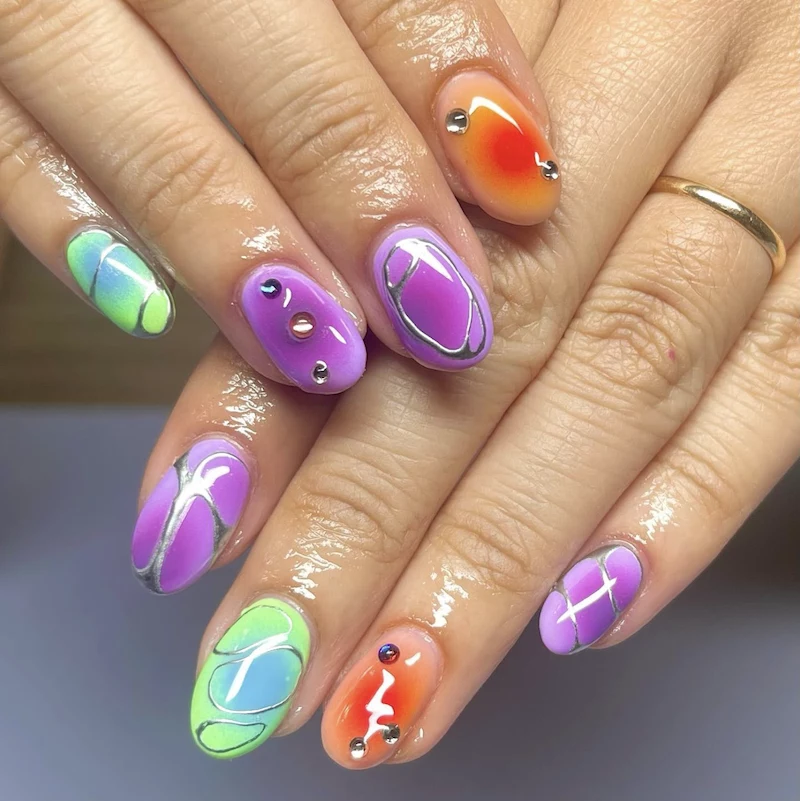
The aura nail is no longer just a simple gradient. The trend is evolving with stunning new textures and dimensions. Top artists are now layering it with:
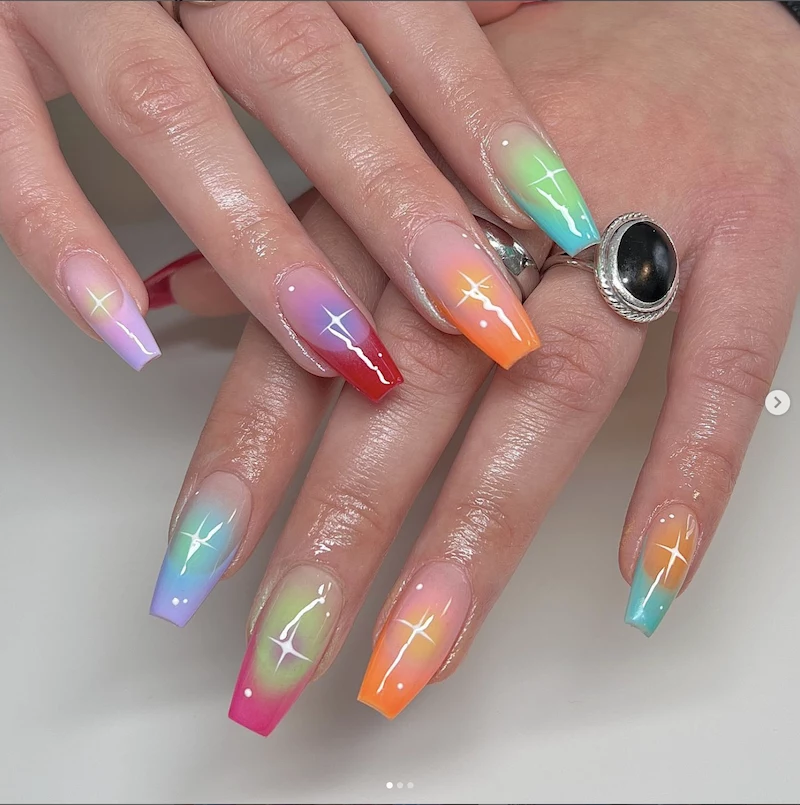
- Chrome Powder: After creating the aura, a ‘glazed donut’ or holographic chrome finish like that from OPI is rubbed on top for an iridescent, multi-tonal shine.
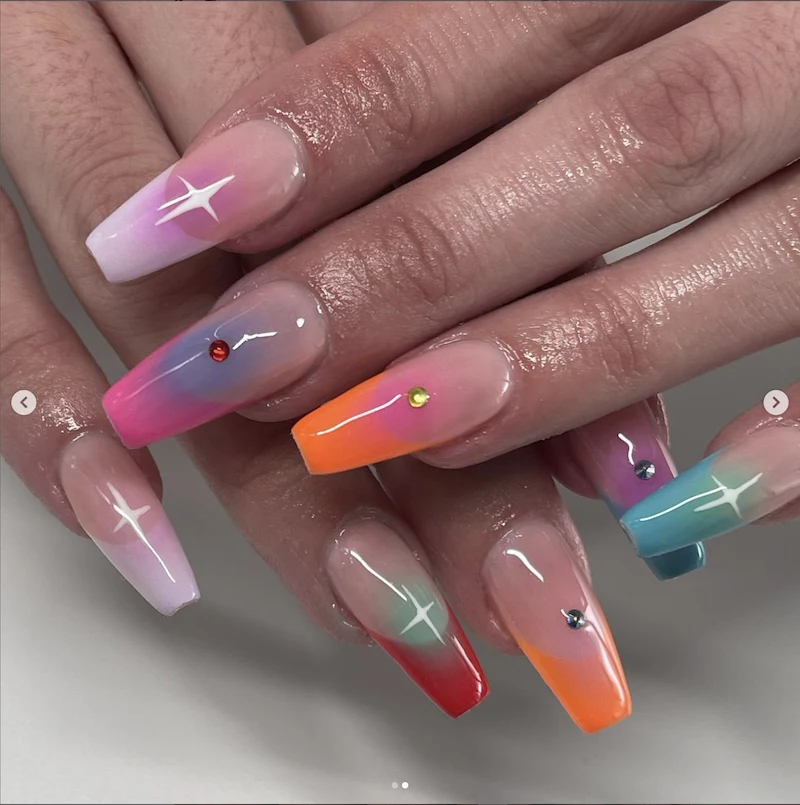
- 3D Gel Accents: Clear sculpting gel is used to create ‘water droplets’ or abstract squiggles over the aura, adding a tactile element to the design.
Sheer Nude Base: This creates the classic, ethereal ‘glowing from within’ look. The aura color appears to float on the natural nail. Perfect for a subtle, everyday style.
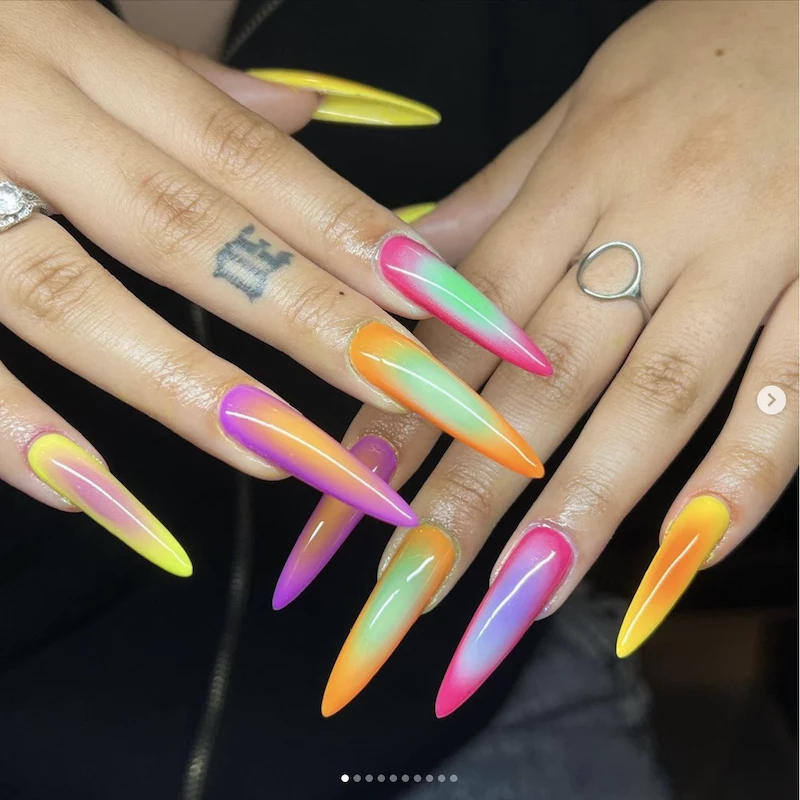
Opaque Color Base: Using a contrasting solid color—like a black base with a neon pink aura—delivers a dramatic, graphic, and high-impact look that’s pure fashion.
The choice completely transforms the mood from delicate to daring.
- Creates a soft, watercolor-like bleed automatically.
- Eliminates harsh lines for a seamless blend.
- Lets you work faster than with manual blending techniques.
The magic behind this effortless diffusion? A quality blooming gel. Products like The GelBottle Inc’s
In color theory, pink evokes compassion and warmth, while blue is associated with calmness and serenity. Combining them in an aura design creates a powerful visual representation of balanced energy.
The secret to a lasting glow: It’s not just about the application; it’s about the seal. A high-quality, non-wipe gel top coat is non-negotiable. For an extra durable, glass-like finish, consider applying two thin layers, curing fully between each. This protects the delicate gradient from chipping and keeps the colors vibrant for weeks.
Want to try the trend without the salon appointment or DIY hassle? High-quality press-on nails are your best friend. Brands like Glamnetic and Static Nails offer intricate, pre-made aura designs that look professionally done. It’s the perfect way to rock the look for a weekend or special event with zero commitment.
- Immediately after use, run airbrush cleaner or 99% isopropyl alcohol through your gun until it sprays clear.
- Never let gel polish cure inside the nozzle; it will ruin the device.
- Use a small interdental brush to gently clean the needle and nozzle for any stubborn residue.


