That Roll of Aluminum Foil is Your Secret Weapon. Here’s How to Use It.
I learned some of my most valuable lessons from an old-timer in a workshop who believed that wasting anything was a crime. He taught me that the key to solving any problem was to truly understand your materials. And believe it or not, one of his go-to problem-solvers wasn’t a fancy power tool, but a simple roll of heavy-duty aluminum foil. He showed me how it could be a heat shield, a makeshift funnel, a scrubber, and more. Those lessons have stuck with me for decades.
In this article
Today, most people just see foil as something for covering leftovers. But if you know how to use it right—and respect its limits—it’s one of the most versatile tools you can have. This isn’t just a list of clever party tricks. This is a guide to the practical, pro-level uses for foil, based on real-world experience. Understanding why something works is always better than just knowing the trick.
First, Let’s Get Nerdy: What Exactly Is Aluminum Foil?
Before we dive into the cool stuff, you’ve got to know what you’re working with. Aluminum foil isn’t just shiny paper; it’s a super-thin sheet of actual aluminum metal, rolled to less than 0.2 millimeters thick. That manufacturing process is what gives foil its most famous, and most misunderstood, feature.
Shiny Side vs. Dull Side: The Myth Busted for Good
Let’s clear this up right now: the shiny and dull sides do NOT have different properties for everyday use. It’s just a quirk of how it’s made. To get the foil incredibly thin without it ripping, the factory rolls two sheets together at the same time. The sides that touch the giant, polished steel rollers come out shiny. The sides that touch each other come out with a matte, or dull, finish. For cooking, heat reflection, or pretty much anything you’ll do at home, the performance difference is so microscopic it’s impossible to measure. So, you can officially stop worrying about which side is up. It’s one less thing to think about!

What the Pros Look For in Foil:
- Heat Conductor: It moves heat around fast and evenly. That’s its main job in the kitchen.
- Heat Reflector: It’s also a fantastic mirror for heat, reflecting about 95% of the thermal radiation that hits it. This is the key to its use as a little insulator.
- Easy to Shape: It’s soft and malleable, so you can fold it and wrap it around almost anything. Perfect for creating custom tools on the fly.
- Total Barrier: A solid sheet of foil is waterproof and airtight, and it blocks light completely. Great for preserving things.
- It’s Reactive: Now, this is a big one. It’s a reactive metal, which means it doesn’t play nicely with strong acids, super alkaline stuff, or even other metals under the right (or wrong) conditions. We’ll get to that.
Once you get these basic principles, you can stop just copying tricks and start inventing your own solutions.
Mastering Heat: How to Control Temperature with Foil
Because it’s a rockstar with heat, foil can be a powerful tool for temperature management all over the house.
Technique 1: Iron Your Clothes in Half the Time
Ironing is a drag, right? Your ironing board cover just soaks up a ton of heat, forcing you to make more passes. We can fix that.
How to do it:
- Pop the cover off your ironing board.
- Lay a single sheet of heavy-duty foil over the board. By the way, “heavy-duty” or “grilling” foil is just a thicker version you can get at any grocery store. It’s usually a couple of bucks more a roll, but it’s much tougher and well worth it for these kinds of jobs.
- Carefully stretch the cover back on over the foil.
The foil beneath the cover acts as a heat reflector. When you iron, the heat that normally gets absorbed by the board is bounced right back up into the underside of your clothes. You’re basically ironing both sides at once. This means you can often use a lower heat setting and get done faster. From my experience, a single layer of heavy-duty foil will last a good six months to a year before it gets too crumpled and needs replacing.
Heads up! This makes your ironing board surface much hotter than you’re used to. Never, ever leave the iron face down on the board, even for a second, or you’ll risk a nasty scorch mark.
Technique 2: Make Your Old Radiators More Efficient
This is a classic trick for homes with those old, free-standing cast-iron radiators, especially if they’re on an outside wall. A huge amount of their heat radiates backward and gets lost through the wall. A simple reflector can push that warmth back into your room where it belongs.
How to do it:
- Cut a piece of cardboard so it’s just a bit smaller than your radiator.
- Wrap the cardboard completely in heavy-duty foil, shiny or dull side out, and tape it on the back. You want a smooth, reflective surface.
- Slide this panel behind the radiator, making sure there’s at least an inch of space between the foil and the radiator itself for air to circulate.
Did you know? This simple setup can reflect up to 95% of the radiant heat that would otherwise be lost. It’s not going to slash your heating bill in half, but it can genuinely make a room feel warmer and save a few bucks over a cold winter. Just remember, this is for radiant heaters only. It does absolutely nothing for modern convection baseboard heaters that work by circulating air.
Cleaning and Polishing: Foil as a Surprising Tool
Sometimes the solution to a tough cleaning job is already in your kitchen drawer. But you need to know which surfaces are safe, and which you’ll destroy.
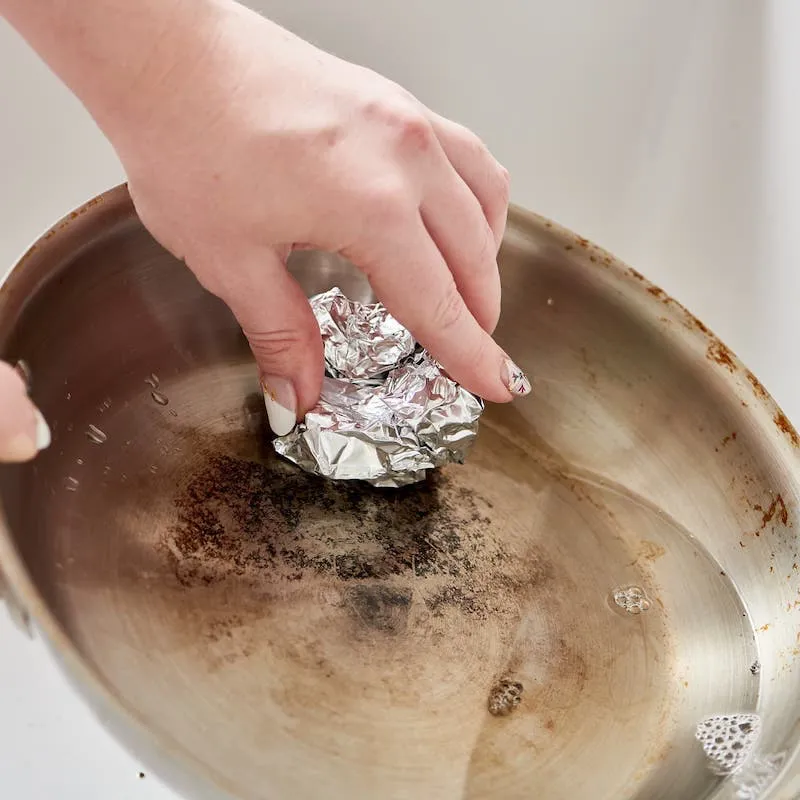
Technique 3: The Emergency Pan Scrubber
Got a stubborn, burnt-on mess on a stainless steel or cast-iron pan? A crumpled ball of foil can work wonders in a pinch.
Just tear off a piece, crumple it into a tight ball, add a squirt of dish soap, and scrub away like you would with steel wool. The crumpled edges are abrasive enough to scrape off gunk but generally softer than the pan itself, so it’s less likely to leave deep scratches.
CRITICAL WARNING: Listen carefully. Never, ever use this on non-stick pans, enameled cast iron (you know, the colorful, fancy stuff), or any coated cookware. You will instantly scratch and ruin the surface forever. I once saw someone do this, thinking they were helping, and they destroyed an expensive pan in seconds. This is a last-resort trick for durable, uncoated metal only.
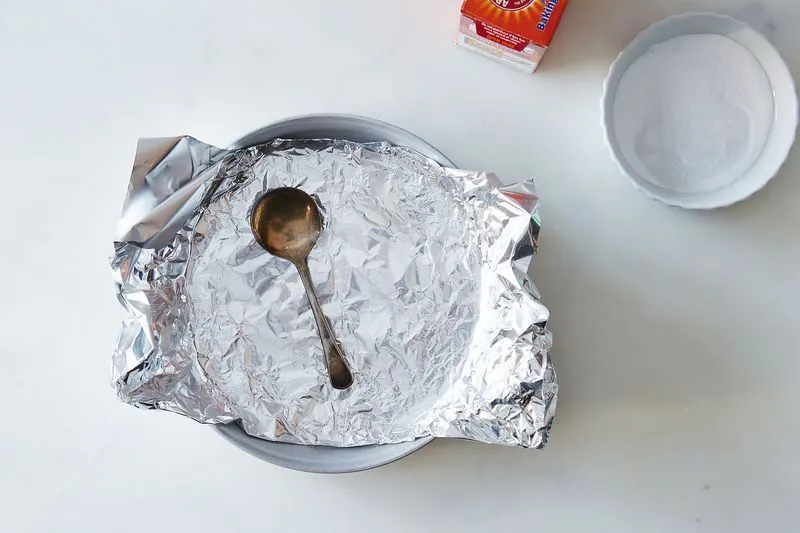
Technique 4: Polishing Silver with Kitchen Chemistry
This is one of my favorites. You’re not actually polishing the silver; you’re using a simple chemical reaction to reverse the tarnish.
Here’s what you’ll need:
- A non-metal dish (a glass baking dish is perfect)
- Heavy-duty aluminum foil (about $5 a roll)
- Baking soda (maybe $2 a box)
- Table salt
How to do it:
- Line the bottom of your glass dish with foil.
- Place your tarnished sterling silver items right on top, making sure each piece touches the foil.
- Add about a tablespoon of baking soda and a tablespoon of salt to the dish.
- Carefully pour in enough boiling water to cover the items. You’ll see it start to bubble and might smell a faint rotten-egg scent—that’s the sulfur leaving the silver. It’s working!
- Let it sit for 5 to 10 minutes.
- Using tongs (the water is hot!), remove the silver, rinse it under cool water, and buff it dry with a soft cloth.
If some tarnish remains, don’t just let it sit longer in the cooling water—the heat is the key. Dump the old water and make a fresh, boiling batch with new salt and soda. That second round almost always does the trick.
Good to know: This is for solid sterling silver ONLY. Don’t try this on silver-plated items, as it can damage the thin plating. It’s also a no-go for jewelry with soft stones like pearls, opals, or turquoise.
Around the Workshop: Quick Fixes with Foil
Foil’s ability to be shaped and folded makes it surprisingly useful for little jobs around the house.
Technique 5: The 30-Second Scissor Tune-Up
Got 30 seconds? Grab that crummy pair of scissors from your junk drawer and let’s make them useful again. This isn’t true sharpening, which removes metal to create a new edge. This is honing—it just cleans up and realigns the existing edge.
Take a piece of foil and fold it over on itself 6 or 8 times. Now, make 7-10 full cuts through the folded foil. You’ll feel it smooth out the cutting action. It’s a great quick fix for craft or paper scissors to get them cutting cleanly again.

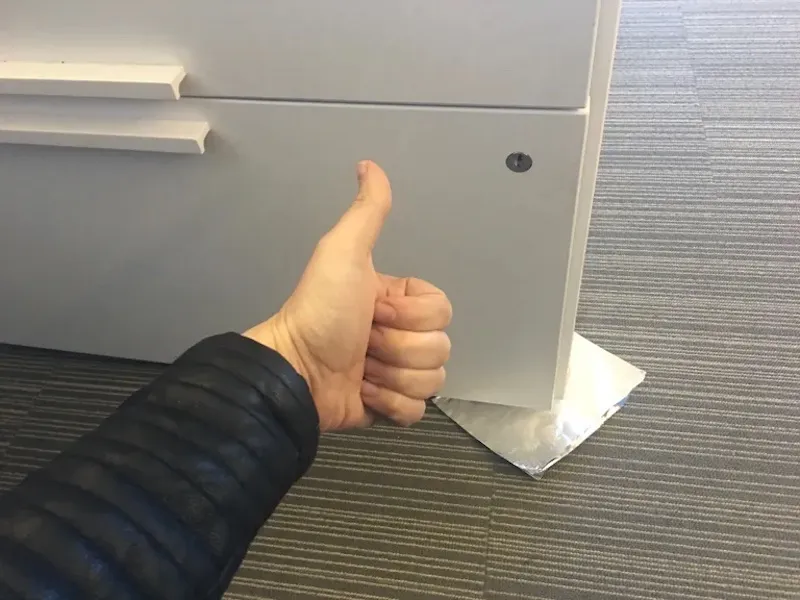
Technique 6: Moving Heavy Furniture (The Emergency Method)
You can absolutely use foil as makeshift sliders to move heavy furniture on carpet. Just fold up a few layers of heavy-duty foil into squares, lift each corner of the furniture, and slip a foil pad under each leg. And no, it doesn’t matter if the shiny or dull side is down—it slides the same.
But here’s some honest advice: think of this as a last resort. The foil can tear, especially under a really heavy dresser. To be frank, you’re almost always better off buying a real set of furniture sliders. You can get a decent set at any hardware store for $10 to $20, and they are way more durable and safer for your floors and your back.
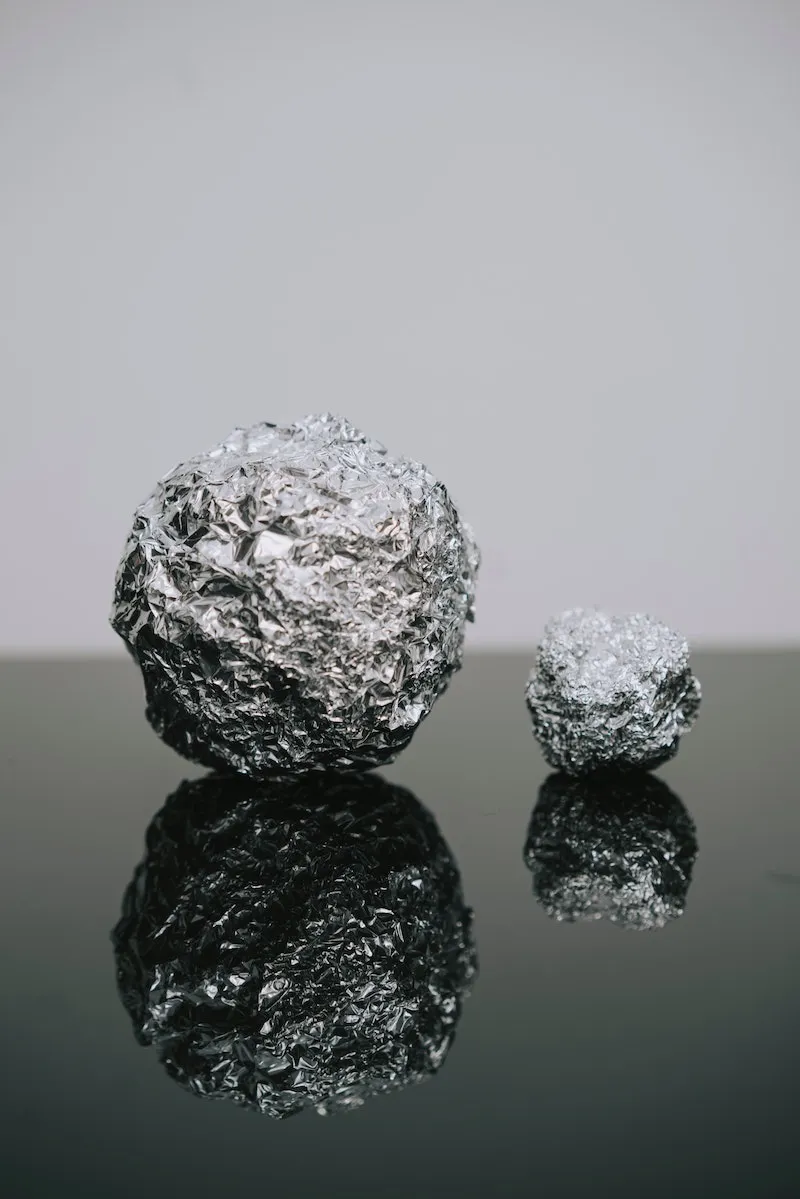
Technique 7: Ditch the Dryer Sheets for Foil Balls
If you’re out of dryer sheets, a ball of foil can do a surprisingly good job of reducing static cling. Crumple a couple of feet of foil into a really tight, dense ball (about the size of a golf ball) and toss two or three into the dryer with your wet clothes. The foil helps discharge the static electricity that builds up as clothes tumble. The best part? You can reuse these foil balls for dozens, sometimes even hundreds, of loads. Just check them every so often to make sure they’re still tightly wadded up.
The Unbreakable Rules: When to NEVER Use Foil
Okay, we’ve covered the good stuff. Now for the critical safety rules. These are non-negotiable.
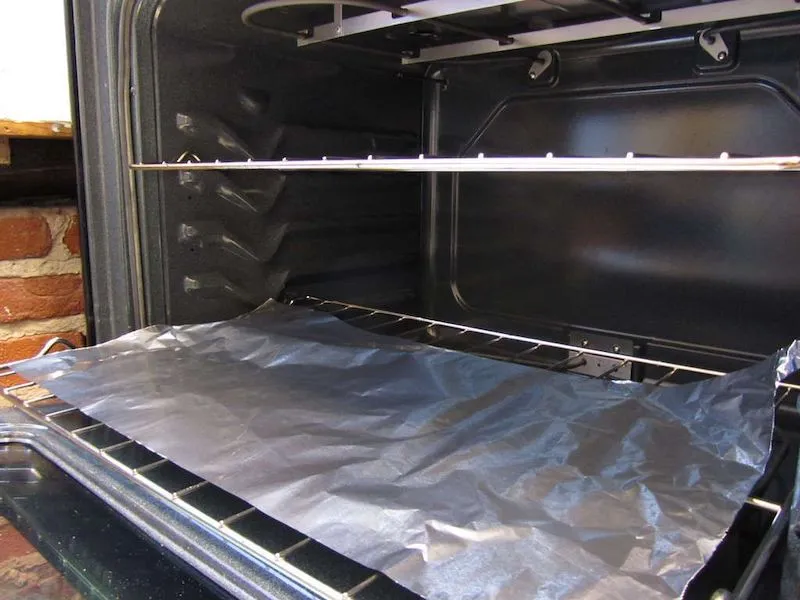
1. NEVER Line the Bottom of Your Oven. I see this all the time, and it’s so dangerous. Lining the oven floor blocks airflow and traps intense heat. This can lead to uneven baking, destroy your oven’s heating elements, and in a gas oven, it can even cause a buildup of carbon monoxide. If you want to catch spills, the safe way is to place a sheet of foil on the rack below the one you’re baking on. It will catch drips without messing with your oven’s mechanics.
2. NEVER Put Foil in the Microwave. This is the big one. Metal in a microwave acts like a mirror, causing the energy waves to arc and spark. This can easily cause a fire or fry your microwave’s electronics. Don’t do it. Ever.
3. Avoid Storing Acidic or Salty Foods in Foil. Things like tomato sauce, citrus, or anything with a lot of vinegar can react with the aluminum. The acid can actually dissolve tiny amounts of the foil into your food, giving it a weird metallic taste. Use glass or plastic containers for storing these kinds of leftovers.
Finally, remember to recycle your foil! Just give it a quick rinse to get any food gunk off first. A little oil is usually fine, but a sheet caked in cheese will just contaminate the batch. Aluminum is infinitely recyclable, so it’s worth the effort.
Inspirational Gallery with Photos
Regular Foil: Your go-to for covering dishes and wrapping sandwiches. It’s thinner, more flexible, and perfect for low-heat applications or tasks where strength isn’t critical.
Heavy-Duty Foil: Think of this as the pro-grade version. Brands like Reynolds Wrap Heavy Duty are thicker and far more resistant to tearing. It’s essential for lining grills, creating sturdy packets for the oven, or scrubbing tough grime without disintegrating.
For high heat or when durability counts, always reach for heavy-duty.
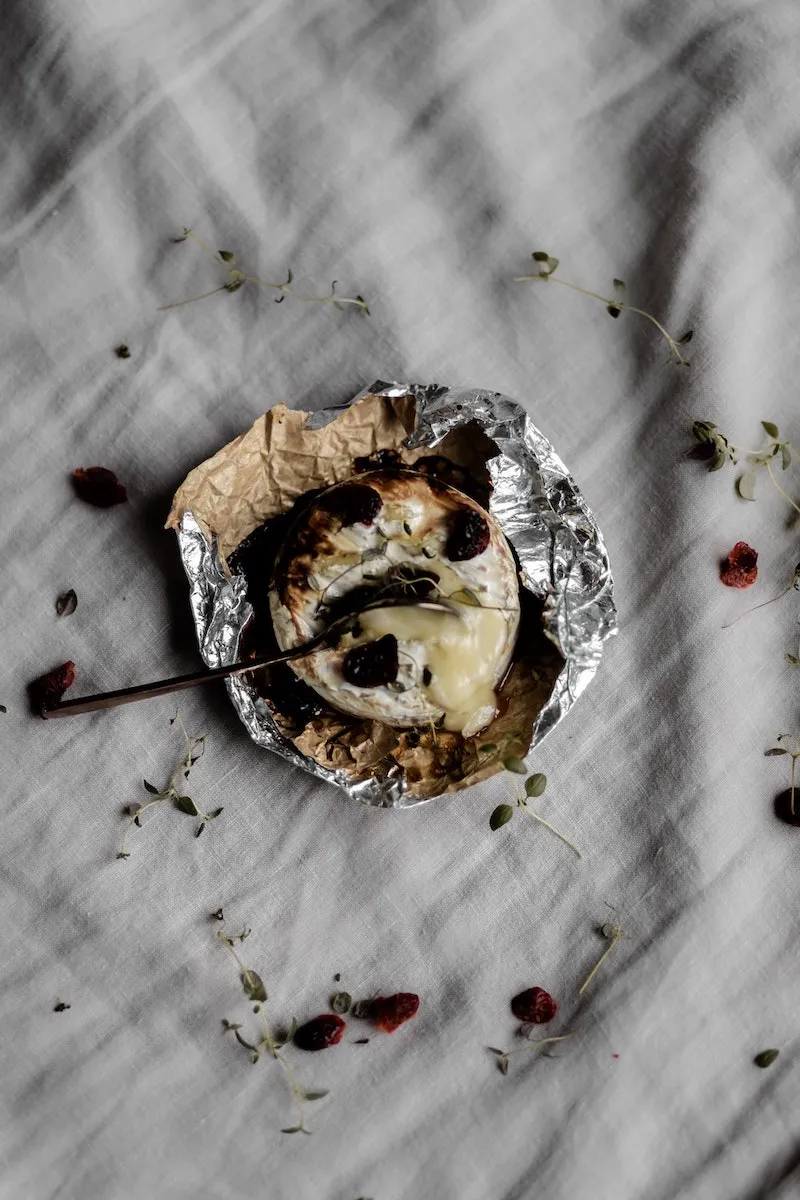
Ever notice a metallic taste or dark spots on your foil after cooking with tomatoes or lemon juice?
That’s a chemical reaction in action. Highly acidic or salty foods can cause the aluminum to leach into your food, altering the flavor and creating small pits in the foil. While the amount is generally considered safe, for best results, use parchment paper as a barrier between acidic ingredients and foil, especially for long cooking or storage times.
- Reduces static cling in your clothes.
- Helps separate garments for faster drying.
- Lasts for dozens, even hundreds, of cycles.
The secret? Just toss a tightly crumpled ball of aluminum foil (about 2-3 inches in diameter) into the dryer with your wet laundry. It discharges the static electricity that builds up as clothes tumble.
Don’t have the right-sized baking pan? No problem. Heavy-duty foil is strong enough to create custom molds for cakes, brownies, or breads.
- For a ring mold: Tear off a long sheet of heavy-duty foil. Fold it lengthwise multiple times to create a sturdy strip about 2 inches wide. Shape it into a ring, place it in the center of a larger pan, and pour your batter around it.
- For a specific shape: Fold a long sheet to create a strong
Aluminum is infinitely recyclable. Recycling it uses only 5% of the energy needed to produce new aluminum from bauxite ore.
To ensure your used foil makes it through the recycling process, make sure it’s clean of major food residue and crumpled into a ball at least two inches in diameter. Small, flat pieces can get lost in the sorting machinery.
Forget expensive scrubbers for your cast-iron skillet or grill grates. A crumpled ball of heavy-duty foil is one of the most effective tools for removing baked-on residue. After scraping off large debris from your Lodge skillet or Weber grill, use tongs to hold the foil ball and scrub the surface vigorously. It’s abrasive enough to clean but won’t damage the seasoned iron or stainless steel.
The secret to a juicy roast: Don’t just pull it from the oven.
- Sharpen scissors by cutting through a folded piece of foil several times.
- Protect doorknobs and fixtures by wrapping them securely before painting.
- Form a cone into a makeshift funnel for pouring liquids like oil or turpentine without a mess.
Did you know wrapping your phone in several layers of foil can block its signal?
This demonstrates the principle of a Faraday cage. Aluminum is an excellent electrical conductor. When formed into an enclosure, it distributes any external electrical charge or electromagnetic field (like a cell signal) around the exterior, canceling it out on the inside. It’s the same science used to shield sensitive electronic equipment from interference.
Professional chefs have long used a technique called


