My Go-To Guide for Building a Hummingbird Feeder (The Right Way)
My very first hummingbird feeder was, to be frank, a total disaster. I cobbled it together from a glass jar and a piece of red plastic I snipped off a coffee can lid. I was so proud, but it leaked constantly, became an ant magnet, and was a nightmare to clean. The birds showed up, sure, but I quickly realized that hanging a feeder isn’t just a cute craft project—it’s a real responsibility. A poorly made or dirty feeder can do a lot more harm than good.
In this article
That experience was a wake-up call. To truly help these incredible birds, you have to understand what they actually need. Fast forward through years of building feeders, observing these little dynamos, and learning from my mistakes, and you get this guide. I’m not just going to give you blueprints; I’m going to share the why behind a great feeder design. We’ll get into safe materials, easy cleaning, and smart placement. This is everything I wish I knew when I started.
First, Let’s Talk About Your Tiny Guests
Before you even think about tools, you have to appreciate the creature you’re inviting over. Hummingbirds are biological marvels, and a good feeder is designed with their unique needs in mind. Getting this part right prevents some of the most common—and dangerous—mistakes.
Why They’re Always Hungry
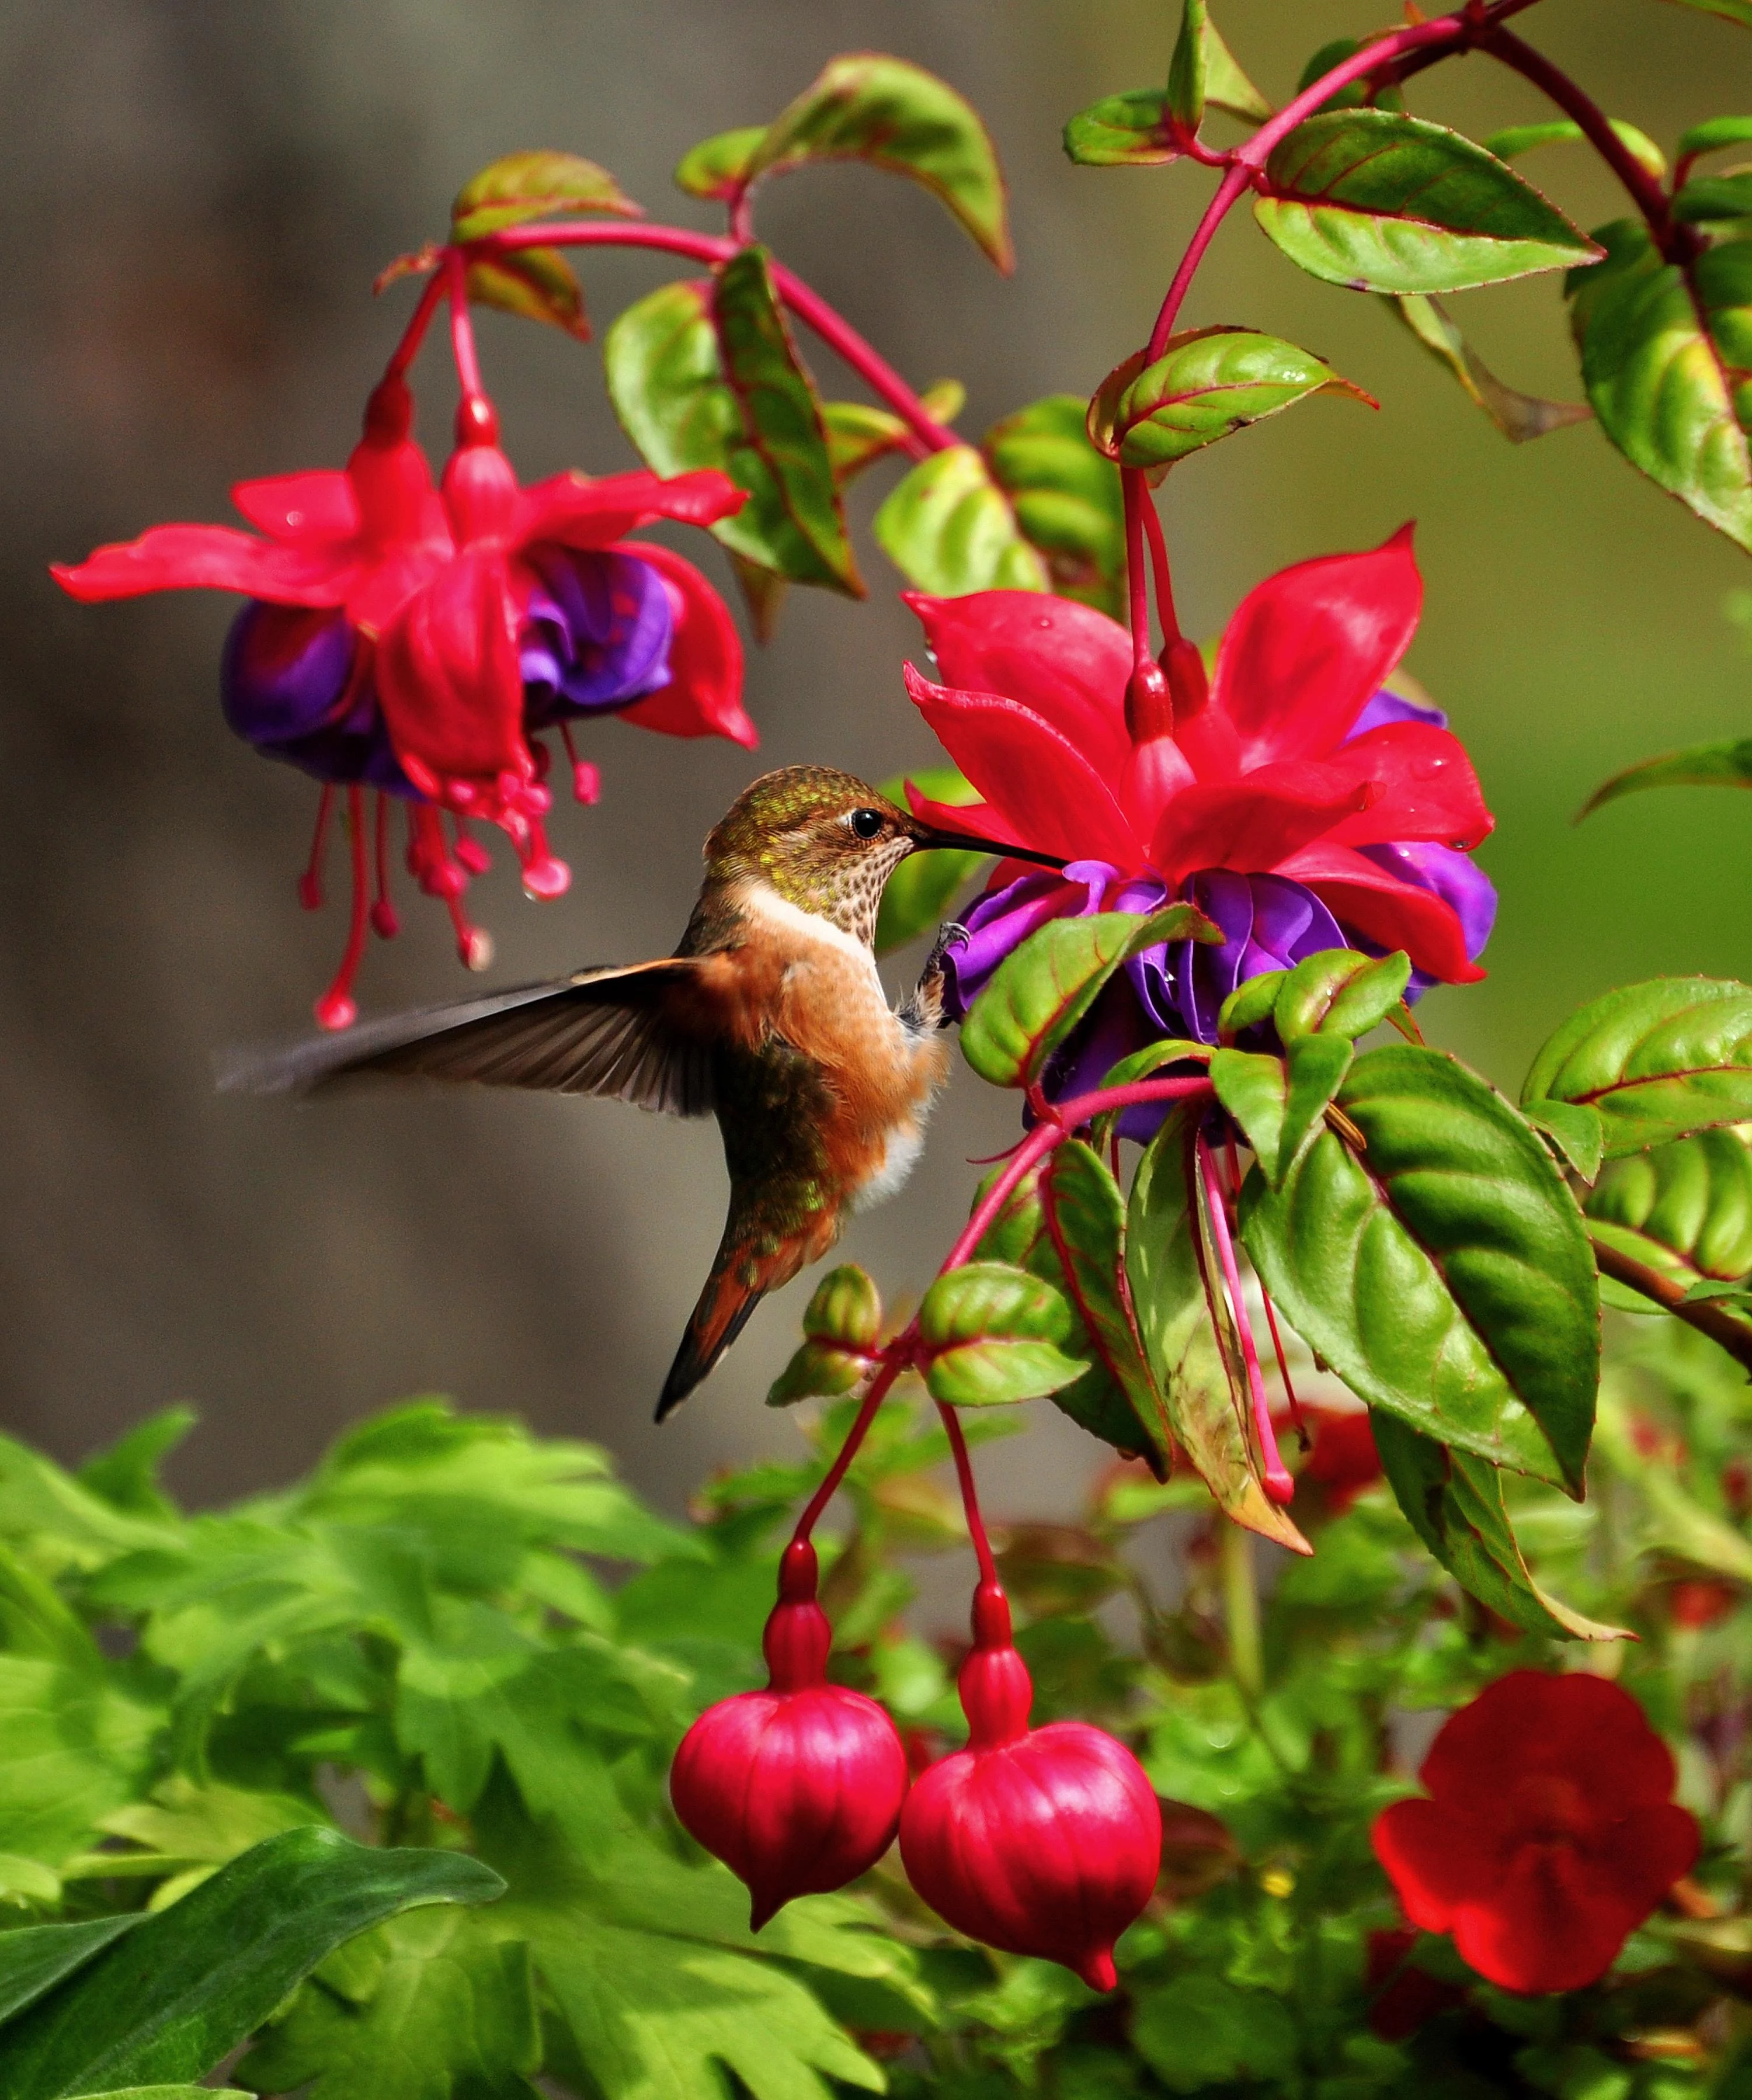
Picture this: a heart beating over 1,200 times a minute and wings flapping up to 80 times every second. That’s a hummingbird. This level of activity burns an insane amount of energy, giving them the highest metabolism of any warm-blooded animal on the planet. To survive, they need to drink more than their own body weight in nectar every single day. So yeah, a clean, reliable feeder can be a literal lifesaver, especially during migration or in urban areas where flowers are scarce.
The Only Nectar Recipe You’ll Ever Need
Forget all the weird concoctions you see online. Natural flower nectar is basically just sugar water (sucrose, to be exact), so the best and safest recipe is the simplest one. After talking with wildlife pros and seeing the consensus, this is the only one I trust.
- The Magic Ratio: It’s just 1 part plain white table sugar to 4 parts water. That’s it.
- How to Mix It: Bring the water to a boil first. This helps the sugar dissolve completely and kills off any lurking bacteria or mold spores. Take it off the heat, stir in the sugar until it’s totally gone, and then—this is important—let it cool completely before you fill your feeders.
You can easily make a bigger batch and keep it in a covered container in the fridge for up to a week. This makes daily top-offs way less of a chore.
Ingredients That Are a Hard ‘No’
This isn’t the time to get creative. Using the wrong stuff can make hummingbirds sick or even be fatal. I’ve seen the sad results, and it’s completely avoidable.
- No Red Dye: Those commercial red nectars are a marketing gimmick. The red parts on your feeder are all you need to attract the birds. We don’t fully know the long-term effects of these dyes on their tiny organs, so why risk it? It offers zero benefit. Just skip it.
- No Honey, Ever: Honey ferments very quickly and can grow a fungus that causes a deadly disease in hummingbirds. It makes their tongues swell, and they starve. Please, never use honey.
- No Brown or Raw Sugar: These sugars contain molasses, which is loaded with iron. Hummingbirds can’t process that much iron, and it builds up to toxic levels in their system. Stick to plain old refined white cane sugar.
- No Artificial Sweeteners: These have zero calories. A hummingbird will waste precious energy visiting your feeder for absolutely no reward. It’s the equivalent of giving a starving person a glass of diet soda and calling it a meal.
How Do Inverted Feeders Not Leak?
Ever wonder why those upside-down bottle feeders don’t just dump all the nectar on the ground? It’s simple physics. When you fill it and flip it over, a little nectar drips out until a vacuum forms in the air space at the top. The air pressure outside the feeder is now greater than the pressure inside, which holds the liquid up. As a hummer drinks, a tiny air bubble zips up to replace the liquid, and the vacuum seal is re-established. If your feeder is leaking, it’s because that seal isn’t airtight.
What Makes a Great DIY Feeder?
At the end of the day, a feeder is a tool. And like any good tool, it should be functional, safe, and durable. The best designs all share a few key features that I now build into every feeder I make.
Choosing Your Materials Wisely
- Glass is King: For the main container, glass is my top choice. It’s a breeze to clean and sterilize, doesn’t scratch easily (meaning fewer nooks for bacteria), and holds up to sunlight. The only downside is, well, it can break if you drop it.
- Plastic (The Right Kind): If you go with plastic, make sure it’s a high-quality, food-safe, and BPA-free type. The issue with cheaper plastics is that they scratch over time, creating micro-grooves where mold loves to hide. They can also get brittle and yellow in the sun. I had a cheap one crack and fall apart after just one hot summer.
- A Word on Feeding Ports: The little openings where the birds drink are crucial. Bright red plastic is perfect for attracting them. Some fancy feeders use metal ports, but I steer clear of most. Metals like brass and copper can leach into the nectar, especially if it’s acidic, and poison the birds. If you must use metal, make sure it’s stainless steel.
The Most Important Thing: Easy Cleaning
I can’t say this enough: a feeder that’s hard to clean is a feeder that won’t get cleaned enough. This puts birds at risk. When I’m looking at a design, I prioritize:
- Wide Openings: This is why a mason jar beats a wine bottle. You absolutely have to be able to fit a brush inside to scrub every single surface.
- Simple Parts: The fewer pieces, the better. Every seam and crevice is a potential mold factory. The base of the feeder should come apart completely.
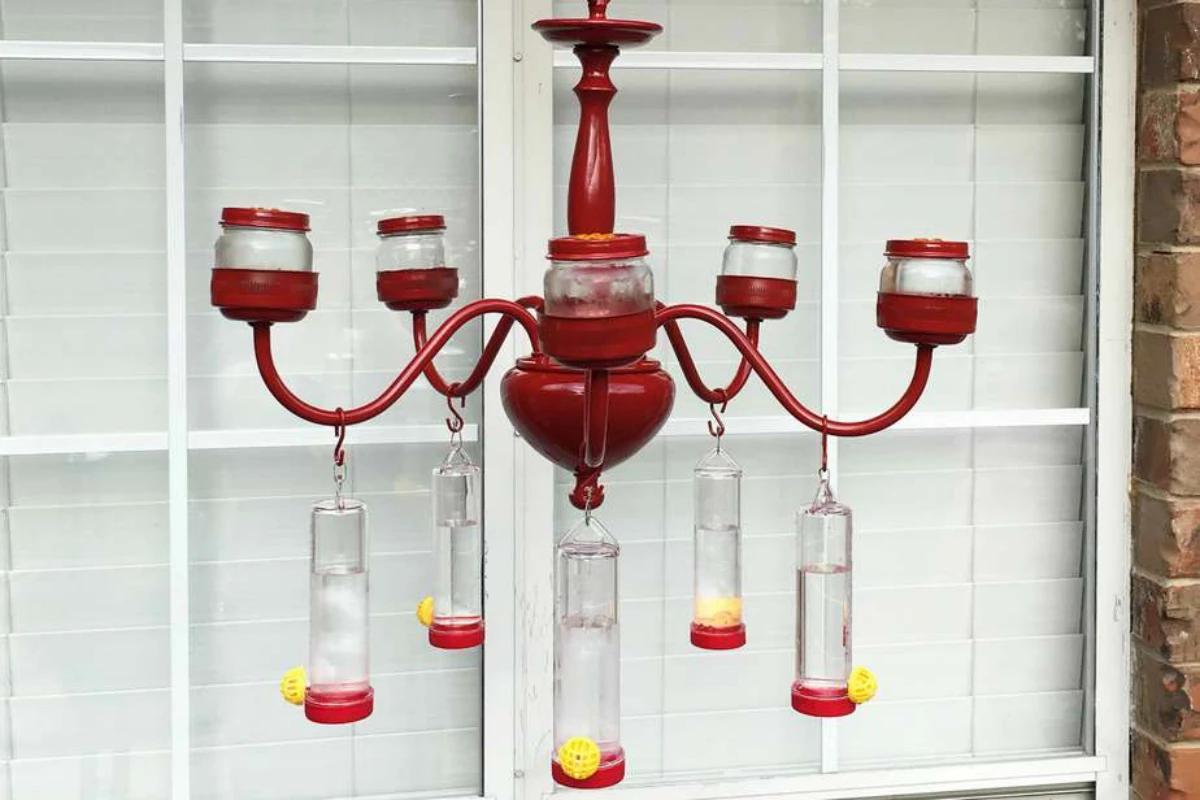
- No Funky Shapes: I’ve seen some wild-looking feeders with decorative patterns and hidden chambers. They look cool on a shelf but are a health hazard in the yard. Simple and smooth is always safer.
The Great Perch Debate
Should your feeder have perches? Honestly, there are good arguments on both sides. I’ve built plenty of both styles.
- Team Perch: Perches let the birds sit and rest while they eat. This helps them conserve precious energy and, as a bonus, gives you a longer look at them.
- Team No-Perch: The argument here is that perches allow bigger, more aggressive birds to camp out and guard the feeder, chasing everyone else away. A perchless design forces all birds to hover, which sort of levels the playing field.
My solution? I do both. I’ll have one main feeder with perches and then a couple of smaller, perchless feeders placed in different spots. It seems to keep the peace.
Tips for Your Neck of the Woods
Where you live really changes the game. The advice for someone in rainy Oregon is totally different than for someone in sunny Arizona. You’ve got to adapt.
Climate and Your Cleaning Schedule
Heat is the enemy of fresh nectar. Sugar water is a perfect breeding ground for bacteria, and high temps kick that process into overdrive.
- Hot Climates (Above 80°F / 27°C): Your nectar can spoil in a day or two. You have to be ready to clean your feeder and change the nectar every other day, or even daily. In these temps, I only fill the feeder with as much as the birds will drink in a day to avoid waste.
- Mild Climates (60-80°F / 15-27°C): Cleaning every 3 to 4 days is usually fine.
- Cool Climates (Below 60°F / 15°C): You can stretch it to 5 or 6 days. But always, always check the nectar. If it looks cloudy, it’s spoiled. Change it, no matter the schedule.
Keeping Pests Away
Your hummingbirds aren’t the only ones with a sweet tooth. Ants and bees are the most common party crashers.
- For Ants: The best defense is an ant moat. It’s a little cup that hangs between the hook and the feeder. You fill it with plain water, and the ants can’t swim across. You can buy one online or at a birding store for about $5-$10, or make one yourself. Heads up: NEVER put Vaseline or oil on the pole. It can get on a bird’s feathers and be fatal.
- For Bees & Wasps: These can be trickier. Yellow on a feeder is like a magnet for bees, so stick to red parts. Some feeders have bee guards, which are small grates that let a hummingbird’s long beak in but keep insects out. If bees are a huge issue where you are, your best bet is switching to a saucer-style feeder where the nectar level is naturally too low for them to reach.
Let’s Build! Three Reliable Feeder Projects
Alright, let’s get to the fun part. Here are three feeders I’ve made over and over. Before you pick one, here’s the quick rundown:
The Mason Jar Feeder is the best all-around choice for beginners. It’s cheap, tough, and the easiest to clean. The Spice Jar Feeder is a tiny, fun project for getting super close-up views, but it demands daily attention. The Recycled Bottle Feeder looks fantastic but is the most difficult to clean properly, making it a project for the truly dedicated.
Project 1: The Workhorse Mason Jar Feeder
This design is a classic for a reason. It’s sturdy, a breeze to clean, and the perfect starter project. It’s a quick 30-minute build, and the materials will probably run you between $10 and $15 if you don’t have a jar already.
You’ll Need:
- One 16-ounce wide-mouth glass mason jar with a two-part lid.
- A flat, red plastic lid (like from a sour cream or cottage cheese container).
- Drill with a 1/8-inch bit.
- Waterproof sealant. At the hardware store, look for a tube labeled “100% Silicone” or “Aquarium-Safe Sealant.”
- Sturdy wire for hanging.
Instructions:
- Take the flat metal disc from the mason jar lid. Drill three or four 1/8-inch holes in it, spaced out evenly. These are your feeding ports.
- Crucial step: Smooth the edges of the drilled holes. Metal burrs can hurt a hummingbird’s tongue. I use a small round file or a Dremel grinding bit. If you run your finger over it, it should feel perfectly smooth.
- Cut a circle from the red plastic lid that’s the same size as the metal disc. Use the disc as a template to drill matching holes in the plastic. This red is the “Welcome” sign.
- Sandwich the red plastic and the metal disc together and pop them into the screw-on ring. To guarantee it won’t leak, run a very thin bead of the silicone sealant around the inside edge where the disc meets the ring. Let it cure for a full 24 hours.
- Wrap your wire securely around the neck of the jar to create a hanger.
- Fill with cool nectar, screw the lid on tight, and flip it over. A few drops might fall out, but then it should stop.
My experience: This feeder is incredibly reliable. The only issue is that the lid might rust after a couple of seasons, but making a new lid assembly costs next to nothing.
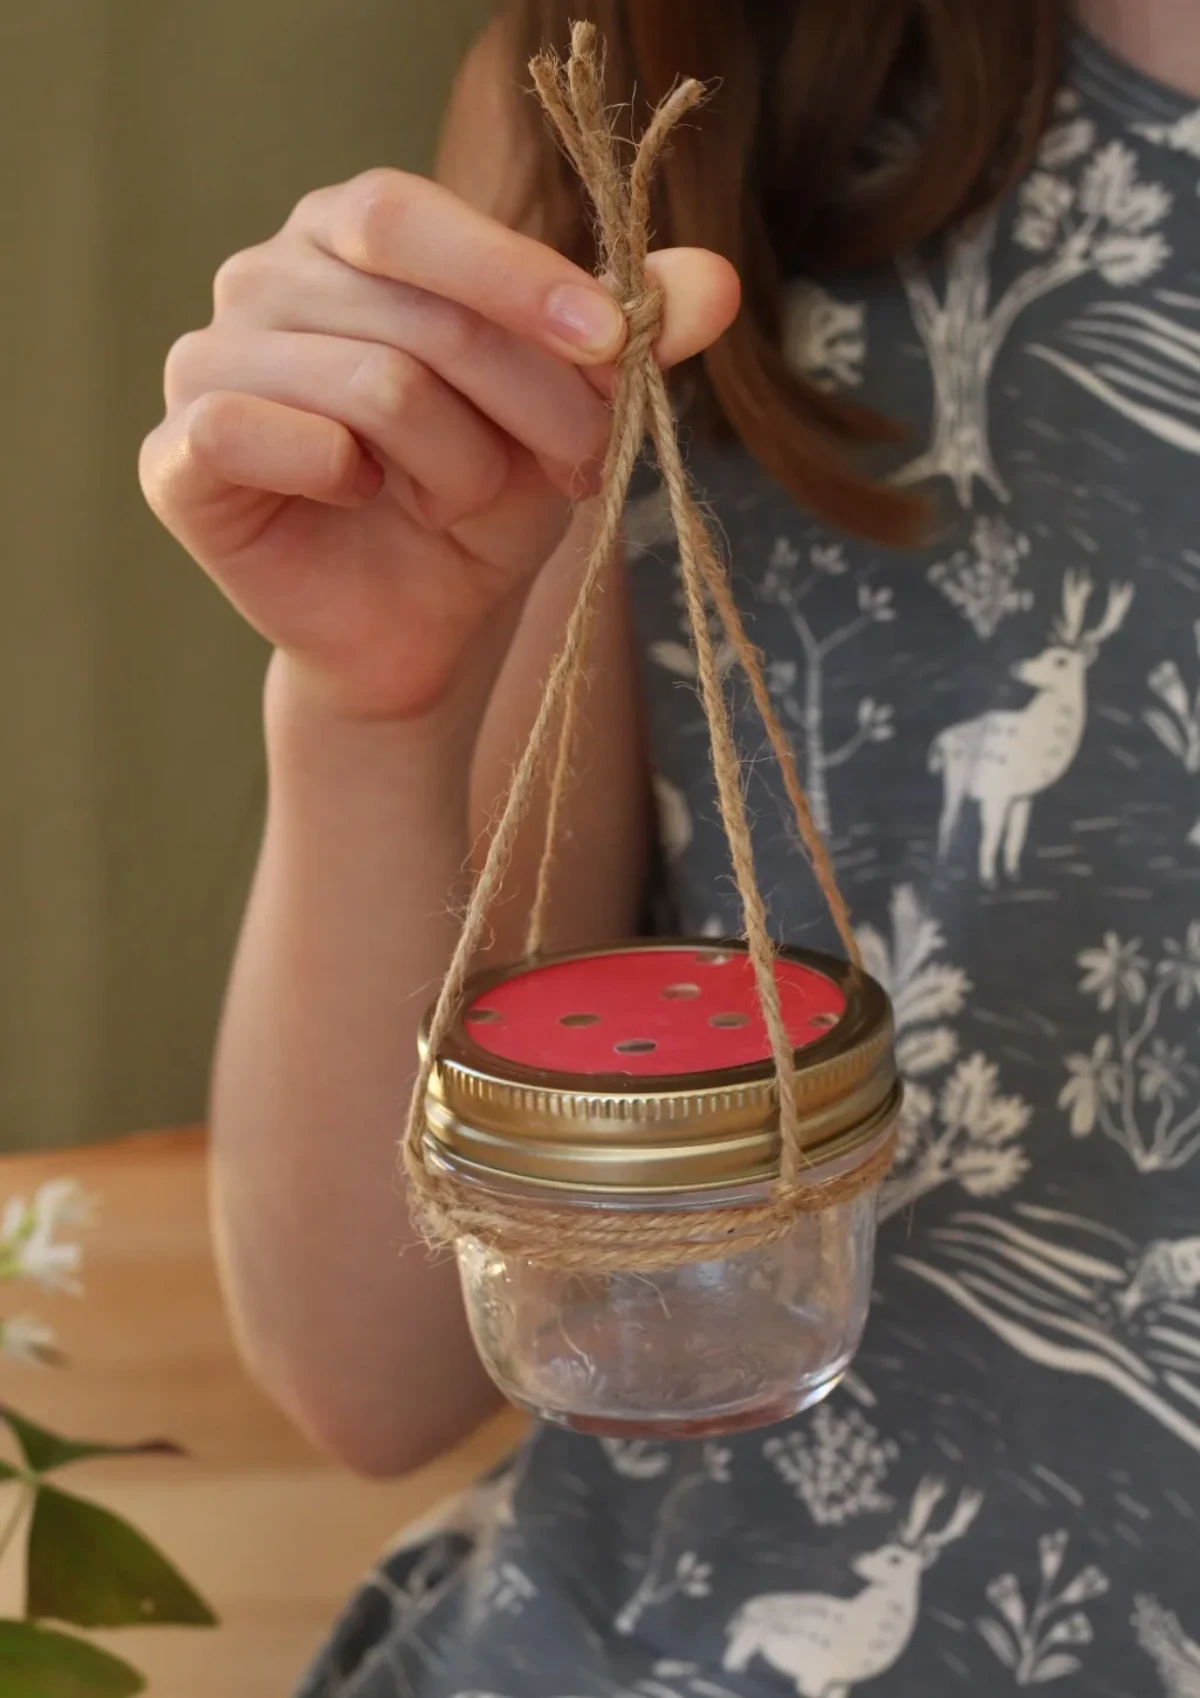
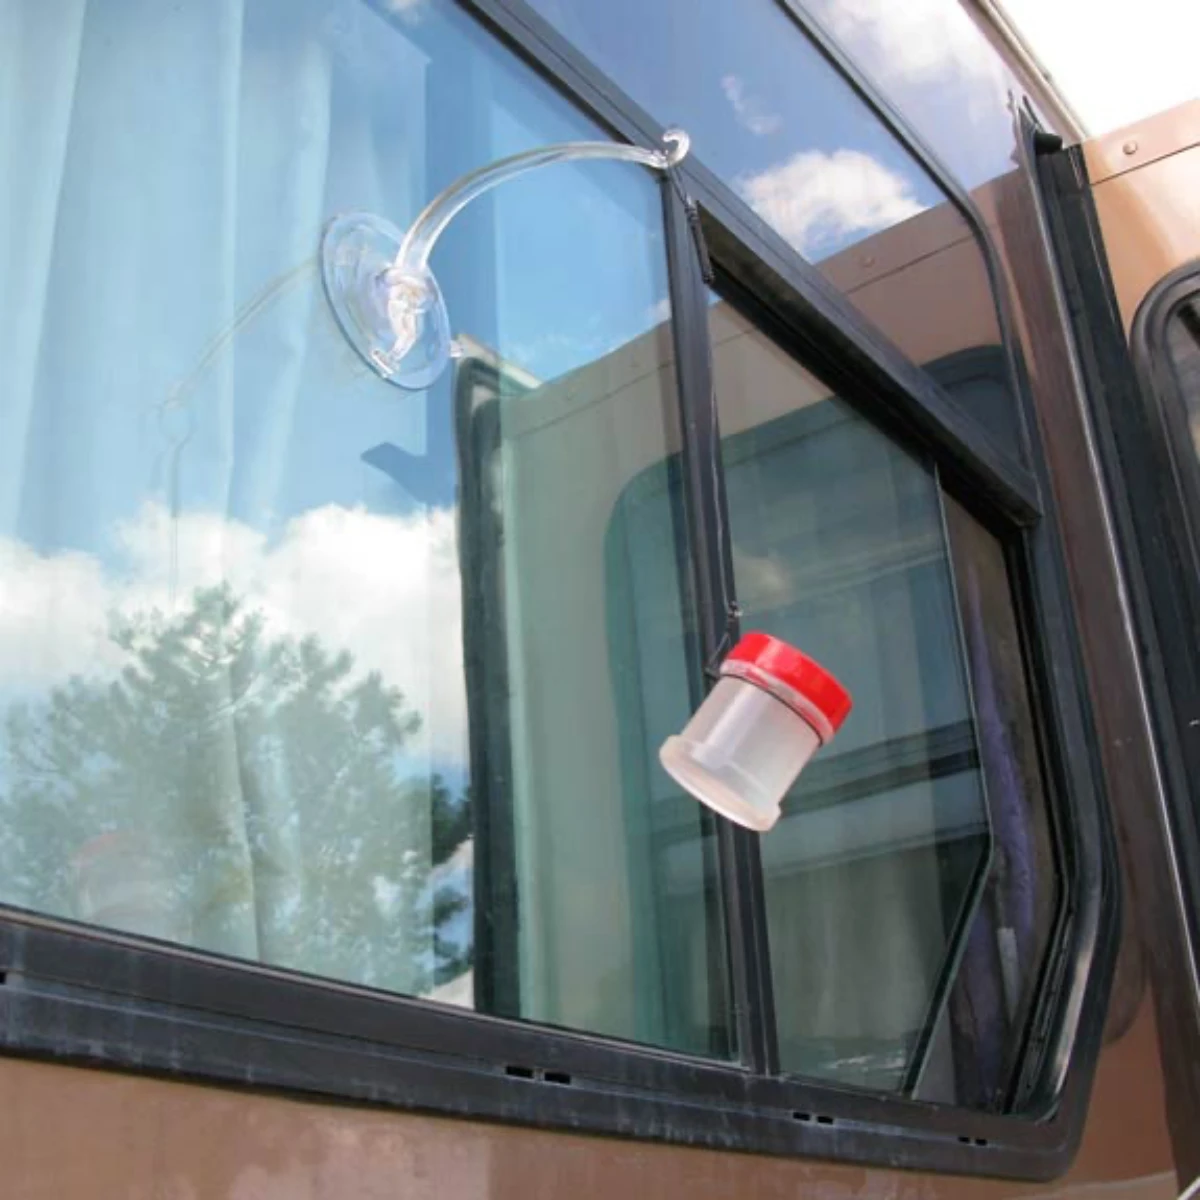
Project 2: The Up-Close Window Feeder
This little guy is perfect for attaching right to a window for amazing views. It’s a super cheap build—maybe $5 for the parts—and takes about 15 minutes (plus curing time). But because it’s so small and gets warmed by the window, it’s a major commitment.
You’ll Need:
- A small, clean glass spice jar with a plastic lid.
- A plastic hummingbird feeder tube (you can find these online or in wild bird stores).
- A drill bit that matches the tube’s stem.
- A good quality suction cup with a hook.
- Waterproof epoxy or silicone.
Instructions:
- Drill a hole in the center of the spice jar’s plastic lid, just big enough for the feeder tube to fit snugly.
- Pop the feeder tube into the hole. To make it totally leak-proof, apply a small amount of waterproof epoxy or silicone around the seam on both the top and bottom of the lid. Let it cure completely.
- Clean your window and the inside of the suction cup with some rubbing alcohol for a super-strong grip. Stick it to the window.
- Create a small wire hanger for the jar, just like you did for the mason jar project, so you can hang it from the suction cup hook.
- Fill the little jar with nectar, screw on the lid, and hang it up!
A friendly warning: This feeder must be cleaned daily without fail. Think of it more as a special treat station for getting to know your local birds than a primary food source.
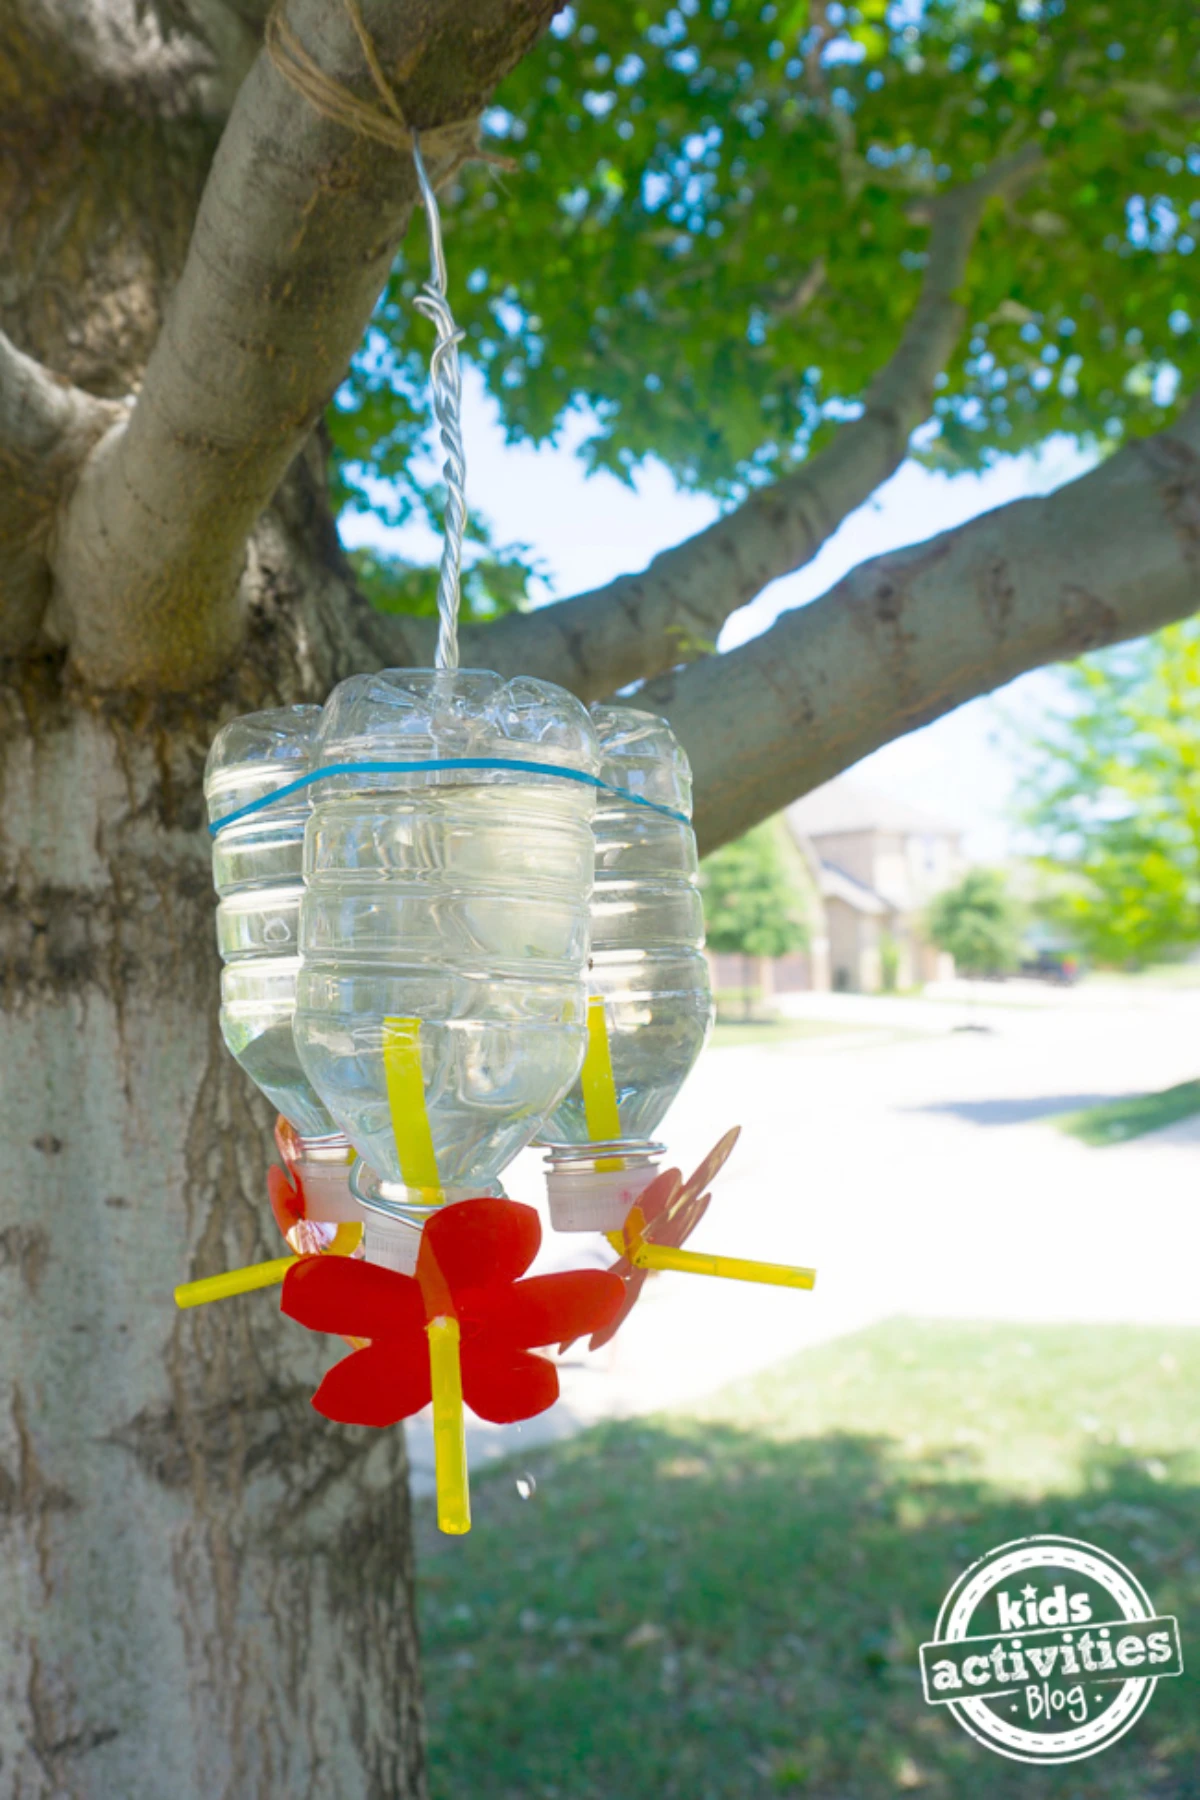
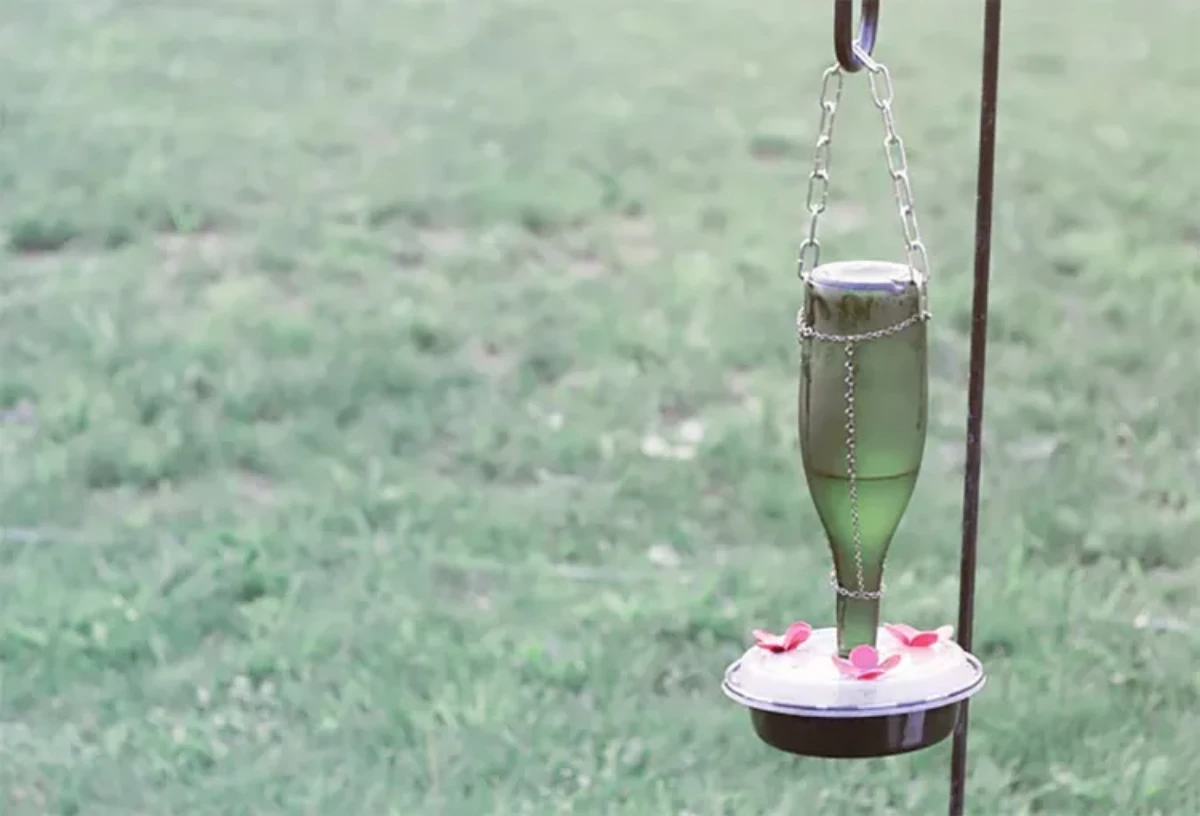
Project 3: The Elegant Recycled Bottle Feeder
This one looks stunning, but it comes with that big cleaning challenge. I only recommend this if you’re serious about the upkeep. The cost is low—under $10 for the stopper and tube—and assembly takes about 20 minutes.
You’ll Need:
- A clear or light-colored glass bottle (a wine or fancy soda bottle works well).
- A drilled rubber stopper that fits the bottle opening (usually a
6 or
7 size).
- A bent glass or plastic feeder tube.
- Decorative copper wire (12-gauge is sturdy and looks great).
- A long, flexible bottle brush. This is not optional.
Instructions:
- Cleaning is everything here. Use hot water, a splash of vinegar, and that flexible brush to scrub the entire inside of the bottle. Be thorough.
- Insert the bent feeder tube into the hole in the rubber stopper. It should be a very tight fit.
- Wrap the copper wire securely around the neck of the bottle, creating a strong, decorative cradle that ends in a hook for hanging.
- Fill the clean bottle with cooled nectar.
- Press the stopper and tube firmly into the bottle’s opening. It has to be airtight, or it will drip.
- Hang it from a strong branch—it’ll be heavy when full.
Lesson learned the hard way: I once made one of these with a gorgeous dark blue bottle. It looked amazing, but I couldn’t see when the nectar was getting cloudy. I learned my lesson: only use clear or very light-colored bottles so you can monitor the nectar’s condition. Always choose safety over aesthetics.
Dealing With Common Feeder Problems
Once you hang a feeder, you’re part of the neighborhood drama. Here’s how I handle a few common issues.
Solving Turf Wars
Hummingbirds are notoriously territorial. It’s very common for one feisty male to claim a feeder and dive-bomb any other bird that comes near. The solution isn’t a bigger feeder; it’s more feeders. Place several small feeders out of sight of one another—one in the front yard, one in the back. This breaks up the territory and gives the less dominant birds a chance to eat in peace.
What About Vacations?
This is a big one. What do you do when you leave town? The best and kindest thing to do is to take your feeders down a week or two before you leave. This gives the birds time to transition to other food sources instead of suddenly finding their reliable spot empty. When you get back, give the feeders a deep clean and hang them back up. The birds will find them again!
When to Just Buy a Feeder
DIY is awesome, but sometimes a store-bought feeder is the smarter choice. If you have a major, persistent issue with bees, for example, a specially designed commercial feeder is probably your best bet. If I had to recommend one, it would be the Aspects HummZinger HighView. It’s a saucer-style feeder, which bees can’t really use, it’s incredibly easy to clean, and costs around $20-$25 online or at specialty bird stores. There’s no shame in buying the right tool for the job. The goal is to safely feed birds, not prove you can build everything from scratch.
Oh, by the way… if you don’t have time to build anything, here’s a quick win: just mix up the 1:4 nectar recipe and put a little in a small, shallow red dish. Set it out on your porch railing and you might be surprised who stops by for a drink!
A Final Word on Your Responsibility
Being a good host to hummingbirds is an active job. Your feeder isn’t just a decoration; it’s a food source for wild animals, and their health is in your hands.
The #1 Rule: Keep It Clean
I feel like I’m repeating myself, but it’s that important. Black mold can grow in feeders, and it’s deadly to hummingbirds. You need a strict cleaning routine. You should be looking for small, stubborn black specks or a slimy film, especially down inside the feeding ports—that’s the enemy.
My Cleaning Routine:
- Take the whole feeder apart.
- Soak all the parts in a solution of 1 part white vinegar to 4 parts hot water for at least an hour.
- Use a set of feeder brushes (they’re cheap and essential) to scrub every surface, especially the ports.
- Rinse everything thoroughly with clean water until there’s no trace of vinegar.
- Let it air dry completely before you refill it.
A quick tip to make life easier: I always keep a second, identical feeder clean and ready. When I bring a dirty one inside for a soak and deep clean, the fresh one goes right out. The birds never have to wait, and I’m never tempted to rush the cleaning process.
Where to Hang Your Feeder
Placement is almost as important as cleanliness. To prevent deadly window collisions, hang feeders either super close (less than 3 feet from the glass) or far away (more than 15 feet). That middle distance is the danger zone. Also, make sure it’s not near a spot where a cat can hide and ambush the birds. A location with a nearby bush for cover—but not right next to it—is usually the sweet spot.
By building a feeder with care and maintaining it with diligence, you’re doing more than just putting out a bird buffet. You’re becoming a trusted partner in their survival. It’s a small effort that pays off in the incredible joy of watching these tiny, buzzing jewels thrive right in your own yard.


