Finally, a Dusting Method That Actually Works: A Pro Cleaner Spills the Secrets
I’ve been deep in the professional cleaning world for a long, long time. On my very first day, my mentor told me something that completely changed how I see my job. He said, “We don’t just wipe away dirt. We manage the home’s environment.” That one idea has stuck with me ever since. Dusting isn’t just about making a coffee table look shiny for an hour. It’s about really understanding what dust is, where it’s coming from, and how to get it out of your house for good.
In this article
Let’s be honest, dusting can feel like a totally thankless chore. You spend an afternoon cleaning, and it seems like a fresh, fuzzy layer settles on everything by Tuesday. Sound familiar? That usually happens when you’re just pushing dust around instead of actually capturing it. But the good news is, you can absolutely get the upper hand. It just takes the right system, the right tools, and a little consistency. I’m going to walk you through the exact methods the pros use—the same stuff I teach new trainees to get incredible results.
First Off, What Are We Even Fighting?
Understanding What’s In Your Dust
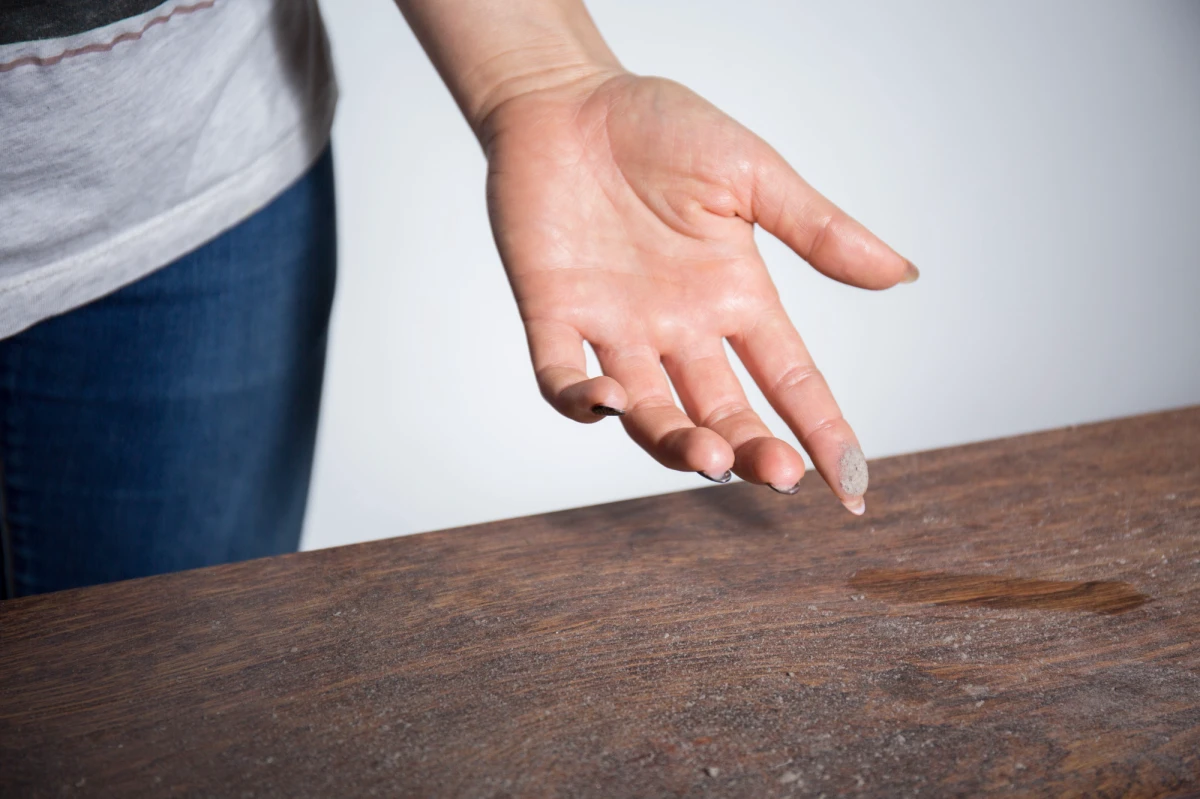
To really win the war on dust, you need to know your enemy. And household dust isn’t just one thing; it’s a wild cocktail of tiny particles from inside and outside your home. The biggest ingredient? Dead skin cells. Yep, a little gross, but we all shed them constantly, and so do our pets.
Beyond that, you’ve got microscopic fibers from your carpet, clothes, and furniture. You’ve also got pollen, dirt, and pollutants that sneak in through open windows and even your HVAC system. But the real troublemakers for allergy sufferers are the dust mites. These tiny creatures feast on the skin cells in dust, and it’s their waste products that trigger asthma and allergy attacks. So, when you think about it that way, you can see why just wiping with a dry rag doesn’t cut it. You need to trap and remove this entire mess.
How Dust Gets Around
Dust doesn’t just fall straight down; it floats on air currents like a tourist. Your home’s heating and air conditioning system is basically a dust superhighway, circulating fine particles from room to room. Even just walking on a carpet or plopping down on the sofa can launch a cloud of dust into the air, where it can hang out for hours before settling again.
This is where a little basic physics comes in handy. Gravity pulls the heavier stuff down first, which is why the golden rule of cleaning is to ALWAYS work from top to bottom. But finer particles are often bossed around by static electricity. Have you ever noticed how your TV screen and other electronics are total dust magnets? That’s because the plastic surfaces build up a static charge that actively pulls dust out of the air. Understanding this means you can work with gravity and static, not against them.
The Pro System: Order of Operations is Everything
Top-to-Bottom, Left-to-Right
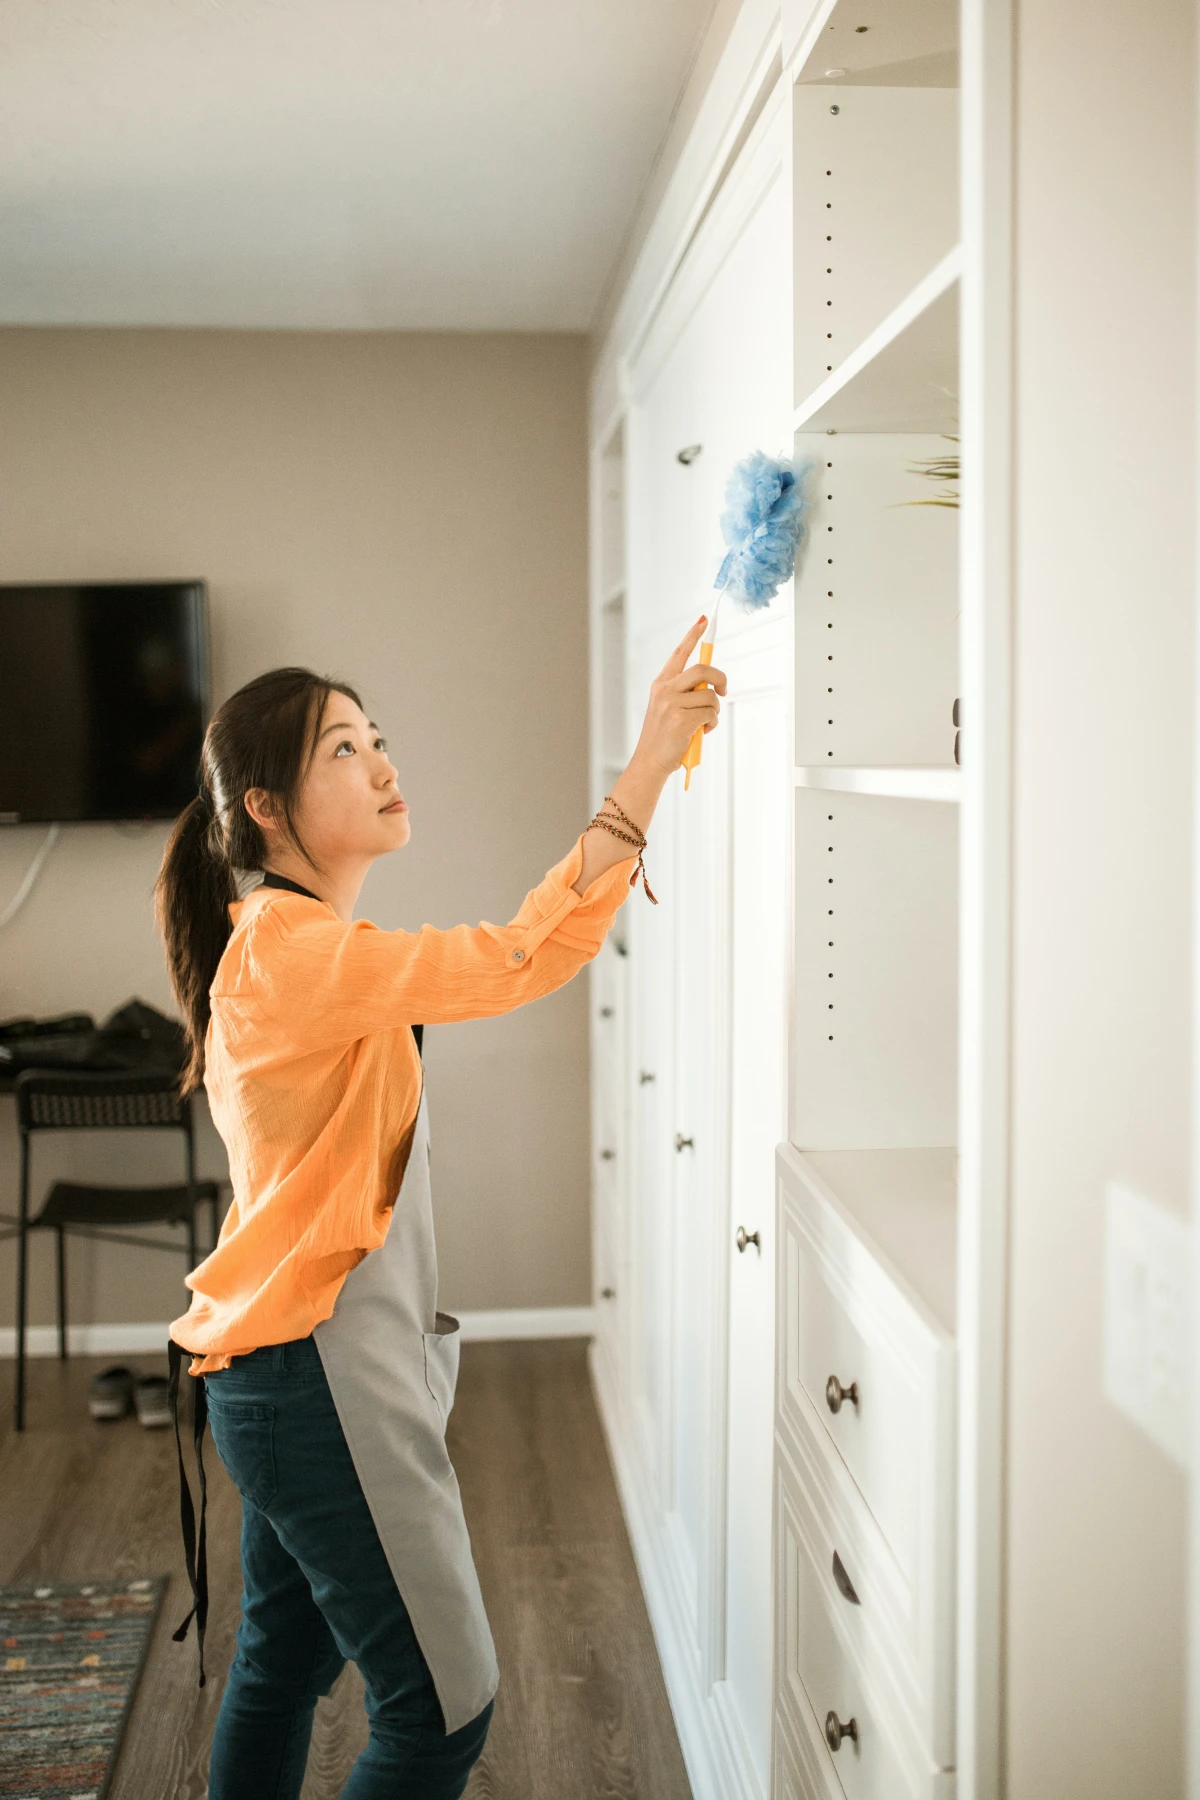
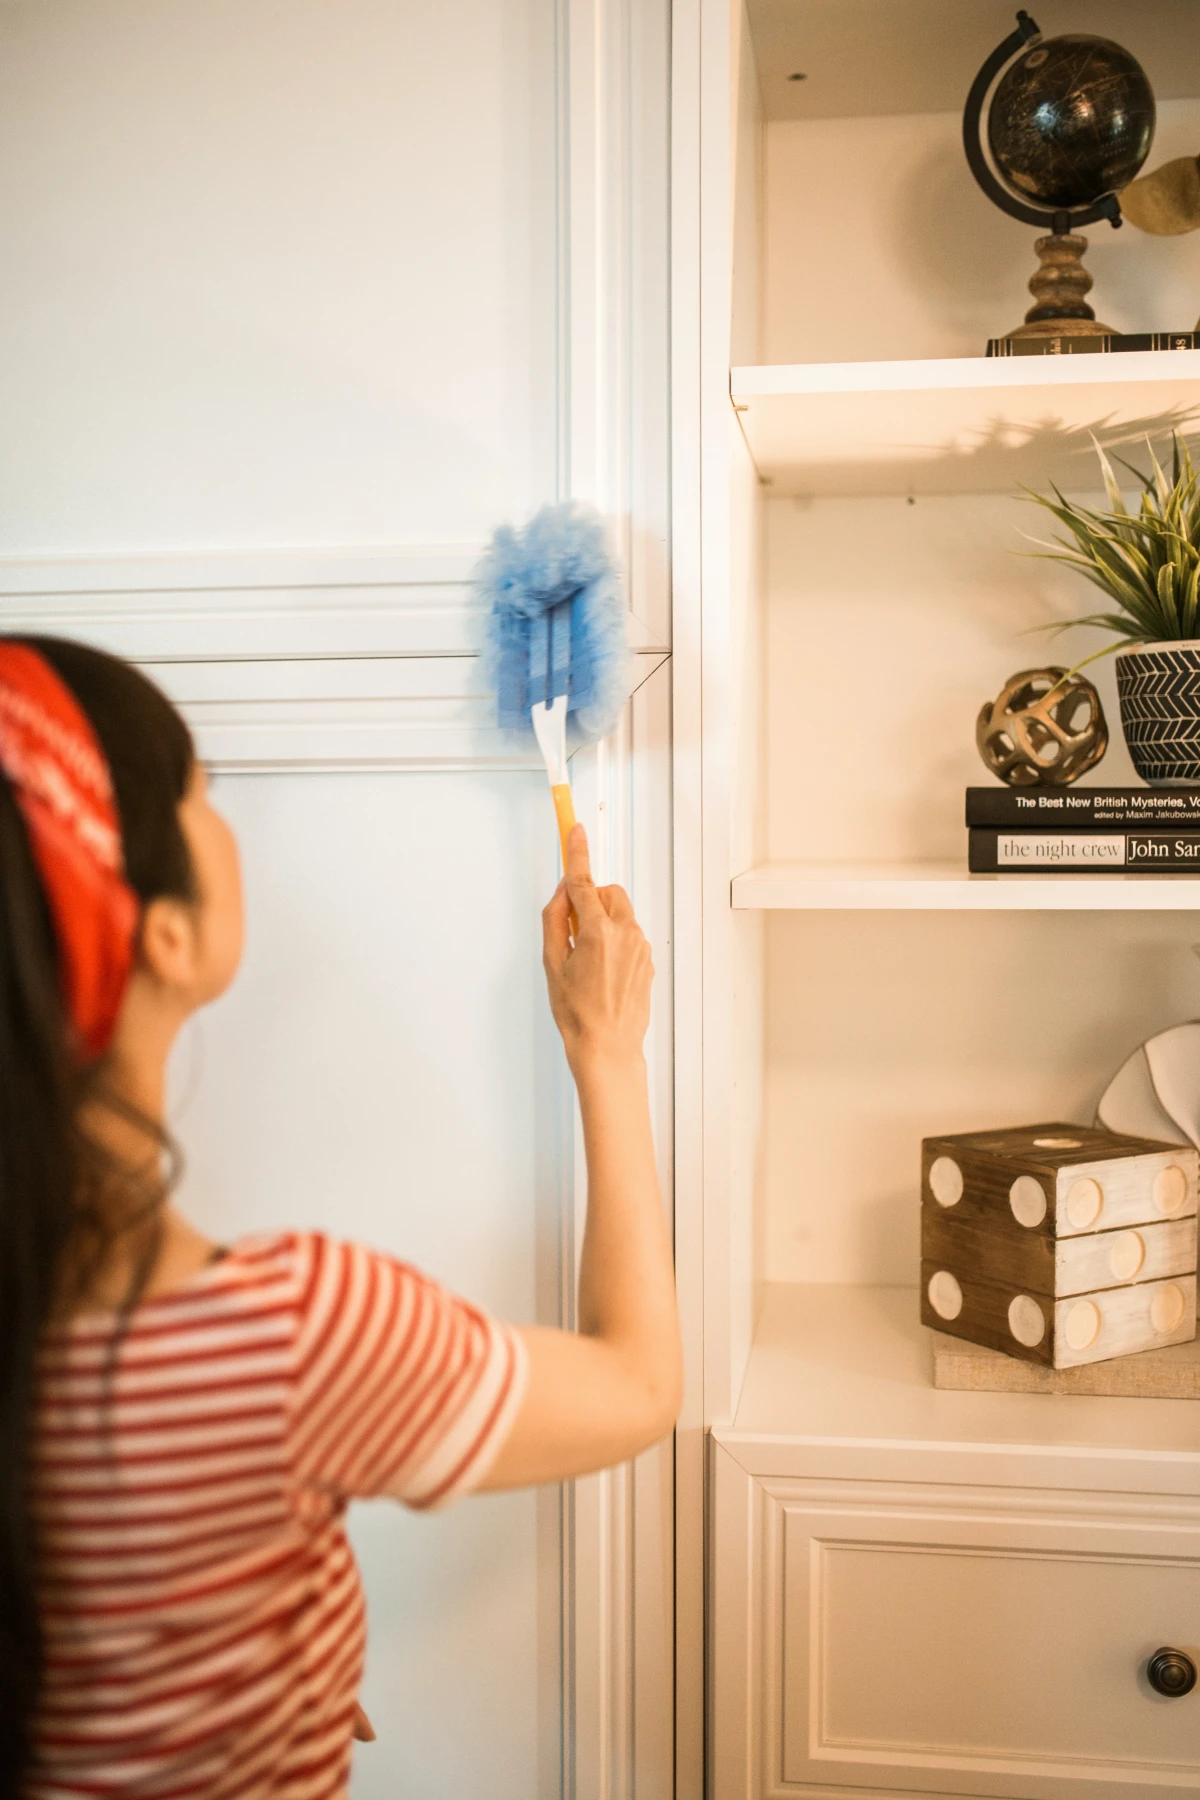
Every single pro cleaner works with a system. It’s how we guarantee everything gets cleaned without accidentally messing up an area we just finished. The most important rule, as I mentioned, is top-to-bottom. Start with the highest points in a room—think ceiling fans, light fixtures, and the tops of your tallest furniture—and work your way down. Dust will fall onto the tables, then the chairs, and finally, the floor, which you’ll clean last. Simple, but it makes all the difference.
To make it even more foolproof, we add a circular pattern. Pick a spot in the room (the door is a good one) and work your way around, either left-to-right or right-to-left. This stops you from missing spots and breaks a big job into smaller, more manageable chunks.
The Complete Cleaning Sequence
Dusting is just one step in the full process. Getting the order right is crucial for not making more work for yourself. Here’s how it should flow:
- Declutter First. You can’t clean what you can’t reach. Take a few minutes to clear off surfaces by putting away mail, toys, and other clutter.
- Dust High to Low. Now, using the top-to-bottom method, dust all the surfaces in the room.
- Clean Glass and Mirrors. After the dust has settled a bit, tackle your glass and mirrors.
- Wipe Down Hard Surfaces. If countertops or tables need a little more than a dusting, give them a proper wipe-down now.
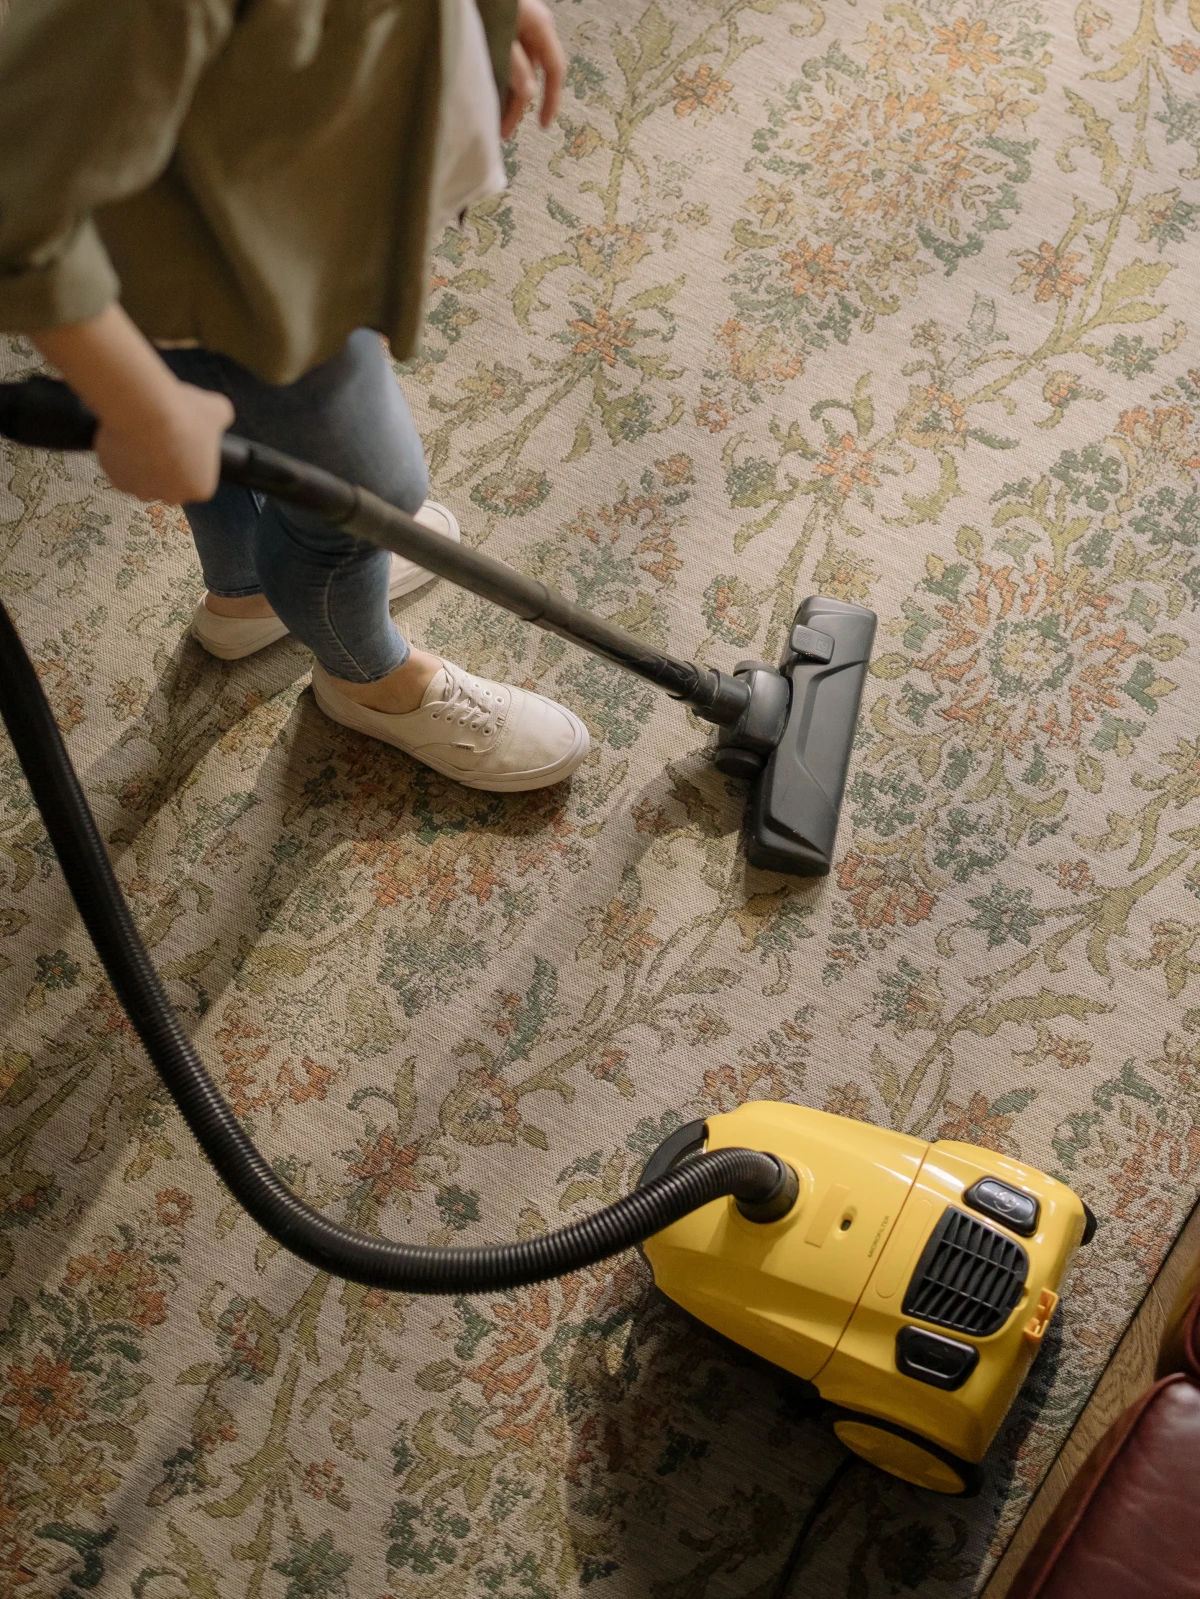
- Vacuum Last. This is the grand finale! Your vacuum will pick up all the dust you’ve just knocked down to the floor.
Heads up! Even the best vacuums can kick up a little fine dust. If someone in your house has serious allergies, it’s a good idea to let the air settle for about 20 minutes after vacuuming before they come back into the room.
Your Toolkit: Choosing Gear That Actually Works
Okay, let’s talk tools. Getting a few key items will make your life so much easier and your home so much cleaner. Honestly, you don’t need a lot, but you do need the right things.
A Pro Dusting Starter Kit:
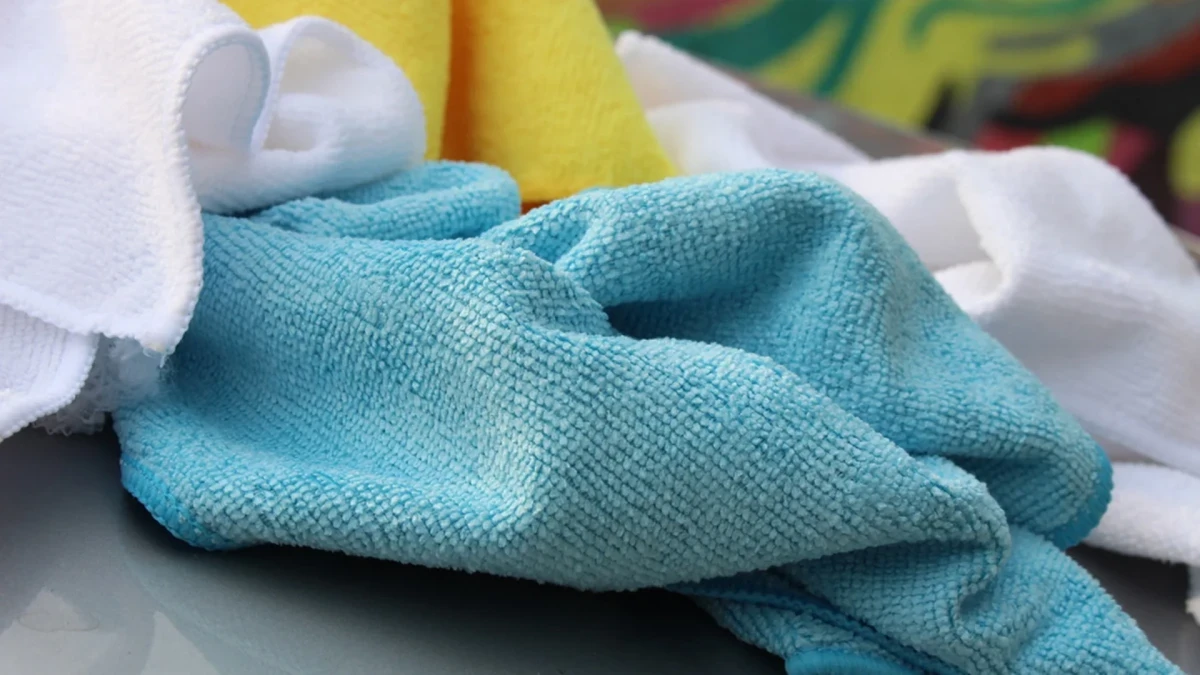
- Microfiber Cloths (a big pack!): This is your number one weapon. A 20-pack of good quality cloths will run you about $20-$30 on Amazon or at a place like Costco. Don’t skimp here.
- An Extendable Duster: For reaching those high places without balancing on a wobbly chair. Expect to pay around $25 at Home Depot or Lowe’s. Make sure you get one with a removable, washable head.
- A Good Spray Bottle: Just a simple one for water. Maybe $5.
- Furniture Sliders: A lesser-known trick! These little plastic discs cost about $10 at any hardware store and make moving heavy furniture an absolute breeze. No more scratched floors!
Why Microfiber is King
Forget old cotton rags or paper towels. Microfiber is a total game-changer. A cotton fiber is smooth and tends to just push dust around. But a microfiber is made of millions of tiny, split fibers that are shaped like stars. This structure creates a net that physically traps dust, dirt, and allergens. Plus, it generates a tiny bit of static charge, helping it pull in dust even more effectively.

In a nutshell, here’s why microfiber is so much better than the old-school cotton rag:
- It Traps Dust: Microfiber’s split fibers grab and hold onto dust particles. Cotton just pushes them around.
- No Streaks Left Behind: It absorbs oils and moisture without leaving lint or streaks, making it perfect for shiny surfaces.
- It’s Super Durable: A good microfiber cloth can be washed hundreds of times without losing its effectiveness, saving you money in the long run.
A common mistake that ruins these cloths is using fabric softener. NEVER wash microfiber with fabric softener! It clogs up all those amazing little fibers and makes them useless. Just wash them with regular detergent (separately from linty things like towels) and let them air dry or tumble dry on low.
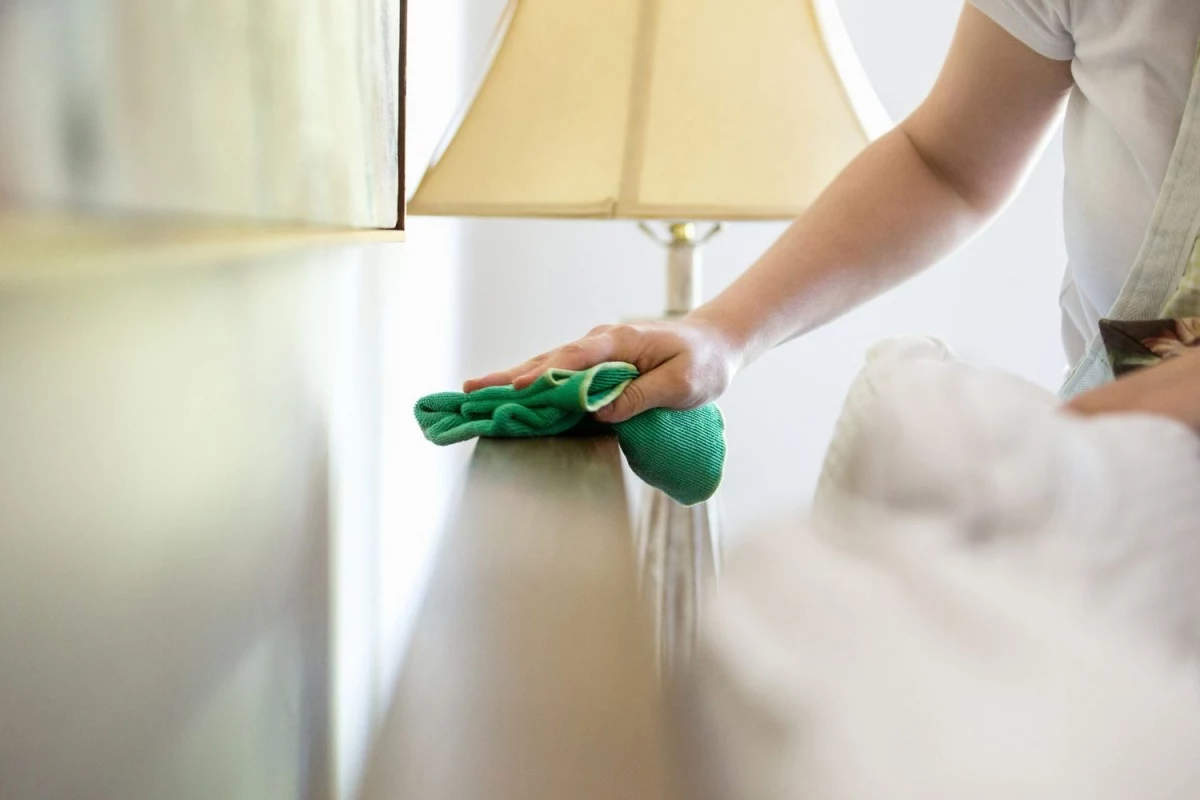
Damp Dusting: The Secret to Capturing Everything
Here’s a technique the pros swear by: damp dusting. For almost every surface, a slightly damp cloth is way better than a dry one. The moisture helps break the static bond holding dust to a surface and ensures the microfiber grabs every last particle.
But “damp” is the key word. You don’t want it wet. Here’s my trick for the perfect damp cloth:
- Fold your clean, dry microfiber cloth into fourths. This gives you eight clean surfaces to work with (front and back of each quadrant).
- Holding the cloth about a foot away, give it just two or three light mists of water from your spray bottle.
- The cloth should feel slightly cool and barely moist to the touch, but it should never leave a trail of water on your furniture.
Once a section of your cloth looks dirty, just flip to a clean one. You’ll be shocked at how fast it picks up grime. This prevents you from spreading dirt from one surface to another.
The Heavy Hitters: Vacuums and Attachments
A Vacuum with a HEPA Filter: This is non-negotiable for serious dust control. A HEPA filter traps 99.97% of those microscopic particles we talked about. A standard vacuum without one can just spew fine dust and allergens right back into the air you breathe. You don’t have to break the bank, either.
- Best on a Budget: Look at brands like Shark. A model like the Shark Navigator Lift-Away often costs between $150 and $200 and has a sealed system with a HEPA filter. It’s a fantastic value.
- The Workhorse: If you’re ready to invest in something that will last, a canister vacuum from a brand like Miele is a great choice. They’re powerful, quiet, and built like tanks. Expect to start in the $500 range.
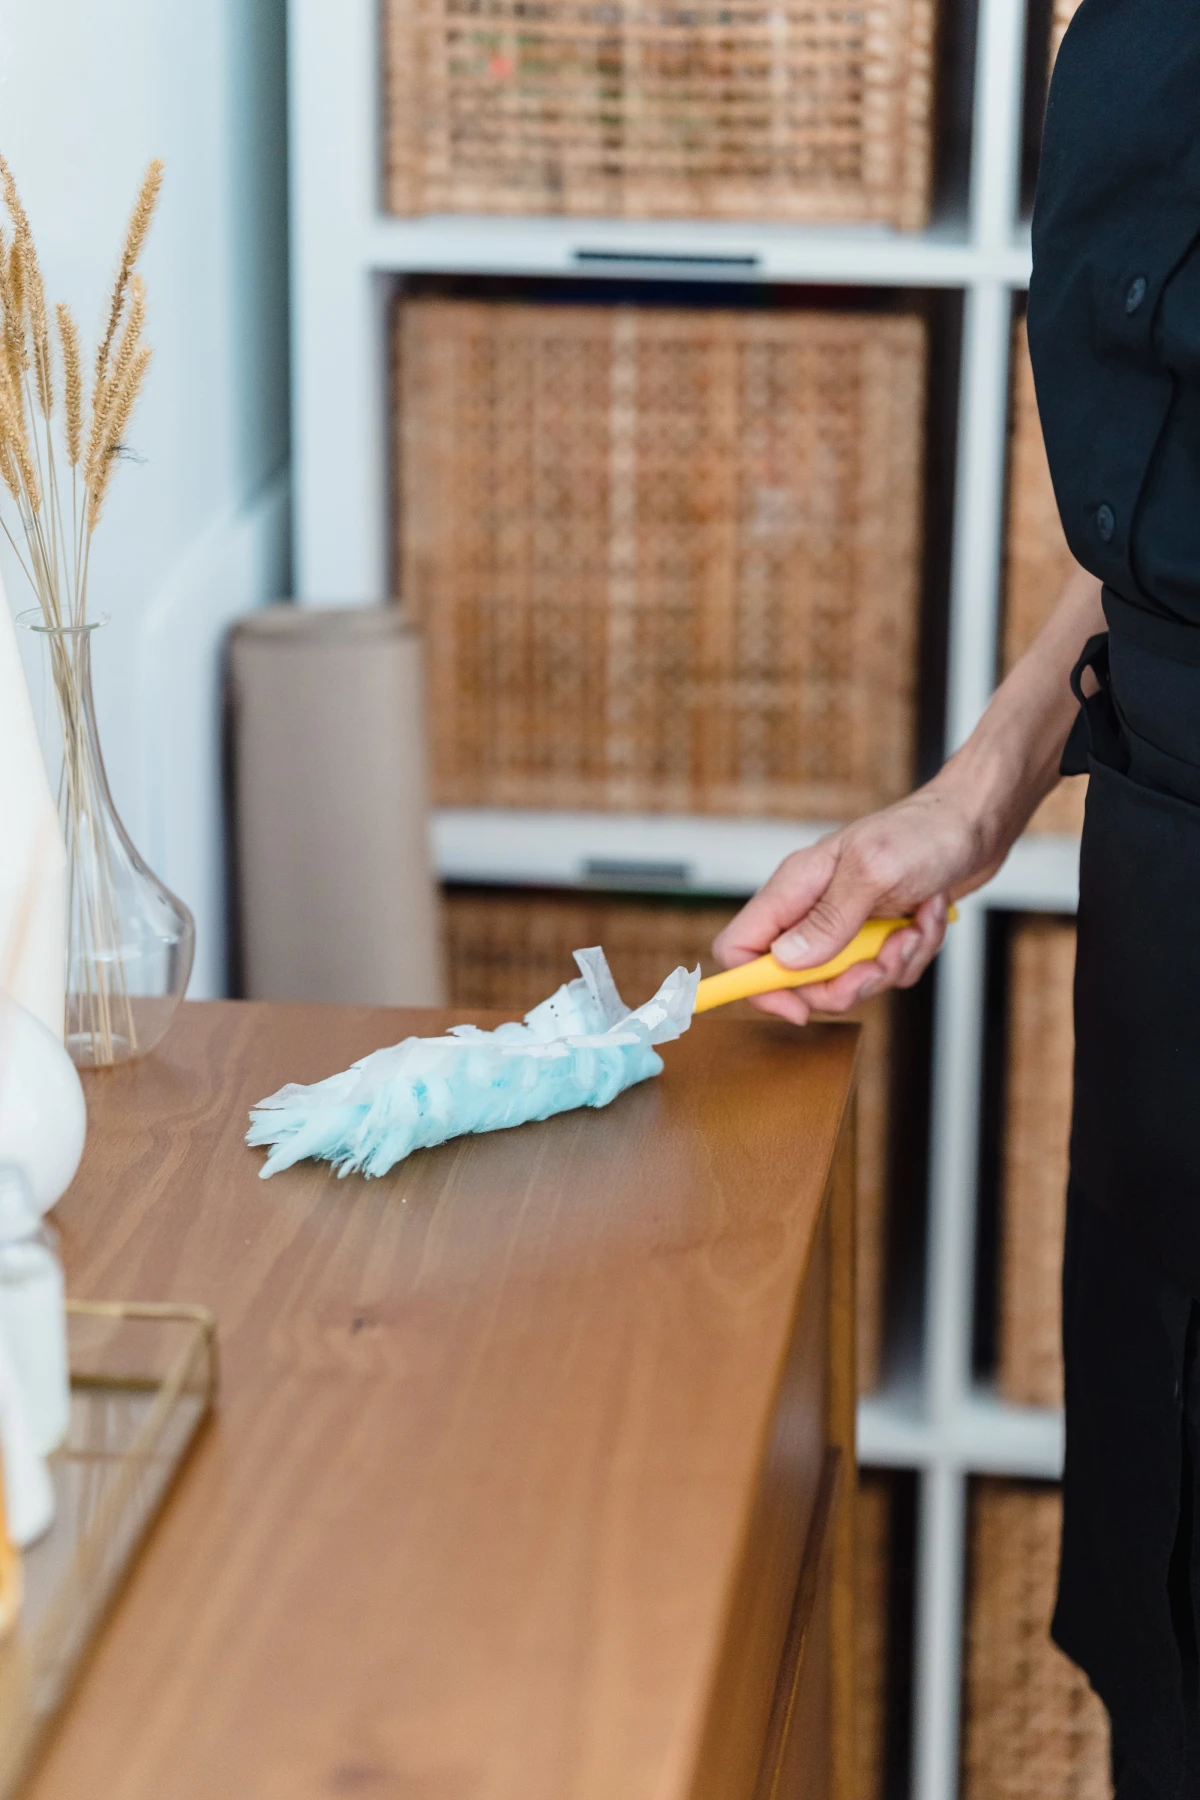
The Soft Brush Attachment: That little round brush with soft bristles that came with your vacuum? It’s your secret weapon. It’s perfect for gently dusting delicate or awkward items like lampshades, speaker grills, the tops of books on a shelf, and even curtains. The bristles loosen the dust, and the vacuum sucks it away instantly.
Oh, and by the way, please throw out your feather duster. It might look quaint, but all it does is fling dust into the air to settle somewhere else. You’re just redecorating with dust, not removing it.
Where the Dust Bunnies Hide
A quick swipe of the main surfaces isn’t enough. Dust is sneaky and loves to accumulate in places you don’t see every day. Hitting these forgotten spots once a month can dramatically cut down the overall dust in your home. Be sure to check:
- Up High: The tops of kitchen cabinets, door and window frames, ceiling fan blades, picture frames, and light fixtures.
- Down Low: Baseboards, the space under and behind furniture, electrical outlets, and heating vents. (The area behind the toilet is a classic!)
- Electronics & Fabrics: Vents on computers and TVs, lampshades, curtains, upholstered furniture, and even the leaves of your houseplants.
I once had a new client who was convinced their allergies were worse inside their home than outdoors. After we did the standard cleaning, I pulled their refrigerator away from the wall. The coils and the floor beneath were covered in a thick, fuzzy blanket of dust and pet hair. It was years of buildup. After we cleaned it, they called a week later to say the air felt noticeably cleaner. It’s often these hidden spots that make the biggest difference.
Setting Up a Realistic Cleaning Rhythm
How Often Should You Really Dust?
The perfect schedule depends on your home—if you have pets, lots of carpets, or live in a high-pollen area, you’ll need to dust more often. But here’s a great general routine to start with:
- Weekly (30-45 minutes): This is your maintenance dust. Hit the high-traffic areas like living rooms and bedrooms. Focus on the surfaces you see and use regularly.
- Monthly: Tackle a low-traffic area you might have skipped, like a guest room or formal dining room.
- Quarterly Deep Dust (2-3 hours): This is when you go all out. Move the furniture, dust the baseboards, clean the high ledges—all those forgotten spots.
Consistency beats intensity every time. A light, regular dusting is much faster and easier than letting it build up into a massive project.
Special Case: After a Renovation
Cleaning up after a home renovation is a whole different beast. That fine drywall dust gets into everything. To be frank, I strongly recommend hiring a professional post-construction cleaning service. Depending on the job, it can cost anywhere from $500 to over $1,500, but it’s often worth it. If you have to tackle it yourself, be prepared for a multi-day job involving a shop vac, endless damp wiping, and changing your HVAC filter immediately.
Safety First, and When to Call in a Specialist
For most of us, dusting is perfectly safe. But if you have severe allergies or asthma, it’s smart to wear a simple N95 mask while you clean to avoid inhaling all the particles you’re kicking up. And please, use a sturdy step stool or an extendable duster for high places—no balancing on chairs!
You can handle 99% of dust yourself, but there are a few situations where you should stop and call an expert. It’s not admitting defeat; it’s being smart and safe.
- Suspected Mold: If you see black spots or smell a persistent musty odor, don’t touch it. Call a certified mold remediation specialist.
- Older Homes: In many older homes, there’s a risk of lead-based paint. If you have chipping or peeling paint, the dust can be toxic. Don’t scrape it. Call a certified lead abatement professional.
- Potential Asbestos: Some older building materials, like certain types of insulation or popcorn ceilings, contain asbestos. If you think you might have it, leave it completely alone and call an asbestos abatement company for testing.
Your 5-Minute Dust-Buster Challenge
Feeling overwhelmed? If you do nothing else this week, I challenge you to try this. Grab one damp microfiber cloth and spend just five minutes wiping down these three surprising dust magnets:
- The top of your refrigerator.
- All your light switch plates and outlet covers.
- The back and vents of your main TV.
You’ll be absolutely shocked at what you pull off.
Final Thoughts
Controlling dust isn’t a battle you win just once; it’s more like tending a garden. It takes a little system, the right tools, and a bit of rhythm. But by working top-to-bottom, embracing damp microfiber, and using a good HEPA vacuum, you’re doing so much more than just tidying up. You’re actively removing pollutants from your home.
Remember what my mentor said: you’re managing your home’s environment. This approach turns a tedious chore into a meaningful craft, creating a space that doesn’t just look clean, but actually feels healthier and more comfortable to live in. And that’s a result that’s definitely worth the effort.
Inspirational Gallery
Do air purifiers actually reduce the amount of dust in a home?
Absolutely. While manual dusting removes settled particles, an air purifier with a HEPA filter is your secret weapon against airborne dust. It continuously pulls microscopic particles—like pet dander, pollen, and dust mite debris—out of the air before they even have a chance to land on your furniture. Think of it as teamwork: you handle the surfaces, and a quality unit from a brand like Levoit or Coway works 24/7 to capture what’s floating around. It’s a game-changer for allergy sufferers and significantly extends the time between deep dustings.
The right tool for the job: Microfiber vs. Disposable Dusters
High-Quality Microfiber Cloth: The professional’s choice for a reason. Brands like E-Cloth or VibraWipe design cloths with split fibers that create a static charge, actively grabbing and holding onto dust. They are washable, incredibly durable, and more sustainable. A light mist of water makes them even more effective.
Disposable Electrostatic Duster: Think Swiffer Dusters. They are incredibly convenient for quick touch-ups and hard-to-reach spots. The disposable heads use static to attract dust, but they can become saturated quickly and generate more waste. They’re great for maintenance, but a good microfiber cloth is king for a deep clean.
The average six-room home in the United States collects 40 pounds of dust each year.
This surprising statistic from the National Air Duct Cleaners Association highlights why consistent dusting isn’t just about appearances. This accumulation contains a cocktail of allergens and pollutants. A regular, thorough dusting routine is one of the most effective ways to improve your home’s indoor air quality and manage this constant influx.
When dusting, don’t overlook these commonly missed hotspots where dust loves to settle:
- The tops of door and window frames
- Baseboards and shoe molding
- Light fixtures and ceiling fan blades (when turned off!)
- Picture frames and wall art
- The tops of your kitchen cabinets
One crucial rule: Never use fabric softener or dryer sheets when washing your microfiber cloths. These products coat the fibers, destroying the natural static charge that makes them so effective at trapping dust. Wash them with a gentle detergent in a separate load or with other non-linting items, and let them air dry for best results.
Your electronics are dust magnets due to the static electricity they generate. To clean them safely, always unplug the device first. Use a clean, dry microfiber cloth to gently wipe screens and surfaces. For keyboards and vents, a can of compressed air is perfect for blasting out trapped dust and debris without causing damage. Avoid using any liquid sprays directly on your electronics.
For a natural and effective clean, you can easily make your own dusting spray that helps repel future dust.
- In a spray bottle, mix one cup of water with 1/4 cup of white vinegar.
- Add two teaspoons of olive oil, which helps nourish wood and condition surfaces.
- For a pleasant scent, add 10-15 drops of an essential oil like lemon or lavender.
Shake well before each use and spray lightly onto your microfiber cloth, not directly on the surface.
- You won’t have to re-clean surfaces you just finished.
- It’s the most efficient use of your time and energy.
- You work with gravity, not against it.
The secret to achieving this? Always dust from the top of the room to the bottom. Start with ceiling fixtures, shelves, and the tops of furniture, letting dust fall to the floor. Finish by vacuuming the floor to capture everything in one final step.
A typical used mattress can have anywhere from 100,000 to 10 million dust mites inside.
This unsettling fact from researchers at Ohio State University is a powerful reminder to include your bedroom in your deep dusting routine. Beyond the mattress, be sure to regularly dust headboards, bed frames, and under the bed, where dust and its accompanying mites thrive. Washing bedding in hot water is also key to keeping their populations in check.


