Stop Killing Your Flower Boxes: A Pro’s Guide to Lush, Season-Long Color
I’ve been elbow-deep in dirt for a long time, working in big nurseries, designing gardens for clients, and showing new folks the ropes. And you know what? After all that, the humble flower box is still one of my absolute favorite things to create. It’s a small space that can bring a ridiculous amount of joy. But honestly, I’ve also seen so many people get completely frustrated when their boxes look sad and scraggly by August. It almost always comes down to missing a few key basics.
In this article
A flower box that thrives isn’t just a happy accident. Think of it as a tiny, self-contained ecosystem that you’re in charge of. It’s about way more than just grabbing pretty flowers at the garden center; it’s about building a sustainable little world where your plants can flourish from the first warm days of spring right up until frost.
So, let’s get into the practical, no-fluff knowledge that keeps flower boxes looking amazing. This isn’t about fleeting trends. This is about building something beautiful that actually lasts.
The Foundation: It All Starts with the Box
Okay, let’s be real. The container you choose is probably the single most important decision you’ll make. It controls how often you have to water, how well roots can breathe, and whether your plants will fry in a heatwave. I’ve seen gorgeous plants fail simply because the box itself was working against them.
Box Materials (and What They Really Mean for Your Plants)
Every material behaves differently. Picking the right one for your climate and how much you plan to fuss over it is key.
- Wood (Think Cedar or Redwood): This is my go-to for a lot of projects. These woods naturally resist rot and provide fantastic insulation, which protects roots from those wild temperature swings. The soil in a wooden box just won’t get as scorching hot as in a dark plastic one. The downsides? They’re heavy and will eventually break down. A quick tip: You can paint the inside with a non-toxic water sealer to make them last even longer. Expect a quality 36-inch cedar box to run you anywhere from $50 to $80, but it’s an investment that pays off.
- Terracotta: You can’t beat the classic, rustic look of terracotta. It’s porous, meaning air passes through the walls to the roots, which is great for preventing root rot. But—and this is a big but—that also means they dry out incredibly fast. In a hot, sunny spot, you might be watering twice a day. They’re also fragile and can easily crack in a frost if you leave them out with damp soil.
- Plastic or Fiberglass: These are the budget-friendly champs. They’re lightweight, hold moisture really well (less watering for you!), and come in a million styles. A decent plastic box might only cost you $20-$30. The main drawback is that they don’t breathe, so good drainage is a MUST. And a heads-up: dark-colored plastic can get crazy hot and literally cook the roots on a blistering afternoon. I learned that the hard way for a client whose south-facing black boxes kept failing until we switched to a lighter color.
- Metal: Metal planters can look incredibly sharp and modern. But just like dark plastic, they heat up like an oven in direct sun. They can also rust unless they’re properly galvanized or coated. If your heart is set on metal, try to place it where it only gets morning sun, or use a smaller plastic pot as an insert to act as an insulator.
Let’s Talk Size and Drainage
Before you buy, think about size. A bigger, deeper box holds more soil, which in turn holds more moisture. This means you won’t have to water quite as often. For a beginner, I’d suggest starting with a box that’s at least 8 inches deep and 24 to 36 inches long. It’s a manageable size that gives your plants enough room to establish a healthy root system.
Now, if you remember only one thing, let it be this: your flower box MUST have drainage holes. No exceptions. Without them, water pools at the bottom, the soil gets saturated, and roots suffocate. For years, people were told to put gravel in the bottom of pots. It’s a total myth! Water actually gets trapped in the soil above the gravel layer, creating a swampy mess right where the roots are. Just use a quality potting mix all the way down and make sure those holes are clear.
The Good Stuff: Getting Your Soil Right
You absolutely cannot scoop soil out of your garden and put it in a flower box. It’s too heavy, compacts into a brick, and often brings along weed seeds and other unwanted guests. You need a potting mix that’s light, airy, and holds just the right amount of water.
The Pro’s Go-To Potting Mix
When I’m potting up containers, I often whip up my own mix. It’s cheaper if you’re doing a lot of pots and you get total control over the quality. You can mix it easily in a wheelbarrow or on a tarp.
My all-purpose formula is simple:
- One Part Peat Moss or Coconut Coir: This is the body of your mix. It’s a fantastic sponge for holding water and nutrients. Coconut coir is a more renewable resource, but both work great.
- One Part Compost or Aged Pine Bark Fines: This provides a slow, gentle release of nutrients and introduces beneficial microbes.
- One Part Perlite or Vermiculite: This is for aeration. Perlite, those little white crunchy things, creates air pockets so roots can breathe. You can find all these components at any decent garden center or order them online.
Buying a Bagged Mix (The Easy Way)
Don’t want to play chemist? No problem. Just buy a high-quality bagged mix. Look for bags specifically labeled “Potting Mix” or “Container Soil.” Avoid anything called “Garden Soil.” A good quality bag that will fill a standard 36-inch box usually costs between $15 and $25. It’s worth paying for the good stuff; your plants will thank you.
A Quick Word on Feeding Your Plants
Container plants are hungry. All the watering you do washes nutrients out of the soil over time. I suggest a two-pronged attack: First, mix a granular, slow-release fertilizer into the soil when you plant. Look for a balanced formula like 10-10-10. Don’t let the numbers intimidate you! Just think of it as Nitrogen-Phosphorus-Potassium, or more simply: Leaves-Flowers-Roots. A balanced number is a great all-around meal. Then, every 2-4 weeks during summer, give them a snack with a water-soluble liquid fertilizer for an extra boost.
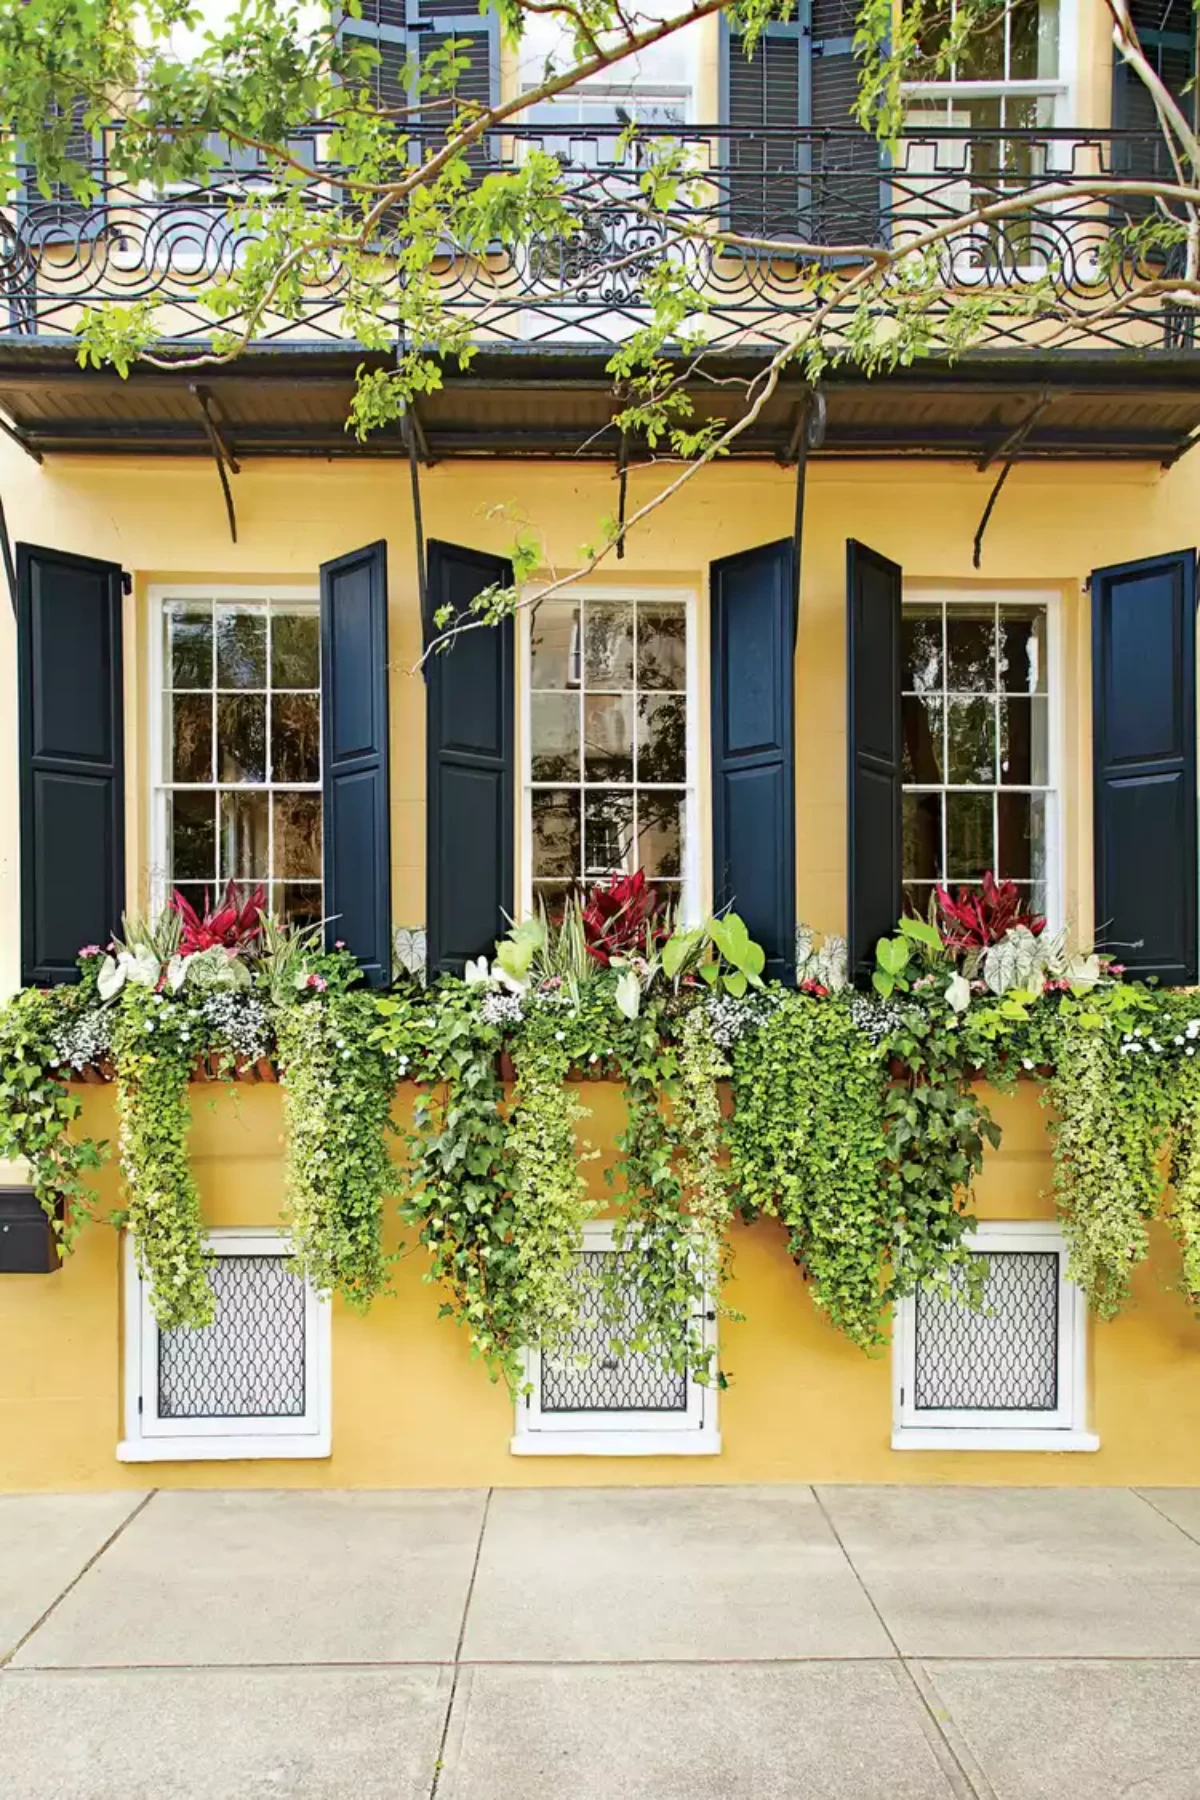
The Fun Part: Designing with Plants
This is where your creativity comes in, but it still requires a little strategy. The most common mistake? Putting sun-loving plants in the shade (or vice-versa).
Know Your Light
Before you even think about going to the nursery, watch the spot where your box will live. How many hours of direct sun does it actually get?
- Full Sun: 6+ hours of direct sun.
- Part Sun/Shade: 4-6 hours of direct sun.
- Full Shade: Less than 4 hours of direct sun.
Be honest with yourself! A petunia just won’t bloom in the shade, and a begonia will get scorched in six hours of afternoon sun.
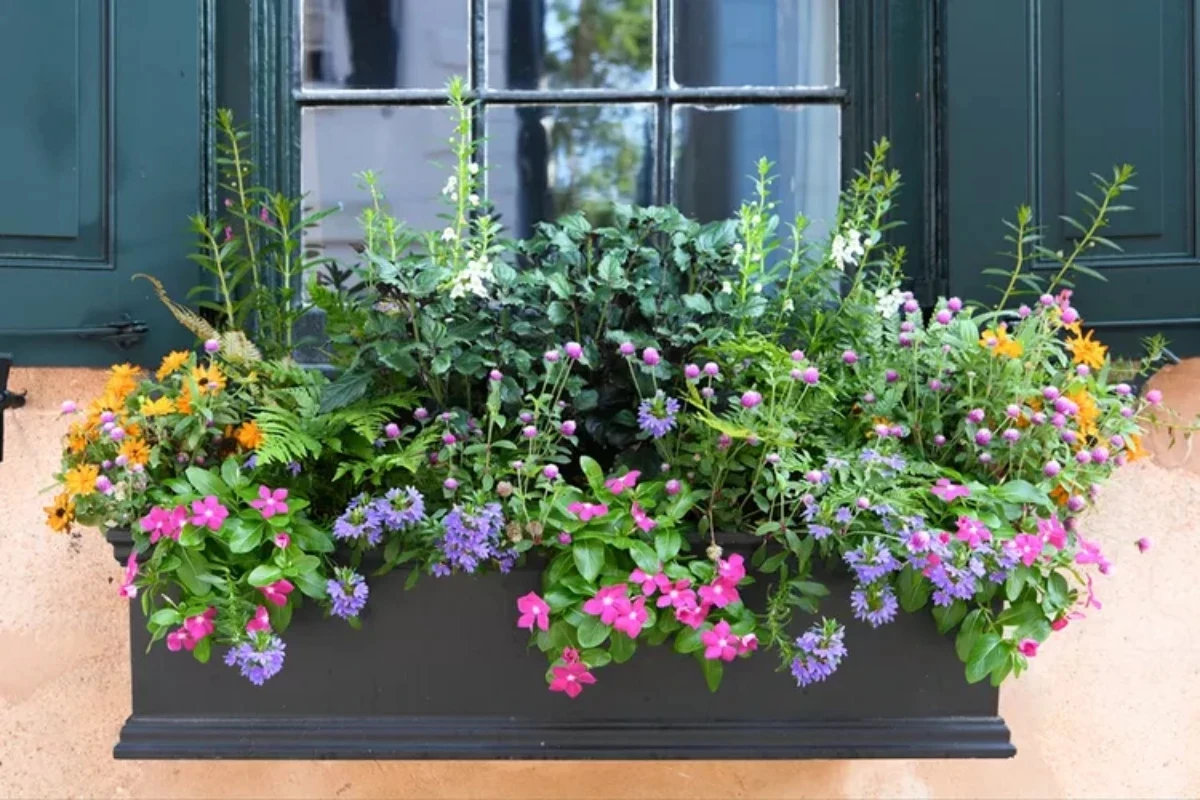
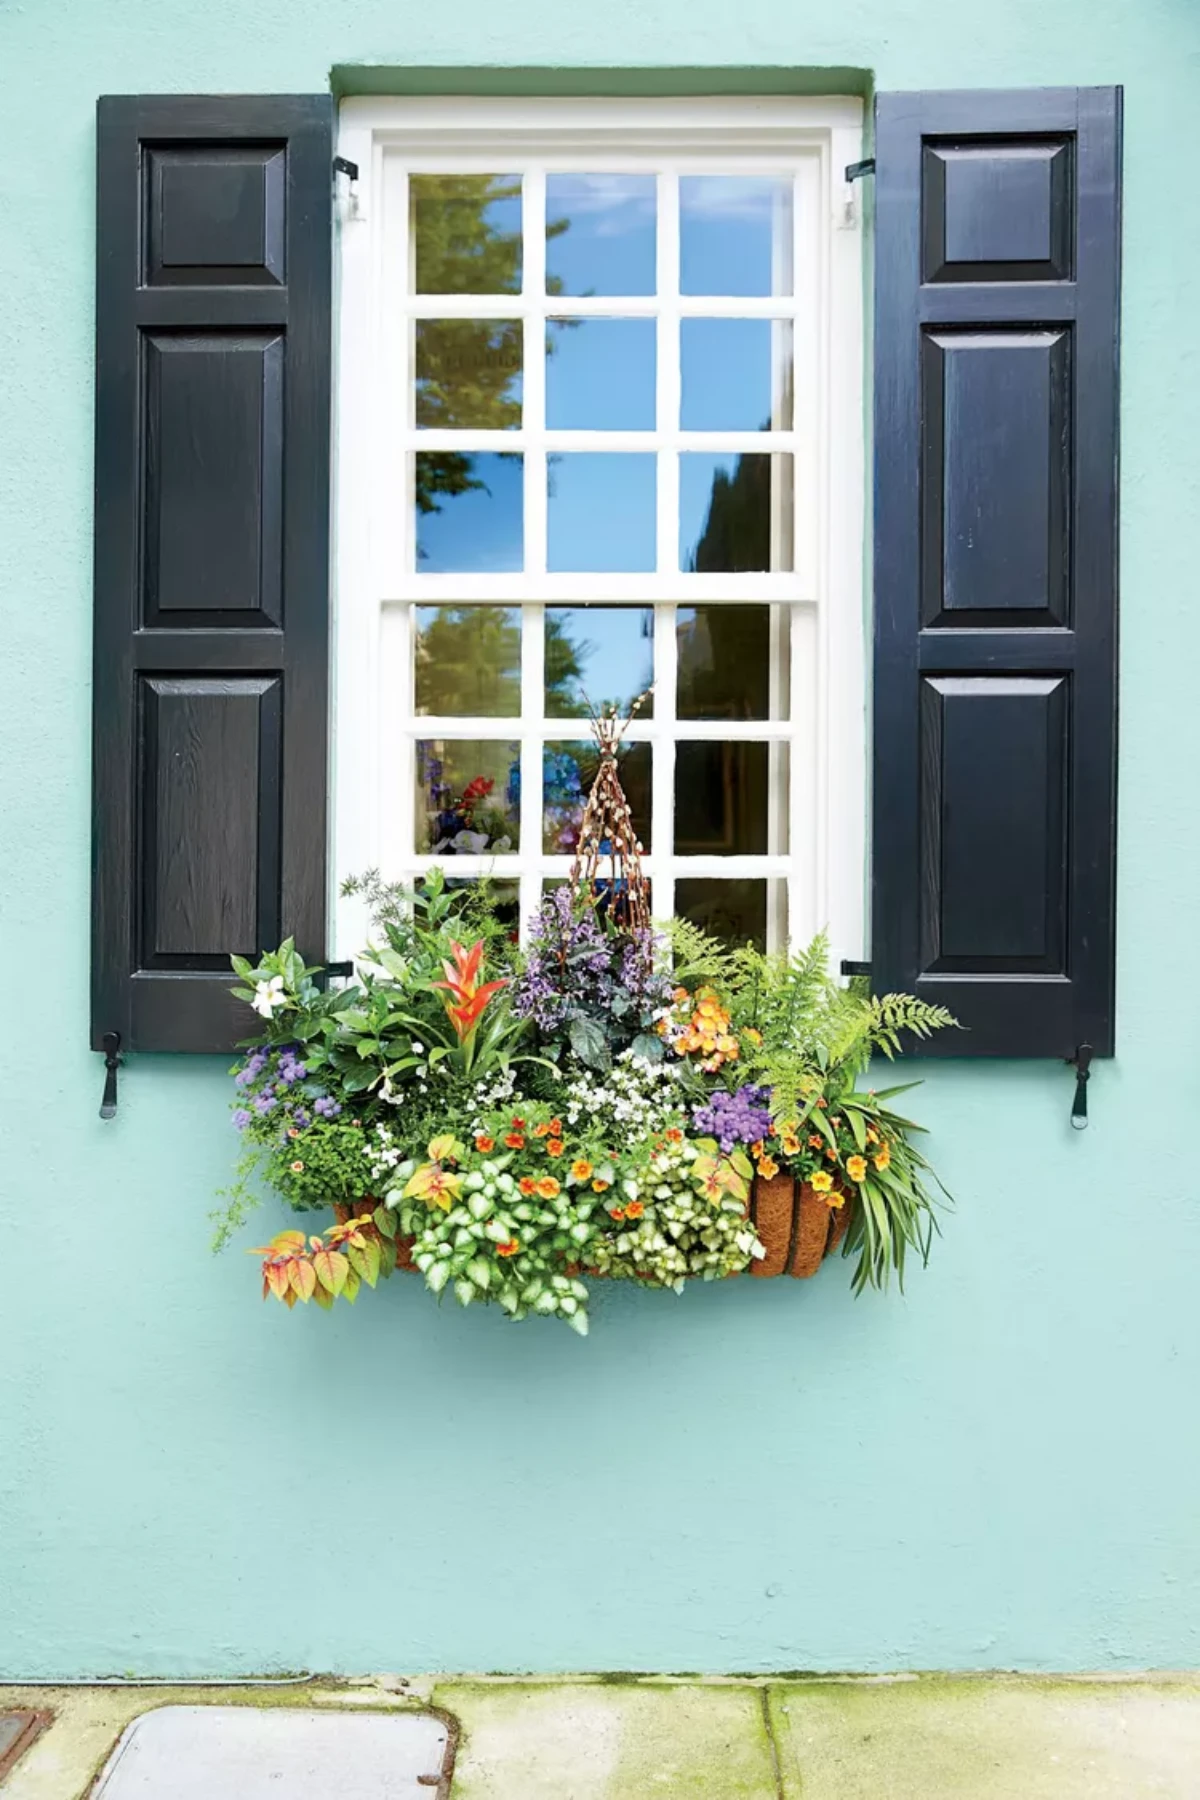
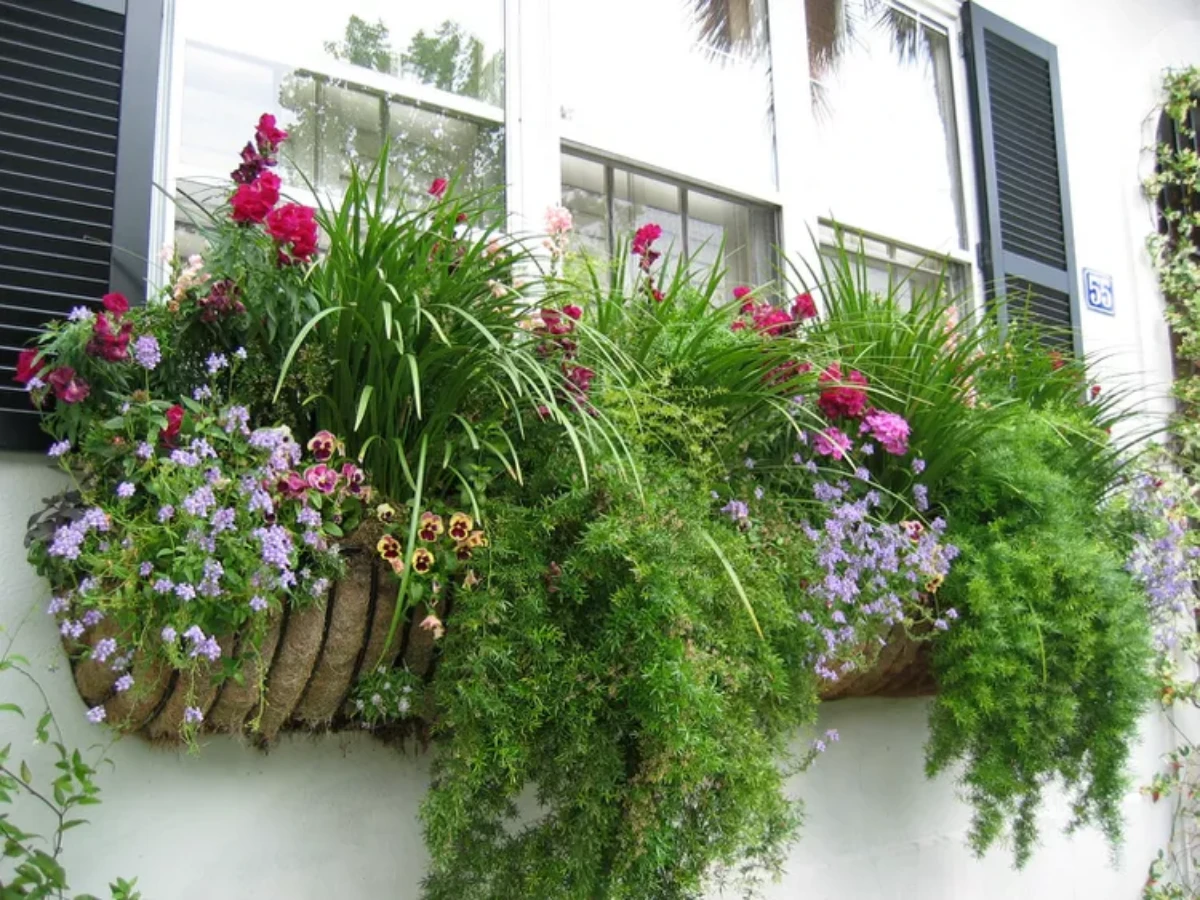
The ‘Thriller, Filler, Spiller’ Secret Weapon
This is a classic design trick the pros use to create gorgeous, balanced containers every time. It’s foolproof.
- The Thriller: Your vertical, attention-grabbing star. It adds height. Think Dracaena spikes, tall ornamental grasses, or an upright Salvia.
- The Filler: Mounding plants that surround the thriller and make the box look full. Think Geraniums, Coleus, or Petunias.
- The Spiller: Trailing plants that cascade over the edges, softening the look. Sweet Potato Vine, Creeping Jenny, and Bacopa are perfect for this.
How Many Plants Do I Actually Need?
This is the question I get asked most. It feels weird buying so many plants for one box, but you need to pack them in for that lush look.
A good rule of thumb for a standard 24-inch (60cm) box is: 1 Thriller, 3 Fillers, and 2 Spillers.
For a longer 36-inch (90cm) box, you might go with: 1-2 Thrillers, 4-5 Fillers, and 3 Spillers.
Trust me, they’ll fill in!
A Foolproof Recipe for a Sunny Spot
Want a guaranteed win? For a sunny spot, grab one Dracaena Spike (thriller), three red Geraniums (fillers), and two ‘Marguerite’ Sweet Potato Vines (spillers). You literally can’t mess this up, and it looks like a million bucks all summer long.
Putting It All Together
Okay, you’ve got your box, soil, and a cart full of plants. Time to get your hands dirty.
- Cover the Holes: A small piece of window screen or a coffee filter over the drainage holes will stop soil from washing out.
- Fill ‘Er Up: Fill the box about two-thirds full with your pre-moistened potting mix.
- Arrange First: Place the plants, still in their nursery pots, on top of the soil to plan your layout. It’s so much easier to move them around now.
- Plant ‘Em: Gently pop each plant out of its pot. If the roots are a tight, tangled mess, gently tease them apart with your fingers to encourage them to grow outward.
- Backfill and Settle: Add more soil around the plants, pressing gently to remove big air pockets. Leave about an inch of space at the top so water doesn’t spill everywhere.
- Water In: Give the box a slow, deep drink until water runs out the bottom. This is a critical step that settles everything into place.
Heads Up! A Quick Note on Safety
This is the part everyone skips, and it’s so important. A flower box filled with wet soil is shockingly heavy—a 3-foot box can easily top 100 pounds. Make sure it’s secured properly.
Use heavy-duty lag bolts for wood studs or sleeve anchors for brick. Never hang a heavy box from a flimsy vinyl railing. If you’re not 100% confident, please hire a handyman for $50. It’s worth every penny for the peace of mind. Also, make sure there’s a small air gap between the box and your house or railing to prevent moisture from getting trapped and causing rot.
Keeping It Gorgeous: Long-Term Care
Your work isn’t over! Consistent care is what separates a great flower box from a sad one.
- Watering: The golden rule is to check first. Stick your finger two inches into the soil. If it’s dry, water. If it’s damp, wait. Water deeply until it runs out the bottom.
- Deadheading: This just means pinching off dead flowers. Doing this regularly tricks the plant into producing more blooms instead of making seeds. It’s the secret to a box that’s still bursting with color in August.
- Troubleshooting: If leaves turn yellow, you’re likely overwatering. If plants look long and stringy with no flowers, they need more sun. If you see pests like aphids, a strong spray of water from the hose is often enough to knock them off. If they persist, insecticidal soap is a safe and effective option.
Creating a beautiful flower box is so rewarding. It’s a little bit of science and a little bit of art. By starting with a solid foundation and giving it a bit of regular attention, you’ll have something that brings you joy all season long. And remember, every year is a new opportunity to try a new combination!
Inspirational Gallery
The #1 Mistake to Avoid: Never, ever fill your flower box with soil from your garden. It’s too heavy, compacts easily, and suffocates plant roots. Worse, it’s often full of weed seeds and potential pests. Always opt for a quality, lightweight potting mix specifically formulated for containers, like Proven Winners Premium Potting Soil or a similar brand. It’s the single best investment for healthy, happy plants.
A single geranium in a 1-gallon pot can require over a quart of water on a hot, windy day to prevent wilting.
For foolproof design, remember the “Thriller, Filler, Spiller” rule. It’s a classic for a reason.
- Thriller: A tall, dramatic plant in the center or back for height (think Salvia ‘Amistad’ or a single ornamental grass).
- Filler: Mounded plants that surround the thriller to make the box look full (like petunias, coleus, or lantana).
- Spiller: Trailing plants that cascade over the sides to soften the edges (Sweet Potato Vine ‘Margarita’ or trailing verbena are perfect choices).
How do I keep my plants fed all season long?
A flower box is a closed system, so plants quickly use up all the available nutrients. The secret to season-long blooms is a two-pronged approach. Start by mixing a slow-release granular fertilizer, like Osmocote Plus, into your potting soil at planting time. This provides a steady base of food for several months. Then, supplement with a weekly or bi-weekly dose of water-soluble liquid fertilizer, such as Miracle-Gro Bloom Booster, to give them that extra push needed for continuous, vibrant flowering.
- Plants that keep producing new flowers all summer.
- A container that looks neat and tidy, not ragged.
- Energy directed to making more blooms, not seeds.
The secret? The simple, satisfying task of ‘deadheading.’ Just pinch or snip off spent flowers right at the stem. Doing this for 10 minutes once a week makes a world of difference for plants like petunias, geraniums, and marigolds.
Think beyond just visual appeal and consider fragrance, especially for a box by a door or a window you open often. The sweet, honey-like scent of Sweet Alyssum is a classic choice for spilling over the edges. For something more substantial, consider planting fragrant stocks or heliotrope, which has a delightful cherry-vanilla aroma that intensifies in the sun. It’s a simple way to add an invisible layer of luxury to your home’s entrance.
Slow-Release Granules: These are coated pellets (like Jobe’s Organics) you mix into the soil once. They release nutrients gradually every time you water. It’s a “set it and forget it” method, perfect for busy gardeners.
Liquid Feed: This is a concentrated liquid you dilute in your watering can. It gives plants an immediate, powerful boost. It requires more frequent application but offers more control and quick results if plants look pale.
For the best of both worlds, use granules at planting and supplement with liquid feed during peak summer.
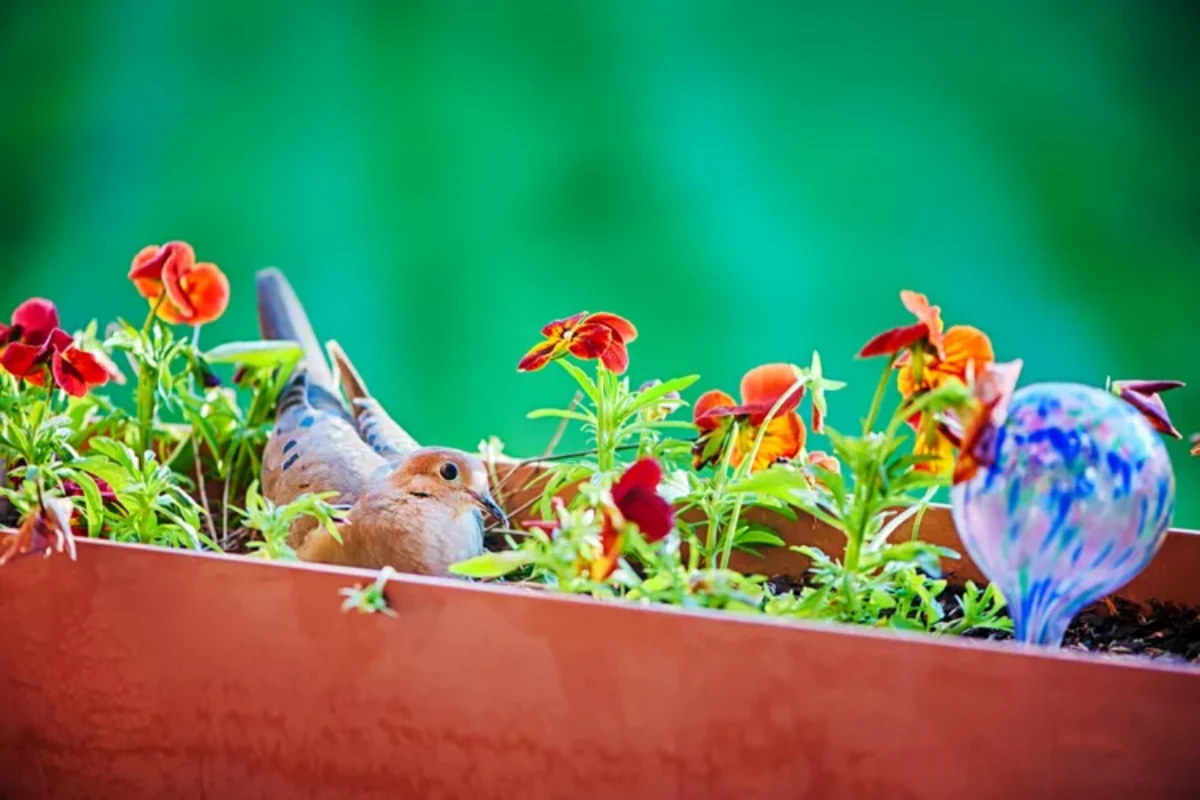
According to the Pollinator Partnership, pollinators like bees and butterflies are responsible for 1 out of every 3 bites of food we eat.
Your flower box can be more than just pretty; it can be a crucial refueling station for these vital creatures. By choosing single-petal flowers (which are easier for pollinators to access than dense, double-flowered varieties), you create a mini-sanctuary. A simple combination of purple Salvia, yellow Bidens, and trailing Lantana provides a high-nectar buffet that will be buzzing with life all season.
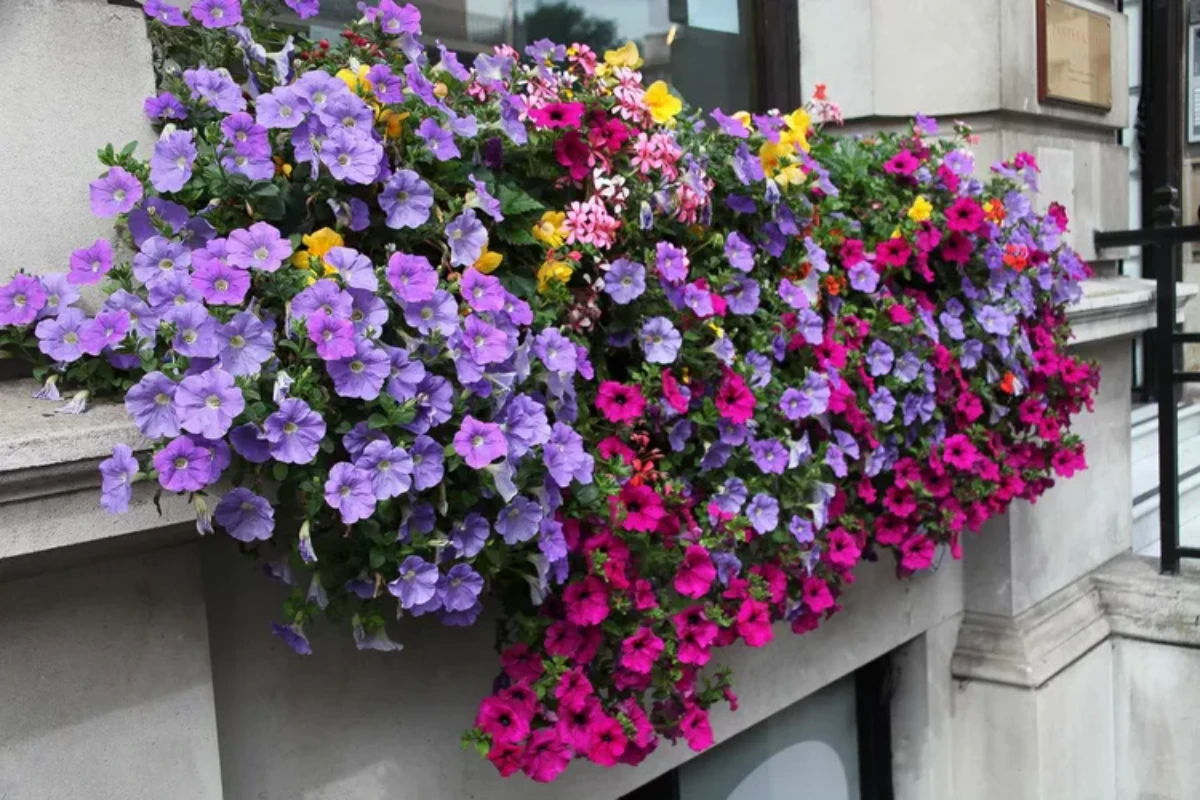
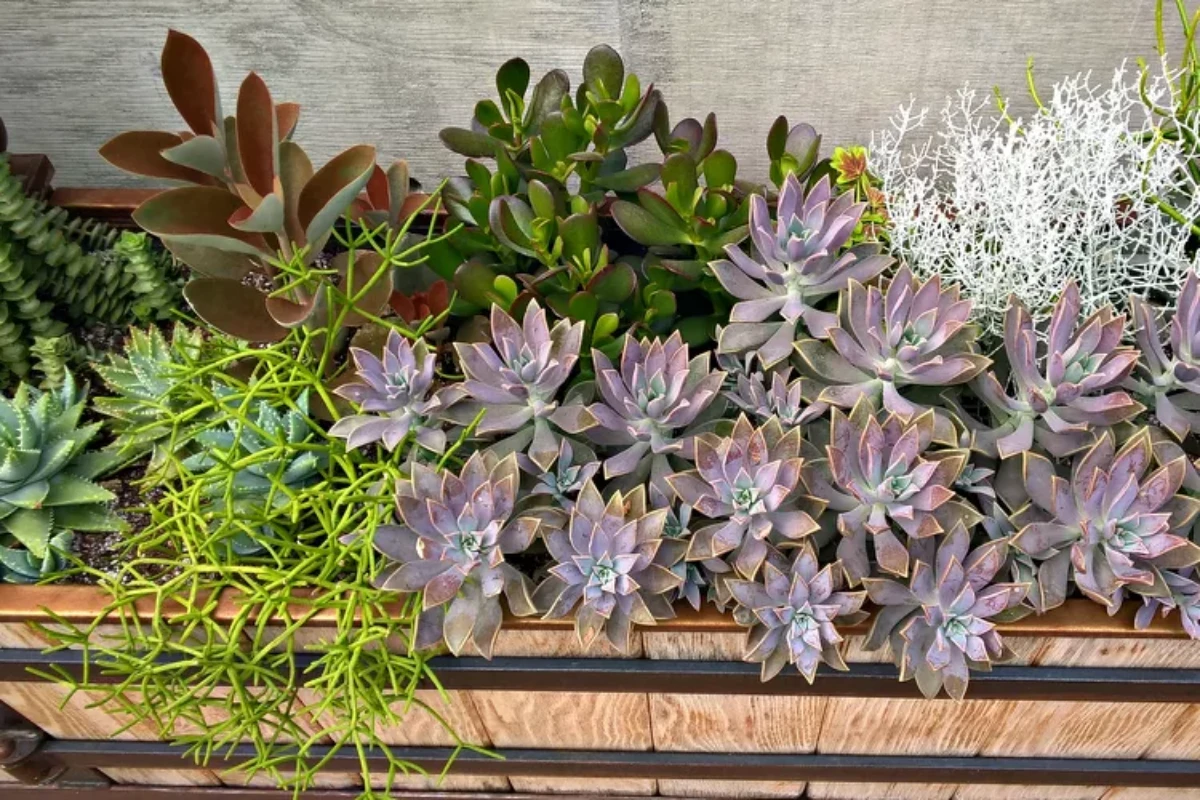
Creating a sophisticated, high-impact look is easy when you stick to a defined color palette. Move beyond just mixing and matching your favorites and try a more intentional approach.
- Monochromatic: Use different shades and tints of a single color for a serene, elegant feel. Imagine a mix of deep purple, lavender, and pale lilac petunias and verbenas.
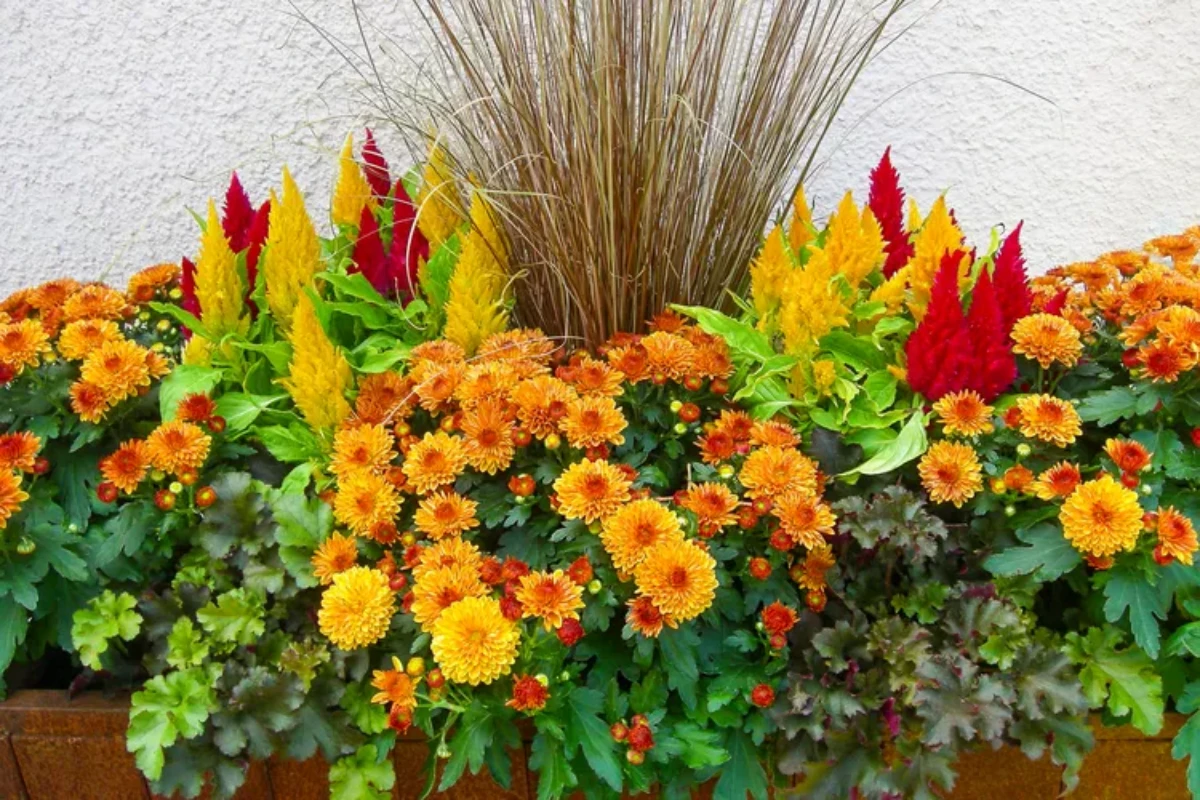
- Analogous: Choose colors that are next to each other on the color wheel, like yellow, orange, and red. This creates a harmonious, fiery sunset effect. Think marigolds, orange calibrachoa, and red salvia.
- Complementary: Pick two colors opposite each other on the color wheel for a bold, vibrant pop. The classic combination of purple and yellow is always a winner.
A lush flower box doesn’t have to break the bank. Instead of buying large, expensive plants, look for smaller “plugs” or 4-packs, which are much cheaper. They may look small at first, but with good soil and regular feeding, fast-growing annuals like coleus, impatiens, and sweet potato vine will fill out a container in just a few weeks. Also, consider starting a few things from seed directly in the box, like nasturtiums, which are incredibly easy and grow rapidly.


