Why Your Windows Still Look Spotty After Rain (And How to Actually Fix It)
I’ve spent more hours than I can count cleaning windows, from simple storefronts to massive custom homes. And in all that time, the number one complaint I hear is about those stubborn, cloudy spots that show up after a good rain. It’s incredibly frustrating. You feel like you just cleaned them, and now they look even worse. People scrub and spray, but the spots just don’t budge.
In this article
- So, Why Does Clean Rain Make Windows So Dirty?
- Setting Yourself Up for Success: The Prep Work Pros Never Skip
- My Go-To Stain Removers (and What to Avoid at All Costs)
- Mastering the Squeegee for a Pro Finish
- When Stains Are Extra Stubborn: What to Do Next
- The Best Long-Term Fix? Prevention.
- Quick Troubleshooting & Final Thoughts
- Inspiration:
Most folks call them hard water stains, which is only half the story. The truth is a bit more interesting, and honestly, understanding what you’re up against is the key to winning the battle. So, I’m going to walk you through what I’ve learned on the job. We’ll get into the simple science behind the spots, the tools that pros actually use, and the techniques that will give you a perfect finish without accidentally damaging your glass. This isn’t magic; it’s just about doing things the right way.
So, Why Does Clean Rain Make Windows So Dirty?
It’s a great question. People assume rainwater is pure, but it’s not. As a raindrop falls, it’s like a tiny magnet for whatever is floating in the air—dust, pollen, and all sorts of pollutants. But that’s not even the main culprit. The real problem is often your own house.
Think about it: that rainwater runs over your siding, drips from the window frames, and streams through your dusty window screens. Along the way, it picks up a whole new payload of gunk. Oxidized particles from painted frames, dirt from your screens, and even minerals like calcium and lime from brick or concrete sills all dissolve into the water. When the sun comes out, the pure water evaporates, but all that dissolved stuff gets left behind. Those are the cloudy mineral deposits you’re seeing.
Basically, you’re not fighting dirt anymore. You’re fighting a chemical deposit that has bonded to the glass surface, which is why regular soap and water don’t stand a chance.
Oh yeah, and a quick pro-tip: Clean your screens before you tackle the glass. Just pop them out, spray them down with a hose, and give them a gentle scrub with a soft brush and some soapy water. Let them air dry while you work on the windows. This single step can make a huge difference.
Setting Yourself Up for Success: The Prep Work Pros Never Skip
A great result is all about the prep. Rushing this part is the fast track to a streaky, frustrating mess. Trust me on this.
First, Pick the Right Day
This is the number one rookie mistake I see. Never, ever clean windows in direct, hot sunlight. The heat from the sun bakes the glass, causing your cleaning solution to evaporate in seconds. This leaves behind a streaky film of soap and minerals. You end up feeling rushed and stressed, and the windows look terrible.
The perfect time for window cleaning is on a cool, overcast day. This gives you plenty of time to work without your solution drying on you. A super windy day can be just as bad as a sunny one, so check the forecast for a calm, cloudy day if you can.
Next, Do a Basic Pre-Wash
You can’t treat the mineral stains if they’re hiding under a layer of loose grime. I always start with a basic wash. I use a bucket of clean water with just a few drops of a quality dish soap, like Dawn. And when I say a few drops, I mean for a standard 3-gallon bucket, literally 2-3 drops. Any more and you’re in streak city.
With a microfiber wash mitt, I give the whole window a good scrub—frames and sills included. Cleaning the frames first stops dirty water from dripping onto your glass later. After that, I’ll squeegee the soapy water off. Now the surface dirt is gone, and you can clearly see the stubborn spots you need to target.

Gathering the Right Gear (It’s Cheaper Than You Think)
Having the right tools makes all the difference. You don’t need to break the bank, but a few quality items will make the job so much easier.
- A Quality Squeegee: This is your most important tool. Forget the cheap ones at the gas station. Head to a janitorial supply store or look online for a pro brand like Ettore or Unger. Expect to pay between $15 and $25 for a good one, and it’s worth every penny. The key is the rubber blade—it needs to be sharp and straight. A 12-inch or 14-inch model is perfect for most homes.
- Microfiber Cloths: You’ll want at least two. A regular, fluffy one for washing, and a special lint-free cloth for the final polish. The pros use something called a “huck towel,” but a good quality, fine-weave microfiber polishing cloth works great too.
- Two Buckets: A simple two-bucket system prevents you from washing your windows with dirty water. One for your soapy solution, and a smaller one for your stain-treating mix.
- Spray Bottle: Just a basic spray bottle for applying your stain remover precisely where you need it.
My Go-To Stain Removers (and What to Avoid at All Costs)
The internet is full of DIY cleaning hacks. Some are great, but some can permanently ruin your windows. Here’s my take after years of trying just about everything.
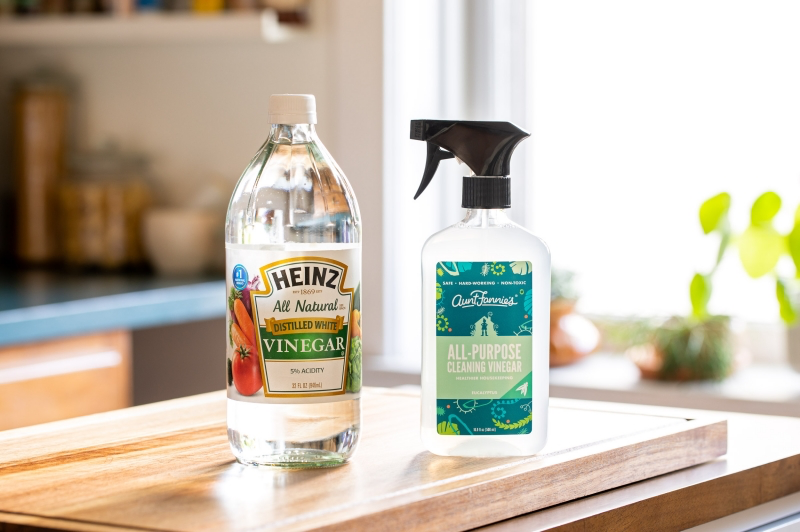
The Hero: White Vinegar and Distilled Water
This is my secret weapon, and it’s probably already in your pantry. White vinegar is a mild acid, and since those mineral deposits are alkaline, the vinegar works to dissolve them chemically. It’s that simple.
My go-to formula couldn’t be easier: mix one part white vinegar with one part distilled water in your spray bottle. And yes, it has to be distilled water. Your tap water is full of minerals, so using it to clean mineral stains is like trying to dry off with a wet towel—you’re just putting more minerals right back on the glass. You can get a gallon of distilled water at any grocery store for about a dollar.
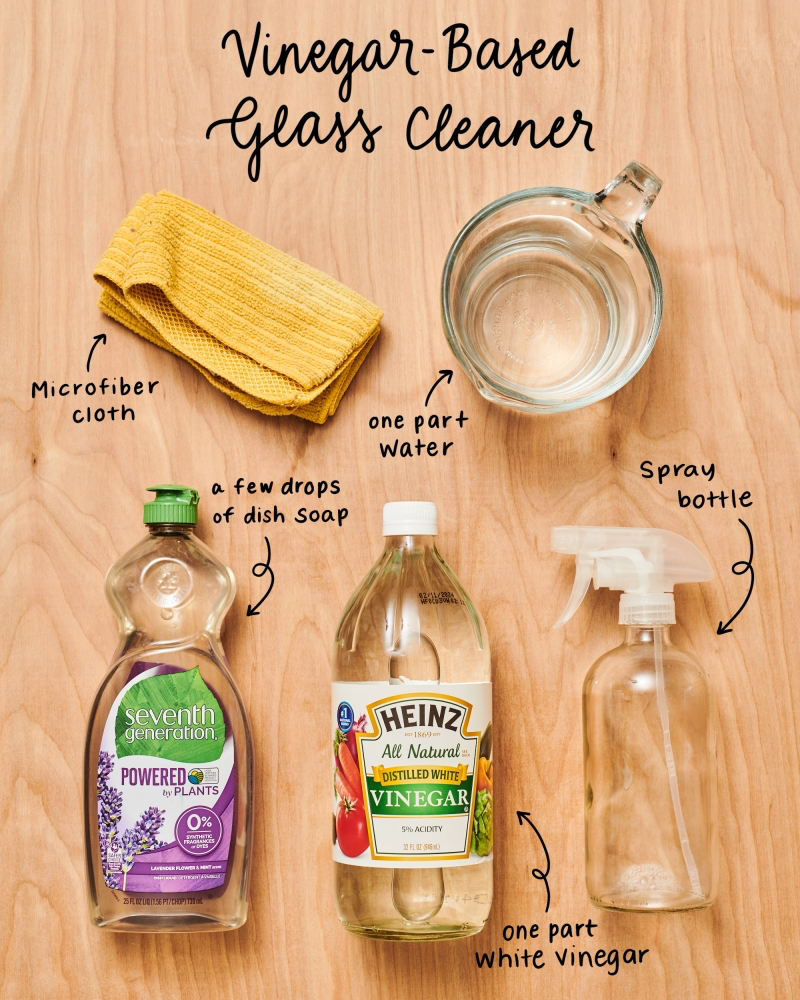
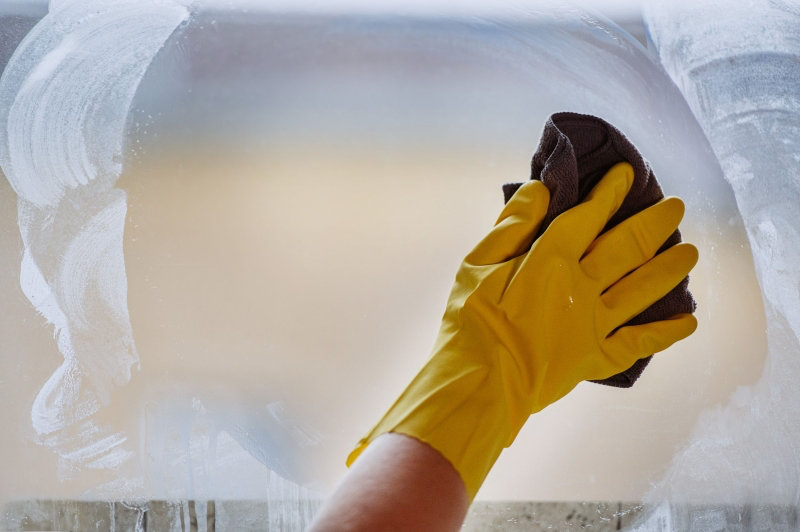
Spray the solution directly onto the stained areas and let it sit for a few minutes. This dwell time is critical. For really tough spots, you can let it sit for up to five minutes, but NEVER let it dry on the glass. After it has worked its magic, you can gently agitate the area with a non-abrasive white scrub pad, then squeegee the window clean.
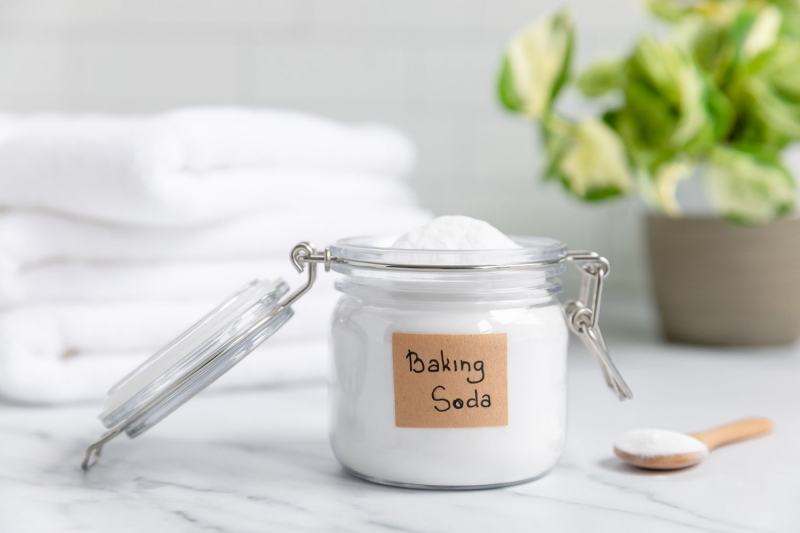
A Word of Warning: Stay Away from Baking Soda
I have to correct a lot of bad online advice here. Please, please do not make a paste of baking soda to scrub your windows. I’ve seen the damage, and it breaks my heart because it’s permanent.
Baking soda is an abrasive. While it feels soft, its tiny crystals will create thousands of micro-scratches on your glass. You might not notice them at first, but when the sun hits that window just right, you’ll see a hazy, swirled mess that you can never clean away. It’s especially damaging to modern windows with delicate Low-E coatings. There are better, safer ways to get scrubbing power.
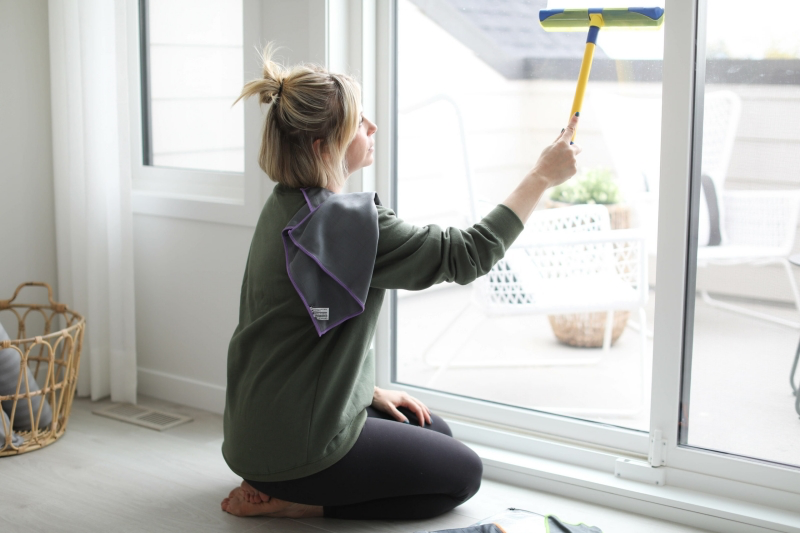
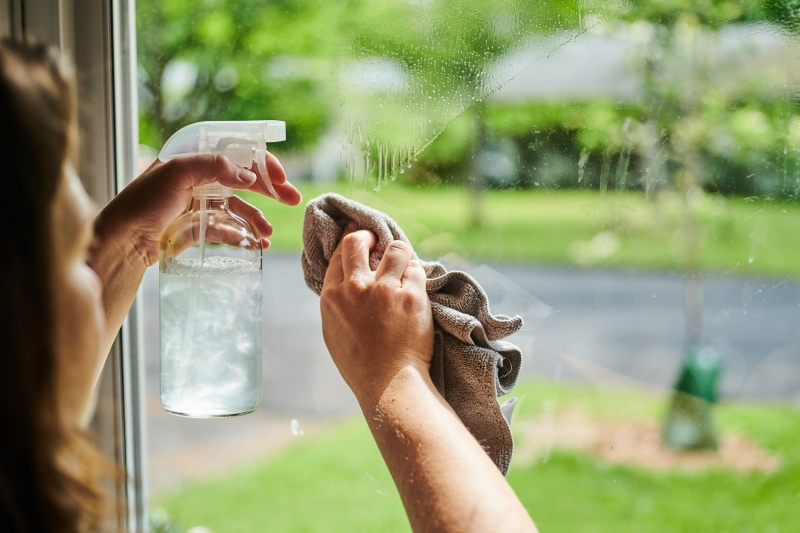
Mastering the Squeegee for a Pro Finish
The squeegee is what separates the amateurs from the pros. The goal is a perfectly dry, streak-free pane of glass. Once you get the hang of it, a standard window should only take you 5-10 minutes from start to finish.
For beginners, the “straight pull” is easiest. Start at the top, angle the squeegee, and pull straight down in one smooth motion. Wipe the blade with your cloth after every single pull. Then, overlap your next pull by about an inch to prevent vertical streaks. The pros use a more fluid S-shaped motion called “fanning,” which is faster but takes some practice.
No matter which method you use, you’ll always have a little water left around the edges. That’s where your lint-free detailing cloth comes in. Just trace around the perimeter of the glass to soak up that last bit of water. This final touch is what really makes it look professional.
When Stains Are Extra Stubborn: What to Do Next
Sometimes, vinegar just isn’t enough. This usually means the problem is more advanced. In the industry, we call this Stage 1 vs. Stage 2 damage.
Stage 1 stains are just sitting on the surface. A good test is to spray water on them—if the stains seem to disappear while wet but come back when dry, that’s a Stage 1 stain. This is good news! It means it’s removable.
Stage 2 corrosion is when the glass itself is etched and pitted. This happens when minerals are left on the glass for years. A Stage 2 stain will still be visible even when the window is wet. Unfortunately, no amount of cleaning will fix this.
For tough Stage 1 stains, you might need to step up to a professional-grade product. A paste-like cleaner such as Bio-Clean Hard Water Stain Remover can work wonders. You can find it online or in some hardware stores for about $20. But heads up: this stuff is serious business. Wear gloves, and always, always test it in an inconspicuous corner first to make sure it’s safe for your glass.
If you suspect you have Stage 2 damage, this is where I build trust with my clients by being honest: it’s time to call a professional who specializes in glass restoration. They use power polishers and special compounds to resurface the glass. It is absolutely not a DIY job—you risk distorting or even cracking the window.
The Best Long-Term Fix? Prevention.
The easiest way to deal with stains is to stop them from happening. After you’ve done a deep clean, I highly recommend applying a hydrophobic glass sealant. You might be thinking, “Can I just use the Rain-X I have for my car?” The short answer is, it’s better not to. Car-specific formulas are designed for tempered auto glass, while residential sealants are formulated for the plate glass in your home and last much longer in a stationary environment. A good one, like the kind from 3-Star or Titan Labs, costs around $20-$30 a bottle and can last for months.

This invisible coating makes water bead up and roll right off, taking the dirt and minerals with it. It makes future cleanings a breeze.
Quick Troubleshooting & Final Thoughts
Let’s end with a quick FAQ for when things go wrong.
- Help, I still have streaks! Nine times out of ten, your squeegee blade is nicked or dirty, you used way too much soap, or your cleaning solution dried on the glass. Try a fresh blade and use less soap.
- My vinegar mix isn’t working! Be patient. Let it dwell on the glass for the full 5 minutes (don’t let it dry!). If that fails, gently scrub with a non-abrasive white pad before you squeegee. If that still doesn’t work, it may be time for a professional-grade paste.
- When should I just call a pro? If you have Stage 2 damage, if you’re not comfortable on a ladder for second-story windows, or if you simply decide your time is more valuable. There’s no shame in it!
At the end of the day, cleaning these stains is about using a little bit of science and the right technique. Be patient with yourself, enjoy the satisfaction of a crystal-clear view, and always be safe. No clean window is worth an injury.
Inspiration:

Beyond the simple cloth and spray bottle, a professional’s toolkit makes all the difference in tackling stubborn mineral deposits. Investing in a few key items elevates your cleaning game from amateur to flawless.
- A High-Quality Squeegee: Look for brands like Ettore or Unger. A sharp, flexible rubber blade is crucial for a streak-free finish. Replace the blade as soon as it gets nicked.
- Grade #0000 Steel Wool: It sounds scary, but this ultra-fine steel wool is a pro secret. Used wet on a small, stubborn spot, it can gently abrade mineral buildup without scratching the glass. Always test on an inconspicuous corner first!
- A Specialized Cleaner: For severe staining, a consumer-grade product like Bio-Clean Hard Water Stain Remover can dissolve what soap and vinegar can’t.
Did you know? Glass is technically a liquid that flows very, very slowly. Its surface is also porous, which is why mineral deposits can get such a stubborn foothold over time.
This is why aggressive scrubbing with the wrong pad can cause micro-scratches, permanently clouding the glass. The goal isn’t to scrape the minerals off by force, but to use a chemical reaction (like a mild acid or a specific cleaning compound) to dissolve the bond between the mineral and the glass surface.


