Orange Chrome Nails: The Pro Secrets for a Perfect Mirror Finish
I’ve been a nail tech for a long, long time, and I’ve seen trends explode onto the scene and then fizzle out just as fast. But chrome? Chrome is different. It has some serious staying power. I still remember the first time a client came in with a tiny pot of shimmering powder, asking for a true mirror look that gel polish just couldn’t deliver. We fumbled through it together, learning on the fly. Now, it’s a standard service, but getting it perfect is still a true art form.
In this article
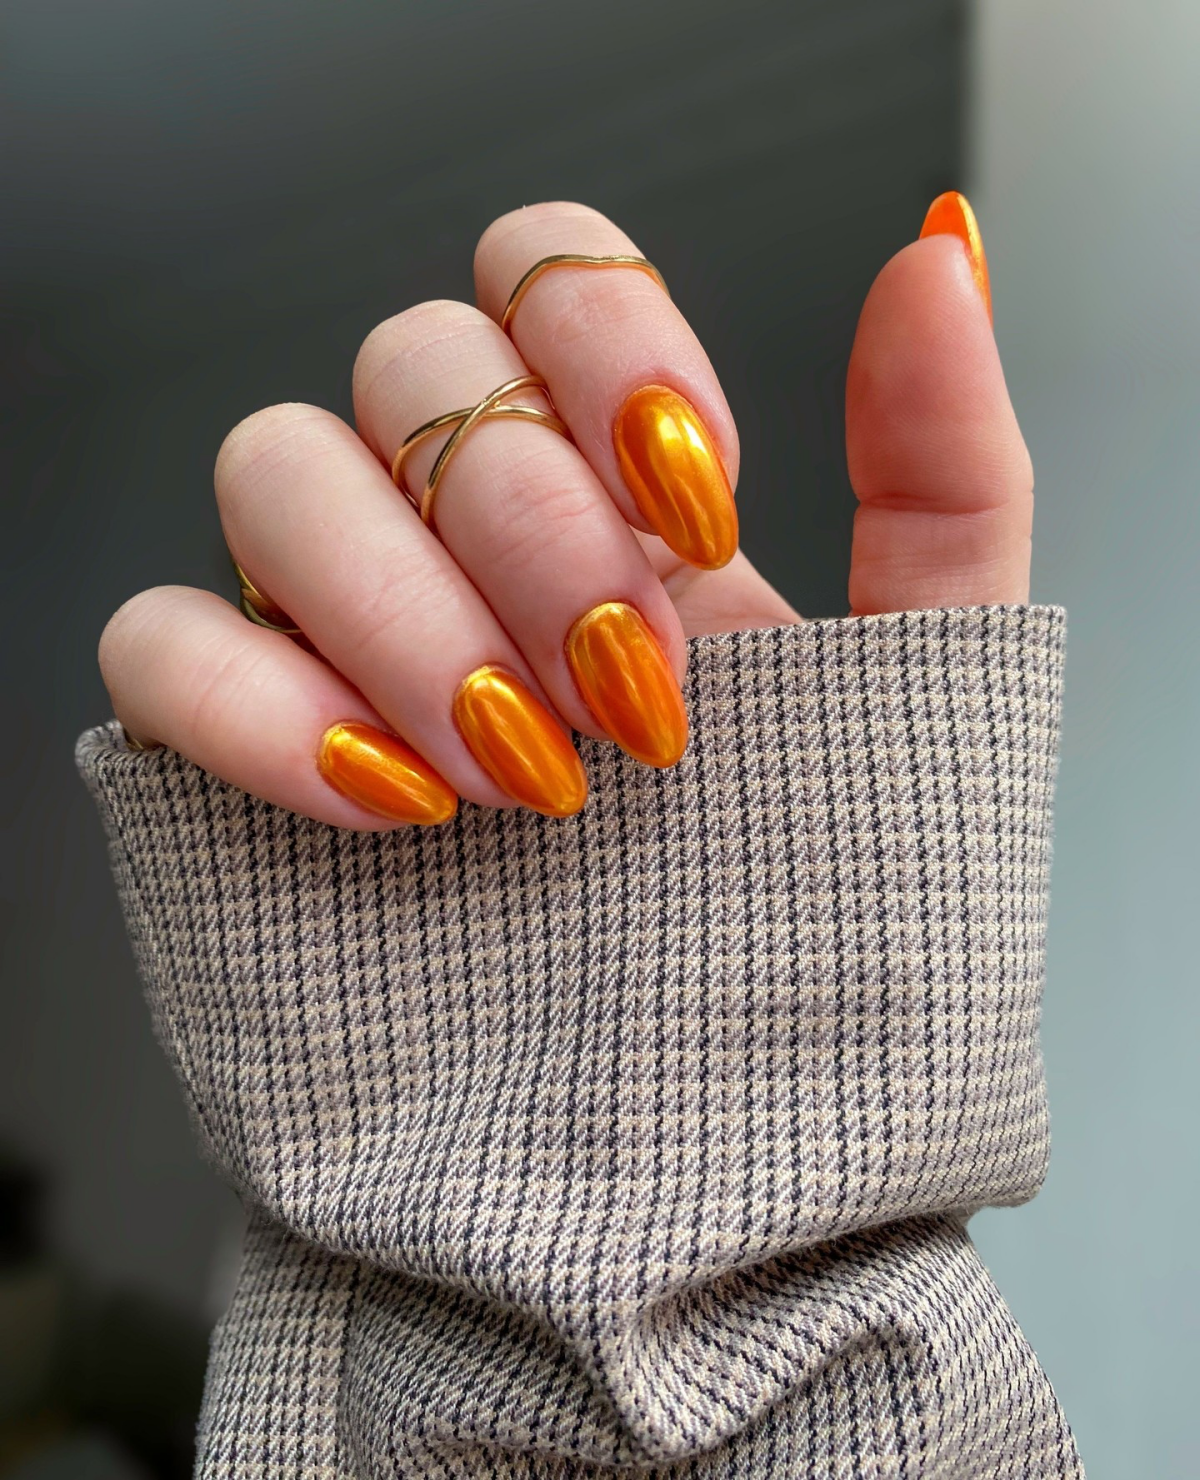
And let’s talk about orange chrome specifically. It’s a special kind of magic. Depending on what you do, it can be a fiery, molten-metal orange or a bright, electric tangerine. The secret is that its final look is hugely influenced by the base color you put underneath. This guide is basically a brain dump of everything I’ve learned from my salon chair—the science, the step-by-step process, and all the little tricks that make a huge difference.
So, How Does Chrome Powder Actually Work?
First things first, let’s get one thing straight: chrome powder is NOT glitter. Not even close. It’s made of unbelievably fine, microscopic flakes, usually aluminum-based, that are designed to lie perfectly flat. When you get them all lined up on a smooth surface, they reflect light uniformly, creating that insane mirror effect. But if the surface is bumpy or the flakes are jumbled? The light scatters, and you get a dull, shimmery look instead of a true chrome.
The key to making this work is the surface you apply it to. This is why a no-wipe gel top coat is absolutely non-negotiable. Your typical gel top coat cures with a sticky, tacky layer. That’s great for helping another layer of polish stick, but it’s a total disaster for chrome. The powder would just clump into a gritty mess. A no-wipe top coat, on the other hand, cures completely dry and smooth, creating a perfect, glass-like canvas. It’s this slick surface that lets you buff—or “burnish”—the powder into a flawless, reflective sheet.
Your Shopping List: The Right Tools and Materials
Honestly, trying to skimp on materials here is a recipe for frustration. Using the right stuff is the foundation for a good result. Here’s what I keep stocked at my station.
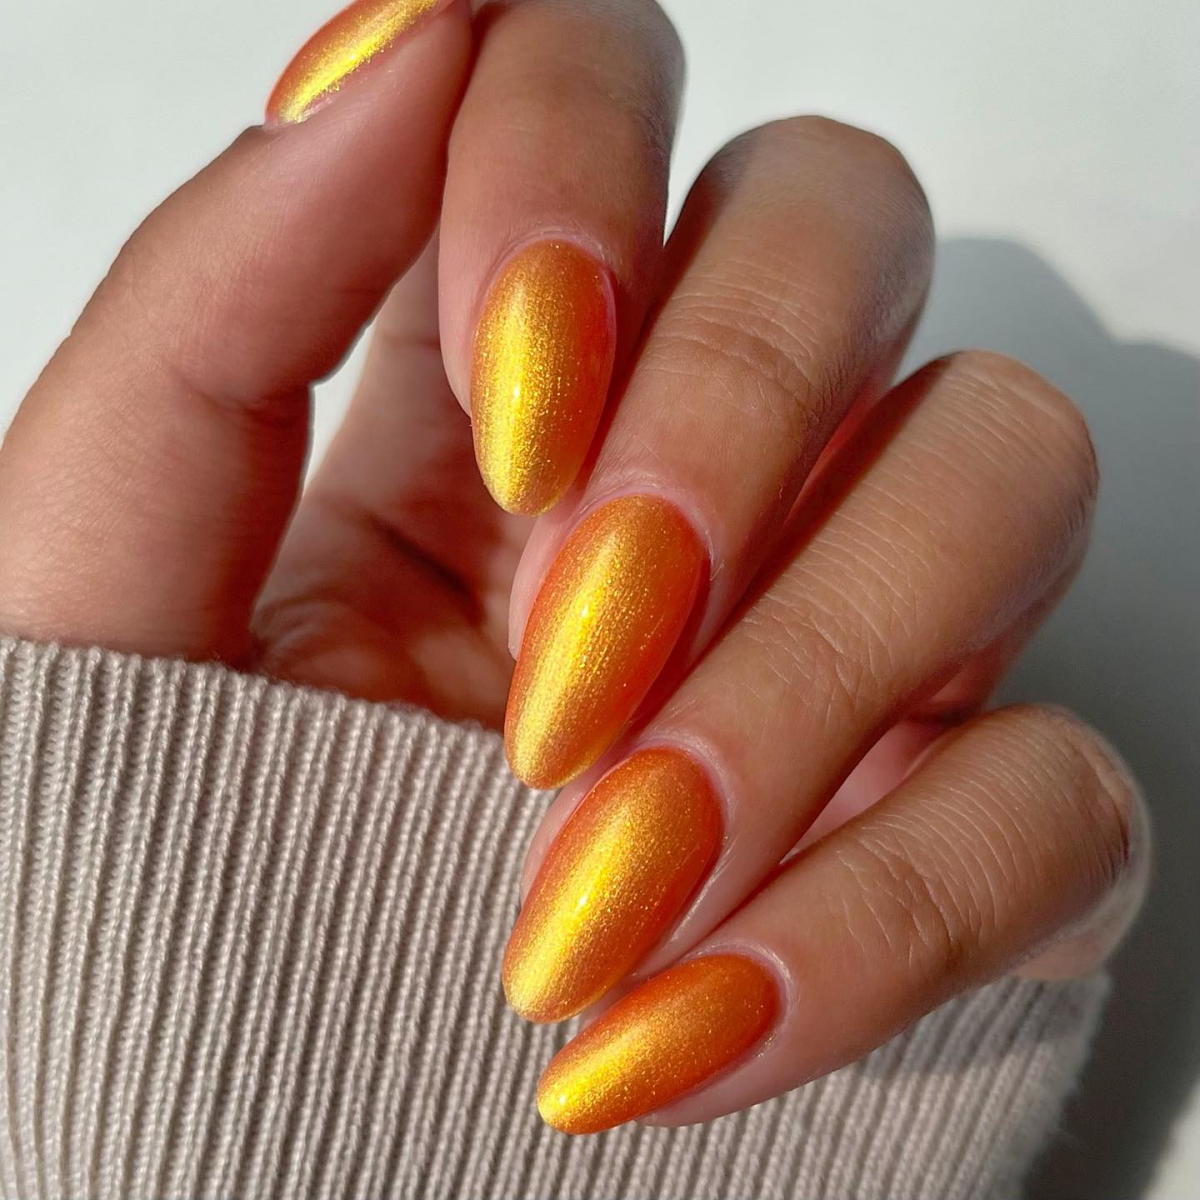
For the actual products, you’ll need a pH bonder or dehydrator to prep the nail, a quality gel base coat, and your base color gel polish. The base color is a big decision! Black is the industry standard for that deep, molten metal vibe. A white base will give you a brighter, almost creamsicle orange. And using a matching orange base? That creates the most vibrant, intense result you can imagine.
Of course, you need the orange chrome powder itself. Quality really matters here. I’ve had consistently great results with powders from brands like Daily Charme or Wildflowers. They usually run about $15 to $25 for a small pot, but that pot will last you forever. Cheaper powders I’ve tested often look gritty. And most importantly, you need a no-wipe gel top coat. I can’t stress this enough—don’t even try it with a regular one.
For tools, a good UV/LED lamp of at least 48 watts is a must for ensuring a proper cure. My favorite tool for applying the powder is a little silicone applicator. It has a flexible tip that doesn’t absorb powder, giving you a smoother finish. A simple sponge eyeshadow applicator works too, but it soaks up product and can sometimes break down. You’ll also want a super soft, fluffy brush (like a makeup blending brush) to gently dust off the excess without scratching your hard work.
Quick tip: Always work on a disposable paper towel or mat. That chrome powder is finer than dust and gets EVERYWHERE. This will make your cleanup about a thousand times easier.
My Step-by-Step Guide to Flawless Chrome
Ready to get started? A full set of chrome nails, done right, will probably take you about 90 minutes to two hours, so put on some music and settle in. Follow these steps, and don’t rush—every detail counts.
Step 1: Prep Like a Pro
The chrome finish will magnify every single flaw. Start with perfect prep. Gently handle the cuticles, shape the nail, and then lightly buff the nail surface with a fine-grit buffer to remove the shine. Cleanse the nail with isopropyl alcohol on a lint-free wipe to get rid of every trace of dust and oil.
Step 2: Apply Your Foundation
Apply a thin, even layer of your gel base coat, making sure to cap the free edge to prevent chipping. Cure it for the full time recommended by the manufacturer (usually 30-60 seconds).
Step 3: Build Your Base Color
Now for your color. Let’s say you’re using black for that fiery look. Apply one thin coat and cure it fully. A common mistake is applying the polish too thick, which causes it to wrinkle. Apply a second thin coat for opaque coverage and cure that one completely, too.
Step 4: The All-Important Top Coat Cure
Okay, this is the step that separates the pros from the amateurs. Apply a thin, smooth layer of your no-wipe top coat. Now, the curing time is critical. If you cure it for the full 60 seconds, the surface can become too hard and slick for the powder to stick. But if you under-cure it, it’ll be a clumpy mess.
From my experience, the sweet spot is often a flash cure of about 15-30 seconds in a 48w lamp. It’s just enough to set the gel so it’s not wet, but it stays receptive to the powder. Heads up! You HAVE to experiment with your specific lamp and top coat, as times can vary. Start with 15 seconds and see how it feels.
Step 5: Burnish to a Mirror Shine
Immediately after curing, dip your silicone applicator into the chrome powder—a little goes a long way! Gently but firmly rub the powder onto the nail. Think of it like you’re polishing a silver trophy. You need to use firm, back-and-forth motions to flatten those microscopic flakes until the surface transforms from a shimmery powder to a smooth, solid mirror. Once the whole nail is covered and reflective, you’re golden.
Step 6: Seal the Deal
Using your soft, fluffy brush, gently dust off all the excess powder. Be delicate here! Then, to protect the finish, apply one more thin layer of your no-wipe top coat, making sure to cap the free edge again. Do a full cure on this final layer (e.g., 60 seconds) to ensure it’s rock solid.
Help! What Went Wrong? (Common Fixes)
Even pros have off days. If your chrome isn’t looking right, here are a few common culprits:
- It looks like glitter, not a mirror. This is the most common issue. It almost always means your no-wipe top coat was either under-cured (making it grab the powder in clumps) or over-cured (making it too slick to grab anything). Try adjusting your flash cure time by 5-second increments. It could also mean you didn’t burnish firmly enough.
- It’s scratching or chipping easily. You either missed a spot when dusting off the excess powder before the final top coat, or you didn’t cap the free edge properly with that final coat. You have to completely seal in the chrome layer.
- There are tiny specks or scratches in the finish. This could be from dust landing on the nail before you applied the chrome, or from using a brush that was too stiff to dust off the excess. Cleanliness is key!
By the way, when it’s time to take them off, the removal process is basically the same as for any other gel manicure. You’ll just need to file through the top coat and the chrome layer before soaking in acetone. It doesn’t make removal significantly harder, which is great news.
Galerie d’inspiration
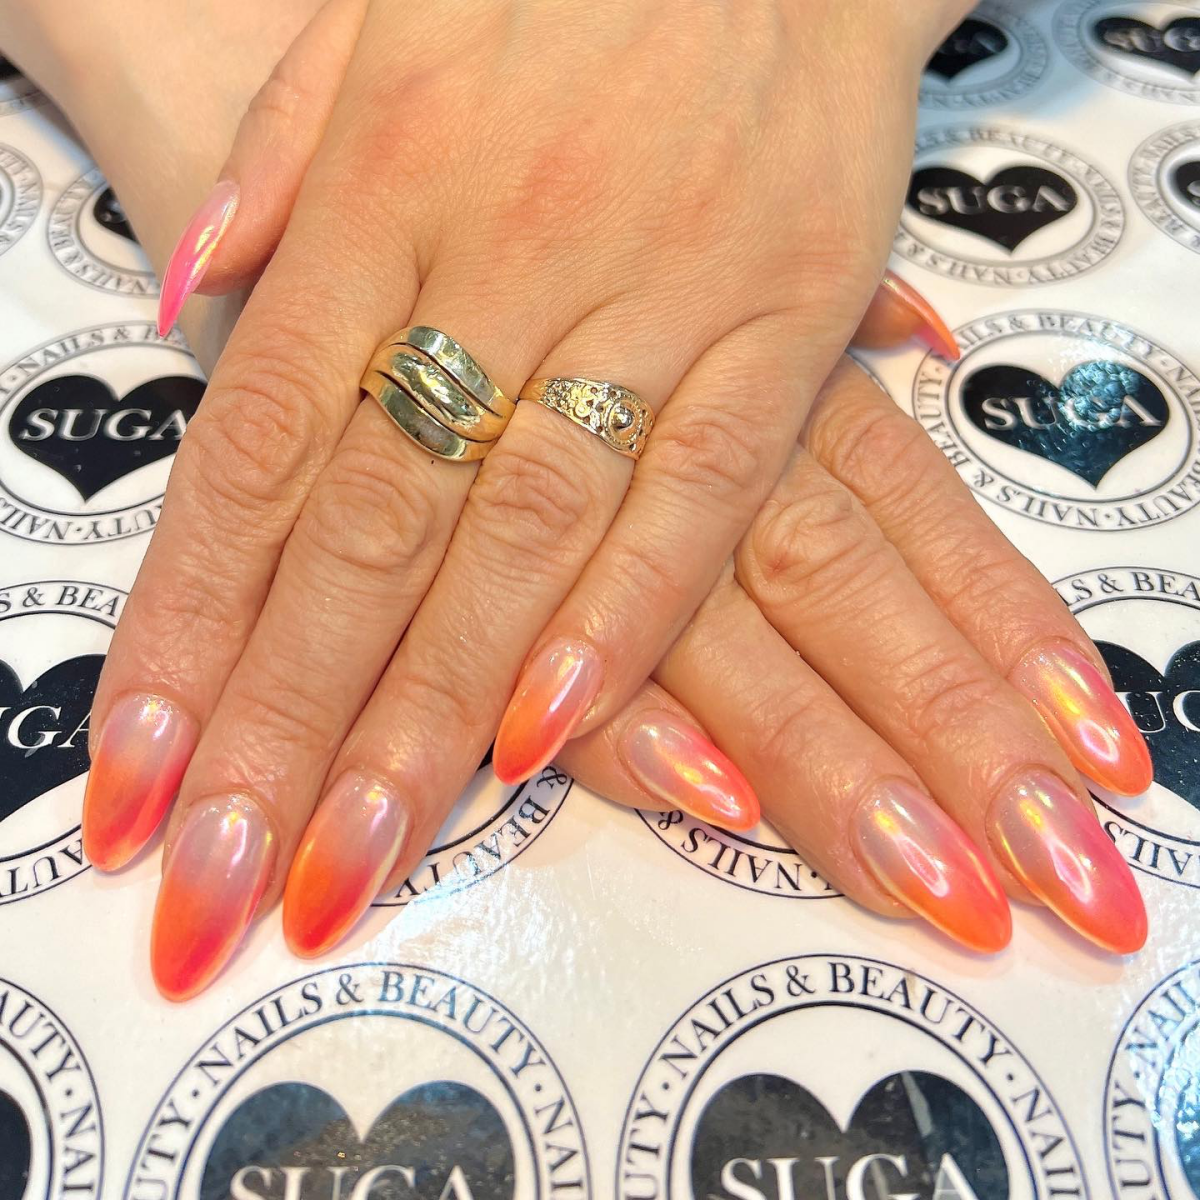
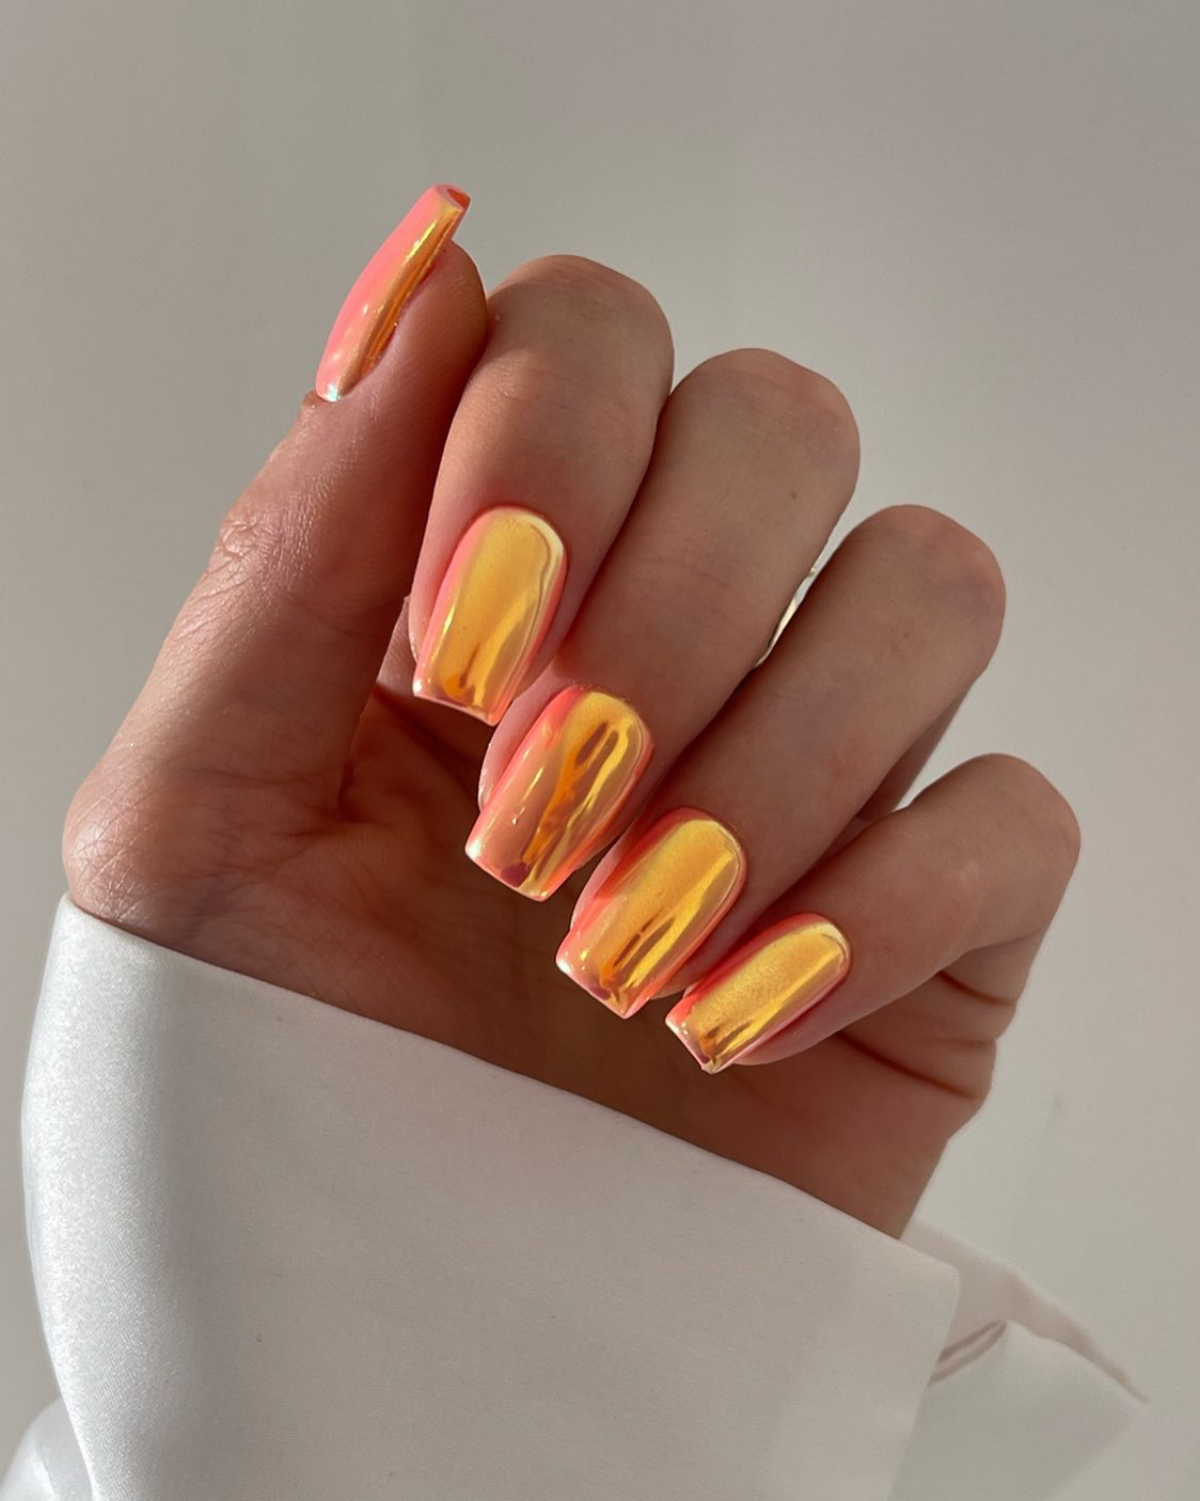
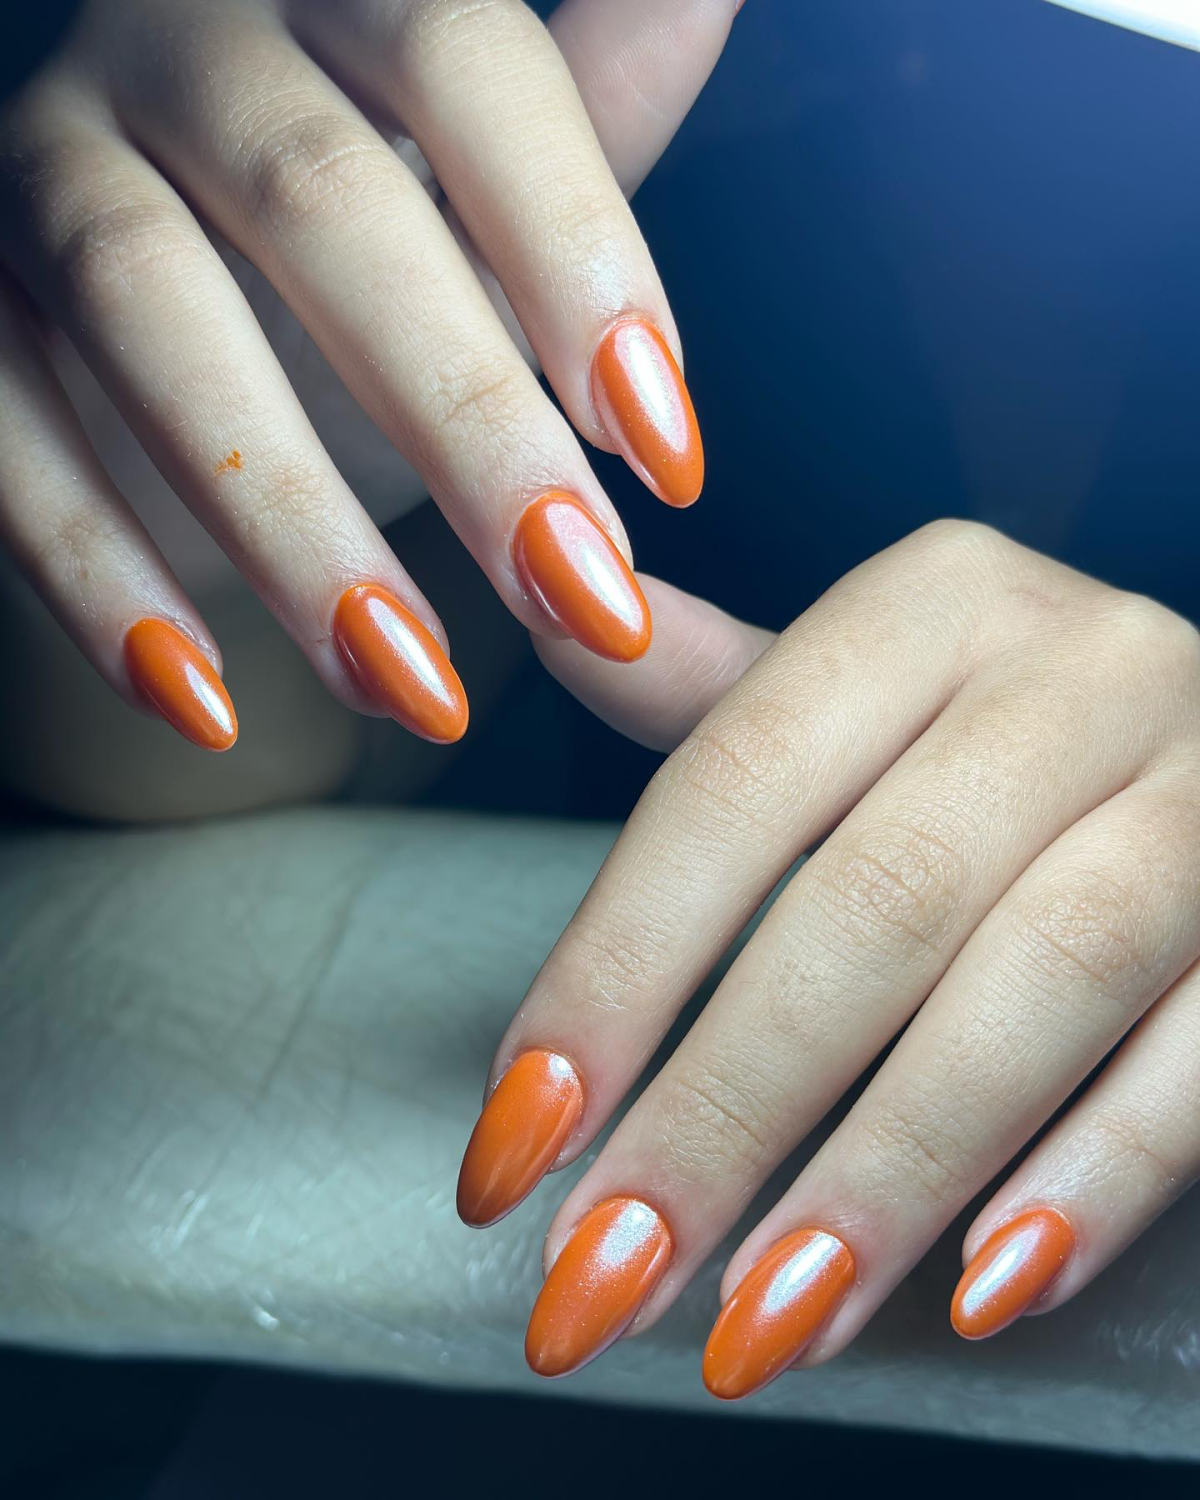
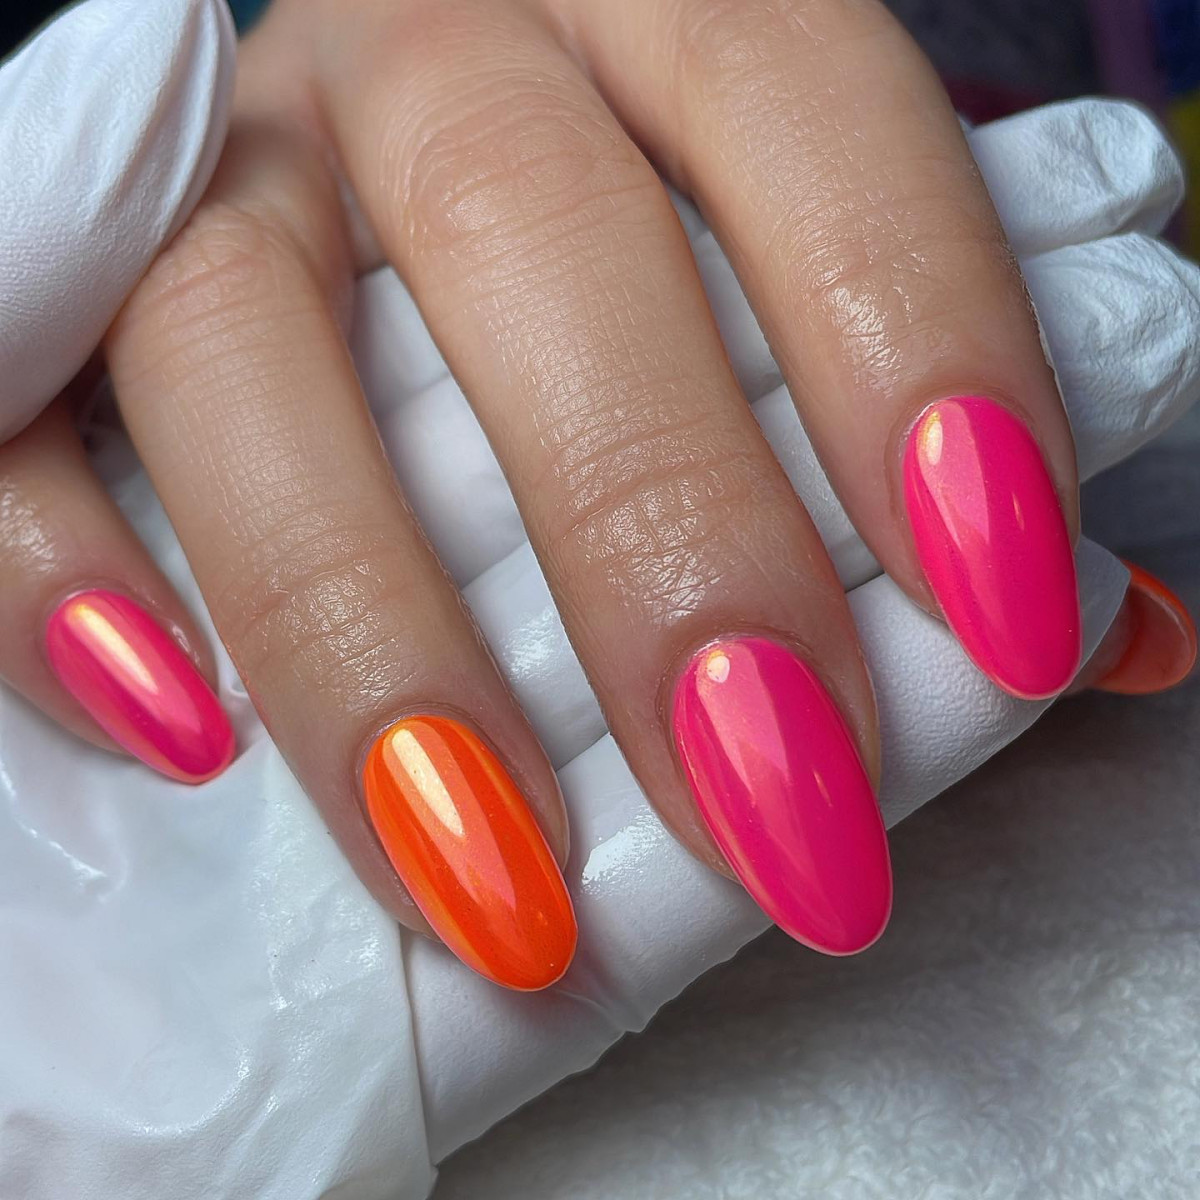
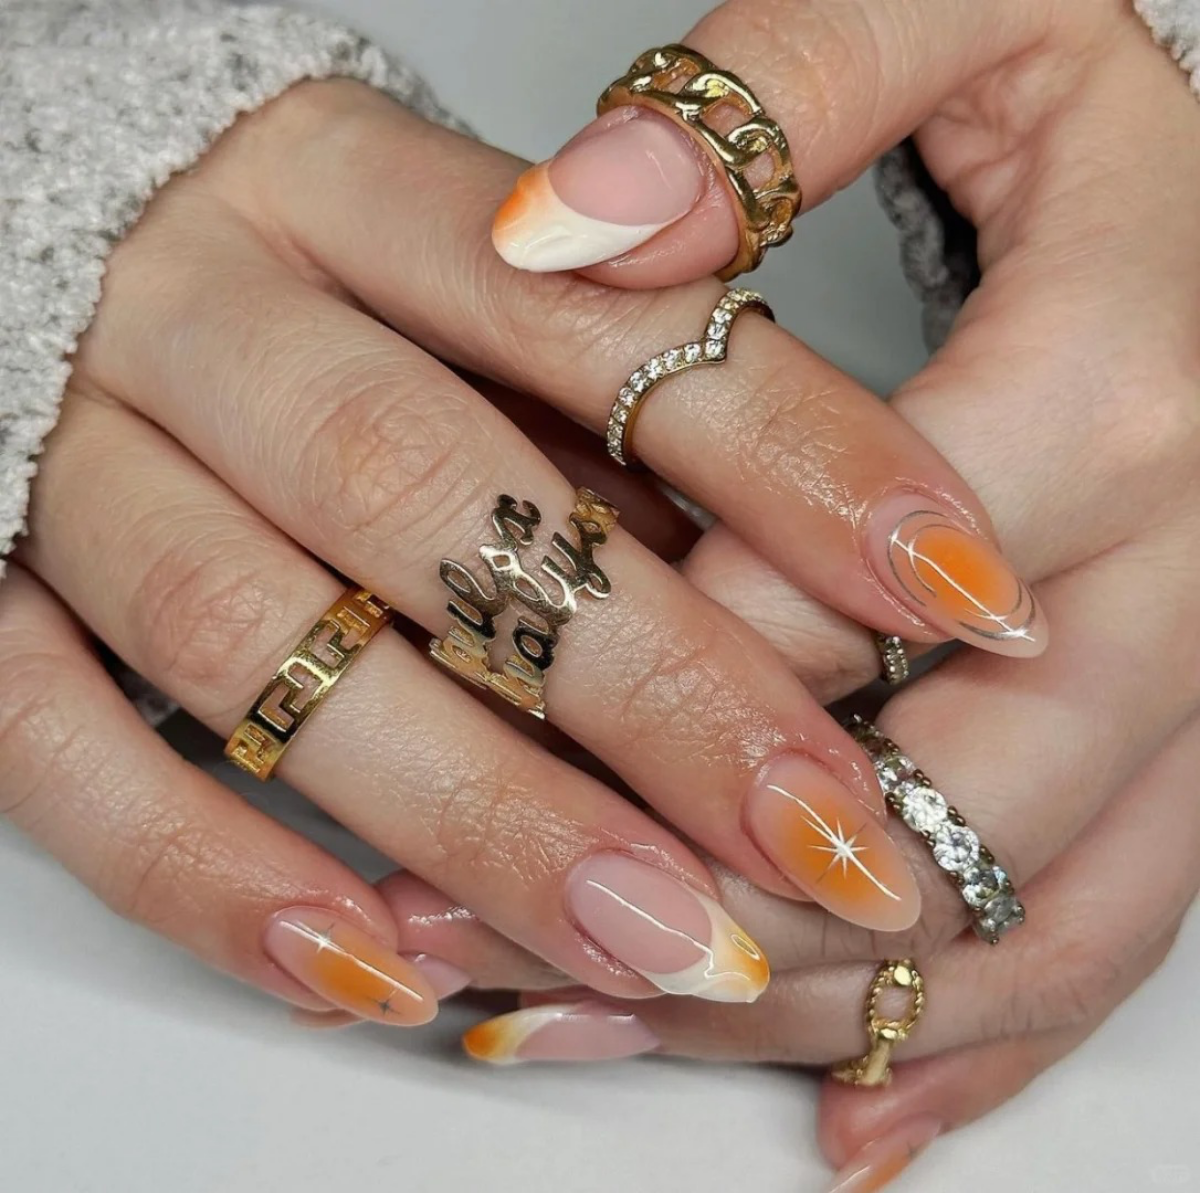
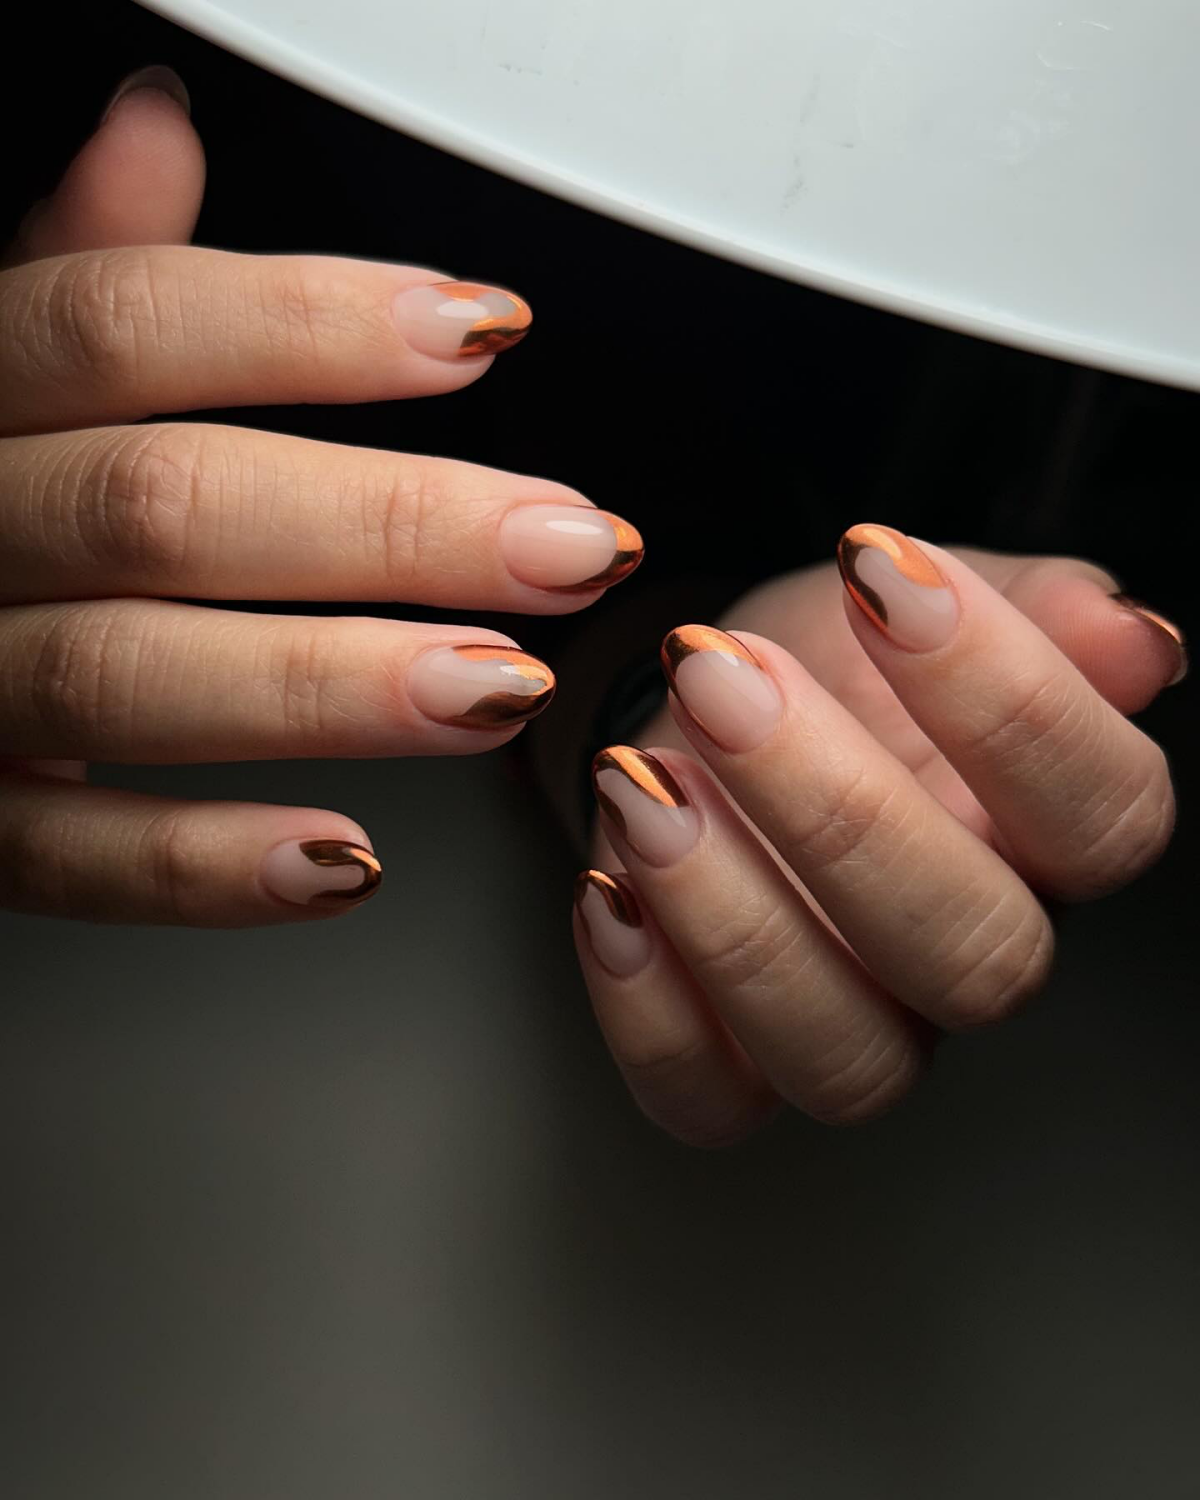
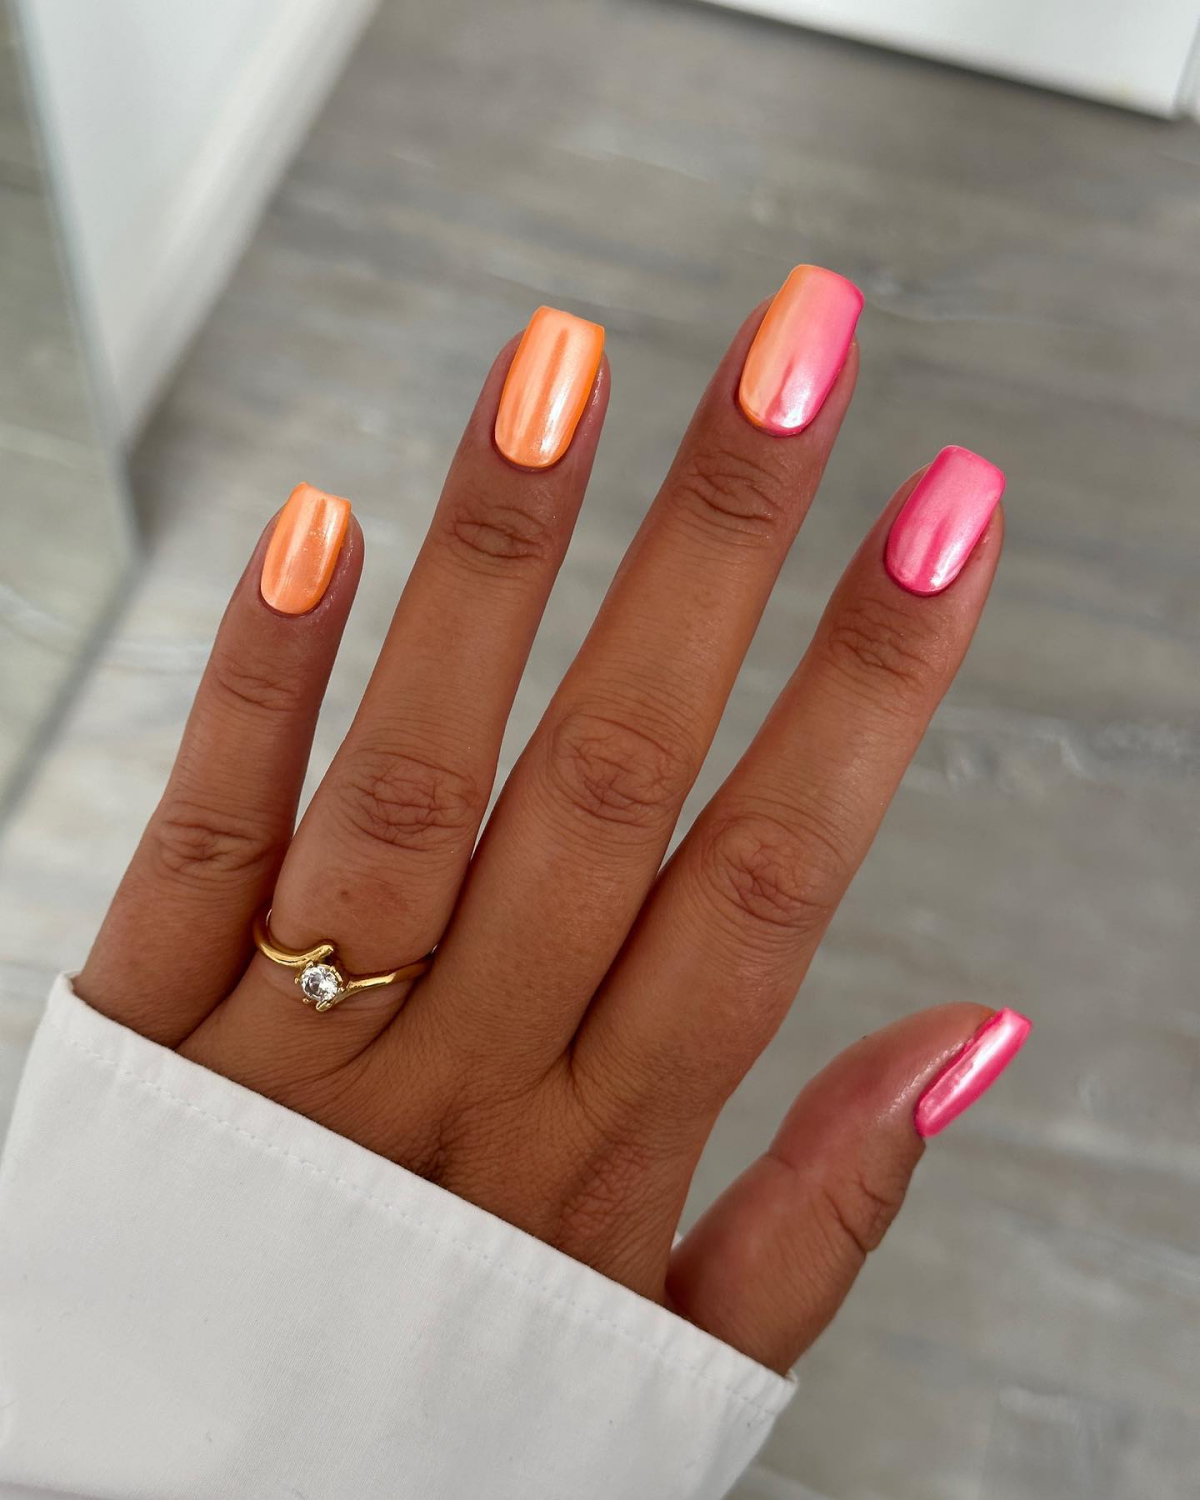
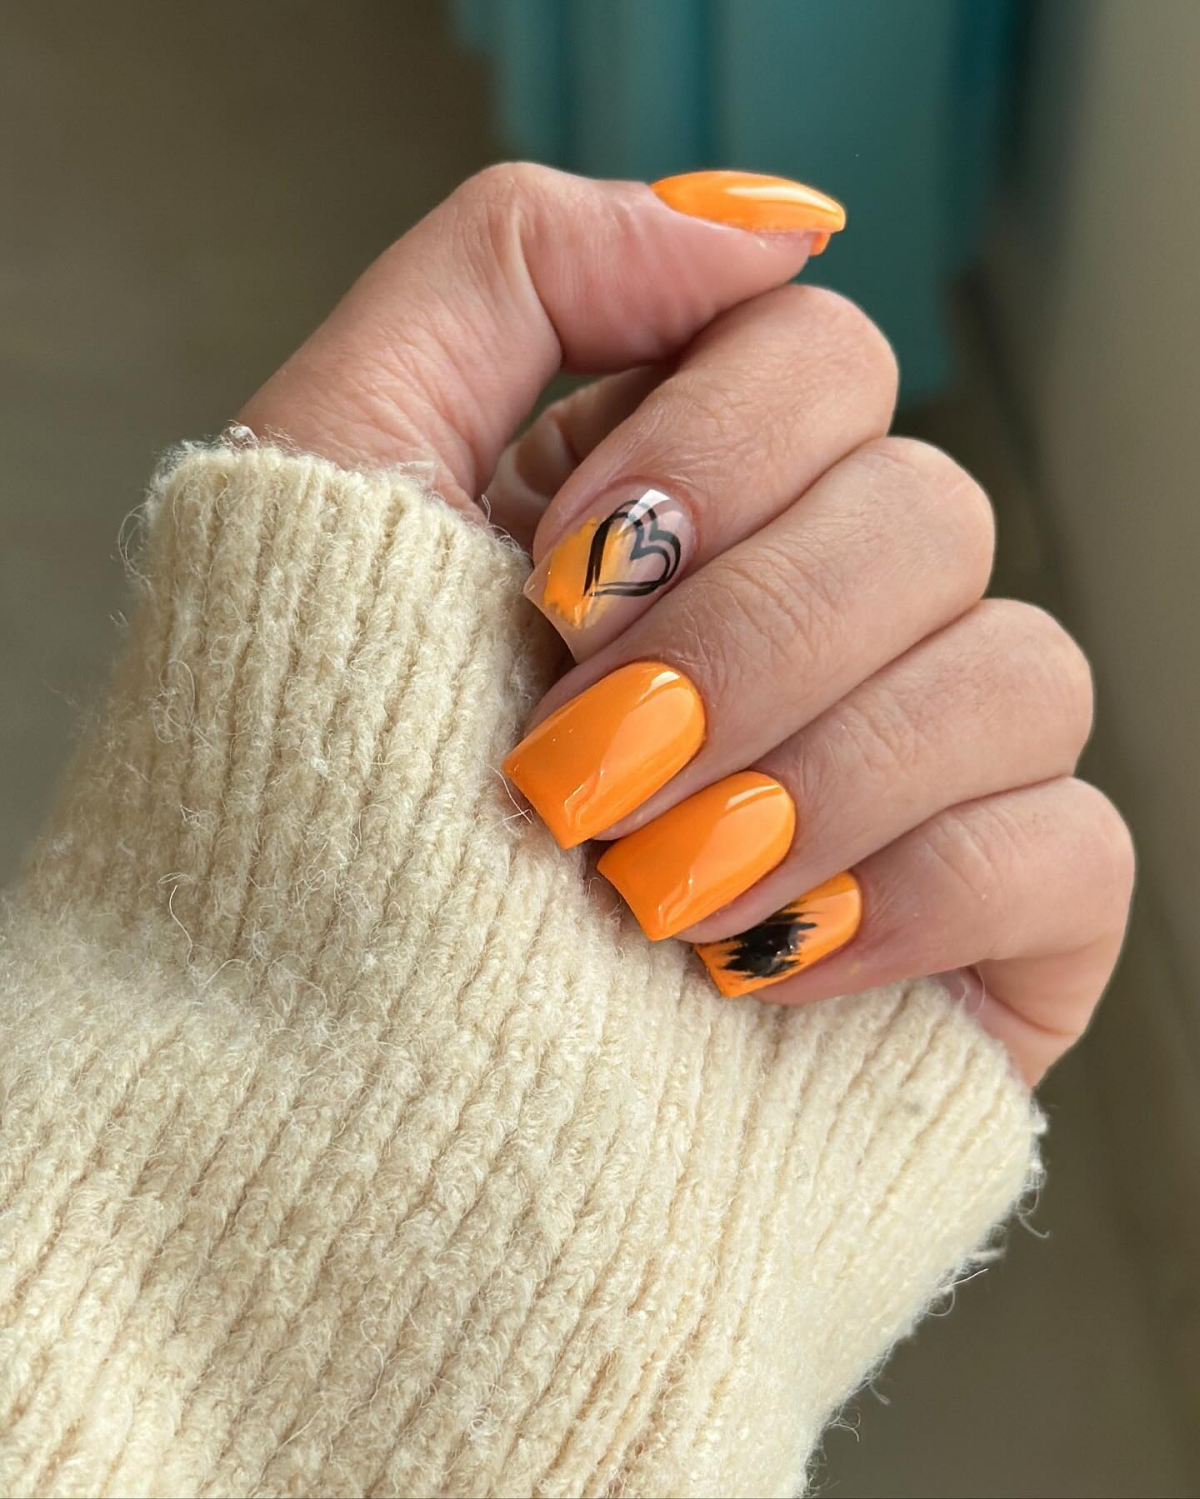
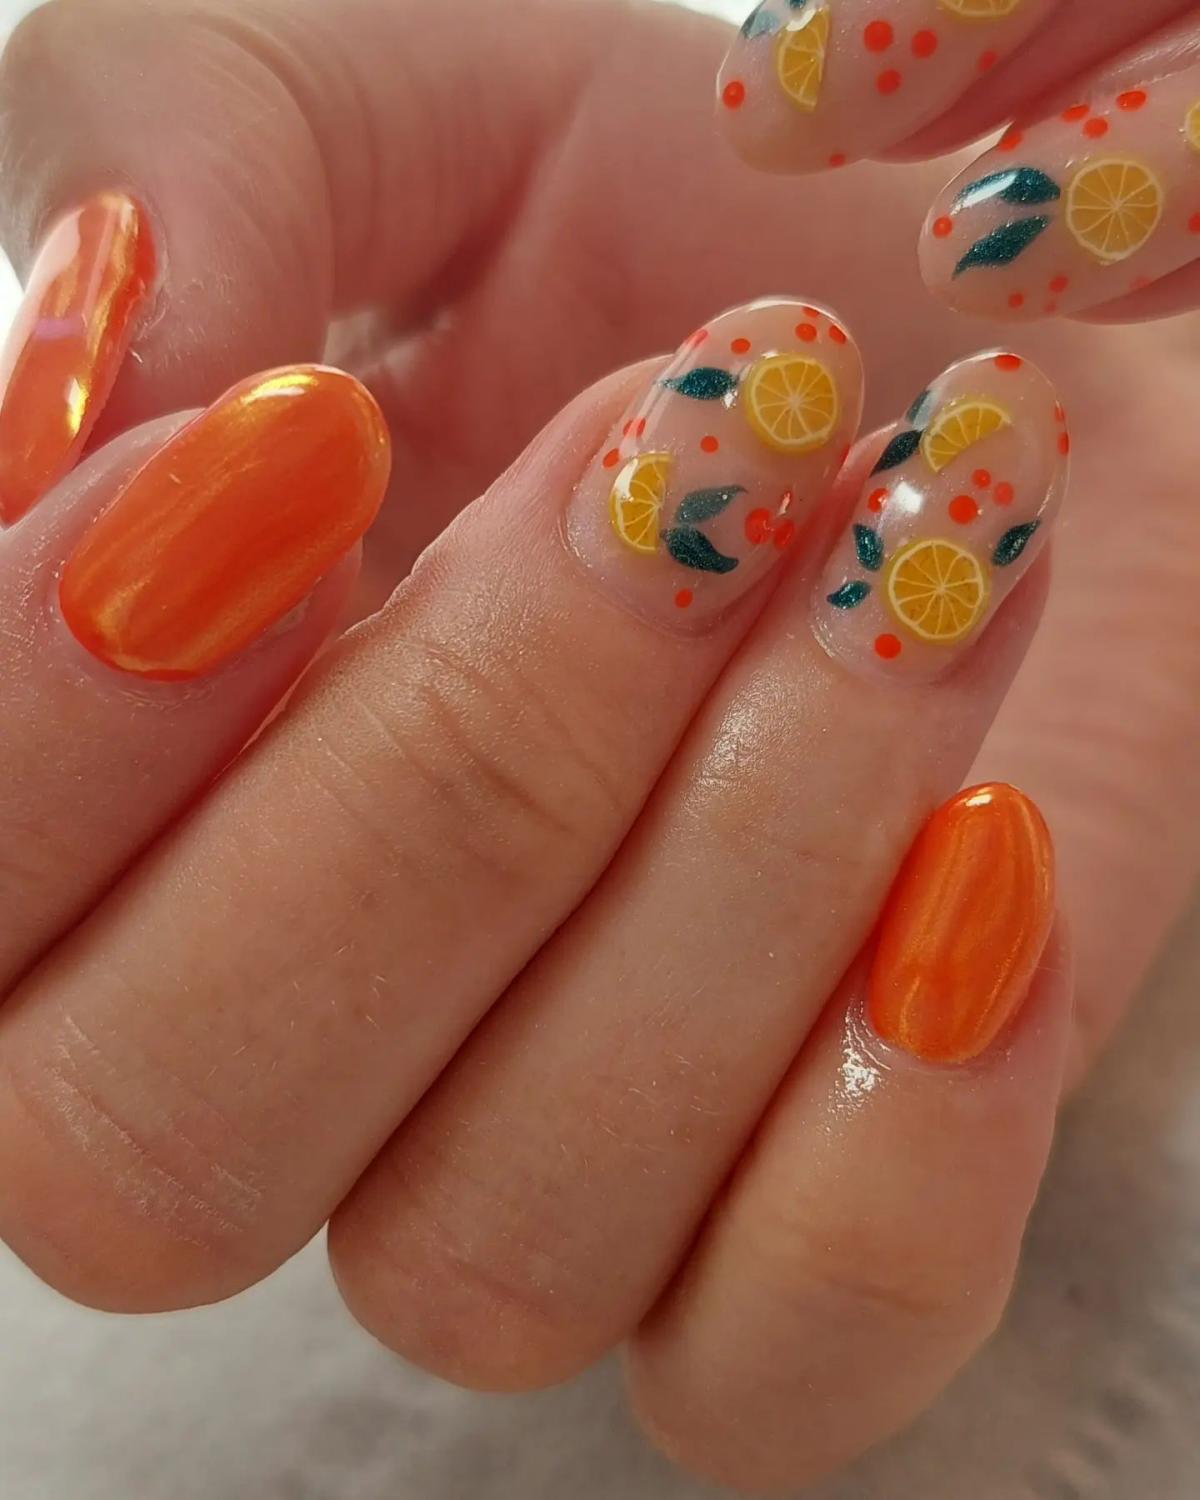
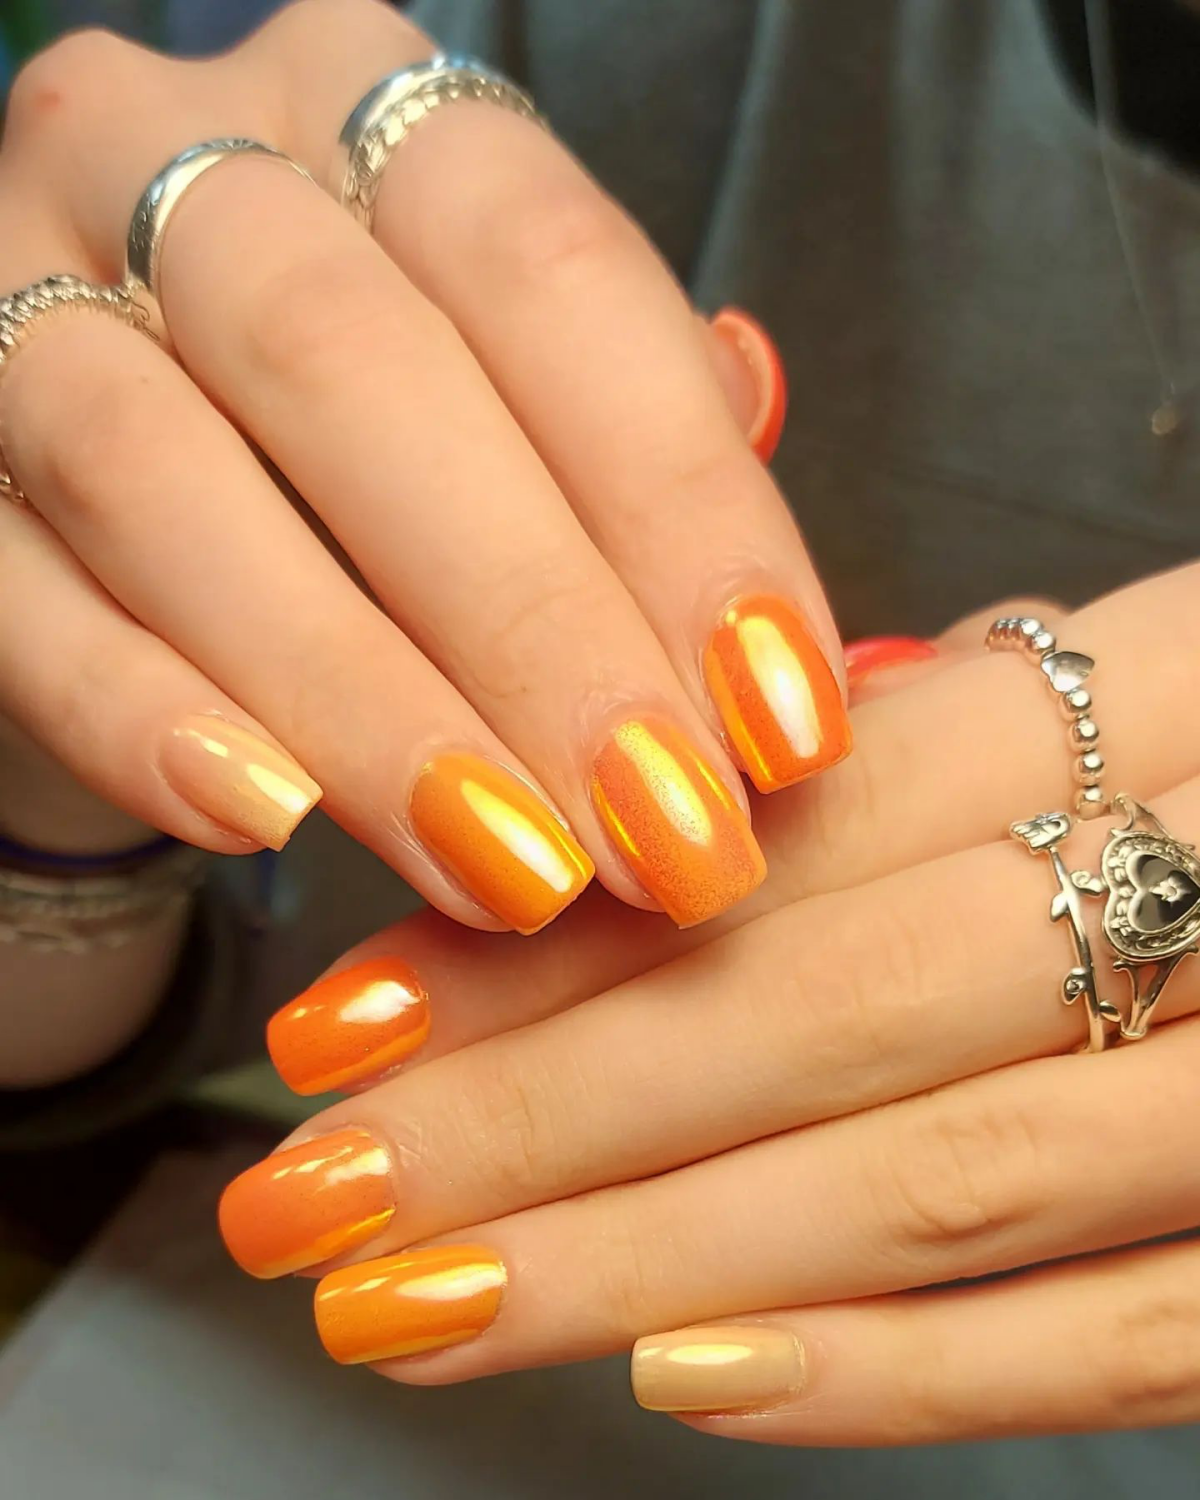
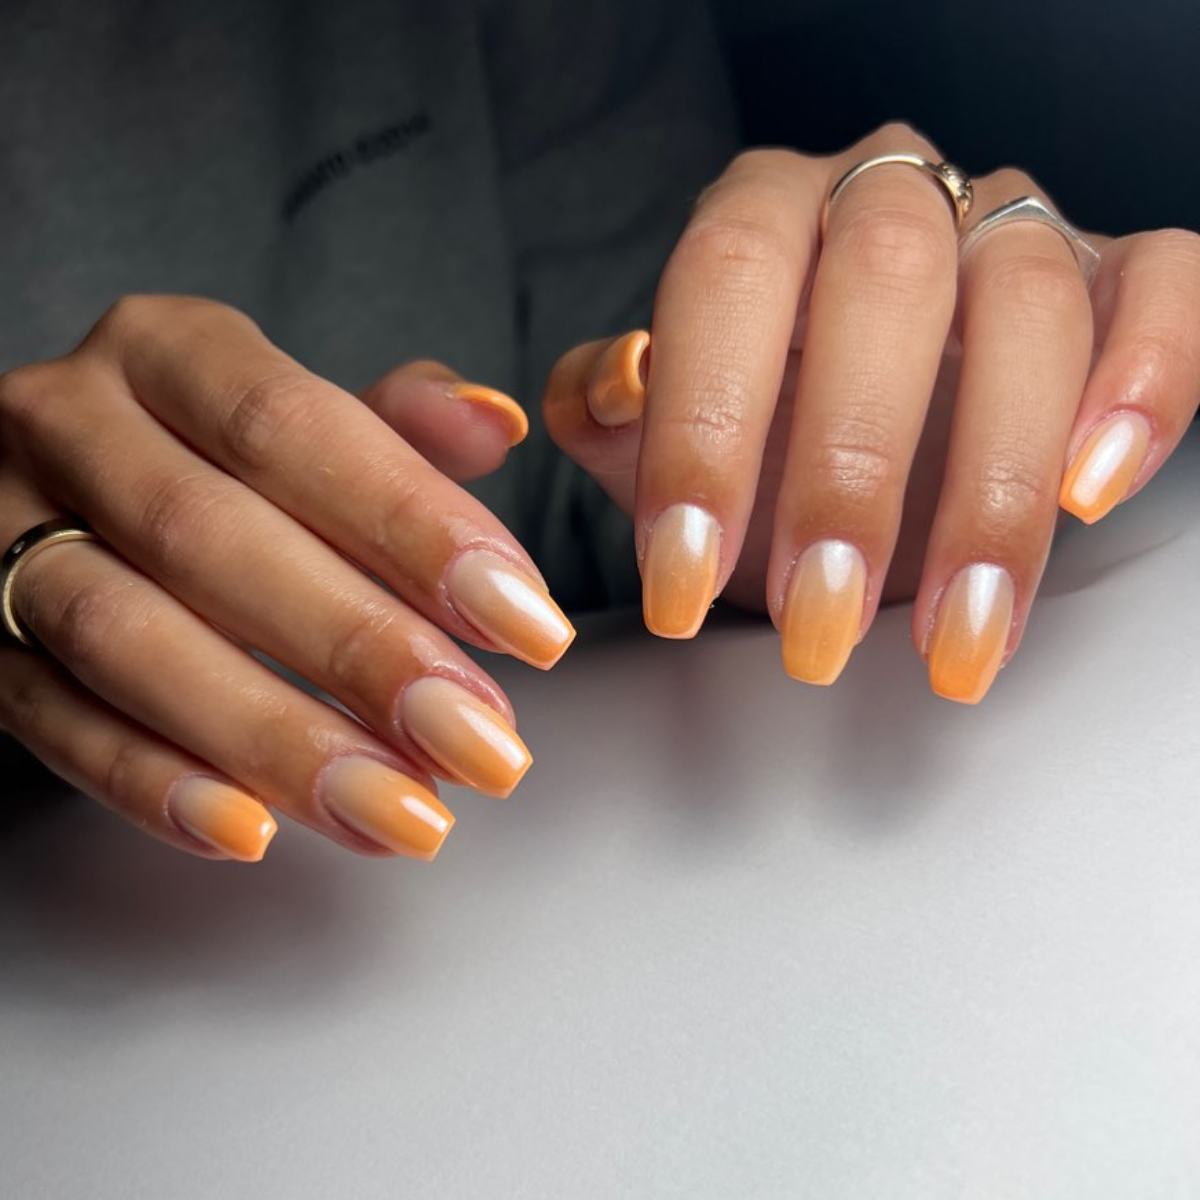
The Base Color Is Everything. Want a fiery, molten lava look? Apply your orange chrome powder over a solid black gel polish. For a bright, citrus-pop or a soft apricot glow, use a milky white, a sheer nude, or even a hot pink base. The base dictates the final mood, turning one powder into a dozen different possibilities.
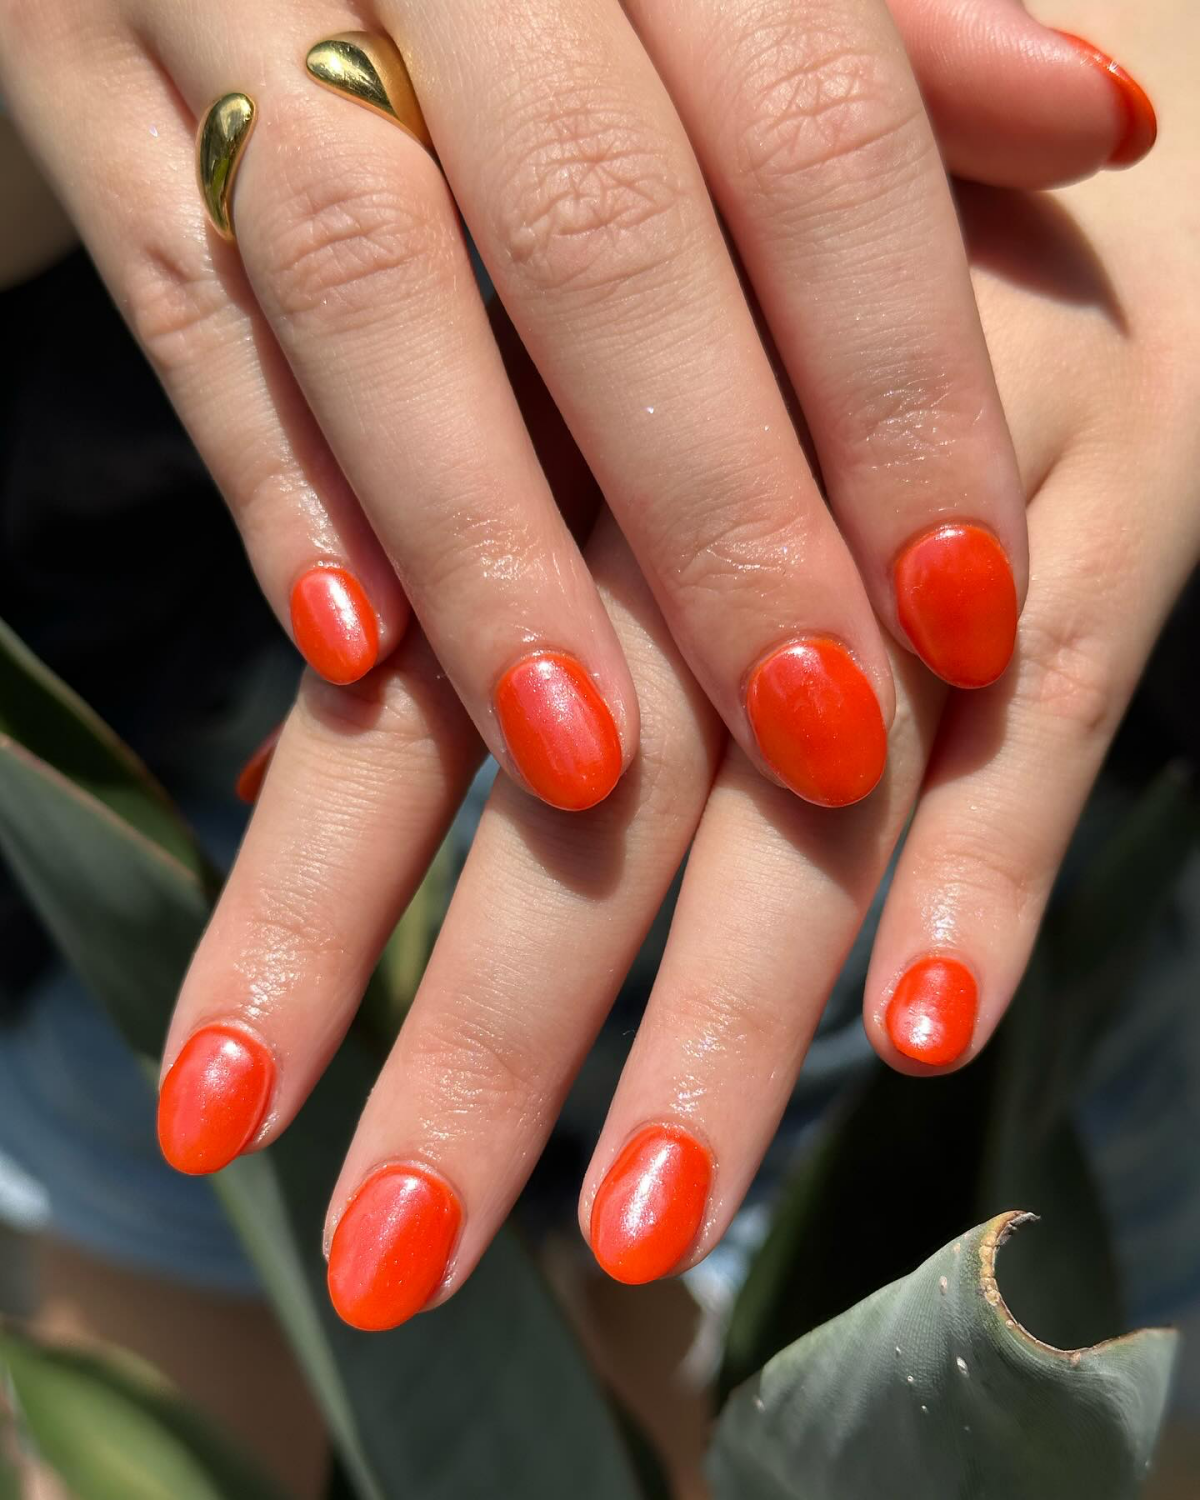
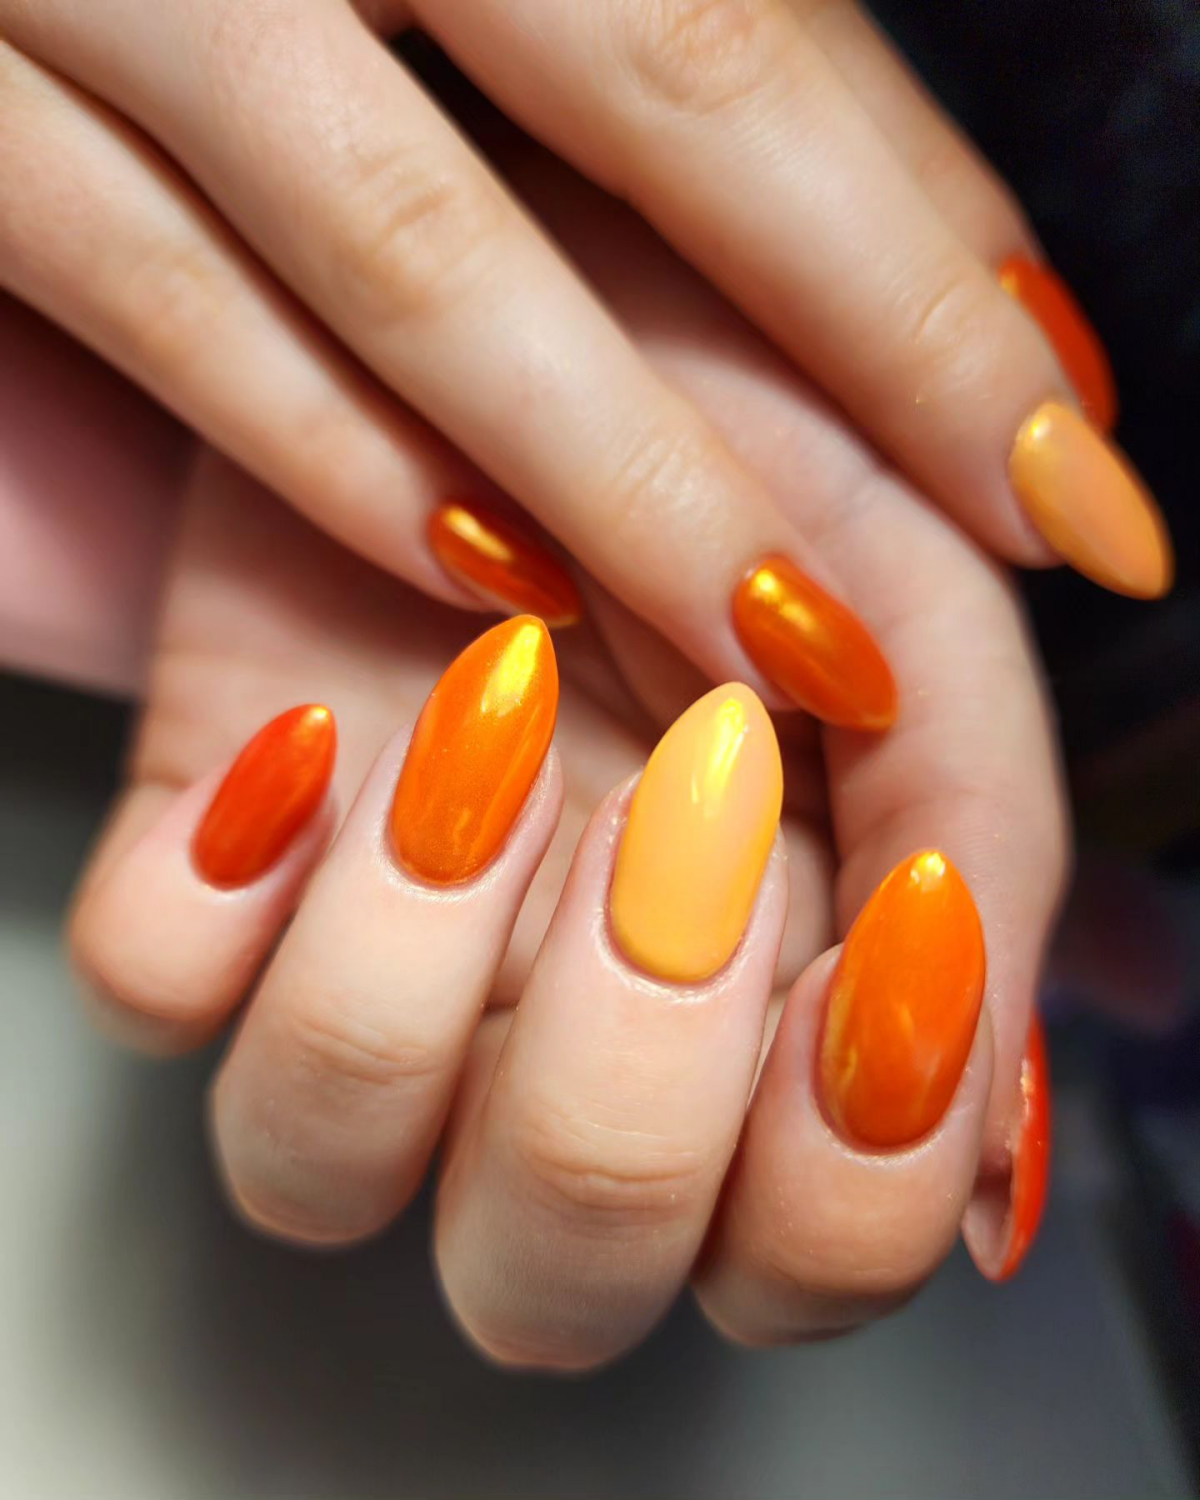
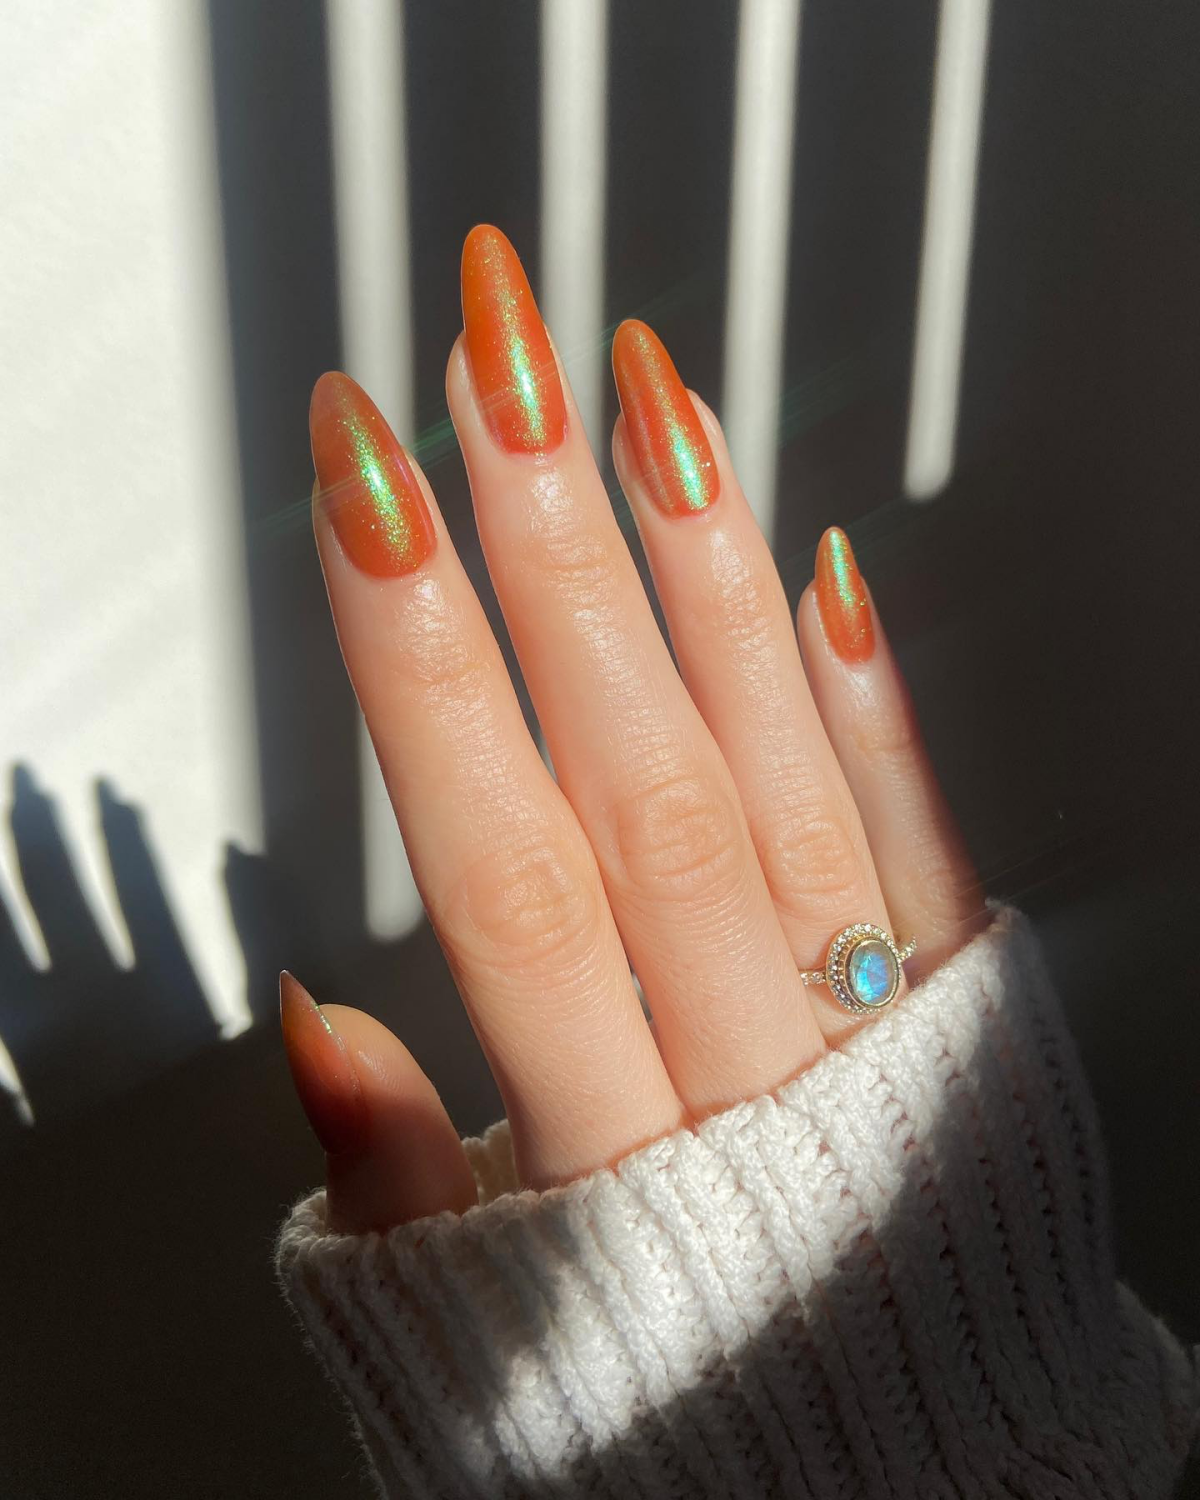
- A deep, burnt-orange that mimics autumn leaves.
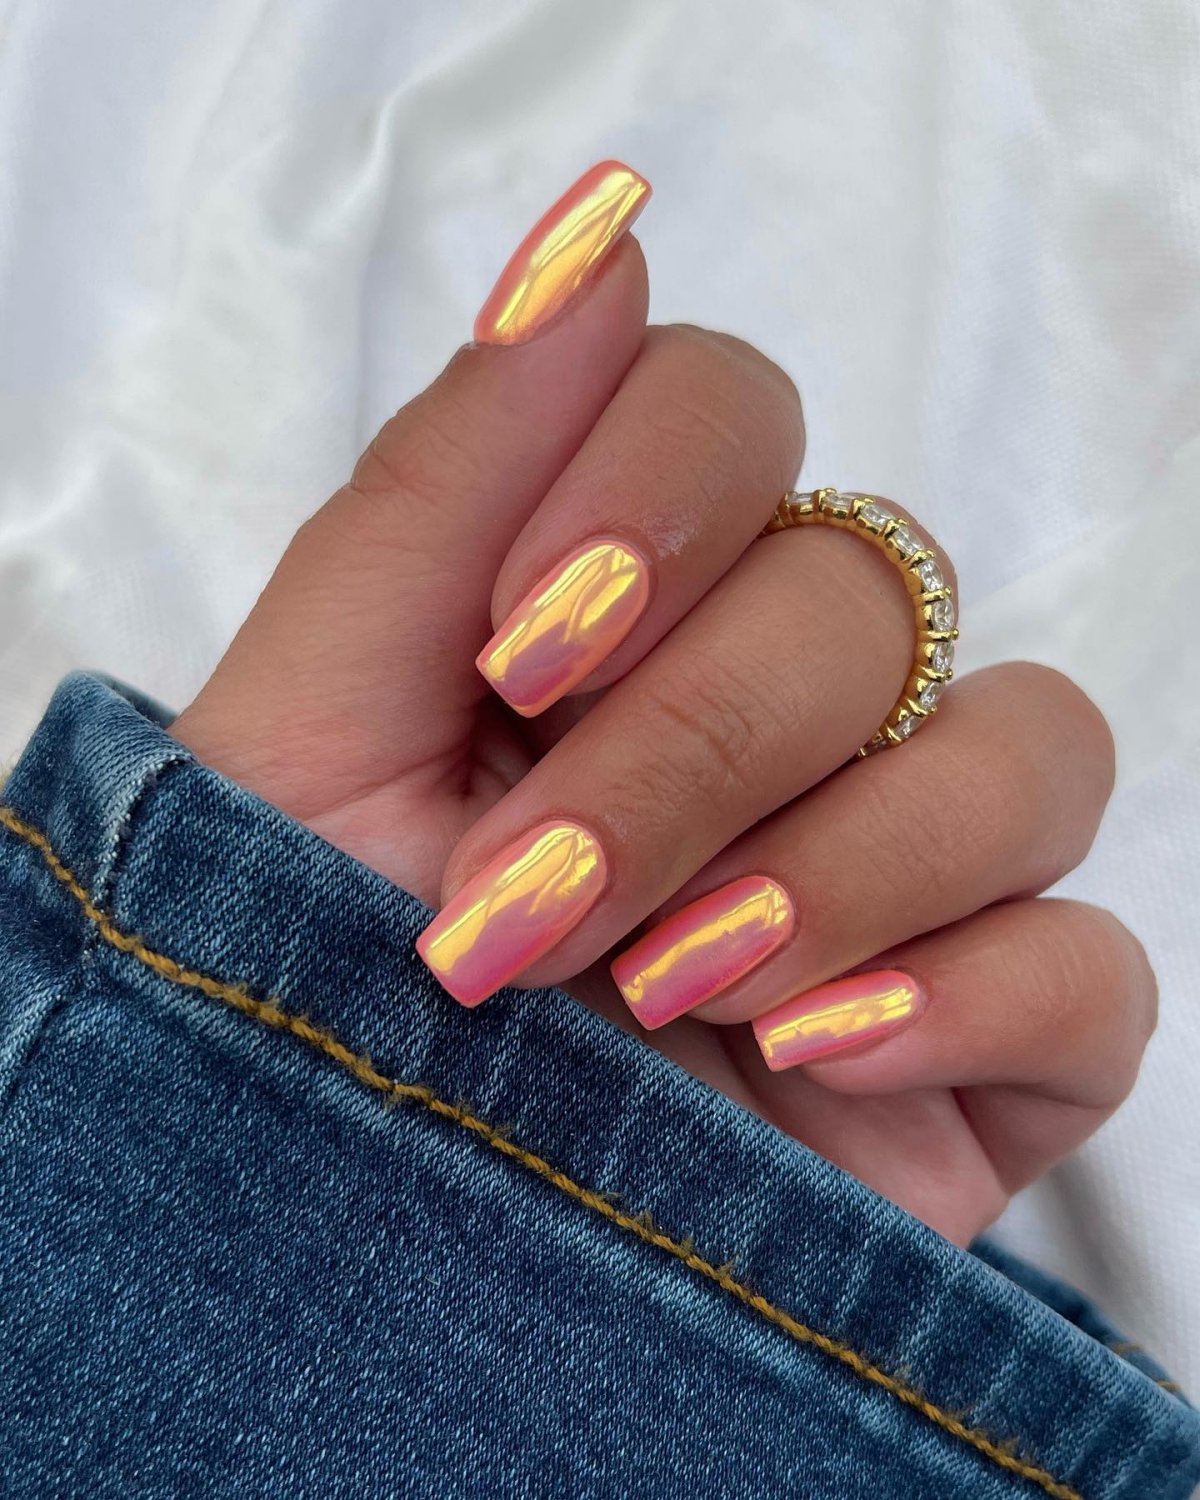
- A vibrant, electric tangerine that screams summer.
The secret to this versatility? It’s not different powders, but the base gel color you apply underneath. A black base will create a dark, metallic reflection, while a white or orange base will make the color pop with bright intensity. Experiment to find your signature shade.
Over 80% of nail technicians agree: the most common chrome application error is improperly curing the no-wipe top coat.
The perfect surface for burnishing chrome powder is not fully cured and rock-hard. It needs to be cured for just the right amount of time—often slightly less than the full time for a final top coat, around 30 seconds in most LED lamps. This leaves a smooth, but slightly receptive surface that the powder can grip onto for that perfect mirror shine.
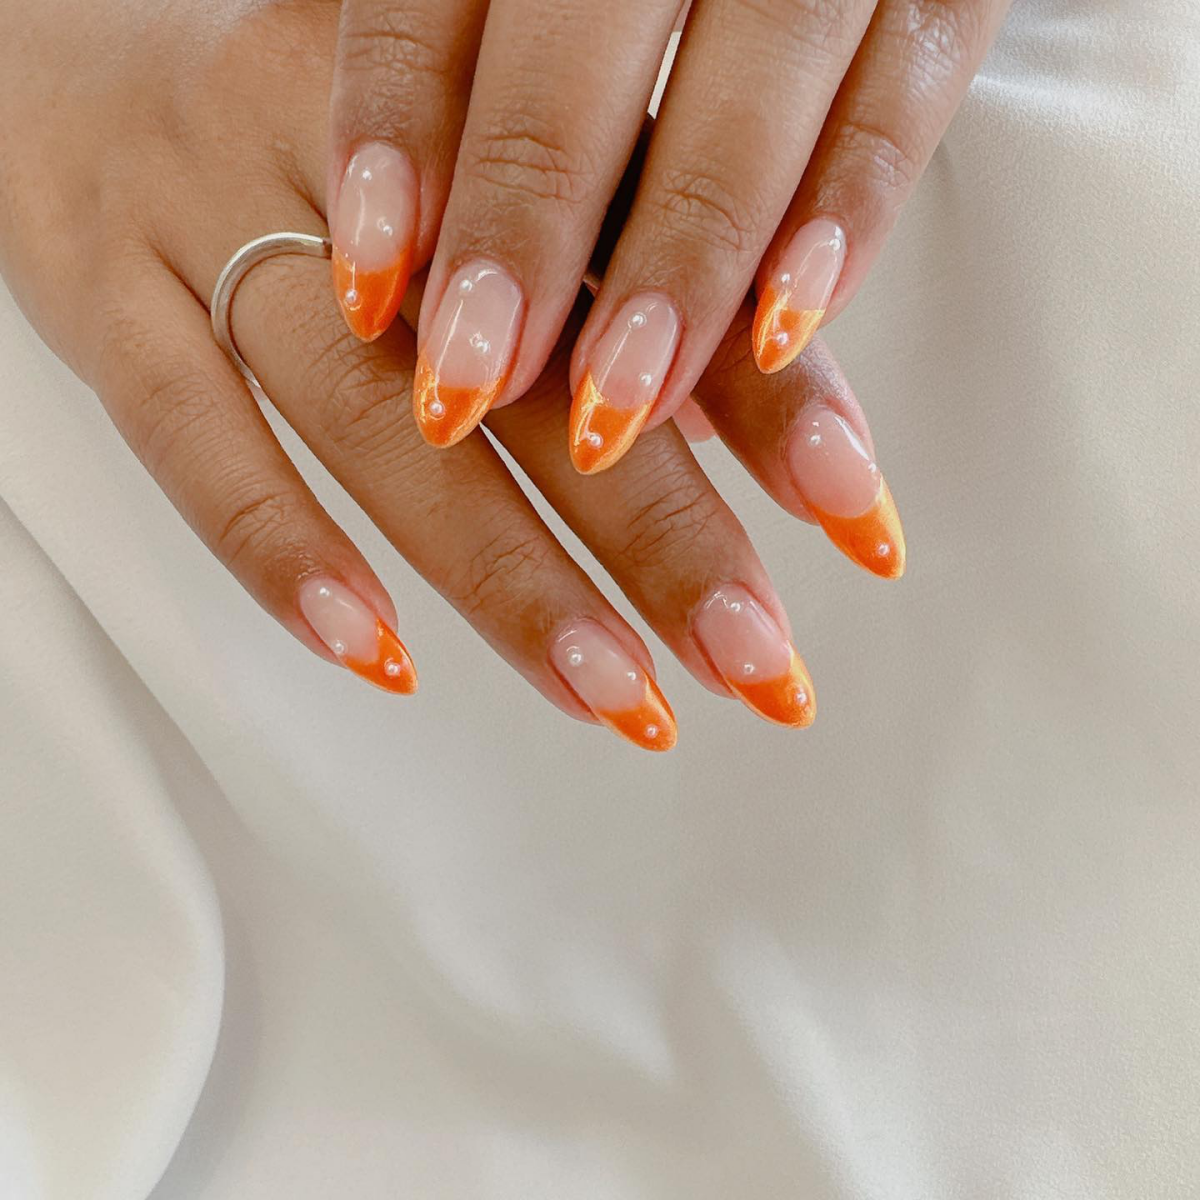
Struggling with getting a clean, crisp line along the cuticle?
Instead of the standard sponge applicator, switch to a small, soft-tipped silicone tool. Its flexible, non-porous surface gives you pinpoint precision, allowing you to push the chrome powder right up to the edge without spilling onto the skin. Brands like Kokoist and Apres Nail offer excellent, durable silicone tools that are a game-changer for detailed work.
Create a stunning
Don’t skip the final seal: After applying your final no-wipe top coat over the chrome, take a moment to ‘cap the free edge.’ This means running the top coat brush along the very tip of the nail. This simple step creates a seal that dramatically reduces the chance of chipping and keeps your molten manicure looking flawless for weeks.

For a truly professional finish, pay attention to the powder quality. Cheaper powders often have larger, less uniform particles, resulting in a glittery shimmer rather than a true mirror effect. Invest in professional-grade powders from brands like Daily Charme or Magpie Beauty. Their ultra-fine, cosmetic-grade pigments are designed to lie perfectly flat, delivering that coveted liquid-metal look.
How do you fix a small chip without redoing the entire nail?
It’s tricky, but possible! Gently file the chipped area to smooth the edges. Apply a thin layer of gel base coat just over the patch, cure it, and then apply your no-wipe top coat over the same small area. Cure for 15-20 seconds, then carefully dab and burnish a tiny amount of orange chrome powder to blend. Finish with a final top coat over the whole nail.
True Gel Chrome: Achieved with fine powder burnished onto a no-wipe gel top coat. The result is a flawless, true-mirror reflection that lasts for weeks. It requires a UV/LED lamp and specific gel products.
- After burnishing, use a fluffy, soft brush (like a fan brush) to dust away all excess powder before top coating.
- For stubborn flecks on the skin, a lint-free wipe with a bit of isopropyl alcohol works wonders.
- Never use your finger to wipe away excess powder; the oils from your skin can ruin the finish.
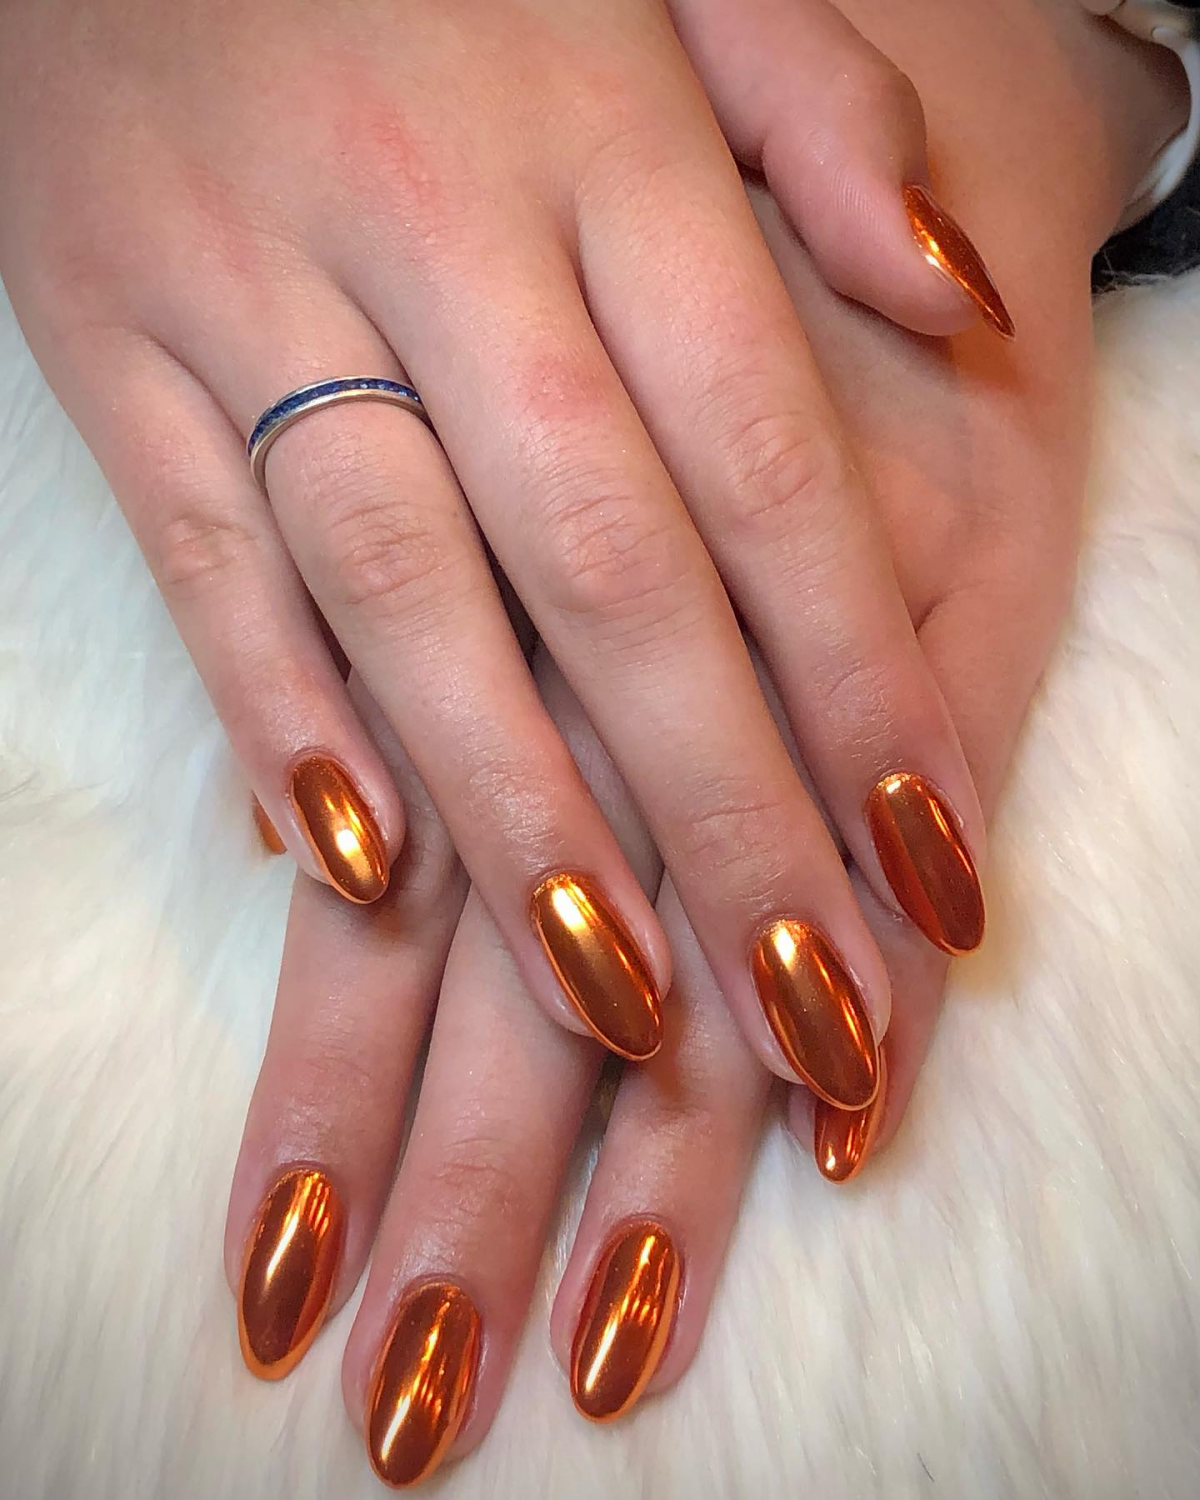
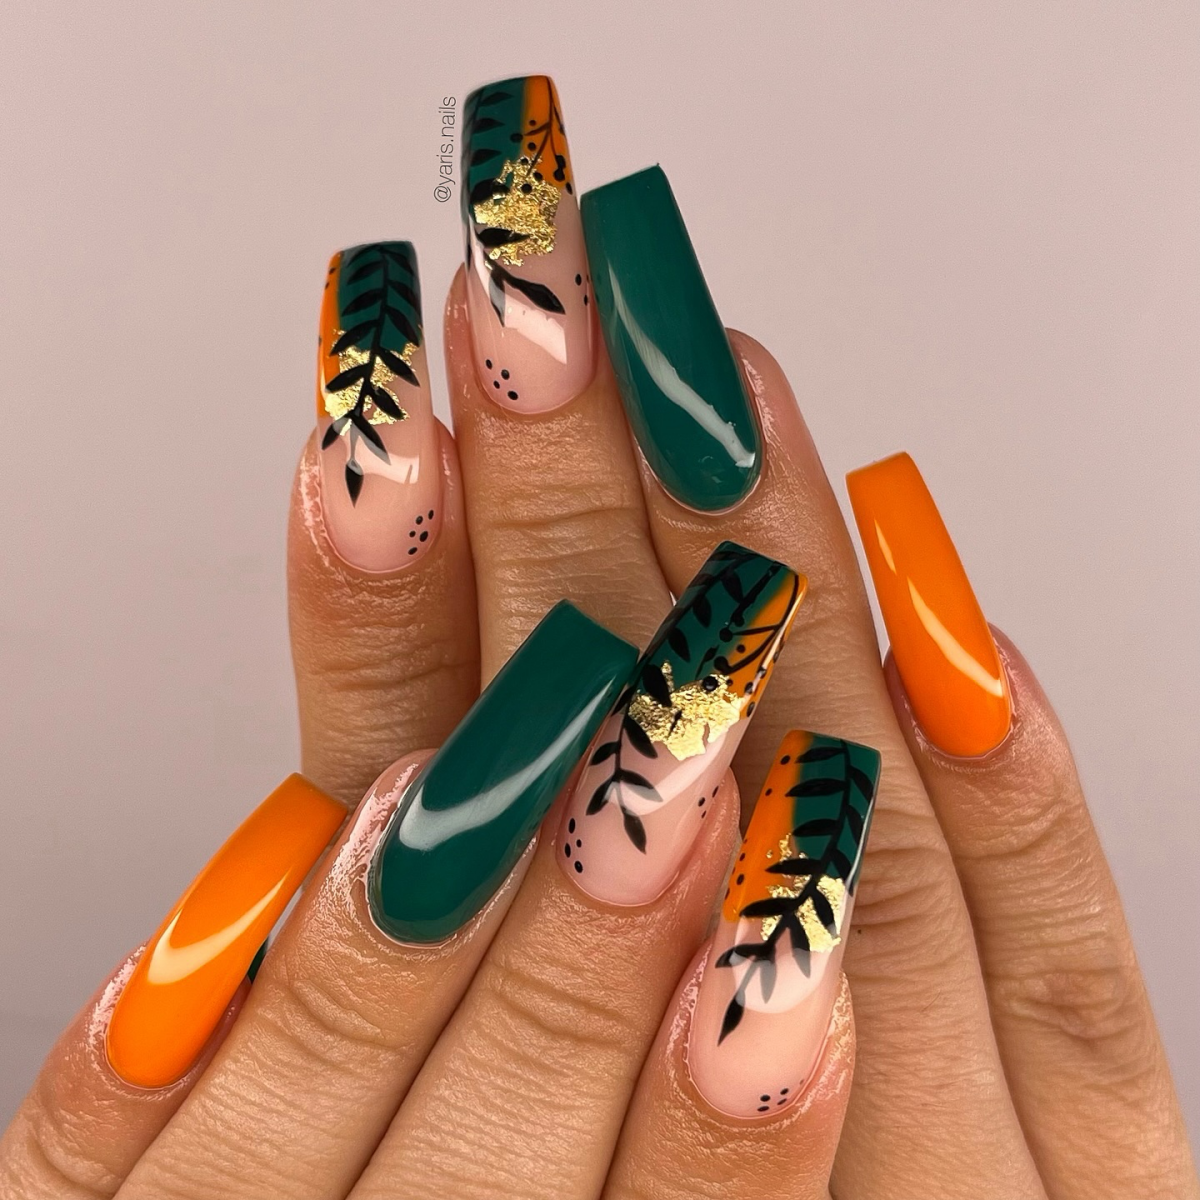
Orange chrome isn’t just for Halloween. Think of a deep, coppery orange for a sophisticated autumn look, paired with cozy sweaters. In summer, a bright tangerine chrome becomes the perfect accessory for a sundress, reflecting the sun like a tiny, polished sunset on your fingertips. It’s a surprisingly versatile shade that adapts to the season.
Looking for a modern twist? Try a
Hailey Bieber may have popularized the


