My Favorite St. Paddy’s Day Crafts for Little Kids (That Aren’t a Total Mess)
I’ve spent more years than I can count with paint, glitter, and glue on my hands, surrounded by the happy chaos of a preschool classroom. And let me tell you, holiday crafts are so much more than just a cute thing to stick on the fridge. For little kids, this stuff is brain food. St. Patrick’s Day, with all its bright, cheerful themes, is the perfect excuse to get messy and learn a ton.
In this article
But here’s the secret: the goal isn’t a flawless, Instagram-worthy shamrock. The real magic is in the process. It’s about the squishy feeling of paint, the tricky business of threading a piece of cereal onto a string, and that huge, proud smile a kid gets when they make something all by themselves.
So, this guide is packed with my classroom-tested tricks for making crafts fun for everyone—including you. We’ll get into the projects that actually build skills and make cleanup way less of a nightmare. Trust me.
Why This ‘Messy Fun’ Actually Matters
Before we grab the green paper, it’s pretty cool to know what’s firing up in your child’s brain while they’re crafting. When you get the ‘why,’ it’s easier to lean into the chaos.
Tiny Muscle Workout (Fine Motor Skills): This is the big one, honestly. Nearly every craft is a mini-gym for their hands. When a kiddo picks up a tiny torn piece of paper, they’re working on their pincer grasp—the exact same grip they’ll need to hold a pencil later. Squeezing a glue bottle or guiding a paintbrush? That’s all hand-eye coordination and muscle control. These aren’t just crafts; they’re the warm-up for writing their name.
A Feast for the Senses: Little kids learn about the entire world by touching, seeing, and even smelling it. Craft time is a sensory goldmine. They feel the sticky glue, see the vibrant paint, and maybe even notice the bumpy texture of a bell pepper. All this sensory input builds new pathways in their brain. By the way, if your child is hesitant about certain textures (and many are!), I’ll share some simple ways to adapt the projects so they still feel comfortable.
Getting Their Brains in Gear: There’s so much thinking involved here. Following a simple instruction like, “First, find the green paper, then tear it,” teaches them to listen and understand sequences. Sorting colors for a rainbow craft? That’s a basic math skill called categorization. Just talking about what you’re doing introduces a ton of new words. It’s all groundwork for bigger problem-solving down the road.
My Educator’s Guide to a Painless Setup
A happy craft session starts before a single drop of paint is poured. A few minutes of prep can save you a world of frustration and, let’s be real, a major cleanup headache.
Protect Your Zone: My absolute go-to is a cheap vinyl tablecloth from the dollar store. You can also just cut open a garbage bag and tape it to the table. When you’re done, you just roll up the mess and toss it. Easy. For the floor, an old bedsheet or a plastic drop cloth from a hardware store will catch any rogue drips. And an old t-shirt for the kid is non-negotiable! Do this first, and you can actually relax and not hover over them.
Choosing the Right Stuff: Not all craft supplies are made for preschoolers. You want to look for two magic words: non-toxic and washable. Here are my must-haves:
- Paper That Doesn’t Rip: Please, skip the flimsy copy paper. Get some cardstock, which is thicker (look for 65 lb or heavier). It can handle wet glue and paint without tearing, which prevents a very common source of toddler meltdowns. A pack usually runs between $5 and $10 at Target, Walmart, or any craft store.
- The Best Paint for Kids: Washable tempera paint is the classroom champion. Crayola makes a great one that’s thick and cleans up with just water. Quick tip: Instead of giving them the whole bottle, pour small amounts into a muffin tin or an old egg carton. It prevents major spills and wasted paint.
- The Glue Situation: A regular bottle of white school glue (like Elmer’s) is perfect for most projects. Glue sticks are less messy, sure, but they won’t hold anything heavier than paper. A little trick I use for kids who struggle to squeeze the bottle: pour a small puddle of glue on a paper plate and give them a Q-tip or a popsicle stick to use as a spreader. It gives them way more control.
Heads Up on Cleanup: A couple of tricks I’ve learned the hard way… For tempera paint on clothes, rinse it immediately with COLD water. Hot water can set the stain. For spilled glue on a table or floor, just let it dry completely. It will usually peel right off in one satisfying piece!

And most importantly, manage your expectations. It’s going to look like a preschooler made it… because they did! Celebrate their smudgy, crooked, brownish-colored creation. Talk about their effort: “Wow, you worked so hard on that!” That builds their confidence way more than an adult trying to “fix” it.
Which Craft Should You Pick?
Okay, so what’s the vibe today? Your energy level and time are key. Here’s a quick rundown to help you choose:
- In a Hurry & Low on Patience? Jump straight to the 10-Minute Rainbow Necklace. It’s super fast, almost zero mess, and you probably already have the stuff for it.
- Got 20-30 Minutes & Okay with a Little Paint? The Bell Pepper Shamrock Stamp is your winner. It’s a bit messy but has a huge ‘wow’ factor and cleanup is pretty quick.
- Ready for a ‘Real’ Project? If you have more time and want something that really builds skills, go for the Handprint Leprechaun or the Torn Paper Shamrock. They take a bit more involvement and drying time but are classic for a reason.
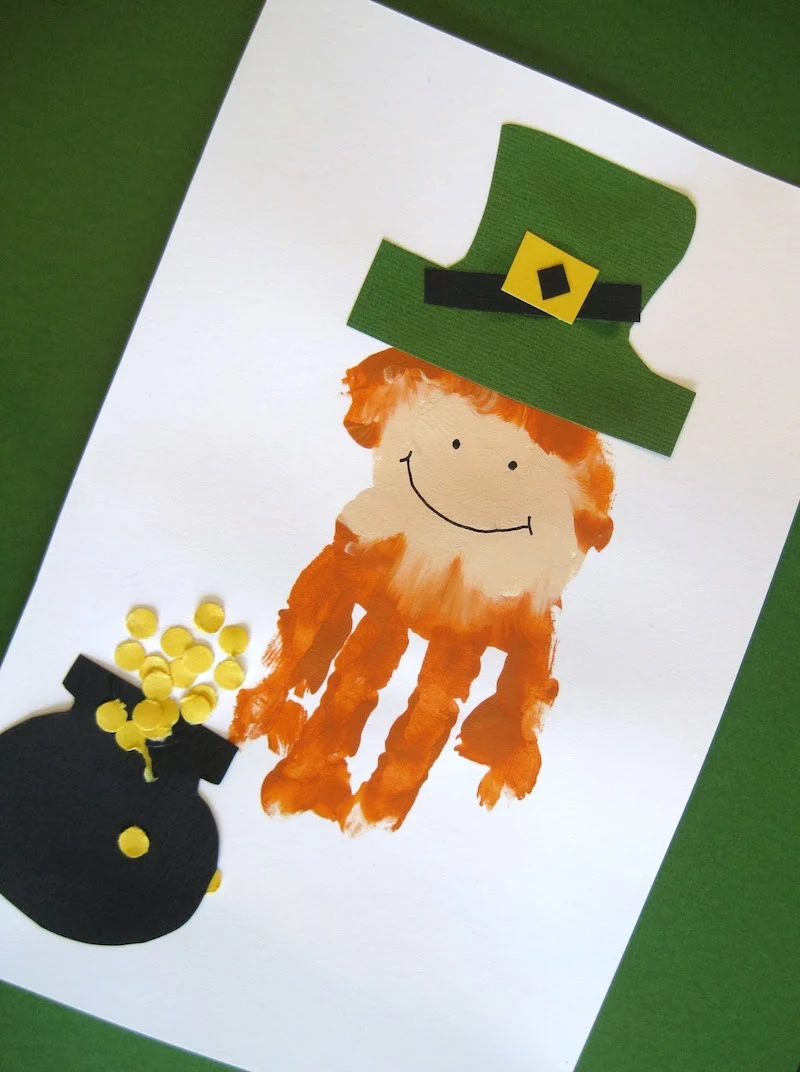
Project 1: The Handprint Leprechaun
This is a classic because it captures a perfect little snapshot in time. It’s a sweet sensory activity that also helps kids learn about their own bodies.
Time Check: Prep: 5 mins | Active Crafting: 10 mins | Drying Time: 30-60 minutes
Materials:
- Orange and flesh-toned washable tempera paint
- Green and black markers or crayons
- White cardstock
- A flat paintbrush (about 1-inch wide)
- Paper towels and a small bowl of water for easy cleanup
The No-Fail Method:
- Get Ready First: Have everything set up before you even call your child over. Pour a little orange and flesh-toned paint onto a paper plate.
- You Be the Painter: Here’s the key—don’t let them dip their hand in the paint. You paint their hand for them with the brush. It ensures even coverage and uses way less paint. Say something like, “I’m going to paint your hand, it might tickle!” Use the brush to paint the four fingers and the top of the palm orange (for the beard). Then, paint the lower palm and thumb with the flesh tone (for the face).
- The Big Print: Guide their hand to the paper, fingers pointing down. Tell them to spread their fingers wide like a star. Press down firmly but gently on the back of their hand and each finger. Then lift the hand straight up in one quick motion to avoid smudges.
- Their Turn: Once the paint is totally dry, let your kid take over. They can use a green marker to draw a leprechaun hat on top and a black marker for the eyes and smile.
Pro-Tip: For kids 4 and up, let them sprinkle some orange glitter onto the wet orange paint for a super sparkly beard! It’s messy, but the payoff is huge.
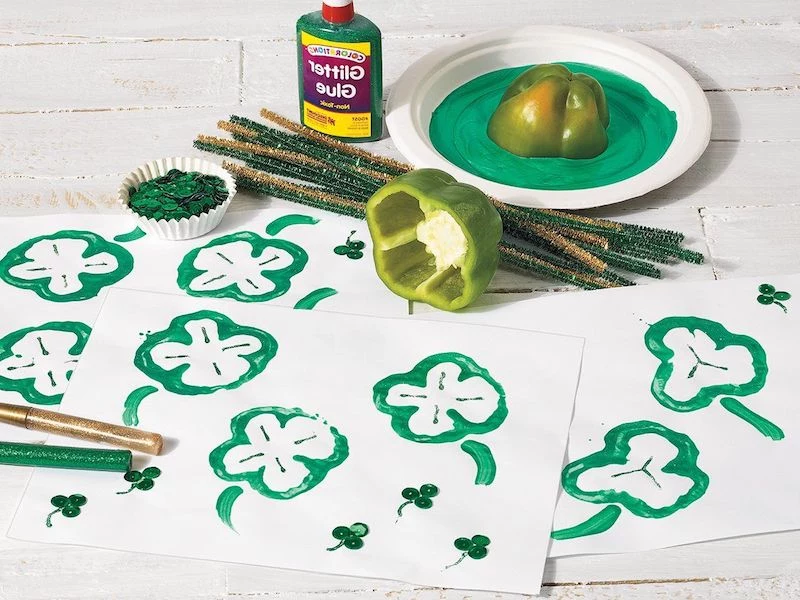
Project 2: The Bell Pepper Shamrock Stamp
I absolutely love this one because it uses something from the kitchen to make art. It’s a fantastic way to show kids that creativity is everywhere. Oh yeah, the inside of a bell pepper looks almost exactly like a shamrock!
Time Check: Prep: 2 mins | Active Crafting: 15 mins | Drying Time: 20-30 minutes
Materials:
- One green bell pepper
- A sharp knife (for adult use only!)
- Green washable tempera paint
- A paper plate
- White or light-colored cardstock
- A green crayon or marker
How It’s Done:
- ADULT-ONLY STEP: Seriously, an adult has to do all the cutting. On a cutting board, use a sharp knife to slice the bell pepper in half horizontally, a little below the middle. The bottom part with its three or four bumps is your stamp. Just pop out any seeds.
- Stamping Time: Pour a thin layer of green paint on a paper plate. Show your child how to hold the pepper and press it into the paint, then press it firmly onto the cardstock.
- Finishing Touches: Let them make a whole field of shamrocks! Once the paint is dry, they can use a green crayon to draw stems.
Good to know: Sometimes you’ll find a pepper with four lobes instead of three. That’s a bonus! Now you can make lucky four-leaf clovers. It’s a great little lesson in how nature has variations. And honestly, some stamps will be blobby. That’s part of the fun—seeing how different amounts of paint change the print.
What to do with it later? These make amazing, kid-made wrapping paper for a small gift or a card for the grandparents!
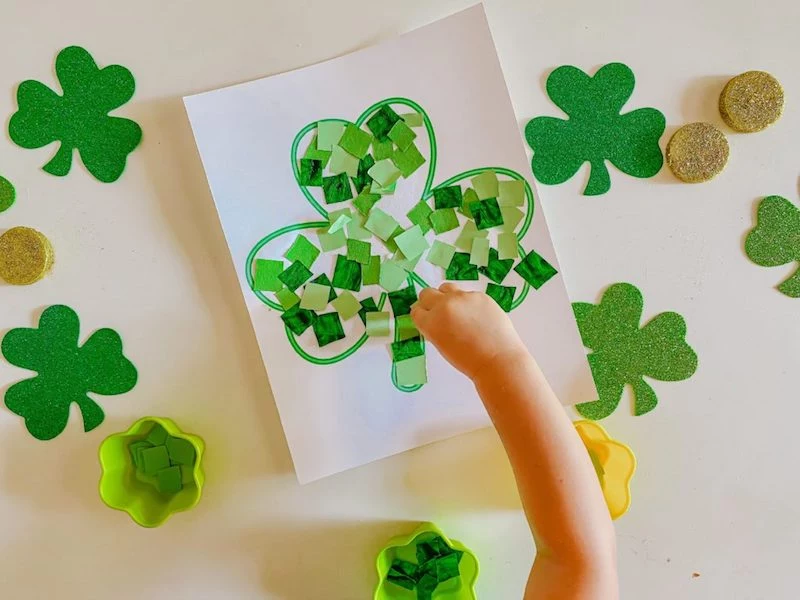
Project 3: The Torn Paper Shamrock Mosaic
This is probably my favorite activity for building up those tiny hand muscles. Tearing paper and gluing the little pieces takes serious focus and coordination. The finished product always looks so cool and textured.
Time Check: Prep: 5 mins | Active Crafting: 20-25 mins
Materials:
- Different shades of green paper (construction paper is great, but also try old magazines or junk mail for cool textures!)
- A piece of white cardstock
- A thick black marker (like a Sharpie)
- White school glue or a glue stick
The Method:
- Adult Prep: On the cardstock, draw a big, simple shamrock outline. Not feeling confident in your drawing skills? No worries. Just Google ‘simple shamrock template,’ print one out, and trace it.
- The Fun Part – Tearing: Give your kid the green paper and show them how to tear it into small pieces. This is such a great skill, using both hands at once. Let them make a big pile of paper ‘confetti’.
- Gluing It All Together: Now, have them apply glue inside the shamrock outline. If they’re using a glue stick, they can color the whole area. If it’s liquid glue, they can spread it with a Q-tip or just put down dots.
- Making the Mosaic: Finally, they can stick the torn paper pieces onto the glue, trying to fill in the whole shape. It’s totally okay if they go outside the lines!
What to do with it later? This looks fantastic cut out and glued onto a folded piece of construction paper to make a beautiful, textured card.
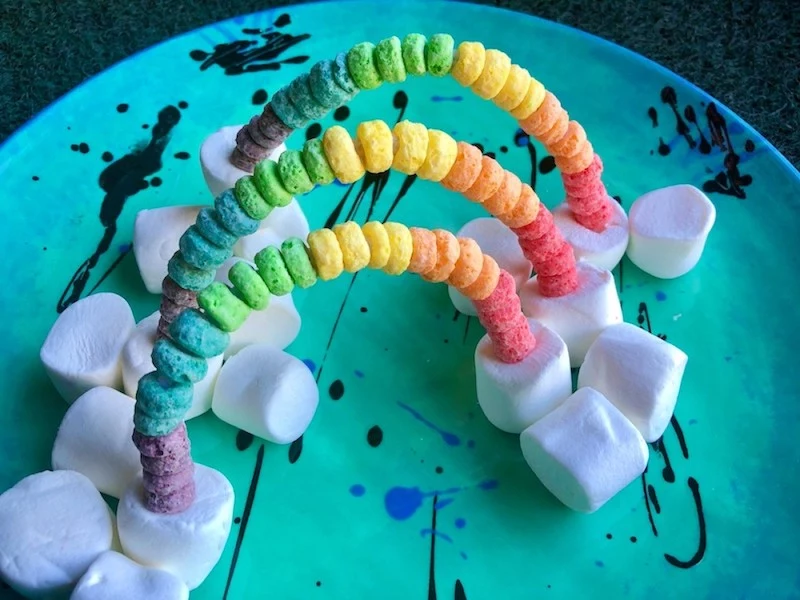
The Quick Win: 10-Minute Rainbow Cereal Necklace
Need something fast, easy, and almost entirely mess-free? This is it. Perfect for when you’re tired but still want to do a ‘thing’.
Time Check: Prep: 2 mins | Active Crafting: 10-15 mins
Materials:
- A piece of yarn, about 2 feet long
- Colorful, O-shaped cereal (like Froot Loops or a store brand equivalent)
- A small piece of tape
The Super-Simple Steps:
- Take one end of the yarn and wrap a small piece of tape tightly around the tip. This creates a makeshift ‘needle’ that makes threading much easier for little fingers.
- Give your child a bowl of the cereal and show them how to thread the pieces onto the yarn.
- That’s it! They can make patterns or just enjoy the simple act of threading. When they’re done, tie the ends together and they have a wearable, snackable craft. It’s a win-win.
Inspirational Gallery
How can I use glitter without it taking over my house for weeks?
The secret is containment! Have your child work on a baking sheet with raised edges. When they’re finished, simply lift their artwork, fold a piece of paper in half to create a funnel, and tap the excess glitter from the tray right back into its container. For a truly no-mess option, glitter glue pens from brands like Elmer’s or Crayola give all the sparkle with none of the fallout.
Did you know the bottom of a bell pepper, when sliced off, looks remarkably like a three-leaf clover?
It’s the perfect, nature-made stamp! Just dip the cut end in a shallow dish of green paint and press it onto paper. Each print will be unique. It’s a wonderful way to connect crafting with everyday foods and textures, turning a simple vegetable into a magical art tool.
Washable Tempera Paint: This is your go-to for most projects. It’s vibrant, covers well on paper, and is perfect for brushes or sponge painting. Crayola’s Washable Project Paint is a classroom staple for a reason.
Finger Paint: Thicker and more gelatinous, it’s designed for pure sensory exploration. It’s less about a perfect image and more about the squishy, tactile experience.
Choose tempera for guided projects and finger paint for when you want to let them dive in, hands first!
- Create a calming

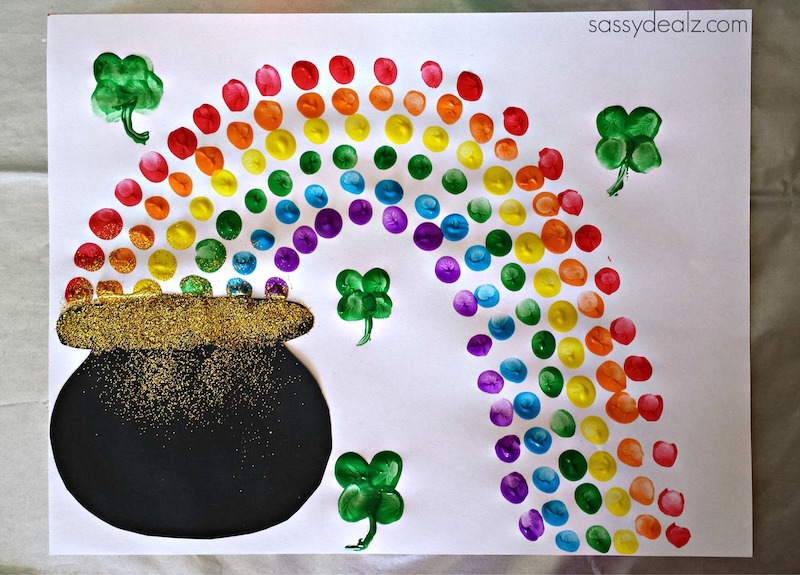
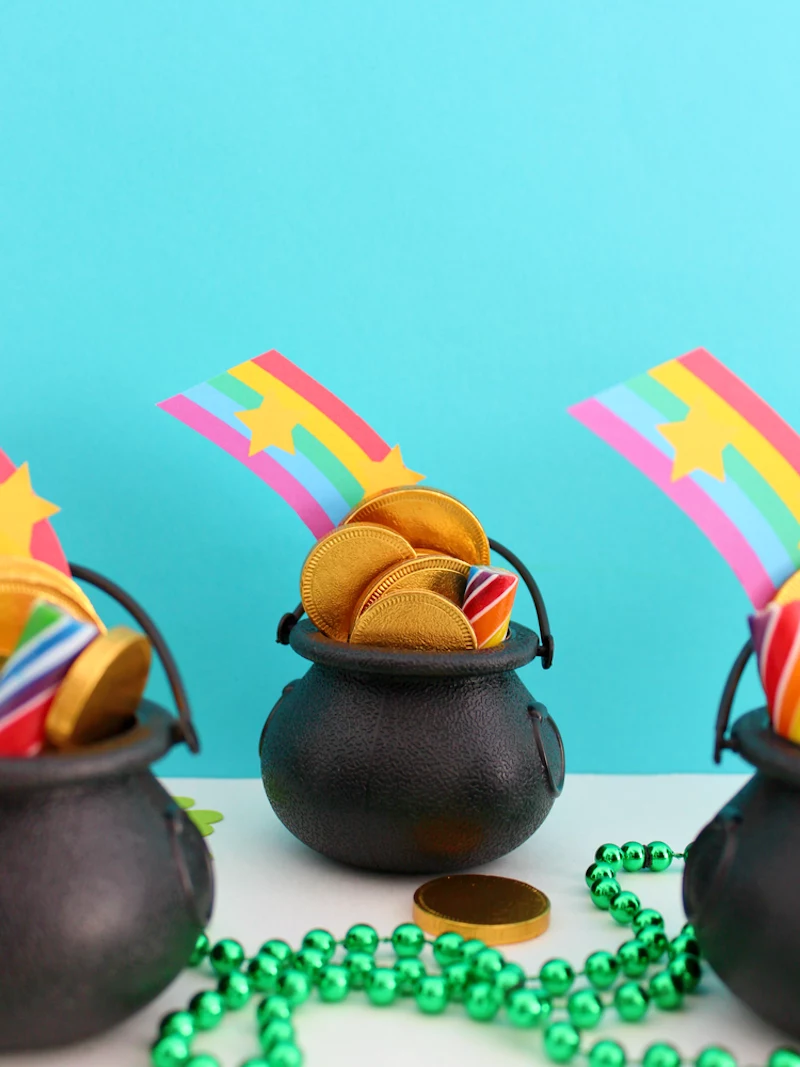
Don’t forget the rainbow! While green is the star of the show, the promise of a pot of gold at the rainbow’s end is just as iconic. Threading Fruit Loops onto a string to make a rainbow necklace or tearing strips of colored paper for a collage adds a vibrant new dimension to the day’s crafts.
According to studies in early childhood development, a child’s brain creates up to 1 million new neural connections per second. Activities that engage multiple senses, like crafting, help strengthen these critical pathways.