A Carpenter’s No-Nonsense Guide to Magnetic Screen Doors That Actually Work
Alright, let’s talk about one of the most clever home gadgets I’ve seen in a while: the magnetic screen door. Over my two decades swinging a hammer, I’ve seen it all when it comes to keeping bugs out. From those old-school beaded curtains to finicky spring-loaded doors, everyone wants the same thing—fresh air without a side of flies.
In this article
A while back, a client with a gorgeous patio door wanted something for the summer months. The catch? They didn’t want a bulky, permanent screen door ruining their view. That’s when I really started looking at magnetic screens not as a cheap gimmick, but as a serious, practical solution.
Since then, I’ve installed dozens. I’ve put budget models in rentals and heavy-duty versions in homes with giant, clumsy dogs. I know which ones last and which ones turn to tatters after a month in the sun. Let’s be crystal clear about one thing: these are not security doors. They offer zero protection. Their job is all about comfort and convenience. This guide is everything I’ve learned, boiled down so you can pick a good one and install it right the first time.
How These Simple Screens Actually Work
At first glance, it’s just two panels of mesh. The real magic is how it closes. The center edges of the two mesh panels are lined with magnets. When you walk through, the panels part easily, and then—snap—the magnets pull them right back together behind you. The quality of that snap comes down to two things: the magnets and the mesh itself.
Cheaper screens often use clunky ferrite magnets. They’re okay, but a stiff breeze can pop them open, and sometimes they’re spaced too far apart, leaving little gaps for clever insects. The good stuff? They use powerful neodymium magnets. These create a much more solid, satisfying seal. Some of the best designs even use full-length magnetic strips instead of individual blocks, which gives you a seamless, quiet closure from top to bottom.
As for the screen material, you’ll usually find two options:

- Fiberglass Mesh: This is the standard stuff you see on most window screens. It’s affordable and gets the job done for flies and mosquitoes. The downside is that it can hold creases from the packaging and gets brittle after a season or two in direct sun.
- Polyester Mesh: This is a definite step up. Polyester is stronger, more flexible, and stands up to sun exposure way better. The heavy-duty, pet-resistant screens? They’re almost always made from a thick, vinyl-coated polyester. The only trade-off is slightly less airflow because the weave is denser, but for durability, it’s the clear winner.
Let’s Talk Money and Brands
So, what should you actually spend? And what brands do I trust? From my experience, the price tells you a lot about what you’re getting.
You can find a basic fiberglass screen for about $20 to $35. Honestly, this is a single-season solution. It’ll get you through the summer, but don’t expect it to look great next year.

The sweet spot for most homes is in the $40 to $60 range. In this bracket, you’re getting that tougher polyester mesh and stronger magnets. I often point people toward brands like Magzo or Apalus for a solid, all-around performer that won’t let you down.
If you’ve got pets, kids, or just a really busy doorway, you need to go heavy-duty. Look for brands like Flux Phenom. These can run $60 or more, but they’re built to take a beating and are worth the investment if you need something that lasts.
The Most Important Step: Measuring Correctly
I’m not kidding. Almost every time I’ve been called to fix a “broken” magnetic screen, it was because of bad measurements. Too small, and you’ll have gaps. Too big, and it’ll drag on the floor and won’t close. Grab a tape measure—don’t guess!
Quick tip: You are measuring the DOOR FRAME, not the door itself.

- Measure the Opening: First, measure the width of the actual opening, from the inside of the frame on the left to the inside on the right. Then, measure the height from the floor threshold to the underside of the top of the frame. Write these numbers down.
- Check Your Trim: Most screens attach with a one-inch-wide adhesive strip. You need at least one inch of flat, smooth surface on the top and sides of your door frame for the tape to stick to. If your trim is super decorative or narrow, this can be tricky.
- Pick Your Size: Your screen needs to be BIGGER than your opening. If your opening is 34 inches wide and 80 inches tall, you need a screen that’s at least 36 inches wide and 81 inches tall. The most common mistake is buying a screen that exactly matches the opening size—it leaves you no room to attach it!
Your homework for today: Go measure your door right now. It takes two minutes and you’ll have the single most important piece of info you need.

How to Install It Like a Pro
Alright, you’ve got your screen. Set aside about an hour for this. Rushing the prep work is a recipe for failure.
First, Grab Your Tools: Get this stuff ready and the job will be a breeze. You’ll need your tape measure, some soap and water, a clean rag, and a bottle of isopropyl (rubbing) alcohol. Oh, and a little painter’s tape can be a huge help for positioning.
Installation Steps:
1. Prep That Surface (Don’t Skip This!)
The adhesive tape will not stick to a dirty frame. It just won’t. Wash the trim with soap and water, let it dry, and then wipe it down with the rubbing alcohol to get rid of any lingering grime or oil. If you have peeling paint, you have to scrape and sand it smooth first, or the tape will just pull the paint right off.
2. Apply the Adhesive Strip
Start at a top corner. Peel back a few inches of the paper backing and press the strip firmly onto the frame. Work your way across the top, then down the sides. Don’t stretch the tape! Once it’s all on, press it down firmly one more time. Now, walk away. Seriously. Let the adhesive cure for at least an hour before you hang the screen—some brands even recommend waiting 24 hours.
3. Hang and Adjust the Screen
This is way easier with a second person. Start by attaching the top center of the screen, making sure the magnetic opening is perfectly centered in your doorway. The top edge must be level. If it sags, the magnets won’t line up. Once the top is on, gently attach the sides. Don’t pull it tight; let it hang naturally.
4. Test, Test, Test
Walk through it a few times. Does it snap shut every time? All the way to the bottom? If not, it’s time to troubleshoot.
Common Problems & Quick Fixes
Heads up, you might run into one of these issues. Here’s how to fix them:
- Problem: There’s a gap at the bottom when it closes.
Solution: The screen is probably hanging a little too high. Try carefully peeling it off and lowering the whole thing by about half an inch. - Problem: The magnets aren’t lining up in the middle.
Solution: Your top strip isn’t level. You’ll need to adjust it until it’s perfectly straight across. This is where having a helper really pays off. - Problem: The adhesive tape fell down after a week.
Solution: Nine times out of ten, this means the surface prep wasn’t thorough enough. You have to get that frame squeaky clean with alcohol, especially in hot or humid weather. For a quick fix, you can try some new double-sided tape, but be sure to clean the spot properly this time.
Once you’re happy with the position, use the included pushpins for reinforcement. I always put one in each top corner, where the most stress is. On a wood frame, it’s easy. For vinyl or metal frames, you may have to skip the pins.
Making It Last: Pets, Weather, and Winter Storage
For high-traffic homes, especially with pets, the standard adhesive might not be enough. For a bulletproof installation, I sometimes ditch the tape and use thin wood batten strips. I just lay the strips over the screen’s edges and use small screws to secure them to the door frame. It’s a more permanent solution, but that screen isn’t going anywhere.
By the way, when winter comes, don’t just rip the screen down. Carefully peel it off the adhesive strip. You can fold it up and store it in its original box. The soft, loopy side of the adhesive tape can usually stay on the door frame all winter without an issue. In the spring, just clean it off and stick the screen right back on!
A Final Word of Advice
I have to say it one more time: a magnetic screen is for bugs and breezes, not security. It won’t stop an intruder or even a determined raccoon. Also, make sure it hangs straight and doesn’t bunch up on the floor, as it can be a trip hazard for kids or older folks.
For most people, this is a totally doable DIY project. But if you have a tricky non-standard door or want that super-durable batten strip installation, it might be worth calling a local handyman. A pro can get it done cleanly and securely, ensuring it lasts for years to come.
Inspirational Gallery
To make your screen last beyond a single season, proper winter storage is key. Don’t just rip it down and shove it in a drawer.
- Gently wipe the mesh with a damp cloth and mild soap.
- Ensure it’s completely dry to prevent mildew.
- Roll the screen carefully; folding creates permanent creases and weakens the mesh.
- Store it in its original box or a protective bag to prevent snags.
The single biggest installation mistake: A dirty doorframe. The adhesive strips that hold the screen are incredibly strong, but only on a clean, dry surface. Wiping the frame with isopropyl alcohol before you begin removes grease and grime, ensuring the adhesive bond holds all summer long, even with heavy use.
The World Health Organization notes that vector-borne diseases, often transmitted by insects like mosquitoes, account for more than 17% of all infectious diseases.
While your backyard might not be a global hotspot, this highlights the importance of a reliable barrier. A well-fitted magnetic screen door is one of the easiest, non-chemical ways to create a safer, more comfortable zone for your family, effectively blocking the primary entry point for these pests.
Worried your dog will shred your new screen in a day?
You’re right to be concerned. Standard fiberglass mesh is no match for excited claws or a charging Labrador. Look specifically for models advertised as
- A hands-free entry for your garage workshop.
- An easy bug barrier for an RV or camper van door.
- A renter-friendly solution for an apartment balcony.
The secret? Magnetic screen doors aren’t just for standard patios. Many are designed for versatility. Just be sure to measure your unique doorway carefully and check if the model can be trimmed or if custom sizes are available.
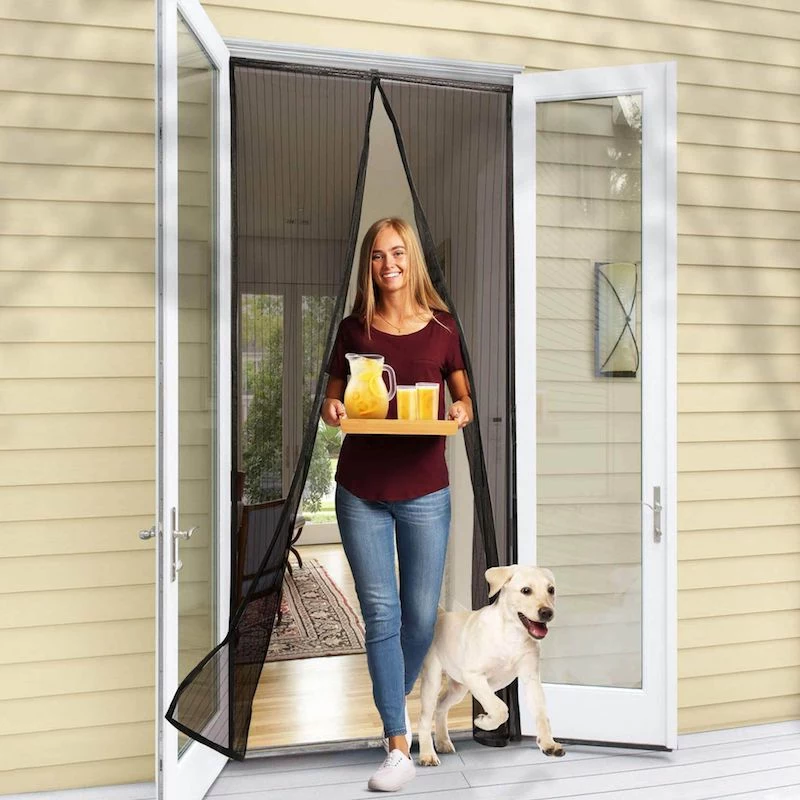
There’s a simple, profound satisfaction in walking through with a tray of drinks and hearing that crisp snap-click of the magnets sealing the doorway behind you. It’s the sound of a seamless transition between inside and out—the gentle breeze without the annoying buzz, the evening air without the uninvited guests. It’s the sound of summer, simplified.
Black Mesh: This is the professional’s choice for visibility. It tends to ‘disappear,’ giving you a clearer, less obstructed view of your yard or patio.
White Mesh: Can make a doorway feel brighter and airier, but it shows dirt much more quickly and can create more visual glare.
For the best all-around experience, black mesh almost always wins for its unobtrusive look.
Measure your door frame, not the door itself. You need a flat surface at least one inch wide all the way around for the adhesive to stick properly.
That ultra-cheap $15 screen might seem tempting, but buyer beware. You’re likely getting brittle fiberglass mesh that will tear easily and weak ferrite magnets that a strong breeze can pop open. For a bit more, a reputable brand like Flux Phenom uses durable polyester mesh and a series of powerful neodymium magnets, creating a reliable seal that will last multiple seasons, not just a few weeks.
- The top-center of the screen endures the most pulling force.
- The provided adhesive hook-and-loop tape might not be enough over time.
The solution? Use the included thumbtacks. Placing one tack on each side of the central opening, right at the top of the doorframe, provides crucial reinforcement where it’s needed most and prevents sagging.


