A Pro’s Guide to Laying Out a Tiny Studio (That You’ll Actually Love Living In)
So, you’ve got a studio apartment. We’re talking about that classic 20-square-meter (or roughly 215-square-foot) space that’s a rite of passage for so many of us. For years, I’ve helped people tackle this exact puzzle, and I’ve seen it all—the excitement, the panic, and the sheer confusion of trying to fit a whole life into one room.
In this article
- First Things First: Understanding Your Canvas
- The Pro’s Method: Zoning Your Studio Like a Boss
- Let’s Talk About Common (and Costly) Mistakes
- Smart Furniture That Actually Works
- Creating Separation Without Building Walls
- A Quick Word on Safety (This is Important!)
- Your Studio Action Checklist
- Inspirational Gallery
The internet is flooded with articles showing you ‘clever hacks’ and ‘cool tricks,’ but honestly, a lot of that is just fluff. My goal is different. I want to walk you through the actual, foundational method the pros use. This isn’t just about making it look good for a photo; it’s about creating a space that is genuinely functional, comfortable, and safe to live in every single day. Forget the quick fixes for a minute. Let’s build this from the ground up.
First Things First: Understanding Your Canvas
Before you even think about buying a new sofa, you have to get to know the box you’re working with. Seriously. The biggest mistake people make is skipping this part and jumping straight to furniture shopping.
Let’s Talk Light and Color
You’ve probably heard the advice to “just paint it white.” It’s popular for a reason—it’s based on simple physics. Light colors reflect light, making a space feel bigger and more airy. Dark colors absorb light and can make the walls feel like they’re closing in on you. It’s a real, measurable effect.
But you are absolutely not stuck with sterile white! Any light, cool color will do the trick. Think about soft grays, pale blues, or even a hint of sage green. By the way, the paint’s finish matters a ton. A satin or eggshell finish has a subtle sheen that bounces more light around than a flat matte finish. While matte is great for hiding wall imperfections, the extra light reflection from satin is usually worth it in a compact home.
Map Your Movement Paths
Every room has invisible pathways you use to get around—from the front door to the kitchen, from your bed to the bathroom. In a studio, keeping these paths clear is everything. Block them, and your apartment will feel frustrating and cramped, no matter how stylish it is.
Here’s a pro tip: Grab a roll of painter’s tape. The industry standard, based on how our bodies move, says you need a clear walkway of at least 90 centimeters (about 36 inches). Tape these main paths out on your floor. This is your first and most important rule. No furniture can cross into these taped-off zones. It might seem silly, but this simple visual will save you from buying a beautiful sofa that you have to shuffle past sideways every single day.
Controlling the Sound
Ever notice how an empty room echoes? That’s because sound waves are bouncing off all the hard surfaces. The fix is to add soft things that absorb sound, which does more than just quiet the space—it makes it feel calmer and more like a sanctuary.
- An Area Rug: This is non-negotiable. It’s the best tool for dampening sound, it adds texture, and it helps define your living zone.
- Curtains: Even sheer linen curtains can absorb a surprising amount of noise. Heavier drapes are even better.
- Upholstery: A fabric sofa will do a much better job of soaking up sound than a leather one.
- Bedding: Your duvet, pillows, and even a fabric headboard all help create a softer, more peaceful environment.
The Pro’s Method: Zoning Your Studio Like a Boss
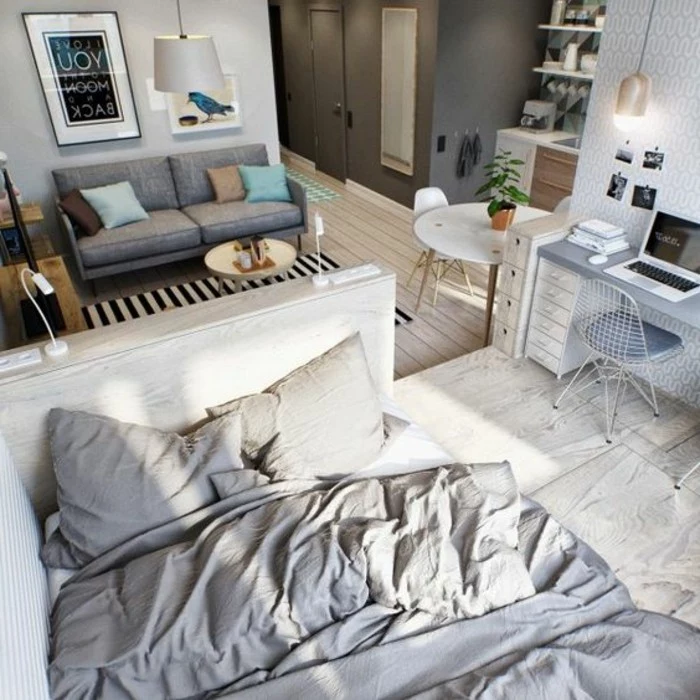
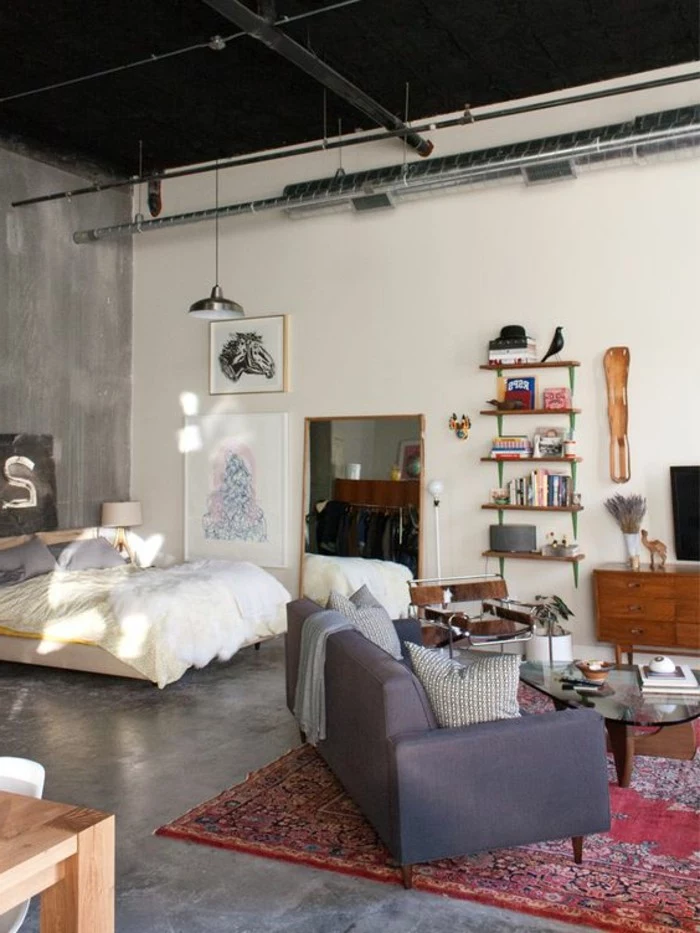
Okay, with the basics handled, it’s time to plan. The core of a successful studio layout is zoning. We’re going to mentally slice your one room into distinct areas for different activities—usually Sleep, Live, and Eat/Work. This makes each space feel intentional, even without walls.
Step 1: Choose and Place Your Anchor—The Bed
Your bed is almost always the starting point. It’s the biggest thing you own, and its location will dictate everything else. This first decision is a big one, so let’s be real about the options:
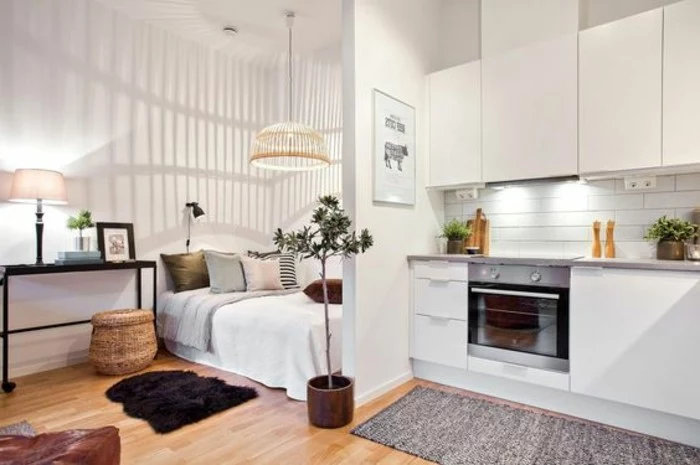
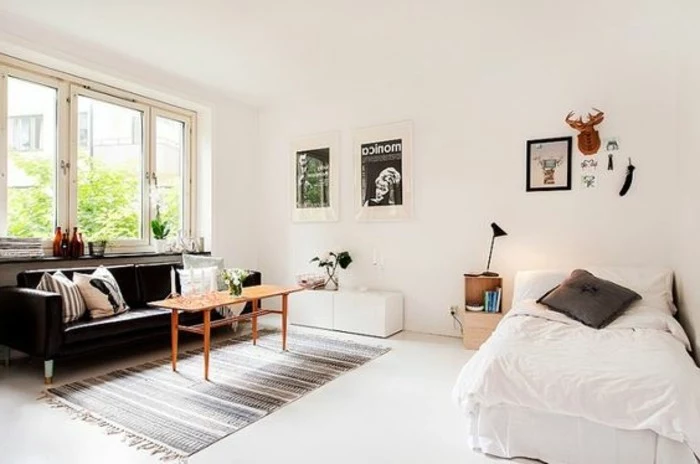
- The Standard Bed: If sleep quality is your absolute number one priority, this is your best bet. A real mattress on a solid frame is unbeatable for comfort. You’ll want to tuck it into a corner or against the wall furthest from the door to give it a sense of being a separate, private nook. The obvious downside? It takes up a huge chunk of your floor space, 24/7.
- The Sofa Bed: This offers amazing flexibility, giving you a proper living room during the day. But you have to be honest with yourself: will you really fold it up every single morning? I’ve seen countless clients leave them permanently in bed-mode, defeating the whole purpose. If you go this route, invest in quality. A cheap one will have a thin, lumpy mattress and a squeaky frame that will drive you nuts. Expect to pay at least $800-$2,000 for a decent one that will last.
- The Wall Bed (Murphy Bed): The ultimate space-saver. It literally vanishes into the wall, giving you back the entire room during the day. This is a more advanced solution and a real investment. A good wall bed is a piece of machinery. Heads up on cost: A quality wall bed unit itself can run from $1,500 to $4,000+, and you MUST budget for professional installation, which can add another $500 to $1,000. This is not a DIY project. It’s incredibly heavy and needs to be securely bolted to the wall studs to be safe.
Step 2: You Must Draw a Floor Plan
I know, I know, it sounds like homework. But this is not optional. You can use a free online tool like Floorplanner or just a simple piece of graph paper (let one square equal 6 inches or 15 cm). Measure your room, then make to-scale cutouts of the furniture you’re considering. This lets you play Tetris with your layout without breaking your back.
Quick tip: Try this right now. Measure your current bed and sofa. Now calculate how much of your total square footage they eat up. It’s usually a shocking number and the best motivation to plan carefully!
And for the love of all that is holy, measure your doorways, elevator, and stairwells before you buy anything. The number of times a gorgeous new sofa has been left on the sidewalk because it couldn’t make the turn into the apartment is heartbreakingly high.
Let’s Talk About Common (and Costly) Mistakes
Over the years, I’ve seen a few mistakes pop up again and again. Avoiding these will put you way ahead of the curve.
- The Bottleneck: This is when a piece of furniture—usually the sofa or a dining table—partially blocks a main pathway. My client’s story about the sofa creating a traffic jam between the kitchen and the door is a classic example. If you have to turn sideways to get by, it’s a layout fail.
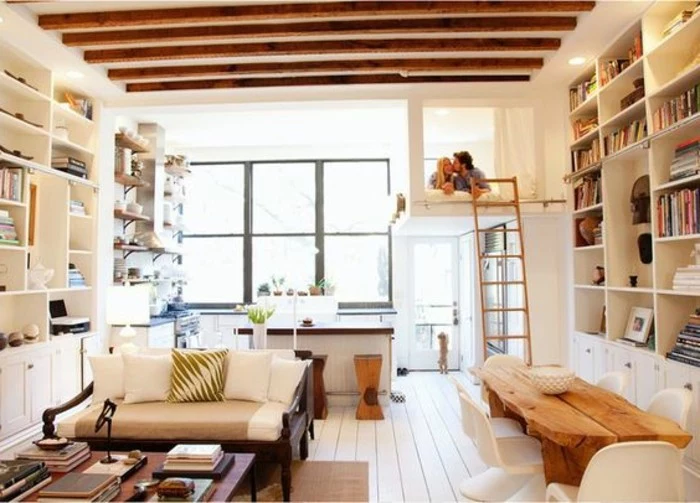
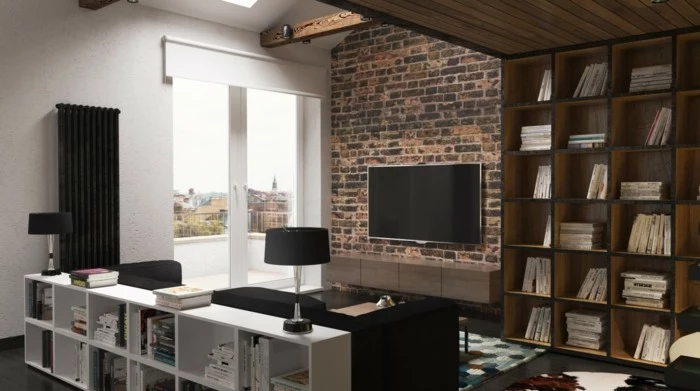
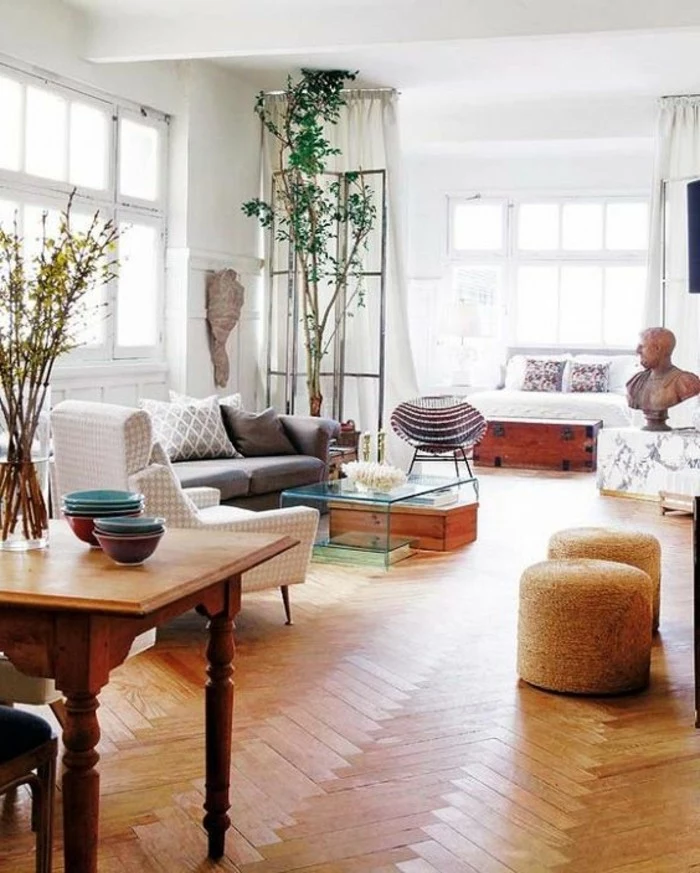
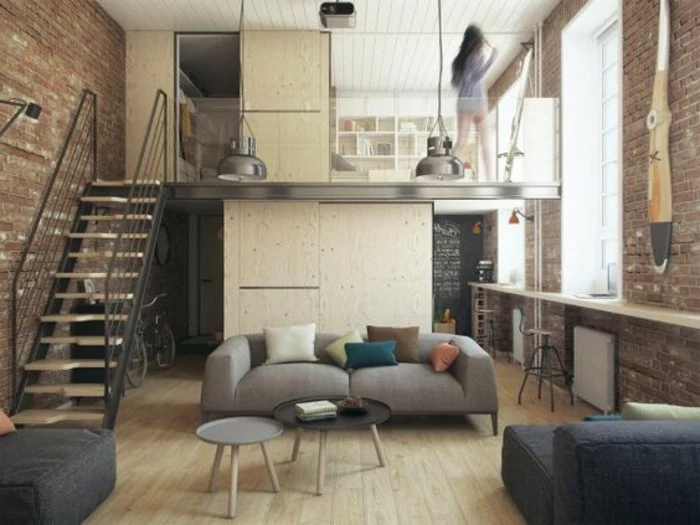
- Forgetting Vertical Space: In a small footprint, the only place to go is up! Tall, narrow bookcases draw the eye upward and make the room feel bigger. Floating shelves above doorways are great for storing things you don’t need daily.
- Ignoring Proportions: A giant, overstuffed sectional will look comical and feel oppressive in a tiny studio. Look for furniture with clean lines, exposed legs (which create a sense of spaciousness), and a smaller scale overall. Think “apartment-sized” everything.
- The “Too Many Little Things” Problem: A bunch of small furniture pieces can make a room feel more cluttered than a few larger, well-chosen ones. It’s often better to have one proper sofa and one storage ottoman than four mismatched little chairs and tables.
Smart Furniture That Actually Works
The term “multi-functional furniture” gets thrown around a lot. In practice, it just means that every large item you own should do at least two jobs.
A standard dining table is often a luxury you can’t afford. A much better choice is a lift-top coffee table. It serves as a regular coffee table, but the top pops up to a comfortable height for eating or working from the sofa. This is a game-changer. Just be sure to test the mechanism in the store; it should be smooth and stable, not wobbly. Expect to pay between $250 for a basic model and up to $700 for a really solid one with a durable lift.
And when it comes to storage, get creative. A storage bed with drawers underneath or a gas-lift mechanism that reveals a huge hidden compartment is perfect for stashing away seasonal clothes and extra bedding. A storage ottoman is another hero piece—it’s a footrest, extra seating, a makeshift table (with a tray on top), and hidden storage all in one.
Creating Separation Without Building Walls
Creating a psychological divide between your sleeping and living areas is so important for your mental health. Waking up and staring right at your dirty dishes is not a recipe for relaxation. Here’s how to do it:
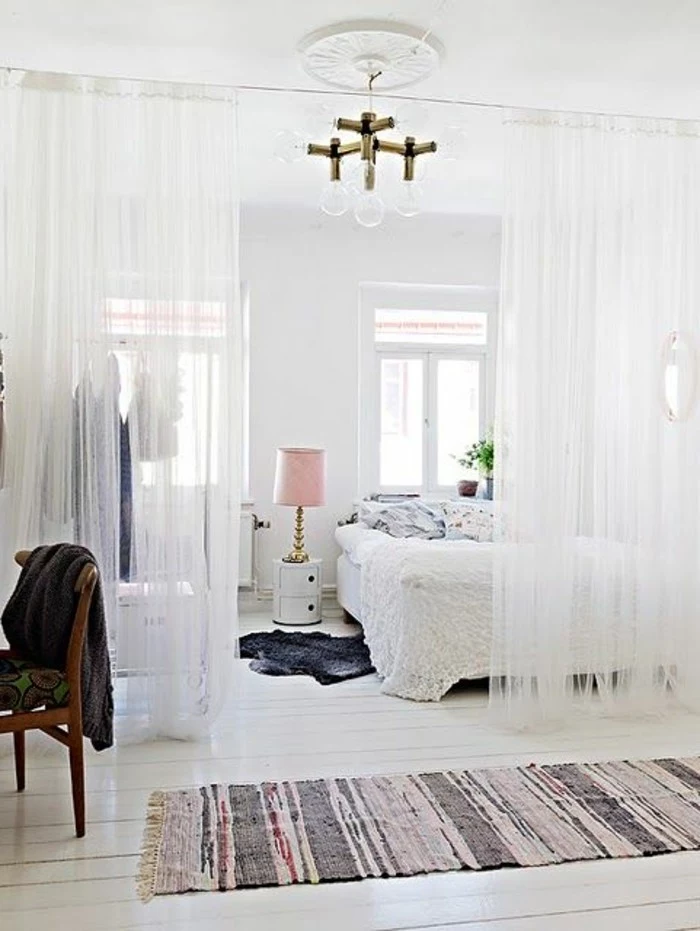
- The Curtain Divider: This is a cheap and effective trick. Use a ceiling-mounted track (not a flimsy tension rod) so the curtain glides easily and makes the ceiling feel higher. A semi-sheer linen fabric can define the space while still letting light through. Total cost for a track and a nice curtain? Probably under $300.
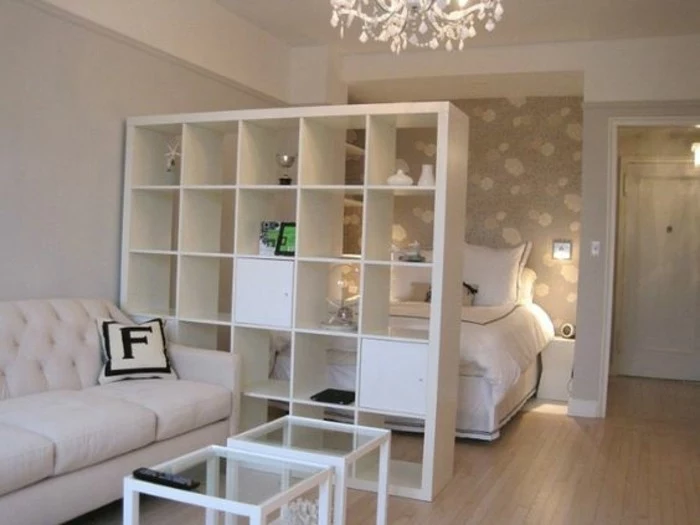
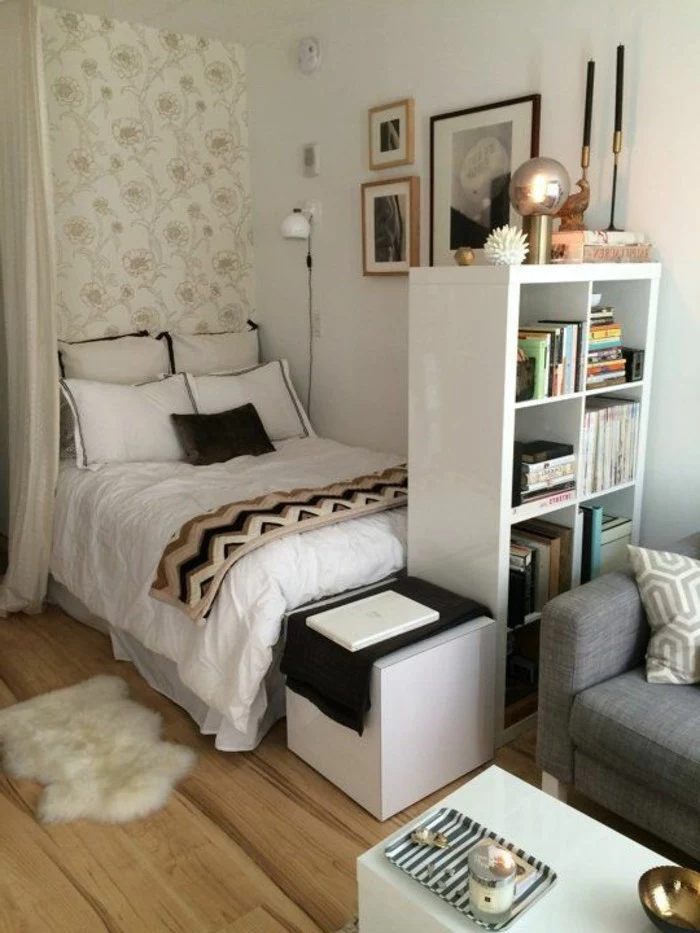
- The Open Bookshelf: A classic cube-style, open-backed bookshelf is a fantastic room divider. It creates a clear visual boundary but doesn’t completely block light, so the room still feels connected. The key is to not cram it full; leave some cubes empty to maintain that airy feeling.
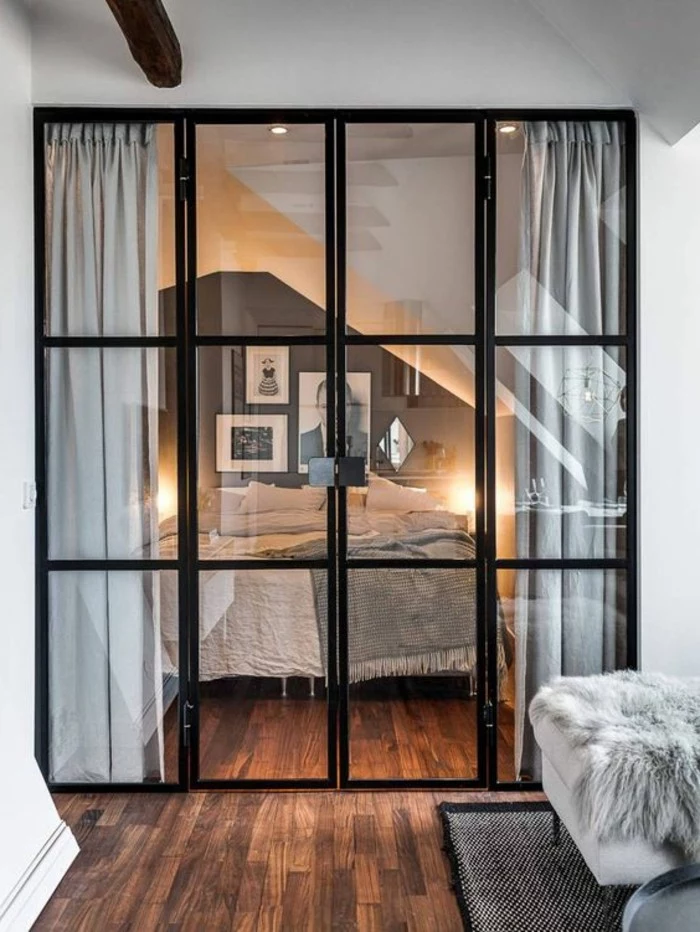
- The Glass Partition: This is the high-end option. An industrial-style steel-and-glass partition looks incredible and provides a real physical and acoustic barrier while keeping things visually open. It instantly elevates the space. However, this is a major project. They are heavy, require professional installation, and are a significant investment—think $2,500 to $6,000 depending on size and complexity.
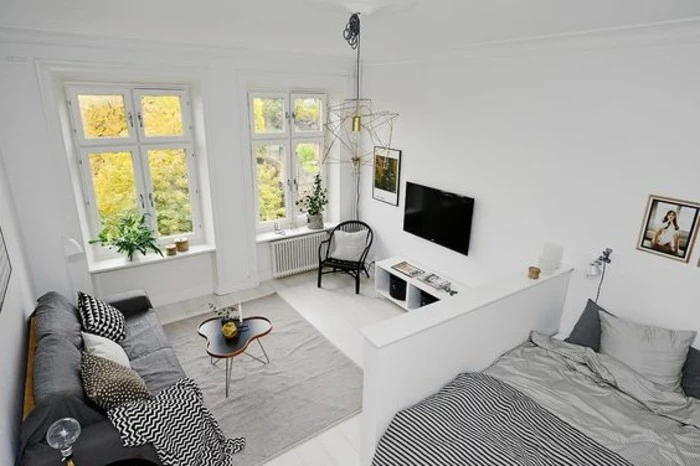
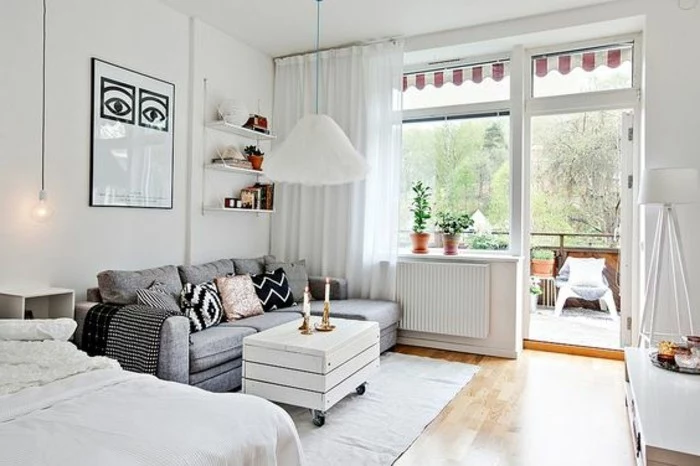
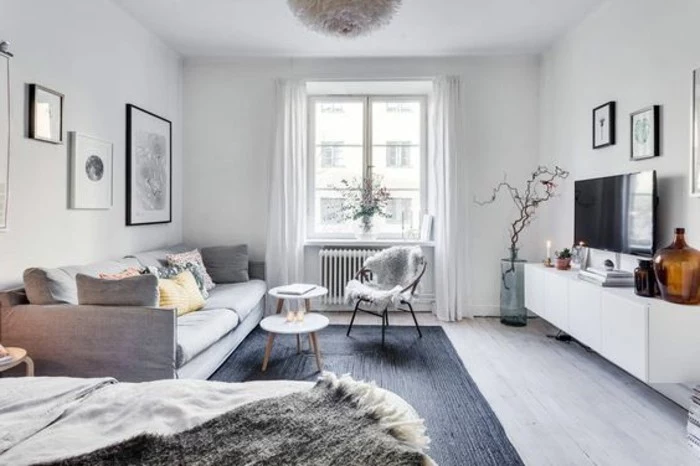
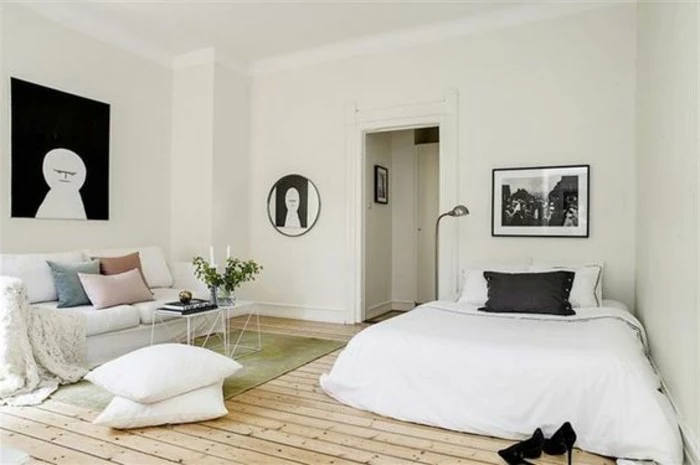
- The Humble Rug: Never, ever underestimate the power of a rug. Placing a large rug in your living area draws a clear line on the floor. Your brain reads that cue and understands, “This is the living room.” Just make sure the front legs of your sofa and chairs are on the rug to anchor the space properly.
A Quick Word on Safety (This is Important!)
In a small space, safety is even more critical. Please don’t skip this.
Egress and Fire Safety: Building codes require a clear, unobstructed path from your bed to the main exit. Don’t let your layout block that path or any windows that could be used as a secondary escape route.
How to Find a Wall Stud for $20: Before you hang anything heavy—a TV, big shelves, a wall-mounted desk—you must anchor it to the wooden studs inside your walls. Drywall alone will not hold it! You can buy a basic electronic stud finder at any hardware store for about $20. Just turn it on, place it flat against the wall, and slide it horizontally. It will beep or light up when it detects a stud. Mark the spot with a pencil. Do this in a few vertical spots to confirm you’ve found the center of the stud. It’s a simple step that prevents a catastrophic crash.
When to Call a Pro: Painting and assembling flat-pack furniture are great DIY projects. But for any electrical work, plumbing, or hanging extremely heavy items (like that wall bed!), please call a licensed professional. Your safety is always worth the cost.
Your Studio Action Checklist
Feeling overwhelmed? Don’t be. Just take it one step at a time. A great studio isn’t one that looks like a magazine cover; it’s one that works perfectly for the life you live inside it.
Here’s your plan. You got this.
- [ ] I have accurately measured my room’s dimensions.
- [ ] I have used painter’s tape to mark my essential 36-inch walkways.
- [ ] I have drawn a to-scale floor plan of my space.
- [ ] I have decided on my ‘anchor’ piece (the bed) and its best location.
- [ ] I have a plan for creating zones (using rugs, shelves, or curtains).
- [ ] I have measured my doorways to make sure new furniture will actually fit.
Inspirational Gallery
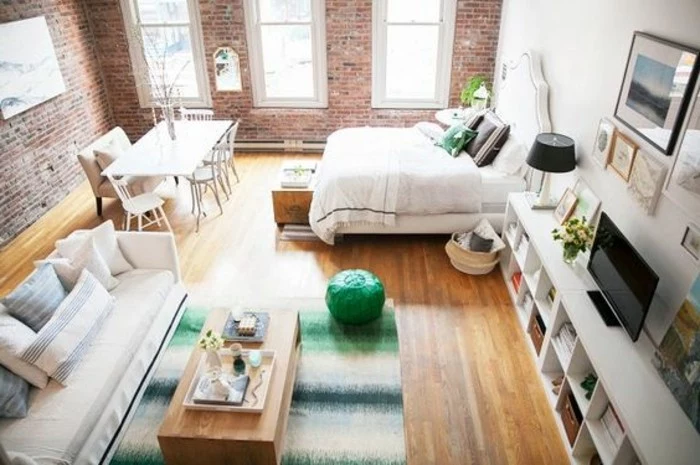
- A unified, cohesive feel.
- A clear definition of your living space.
- A touch of plush, luxurious texture underfoot.
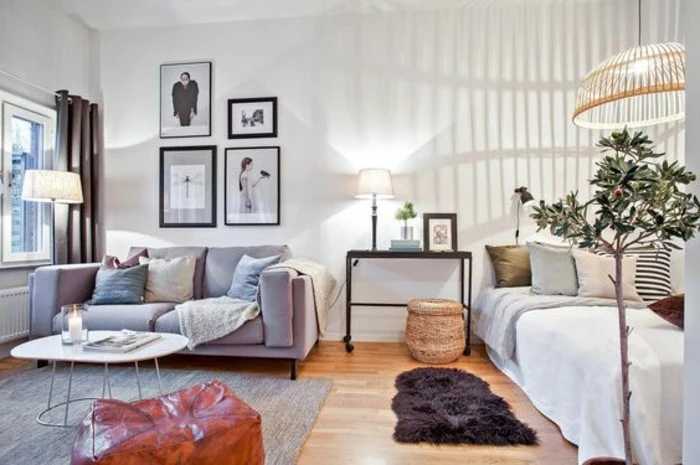
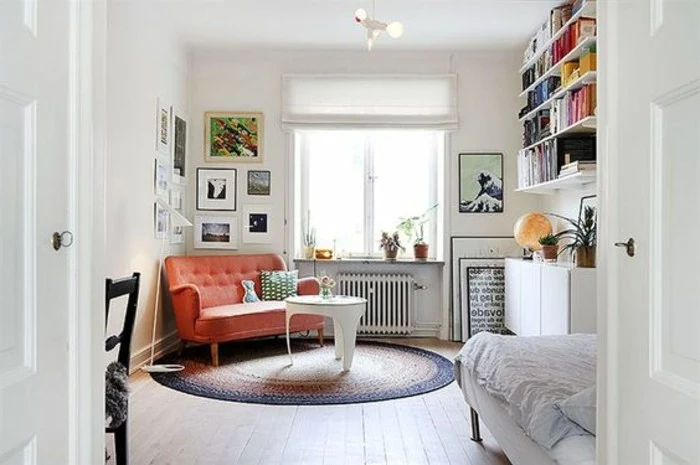
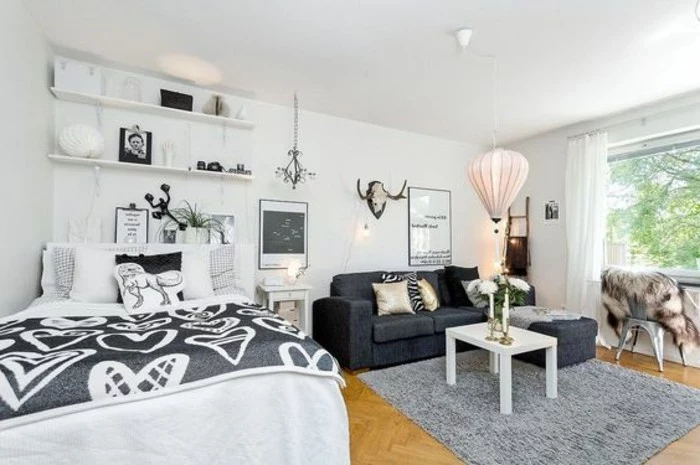
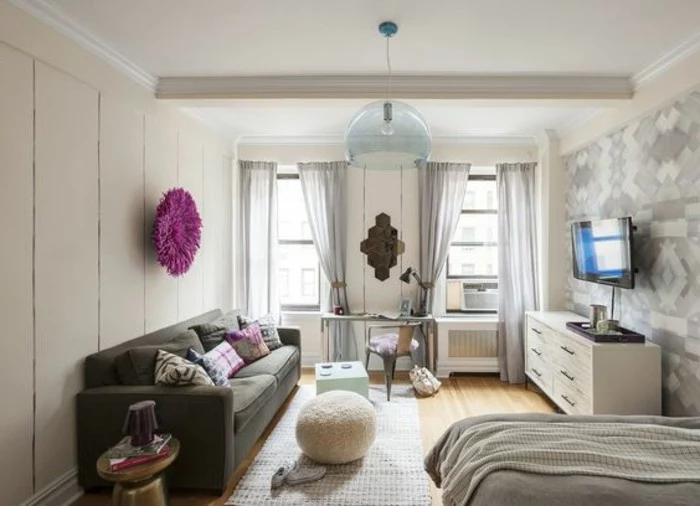
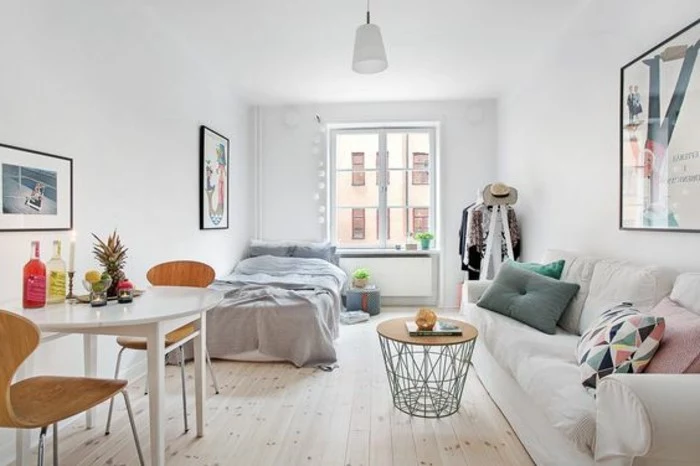
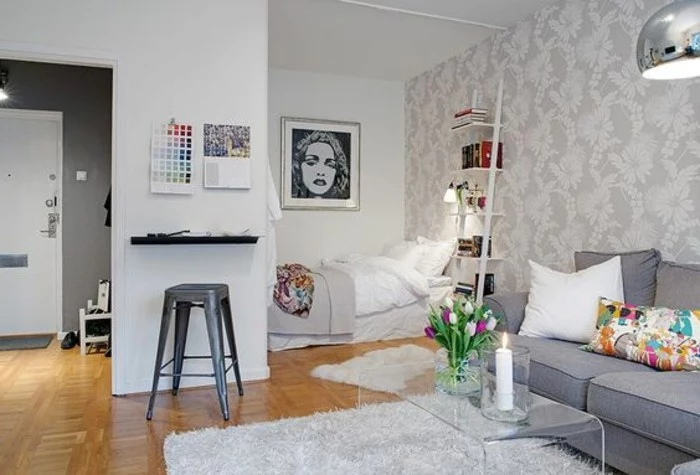
The secret? A single, large area rug. Contrary to popular belief, using one large rug that anchors the main furniture (sofa, coffee table, chair) makes a studio feel bigger and more intentional than multiple small, disconnected rugs.
Go beyond the basic white paint. The trick is not just the color, but the finish. An eggshell or satin finish has a slight lustre that bounces light around the room far more effectively than a flat matte. While matte is chic, in a 20-square-meter space, that extra bit of reflectivity from a good quality paint like Farrow & Ball’s Estate Eggshell can make all the difference, creating a soft glow rather than a sterile box.
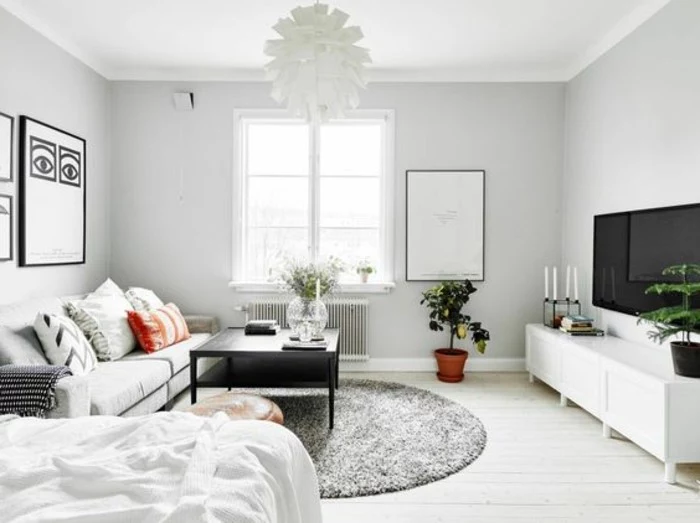
How do you create separate zones without building walls?
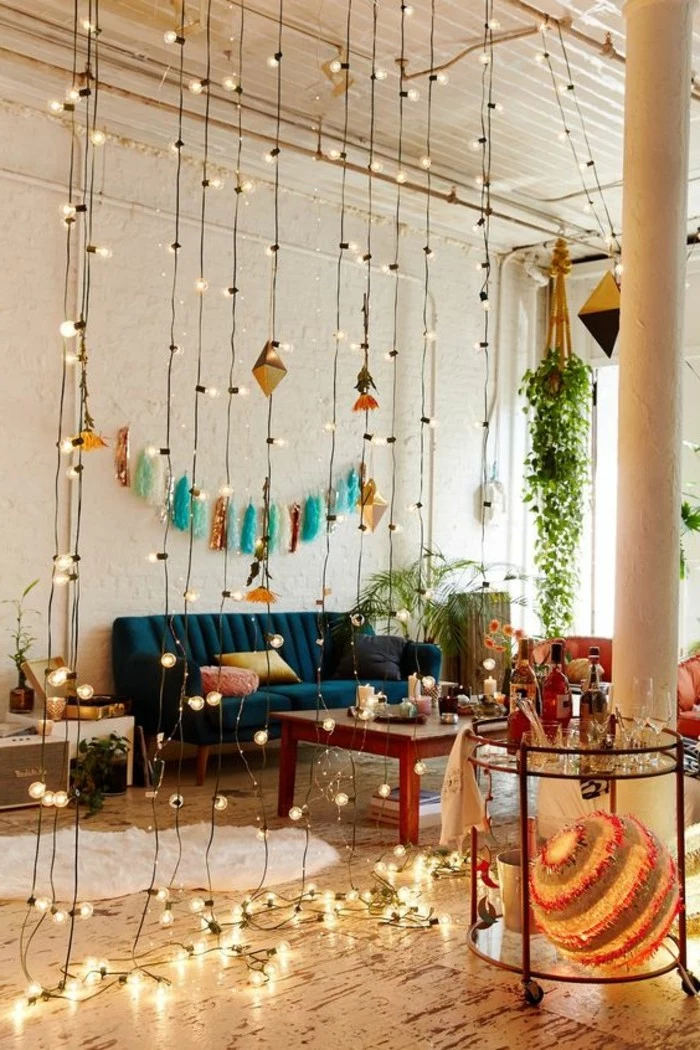
Think with light. Use different types of lighting to signal different functions. A stylish, low-hanging pendant light over your dining table carves out an eating nook. A sleek floor lamp next to an armchair creates a reading corner. Dimmable, under-cabinet LED strips define the kitchen workspace. This ‘light zoning’ creates distinct moods and areas without a single physical barrier.
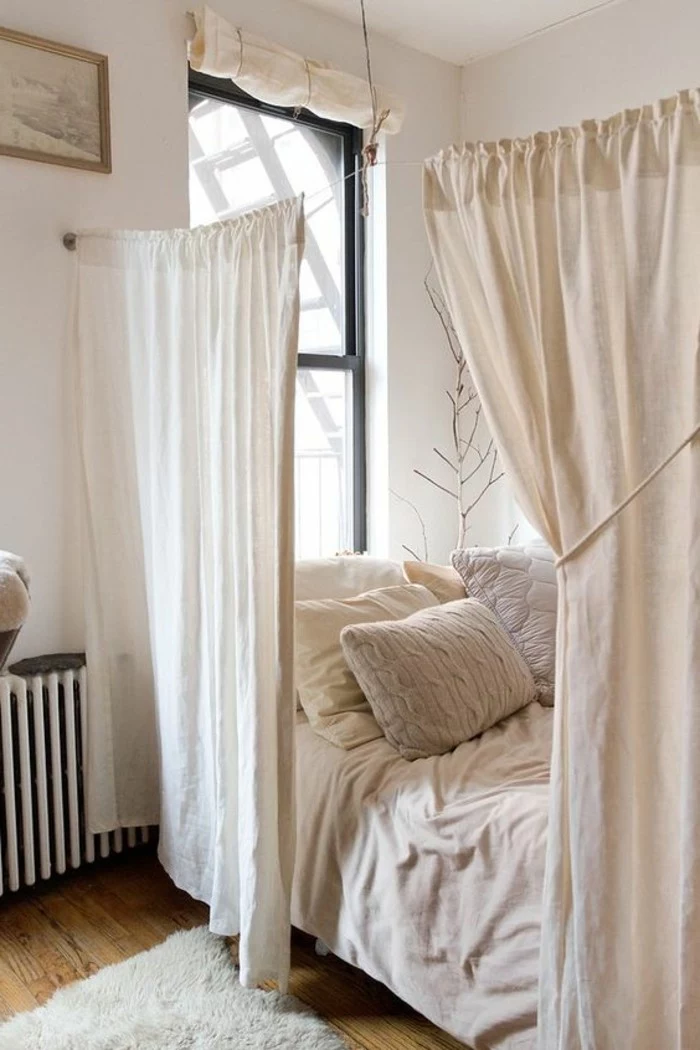
Nearly 40% of our ‘visual diet’ at home is the floor and the ceiling.
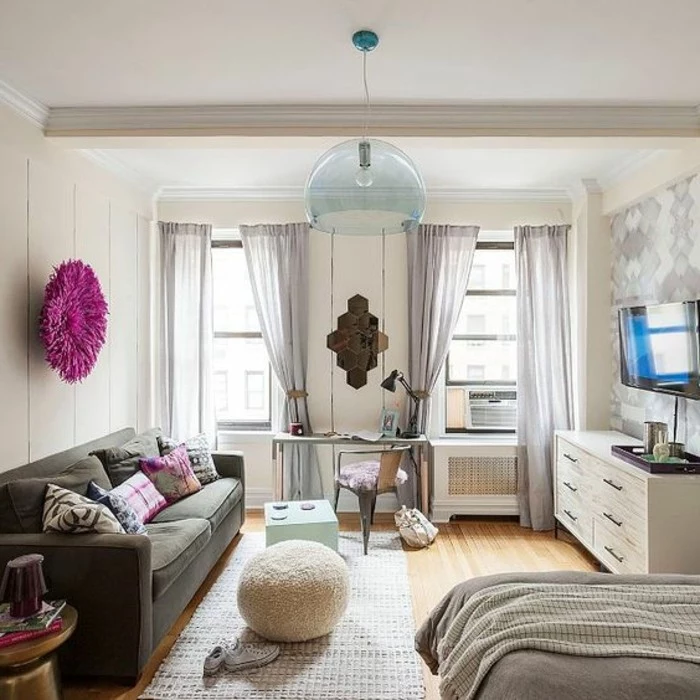
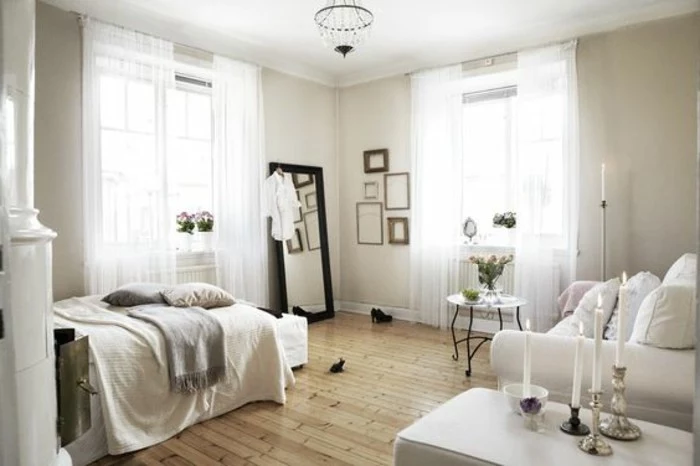
This is why drawing the eye upward is a classic pro trick. Install floor-to-ceiling curtains, hung a few inches wider than the window frame. This creates an illusion of height and width, making the entire room feel grander and less confined. It’s a simple change with a massive architectural impact.
The Murphy Bed’s Modern Cousin: Before you commit to a bulky sofa bed, consider the new generation of cabinet beds. Companies like Resource Furniture offer stylish, freestanding cabinets that fold out into a comfortable queen bed, often with integrated shelving or even a desk. They disappear completely during the day, giving you back your entire living space.
The High-End Sofa Bed: If you prefer a sofa, invest in quality. Brands like Joybird or Article offer sleeper sofas with memory foam mattresses that don’t feel like a compromise. The key is to test them for both sitting and sleeping comfort.
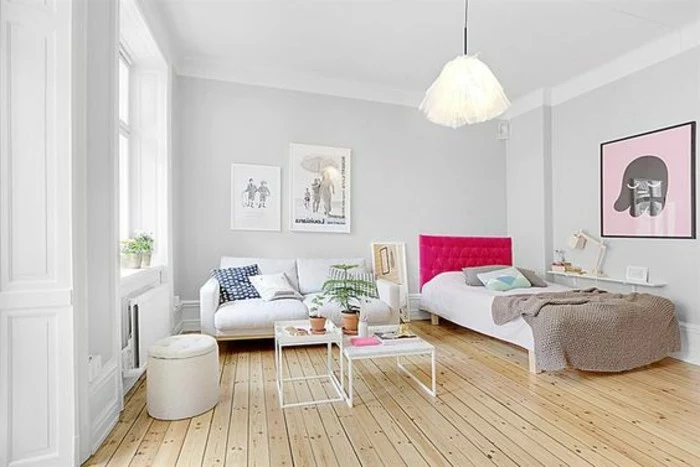
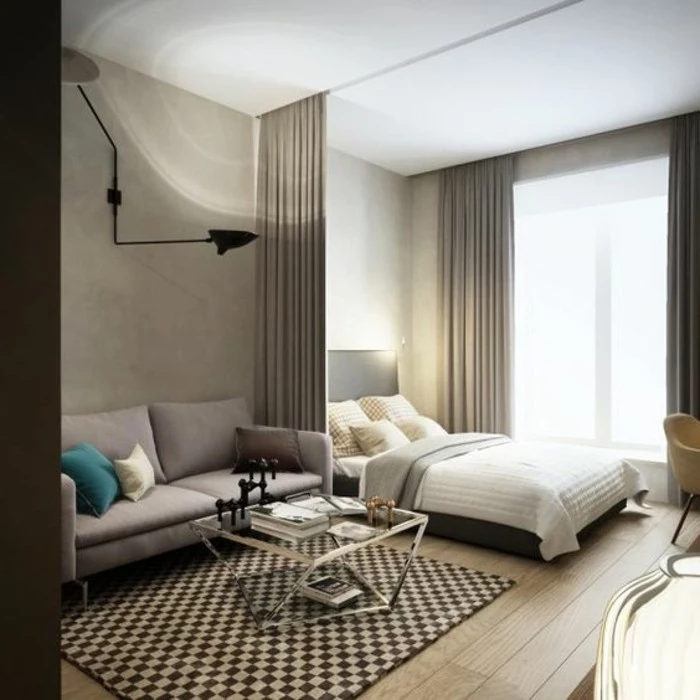
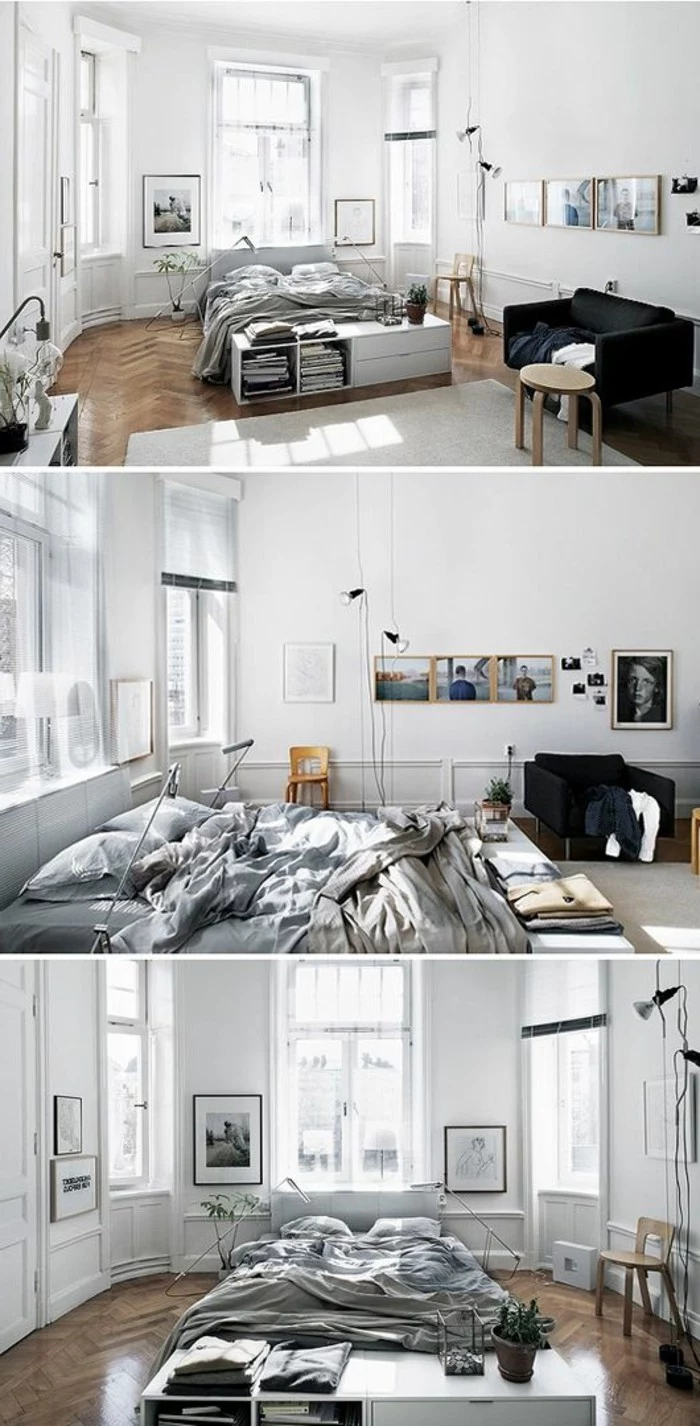
Your furniture shouldn’t be a wallflower. Pulling your sofa and chairs even a few centimeters away from the walls creates a little breathing room. This negative space, however small, tricks the eye into perceiving a larger, airier room. It prevents the ‘stuck to the edges’ look that can make a studio feel like a waiting room.
- Coffee Table: Choose a set of nesting tables you can expand for guests or a storage ottoman to hide blankets and remotes.
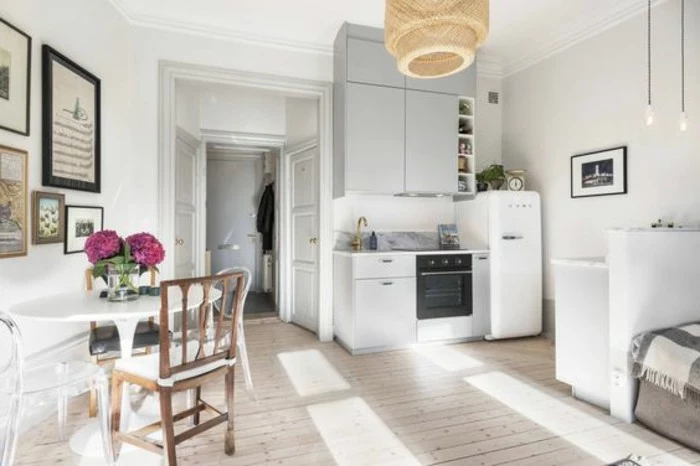
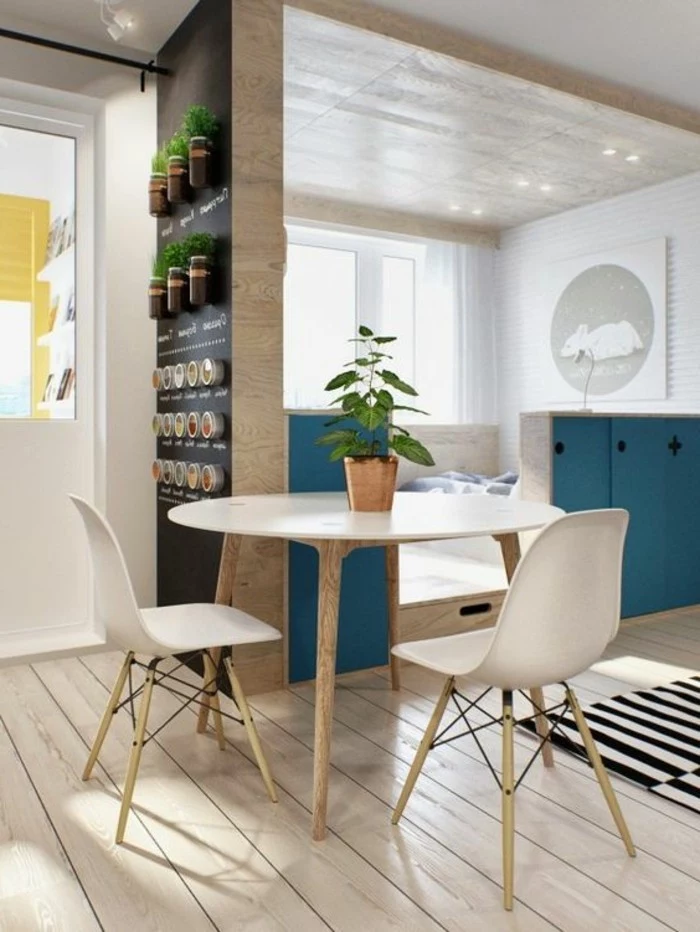
- Dining Table: A round pedestal table has a smaller physical and visual footprint. A wall-mounted drop-leaf table disappears when not in use.
- Bed: A hydraulic lift-up storage bed (like those from IKEA or West Elm) offers a ‘garage’ of space underneath for out-of-season clothes.
“The essence of interior design will always be about people and how they live. It is about the realities of what makes for an attractive, civilized, meaningful environment, not about fashion or what’s in or what’s out.” – Albert Hadley
One major mistake: Buying ‘small-scale’ everything. A room filled with tiny furniture can feel cluttered and dollhouse-like. It’s better to have fewer, but regular-sized, pieces. A comfortable, standard-depth sofa is more inviting and functional than a cramped loveseat. The key is choosing the *right* regular-sized pieces, not just miniaturizing your life.
Think transparent. Using furniture made of acrylic or lucite is a powerful tool in a small space. A ‘ghost’ coffee table, console, or even dining chairs (like the famous Louis Ghost chair) take up zero visual space. They perform their function while allowing light and sightlines to pass through them, preventing the room from feeling crowded.
Is a TV ruining your studio’s aesthetic?
You have options beyond a big black screen. Consider a smart projector like the Samsung Freestyle, which can project a screen onto any clear wall and be easily put away. Alternatively, integrate the TV into a gallery wall, so it blends in with art, or use Samsung’s ‘The Frame’ TV, which displays artwork when not in use, making it a design feature rather than a tech eyesore.
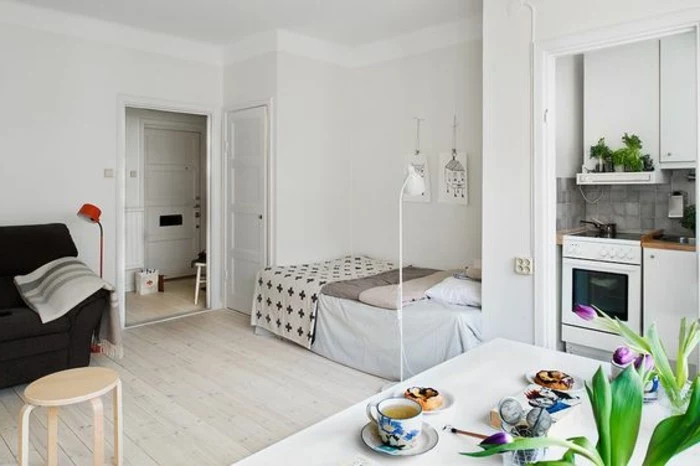
Did you know that in Tokyo, the average apartment size is just 13 square meters (about 140 sq ft)?
This has led to mastery in multi-functional, minimalist design. Take a cue from Japanese interiors: embrace natural materials like light wood and linen, keep decor intentional, and invest in high-quality, clever storage solutions from brands like MUJI, whose modular shelving and storage boxes are designed for exactly these kinds of spaces.

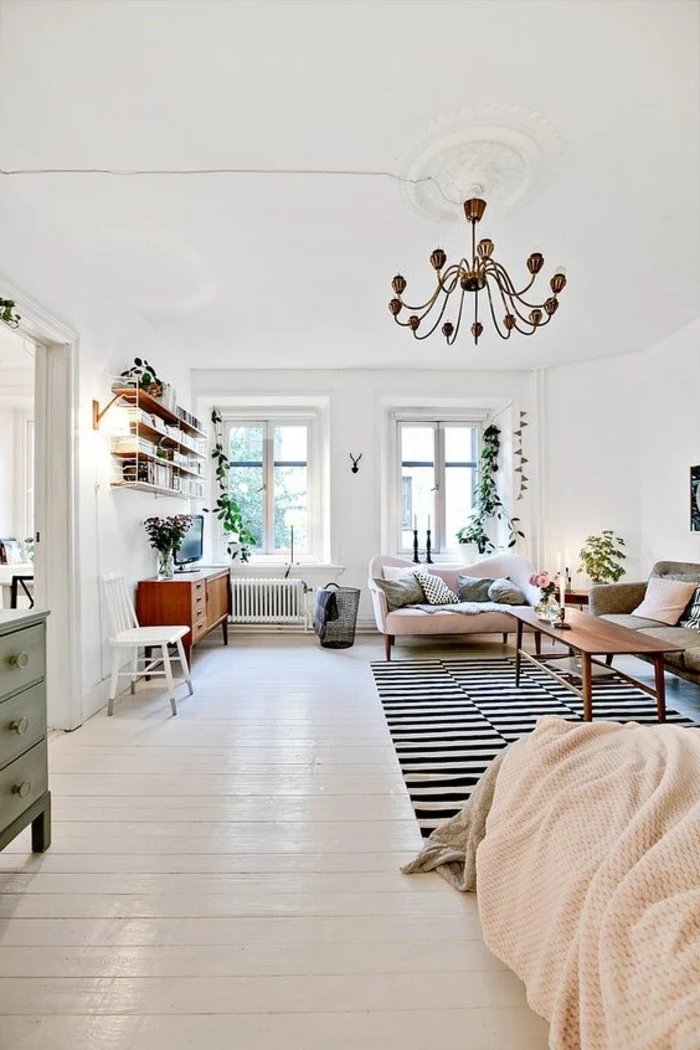
Don’t just hang a mirror; weaponize it. The most effective placement for a large mirror is directly opposite your main window. It will not only bounce the maximum amount of natural light back into the room, but it will also reflect the view, creating a ‘second window’ and a powerful sense of depth.
A cohesive color palette is essential, but it doesn’t have to be boring. Here’s a simple, pro-level formula:
- 60% Main Color: Your light, neutral wall color.
- 30% Secondary Color: Use this for larger pieces like your sofa, rug, or curtains. Think a soft grey, navy, or beige.
- 10% Accent Color: A pop of bold color (mustard yellow, emerald green, terracotta) for cushions, throws, and art.

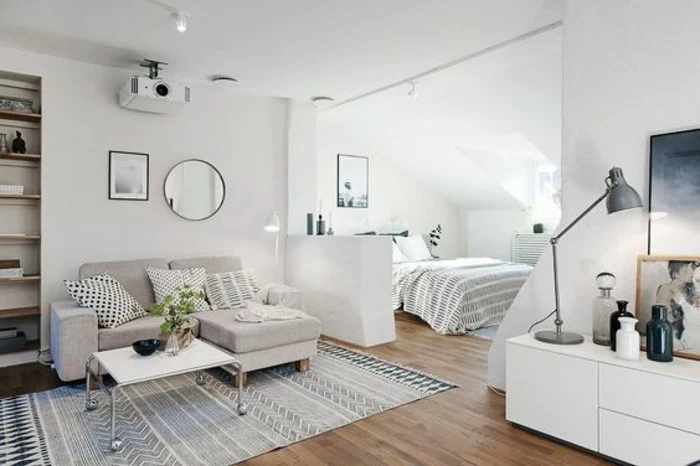
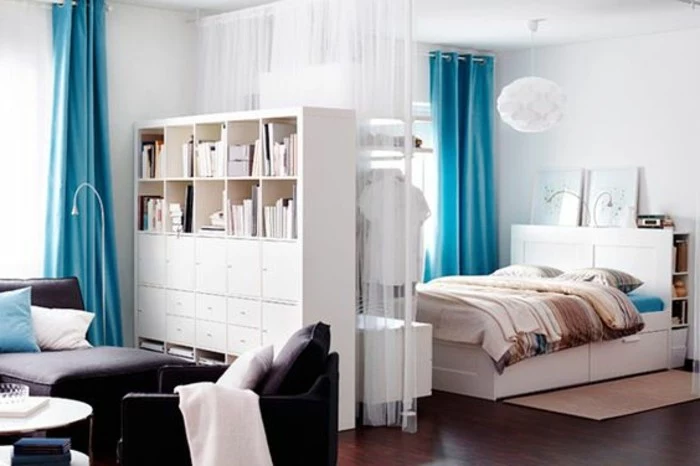
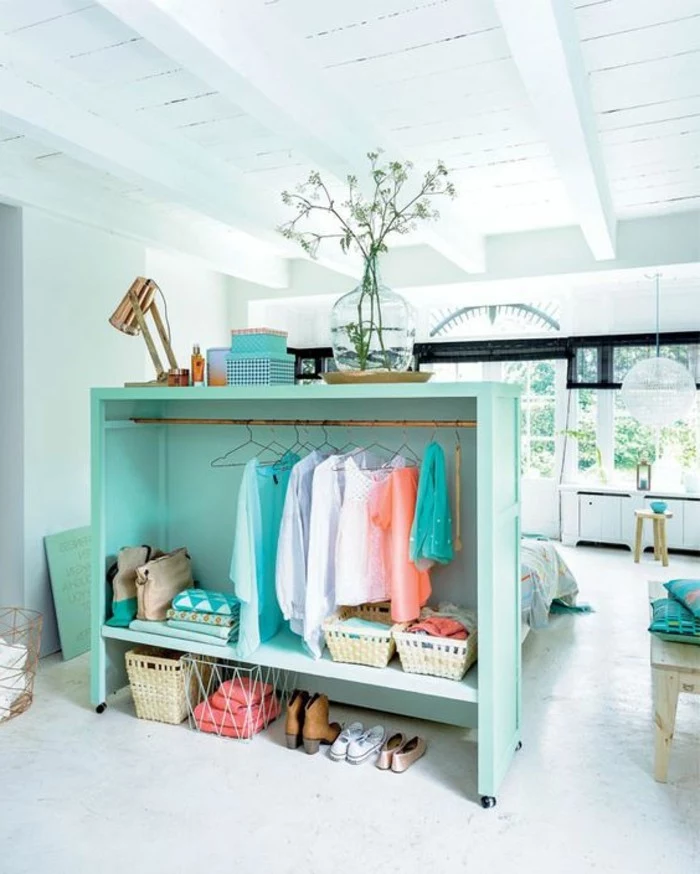
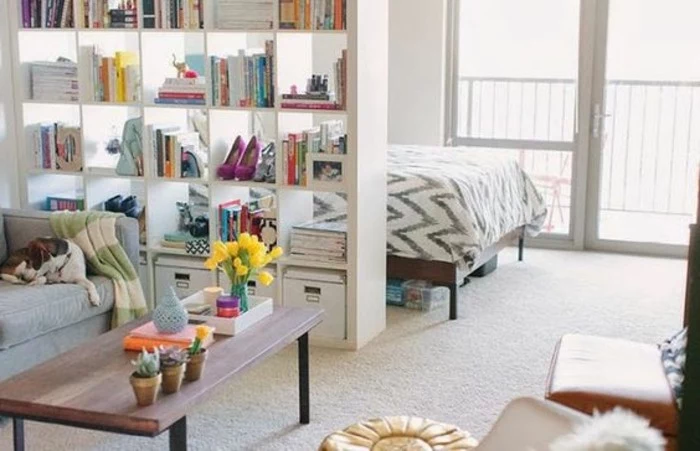
Open Shelving Divider: An IKEA KALLAX or a more airy metal-and-wood bookshelf can partition a sleeping area from the living space. It defines the zone while allowing light to pass through and providing crucial storage.
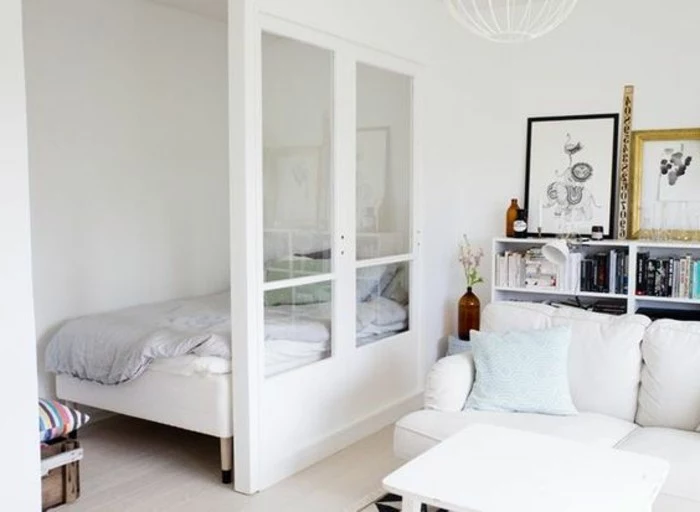
Glass Panel Divider: A Crittall-style glass and metal partition creates a sophisticated, architectural separation. It clearly delineates the space and contains noise better than a shelf, but it’s a more permanent and costly investment.
For flexibility and budget, the open bookshelf is the winner.

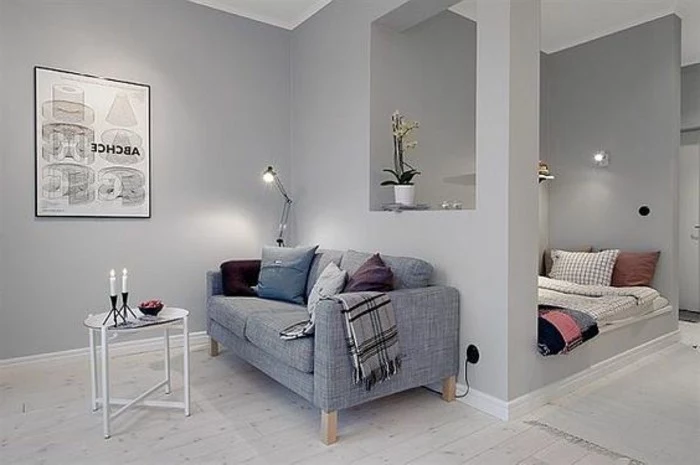
Get your furniture off the floor! Choosing a sofa, console table, and bed frame with visible legs creates an unbroken floor plane. Seeing the floor extend underneath the furniture makes the room feel significantly larger and less weighed down. It’s a subtle but incredibly effective psychological trick.
- It adds a warm, organic texture.
- It can be used for storage, seating, or as a small table.
- It brings a touch of on-trend Japandi or coastal style.
The secret? A simple woven pouf or ottoman. A versatile piece from brands like The Citizenry or even Target can serve multiple functions in a tight space while adding a dose of sophisticated, natural texture.
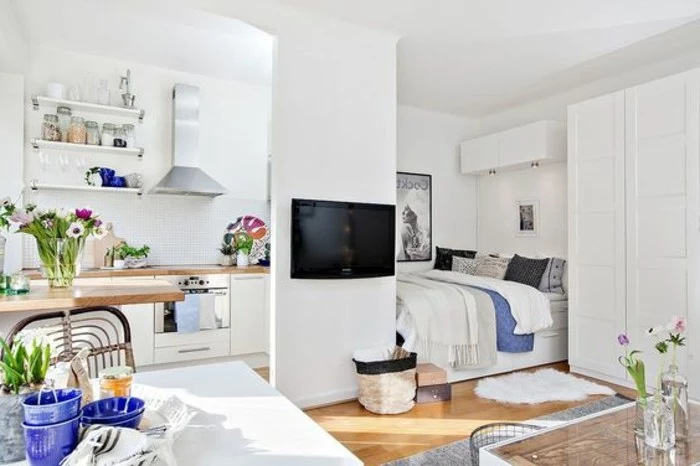
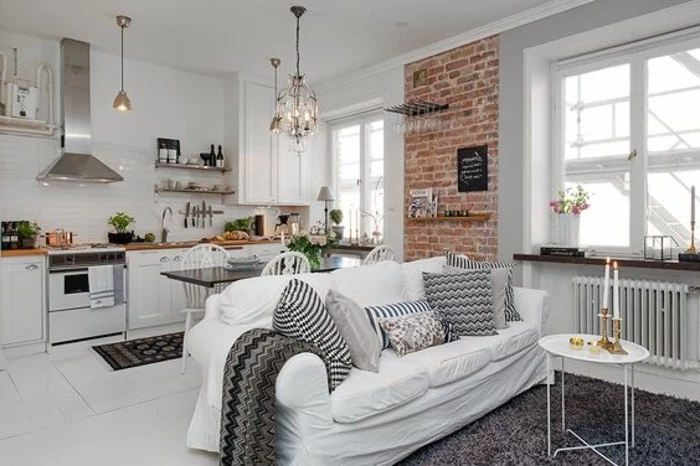
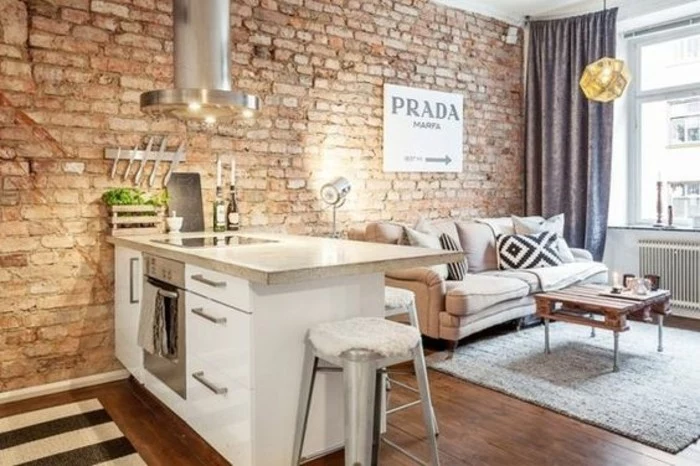
My “kitchen” is just a wall with a sink. How do I make it feel intentional?
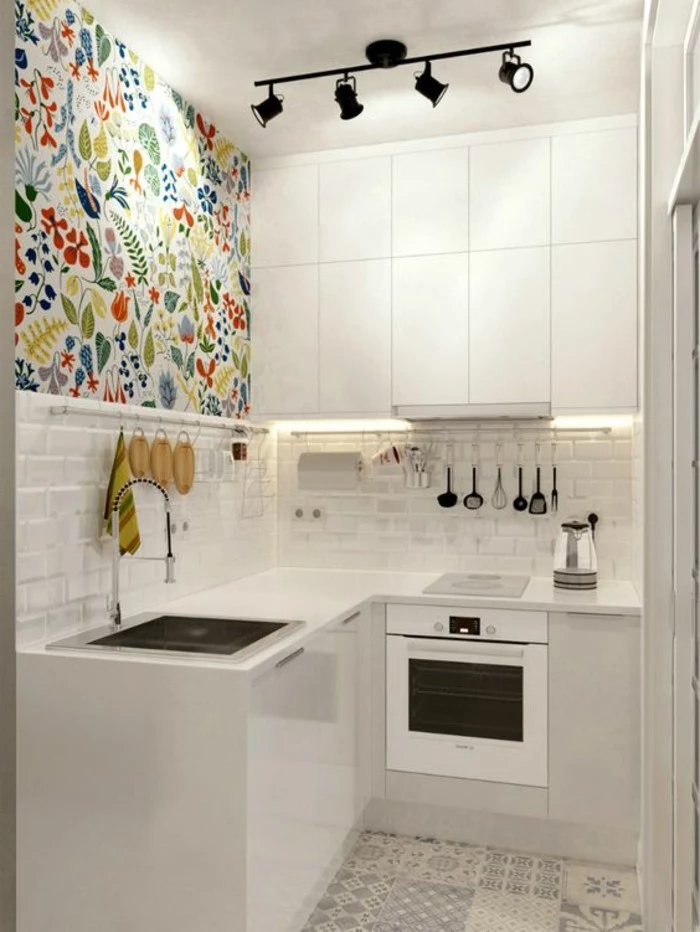
Create a dedicated zone. First, install a wall-mounted rail system, like IKEA’s HULTARP, between the counter and cabinets to hang utensils, spices, and small plants. Then, add a focused light source with stick-on, under-cabinet LED lighting. Finally, place a durable, washable runner on the floor in front of it. These three steps visually frame the area, making it feel like a distinct and functional kitchen.
A 2011 Princeton University study found that physical clutter competes for your attention, resulting in decreased performance and increased stress.
In a studio, this is amplified. The solution is ‘one in, one out.’ Every time you bring a new non-consumable item into your home, an old one must go. This simple rule prevents the slow accumulation of clutter and forces you to be intentional about every object you own.
The problem with downlights: A grid of recessed ceiling lights can make a small apartment feel like an office or a landing strip. They cast harsh shadows and create a flat, uninviting atmosphere. It’s far better to have a central ceiling fixture and supplement with floor and table lamps at varying heights to create a warm, layered, and homey glow.
Use textiles to tell a story and add depth. Don’t be afraid to mix textures:
- A smooth leather or velvet pillow on a linen sofa.
- A chunky knit throw draped over a sleek metal chair.
- A high-pile, plush rug on a smooth wood or concrete floor.
This layering prevents a minimalist space from feeling cold and adds a sense of curated comfort.
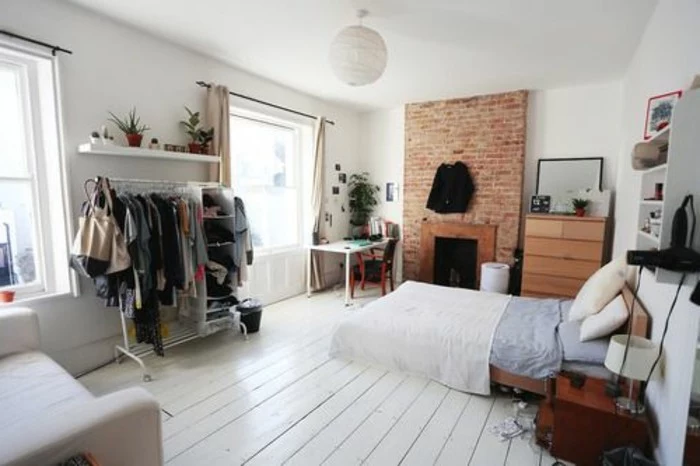
Floating Desk: A wall-mounted desk takes up no floor space and can be installed at the exact height you need. Pair it with a stool that can be tucked completely underneath.
The ‘Cloffice’: If you have a closet to spare, convert it into a small office. Remove the doors, add a desktop, shelving, and good task lighting. You can even hang a curtain to hide it away after work.
Both options are vastly superior to using your dining table, which keeps your ‘work’ and ‘life’ zones frustratingly blurred.
“The question of what is calling to us, what we are drawn to, is the question of what we will cherish.” – Marie Kondo
In a studio, every item is always on display. This is your chance to edit your life down to only the things that serve a purpose or bring you genuine joy. A beautiful ceramic mug is better than six mismatched ones. One great piece of art is better than five generic prints. Curate your space like a personal gallery.
Don’t forget the power of scent to define your tiny home. Because the space is small, a single fragrance can create an immersive atmosphere. Avoid cloying plug-ins and opt for a high-quality ultrasonic diffuser with essential oils. Use an energizing scent like citrus during the day and a calming one like lavender or cedarwood in the evening to signal a shift in mood and function.
A common pitfall: Forgetting about landing zones. You need a dedicated spot right by the door for keys, mail, and your wallet. Without one, your dining table or kitchen counter will become a permanent clutter magnet. Install a small floating shelf, a wall-mounted organizer like the Umbra Cubby, or even just a beautiful ceramic bowl on a small console table. This simple habit keeps chaos contained from the moment you walk in.


