Your Remodeling Quote Is a Fantasy. Here’s How to Budget for Reality.
I’ve been swinging hammers and managing job sites for more than two decades. In that time, I’ve seen the pure joy on a homeowner’s face when their dream kitchen finally comes together. But I’ve also had to have that tough conversation, plans spread across a makeshift table, explaining why we’ve hit a snag that’s going to cost real money. It’s the worst part of my job, but it’s also the most important.
In this article
- 1. The Big Reveal: What’s Hiding Behind Your Walls?
- 2. The Paperwork Jungle: Permits and Professionals
- 3. The Messy Middle: Demolition, Disposal, and Site Management
- 4. The Hidden Costs: How You’ll Actually Live
- 5. The Ripple Effect: Long-Term Financial Hits
- So, What’s the Real Plan?
- Inspirational Gallery
Let’s be honest: that signed contract you have? It’s a starting line, not a fixed price tag. The real journey is navigating everything that happens between demolition and that final, glorious walkthrough. And that journey almost always has a few surprises.
Most people think a remodeling quote is set in stone. The truth is, it’s a professional, educated guess based on what we can see. The most detailed estimate in the world can’t predict what’s hiding behind your drywall. This is why the most critical line item in your budget isn’t the cabinets or the labor. It’s your contingency fund.

This is a separate pile of cash—usually 15-20% of the total project cost—that you set aside purely for the unexpected. And no, it’s not a slush fund for upgrading your faucets at the last minute. Think of it as your project’s insurance policy. It’s what turns a potential disaster into a manageable problem.
ACTIONABLE STEP: Before you even call a contractor, open up a spreadsheet. Make your first line item “Contingency Fund” and put 15% of your total estimated spend right there. Seeing that number from day one makes it real and keeps you honest.
This guide isn’t meant to scare you off your dream remodel. It’s meant to arm you with the knowledge I see play out on job sites every single week. Understanding these potential costs is the difference between a nightmare project and a satisfying transformation.
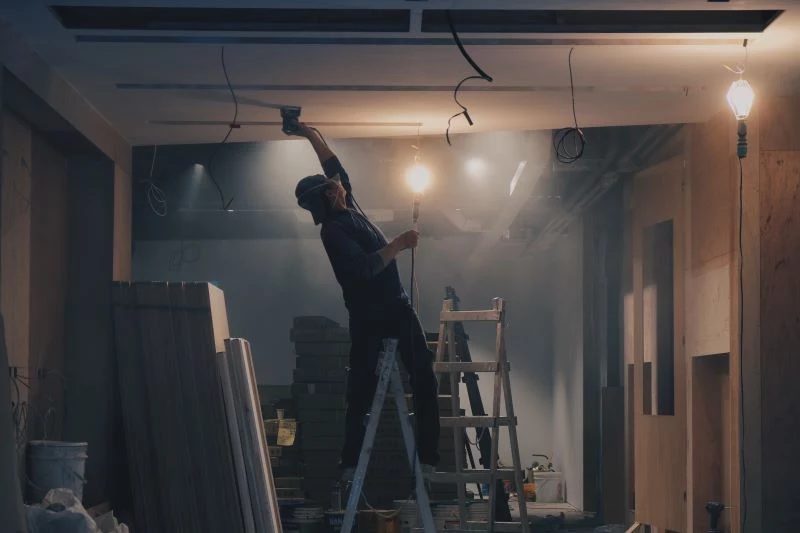
1. The Big Reveal: What’s Hiding Behind Your Walls?
The first day of demolition is always a little bit like Christmas and a little bit like a horror movie. Once we start opening things up, we step into the great unknown. This is where a straightforward job can get complicated, fast.
Water Damage and Mold
Even in a home that looks spotless, a slow, hidden leak is incredibly common. It could be from a leaky shower valve, a bad toilet seal, or a window that wasn’t flashed correctly. You’d never know it was there. But when we pull away the drywall, we see the story: dark stains on the wood studs, damp and compressed insulation, and sometimes, that musty, earthy smell that screams MOLD.
Oh yeah, and mold isn’t just an ugly stain. It thrives on moisture, a food source (like the paper on drywall), and a warm temperature. Your walls are basically a perfect buffet. The mold literally eats the wood, compromising its structural integrity over time.
If we find a significant amount, we have to stop work. Period. This isn’t something you can just spray with bleach from the hardware store (a common mistake that just whitens the surface and can spread spores). You need a professional mold remediation company. They’ll set up containment zones with plastic, use negative air machines with HEPA filters, and properly remove all the affected materials.

Heads up! When you hire one, make sure they are IICRC-certified. (That’s the Institute of Inspection, Cleaning, and Restoration Certification—it’s the gold standard, and if a company isn’t certified, don’t even bother calling them back). On a recent bathroom gut, we found mold behind the shower tile. For a 30-square-foot section, the proper remediation cost the homeowner about $2,800. That’s a perfect, real-world example of what your contingency fund is for.
Outdated Guts: Electrical and Plumbing
Older homes have a certain charm, but they also have secrets. It’s extremely common to open a wall and find systems that are downright dangerous by today’s standards.
- Knob-and-Tube Wiring: If your home is from the first half of the 20th century, you might have this. It’s a system of single wires that lack a ground wire, which is a critical safety feature today. The insulation becomes brittle over time, creating a serious fire hazard. Most building codes require us to remove it completely if we open up the walls.
- Galvanized Steel Plumbing: Popular for a while, these pipes corrode from the inside out. This chokes your water flow and can eventually spring a leak. If we see these pipes, we’ll almost always recommend replacing the whole section. Tying new copper or PEX pipes into old galvanized ones can actually make them corrode even faster right at the connection point.
To be frank, when a contractor recommends replacing this stuff, it isn’t an upsell. It’s about safety. I had a bathroom project where we found knob-and-tube wiring. The homeowner was on a tight budget and wanted to leave it. I had to explain that my electrician literally could not, by law, tie the new bathroom wiring into that old system. The project paused while they secured financing to rewire the entire second floor—an unexpected hit of about $9,000. If it had been just one room, it might have been closer to $1,500-$2,000, but it shows how quickly these things can escalate.
Pests and Structural Surprises
Termites and carpenter ants can do an unbelievable amount of damage silently. I’ve seen situations where a homeowner noticed a little sawdust on the baseboard and ignored it. Behind the wall, that ‘little bit of sawdust’ was evidence of a floor joist that had been hollowed out. I’ve literally been able to push a screwdriver straight through a support beam that looked perfectly fine from the outside. Fixing that kind of damage often means we have to call in a structural engineer to draw up a fix, which adds professional fees and significant labor costs.
2. The Paperwork Jungle: Permits and Professionals
A lot of people think building permits are just a way for the city to make a quick buck. I get it. But as a contractor, I see them as a non-negotiable safety net for you. Any contractor who suggests skipping the permit is waving a giant red flag.
Permits ensure the work is done to modern safety codes. The process usually involves submitting plans for review, followed by on-site inspections at key stages—like before we hang the drywall so the inspector can see the framing and wiring. The permit fees themselves can range from under $100 for something simple to several hundred for a bigger job. For a typical kitchen remodel, expect to pay a permit fee between $250 and $700, depending on your town. Good to know: You can usually find the fee schedule on your local government’s website!
But the real cost is that building to code might require more expensive materials or methods than you planned on. The code might demand a bigger footing for your new deck or specific fire-rated drywall in the garage, adding to your material bill.
And these codes change depending on where you live. In coastal areas, you’ll pay a premium for impact-resistant windows. In seismic zones, there are requirements for special anchors and reinforced walls. In cold climates, foundations have to be dug deeper to get below the frost line. It all adds up.

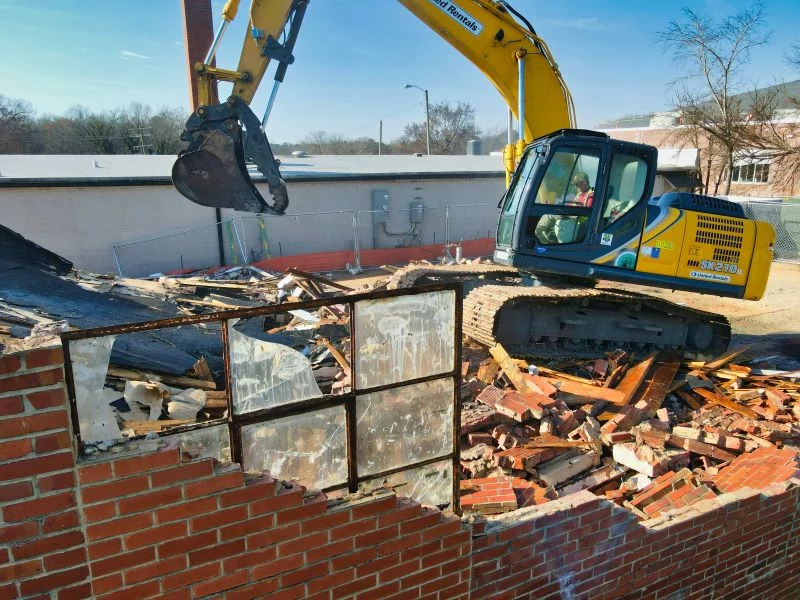
3. The Messy Middle: Demolition, Disposal, and Site Management
Your quote covers building the new stuff, but it also has to cover tearing out the old stuff and keeping your house from becoming a total disaster zone. A standard kitchen remodel can easily generate over a ton of debris. For bigger jobs, we rent a roll-off dumpster, which comes with fees for drop-off, rental time, and tonnage. If the job runs long or we have more debris than planned, that cost goes up.
Hazardous Materials
This is a big one. If your home was built before the 1980s, it’s very likely to contain asbestos or lead-based paint. If we disturb asbestos—found in old flooring, ceiling tiles, and insulation—it releases dangerous fibers into the air. By law, we have to stop all work and call in a licensed abatement company. That process is slow and expensive.
Similarly, for lead paint, contractors are required by the EPA to be certified and use lead-safe practices. This involves extra containment, special vacuums, and specific cleanup methods. It adds time and cost, but it’s legally required to keep everyone safe.
Site Protection and Cleaning
Construction dust is no joke; it gets everywhere. A pro will protect your home with heavy-duty floor coverings, plastic dust walls with zippers, and maybe even an air scrubber that filters the air. This all costs money and takes time to set up. Don’t forget to budget for a final, professional deep clean after we’re gone—it can run $300-$500, but it’s worth every penny.
4. The Hidden Costs: How You’ll Actually Live
Some of the biggest expenses won’t ever show up on my invoice. These are the costs of simply surviving the renovation.
If we’re gutting your only full bathroom or your kitchen, living at home might be… challenging. For a kitchen remodel that I estimate will take 6-8 weeks, that could mean two months in a short-term rental. At $2,000 a month, that’s an extra $4,000 you need to plan for.
And then there’s the food. Without a kitchen, you’re eating out. A lot. A family of four could easily spend an extra $1,000 to $1,500 a month on takeout and restaurant meals. It’s a real cost that can bust your budget if you ignore it.
5. The Ripple Effect: Long-Term Financial Hits
Just when you think you’re done spending, a couple more costs can pop up down the line.
- Higher Homeowners Insurance: A beautiful new kitchen that adds $60,000 of value to your home also increases its replacement cost. You’ll need to call your insurance agent to update your policy, which will likely cause a small but permanent increase in your annual premium.
- Higher Property Taxes: This is the one that really surprises people. When you pull a permit, your local tax assessor gets notified. After the project is done, they will likely reassess your home at a higher value, meaning your annual property tax bill will go up. Forever.
So, What’s the Real Plan?
A great remodel is a partnership between you and your contractor, built on realistic expectations. When you plan for the true, total cost, you can make clear-headed decisions without panicking. Think of it like this: for that hypothetical $60,000 kitchen quote, you should really have $69,000 set aside—the $60k for the job and a $9,000 (15%) contingency fund. That fund might cover that $2,800 mold issue, a $1,500 plumbing fix, and a $2,000 upgrade to a structural beam we didn’t know we needed. Suddenly, those surprises are just bumps in the road, not project-killers.
Finally, before you sign on the dotted line, here are a few questions you should absolutely ask your contractor:
- How do you handle change orders when you find unexpected issues? What does that process look like?
- What, specifically, is included for site protection and final cleanup?
- Is the cost of the dumpster, including potential overages for weight or time, included in the quote?
- Who is responsible for applying for and managing the permits?
When you’re prepared for the whole story, you can actually relax and enjoy the best part: watching your vision for your home finally become a reality.
Inspirational Gallery
Fixed-Price Contract: This sounds reassuring, but it’s only as good as its details. Often, it includes ‘allowances’ for items like fixtures or tile. If your taste exceeds the allowance (e.g., choosing a premium faucet from Brizo over a standard model), you’ll pay the difference out of pocket.
Cost-Plus Contract: Here, you pay for the actual costs of labor and materials, plus a fixed percentage for the contractor’s profit. It’s highly transparent but requires you to be more involved in tracking the budget as it evolves.
For homeowners who need budget certainty, a highly detailed fixed-price contract is usually the safer bet.
According to the National Association of the Remodeling Industry (NARI), homeowner indecisiveness and making changes after the project has started is one of the top reasons for budget overruns, right alongside unforeseen structural issues.
Where can you *safely* use some DIY elbow grease to reduce the final bill from your contractor? Focus on the tasks at the beginning and end of the project.
- Selective Demolition: Tearing out old cabinets, non-structural walls, and flooring can save thousands in labor. Just confirm the scope with your contractor first.
- Painting: Let the pros handle the messy construction, then you can take over the final painting of walls and trim. It’s time-consuming but a classic money-saver.
- Final Cleanup: A deep, post-construction clean is a big job. Handling it yourself can easily save you several hundred dollars.
What exactly is a ‘Change Order,’ and why does it sound so scary?
A Change Order isn’t a penalty; it’s simply a formal amendment to your original contract. It’s generated whenever the scope of work changes, either because you’ve requested an upgrade (like deciding to add heated floors) or an unforeseen issue was discovered (like outdated wiring needing replacement). It documents the new work, the associated costs, and any impact on the timeline. The cardinal rule: never agree to work on a verbal change. Always review and sign the Change Order *before* the new work begins to keep your budget under control.
The Producer Price Index for building materials has seen unprecedented volatility, with items like softwood lumber and steel products experiencing dramatic price surges in recent years.
This means a quote from six months ago might be irrelevant today. Ask your contractor how long their material pricing is guaranteed. Many now include an ‘escalation clause,’ which allows for price adjustments if costs jump significantly. This isn’t a ploy; it’s a reflection of market reality. Your budget should account for this potential volatility beyond the standard 15-20% contingency.
A key to budget success: know where to splurge and where to save. Invest your dollars in the elements you touch and interact with daily. Think high-quality, durable kitchen countertops from brands like Silestone or Caesarstone, solid cabinet hardware that feels good in your hand, and a reliable faucet. You can save money on areas like backsplash tile—a classic, inexpensive subway tile looks chic and timeless—or by using a quality paint like Benjamin Moore’s Regal Select instead of their ultra-premium Aura line, where the difference may be less noticeable to the average eye.
- It ensures you and your contractor share the exact same vision.
- It allows for true, apples-to-apples comparisons between bids.
- It dramatically reduces the chance of costly ‘scope creep.’
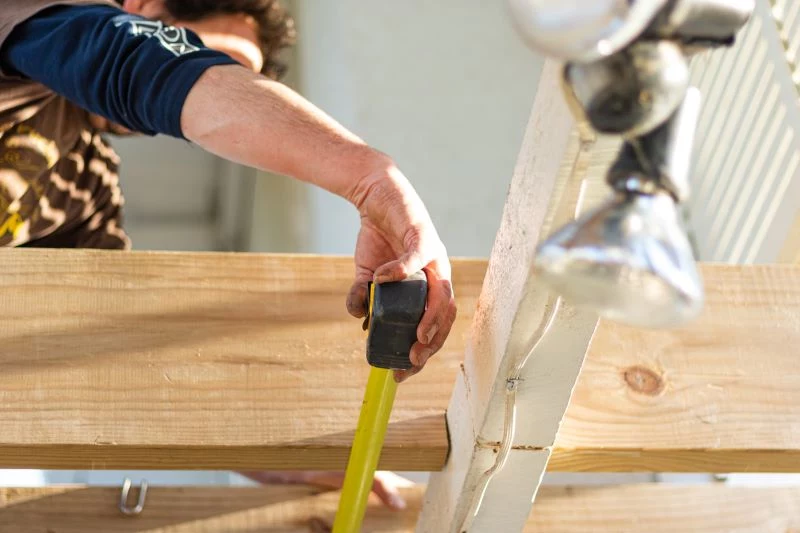
The secret? A hyper-detailed ‘Scope of Work’ document. This goes beyond ‘install new flooring.’ It should specify ‘Install 3/4-inch solid white oak flooring from Carlisle Wide Plank Floors, in a 5-inch width, with a satin polyurethane finish.’ The more detail, the fewer expensive surprises.
That contingency fund is your safety net, but what about funding the main project? Unless you’re paying with cash, you’ll need a financing strategy. These are the most common tools:
- HELOC (Home Equity Line of Credit): A revolving line of credit you can draw from as needed. This is ideal for projects where costs may fluctuate, as you only pay interest on the money you use.
- Cash-Out Refinance: You take out a new, larger mortgage, pay off the old one, and keep the difference for your renovation. This is most effective when current interest rates are lower than your existing mortgage rate.
- FHA 203(k) Loan: A government-insured loan that combines the purchase or refinance of a home with the renovation costs into one loan, often requiring a lower down payment.
Prepare yourself for ‘decision fatigue.’ Choosing every single finish, fixture, and paint color is mentally draining and can lead to rushed, poor choices. Before starting, create a focused mood board with a limited palette: one primary wood tone, one metal finish (e.g., matte black), two main paint colors, and one countertop material. When you feel overwhelmed at the store, this board becomes your anchor, simplifying decisions and ensuring a cohesive final look.


