Your Small Kitchen Isn’t a Problem, It’s a Puzzle—Here’s How to Solve It
After spending more than two decades in the trenches of kitchen design, I can tell you a simple truth. The projects that really test your skills are almost never the biggest ones. Anyone can make a massive kitchen with a blank check look good. The real craft? That comes from fitting a hardworking, beautiful kitchen into a space that doesn’t want to cooperate.
In this article
I’ve wrestled with tight city apartments, cozy cottages, and sleek tiny homes. Every single one teaches you to have a deep respect for every inch of space.
A lot of people see a small kitchen as a limitation to overcome. I think of it more like a puzzle. It forces you to be clever, efficient, and really deliberate with every single choice you make. When it’s done right, a small kitchen feels organized and serene, not cramped. It works with you. In this guide, I’m going to walk you through the real-deal techniques and trade secrets I’ve picked up over the years. We’re going way beyond simple decorating tips to cover the core ideas that make a small kitchen truly great.
The Foundation: Why Small Kitchens Often Feel Awful
Before we jump into solutions, we have to get real about the core problems. Most frustrations with small kitchens boil down to ignoring how we actually move and see. It’s not just about aesthetics; it’s about the physics and ergonomics of the room.
The Work Triangle in a Tiny Space
You’ve probably heard about the kitchen “work triangle.” It’s just a fancy term for the path between your fridge (storage), your sink (cleaning), and your stove (cooking). In a big kitchen, this is easy. In a small one, it gets squished, and that’s where things go sideways.
The whole point of this concept is efficiency. The established guidelines suggest that the path between these three points should be comfortable—not too far, but not too close either. The temptation in a small kitchen is to jam everything together. But if the legs of that triangle are too short, you have zero counter space. If they’re laid out wrong, you’re constantly twisting and bumping into things. It’s annoying and, honestly, a little unsafe.
A classic mistake is putting the stove right next to the fridge. This completely messes up the workflow and creates a thermal problem. The heat from your oven forces the fridge to work overtime, which wastes energy. Plus, you lose that critical landing spot for hot pans or bags of groceries. Getting this flow right is the first step, even if your “triangle” is more of a straight line in a galley kitchen.
How Light Bounces Around a Room
The second reason small kitchens fail is that they ignore the power of light. Our eyes perceive space based on how light reflects off surfaces. This is actually measurable, using a scale called Light Reflectance Value, or LRV. Think of it as a scale from 0 for absolute black to 100 for pure white.
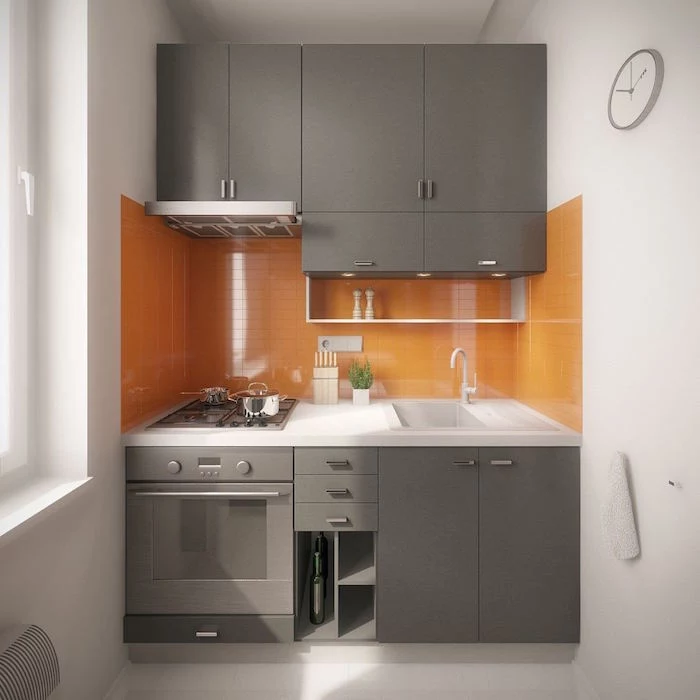
Surfaces with a high LRV, like white cabinets or a light countertop, bounce light around and make a room feel bigger and brighter. Dark surfaces absorb light, making a space feel enclosed. This is about more than just paint color; it’s the combined effect of your cabinets, counters, floor, and backsplash.

Here’s a perfect example. I once consulted on a tiny 80-square-foot kitchen that felt like a cave. The owner had chosen gorgeous dark walnut cabinets, a black granite countertop, and a dark slate floor.
THE FIX: We kept those beautiful cabinets but swapped the countertops for a light-colored quartz and the floor for pale oak. We didn’t move a single wall.
THE RESULT: The kitchen felt twice as big. It was a dramatic change, all based on the simple physics of light.
Layouts That Actually Work
Your layout is the skeleton of your kitchen. For most small spaces, you’re likely working with one of three layouts. And by the way, if you’re stuck with existing plumbing and can’t move your sink, that’s your anchor point. Just design your work triangle from there.
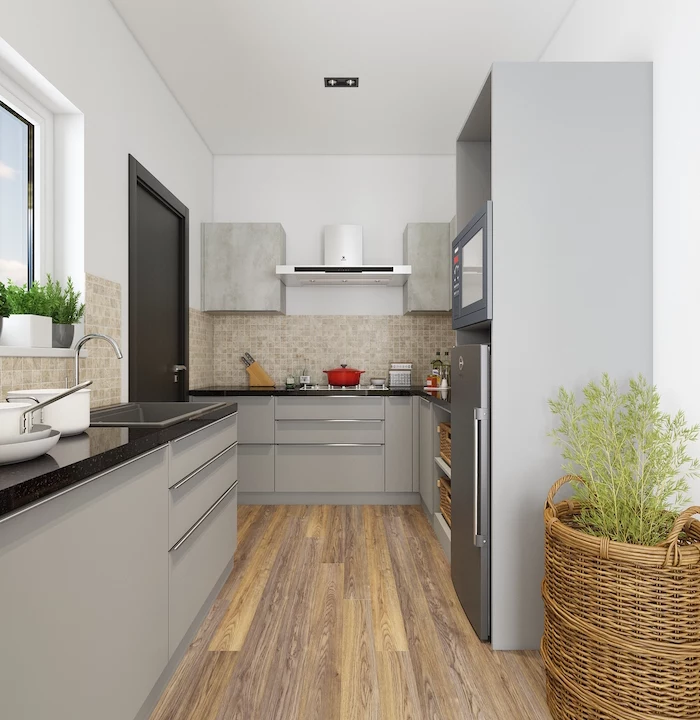
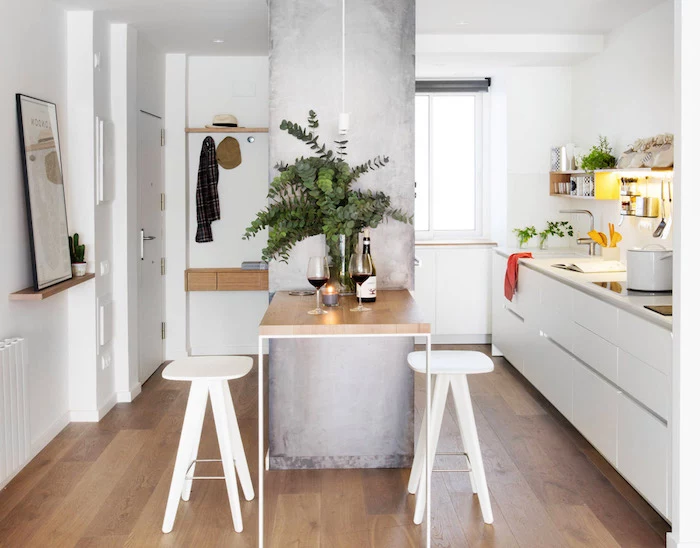
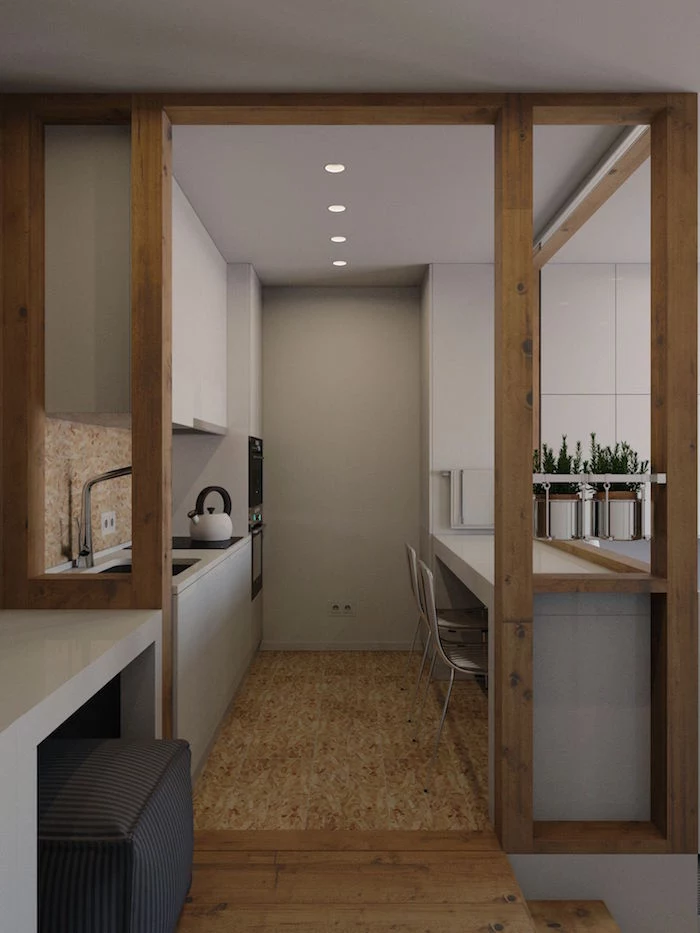
The Super-Efficient Galley Kitchen
This is my personal favorite for pure efficiency. It’s basically two parallel walls of counters and cabinets, creating a single, streamlined work lane. There’s a reason commercial kitchens are set up this way! You can pivot from the sink to the stove in one simple step.
Pro Tip: The secret to a good galley kitchen is the width of the corridor. The pros recommend a minimum of 42 inches for a one-person kitchen, but I always push for 48 inches if possible. It lets two people squeeze past each other and allows you to fully open the dishwasher or oven door without blocking the whole path. I’ve seen people try to get by with 36 inches, and it’s a constant battle.
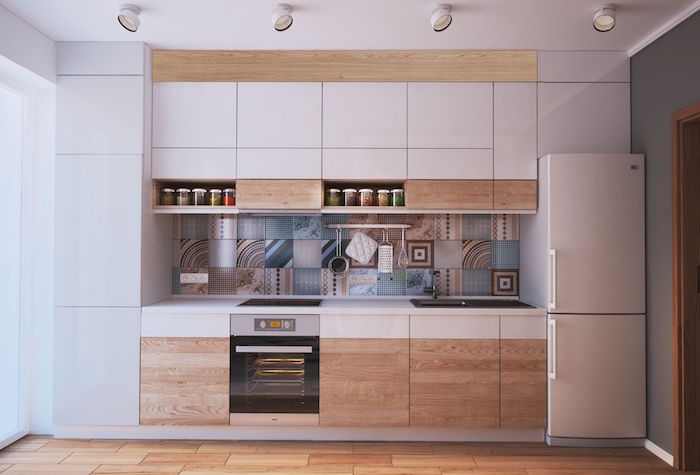
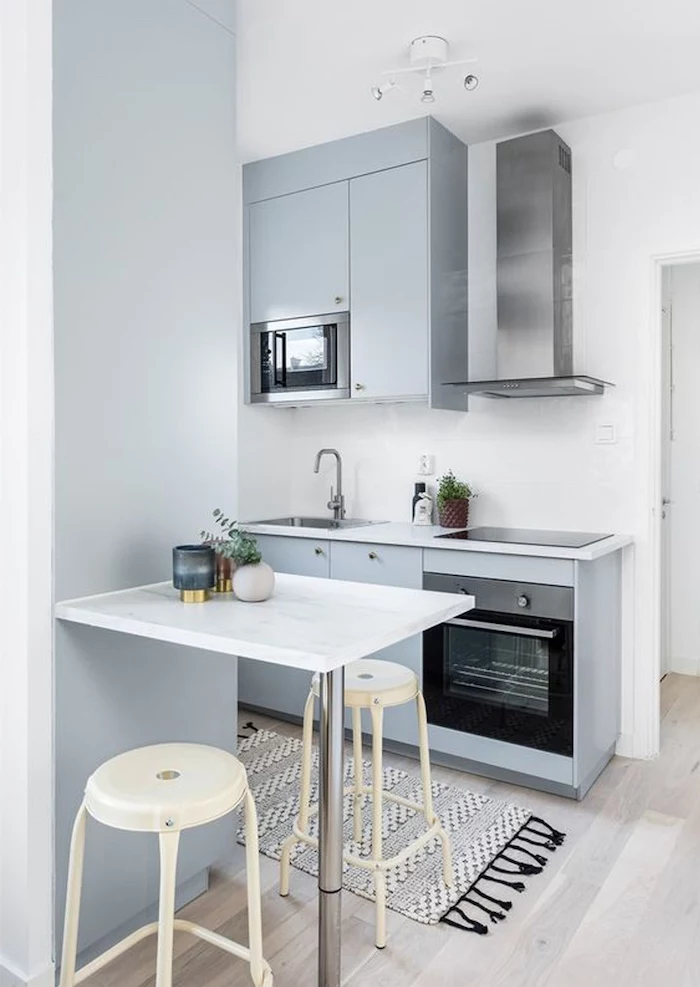
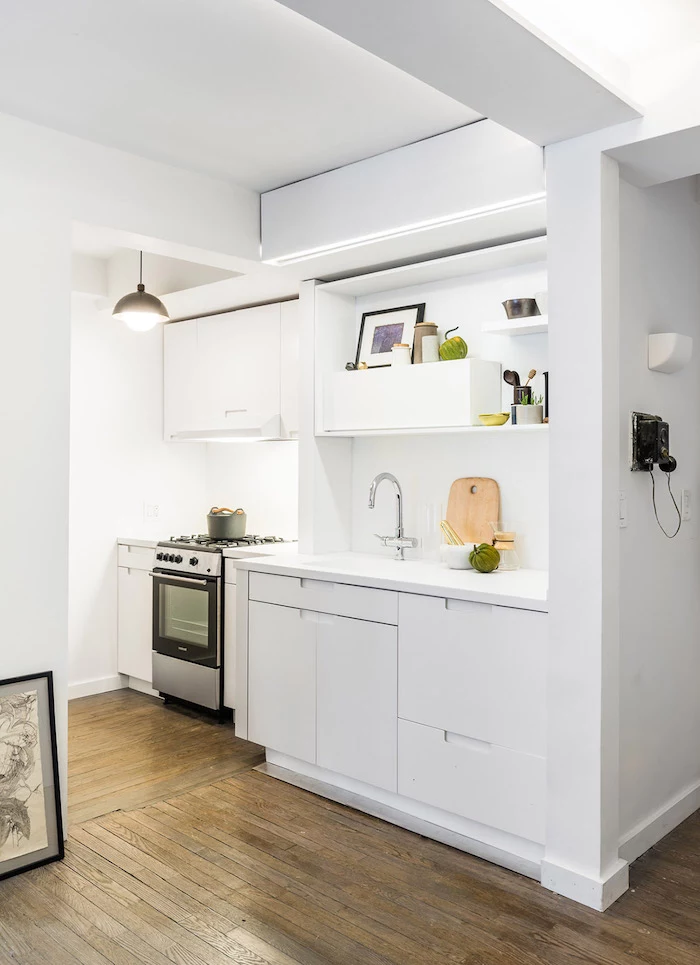
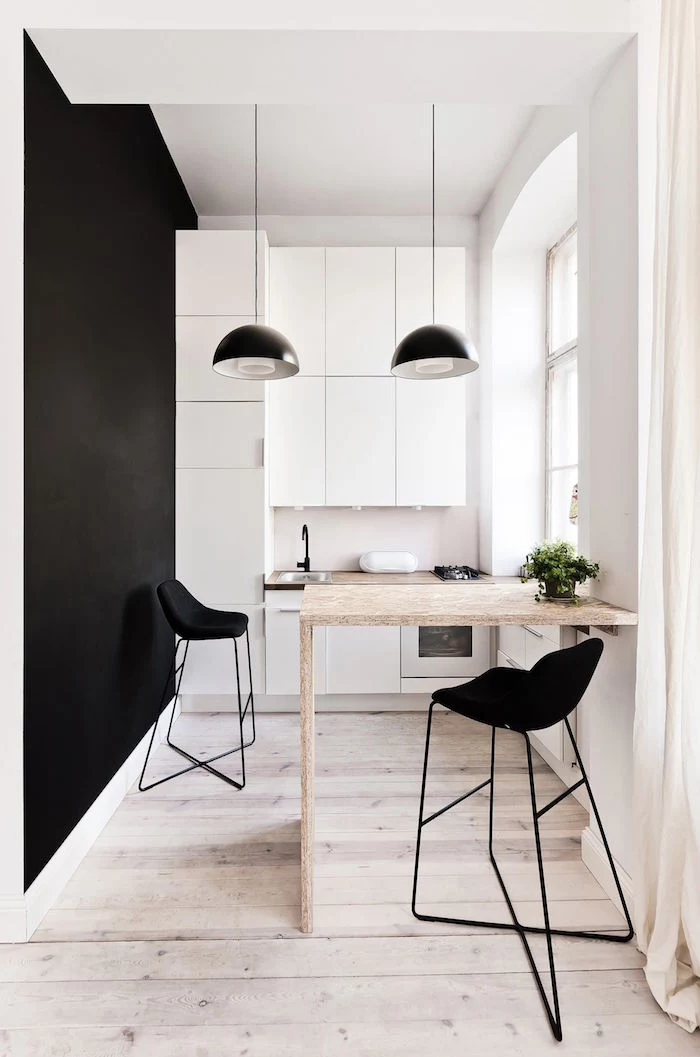
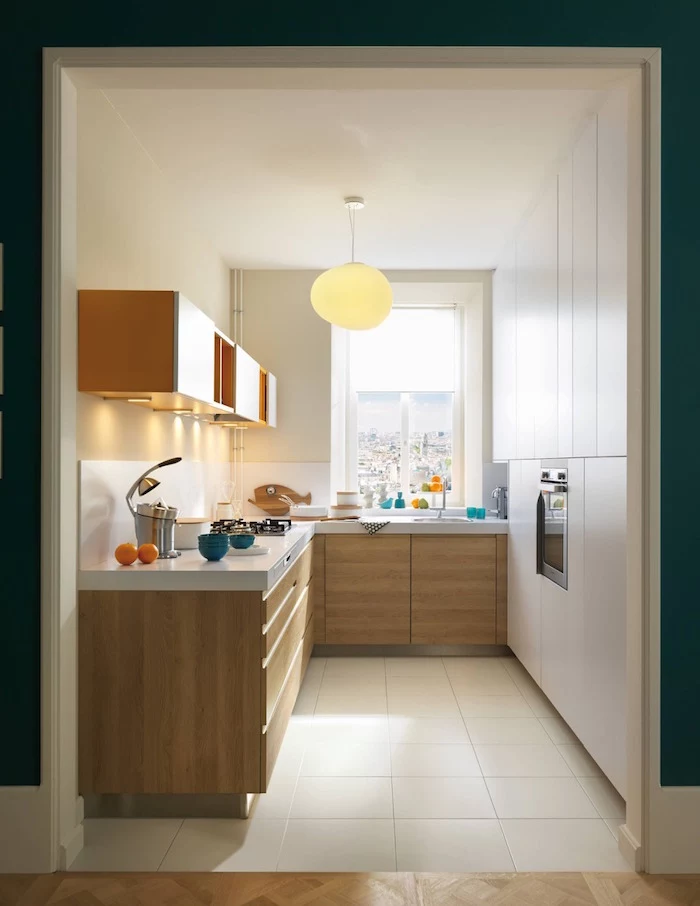
The One-Wall Kitchen
Often found in studios and lofts, this layout puts everything on a single wall. The biggest challenge here is creating that work triangle—it becomes a line. To make it functional, you have to place the sink between the fridge and the stove. This gives you a natural prep area in the middle with landing zones on both sides. The biggest mistake here is skimping on counter space between appliances. You need at least 24 inches of clear prep space next to the sink. If your wall is just too short, grab a moveable kitchen cart or small island. You can find a decent one for around $150 and it’s a total game-changer.
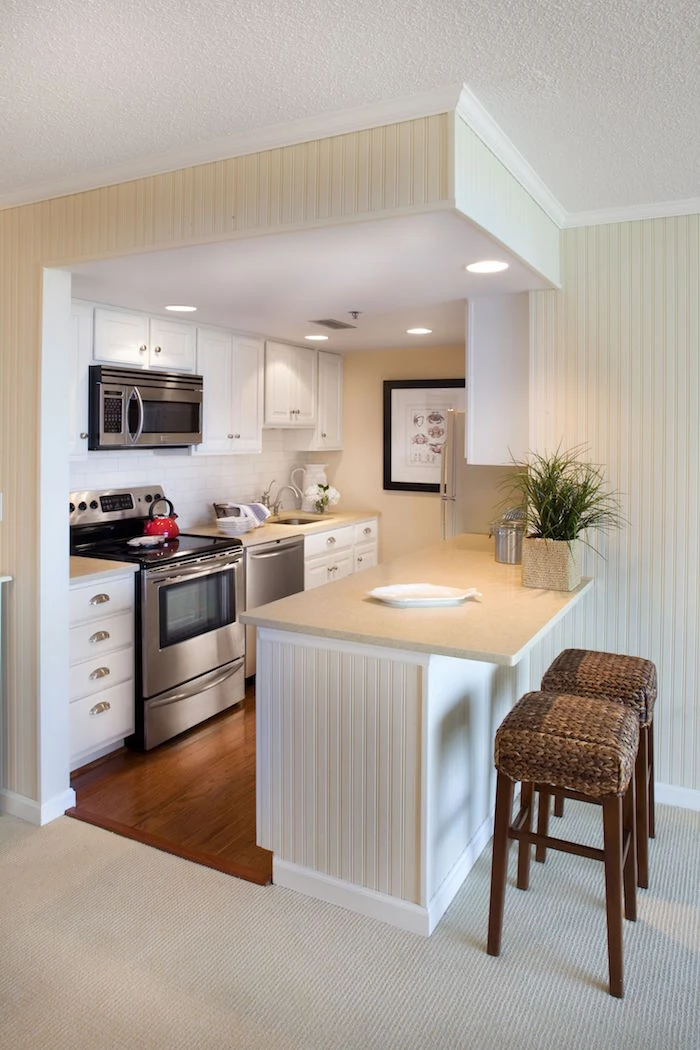
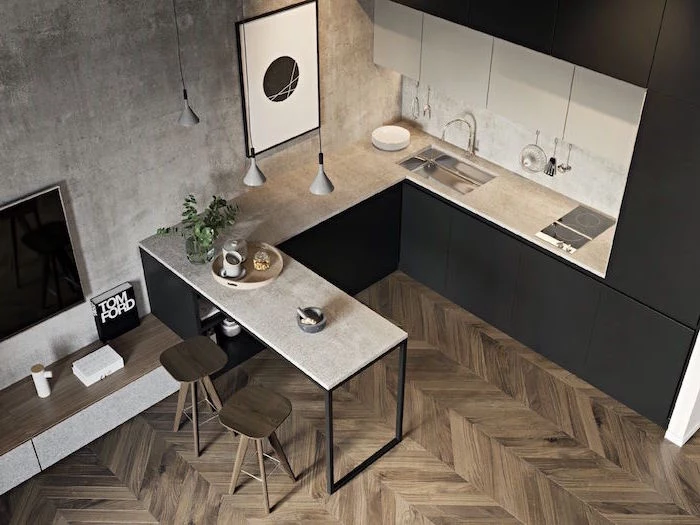
The L-Shape Kitchen
This layout uses two adjoining walls and is a great compromise. It naturally creates a work triangle while opening the kitchen up to the next room, which helps the whole area feel bigger. The main challenge? The corner. That deep corner cabinet can easily become a black hole where your favorite pots and pans disappear forever.
Heads up! Don’t just settle for a cheap, clunky lazy susan. For my clients, I insist on better hardware. A high-quality blind corner pull-out system is incredible. The shelves actually swing completely out of the cabinet, bringing everything to you. Yes, they are an investment. A basic lazy susan might be $50. A solid blind corner optimizer from a good hardware brand will run you $300-$500. A top-tier, German-engineered unit could be $800 or more. It sounds steep, but when you’re short on space, paying to make a dead zone 100% accessible is absolutely worth it.
Cabinetry: Your Greatest Asset
In a small kitchen, your cabinets are more than just boxes for storage. They’re a tool for tricking the eye and maximizing every cubic inch.
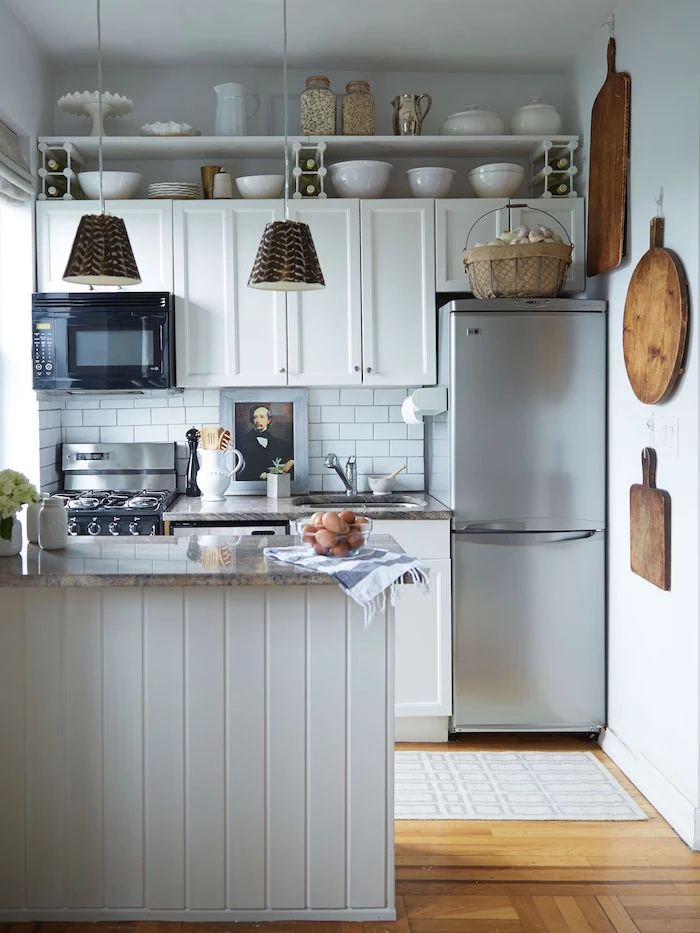
Go Vertical, All the Way Up
That awkward space between the top of your cabinets and the ceiling? It’s wasted air. Taking your cabinets all the way to the ceiling gives you a surprising amount of storage for less-used items (think holiday platters or that giant stand mixer) and draws the eye upward, creating the illusion of height.
A little pro secret: Ceilings are never perfectly level. A good installer doesn’t just slap the cabinet up there; they use a filler strip or a multi-piece crown molding that is carefully cut to match the exact contour of the ceiling. It’s a technique called scribing, and it’s what creates that seamless, custom-built look.
Oh, and what if you have those bulky boxes (called soffits) above your cabinets? A lot of the time, they’re just empty framing. A contractor can often remove them in a day for a few hundred dollars. But you HAVE to check first—sometimes they hide pipes or wires. The best way is to cut a small exploratory hole and peek inside with a flashlight before you bring out the sledgehammer.
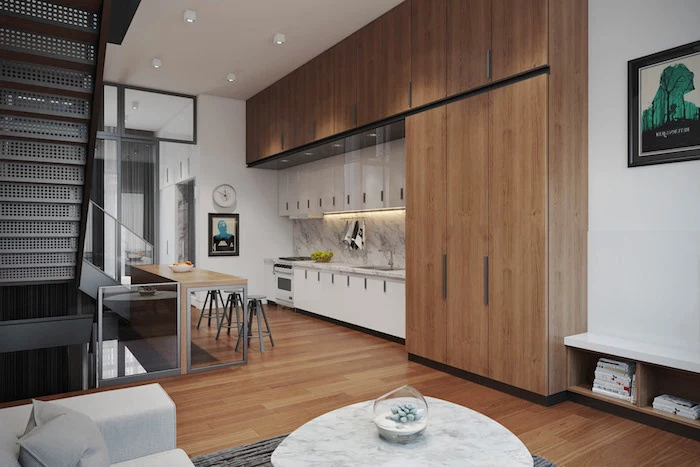
Play with Cabinet Depth
Standard base cabinets are 24 inches deep, and uppers are 12 inches deep. You can mess with these numbers to your advantage. In a really tight galley, using 18-inch-deep base cabinets can buy you a precious 6 inches of floor space. You might need to source a smaller sink or choose a separate cooktop and wall oven, but the improved flow is often worth the trade-off. Conversely, I often specify 15-inch-deep upper cabinets. That extra 3 inches is barely noticeable visually, but it’s the difference between storing large dinner plates flat or having to stand them on their side. It’s a small change that makes a huge difference in usability.
Lighting Is More Important Than Any Appliance
You can have the most brilliant layout in the world, but with bad lighting, your kitchen will always feel grim. A good lighting plan uses layers to make the space bright and functional.
- Ambient Light: This is your room’s main light, usually a fixture in the middle of the ceiling. Go for a flush-mount or semi-flush mount that doesn’t hang down and crowd the space visually.
- Task Light: This is the most important layer! It lights up your work surfaces. Relying on just a central fixture is a classic mistake—your own body will cast a shadow right where you need to see.
- Accent Light: This is the fun stuff, like putting a light inside a glass-front cabinet. It’s optional but adds a lovely sense of depth.
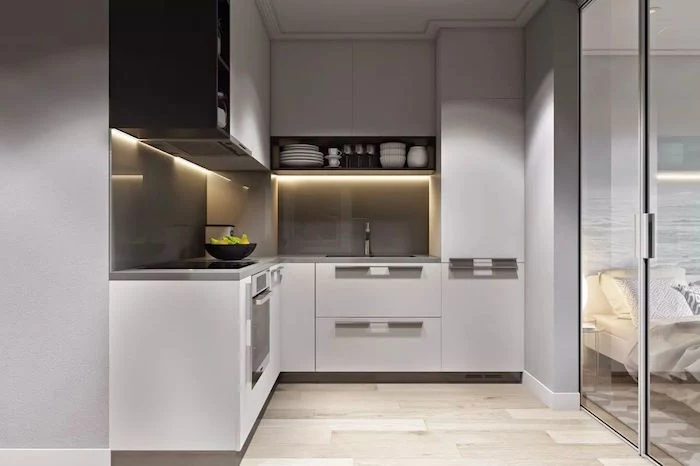
The Power of Under-Cabinet Lighting
If you only do one thing to improve your kitchen lighting, make it this. Install under-cabinet lights. They put bright, focused light right on your countertops, eliminating shadows and making the whole kitchen feel more professional and inviting.
Good to know: I recommend using LED tape or strip lights, which you can find at any big-box hardware store. They give you even light, unlike older-style puck lights that create weird hotspots. Pay attention to the color temperature. Look for something in the 3000K (soft white) to 4000K (neutral white) range. Anything warmer can look dingy, and anything cooler can feel like a hospital operating room.
And please, be safe. This isn’t the best place for a DIY experiment unless you really know what you’re doing. Faulty wiring is a huge fire hazard. Hiring a licensed electrician to hardwire the lights to a switch is usually a few hundred dollars and gives you a clean, safe, professional result.
Appliances and Ventilation: Making Smart Choices
Bulky appliances can absolutely devour a small kitchen. Choosing the right size is critical.
In many parts of the world, 24-inch wide appliances are standard, while in North America, we often default to 30 inches or more. Embracing that smaller, 24-inch scale for your fridge, dishwasher, and stove can save you 18 inches of linear space. That’s enough for a whole new cabinet!
Don’t neglect ventilation, either. In a small space, cooking smells, grease, and steam get concentrated fast. A cheap recirculating range hood that just filters air through a bit of charcoal is mostly for show; it doesn’t remove heat or moisture. You really need a hood that vents to the outside. Its power is measured in CFM (cubic feet per minute), and a good rule of thumb is to have enough power to properly clear the air based on your cooktop’s output. This is another area where consulting a pro is smart to make sure you’re up to code.
Practical Tips, Realistic Budgets, and Quick Wins
A great kitchen renovation balances big dreams with reality. Here’s how to make it happen.
Smart Material Choices
You don’t have to break the bank to get a high-end look.
- Countertops: If a beautiful quartz (around $60-$150+ per square foot, installed) isn’t in the budget, check out modern laminates. They look shockingly like real stone these days and only cost about $20-$50 per square foot. The downside is they can’t take a hot pan directly. Another fantastic option is butcher block ($40-$100/sq ft). It’s warm, can be sanded down if it gets dinged, but it does need regular oiling.
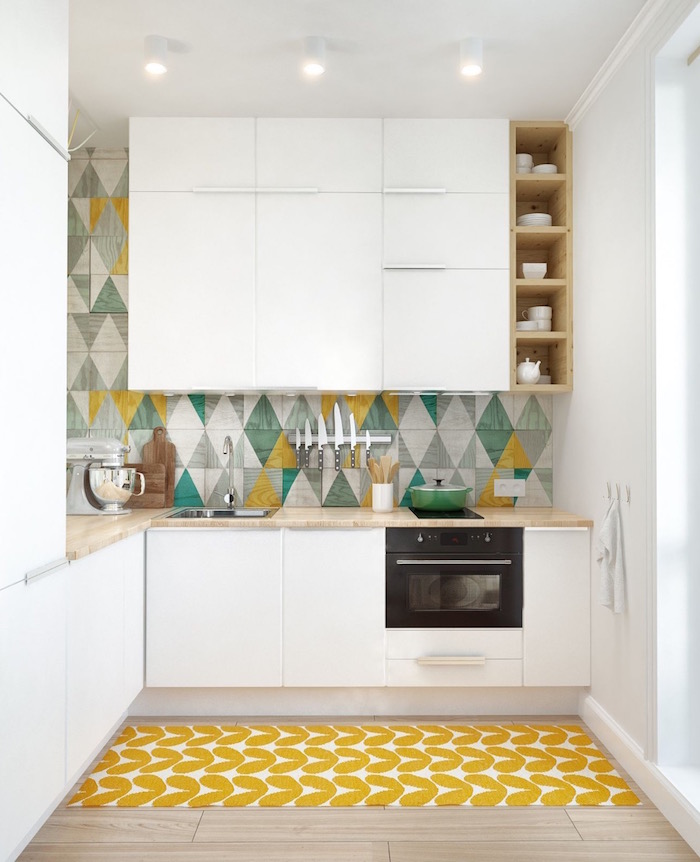
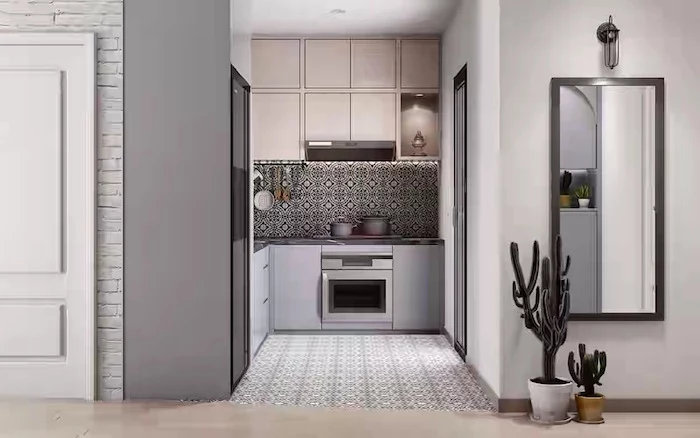
- Backsplash: This is where you can have some fun. Simple, large-format ceramic tiles are affordable and easy to clean. Fewer grout lines also make the space feel less busy. I’d avoid tiny, complex mosaic tiles—they can create a lot of visual clutter in a small room.
- Hardware: Never underestimate the power of new cabinet pulls. It’s like new jewelry for your kitchen and can instantly update old cabinets for just a few dollars per piece. In tight spaces, I love minimalist C-channel or tab pulls that don’t stick out and snag your clothes.
Quick Wins for Renters (or the Commitment-Phobic)
Can’t do a full reno? No problem. These cheap and cheerful updates make a huge difference.
- Get a Freestanding Cart: A nice kitchen cart adds extra counter and storage space. You can find them for $100-$250 at places like IKEA or online.
- Use Your Walls: Get stuff off the counter! Wall-mounted magnetic knife strips and spice racks are your best friends.
- Peel-and-Stick Backsplash: The quality has gotten so much better. Good ones can cost $10-$20 a square foot and look amazing. Best part? They come off when you move out.
- Add Plug-in or Battery Lights: You can buy battery-powered LED puck lights that stick right under your cabinets. It’s a 10-minute job that has a massive impact.
When to DIY vs. When to Call a Pro
I’m a huge fan of DIY, but you have to be honest about your limits. Tiling a backsplash or painting cabinets? Go for it! But some jobs carry too much risk.
A simple refresh like painting and changing hardware might just be a weekend project. A full gut renovation with new everything? Plan for at least 4-8 weeks from demolition to completion, and that’s assuming everything you ordered arrives on time (which… it often doesn’t).
And here are the non-negotiables. Always hire a licensed pro for:
- Electrical: Not worth the risk.
- Gas Lines: Absolutely not a DIY job. Ever.
- Major Plumbing: Moving a drain line might seem easy, but a tiny leak inside a wall can cause thousands in mold damage.
- Removing Walls: You need a structural engineer to tell you if a wall is holding up your house. Getting this wrong is catastrophic.
Honestly, designing a small kitchen well is one of the most rewarding challenges out there. It forces you to be thoughtful, where every surface and every inch has a purpose. By focusing on a smart layout, great lighting, and clever storage, you can create a space that doesn’t just look bigger—it works better. And that’s a puzzle worth solving.
Inspirational Gallery
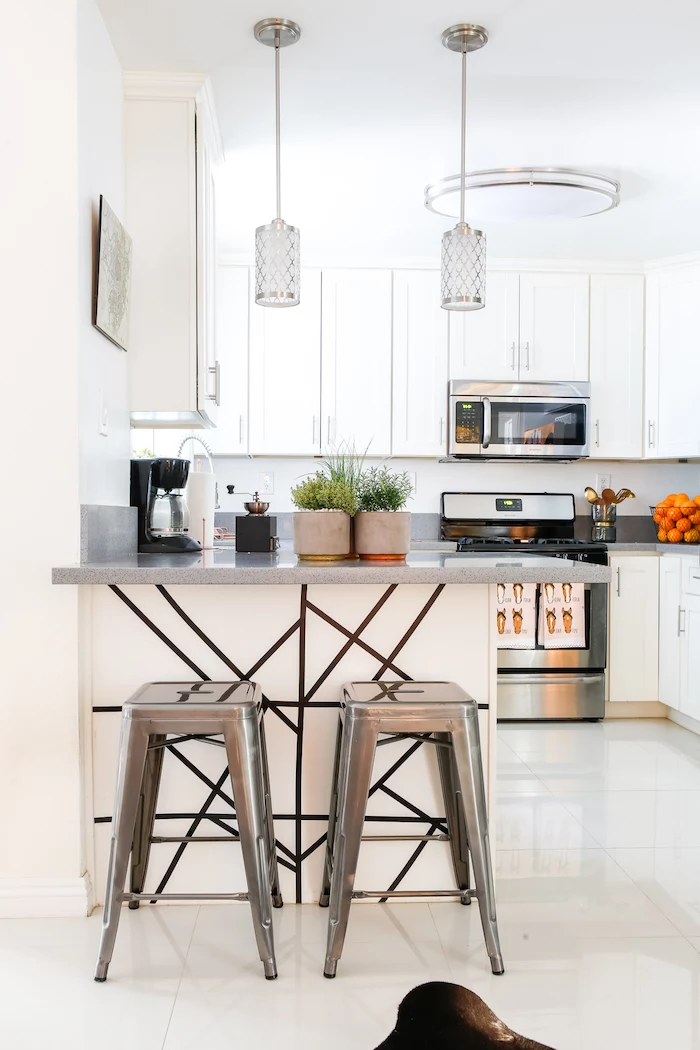
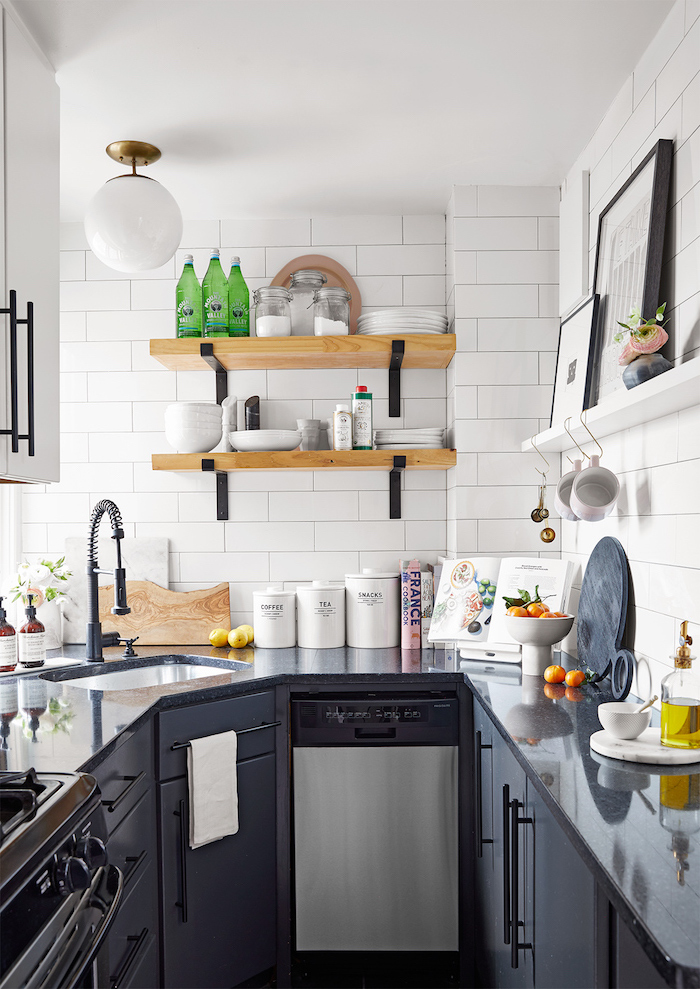
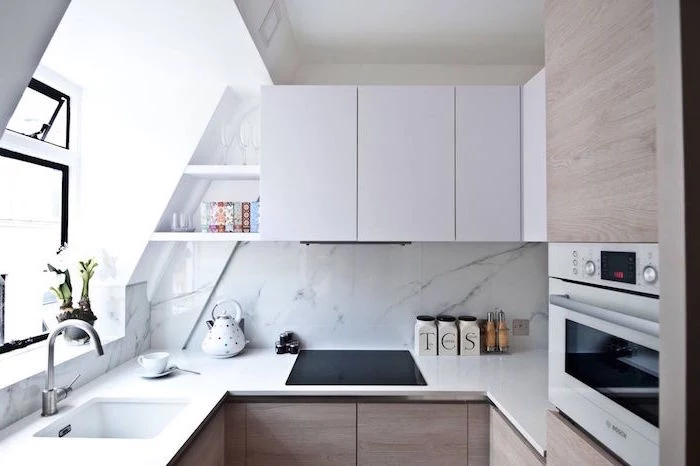
Don’t underestimate the power of under-cabinet lighting. It does more than just illuminate your workspace; it visually pushes the walls back, making the kitchen feel wider and more open. Opt for warm-white LED strips (around 2700K-3000K) for a welcoming glow that’s also energy-efficient. They eliminate shadows cast by overhead lights and turn your countertop into a functional, inviting stage.

- Go vertical with a wall-mounted magnetic knife strip to free up an entire drawer or a block of counter space.
- Install a pot rail with S-hooks under your upper cabinets or on an open wall for hanging utensils, mugs, and even small pans.
- Use the inside of cabinet doors for mounting spice racks or holders for pot lids.
The single biggest mistake: Choosing standard-sized appliances out of habit. A 30-inch range can devour precious counter space. Brands like SMEG, Bertazzoni, and Fisher & Paykel offer stunning 24-inch ranges and refrigerators that are specifically designed for smaller footprints without sacrificing performance or style. The 6 inches you save can become your primary prep area.
A study by the National Kitchen & Bath Association found that for a kitchen to feel functional, there should be at least 15 inches of ‘landing space’ next to the stove.

Mirrors and metallics are your best friends for creating an illusion of depth. But you don’t need to hang a giant mirror. Think more subtly:
- A polished stainless steel or mirrored backsplash.
- High-gloss cabinet finishes that reflect light around the room.
- Shiny brass or chrome hardware that catches the eye and adds a touch of sparkle.
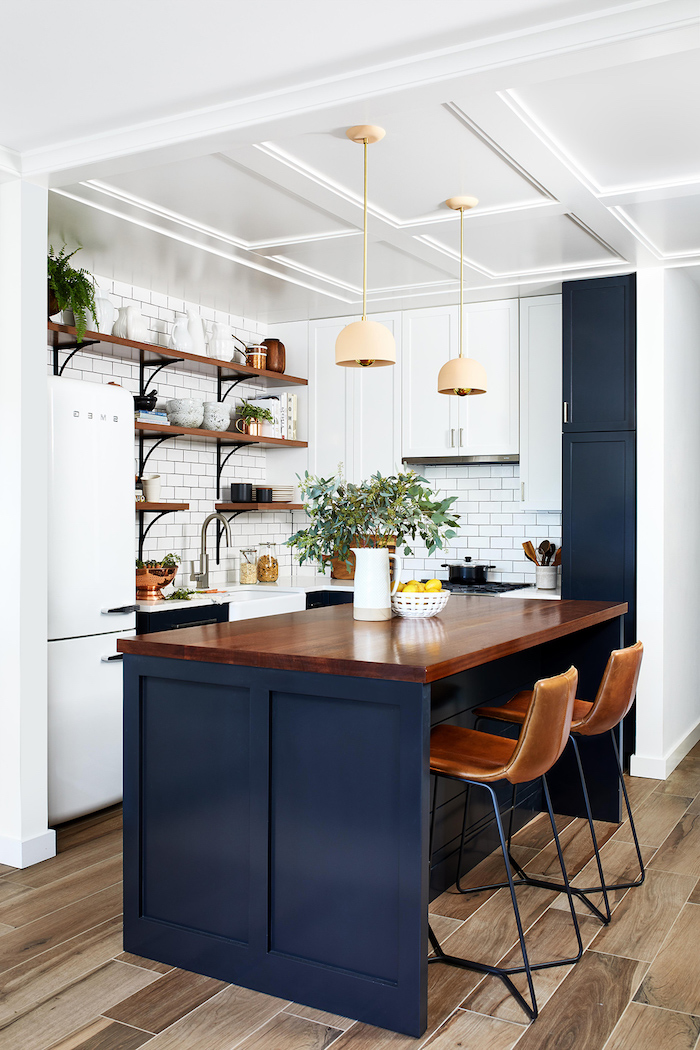
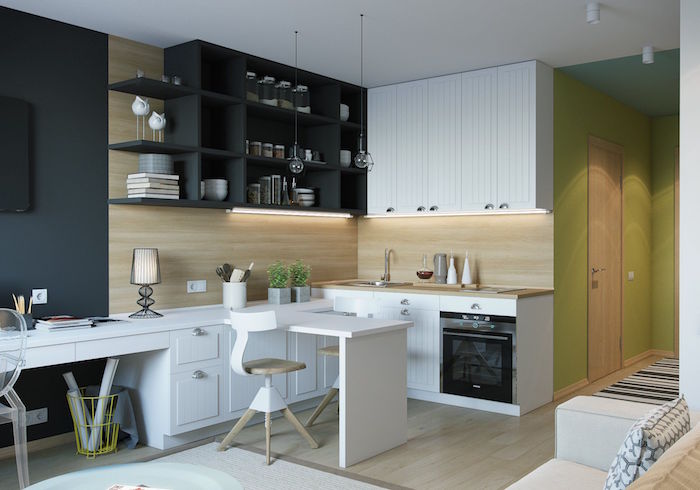
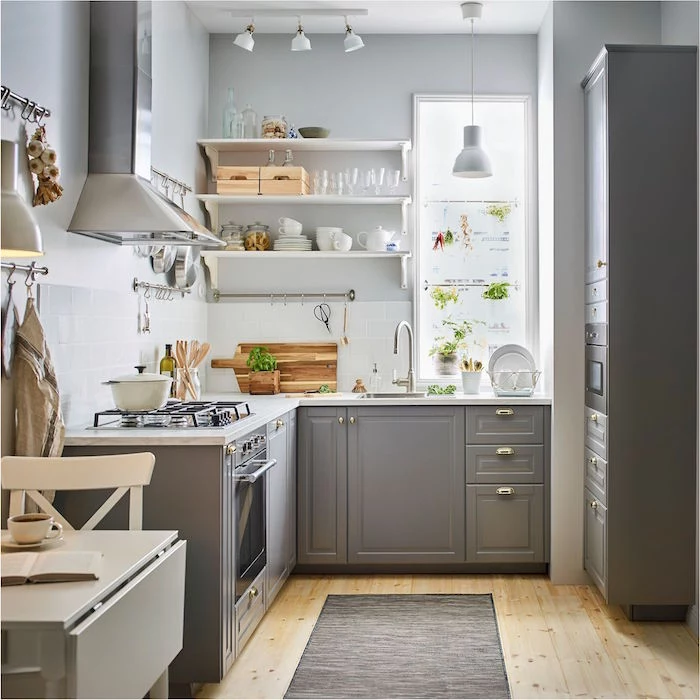
But won’t open shelving just look cluttered?
It’s a valid concern, but the key is curation. Open shelves force you to be intentional. Use them for your most beautiful and frequently used items: a neat stack of everyday plates, a collection of matching glassware, a few shapely ceramic bowls. Keep the chaotic stuff (like that jumble of plastic containers) behind closed doors. This creates a display that is both personal and practical.
Quartz Countertops: Non-porous, incredibly durable, and available in countless patterns, including ones that mimic marble. A brand like Caesarstone offers light, reflective options that can brighten a space. They are virtually maintenance-free.
Butcher Block: Adds warmth and a natural, forgiving texture. It’s budget-friendly and can be sanded down and re-oiled if it gets scratched. However, it requires regular maintenance to prevent staining and water damage, especially around the sink.
For a worry-free surface in a high-use small kitchen, quartz is often the superior long-term investment.
The average person spends about 60 minutes per day in their kitchen. In a small space, that can mean 60 minutes of frustration or 60 minutes of seamless flow.
This is why ergonomics trump aesthetics in a small kitchen. Every choice should minimize awkward movements. Think about pull-out pantry shelves instead of deep, dark cabinets, and drawers for lower storage instead of cupboards you have to crouch to access.
- Frees up 6-8 inches of valuable counter space.
- Makes washing large pots, pans, and baking sheets infinitely easier.
- Creates a cleaner, more minimalist look.
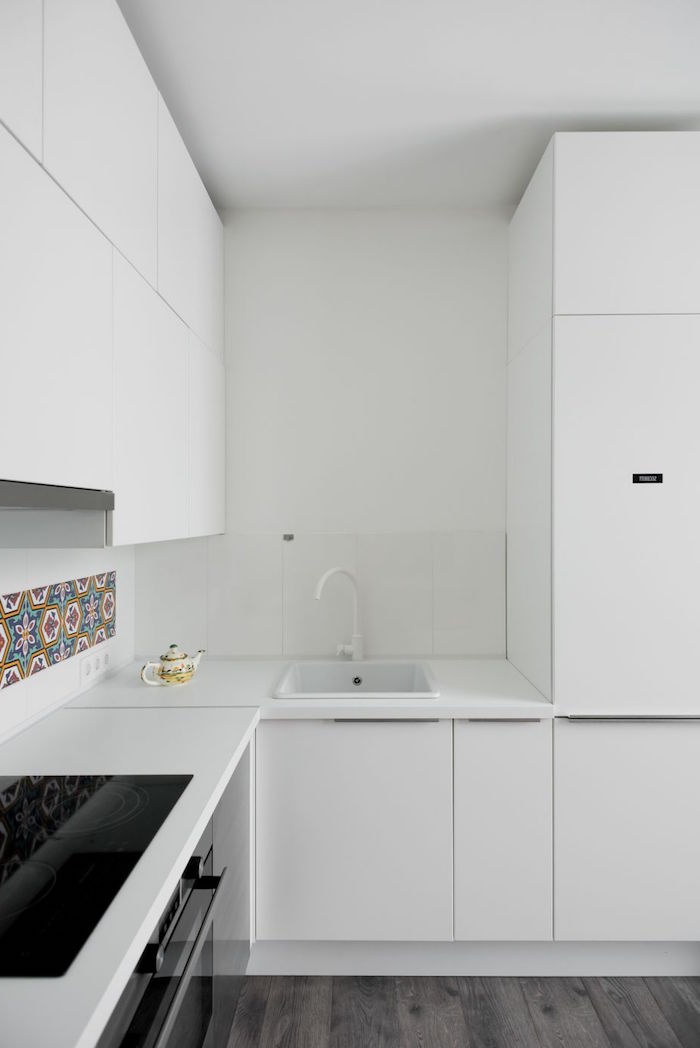
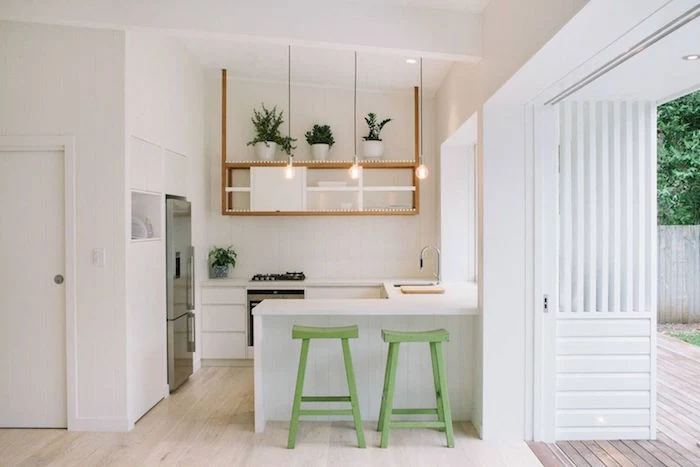
The secret? A single-basin, under-mount sink. By eliminating the divider and the raised lip of a top-mount sink, you gain a surprising amount of utility and visual simplicity.
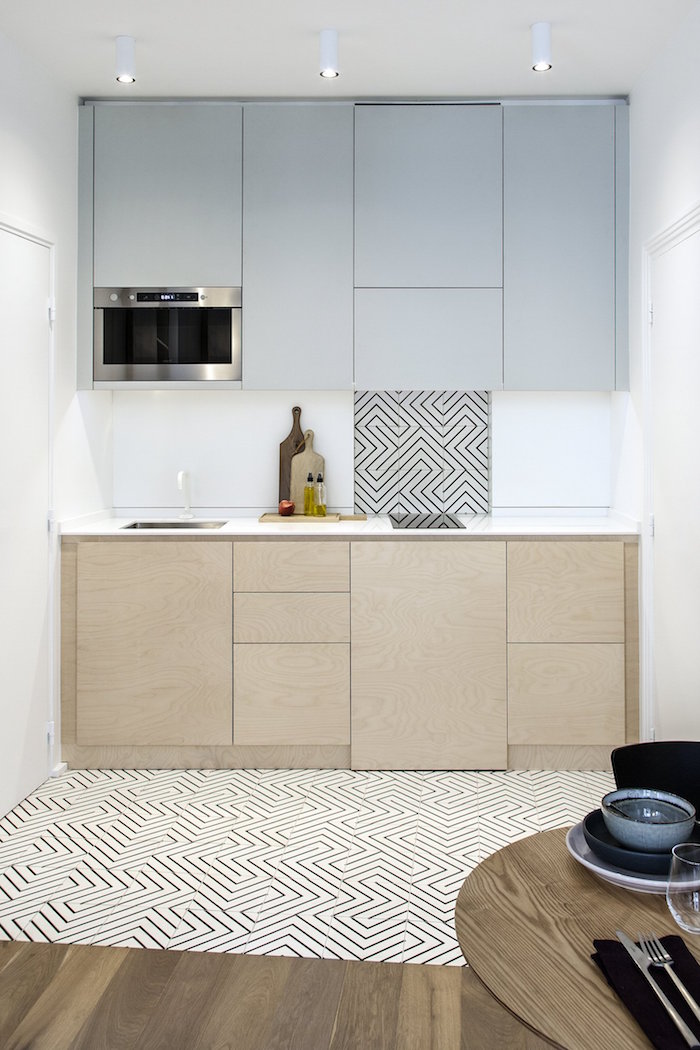
For the ultimate seamless look, consider using the same material for both your countertop and your backsplash. This technique, known as a slab backsplash, eliminates grout lines and creates an unbroken visual plane that makes the entire area feel larger and more cohesive. Solid surfaces like Corian or engineered stone are perfect for this high-impact, minimalist statement.
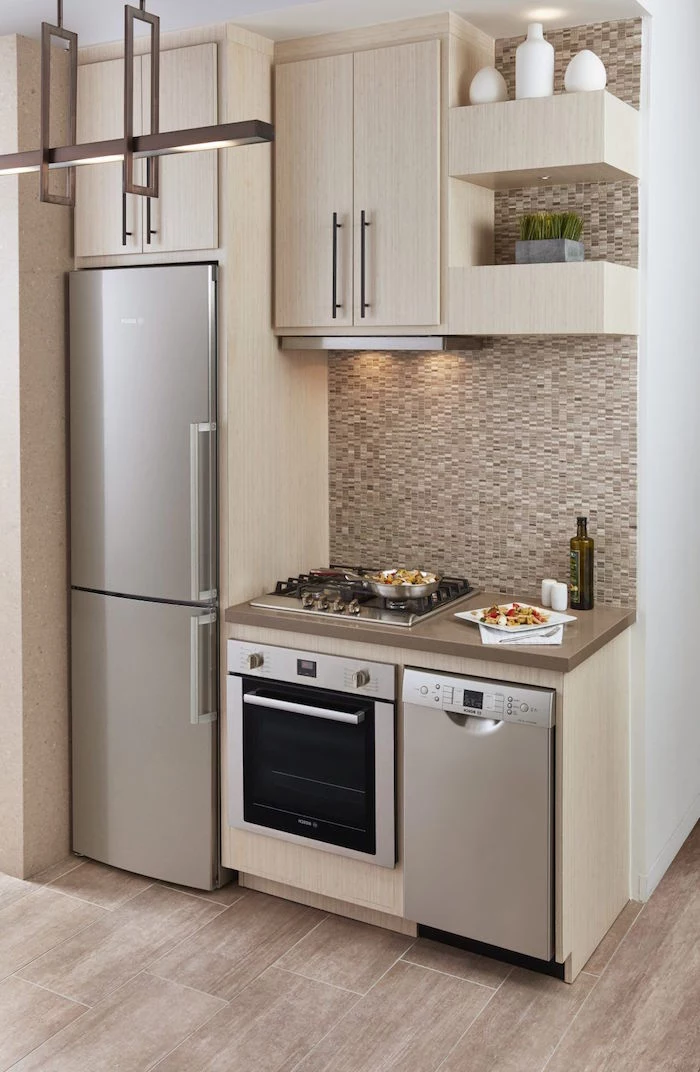
- Drawer-style appliances: A Fisher & Paykel DishDrawer is half the height of a traditional dishwasher, allowing it to fit into unconventional layouts. Microwave drawers are another space-saver, tucking neatly below the counter.
- Slim refrigerators: Look for counter-depth models with a width of 24 inches. They integrate perfectly with cabinetry without jutting out and disrupting the walkway.
- Combination ovens: A convection microwave or a steam-combination oven can perform multiple functions in a single unit, eliminating the need for separate appliances.
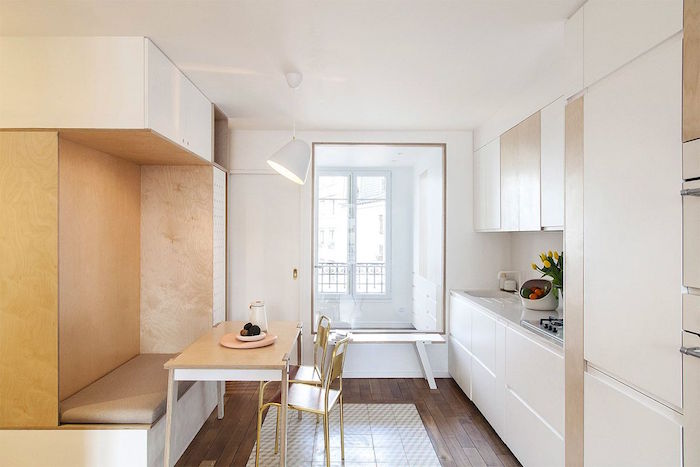
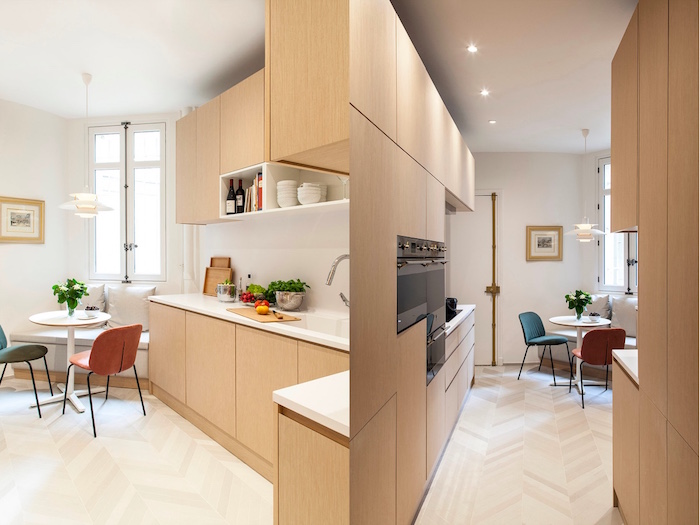
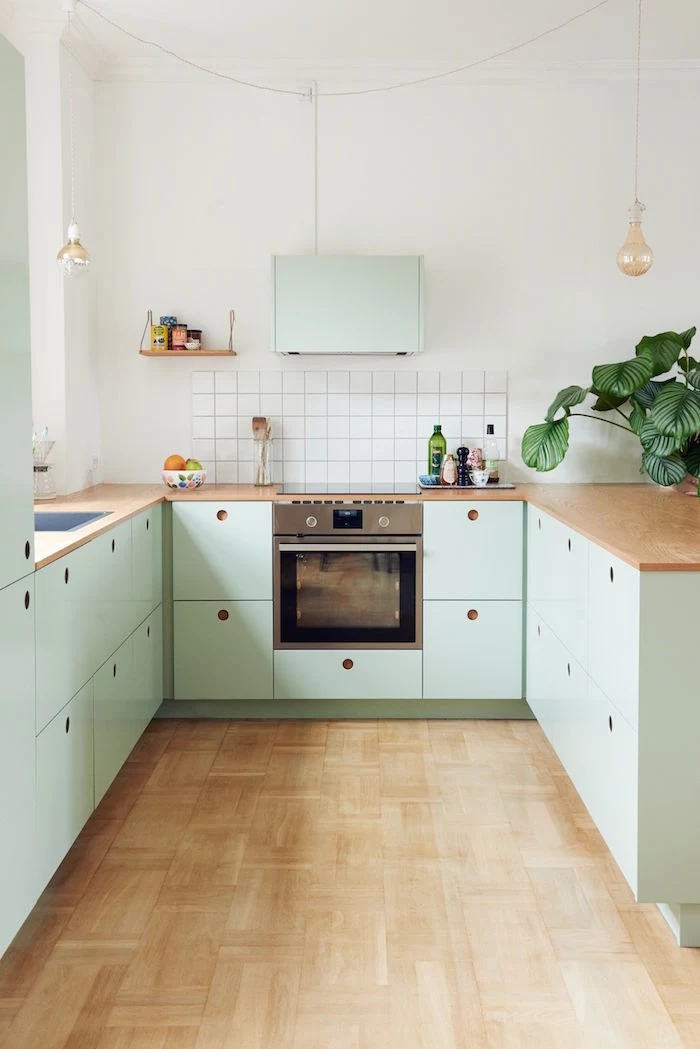
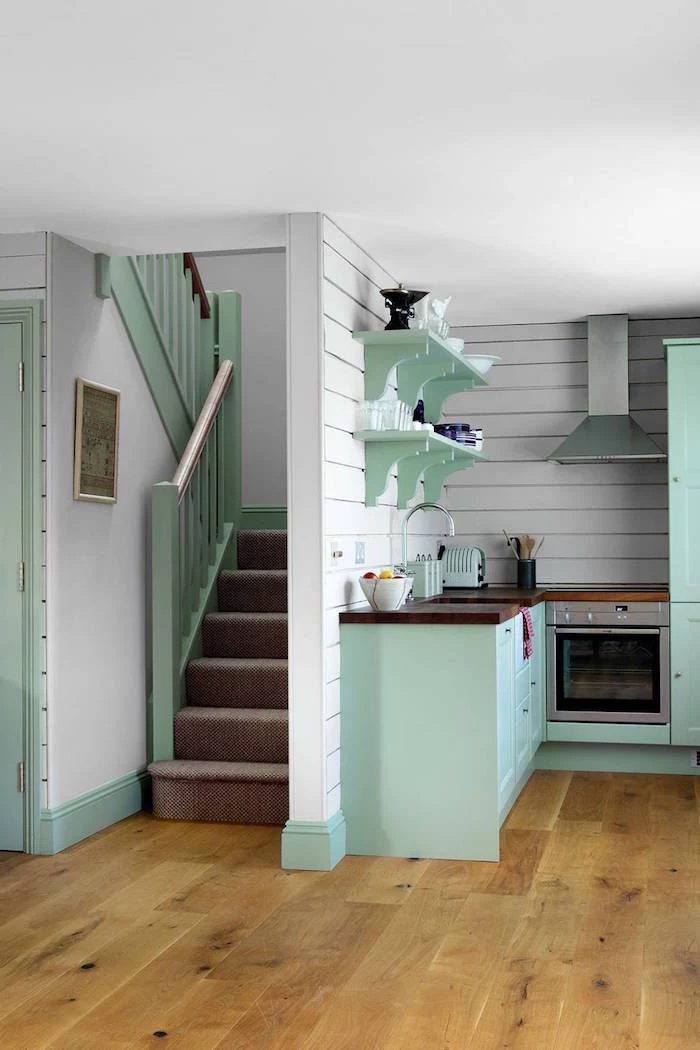
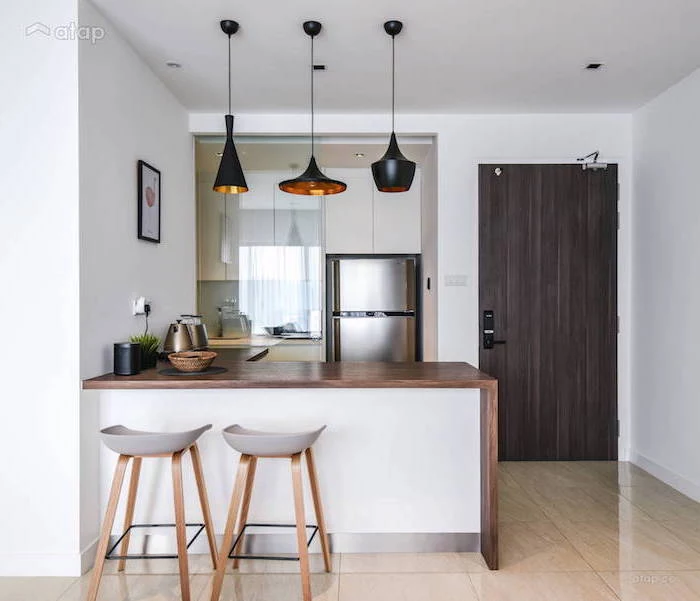
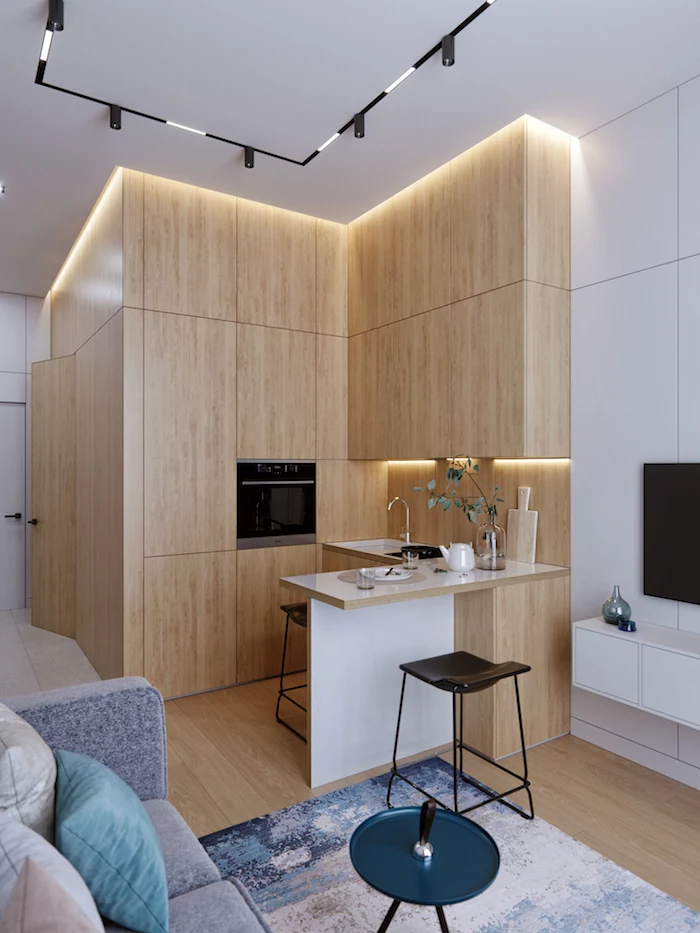
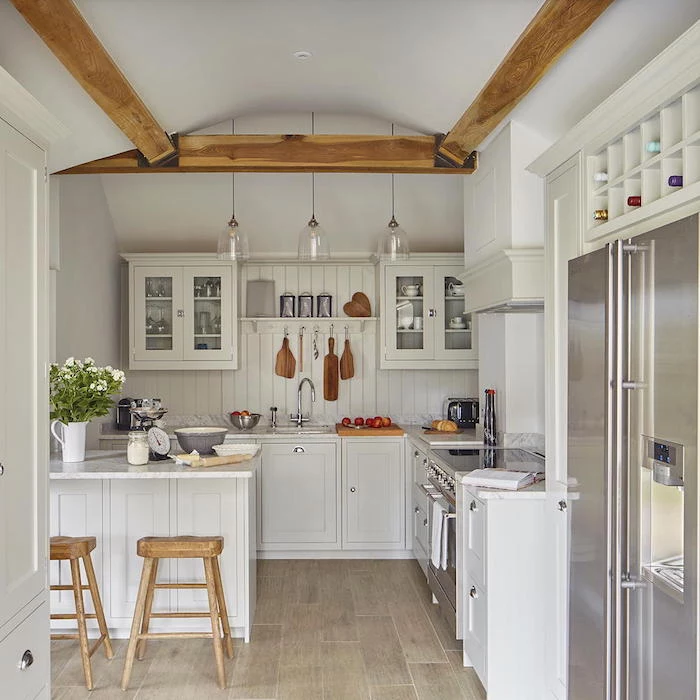
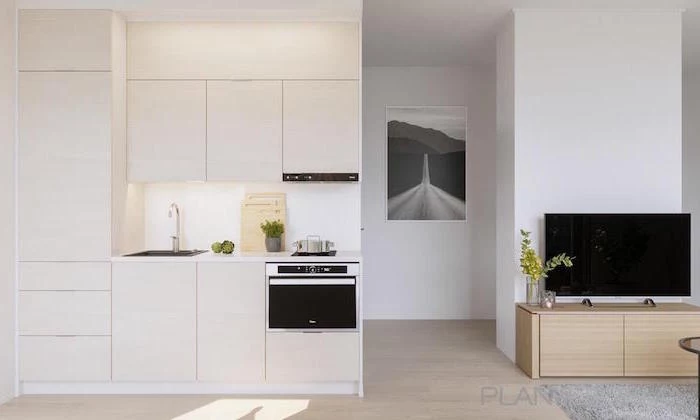
A critical design choice often overlooked: your flooring. Running the same flooring material from the kitchen into the adjoining living or dining area without a threshold creates a continuous flow that dramatically expands the perceived size of the space. A light-colored wood or large-format tile will further enhance this effect.
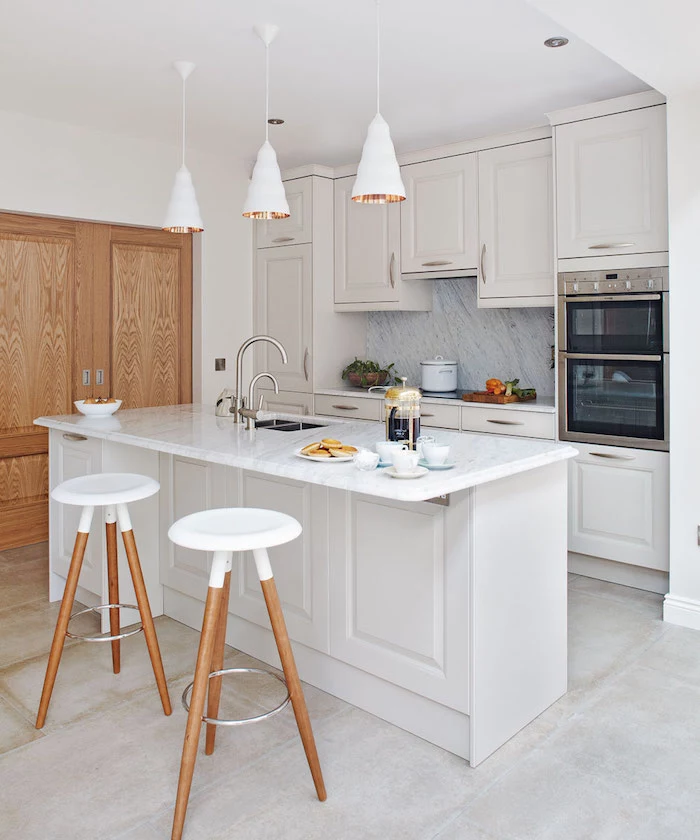
Light colors recede. This is a fundamental principle of visual perception. Using a soft, light shade like Benjamin Moore’s ‘Simply White’ or ‘Pale Oak’ on both walls and cabinets will make the boundaries of the room feel further away.
Tired of a cluttered countertop? The solution might be an
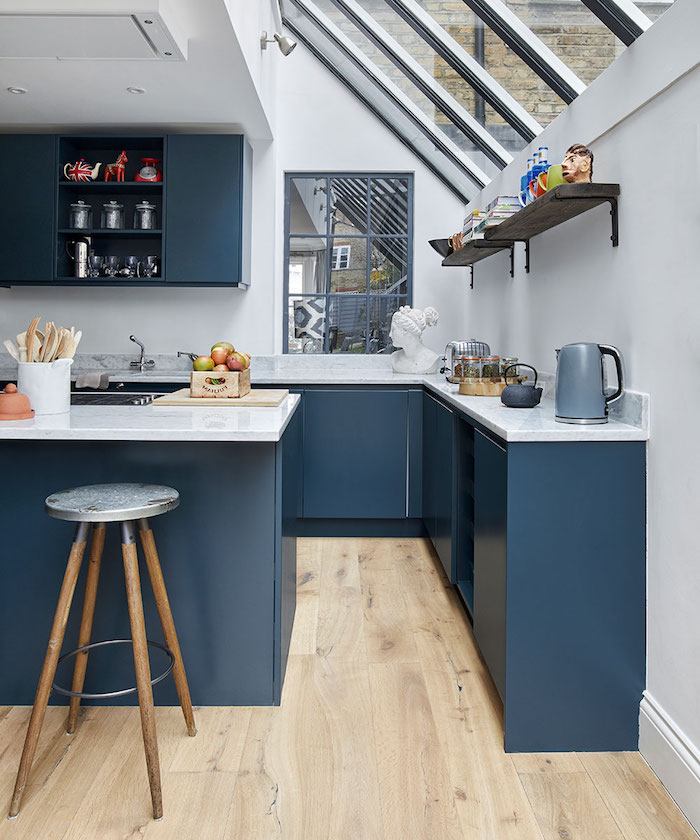
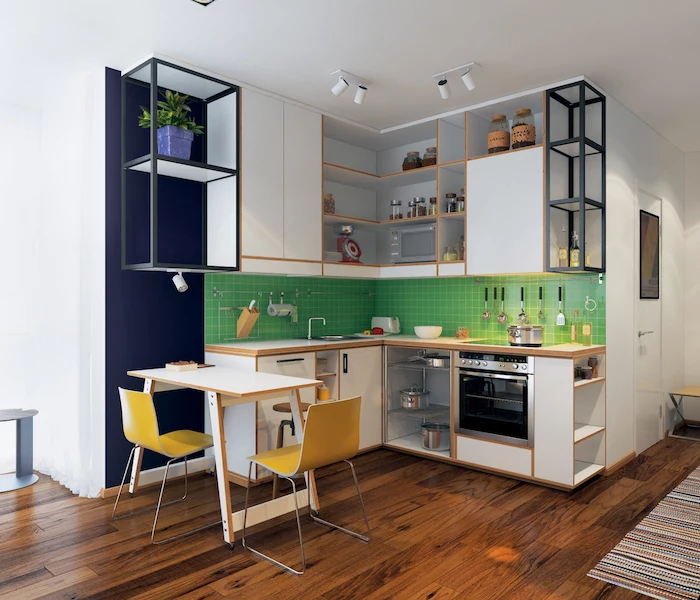
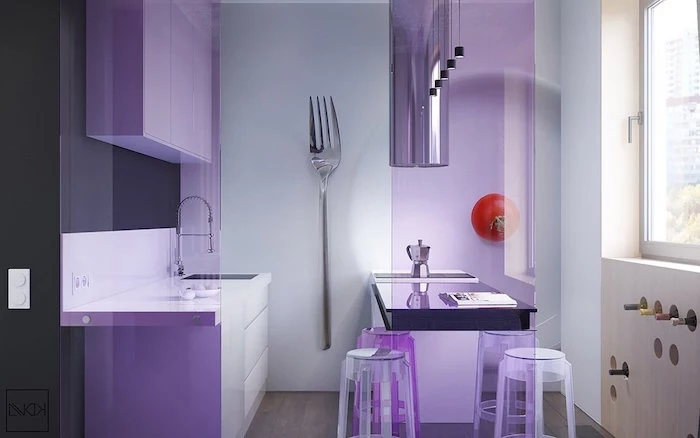
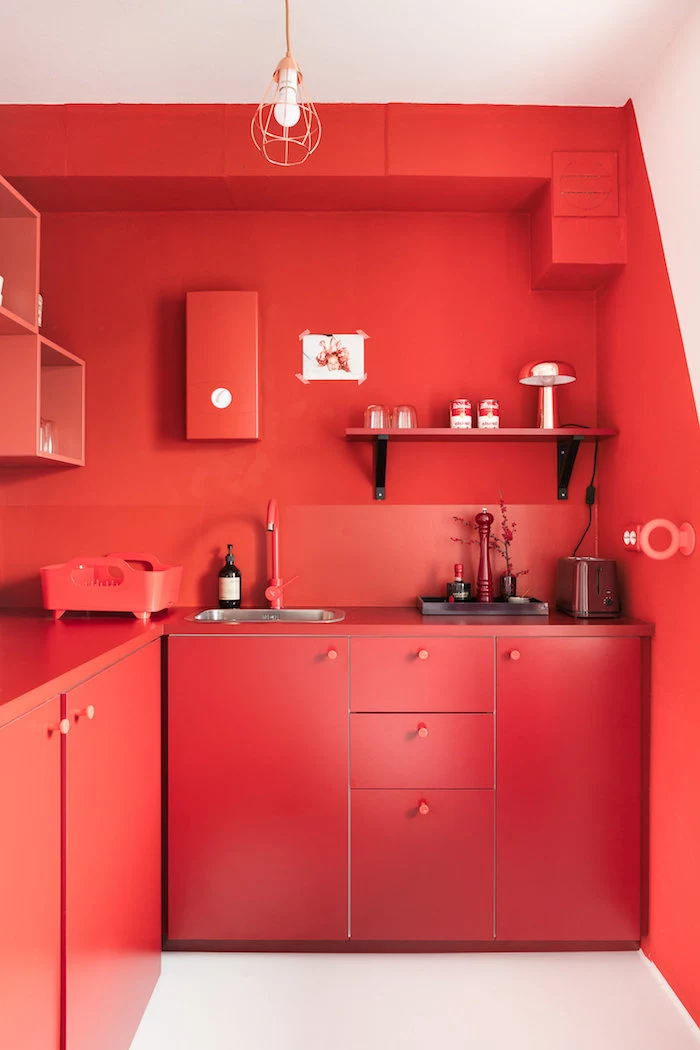
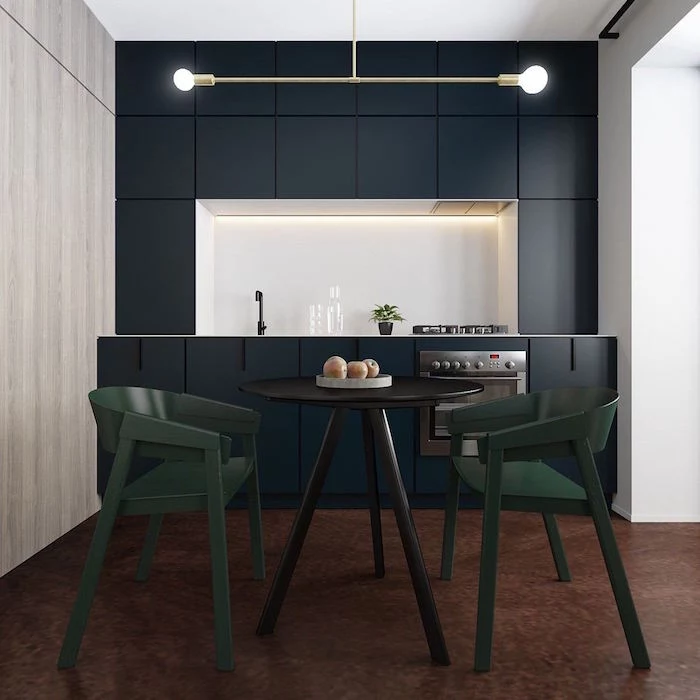
Can I really use dark colors in a tiny kitchen?
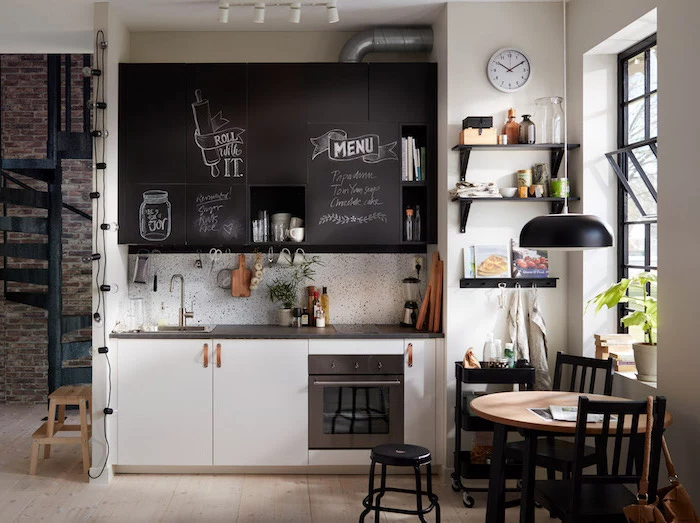
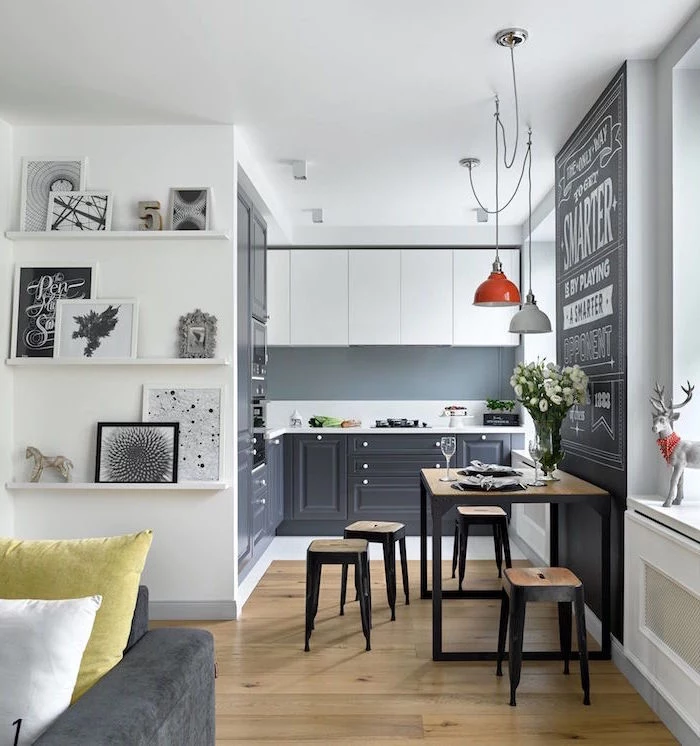
Absolutely, but with strategy. While an all-black kitchen might feel cavernous, using a deep, moody color on just the lower cabinets can ground the space and add a surprising level of sophistication. Paired with white or light-colored upper cabinets and countertops, this creates an illusion of height and draws the eye upward, making the ceiling feel taller.

Lower Cabinets with Doors: The traditional choice. They can be cheaper, but often create a deep, dark cavern where items get lost at the back. You have to get on your knees to find anything.
Deep Drawers: A game-changer for ergonomics. A single pull-out motion gives you a top-down view of everything inside. Perfect for storing pots, pans, and even stacks of dishes. Though slightly more expensive, the functional upgrade is immense in a small kitchen.
For lower storage, drawers win every time.
- Reduces visual noise for a calmer, more streamlined look.
- Makes wiping down cabinet fronts faster and easier.
- Prevents clothes from snagging on knobs or pulls in a tight walkway.
The secret? Integrated hardware (like channel pulls) or push-to-open mechanisms. These systems create a completely flat, uninterrupted cabinet face, a simple trick that makes a small kitchen feel significantly more modern and spacious.
A cluttered counter isn’t just a practical problem; it’s a psychological one. Visual clutter sends signals to our brain that our work is never done, creating a subtle but constant source of stress. In a small kitchen, where every surface is visible, practicing a ‘one in, one out’ rule or adopting Marie Kondo’s method of keeping only useful, joy-sparking items on display can transform the room’s entire atmosphere from chaotic to calm.
- Swap the hardware: Changing out old knobs and pulls for new ones in a modern finish like matte black or brushed brass is a 30-minute job that instantly updates the look.
- Paint a tile backsplash: If you’re stuck with dated tiles, a specialty tile paint can completely transform them for a fraction of the cost and effort of a full replacement.
- Upgrade the faucet: A new, high-arc faucet is like jewelry for your sink. It’s a functional focal point that can make the whole kitchen feel more luxurious.
The forgotten rule of ergonomics: Every major appliance needs a dedicated landing zone. You need a heat-proof surface next to your stove and oven to place hot pans, and clear counter space next to your fridge to set down groceries. Even 12-15 inches is enough to prevent a dangerous balancing act across the kitchen.
In many European cities like Paris or Rome, a ‘large’ apartment kitchen can be as small as 60 square feet (about 5.5 square meters). These spaces have perfected the art of compact, multi-functional design out of sheer necessity.
That recessed space at the bottom of your cabinets is pure potential. Instead of a static baseboard, you can install toe-kick drawers. They are the perfect hidden storage spot for items you don’t use every day. Think about what you could store there:
- Baking sheets and cooling racks.
- Platters for entertaining.
- Extra cleaning supplies or reusable shopping bags.
- Even pet food bowls can be built into a pull-out. Systems from IKEA or Rev-A-Shelf make this a surprisingly accessible upgrade.
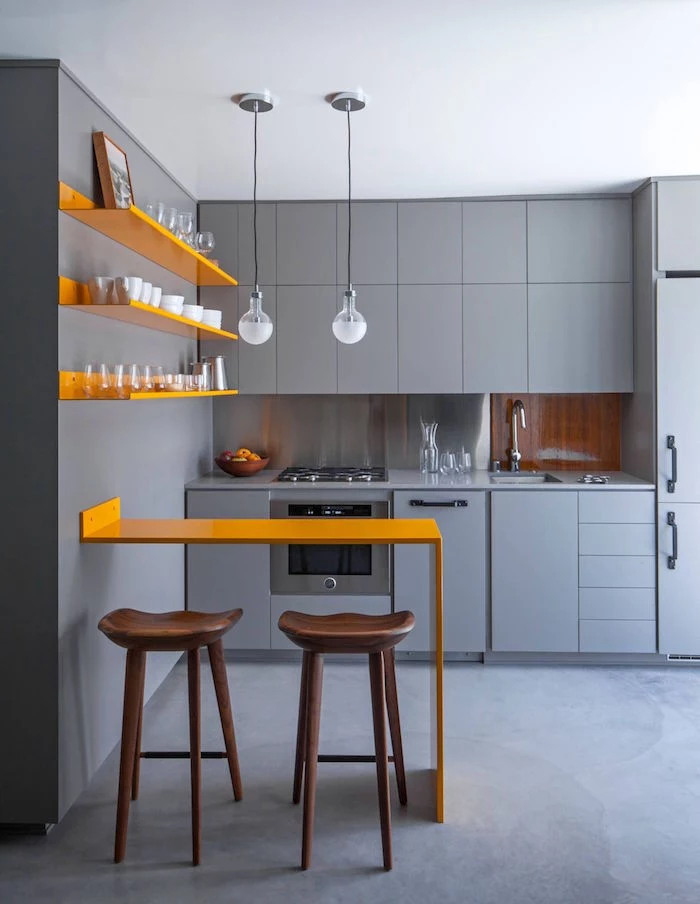
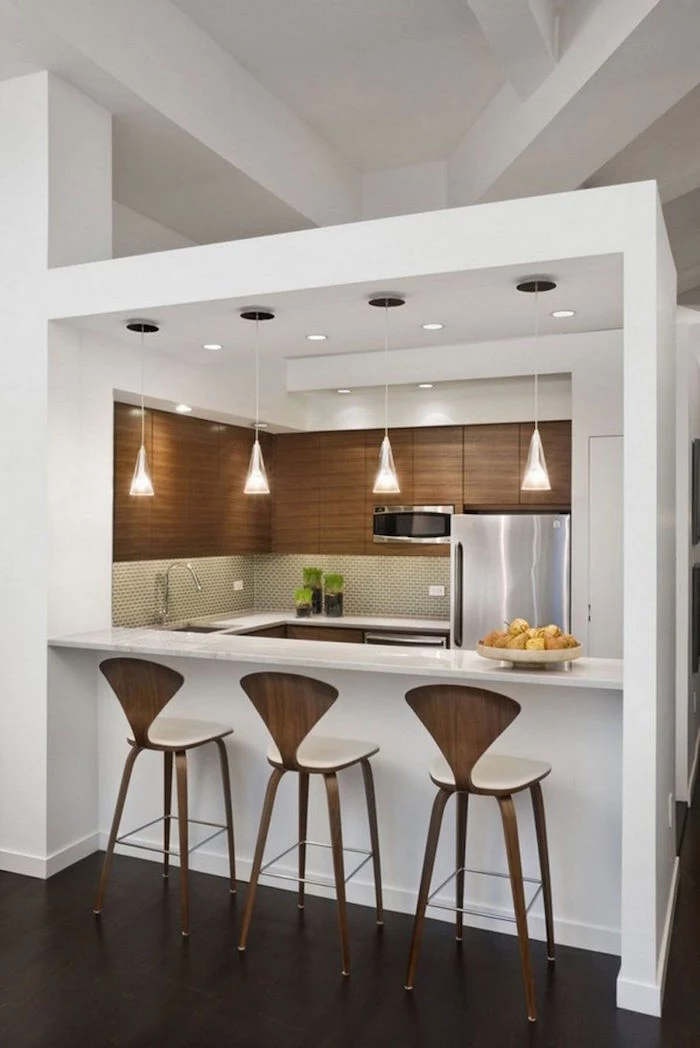
Is an island ever a good idea in a small kitchen?
A fixed island is almost always a mistake, as it blocks flow and makes the space feel cramped. However, a narrow, rolling kitchen cart or a small butcher block on casters can be the perfect solution. It provides extra prep space and storage when you need it, and can be pushed to the side or into another room when you don’t. Look for models with a drop-leaf for even more flexibility.
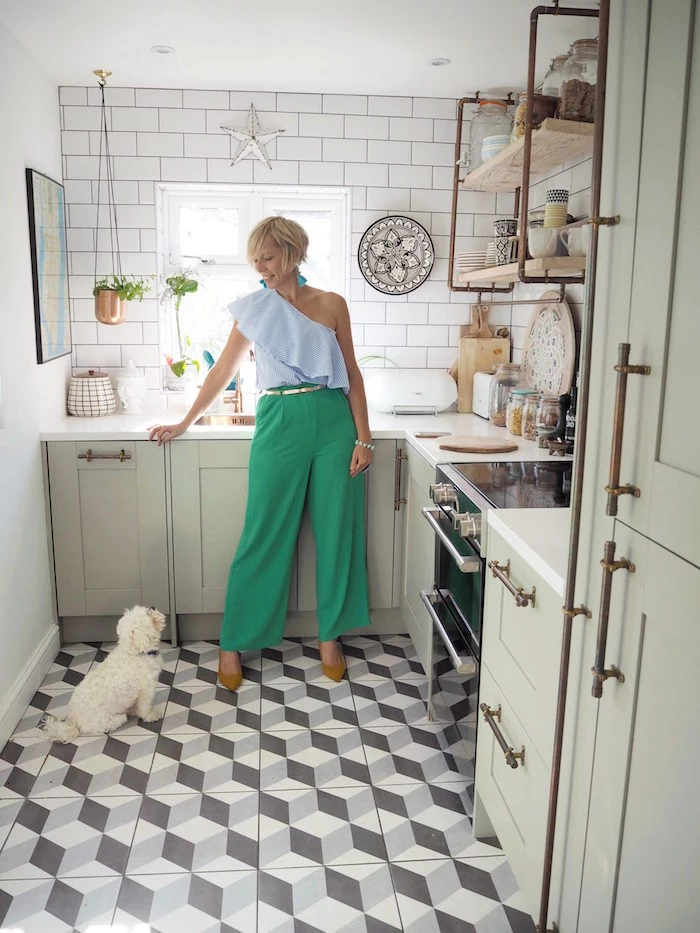
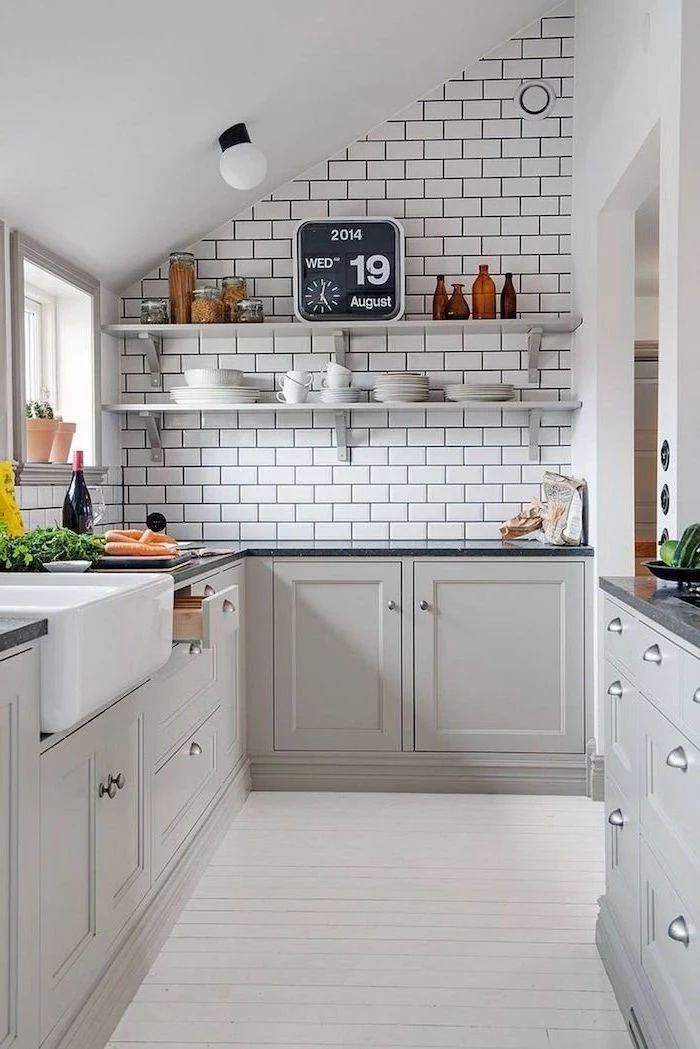
Large Format Tiles: Using larger tiles (e.g., 12×24 inches) for a backsplash means fewer grout lines. This creates a less busy, more monolithic surface that can make a small wall area feel bigger and is much easier to clean.
Classic Subway Tiles: While timeless, the high number of grout lines in a traditional subway tile pattern can sometimes make a small space feel more visually cluttered and grid-like. If you love the look, opt for a grout color that closely matches the tile to minimize the effect.
For a feeling of spaciousness, larger tiles often have the edge.


