Your Dishwasher is Filthy. Here’s How the Pros Actually Clean It.
Let’s be honest. The most common reason a dishwasher stops working well isn’t some catastrophic mechanical failure. After years of working as an appliance tech, I can tell you it’s almost always because the machine is just plain dirty. A grimy dishwasher doesn’t just leave spots on your glasses or smell a bit funky. It’s a sign the whole system is struggling, working harder, and slowly grinding its parts down.
In this article
Think of it like changing the oil in your car—it’s just essential maintenance. Keeping your dishwasher clean protects the pump, ensures the spray arms can actually spray, and helps the sensors do their job. This isn’t just a quick wipe-down; this is the full-service clean that restores a machine’s performance. We’ll cover the monthly tune-up and the once-a-year deep clean that’ll keep it running beautifully.
Oh, and by the way, here’s a little secret the detergent companies don’t shout about: modern dishwasher detergents are designed to work with some food soil. They contain enzymes that need something to latch onto. So, scraping your plates is good, but rinsing them completely clean is actually counterproductive! Crazy, right?
First, A Quick Peek Under the Hood
Before you start cleaning, it helps to know what’s happening inside that big metal box. A dishwasher is simpler than you think. It doesn’t fill up with water; it just uses a couple of gallons that get recycled like crazy during the cycle.
Water collects in a little basin at the bottom (the sump). A pump grabs that water and forces it up to the spray arms with serious pressure. That force is what makes the arms spin, blasting hot, soapy water everywhere. As the water runs back down, it passes through a filter to catch all the gunk—at least, that’s the plan. A heating element gets the water hot and helps dry everything at the end. Hot water is key for cutting grease and sanitizing.
The problem begins when grease, tiny food bits, and hard water minerals team up. They create a nasty, slimy film that coats everything and clogs the works. Hard water leaves behind that chalky white residue (limescale), which can choke the tiny spray holes in the arms, reducing the water pressure to a pathetic dribble.
The Essential Monthly Clean (The 30-Minute Tune-Up)
Doing this once a month will prevent 90% of all issues. It takes about 20-30 minutes of your time, plus the machine’s run time. It’s the best thing you can do for your dishwasher.
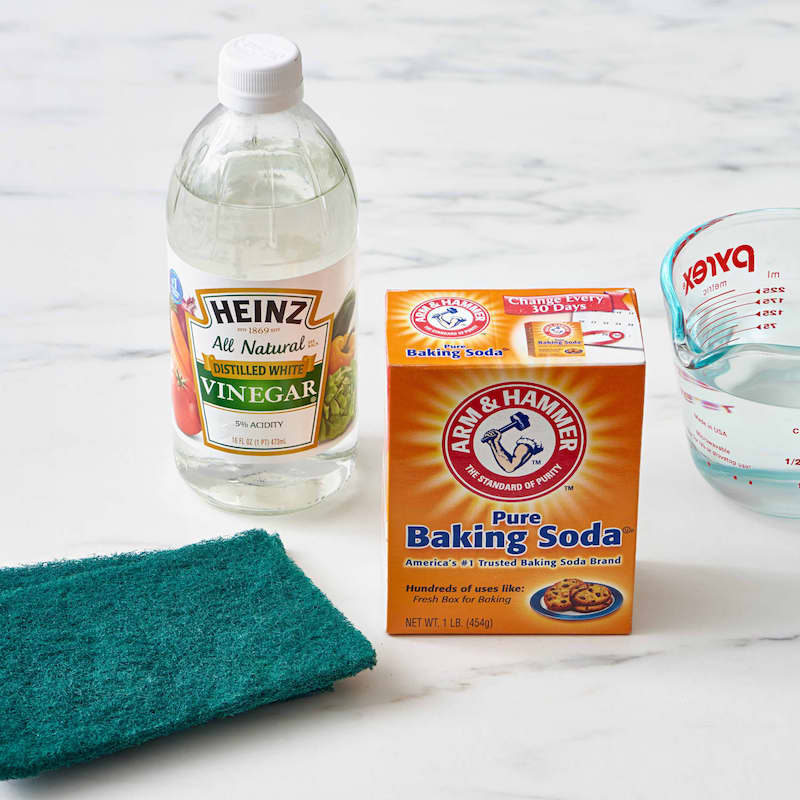
What You’ll Need:
- White Vinegar: Your go-to for dissolving mineral deposits. A huge jug costs like $3 at any grocery store and will last you ages.
- Baking Soda: A fantastic natural deodorizer and gentle scrubber.
- An Old Toothbrush: For getting into the nooks and crannies of the filter.
- A Stiff Wire or Paperclip: Perfect for poking out clogged spray arm holes.
- A Bowl: For soaking the filter and other small parts.
Quick Tip: Don’t have time for the full routine? Just do ONE thing: pull out and scrub the filter. It takes five minutes and solves most performance problems before they even start. It’s the biggest win for the least effort.

Step 1: Get Access
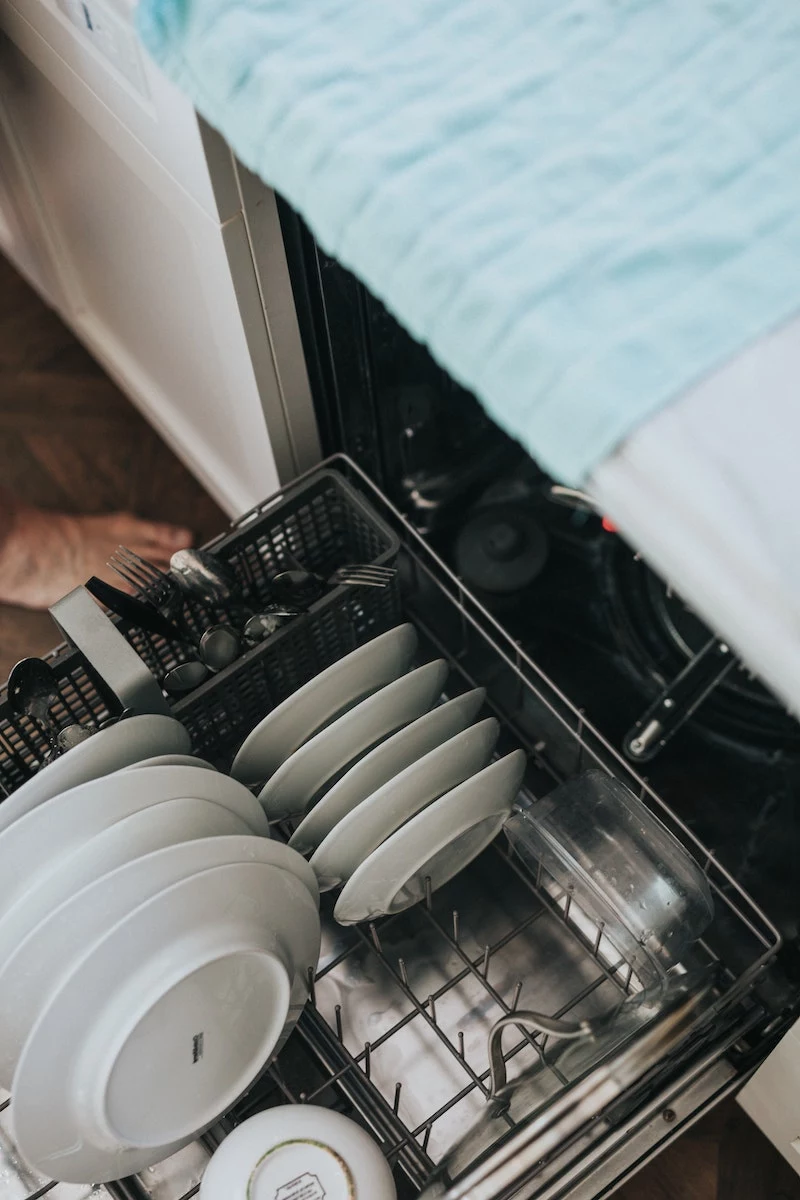
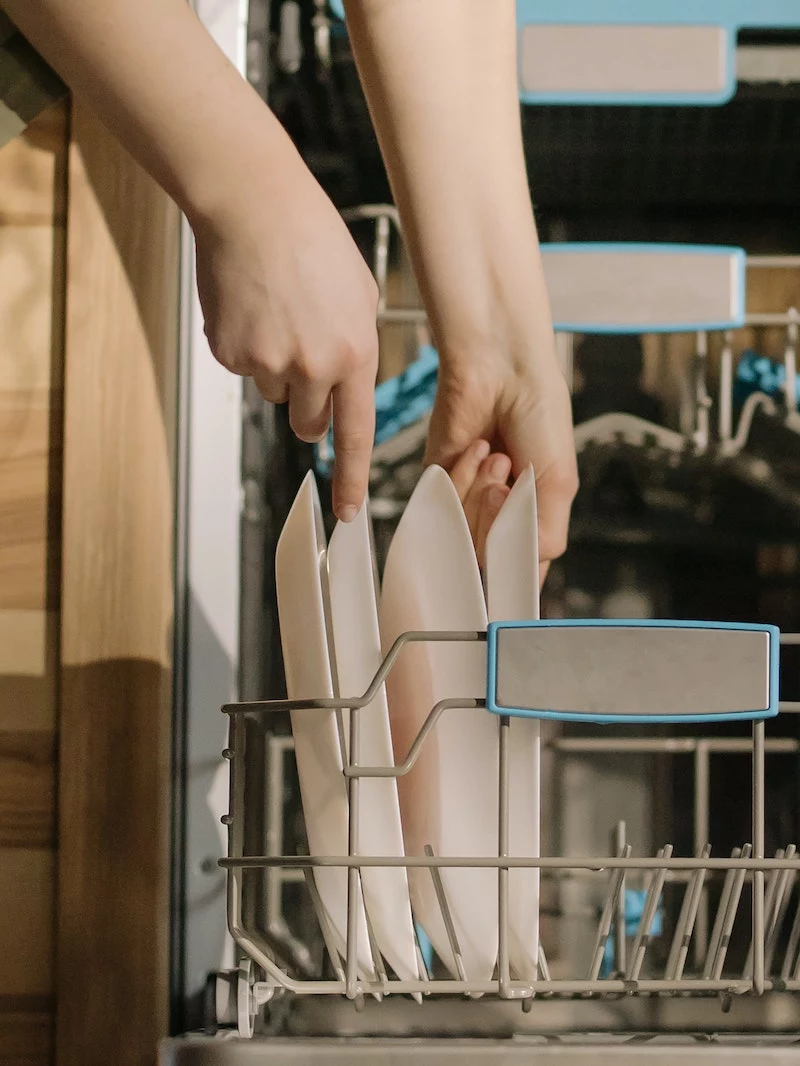
First things first, pull the bottom dish rack all the way out and set it aside. This gives you a clear shot at the floor of the dishwasher. Take out the utensil basket, too.
Step 2: Clean the Filter (This is THE Most Important Part)
The filter is your dishwasher’s hero, and it’s probably disgusting. Most modern machines have a filter you can twist out by hand—usually a quarter-turn counter-clockwise. It’s typically a cylinder-shaped fine filter that sits inside a flat, coarse filter plate.
Heads up! Your filter might look a little different. Some are wide, flat mesh panels, others are basket-style. If you’re not sure, a quick peek at your user manual will show you exactly how to remove yours without breaking anything. I always suggest snapping a quick photo with your phone before you take it apart, just so you remember how it all goes back together.
Take the filter parts to the sink and rinse them under hot water. You’ll be shocked at what comes out—coffee grounds, soggy labels, seeds, you name it. Use that old toothbrush with a little dish soap to gently scrub the greasy film off the mesh. Then, while the filter is out, peek into the housing where it sits. I’ve found everything from broken glass to olive pits down there. Carefully fish out any debris; it could be the source of a weird grinding noise.
Step 3: Clear the Spray Arms
Clogged spray arms mean dirty dishes, period. The bottom arm usually just lifts right off its mount. The middle or upper one might be held on by a plastic nut you can unscrew by hand. Hold the arm under your tap and use a paperclip or a small brush to poke out any debris from every single spray hole. Shake it a bit to get any loose junk out from the inside.
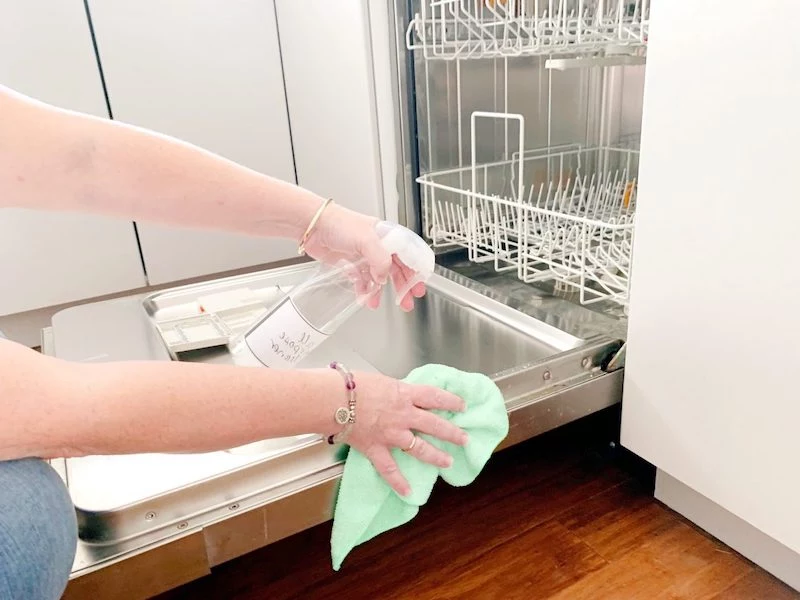
Step 4: The Final Wipe-Down
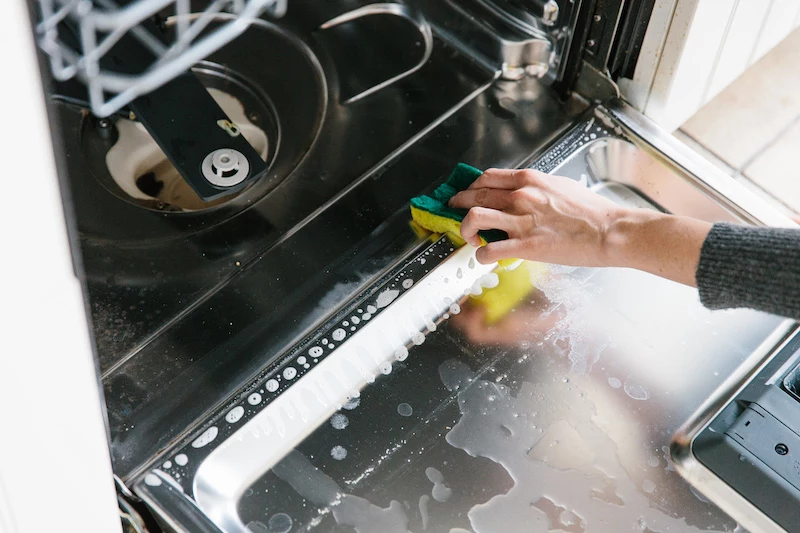
The rubber gasket around the door is a prime spot for mold and gunk. Use a damp cloth to wipe it down thoroughly. Avoid harsh chemicals or bleach here; they can dry out the rubber and cause it to crack, leading to leaks down the road. Also, wipe down the inside of the door and the very bottom lip of the tub, as these spots don’t get much direct spray.
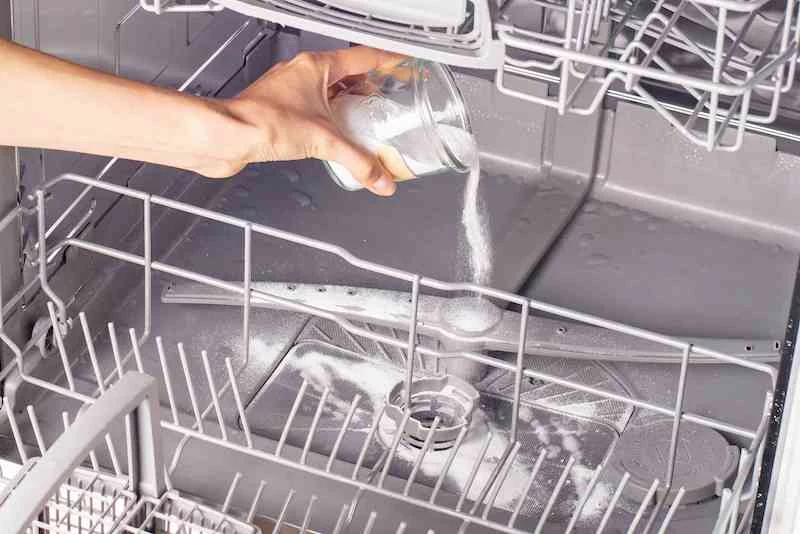
Step 5: The Two-Part Cleaning Cycle
Now that the guts are clean, it’s time to descale and deodorize the whole system. This is a two-cycle process. And no, you can’t combine them.
- The Vinegar Run: Put the filter and spray arms back in. Place a dishwasher-safe bowl with two cups of white vinegar on the top rack. Using a bowl is better than pouring it in the bottom, as it ensures the vinegar is released during the main wash for maximum effect. Run a normal or heavy cycle (empty, of course).
- The Baking Soda Finish: Once the vinegar cycle is done, sprinkle one cup of baking soda across the bottom of the tub. This neutralizes any leftover vinegar smell and scrubs away any remaining grime. Run a short, hot water rinse cycle.
And you’re done! The inside should look brighter and smell completely neutral.
So, What About Those Cleaning Pods?
You’ve seen them at the store—those single-use tablets from brands like Affresh or Glisten. So, how do they stack up against the DIY vinegar method? It really depends on your needs.
- Vinegar & Baking Soda: This is the ultimate budget-friendly method. It costs pennies and is fantastic for routine deodorizing and tackling light mineral buildup. If your water isn’t super hard and you don’t have a lot of greasy film, this is all you need.
- Citric Acid: If you have serious hard water and your glasses are always cloudy, citric acid is your best friend. It’s a more powerful (but still food-safe) acid than vinegar, specifically for dissolving that stubborn white limescale. You can buy it as a powder online for about $10 a pound.
- Commercial Cleaning Pods: These are the convenient, all-in-one solution. They contain surfactants and stronger agents that are formulated to attack both heavy grease buildup and limescale in one go. They’re a great choice for a deep clean or if you just want a simple, powerful, set-it-and-forget-it option. Expect to pay around $8-$12 for a 6-month supply.

The Annual Deep Service (Or When Things Get Really Nasty)
Once a year, or if you’re dealing with a really neglected machine, it’s time to go deeper. You’ll know it’s time if you have stubborn smells that come back right after cleaning, visible mold spots (especially black or orange stuff), or a thick, chalky film that vinegar won’t touch.
A CRITICAL SAFETY WARNING ABOUT BLEACH
I cannot stress this enough. NEVER, EVER mix bleach with vinegar. The combination creates toxic chlorine gas. Seriously. It’s incredibly dangerous. Never mix bleach with any other cleaner, for that matter. If you’ve just run a vinegar cycle, you MUST run at least one full plain-water rinse cycle before even thinking about using bleach. Some manufacturers advise against using bleach at all, especially in stainless steel tubs, so check your manual first. If it’s safe for your model, add one cup of bleach to the bottom of the empty dishwasher and run a long, hot cycle. Air it out well afterward.
If you’re dealing with a nasty, swampy smell, the problem might be a partial clog in the drain hose under your sink. This is getting into intermediate DIY territory. If you’re not comfortable with basic plumbing, this is a good time to call a pro to avoid a messy water situation.
Quick Troubleshooting: “What If…?”
Sometimes things don’t go perfectly. Here are a couple of common hiccups:
- “It still smells weird after I cleaned it!” If the monthly clean didn’t cut it, the smell is likely coming from deep in the sump or the drain hose. It’s time for that annual deep clean, maybe using a commercial pod designed for tough odors.
- “The top spray arm isn’t spinning anymore!” Nine times out of ten, you just didn’t seat it correctly when you put it back. The connection point can be tricky. Try taking it off and carefully re-attaching it. You should feel it click or lock into place and sit level.
- “My dishes are still soaking wet.” Before you panic, check your rinse aid dispenser. It’s usually a little round cap on the inside of the door. If it’s empty, fill it up. Rinse aid helps water sheet off your dishes, which is the magic behind spot-free drying.
At the end of the day, keeping your dishwasher happy is simple. A little bit of monthly maintenance goes a long, long way. But if you do nothing else, just promise me you’ll clean that filter. It’s the key to cleaner dishes and a machine that will serve you well for years to come.
Inspirational Gallery
That funky smell won’t go away, even after cleaning?
The culprit is often hiding in the dishwasher’s sump and drain hose. Even after a vinegar wash, greasy, foul-smelling bacteria can linger. For a targeted attack, try a dedicated product like Glisten Dishwasher Cleaner, which is specifically designed to penetrate and dissolve this buildup in the hidden pipes and pump mechanisms that a simple cleaning cycle might miss.
Did you know? According to the U.S. Geological Survey, over 85% of American homes have hard water.
This means your dishwasher is likely fighting a constant battle against limescale—that chalky, white residue. Limescale clogs the tiny holes in the spray arms, drastically reducing water pressure and cleaning power. A regular descaling cycle is not a luxury; it’s essential maintenance for most households.
- Glasses emerge sparkling, not cloudy.
- Utensils feel clean, not gritty.
- The machine dries dishes more effectively.
The secret? Ensuring the rinse aid dispenser is always topped up. It’s a simple step with a huge impact. Rinse aid works by breaking the surface tension of water, allowing it to sheet off dishes rather than forming droplets that leave spots as they dry.
Don’t forget the door seal: The rubber gasket around the dishwasher door is a prime spot for mold and mildew to grow, thanks to the constant moisture. It’s an area the main spray arms can’t reach. Use an old toothbrush and a bit of soapy water or a diluted vinegar solution to gently scrub away any black or orange grime you find hiding in the folds.
White Vinegar: An excellent, cheap option for a monthly refresh and mild descaling. Just place a cup of it in a bowl on the top rack and run an empty, hot cycle.
Citric Acid: More powerful for tackling serious, caked-on limescale. You can buy it in powder form (check the canning section of your grocery store) and pour about a half-cup into the detergent dispenser before running an empty, hot cycle.
For heavy buildup, citric acid is the clear winner.
Modern enzyme-based detergents from brands like Cascade or Finish are designed to be ‘hungry’. They work best when they have some food soil to break down. Rinsing your plates completely clean before loading them essentially starves the enzymes, making your detergent less effective and sometimes leading to a gritty film on your glassware.
Create your own cleaning bombs for a monthly freshen-up. It’s easy and effective.
- Mix 1 cup of baking soda with 1/4 cup of citric acid.
- Slowly spray in 1 tablespoon of hydrogen peroxide until the mixture clumps like wet sand.
- Press the mixture into an ice cube tray and let it dry for several hours.
Just toss one bomb onto the bottom of your empty dishwasher and run a hot cycle to dissolve grease and deodorize.
- Ensure the main filter is locked back in place correctly. An unsecured filter can allow large debris to enter and destroy the pump.
- Manually spin the lower and upper spray arms to make sure they move freely and aren’t blocked.
- Check that the tiny spray holes on the arms are clear of any dislodged debris from your cleaning. A toothpick is perfect for this.
The satisfaction of opening a truly clean dishwasher is a small but significant household victory. It’s not just about the visible sparkle on the stainless-steel interior; it’s about the smell—or rather, the lack of one. Instead of that familiar damp, slightly sour odor, there’s a neutral, clean scent that signals your machine is reset and ready to perform at its peak.


