An Installer’s Guide: Don’t Buy a Single Appliance Until You Read This
I’ve spent the better part of my career standing in kitchens, from brand new builds to dusty, torn-apart renovations. And I can tell you one thing for sure: nothing stresses people out more than picking appliances. They step into a showroom, get blinded by the shiny steel, and suddenly all the practical stuff just… vanishes.
In this article
My job has always been to be the voice of reason. To pull the conversation away from the fancy sales pitch and back to the real world of electrical loads, plumbing, and what it’s actually like to live with these machines day in and day out. This isn’t about what’s trendy. It’s about finding solid tools that will work for you for years.
So, let’s talk about the lessons I’ve learned from installing, fixing, and sometimes hauling away appliances that just didn’t make the cut. This is the practical, no-fluff guide to turning a stressful shopping trip into a confident investment.
First Things First: Do Your Homework at Home
The most critical decisions you’ll make happen with a tape measure in your hand, not a brochure. A gorgeous refrigerator that can’t fit through your front door is just an expensive, high-tech rock for your lawn. So before you even think about falling in love with a specific model, you need to get intimate with your space.
Mastering Your Measurements
You need to measure more than just the old appliance’s spot. Getting these numbers right will save you from 90% of the most common (and frustrating) installation headaches.
Okay, quick challenge: Pause right now, grab a tape measure, and get these numbers. I’m serious. It takes five minutes and can save you a world of pain.
- The Appliance Niche: Measure the exact opening. Check the width at the top, middle, and bottom. Then check the height on the left and right sides. Why? Because old houses are rarely perfectly square. Always use the smallest measurement you find.
- The Delivery Gauntlet: Measure the width of every single doorway, hallway, and tight corner from the street all the way to your kitchen. I once saw a client buy a beautiful 36-inch French door fridge for a kitchen only accessible through a 32-inch door. We had to literally remove the door frame to squeeze it in. Don’t be that person.
- Breathing Room: Appliances need space to work properly and not die an early death. Refrigerators, in particular, need air gaps to get rid of heat. Plan for at least an inch of clearance at the back and top. Without it, the compressor will work itself to death, run up your electric bill, and fail years sooner. This info is always on the spec sheet online—look it up!
- Operational Space: Can the refrigerator doors open all the way? You often need them to swing past 90 degrees just to pull out the crisper drawers. Will the dishwasher door drop down without smacking into your new kitchen island? Think about how the appliance actually functions in the space.

Checking Your Home’s Guts (The Utilities)
An appliance is just a metal box without the right power or plumbing. A quick check of your existing hookups tells you what you can install easily versus what will require calling in a pro (and spending more money).
- Electrical Supply: Take a peek at your circuit breaker. Most standard fridges and gas ranges are fine on a normal 15 or 20-amp circuit. But if you’re dreaming of a sleek induction or high-powered electric range? That’s a whole different beast. They often demand a dedicated 40- or 50-amp circuit. If you don’t have one, you’ll need an electrician to run a new line from your panel. Heads up: this isn’t a small cost. Expect an electrician to charge anywhere from $400 to $1,500, depending on how complex the job is.
- Gas Connection: If you’re going with gas, find the shut-off valve behind the current appliance. And a quick tip: always replace the flexible gas line with a new one. They’re cheap—usually $20 to $30 at any home improvement store—and it’s incredible peace of mind against a dangerous leak.
- Water Lines: For fridges with ice makers and for your dishwasher, look at the supply line. If you see a flimsy little plastic tube or a ‘saddle valve’ that pierces the main pipe, plan on upgrading. I’ve seen both of those fail and cause thousands in water damage. A proper quarter-turn shut-off valve with a braided steel supply line (around $15-$25) is way more reliable.
- Venting & Ductwork: For a range hood or an over-the-range microwave, check your existing duct. Is it a 6-inch round duct? Does it actually vent outside? The size and path of this duct will limit how powerful of a fan you can effectively use. A massive fan on a tiny duct is just loud, not useful.
Choosing the Kitchen Workhorses
Your fridge, range, and dishwasher do the heavy lifting. Let’s break down the real-world differences so you can choose wisely.
Refrigerators: It’s More Than Just a Cold Box
The main job is simple, but the configurations can make or break your daily kitchen flow. A French door model is great for fitting big platters, while a side-by-side offers fantastic freezer organization. The traditional top-freezer models? Often the most energy-efficient and reliable of the bunch.
A note on maintenance: Pull your fridge out once a year and vacuum the coils on the back or bottom. Seriously. Dusty coils are the #1 reason compressors fail early. This five-minute chore can add years to its life.
- Counter-Depth vs. Standard: This is a big one. A standard-depth fridge sticks out about 6-8 inches from your counters but gives you the most storage for your money. A counter-depth model gives you that sleek, built-in look, but at a cost. You might pay $400 more for a model that has 4 cubic feet LESS space than its standard-depth cousin. You’re paying for style, not capacity.
- The Ice Maker Dilemma: To be frank, in-door ice and water dispensers are the most common point of failure on modern refrigerators. All that complex machinery stuffed into a freezing door is just asking for trouble. A simpler model with the ice maker located inside the main freezer compartment is far, far more reliable.
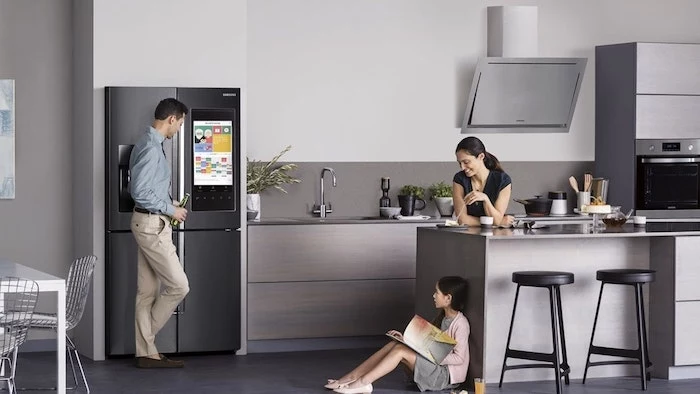
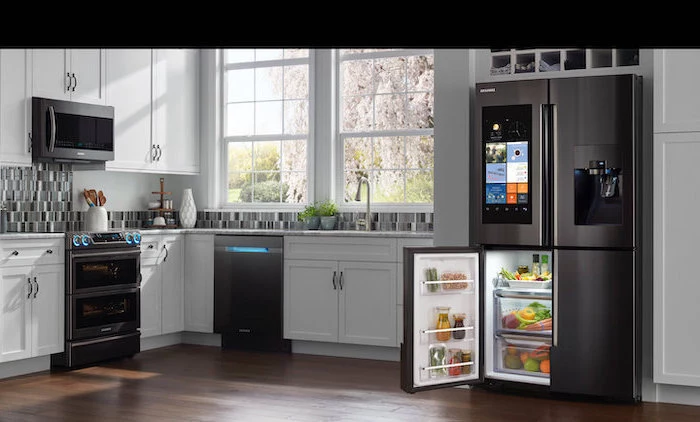
- So-Called “Smart” Features: Some new fridges connect to Wi-Fi. The door-ajar alert is genuinely useful, especially if you have kids. But a screen that shows you the weather? Ask yourself if you’ll still be using that in a year, or if you’re just paying for tech that will be outdated long before the fridge gives out. In my experience, the brands that focus on simpler mechanics without a ton of complex electronics tend to have fewer service calls down the line.
Ranges: The Gas vs. Electric vs. Induction Showdown
This choice fundamentally changes how you cook. Let’s break it down without the marketing fluff.
- Gas Cooktops: Chefs love the instant, visual control of a flame. But that open flame can also create hot spots in your pans. And from a health standpoint, a gas stove releases combustion byproducts into your home. A good, externally vented range hood isn’t a suggestion—it’s a must-have for clean indoor air. I always recommend a carbon monoxide detector in any kitchen with gas appliances.
- Electric Radiant Cooktops: These are the common glass smoothtops. They look sleek and are a breeze to clean. The big downside is the slow response time. They take a while to heat up and cool down, which can be maddening when you need precise control. They’re generally a budget-friendly and simple install, as long as you have the right electrical circuit.
- Induction Cooktops: This is where the magic happens. Induction doesn’t get hot; it uses an electromagnetic field to heat the pan directly. The result? It’s incredibly fast, super-efficient, and much safer, as the cooktop itself stays cool. It can boil water in half the time of gas or electric. The only catch is that your cookware must be magnetic. If a magnet sticks to the bottom of your pot, you’re good to go.
- A Word on Convection Ovens: A standard oven just uses radiant heat, which can be uneven. A convection oven adds a fan to circulate the hot air. This simple feature gives you faster, more even roasting and browning. If you bake or roast at all, consider a convection fan a non-negotiable feature.
- The Anti-Tip Bracket. DON’T SKIP THIS. Every new range comes with a small metal bracket. It gets screwed to the floor or wall behind the range, and a back leg of the stove slides into it. This prevents the entire oven from tipping over if a heavy pot or a Thanksgiving turkey is placed on the open door. It’s a critical safety feature, especially with kids around.
Dishwashers: The Unsung Hero
A good dishwasher is a quiet, reliable workhorse. The two biggest things to look for are noise level and the interior tub.
- Sound Levels (Decibels): A dishwasher’s noise is measured in decibels (dBA). Anything in the low 50s is pretty audible. A model in the low 40s is whisper-quiet. Jumping from a noisy 55 dBA model to a super-quiet 44 dBA one might cost an extra $200-$400. In my opinion, it’s the best money you’ll spend if you have an open-plan kitchen.
- Interior Tubs (Plastic vs. Stainless): Cheaper models use plastic tubs, which can stain and hold odors over time. Stainless steel tubs are more durable, resist odors, and actually help dishes dry better because the hot metal helps water evaporate after the final rinse.
- Pro Install Tip: Most dishwasher leaks come from one of two places: a bad water line connection or an improper drain hose setup. That drain hose must have a ‘high loop’ that goes up and touches the underside of your countertop before connecting to the sink drain. This simple loop prevents dirty sink water from flowing back into your clean dishwasher. I’ve seen floors ruined because this step was missed.
Wrapping It Up: Budgets, Warranties, and Installation Day
Okay, you’ve done your homework. Now let’s talk money and getting these things into your house.
Budget Realities & Smart Shopping
Be honest about your budget. A full kitchen appliance package can run from a few thousand to tens of thousands of dollars. A solid, entry-level package from a reliable brand might run you $2,500 to $4,000. If you’re stepping up to mid-range models with more features (like that quiet dishwasher or a convection oven), you’re more likely in the $5,000 to $9,000 neighborhood.
By the way, scratch-and-dent outlets can be goldmines. A cosmetic ding on the side of a dishwasher that will be hidden by cabinets is a great way to save a few hundred bucks. Just make sure the damage isn’t structural and that the manufacturer’s warranty is still valid.
A Quick Word on Warranties
You’ll get a one-year manufacturer’s warranty. The store will push an extended warranty hard. Is it worth it? For a basic, mechanically simple appliance, probably not. For a high-end, computer-packed induction range or a premium fridge, it can provide peace of mind. The more complex the electronics, the more expensive the repair.
Installation Day & Final Checks
When the delivery truck arrives, clear a path and protect your floors. Before the team leaves, unbox and inspect EVERY appliance for damage. If you see a dent or crack, refuse that specific item. Once you sign the paperwork, it’s a lot harder to get it resolved.
And before I go, let’s just recap the four rookie mistakes I see all the time. Please, don’t make them!
- Forgetting the Delivery Path: Your beautiful appliance is useless if it’s stuck on your porch.
- Ignoring Ventilation Gaps: Choking your refrigerator by pushing it flush against the wall is a recipe for an early breakdown.
- Skipping the Anti-Tip Bracket: It takes two minutes to install and prevents a serious safety hazard. Just do it.
- Missing the High-Loop: Don’t let gross sink water backflow into your dishwasher. Ensure that drain hose is looped up high.
Choosing appliances feels like a huge decision, but it doesn’t have to be a nightmare. By starting with the realities of your own home, you can cut through the noise and find reliable tools that will make your kitchen a better place to be for years to come.
Inspirational Gallery
Don’t forget the noise factor: A key detail often missed in showrooms is the decibel (dB) rating, especially for dishwashers. A machine rated at 45 dB or lower, like many models from Bosch or Miele, will be virtually silent. This is a game-changer in open-plan kitchens where the living area is just a few feet away. Anything above 50 dB will be noticeably disruptive during a conversation or while watching TV.
An induction cooktop is about 84% energy efficient, compared to just 40% for a gas cooktop.
This isn’t just about saving on your utility bill. That efficiency translates directly into performance. An induction hob boils water in nearly half the time as gas and offers incredibly precise, instant temperature control. The heat is generated directly in the pan, meaning the cooktop surface stays cooler and safer, a significant benefit for families with young children.
Beyond the appliance’s dimensions, check its utility requirements *before* purchase. This is where many DIY installations go wrong.
- Gas Lines: Does your new gas range require a different size connector than the old one? Is the shut-off valve easily accessible and in good working order?
- Water Lines: Fridges with ice makers or water dispensers need a dedicated water line. Is one present, or does it need to be run?
- Electrical Specs: A high-performance induction or electric wall oven might require a higher-amperage circuit (e.g., 40 or 50 amps) than the builder-grade model it’s replacing. Check your breaker box first.
Counter-Depth vs. Standard-Depth Refrigerators:
Standard-Depth: Typically 30-36 inches deep, these models offer maximum storage capacity for their width but will stick out about 6-8 inches beyond your cabinets. This can disrupt the kitchen’s flow and look bulky.
Counter-Depth: Usually 24-30 inches deep, models from brands like Fisher & Paykel or Samsung’s Bespoke line are designed to sit nearly flush with your cabinetry for a sleek, built-in look. The trade-off is slightly less interior cubic footage.
For a seamless, high-end aesthetic, counter-depth is the clear winner, but if raw storage is your top priority, standard-depth provides more bang for your buck.
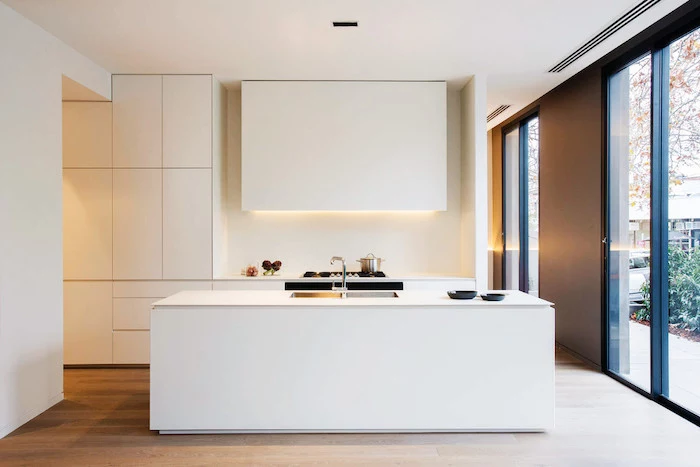
- A perfectly seamless look with your cabinetry.
- No more endless polishing of stainless steel.
- The ability to change your kitchen’s look without changing appliances.
The secret? Panel-ready appliances. These are units designed to be fitted with a custom cabinet panel that matches the rest of your kitchen. Dishwashers are the most common, but brands like Sub-Zero, Thermador, and Bosch offer panel-ready refrigerators and freezers for the ultimate integrated kitchen design.
The configuration of your refrigerator impacts your daily use more than you might think. French door models offer a wide, continuous space for large items like platters or pizza boxes and keep fresh food at eye level. However, their bottom freezers can become a jumble. Side-by-side models provide better-organized freezer space with more shelving, but their narrow compartments can be a challenge for wider items.
When considering a wall oven, pay attention to the door hinge. A traditional drop-down door can force you to lean awkwardly over a hot surface to retrieve heavy dishes. Some brands offer ergonomic alternatives. The Bosch side-opening oven swings open like a cabinet for safer, easier access, while the Neff Slide&Hide® door cleverly retracts underneath the oven cavity, getting it completely out of your way.
Think about the landing zone. It’s a simple concept but crucial for kitchen workflow. Where will you place a hot, heavy pan when you pull it from the oven? Is there clear counter space right next to the cooktop? For a refrigerator, you need a ‘landing zone’ for grocery bags to make unloading easy. Before finalizing your appliance locations, map out these key action-to-surface pathways.


