Cream Kitchen Cabinets: A Pro’s Guide to Getting It Right
Over the years, I’ve seen just about every kitchen cabinet trend you can imagine. We’ve had our moment with dark espresso, sleek high-gloss gray, and even some bold, moody blues. And while those are great, there’s one color that homeowners and designers always come back to: cream.
In this article
But let’s be honest, calling cream a “safe choice” doesn’t do it justice. When you get it right, it’s a brilliant one. It has this incredible warmth that you just don’t get from stark white, plus a flexibility that most other colors envy. The thing is, nailing the perfect cream finish that will actually last is a bit more involved than just grabbing a paint chip that looks nice at the hardware store.
So, this isn’t going to be just a gallery of pretty kitchens. Think of this as a field guide—the kind of stuff I’d share with an apprentice, built from years of wrestling with materials, light, and the daily chaos of a real, working kitchen. We’re going to dig into the technical details and practical steps that help you avoid those expensive, soul-crushing mistakes. My goal? To give you the confidence of a pro so you can create a space you absolutely love.

Understanding the ‘DNA’ of a Perfect Cream
To most of us, cream is just a color. But to a paint professional, it’s a specific recipe of pigments and binders that play with light in a very particular way. Getting a handle on this is the first step to making sure your kitchen feels warm and inviting, not accidentally yellowed or dingy.
LRV: Your New Best Friend
The most important number you need to know is the LRV, or Light Reflectance Value. It’s a simple scale from 0 (think absolute black) to 100 (pure white) that tells you how much light a color will bounce back into your room. This is a game-changer.
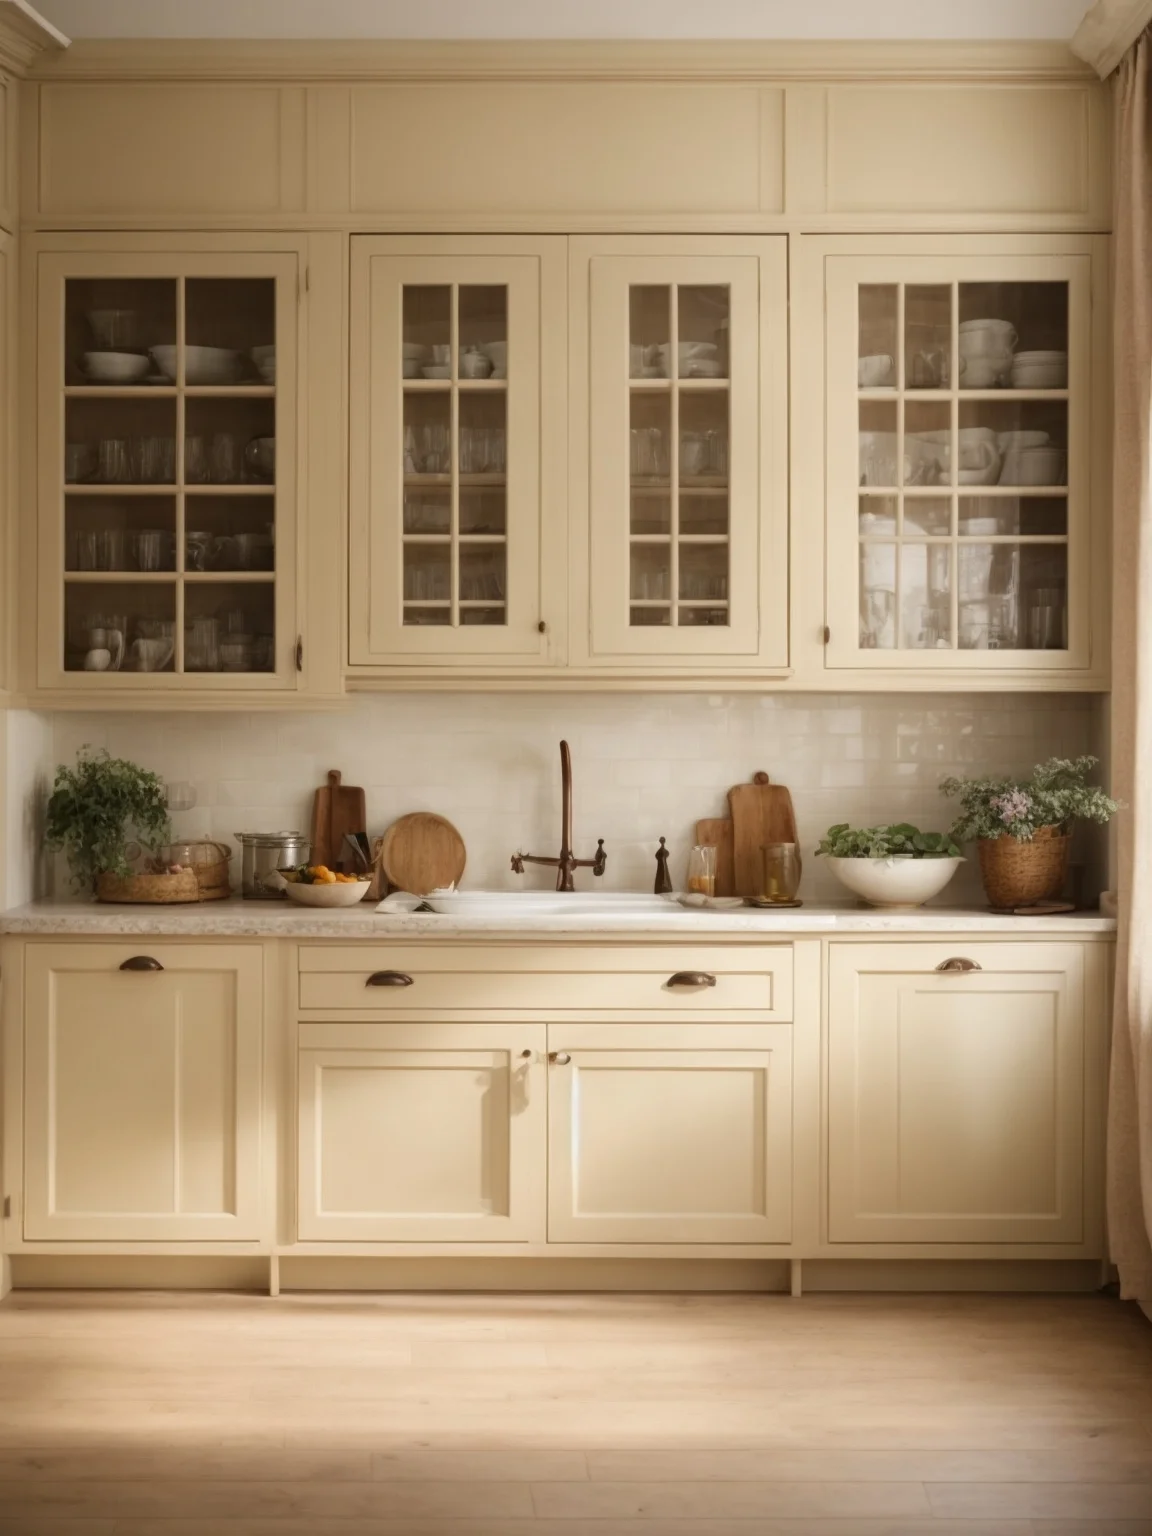
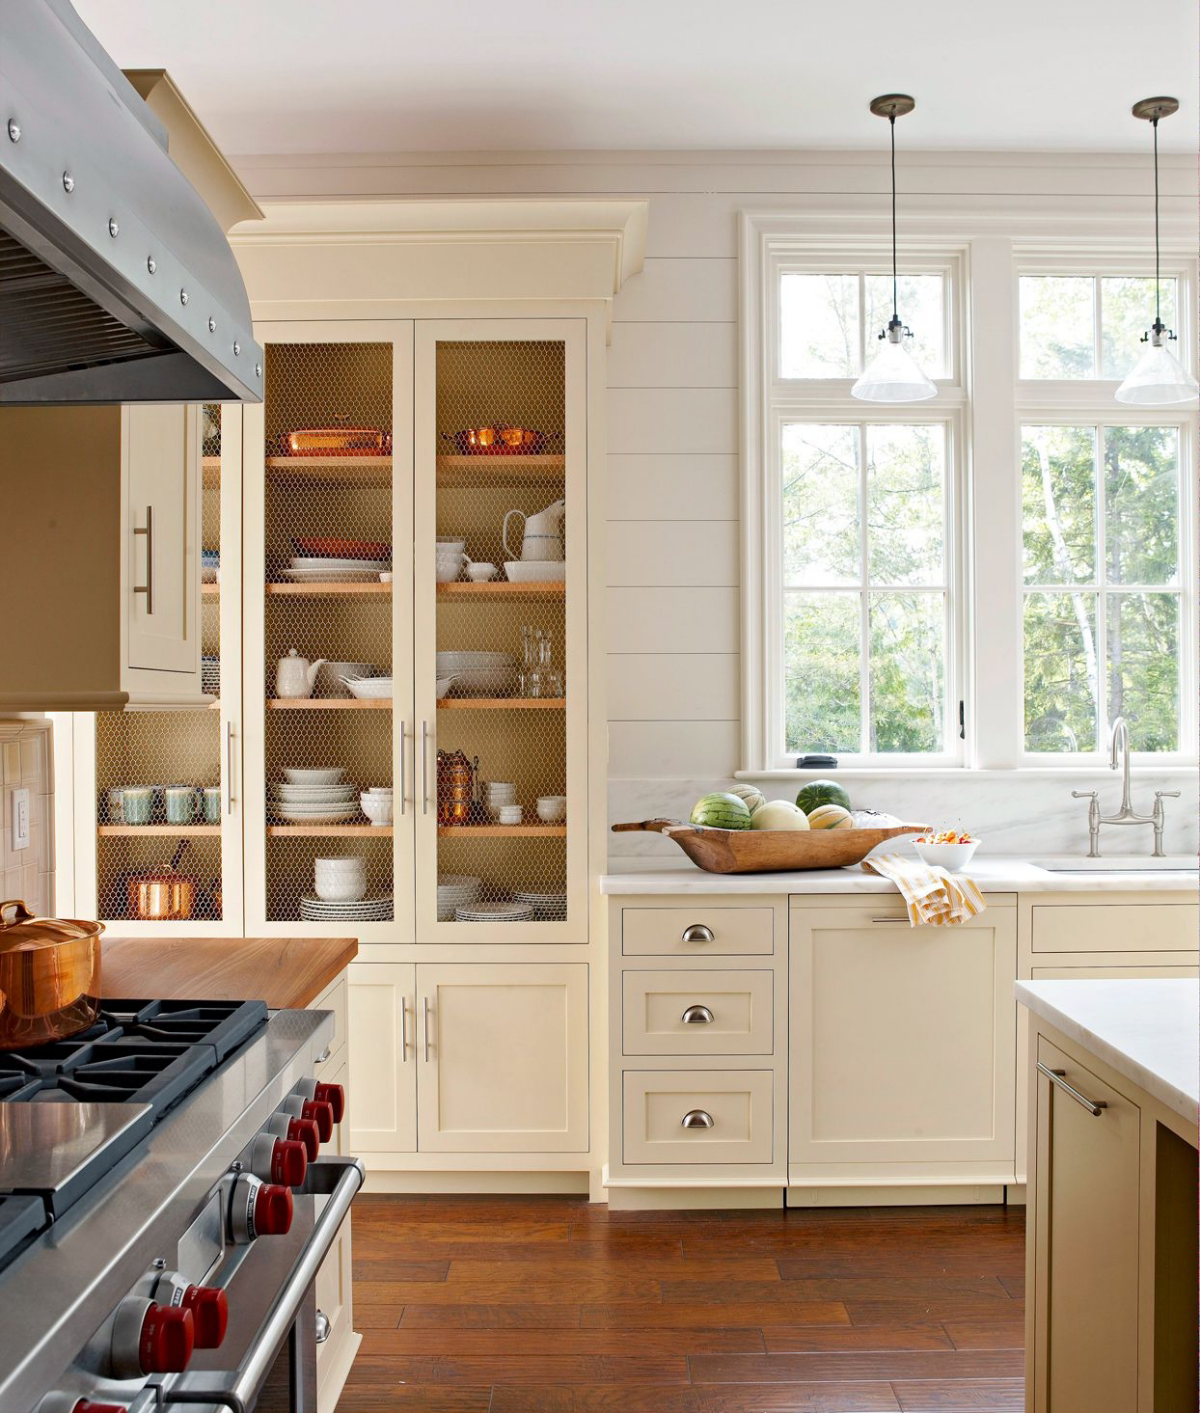
- High LRV (80-85): These are your off-whites. In most lighting, they look white, but they have just enough pigment to knock off that sterile, cold feeling. They’re fantastic for smaller kitchens or rooms that don’t get a ton of natural light.
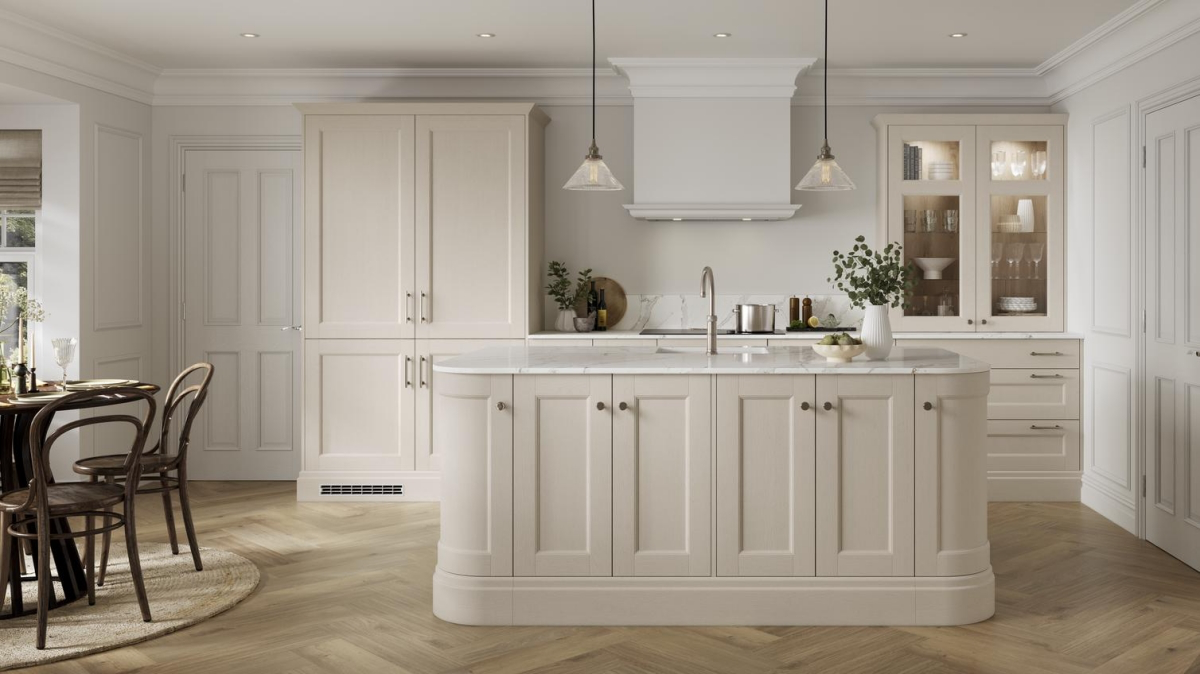
- Mid-Range LRV (73-79): This is the classic cream sweet spot. These have enough color to be unmistakably cream, creating a soft, cozy vibe without making the space feel smaller. Popular colors in this zone often have that perfect balance.
- Lower LRV (below 73): We’re getting into the deeper, moodier creams here—think khaki or some greige tones. They have more gray or beige in them and create a very historic, cozy feel. Just a heads up: they work best in rooms with plenty of light to spare, since they absorb more than they reflect.
You can usually find the LRV on the back of the paint chip or on the manufacturer’s website. Seriously, check it. It tells you way more about how the color will behave than its fancy name does.
The Secret Language of Undertones
Cream paint is never just white plus brown. It’s a careful mix of pigments, and those tiny additions create undertones that give the color its personality. The most common are yellow, pink, and green/gray.
A lesser-known trick: The fastest way to see a cream’s true undertone is to hold the paint chip right up against a plain white piece of printer paper. The contrast makes the undertone immediately jump out.
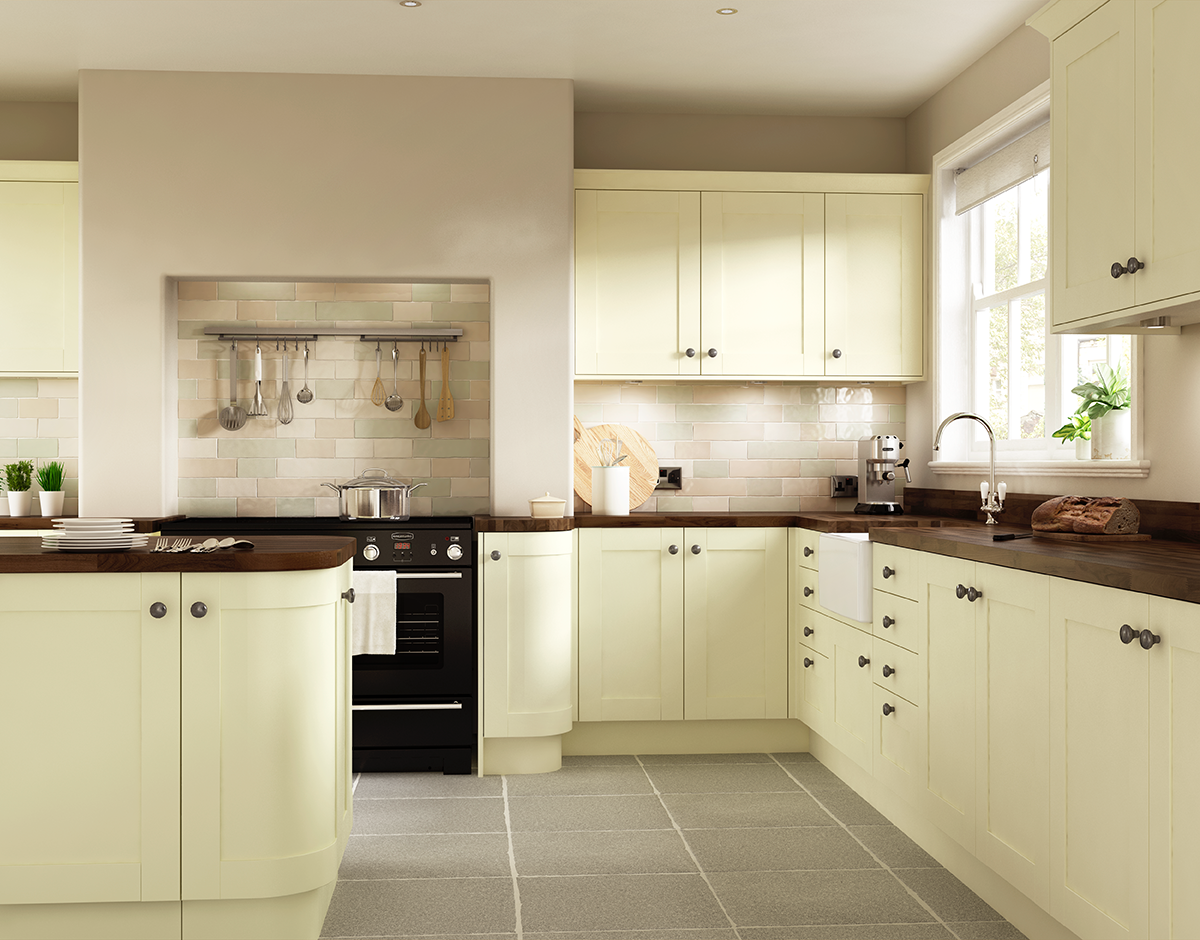
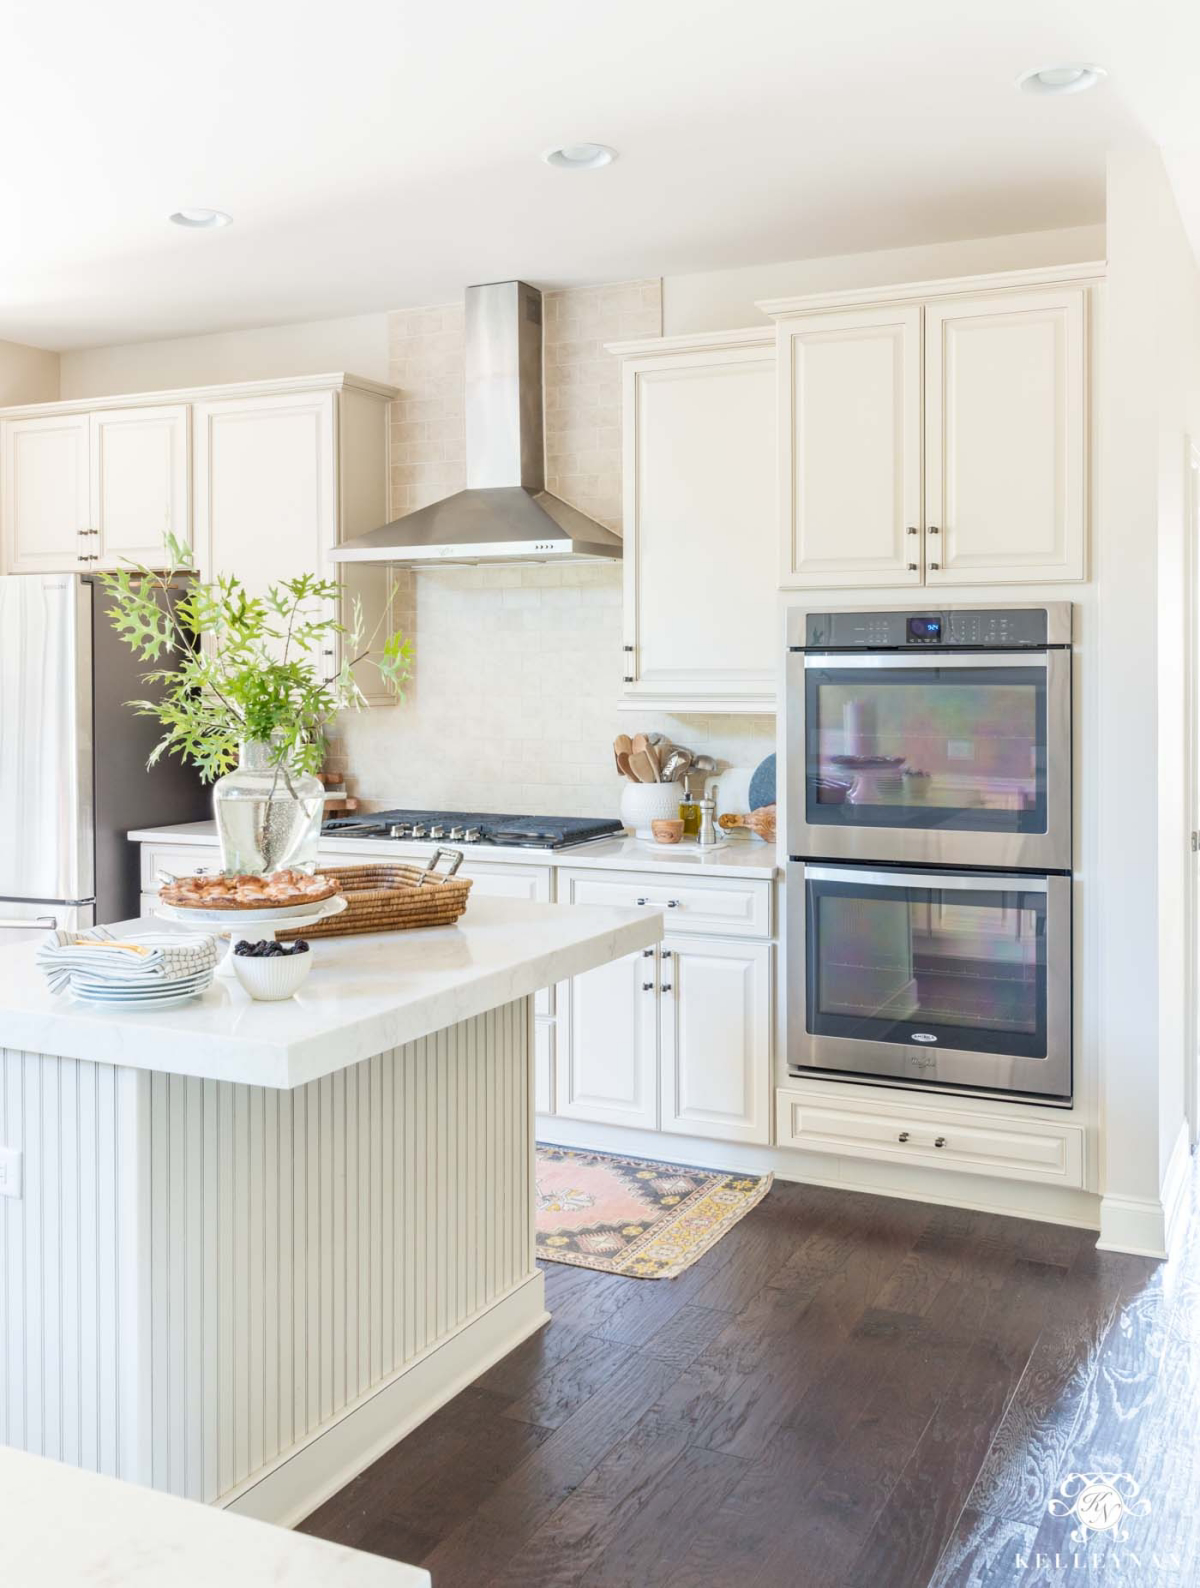
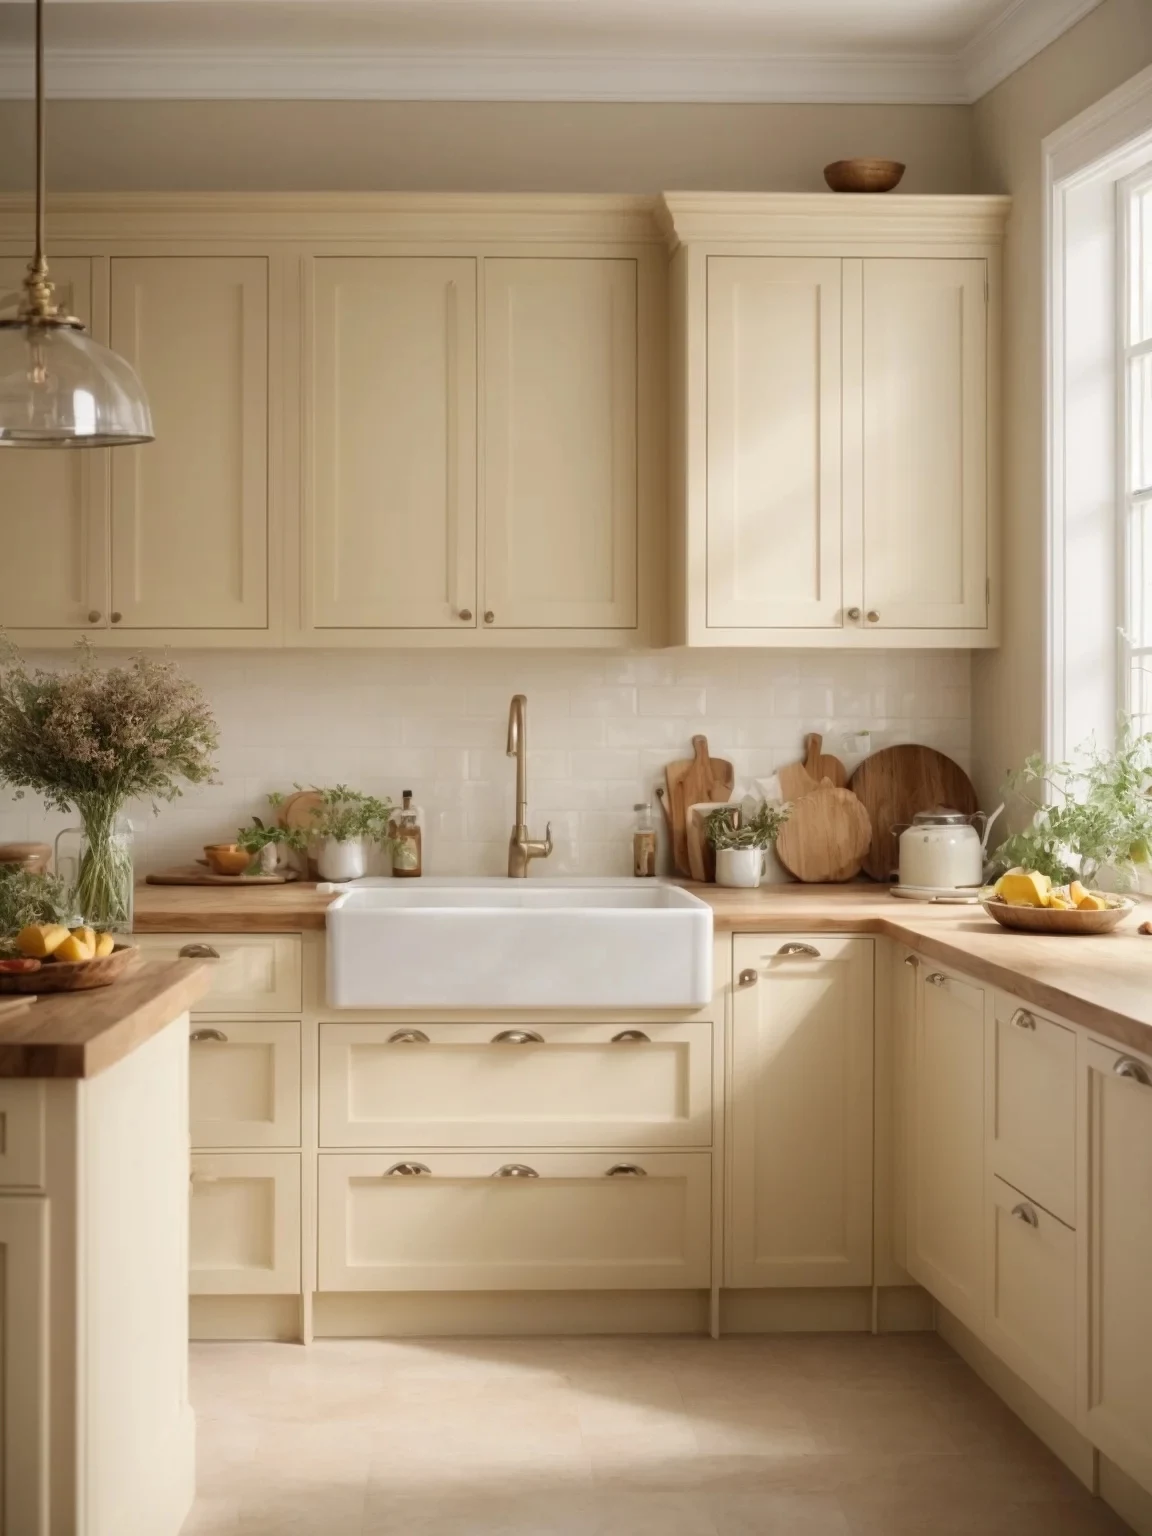
- Yellow Undertones: These are your classic, buttery, sunny creams. Think of tried-and-true colors like Benjamin Moore’s ‘Swiss Coffee’. They feel incredibly warm and inviting. The only catch? In a room with very warm artificial light or intense afternoon sun, they can sometimes skew a little too yellow.
- Pink/Red Undertones: These have a hint of red oxide, giving them a subtle blush or peachy feel. They can be beautiful with rich wood tones, but I’ll be frank—they can be tricky. I’ll never forget a client who fell in love with a pink-undertone cream for their kitchen, not realizing it would clash horribly with their existing olive-green floors. We had to have a serious chat before the first can was opened!
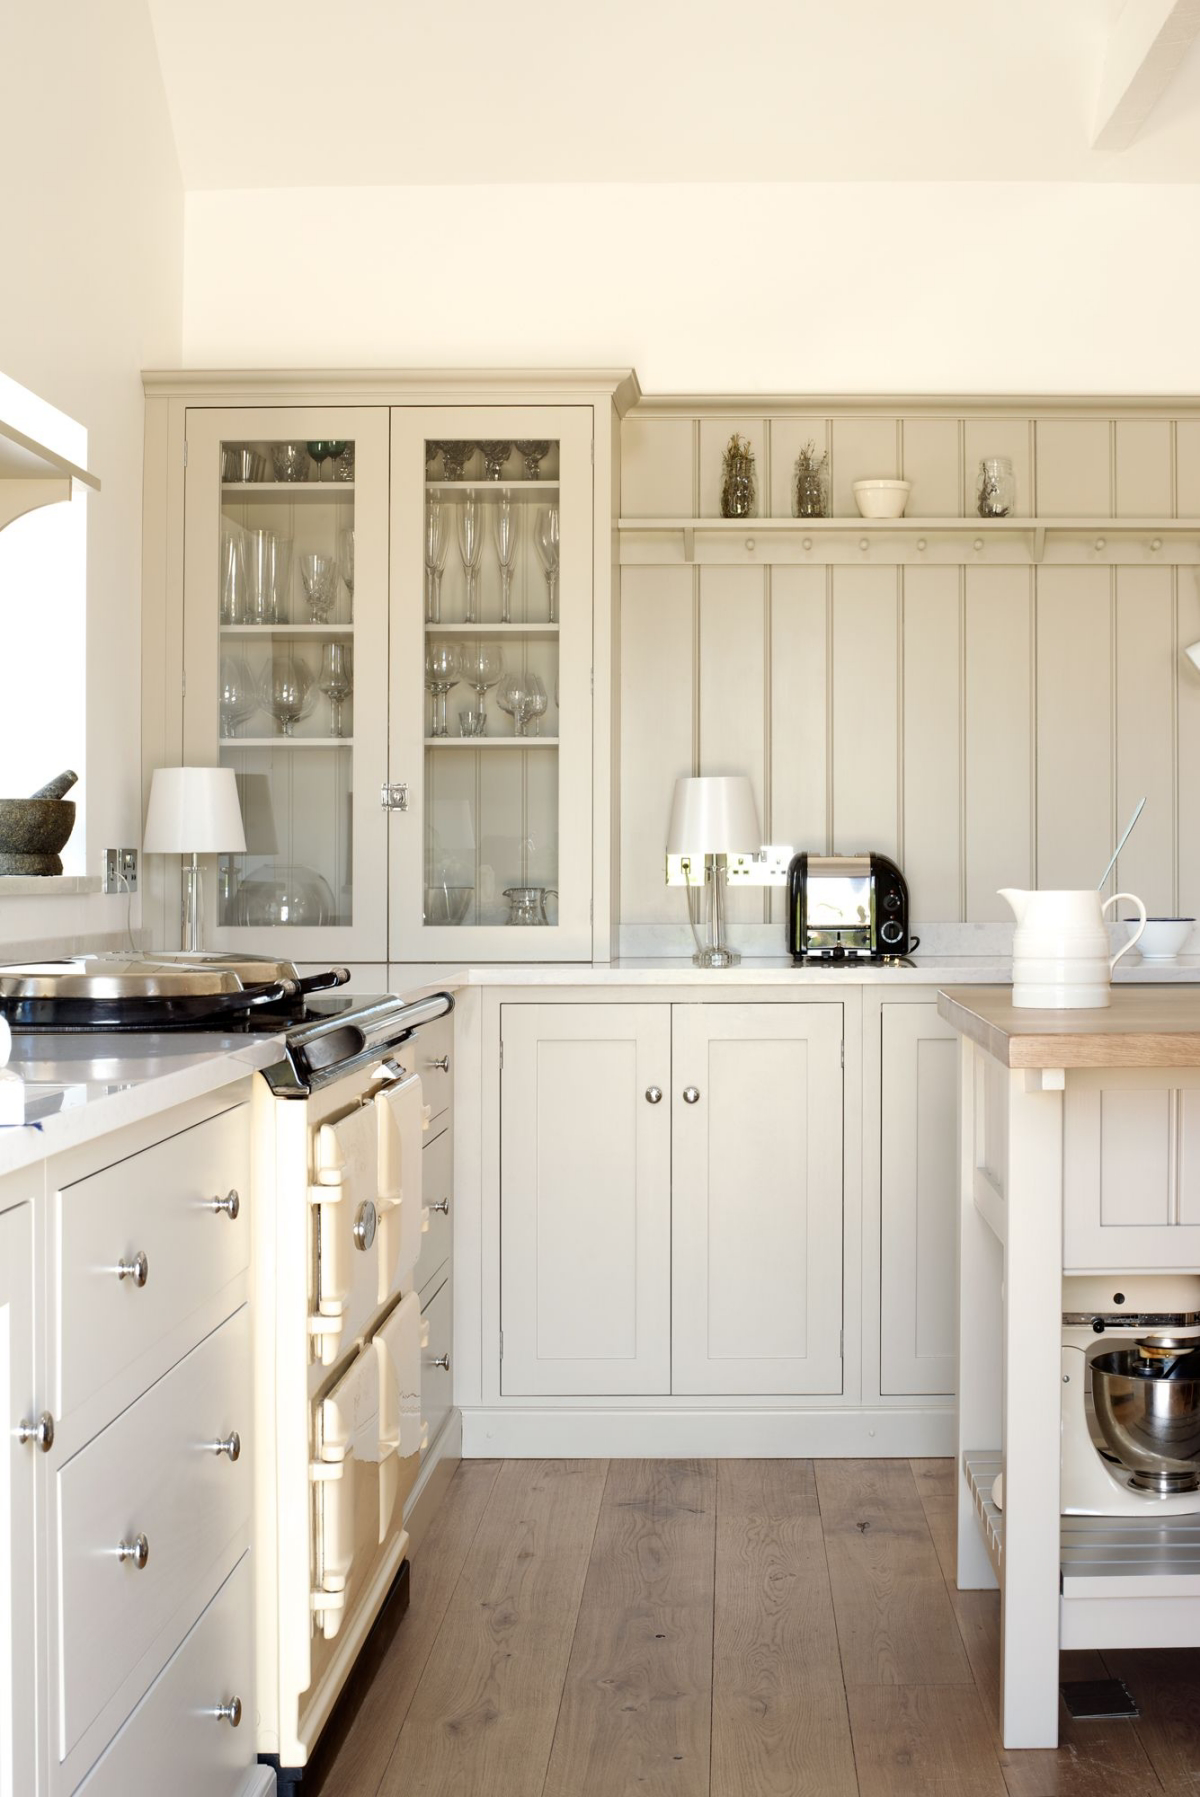
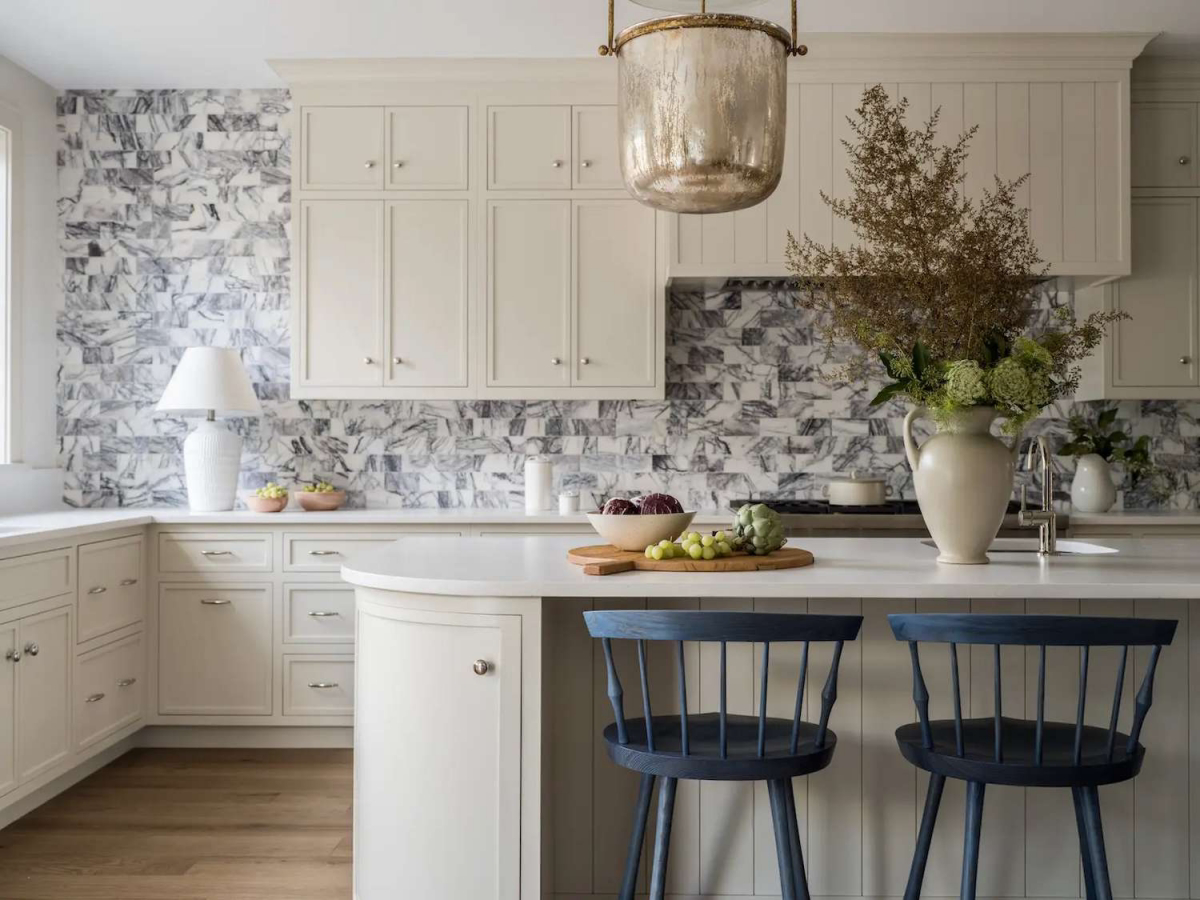
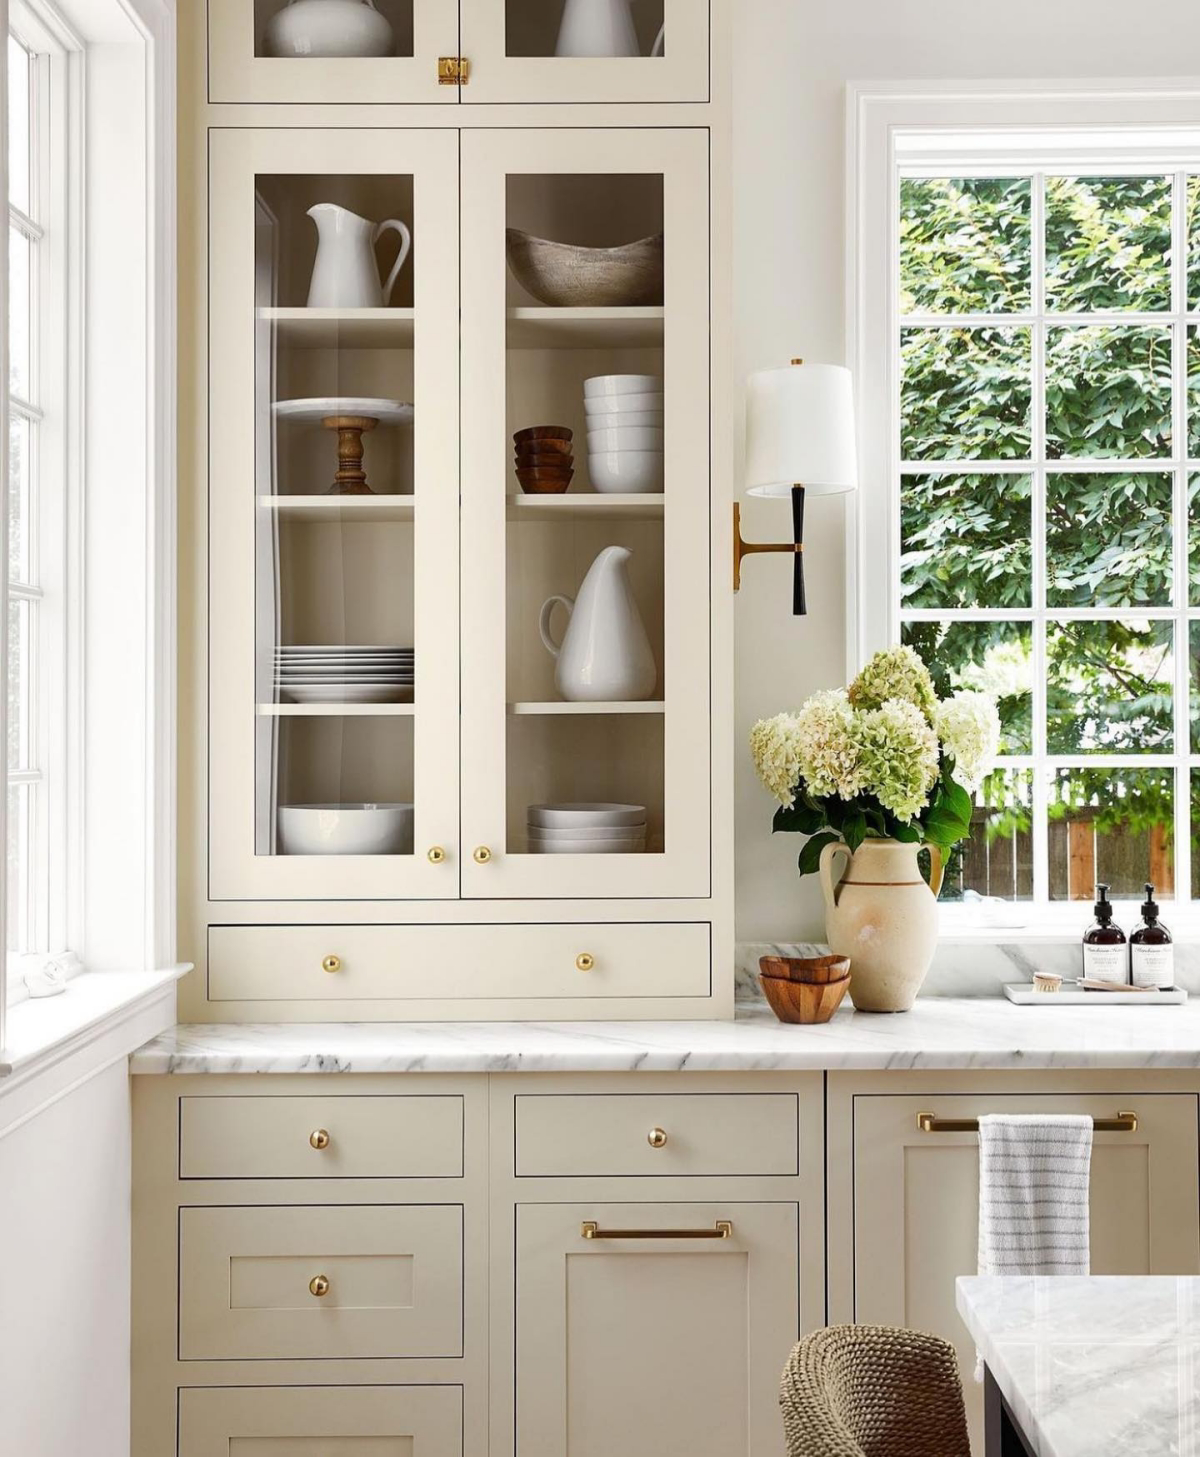
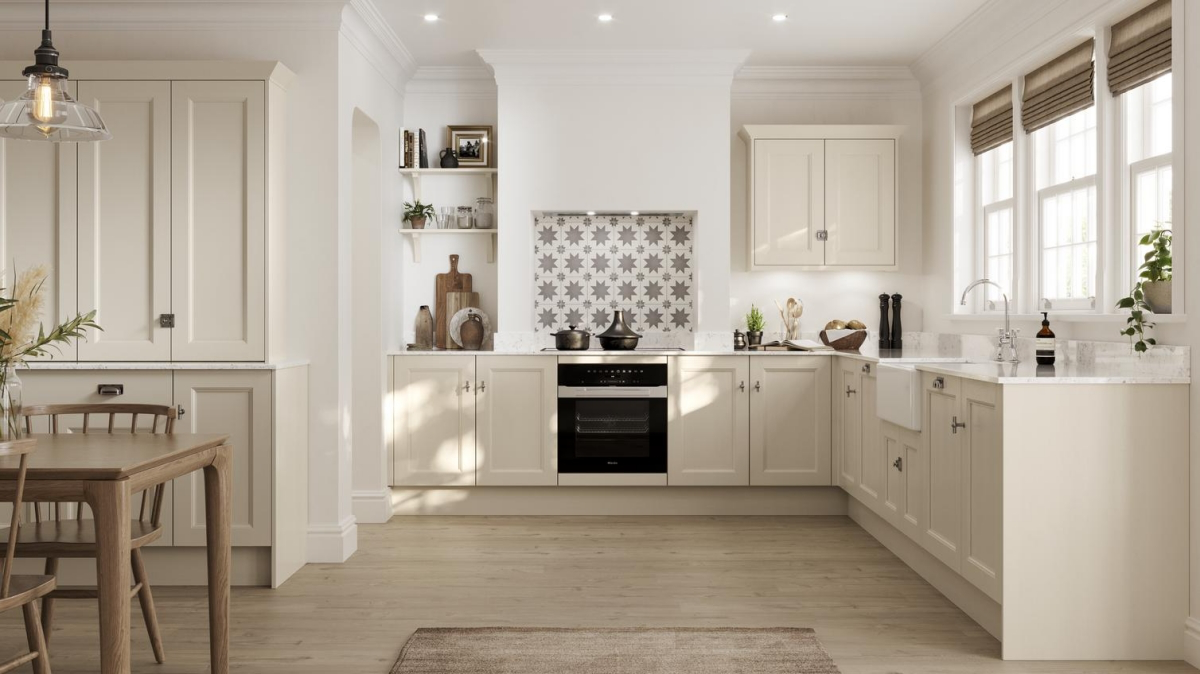
- Green/Gray Undertones: These are the sophisticated, muted creams. Think of something like Sherwin-Williams’ ‘Alabaster’. They have a chameleon-like quality that works beautifully with natural stone like marble or slate. They are incredibly versatile, though in a north-facing room with cool light, you’ll want to balance them with warm textures to keep them from feeling too stark.
Finish: More Than Just Looks
The sheen you choose affects both the look and the cleanability of your cabinets. For a DIY project, you’re typically choosing between satin and semi-gloss.
- Satin (or Eggshell): My usual recommendation. It has a soft, low luster that looks very modern and does a decent job of hiding minor bumps and dings. It’s also durable enough for cleaning.
- Semi-Gloss: This finish has a definite shine, which makes it super durable and easy to wipe down. But that shine is a double-edged sword—it will highlight every single imperfection in the surface. If your prep work isn’t flawless, semi-gloss can look cheap.
- Matte/Flat: Just… don’t. While it looks amazing in photos, a flat finish on kitchen cabinets is a nightmare. Its porous surface grabs onto grease and fingerprints, and it’s nearly impossible to clean without ruining the finish.
By the way, the paint itself matters a ton. The go-to for a high-quality, durable finish these days is a water-based acrylic-alkyd hybrid. A product like Benjamin Moore ADVANCE is a perfect example. It levels out to a beautiful, hard finish without the yellowing issues of old-school oil paints. Expect to pay around $70-$80 per gallon, but it’s worth every penny.
The 90% You Don’t See: Pro-Level Prep
A factory-quality finish is 10% about the final spraying and 90% about the prep work. This is the truth. If you skip a single step here, your beautiful new finish will almost certainly start chipping or peeling down the road.
Here’s the non-negotiable process, along with a little shopping list:
- Label Everything: Before you even touch a screwdriver, label every door and drawer (e.g., U1-L for Upper 1, Left Door). This seems tedious, but it guarantees everything goes back exactly where it came from, so all your alignments are perfect.
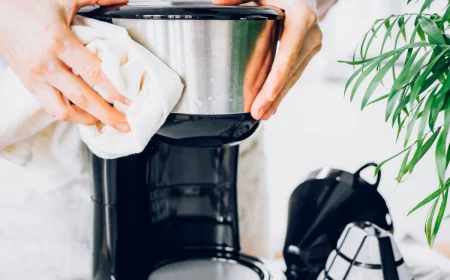
- The Big Clean: Kitchen cabinets are covered in a thin, invisible film of cooking grease. Paint will not stick to it. You need to scrub all surfaces with a degreaser like a TSP substitute until a clean white rag comes away perfectly clean.
- Sanding (Round 1): The goal here isn’t to strip the old finish, but to scuff it up so the primer can grip on. Use 120-grit sandpaper. An orbital sander is great for flat areas, and sanding sponges are perfect for detailed grooves.
- Clean Again: Vacuum up all the dust, then wipe every surface with a tack cloth (a sticky piece of cheesecloth that costs a few bucks). Any dust you leave behind becomes a permanent bump in your finish.
- Prime Time (The Most Important Step): This is where you can’t cut corners. Use a high-adhesion, stain-blocking primer. A shellac-based primer like Zinsser B-I-N is the gold standard for sealing in wood tannins and old stains. It’ll run you about $50-$60 a gallon, and it’s non-negotiable for preventing bleed-through.
- Sanding (Round 2): After the primer is fully cured, you have to sand it all again, this time with a finer 220-grit paper. This step is what separates a DIY-looking job from a professional one. It makes the surface feel like glass and gives the topcoat a perfect foundation. Then, of course, you vacuum and tack cloth one last time.
Oh yeah, about application. Pros use HVLP (High Volume, Low Pressure) sprayers for that flawless, brushless finish. You can actually rent these from places like Home Depot for around $50 a day, but be warned, they have a steep learning curve. If you’re using a brush, do yourself a favor and invest in a high-quality 2.5-inch angled sash brush. A good brush makes a world of difference in reducing brush marks.
The Fun Part: Pairing Your Cream Cabinets
Okay, so you’ve picked the perfect cream. Now what? The number one question I get is what to pair it with. Here are some no-fail ideas.
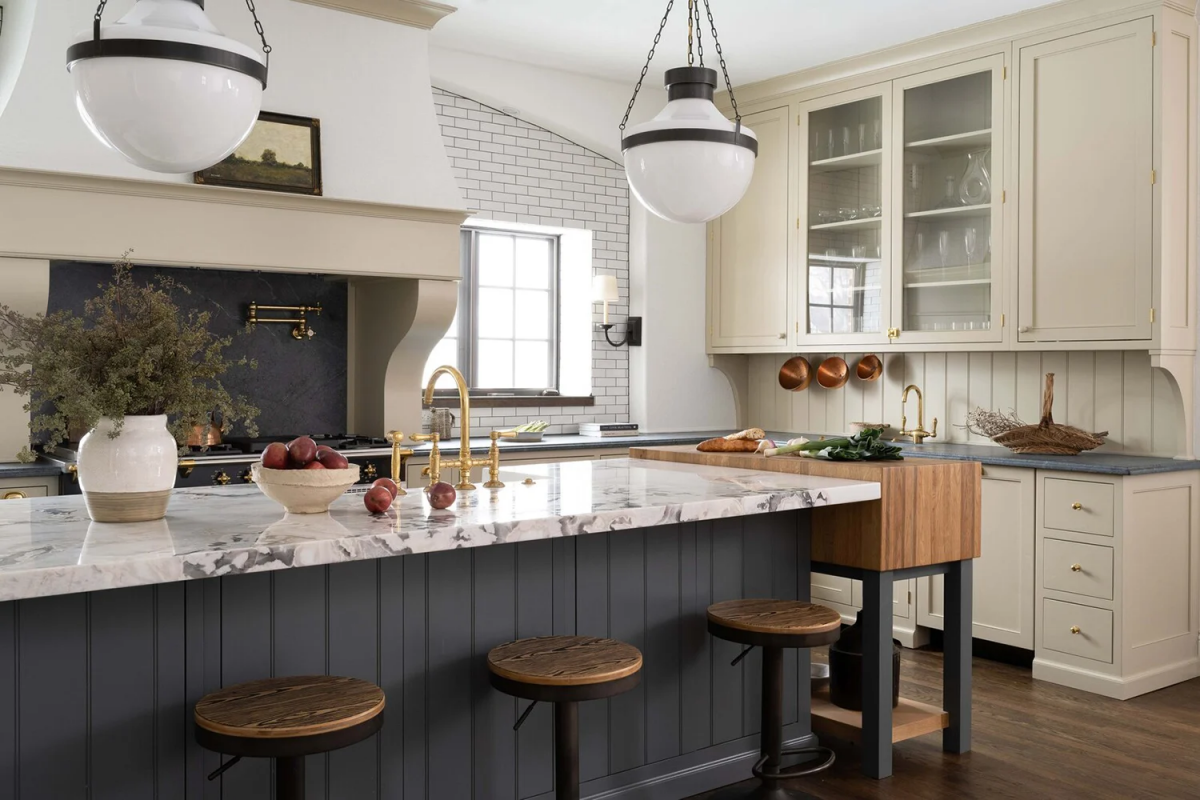
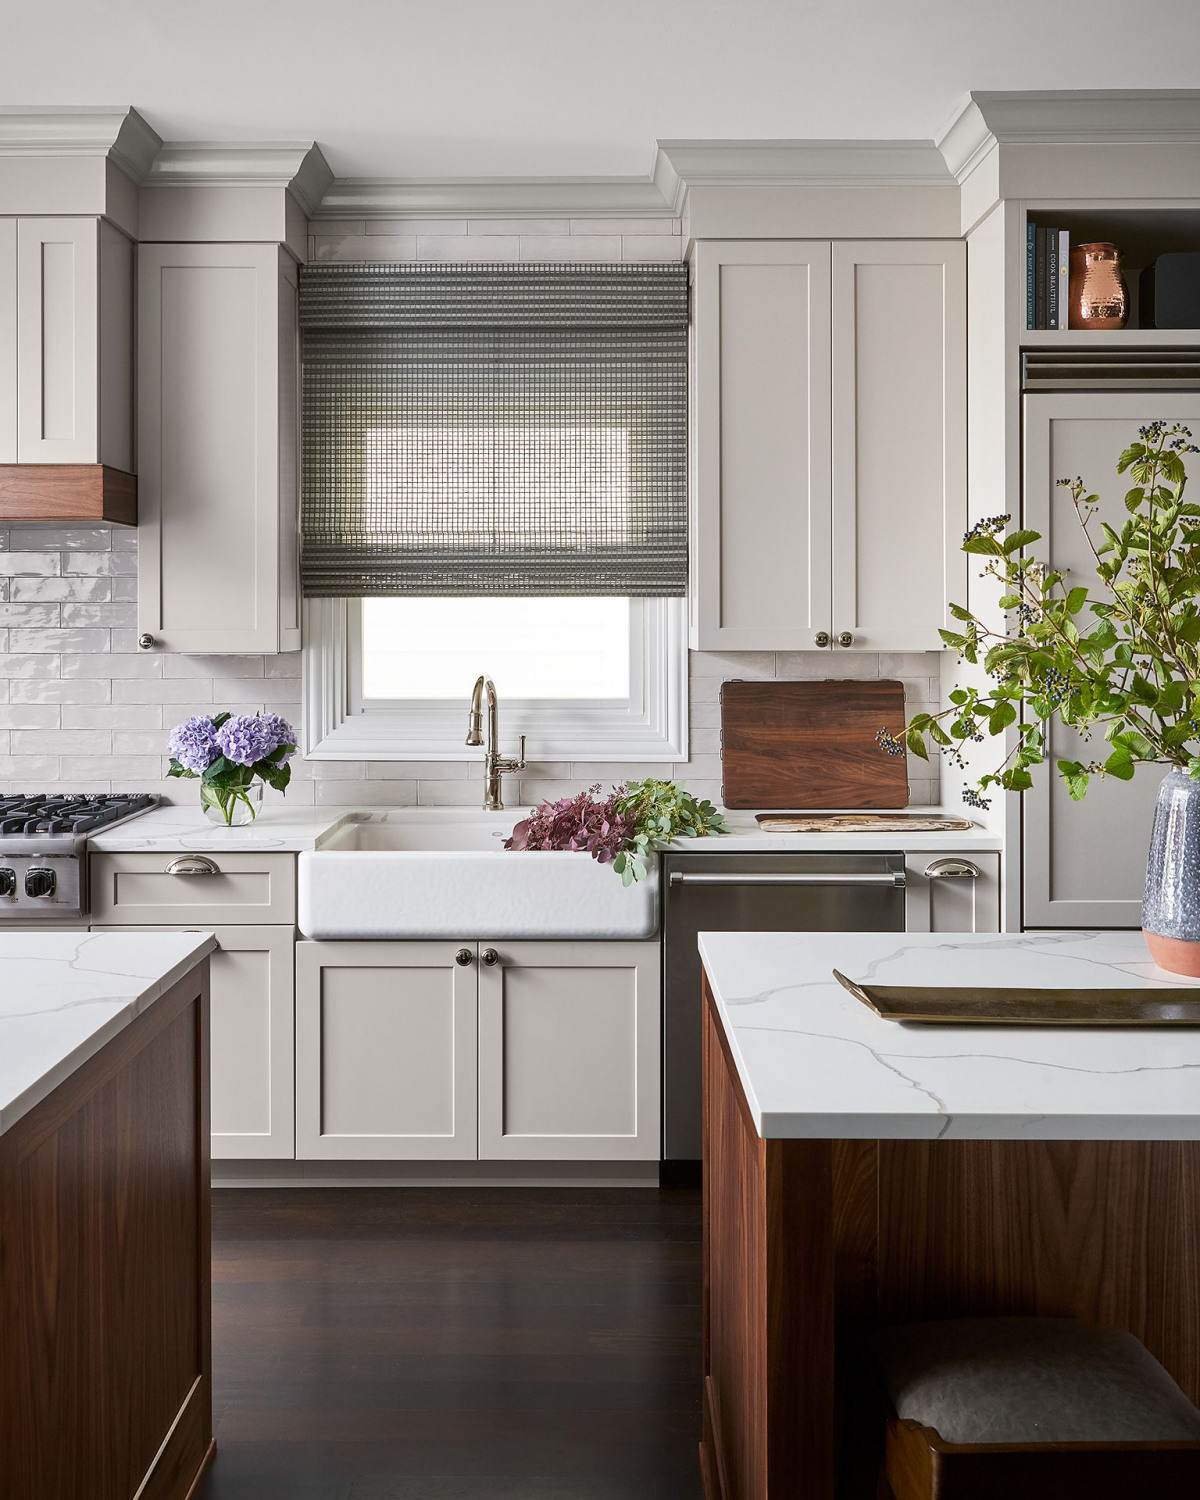
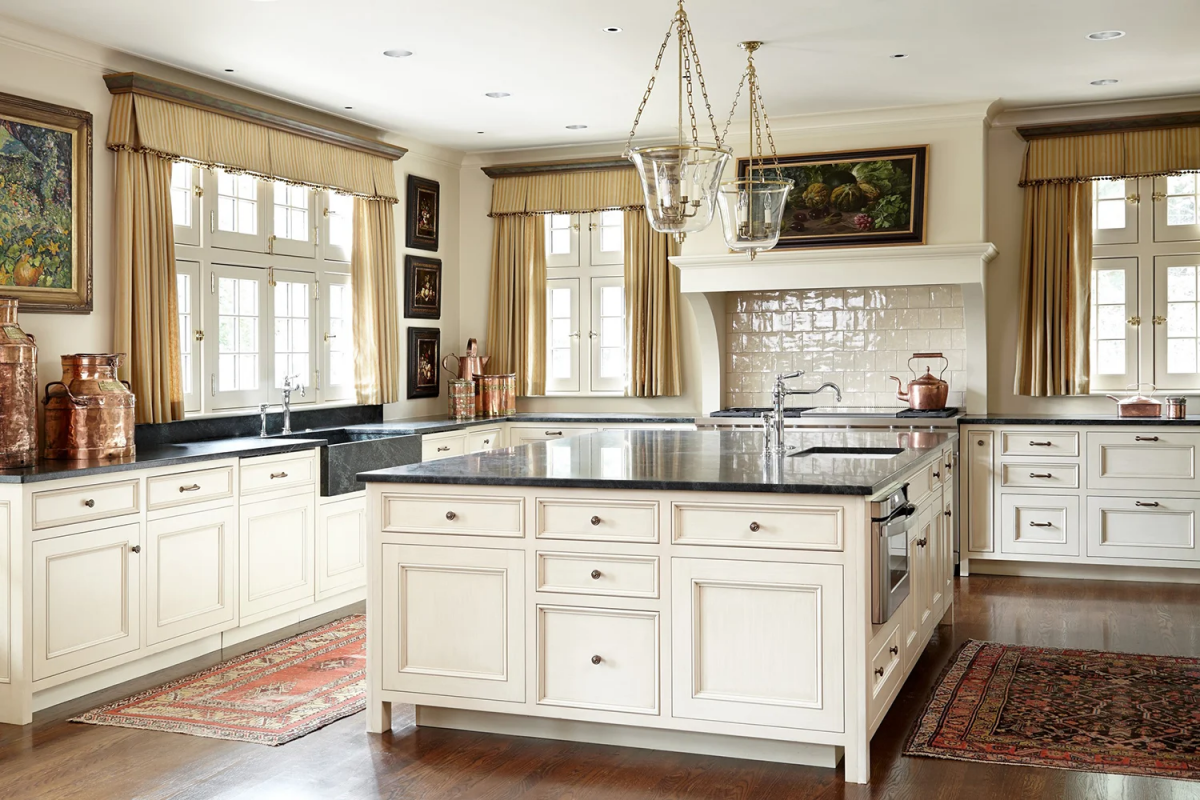
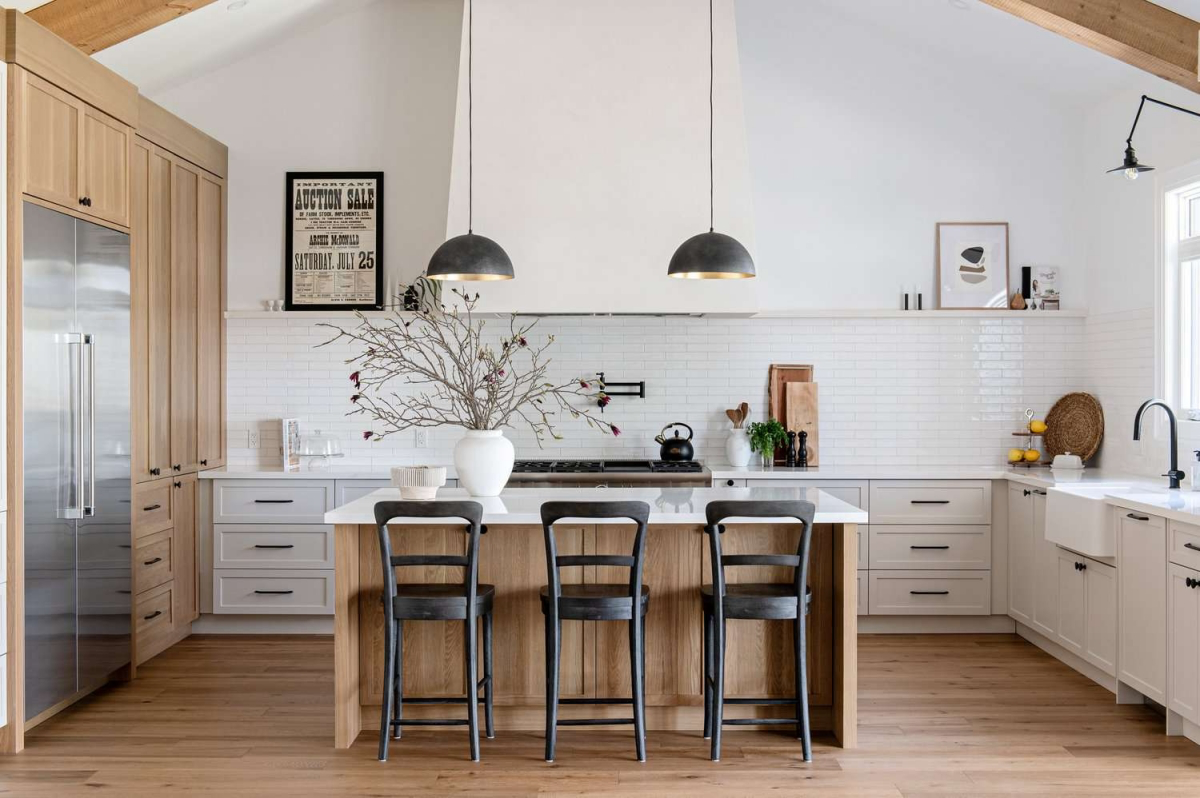
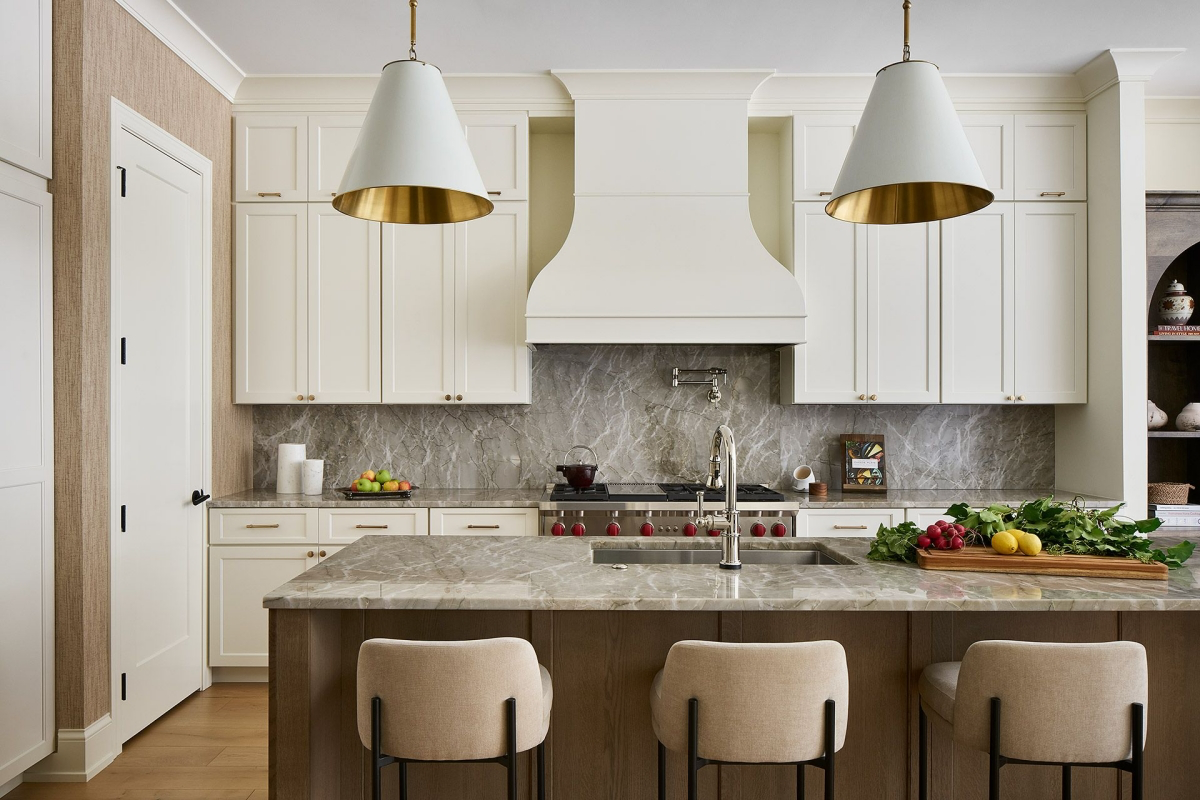
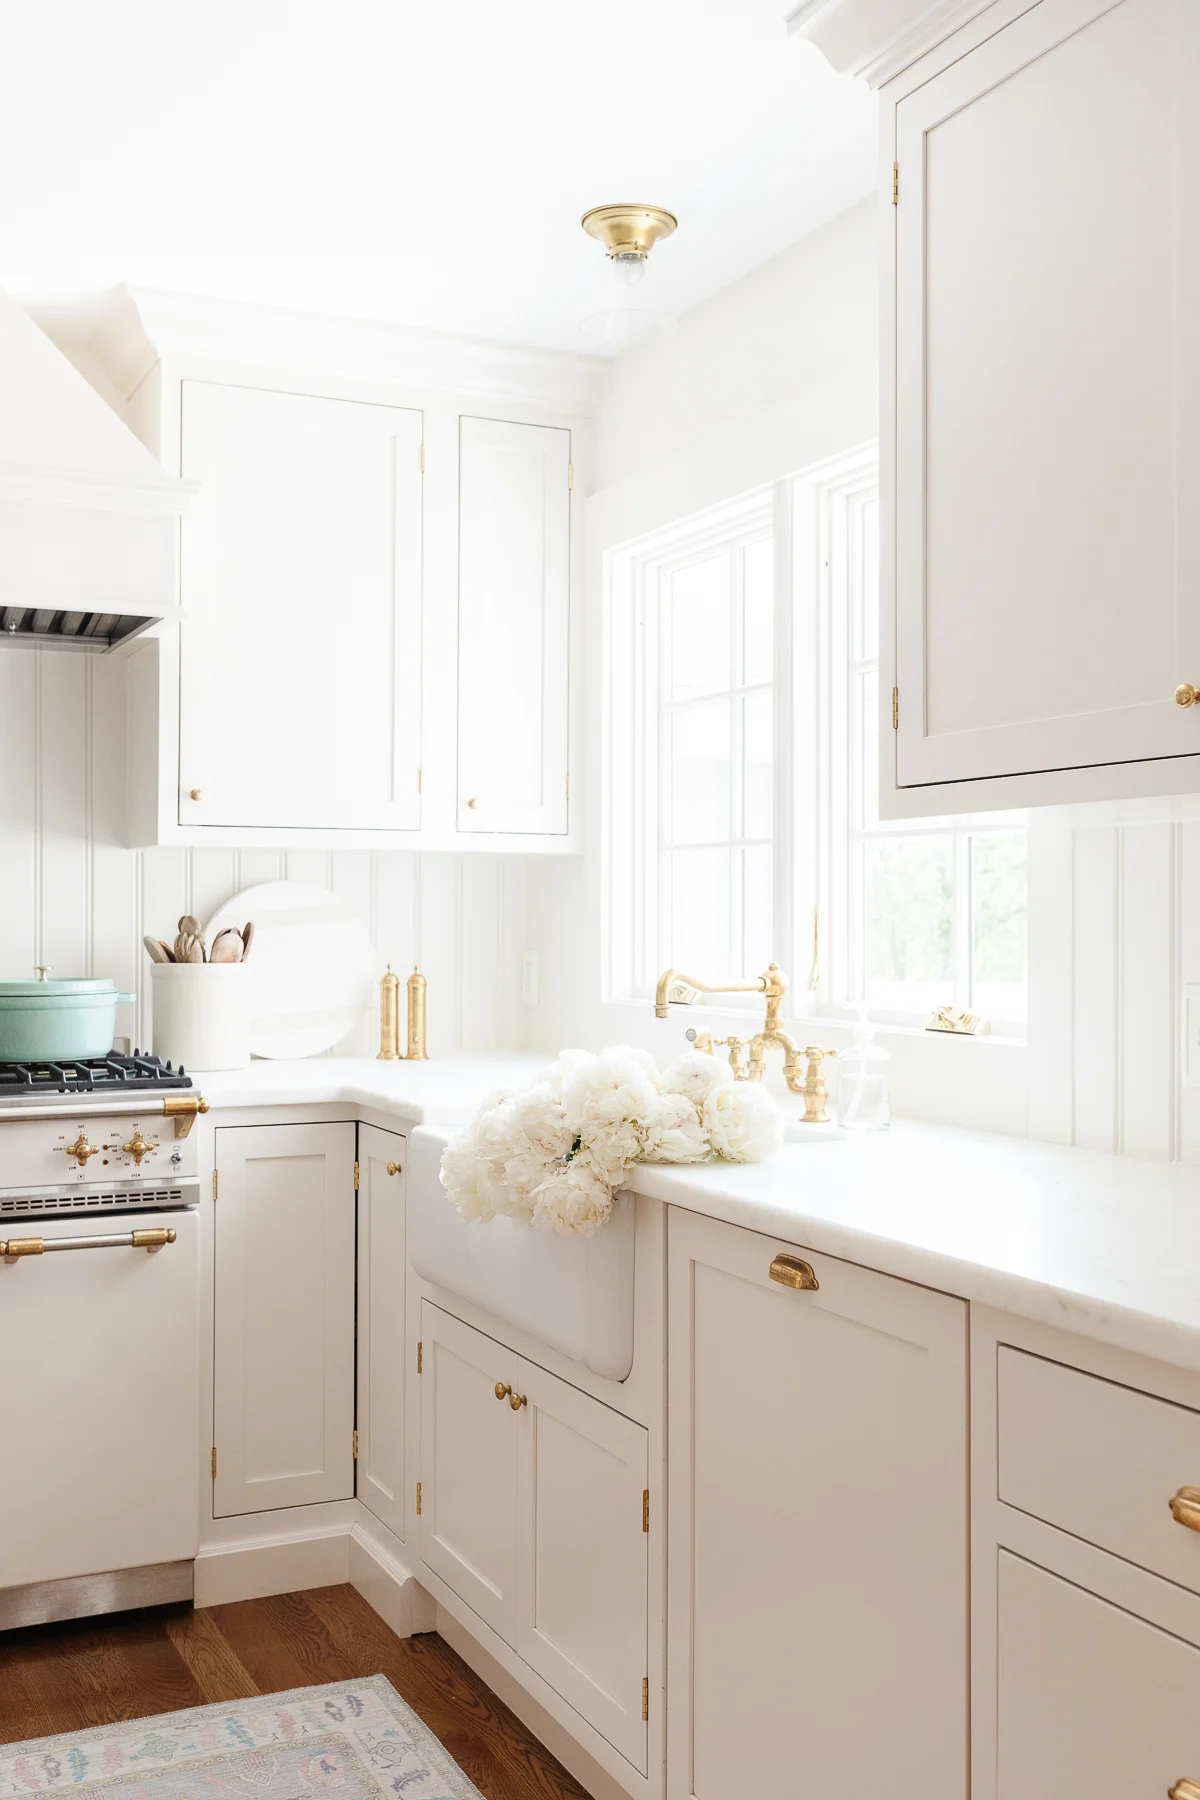
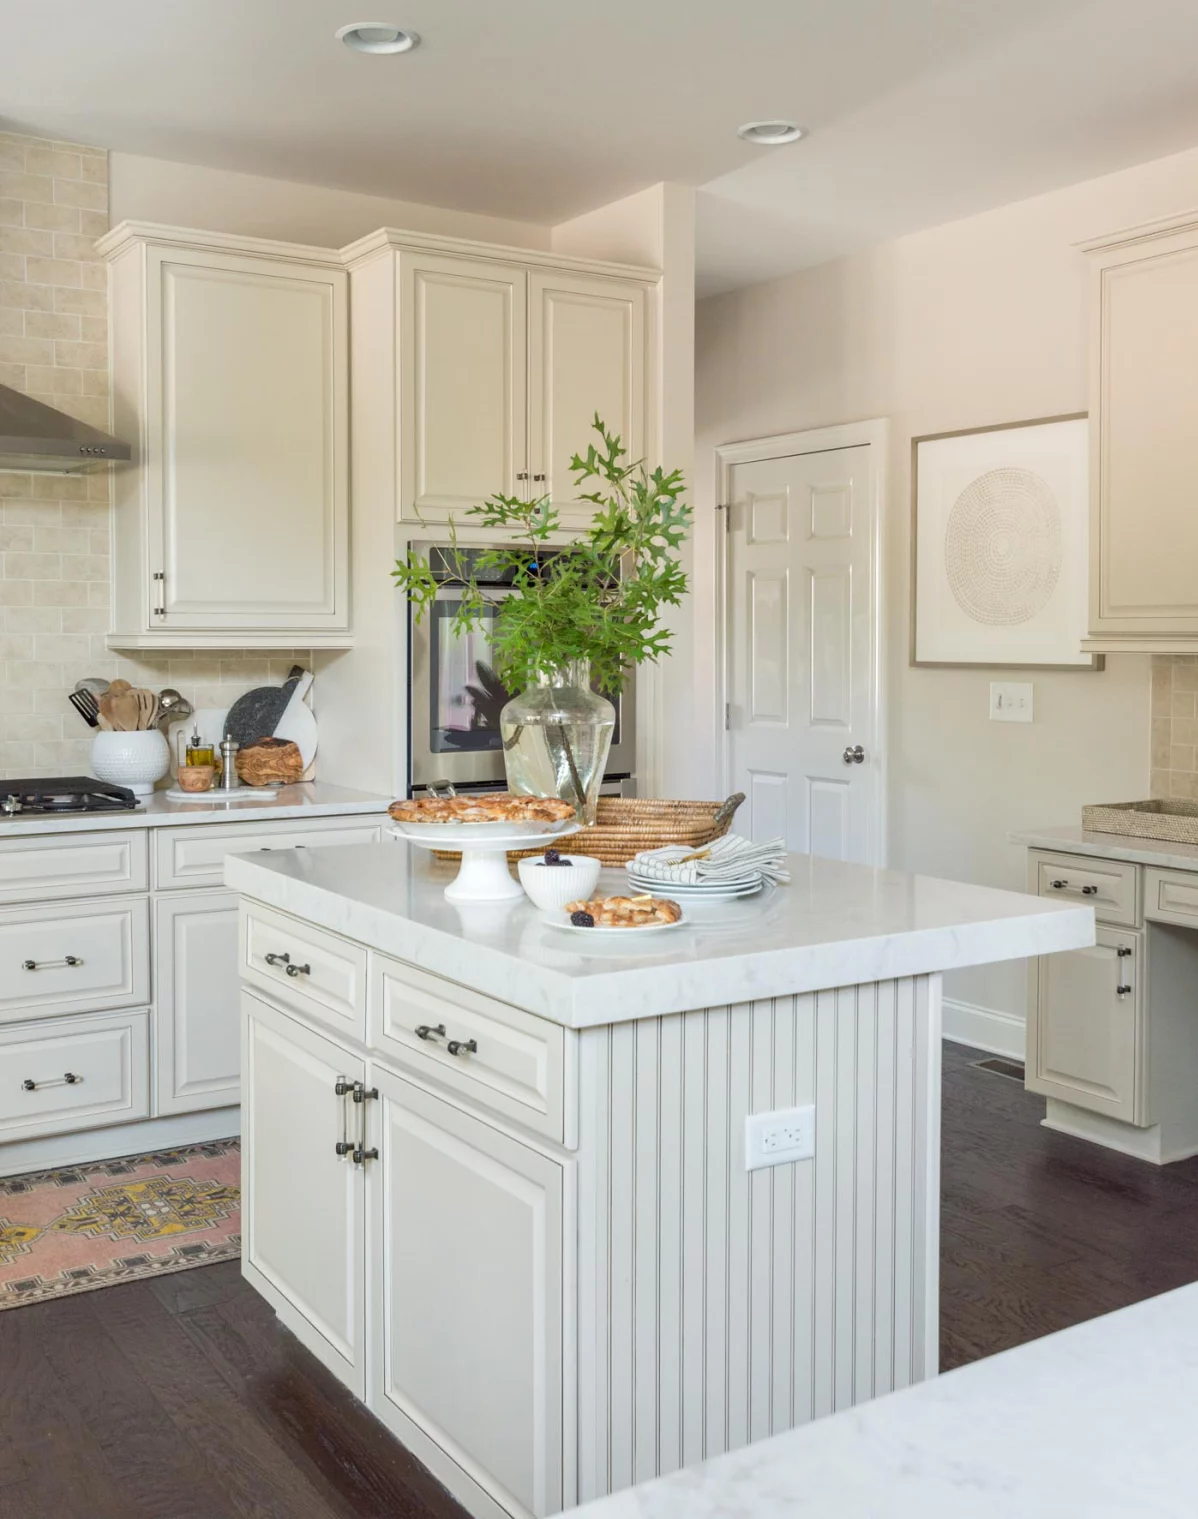
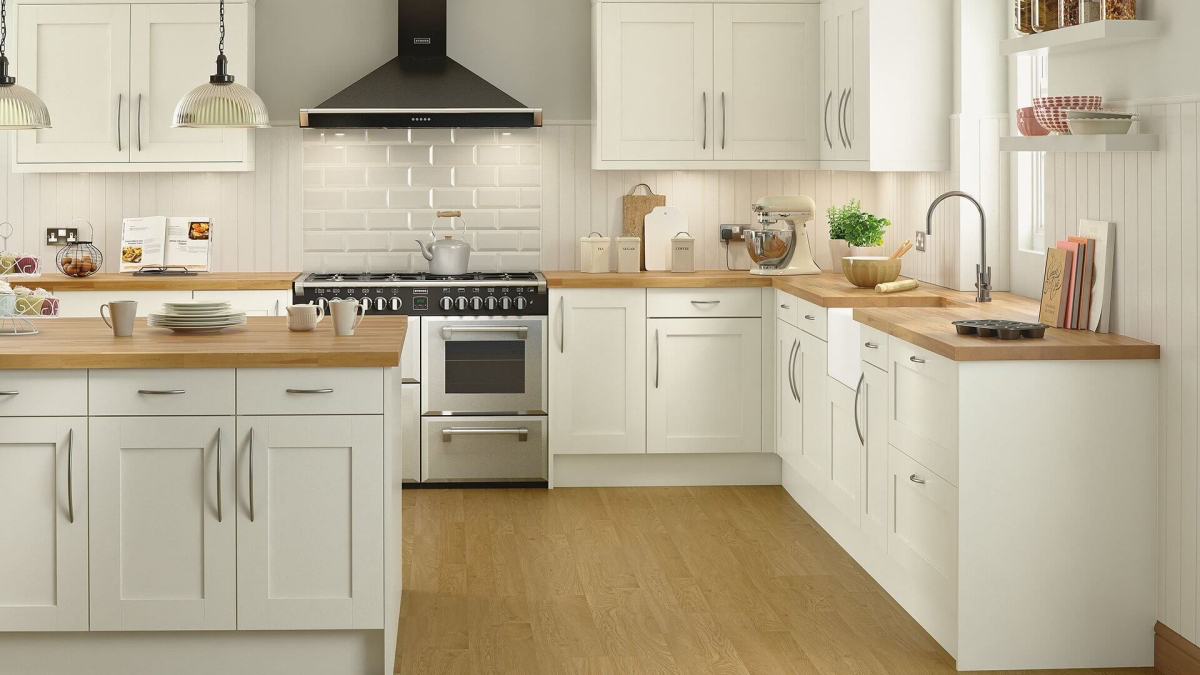
- Countertops: If you chose a warm, buttery cream, it will look stunning with countertops that have warm veining, like a Calacatta Gold style quartz, or even a classic butcher block for a cozy feel. For those cooler, greige-toned creams, a dramatic charcoal soapstone, sleek concrete, or a crisp white quartz with subtle gray veining is a killer combination.
- Backsplash: You can never, ever go wrong with a simple white subway tile—it works with everything. But if you want a bit more personality, a handmade-look Zellige tile adds beautiful texture against a warm cream. For a modern greige cabinet, you could even go bold with a dark, moody backsplash tile to create a graphic contrast.
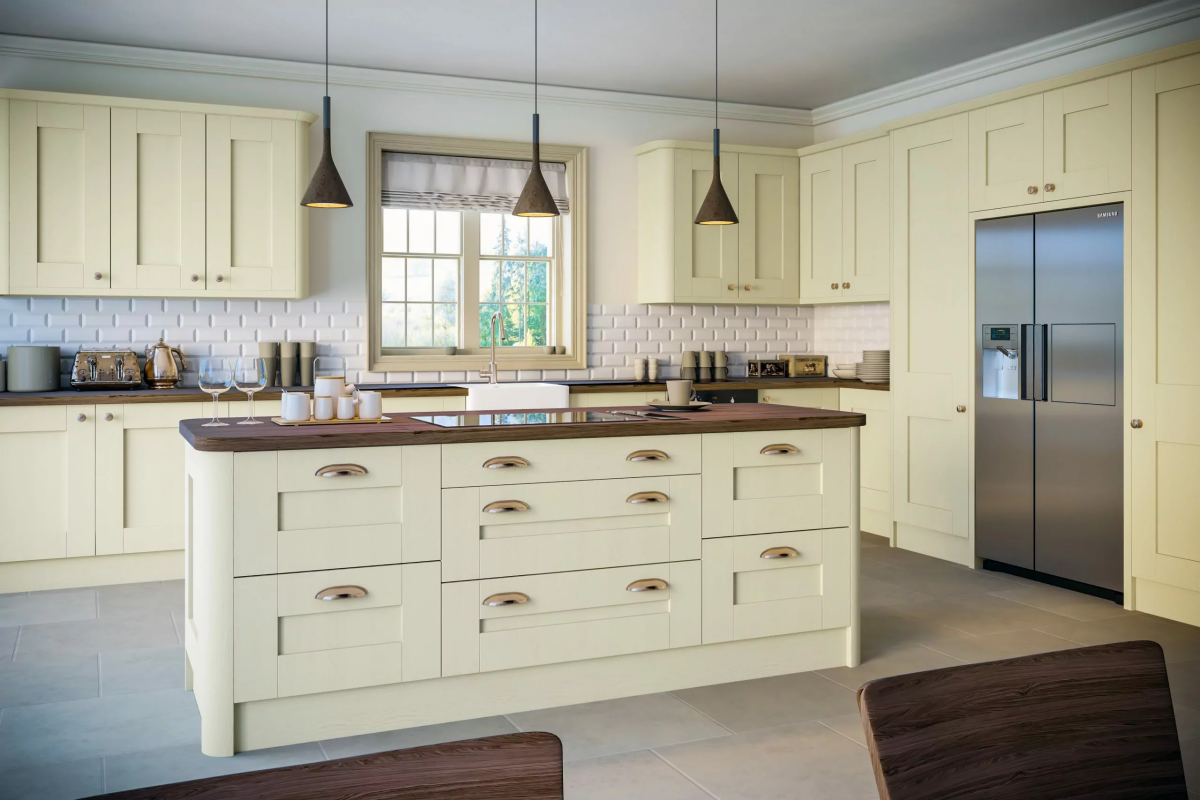
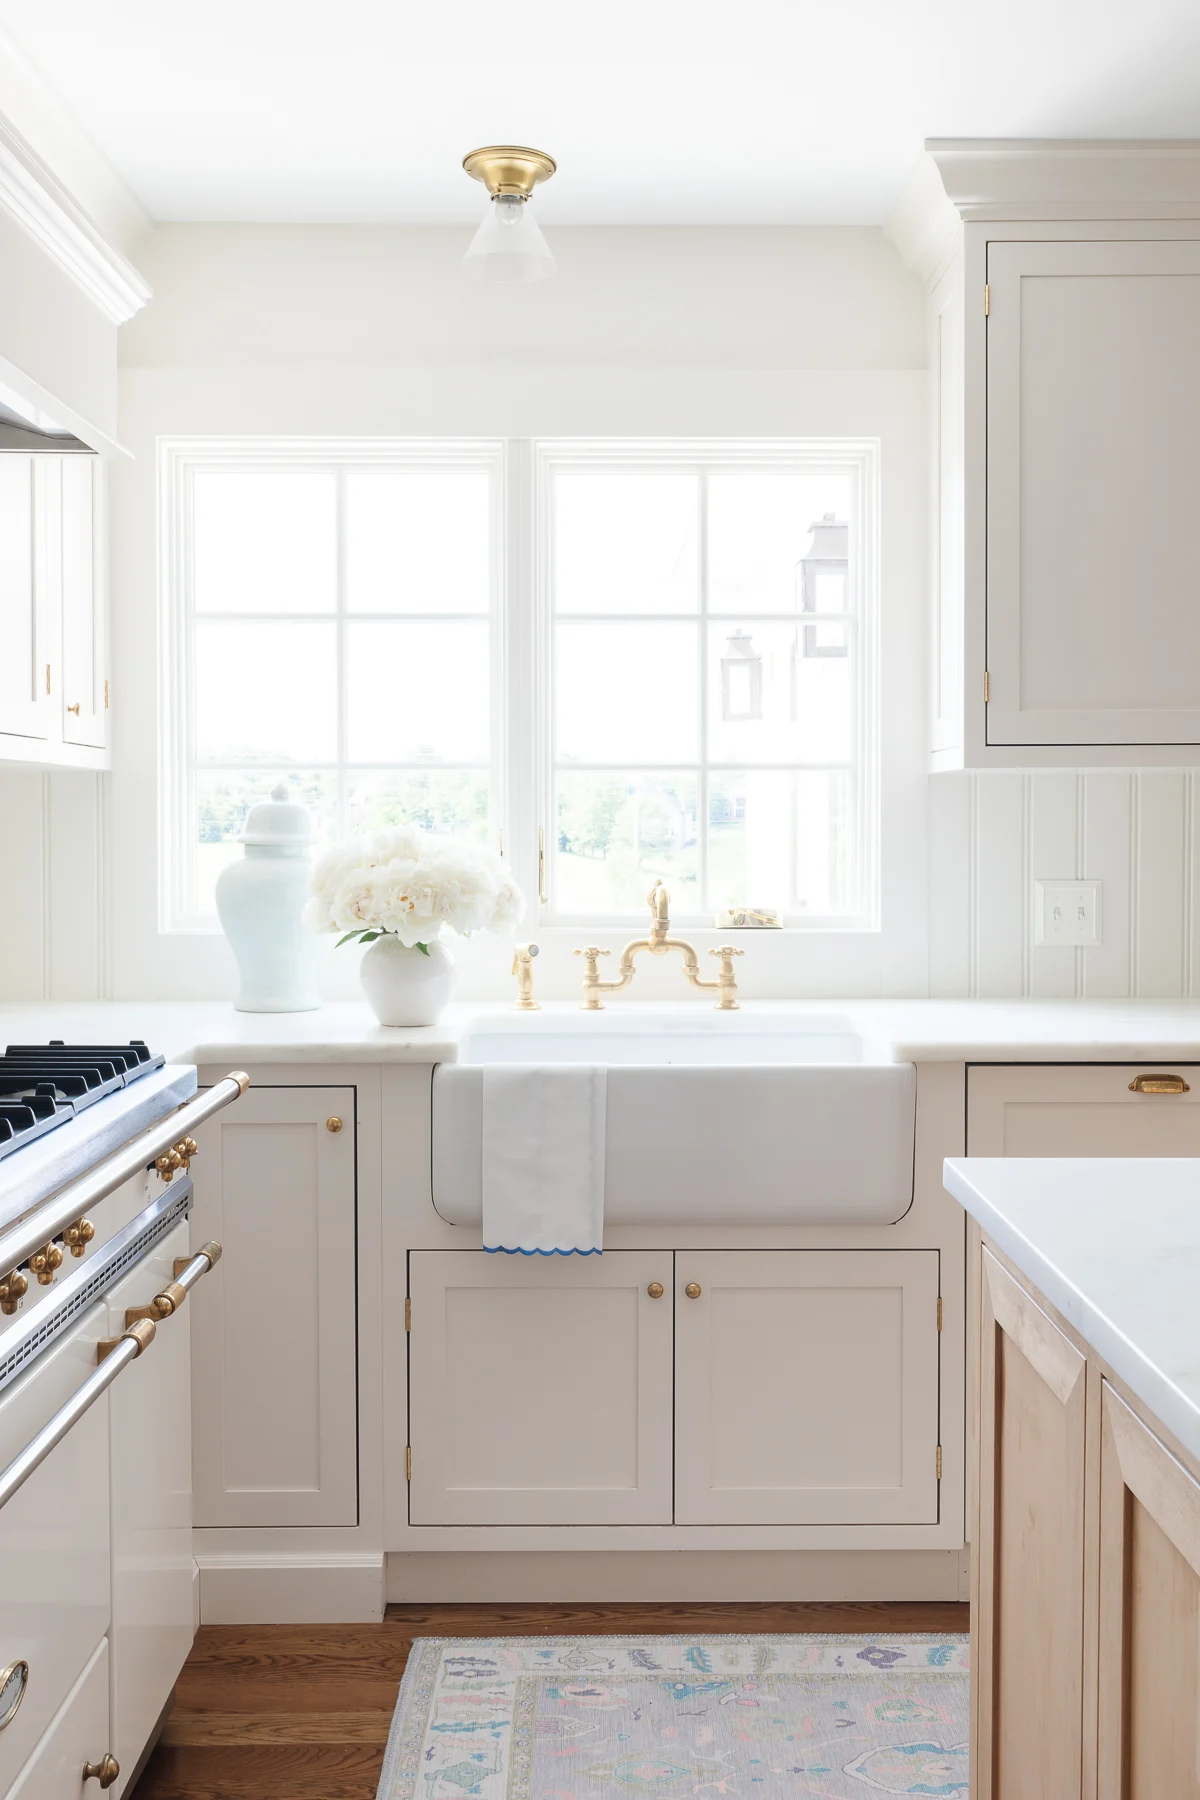
- Hardware: This is the jewelry of your kitchen! My go-to rule is simple: warm metals for warm creams, cool metals for cool creams. Warm brass or bronze hardware makes buttery creams feel even richer. For greige creams, matte black hardware provides a fantastic modern punch. And polished nickel? It’s the timeless classic that honestly looks good on just about anything.
Choosing Your Path: DIY vs. Pro, and What It’ll Cost You
Let’s talk brass tacks. You need to be realistic about your budget, your timeline, and how much work you’re willing to put in.
The Big Question: DIY or Hire a Pro?
Tackling the refinishing yourself is absolutely doable, but you need to know what you’re signing up for. For a standard-sized kitchen, plan on spending between $400 and $700 on top-quality materials (primer, paint, sandpaper, etc.). The real cost, though, is your time. This isn’t a weekend project; it’s a solid 40-50 hours of detailed work. The final quality is 100% dependent on your patience during the prep stages.
Hiring a professional cabinet refinishing crew, on the other hand, will typically cost between $4,000 and $8,000. It’s a significant investment, but you’re paying for expertise and a near-perfect, durable finish that’s often sprayed with professional-grade coatings. The whole process is usually done in about 10-14 days, with much less disruption to your life. A full cabinet replacement, for context, is a much bigger job, often taking 4-8 weeks from demolition to completion.
Common Headaches and How to Fix Them
- Yellowing: If your new water-based paint is turning yellow, it’s almost always bleed-through from the old wood or stain. It means the primer failed. The only real fix is to sand it down, re-prime with that shellac-based primer I mentioned, and repaint.
- Chipping: This is a sign of poor adhesion. Nine times out of ten, it means the surface wasn’t cleaned well enough or the scuff-sanding step was skipped.
- Cracking: Seeing hairline cracks at the joints of your solid wood doors? Don’t panic. This is usually just the natural expansion and contraction of the wood with humidity changes. It’s a feature of real wood, not a flaw in the paint job. (This is actually why many painted doors use MDF center panels—they’re more stable).
A Quick Word on Safety—This Part’s Not Optional
A kitchen project is exciting, but we have to be smart about it.
- Lead Paint: If your house was built before 1978, you HAVE to assume your cabinets are coated in lead-based paint. Do not start sanding anything until you test for it. Lead dust is incredibly toxic, and you’ll need a certified pro to handle it safely.
- Fumes (VOCs): Pro-grade primers and paints contain VOCs (Volatile Organic Compounds) that are seriously bad to breathe. A simple dust mask won’t protect you from these fumes. You need proper ventilation (fans blowing air out) and a NIOSH-approved respirator with organic vapor cartridges.
- Know Your Limits: While painting might be a DIY job, moving electrical outlets or plumbing lines is not. Messing with electrical, gas, or water lines without a license is not only dangerous, but it can also void your homeowner’s insurance. Always hire licensed and insured electricians and plumbers for that work.
Cream cabinets can truly be the foundation of a timeless, beautiful kitchen. The best results always come from understanding the materials, respecting the process, and knowing which corners you absolutely cannot cut. Hopefully, this guide gives you that knowledge and helps you build a kitchen you’ll love for many years to come.
Galerie d’inspiration
When pairing a backsplash with cream cabinets, think beyond color to texture. Zellige tiles, with their handmade irregularities and pearlescent glaze, catch the light in a thousand different ways. This creates a living, breathing surface that prevents a cream-on-cream scheme from feeling flat, adding a touch of rustic Moroccan soul to a polished kitchen.
- Aged Brass: Instantly adds warmth and a sense of history, perfect for farmhouse or traditional designs.
- Matte Black: Creates a sharp, modern contrast that grounds the softness of the cream, ideal for a contemporary or transitional look.
- Polished Nickel: Offers a cool, classic elegance that feels brighter and more formal than chrome.
- Leather or Wood Pulls: Introduce an unexpected organic element for a bespoke, slightly rustic touch.
The critical mistake: Pairing your beautiful, warm cream cabinets with a stark, cool-toned white trim (like Chantilly Lace OC-65) or ceiling. This can make the cream look dingy or accidentally yellow by comparison. Always test your trim and cabinet colors together in your kitchen’s natural light.
The ‘right’ cream can do more than just look pretty. Color theorists note that off-whites and creams tap into our desire for spaces that feel safe, clean, and nurturing, making them a perennial favorite for the heart of the home.

Your countertop is your cabinets’ closest partner. Three pairings that never fail:
- Butcher Block: A walnut or oak countertop introduces natural warmth and texture, creating a cozy, lived-in English country feel.
- Soapstone or Slate: The deep, matte charcoal of soapstone provides a dramatic and sophisticated contrast that makes the cream color pop.
- Marble-Look Quartz: Get the luxurious veining of Calacatta marble without the maintenance. Brands like Caesarstone or Silestone offer stunning options that elevate cream from classic to chic.
Matte, satin, or semi-gloss? Which finish is best for cream cabinets?
While a matte finish offers a contemporary, velvety look, it’s the least durable and hardest to clean—a risky choice for high-traffic kitchens. Semi-gloss is the most durable and easiest to wipe down, but its high shine can highlight imperfections. For the perfect balance of soft glow and robust washability, a high-quality satin or cabinet-specific enamel, like Benjamin Moore’s ADVANCE in Satin, is the pro’s choice. It provides a subtle sheen that resists stains and scuffs without looking plasticky.
Warm, Yellow-Based Cream: Think Benjamin Moore’s ‘Gentle Cream’. It glows in morning light and creates an undeniably sunny, welcoming atmosphere. It pairs beautifully with warm woods and brass hardware.
Cool, Greige-Based Cream: Consider Farrow & Ball’s ‘Stony Ground’. This cream has more gray/beige in it, lending a sophisticated, earthy, and modern feel. It works well with cooler materials like stainless steel and marble.
Choose based on your home’s natural light and the overall mood you want to create.
Did you know? Industry experts estimate that up to 80% of a professional paint job’s longevity comes from the preparation work, not the final coat.
For DIYers, this is crucial. Before you even think about opening your can of cream paint, the doors must be meticulously cleaned with a TSP substitute to remove grease, lightly sanded to create ‘tooth’ for the new paint, and most importantly, coated with a high-adhesion bonding primer. Skipping these steps is the number one cause of chipping and peeling down the line.
- It creates a more personal, collected-over-time aesthetic.
- It adds immense character and breaks the visual monotony.
- It allows for a flexible mix of storage and display.
The secret? Embracing the ‘unfitted’ kitchen concept. Instead of a solid wall of cream, try integrating a freestanding piece like a dark-stained wood island or a standalone hutch painted in a moody green. It’s a hallmark of high-end English kitchen design.
The choice of appliances can define your cream kitchen’s style. Classic stainless steel offers a reliable, modern contrast that breaks up the softness. For a truly seamless and luxurious look, however, consider panel-ready appliances. Brands like Fisher & Paykel or Miele offer refrigerators and dishwashers designed to be fitted with your custom cream cabinet fronts, making them disappear entirely.
Keeping Cream Cabinets Pristine
- DO use a soft, damp microfiber cloth with a drop of gentle dish soap for routine cleaning.
- DON’T use abrasive cleaners, scouring pads, or harsh chemicals like bleach or ammonia, which can strip the finish and cause yellowing over time.
- DO wipe up spills, especially from tomato sauce, coffee, or wine, immediately to prevent staining the paint.
Don’t forget the bulbs: The Kelvin temperature of your lighting is a silent partner in your kitchen’s color scheme. Your perfect cream can look sickly yellow under overly warm bulbs or sterile and gray under cool, bluish light. For a natural, inviting glow that honors the inherent warmth of cream, install LED bulbs in the 2700K to 3000K range.

Choosing a wall color to go with cream cabinets can be daunting. Here are three foolproof strategies:
- Go Deeper: A muted, earthy green like Sherwin-Williams’ ‘Evergreen Fog’ creates a rich, organic backdrop that makes cream cabinets feel cozy and grounded.
- Go Tonal: Paint the walls in the exact same cream color but in a different finish (e.g., eggshell walls with satin cabinets). This creates a sophisticated, seamless, and enveloping feel.
- Go Contrasting: A soft charcoal or a warm, deep blue on an accent wall can provide a dramatic, modern counterpoint to the kitchen’s warmth.
Option A: Full Remodel. The most expensive path, involving a complete tear-out and replacement with new, factory-finished cream cabinets.
Option B: Professional Refinishing. A mid-range solution where experts spray your existing solid wood cabinets for a flawless, durable factory-like finish.
For a budget-savvy alternative, consider a hybrid approach: have your lower cabinets professionally refinished in cream and replace the uppers with more affordable open shelving in a natural wood tone. This opens up the space and cuts costs significantly.