The Real Deal on Kitchen Backsplashes: A Pro’s Guide to Getting It Right
I’ve spent countless hours in kitchens, and let me tell you, a great backsplash is more than just pretty tile. It’s the unsung hero that guards your walls against the daily chaos of cooking. Think about it—splatters from the sink, grease from the stove… that stuff can wreck drywall over time. A proper backsplash is your first line of defense.
In this article
So many people get fixated on a picture they saw online, which I totally get. But the secret to a backsplash that looks amazing for decades isn’t just the tile’s color. It’s in the stuff you can’t see: the wall prep, the right adhesive, and the perfect grout. Nailing these details is what separates a five-year fix from a fifty-year feature. This guide is all about sharing what I’ve learned on the job, from simple subway tile to tricky natural stone, so you can make yours strong, beautiful, and built to last.
First Things First: Dealing with the Old Backsplash
Before we even dream of new tile, we have to talk about what’s already there. Are you staring at some old, dated tile? Or maybe that standard 4-inch granite strip that matches your countertop? Getting rid of it without destroying your wall is step one.
For old tile, the key is patience. First, use a utility knife to cut through any caulk along the countertop and cabinets. Then, you can usually get a stiff putty knife or a small pry bar behind a tile and gently work it loose. Sometimes they pop right off; other times they take a chunk of drywall paper with them. It’s okay, we can fix that. For that little granite strip, it’s usually just glued on. Cut the caulk, then try to work a thin pry bar behind it, protecting your countertop with a piece of wood. Go slow!
Once it’s off, you’ll likely have a messy wall with old adhesive and some paper tears. Your job is to scrape and sand it as smooth and flat as possible. A little joint compound can patch up any big gouges. Don’t skip this—a flat wall is a non-negotiable for good tile work.
The Foundation: What’s Underneath Is Everything
Okay, with a clean slate, let’s talk foundation. If you put beautiful, expensive tile on a weak surface, it will fail. I’ve been called to fix way too many jobs where tiles are literally falling off the wall because of poor prep.
Your Wall Surface Matters. A Lot.
Most kitchen walls are just standard drywall. While that’s fine for a bedroom, it’s not great for areas that see moisture. Drywall is basically chalk dust pressed between paper. When that paper gets wet, it turns to mush, and your tile adhesive has nothing to grip. Mold is a big fan of this situation, by the way.
For the area right behind your sink, I always push for using a better material. The industry pros recommend cement backer board or a specialty coated foam board. Cement board is a beast—it’s heavy and dusty to cut, but it will absolutely not rot or fall apart if it gets wet. A 3×5 foot sheet might cost you $15-$20, but that’s cheap insurance for the wettest part of your kitchen.
If you have to tile over existing drywall, you need to prep it perfectly. First, make sure the wall is dead flat. Use a long level to find any bumps or dips. Sand down the high spots and fill the low spots with a setting-type joint compound (the kind you mix from a powder). The pre-mixed stuff in a tub can shrink and crack later. Once it’s flat and smooth, roll on a quality primer to seal the drywall paper. This gives the adhesive a solid surface to bite into.
The Science of Sticking: Thin-Set vs. Mastic
Now, what holds the tile on? You’ll see two main choices at the store: pre-mixed mastic in a tub and powdered thin-set mortar in a bag. Mastic seems easy—it’s sticky and ready to go. To be frank, I almost never use it for backsplashes.
Here’s why: Mastic is an organic glue that just dries out. It never gets rock hard and can actually re-soften with humidity or steam—exactly what you have in a kitchen. I once repaired a backsplash behind a sink where the tiles were peeling off in sheets because the original installer used mastic. It’s also a bad idea behind a stove, as high heat can weaken its grip over time.
Pros use thin-set mortar. It’s a powder you mix with water, and it cures through a chemical reaction, forming interlocking cement crystals. It becomes incredibly hard and water-resistant. For a backsplash, look for a “polymer-modified” thin-set. Big-box stores carry reliable brands, and a bag will run you between $20 and $30, covering a good-sized area. The polymers add serious grip and a little flexibility.
Quick tip: When you mix thin-set, you’re aiming for a creamy peanut butter consistency. A great test is to scoop some onto your trowel and turn it upside down. If it hangs on for a few seconds without sliding off, you’ve got it just right. Too wet, and your tiles will sag down the wall.
Let’s Talk Tile: Materials, Costs, and Reality
With a solid foundation, now we can get to the fun part. But remember, every tile material has its own personality, both in looks and how it needs to be handled.
Ceramic & Porcelain: The Trusty Workhorses
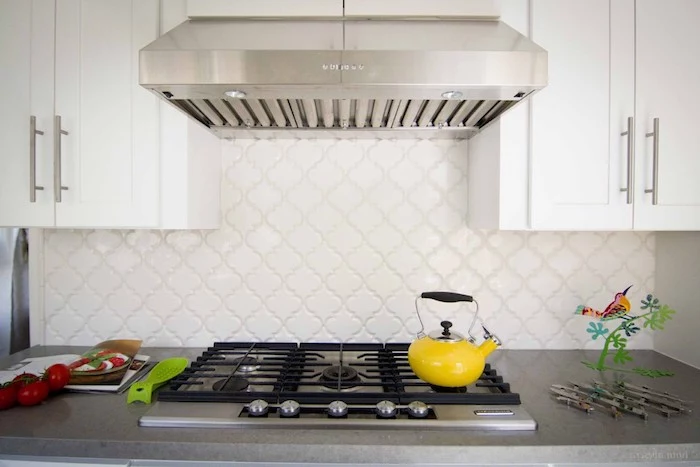
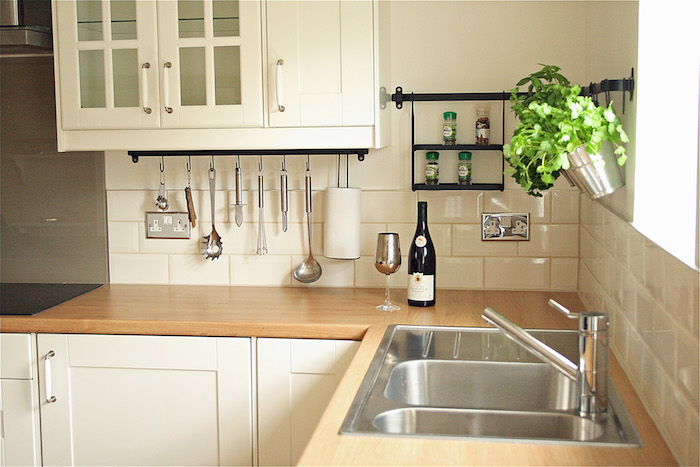
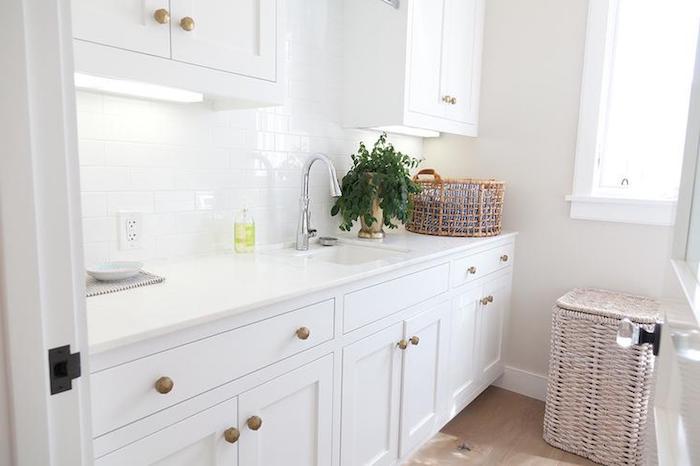
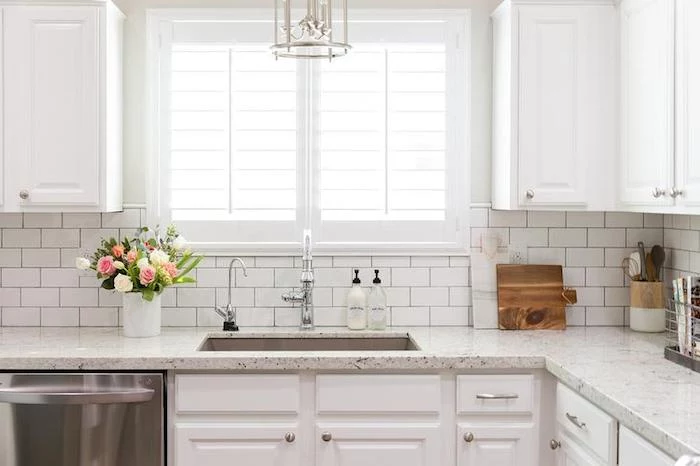
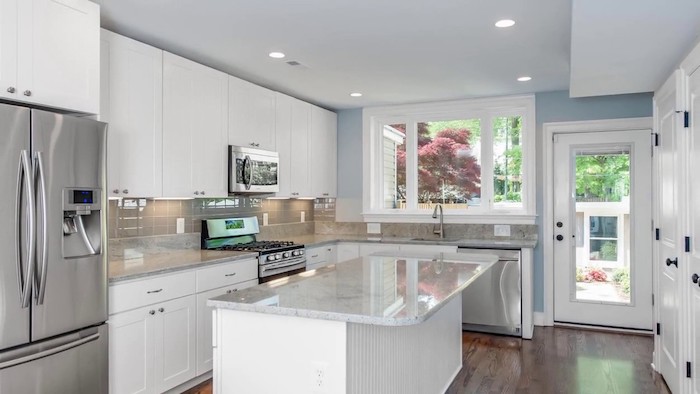
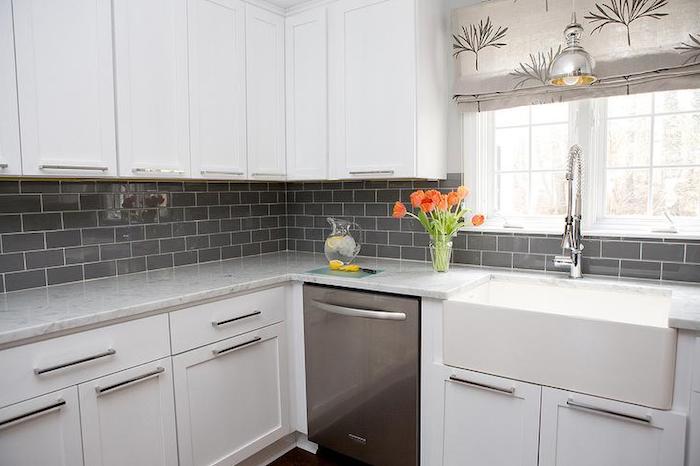
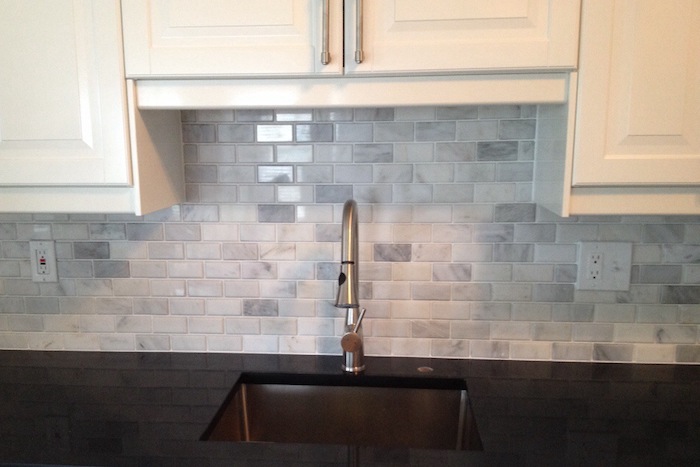
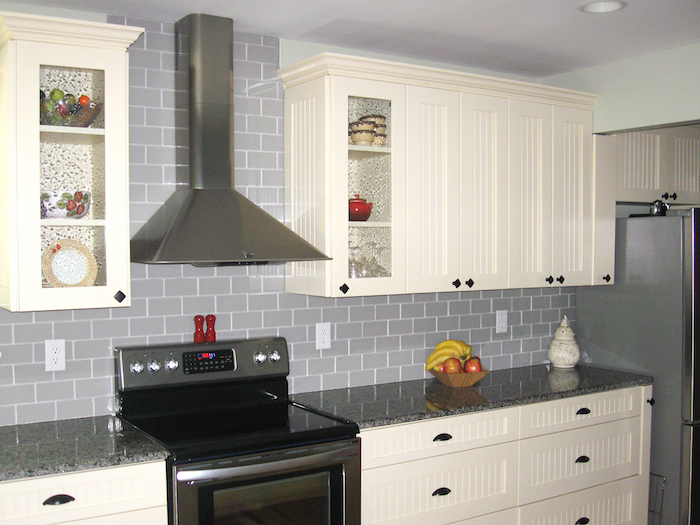
There’s a reason these are so popular. They’re tough, a breeze to clean, and the design options are endless. That classic subway tile look? It’s usually ceramic, and it just works everywhere. The best part for a DIYer? It’s forgiving and affordable, often running between $2 and $10 per square foot.
Porcelain is like ceramic’s tougher older brother—it’s fired hotter, making it denser and virtually waterproof. This makes it a fantastic choice, but that density means it’s harder to cut. You’ll need a quality wet saw with a diamond blade made for porcelain to get clean cuts.
A pro layout secret: The difference between a pro job and an amateur one is avoiding those tiny, awkward sliver cuts at the corners or around outlets. Before I stick a single tile, I do a dry run on the countertop. I lay out the tiles with spacers to see how the pattern will end. Sometimes, just starting your center line a half-inch to the left or right can make everything land perfectly. It’s a small step that makes a huge difference.
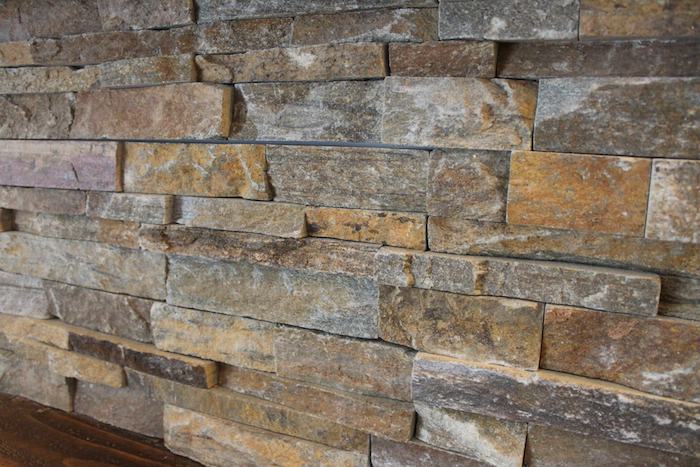
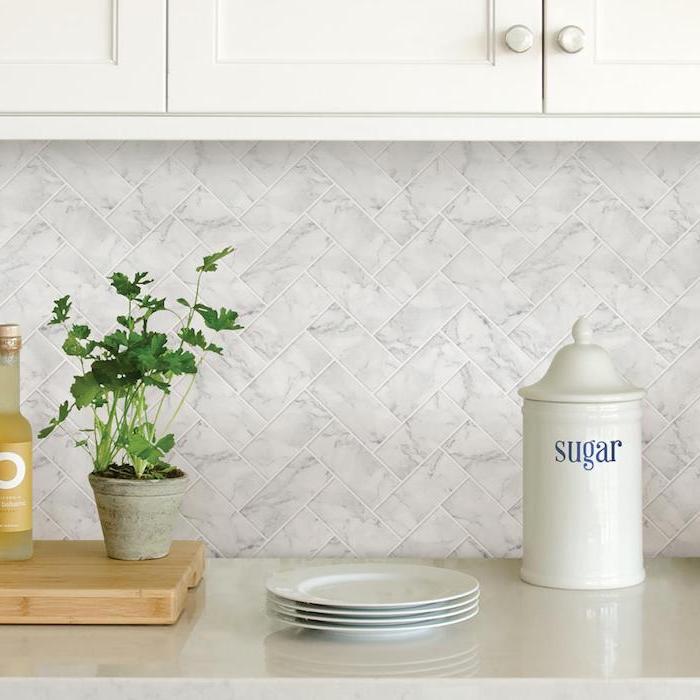
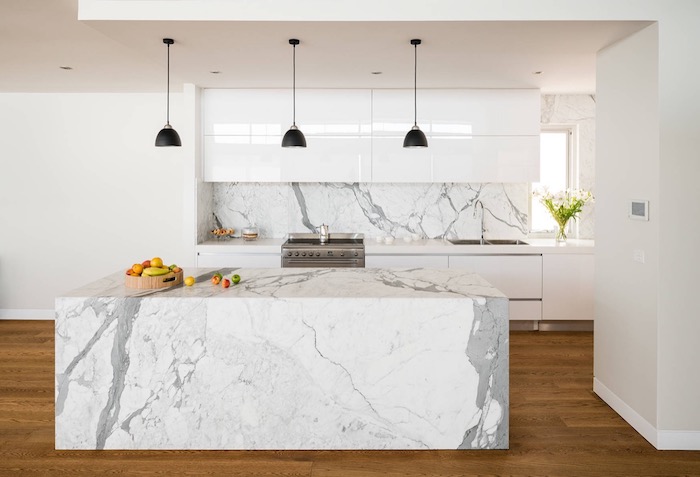
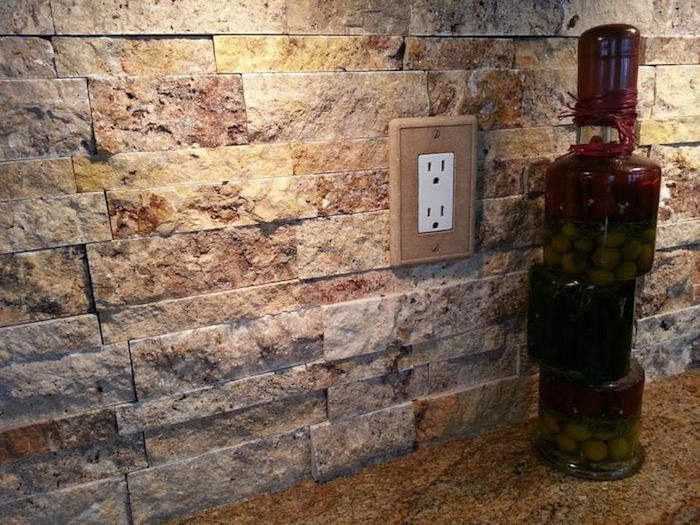
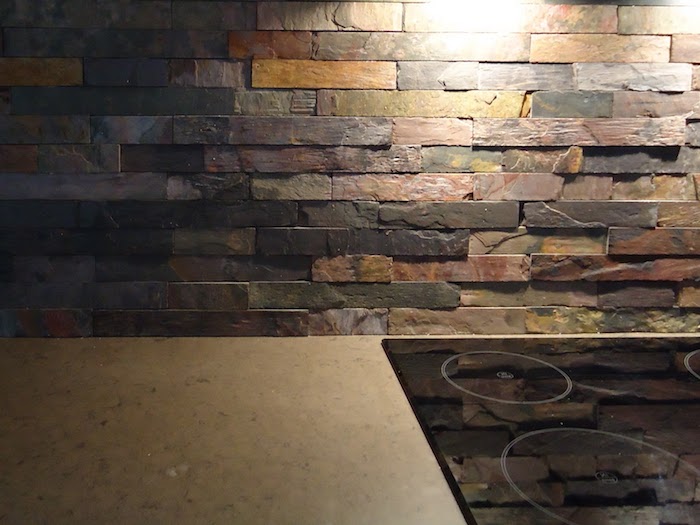
Natural Stone: Gorgeous, But High-Maintenance
Marble, travertine, slate… they bring an incredible, one-of-a-kind beauty to a kitchen. But this beauty comes with homework. Most stone is porous, like a sponge. It will soak up oil, wine, or coffee, leading to stains that are a nightmare to remove.
Here’s my non-negotiable stone rule: Seal it. Twice. First, I apply a coat of quality impregnating sealer to the face of the tiles before I even install them. This stops the minerals in the grout from bleeding into the stone. Then, after everything is installed and grouted, I apply a second coat over the entire surface. A good sealer isn’t cheap—expect to pay $40 to $60 for a quart—but it’s worth every penny. I had a client who skipped this advice, and a single splash of red wine permanently stained their brand-new marble backsplash. It was a costly lesson.
Heads up! When buying stone, always get at least 15% extra for cuts and mistakes, and make sure it’s all from the same lot to ensure the color is consistent. In terms of cost, you’re looking at a higher price point, typically from $15 to over $50 per square foot.
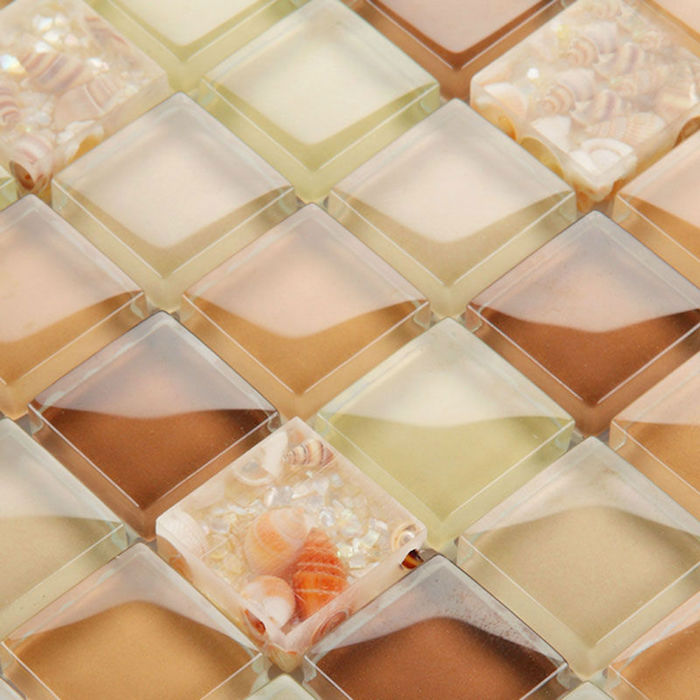
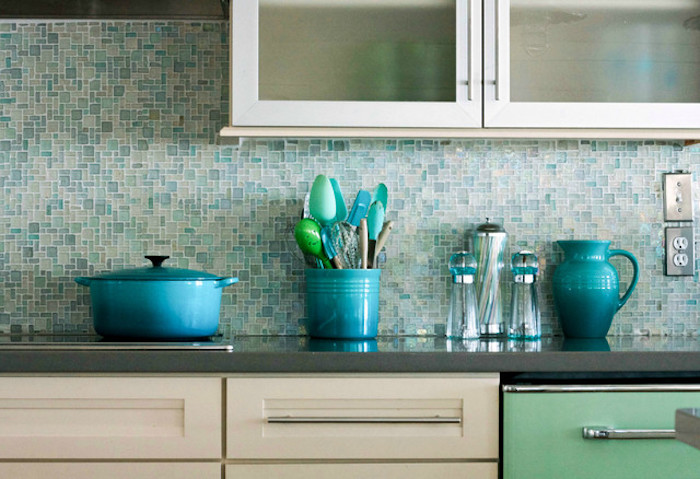
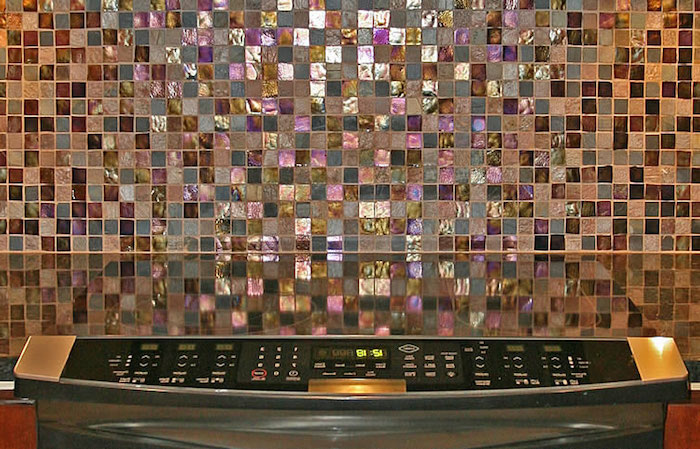
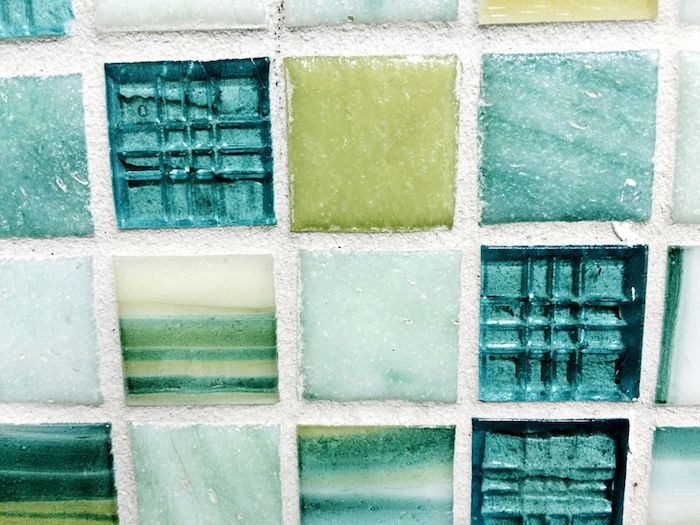
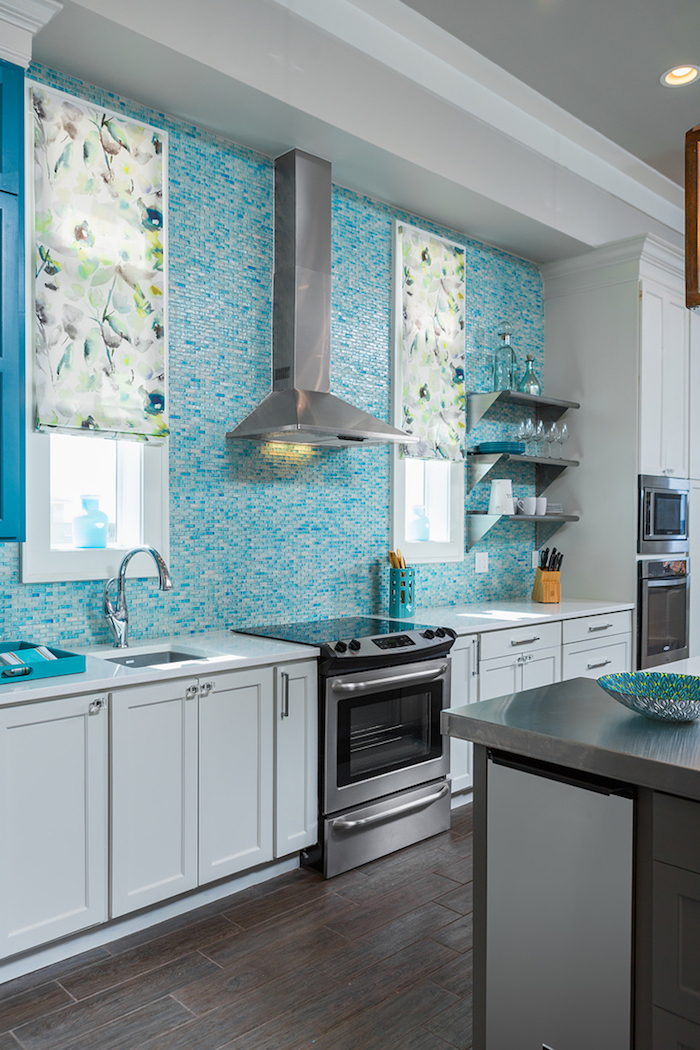
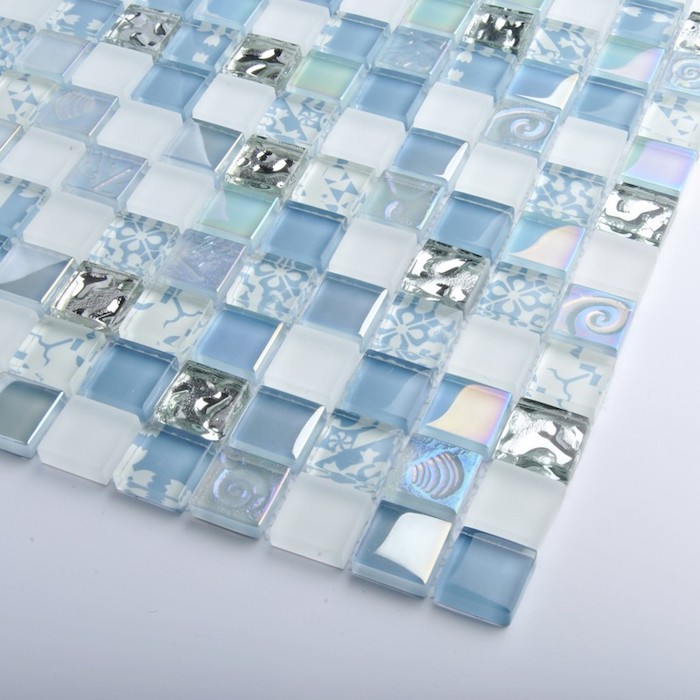
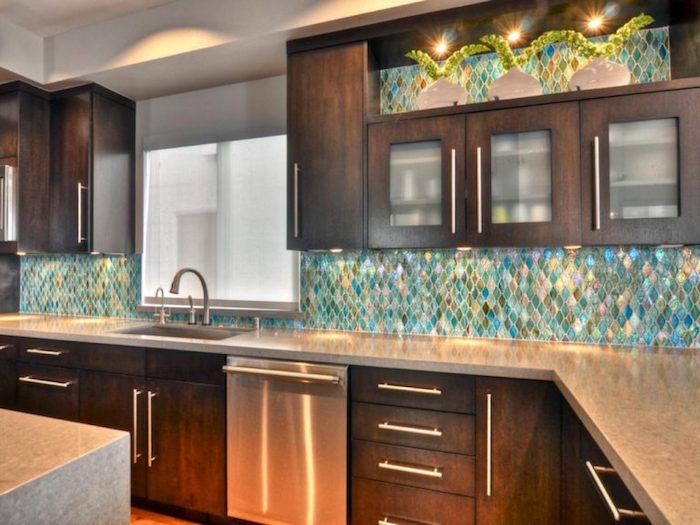
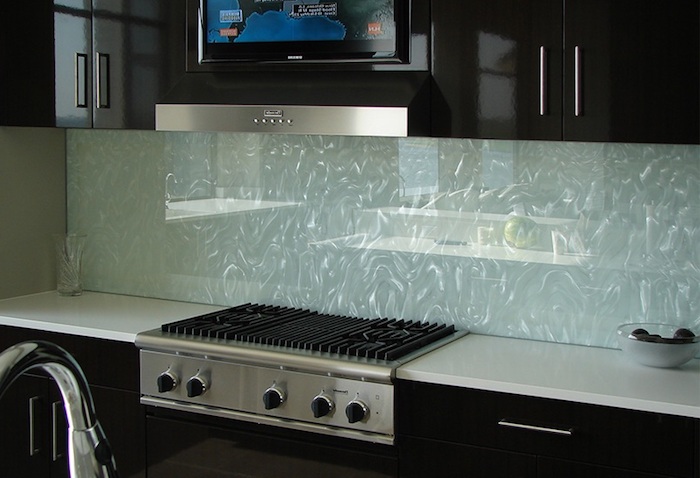
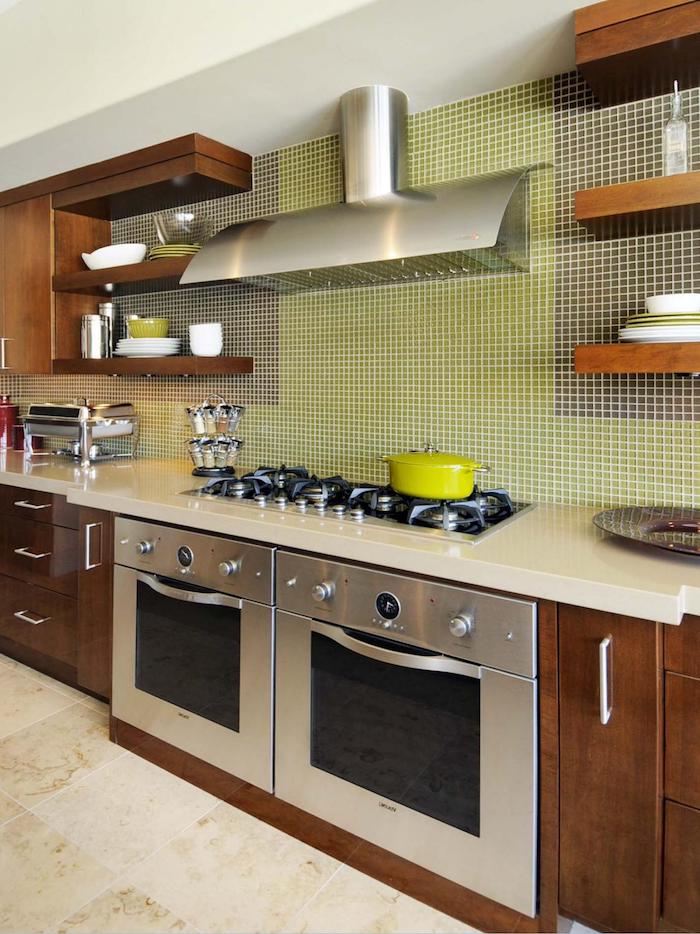
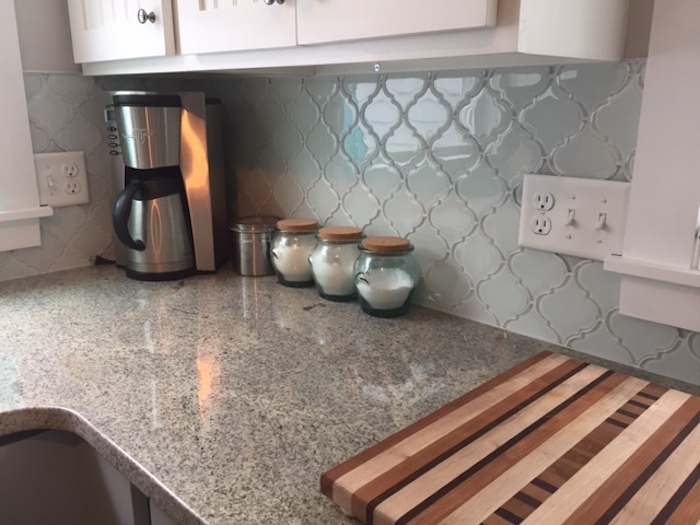
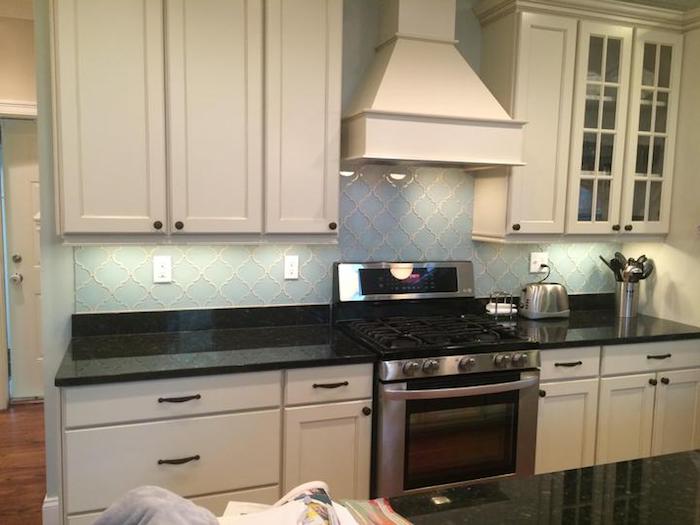
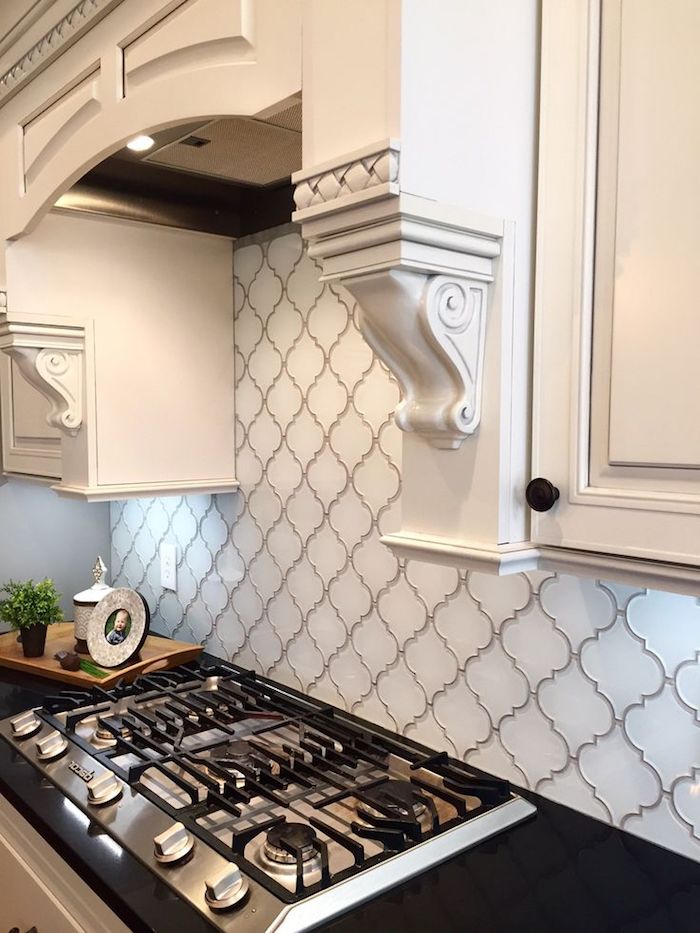
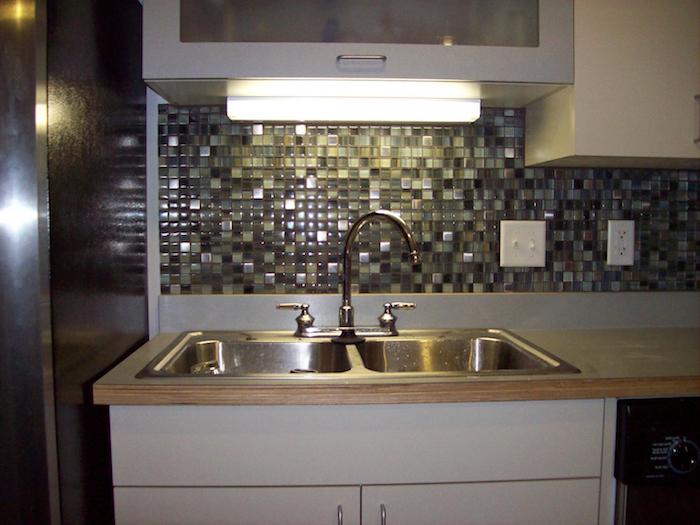
Glass Tile: Modern Shine, Tricky Application
Glass tiles are amazing for making a kitchen feel brighter and more open. But because they’re see-through, they show everything underneath. You have to use a bright white thin-set specifically made for glass; a standard gray mortar will make your beautiful tiles look dull and dingy. Cost-wise, they sit in the middle, from $10 to $40 per square foot.
The trick is to get a perfectly smooth layer of thin-set with no trowel lines showing through. I always “back-butter” each sheet, using the flat side of my trowel to get a smooth, even coat. Cutting is another challenge. You absolutely need a wet saw with a special glass-cutting blade to avoid chipping and shattering.
Finishing Touches That Make All the Difference
You’re not done when the last tile is on the wall. The grout and edge details are what give the project a polished, professional look.
Grout: It’s More Than Just Filler
Grout locks all your tiles together into a solid, water-resistant surface. The basic rule is simple: for grout lines wider than 1/8 inch, use sanded grout. For joints smaller than 1/8 inch or with delicate tile like glass or polished marble, use unsanded grout to avoid scratching the surface.
You might see epoxy grout, which is the gold standard for durability—it’s basically waterproof and stain-proof. But honestly, it’s a nightmare to work with for a beginner. It sets up incredibly fast and is unforgiving to clean up. For most DIY projects, a high-performance pre-mixed grout is a great (though pricier) option that offers good stain resistance without the stress of epoxy.
Timing your grout cleanup is critical. Wipe too soon, and you’ll pull it out of the joints. Wait too long, and you’ll be scraping stubborn haze off your tiles for hours. The sweet spot? Gently touch a joint with your finger. If it feels firm but not rock-hard, it’s time to start cleaning with a damp sponge.
How to Finish the Edges
What do you do where the tile just… ends? Leaving a raw, cut edge looks unfinished and can be sharp. You have a few great options:
- Bullnose Tile: This is a matching piece with a finished, rounded edge. It’s a classic, clean look.
- Metal or PVC Edging: These thin trim strips are super popular for modern designs. You tuck them under the tile as you install, and they provide a clean line while protecting the tile edge from chipping. An 8-foot strip will cost you $10 to $30.
- A Clean Caulk Line: If your tile ends against a cabinet or an inside corner, sometimes all you need is a neat bead of color-matched, 100% silicone caulk.
When to DIY and When to Call a Pro
I genuinely believe a patient person can tackle a simple backsplash, like subway tile on a straight wall. For a beginner, a standard backsplash is a solid weekend project. Plan for 4-6 hours on Saturday for prep and tiling, and another 2-3 hours on Sunday for grouting.
But you should seriously consider hiring a pro if:
- Your walls are wavy or uneven. A pro knows how to float the wall with mortar to make it perfectly flat.
- You’re using pricey materials. One bad cut on a $50/sq ft sheet of marble can cost you more than hiring an installer.
- The pattern is complex. A herringbone or mosaic design involves a ton of difficult cuts. An experienced hand really shows here.
- You’re just not comfortable. If cutting cement board or dealing with electrical outlets makes you nervous, it’s money well spent to have a pro handle it.
Pro Tip: Don’t buy a cheap, wobbly tile saw for one job. You can rent a professional-grade wet saw from a big box store for about $60 a day. The quality of your cuts will be a million times better. It’s a total game-changer.
Safety Is Not Optional. Period.
Let’s get serious for a second. Tiling involves real risks.
- Dust is dangerous. Cutting tile, stone, and especially cement backer board creates fine silica dust, which is seriously bad for your lungs. I always use a wet saw to keep dust down. If I have to make a dry cut, I use a vacuum attachment and always wear a fitted N95 respirator.
- Protect your eyes and hands. Tiny, razor-sharp tile chips can fly everywhere. Safety glasses are not optional. Cut tile edges are also incredibly sharp, so always wear protective gloves.
- Electricity is no joke. Before you even think about removing an outlet cover, go to your breaker box and turn off the power to the kitchen. Use a non-contact voltage tester to be 100% sure the power is off.
One last thing on outlets: You can’t just tile around them and call it a day. The box will be recessed behind the tile. You’ll need something called an “outlet box extender” or “goof ring.” It’s a simple plastic or metal ring that brings your outlet forward so it sits flush with the new tile surface. They cost a couple of bucks each and are essential for a safe, professional finish.
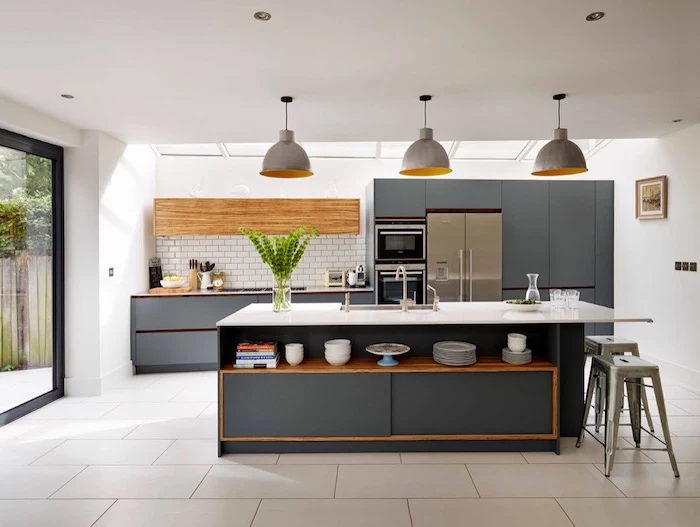
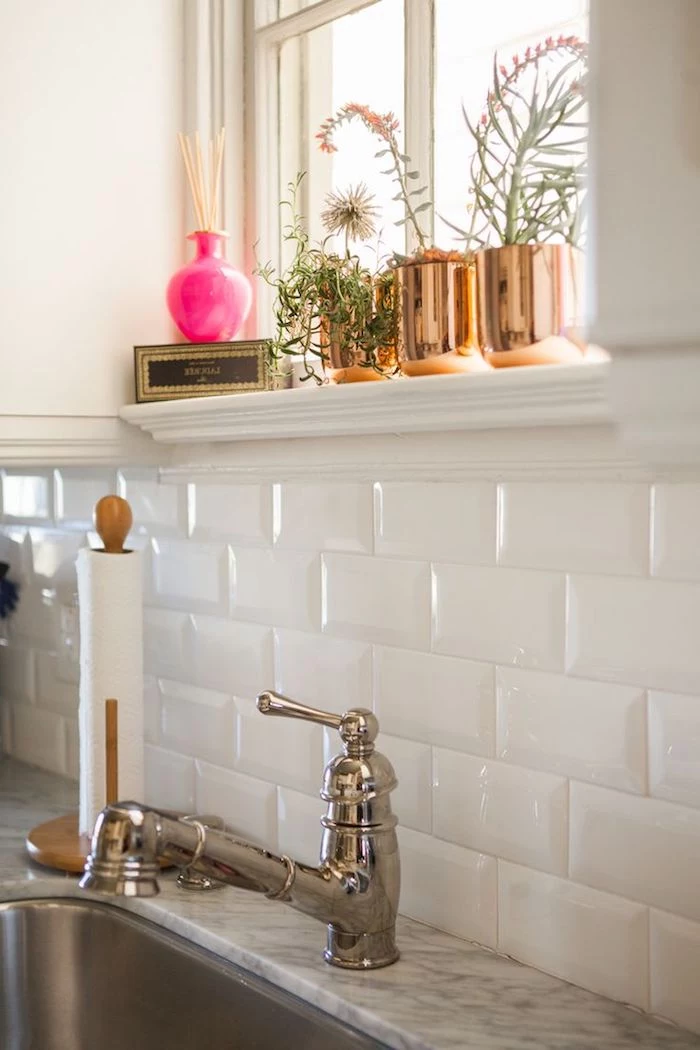
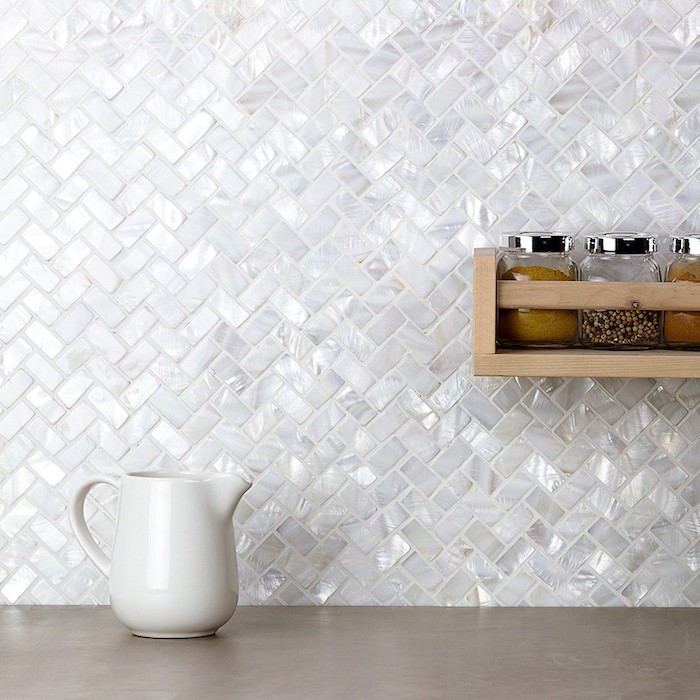
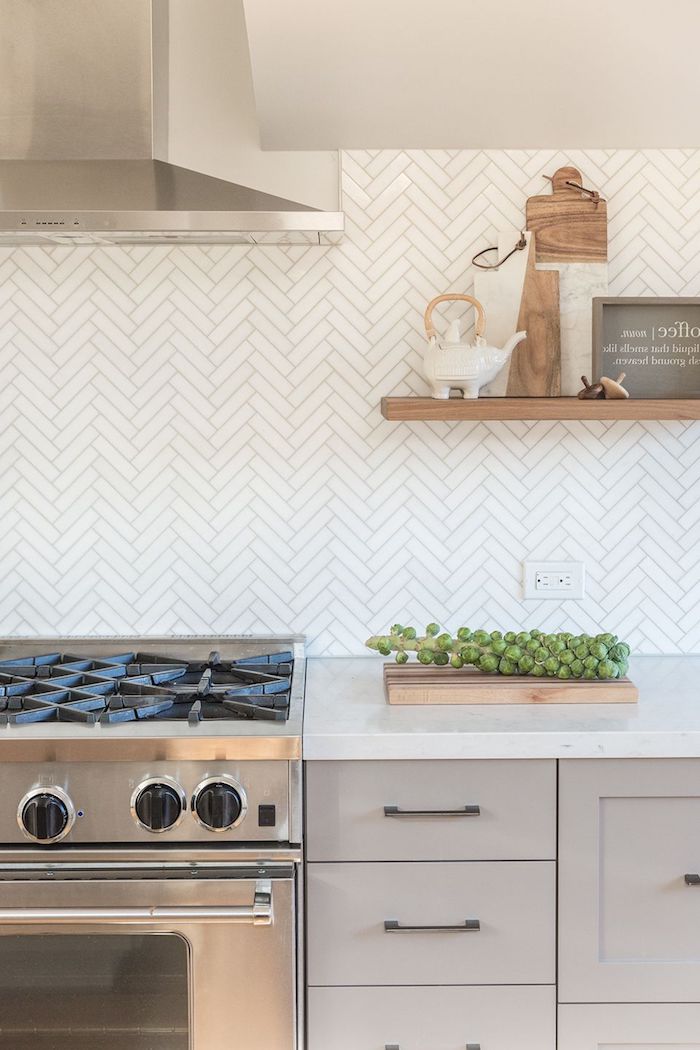
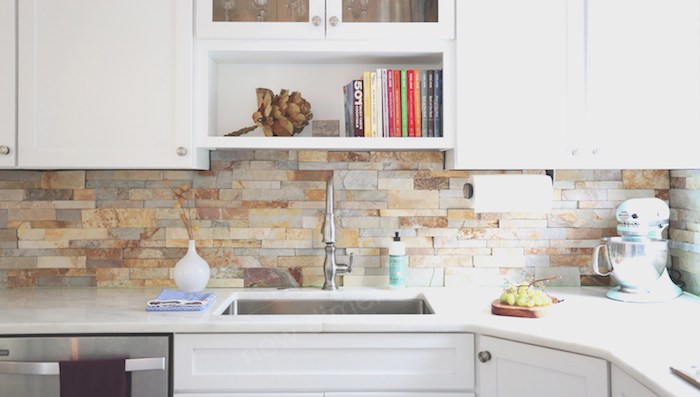
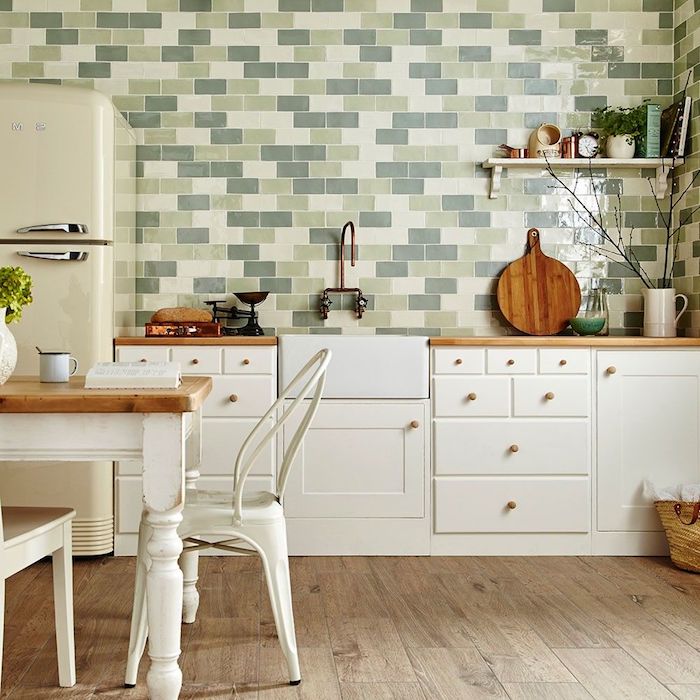
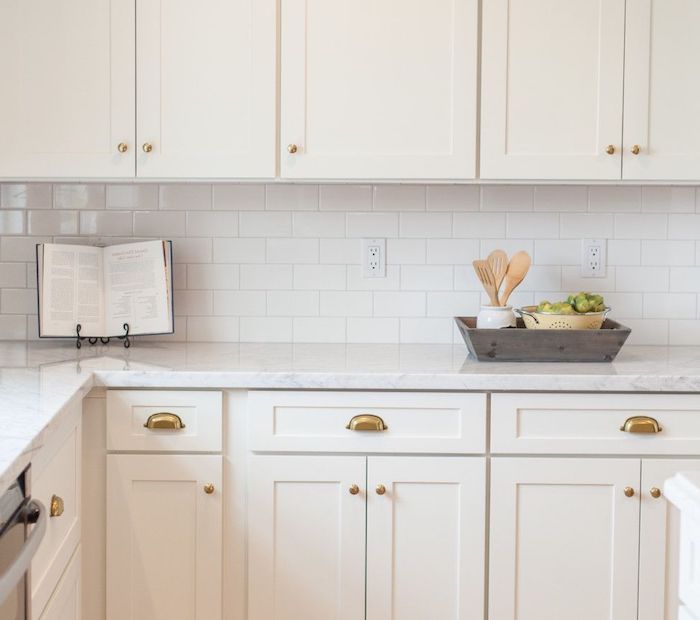
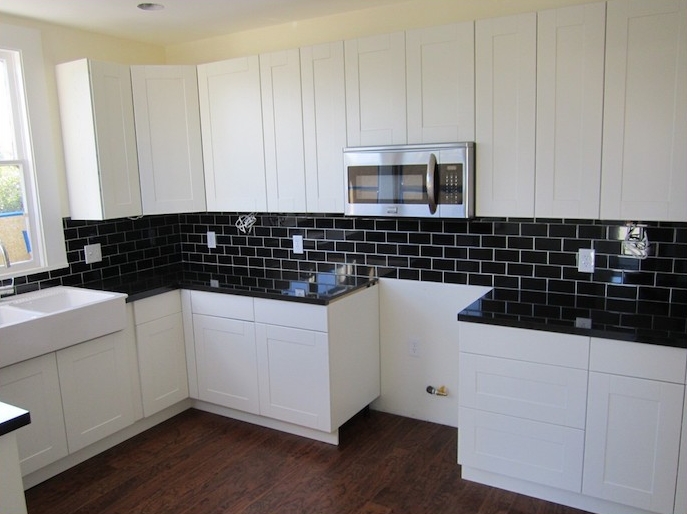
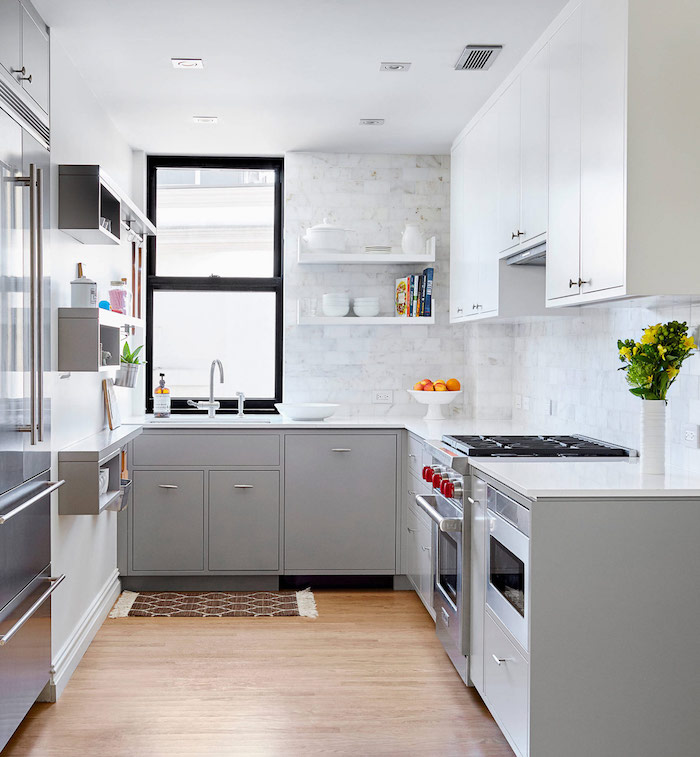
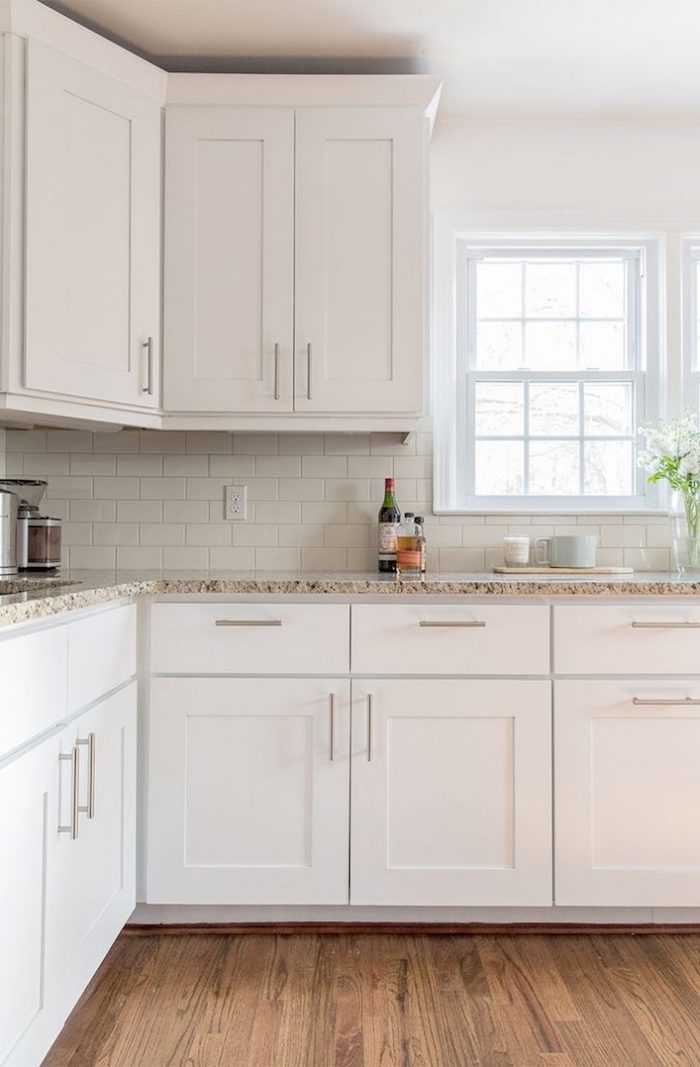
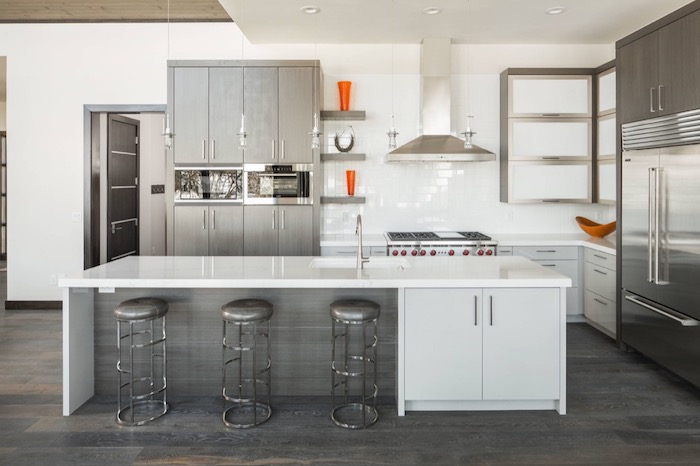
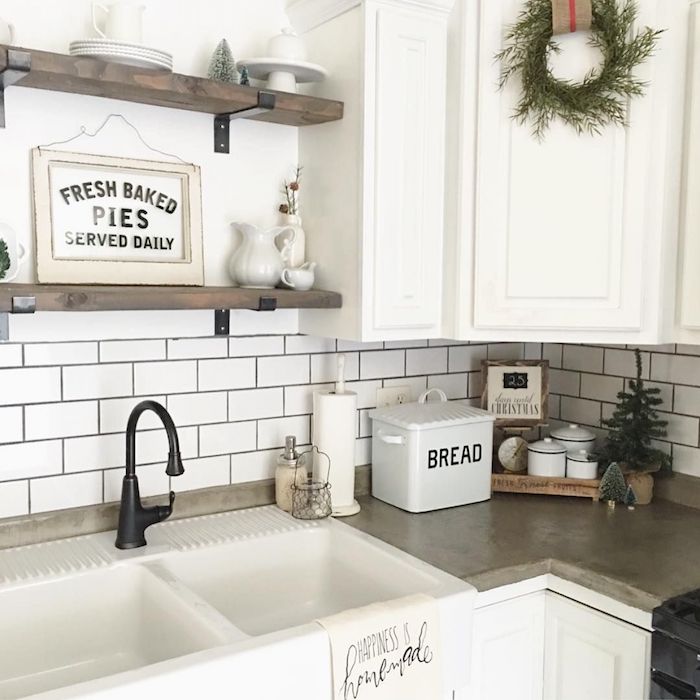
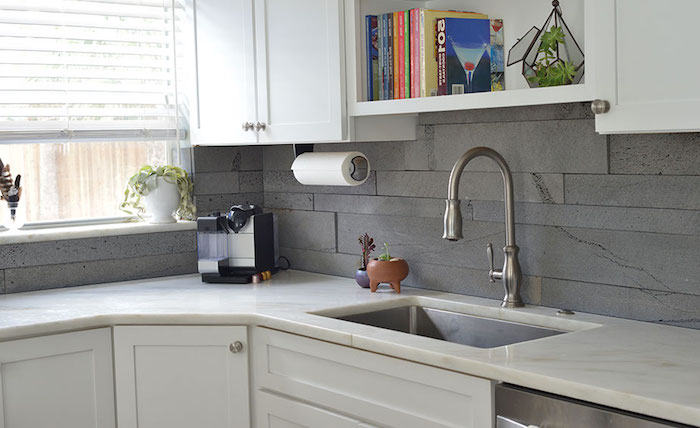
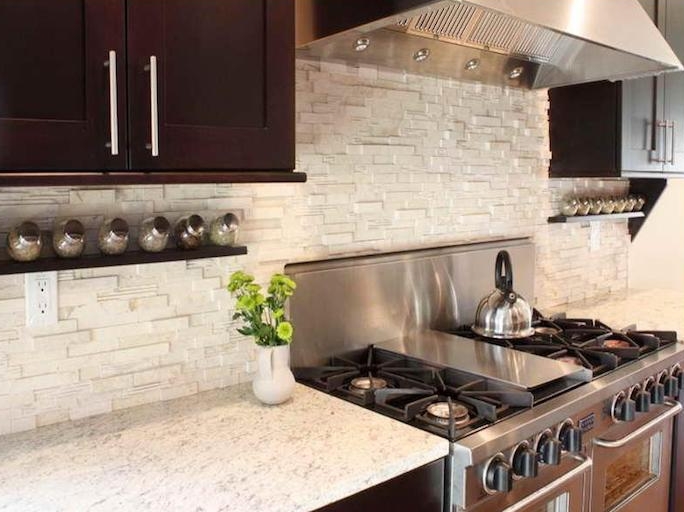
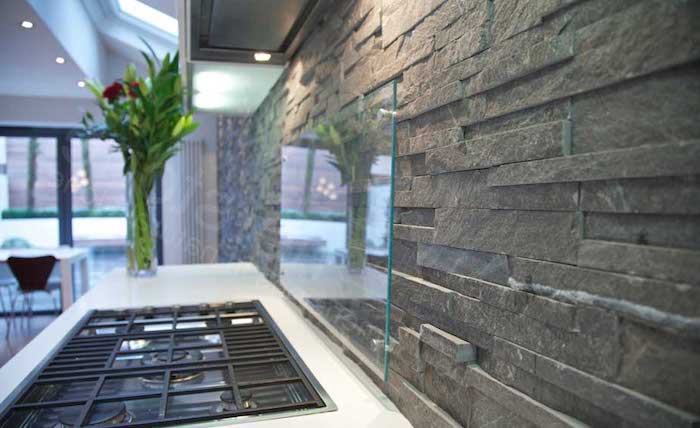
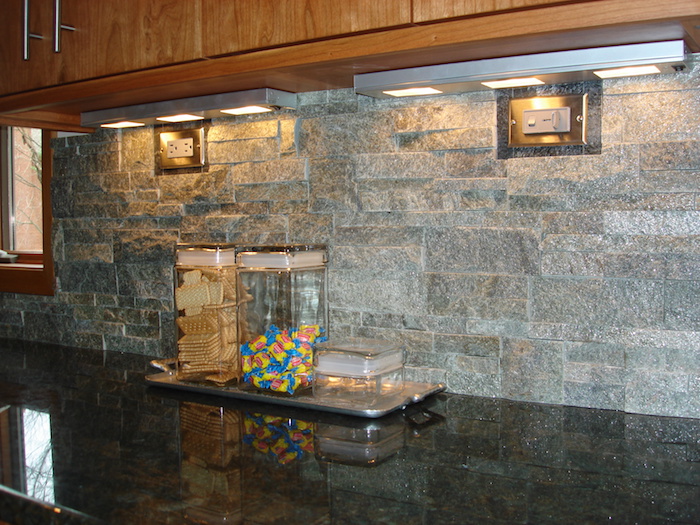
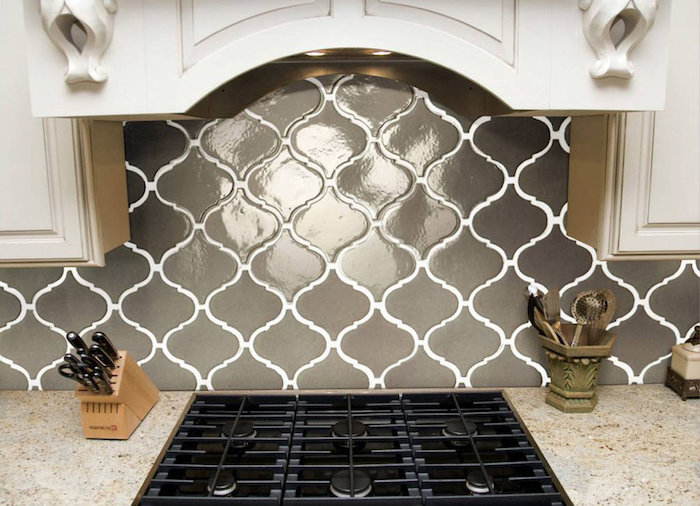
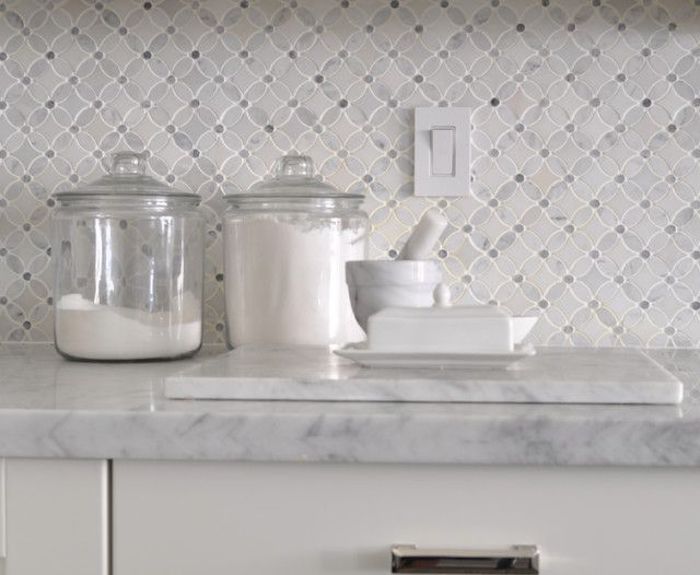
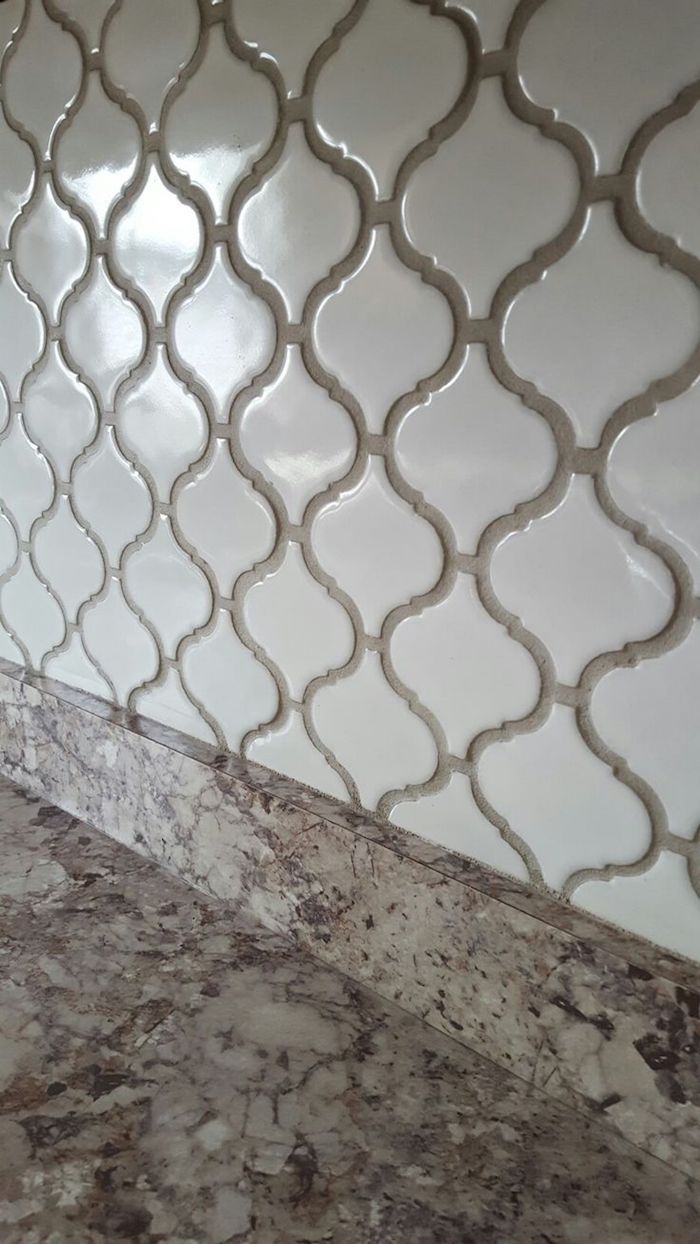
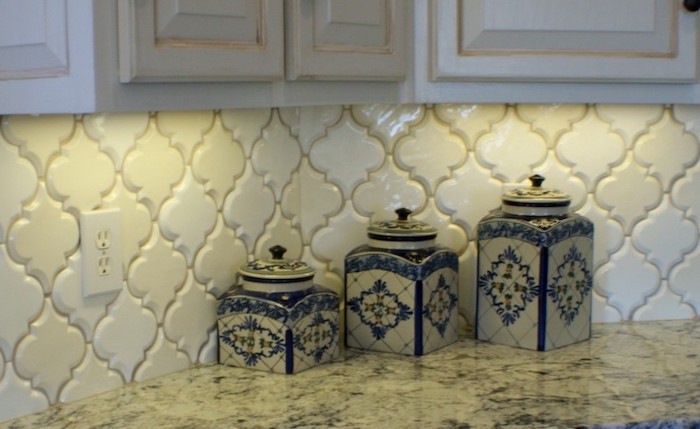
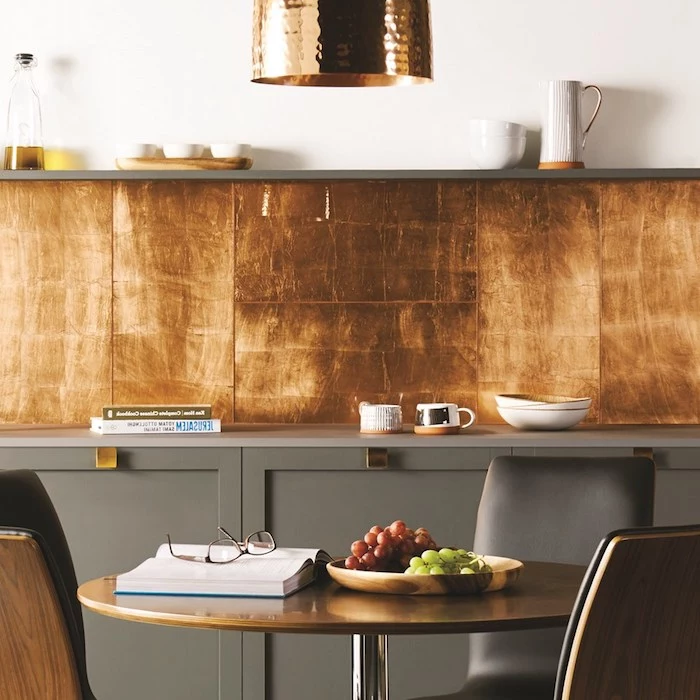
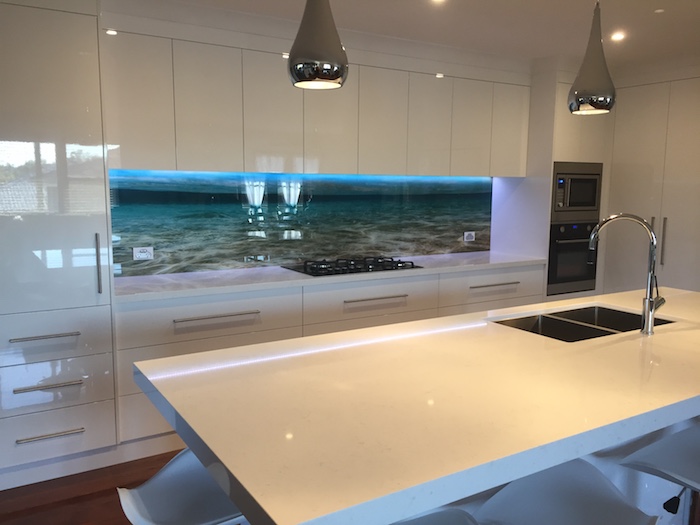
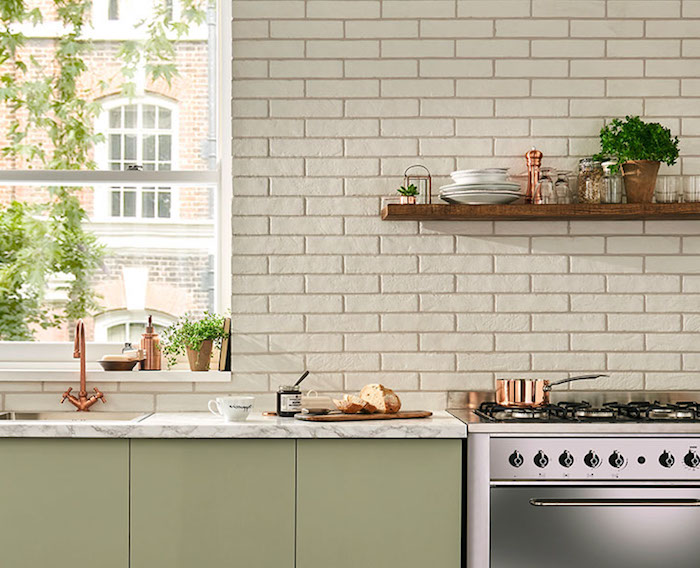
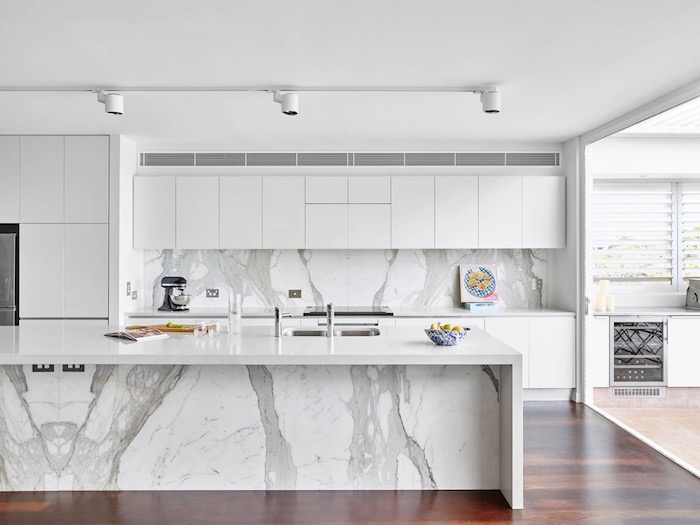
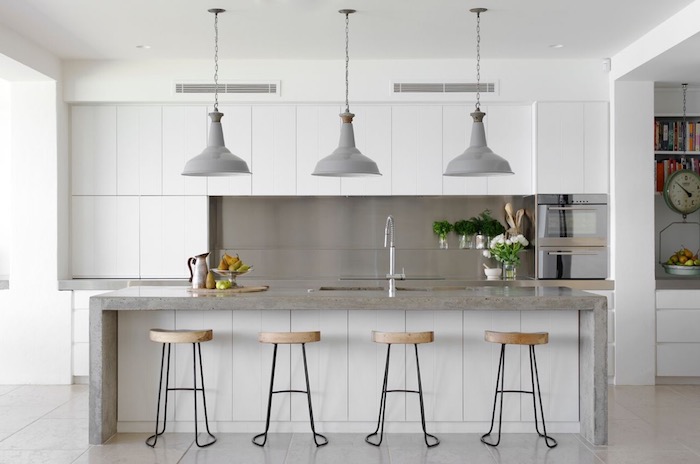
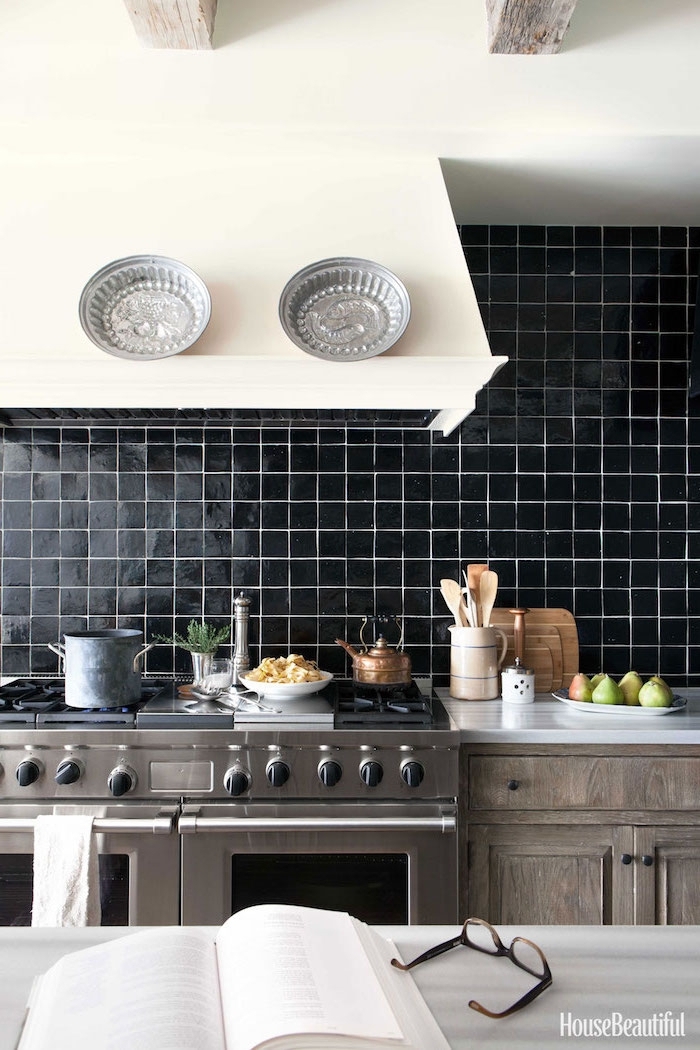
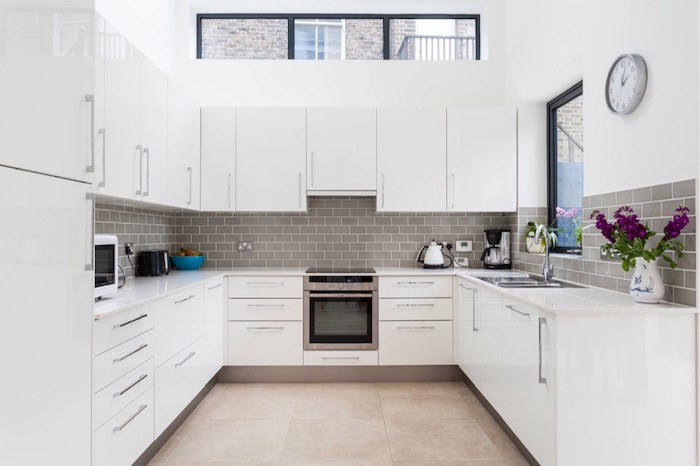
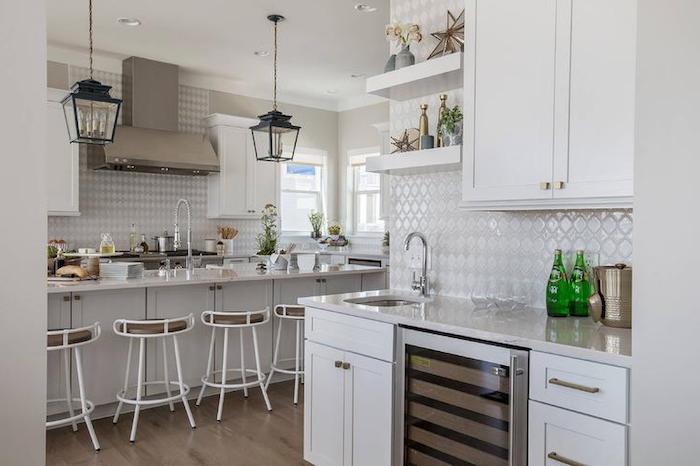
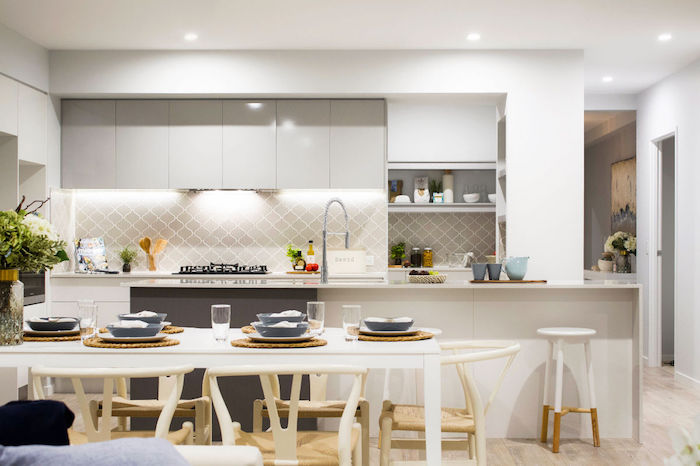
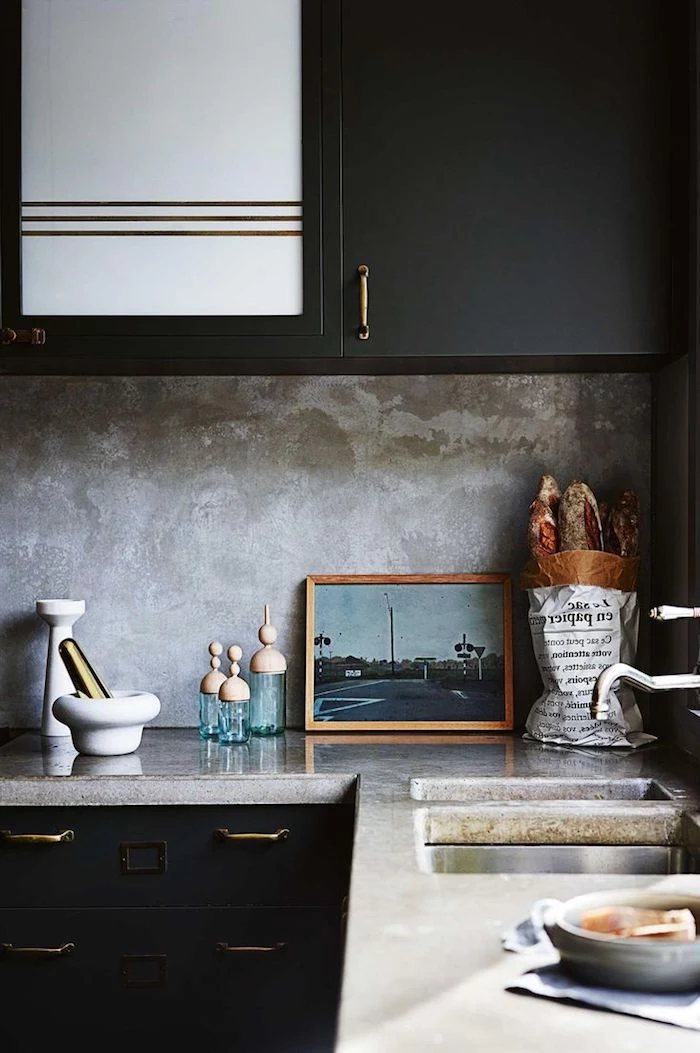
Inspiration Gallery
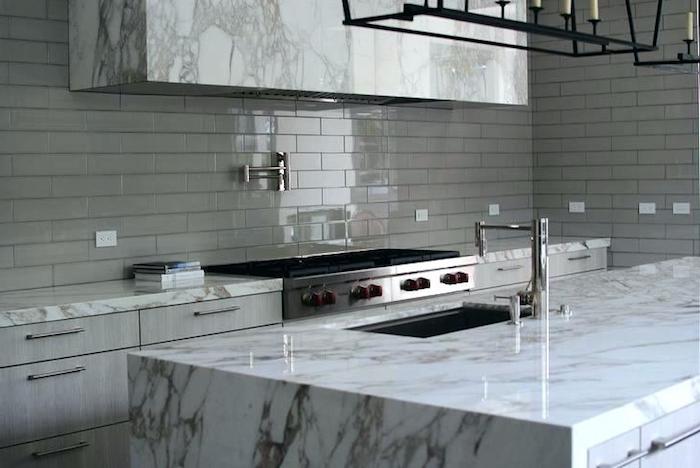
The National Kitchen & Bath Association (NKBA) notes that engineered quartz is now the most popular countertop material. This trend extends to backsplashes.
Using the same quartz slab for both your countertop and backsplash creates a seamless, high-impact look called a ‘slab splash.’ It eliminates grout lines, making cleaning effortless, and offers a bold, monolithic design statement that’s perfect for modern and minimalist kitchens.
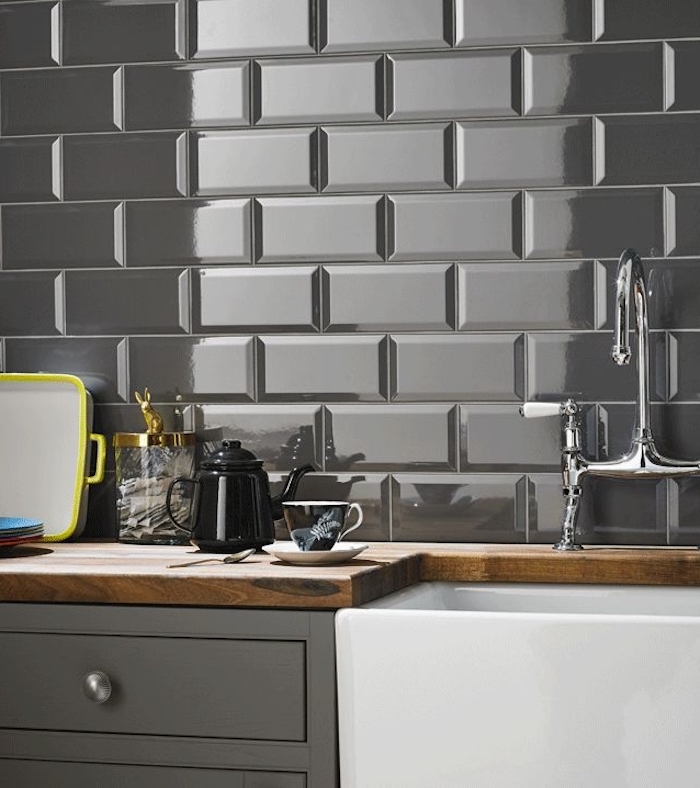
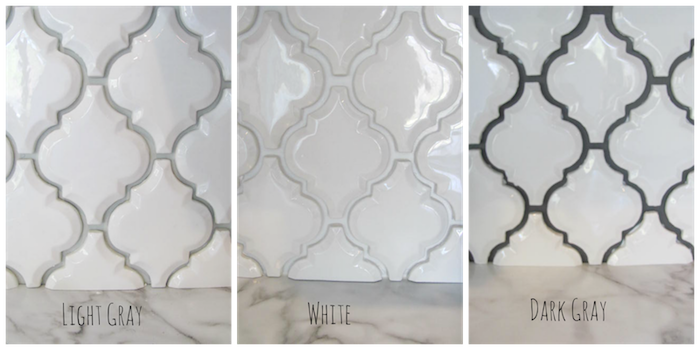
Think beyond white grout. The color you choose for the gaps between tiles can completely transform the final look. A dark charcoal or black grout with classic white subway tile creates a graphic, industrial-inspired pattern. Conversely, a grout that closely matches the tile color, like a light grey with grey tiles, offers a softer, more monolithic appearance that lets the tile’s texture shine.
- For ceramic or porcelain tile, a simple mix of warm water and a pH-neutral cleaner is all you need.
- For natural stone like marble or travertine, avoid acidic cleaners like vinegar or lemon juice, which can etch the surface. Stick to stone-specific cleaners.
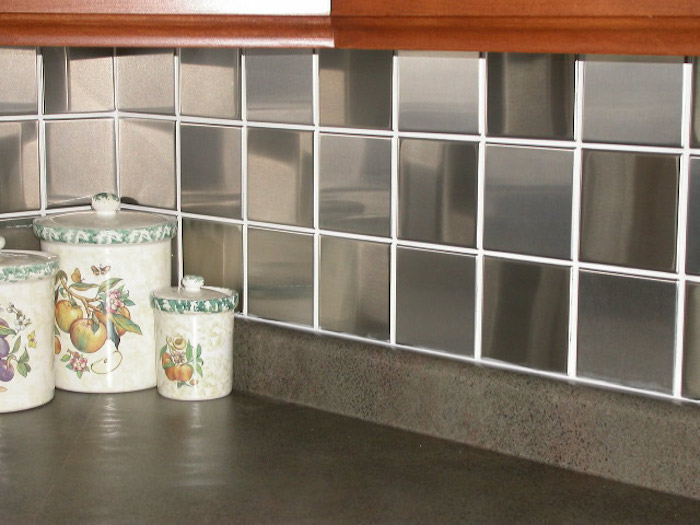
- For stainless steel panels, wipe in the direction of the grain with a microfiber cloth and a specialized cleaner to avoid streaks.
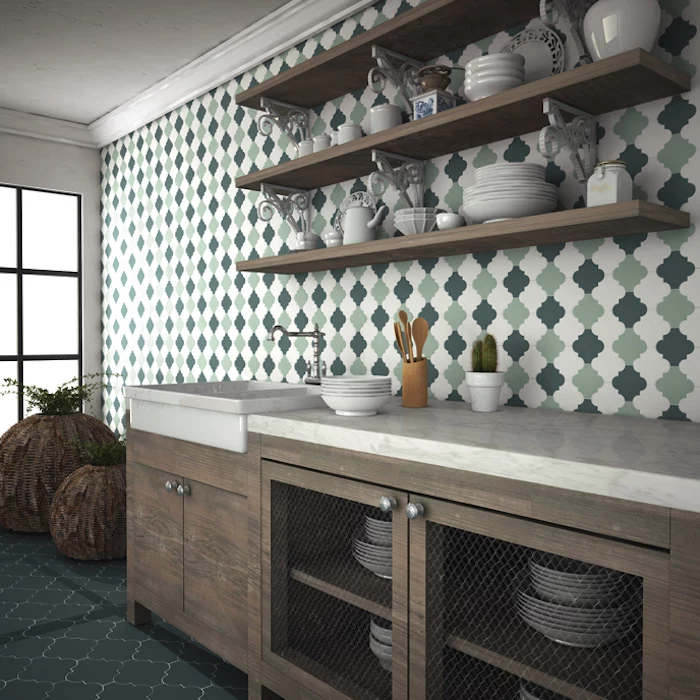
For a touch of rustic, handmade charm, look no further than Zellige tiles. These traditional Moroccan clay tiles are known for their vibrant glazes and subtle imperfections. Each tile is unique, with variations in color, texture, and flatness that create a living surface full of character. They reflect light beautifully, adding depth and a bespoke feel to any kitchen space.
A well-chosen backsplash is the jewelry of the kitchen. It’s where you can inject personality and tie the whole design together.
Can I tile directly over my existing tile backsplash?
While technically possible with the right surface preparation and a high-quality thin-set mortar, most pros advise against it. Tiling over old tile adds thickness, which can create awkward transitions with countertops, cabinets, and outlets. It also means you’re trusting the bond of the old tile. For a professional, long-lasting result, taking the time to remove the old backsplash is almost always the best path.
Epoxy Grout: A professional’s choice, especially behind the stove. Brands like Laticrete SpectraLOCK or Mapei Kerapoxy are non-porous, meaning they resist stains from grease, wine, and coffee without needing a sealer. It’s more expensive and has a shorter working time.
Cement-Based Grout: The traditional, budget-friendly option. It’s porous and must be sealed, with re-application needed every year or two to prevent staining and mildew. It offers a more classic, slightly textured look.
- A cohesive, upscale look without grout lines.
- Makes the kitchen feel larger and more open.
- Reflects light, brightening up darker spaces.
The secret? A mirrored or antique mirror backsplash. It’s a bold choice that adds a layer of glamour and sophistication, working surprisingly well in both modern and transitional kitchens.
Don’t underestimate the power of tile orientation. While the article’s gallery is full of classic horizontal subway tiles, you can create a completely different vibe with the same tile:
- Vertical Stack: Laying rectangular tiles vertically draws the eye upward, making ceilings feel higher. It’s a clean, modern look.
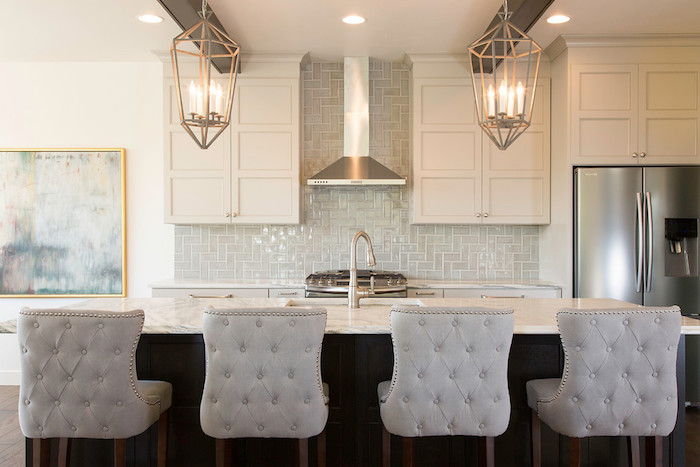
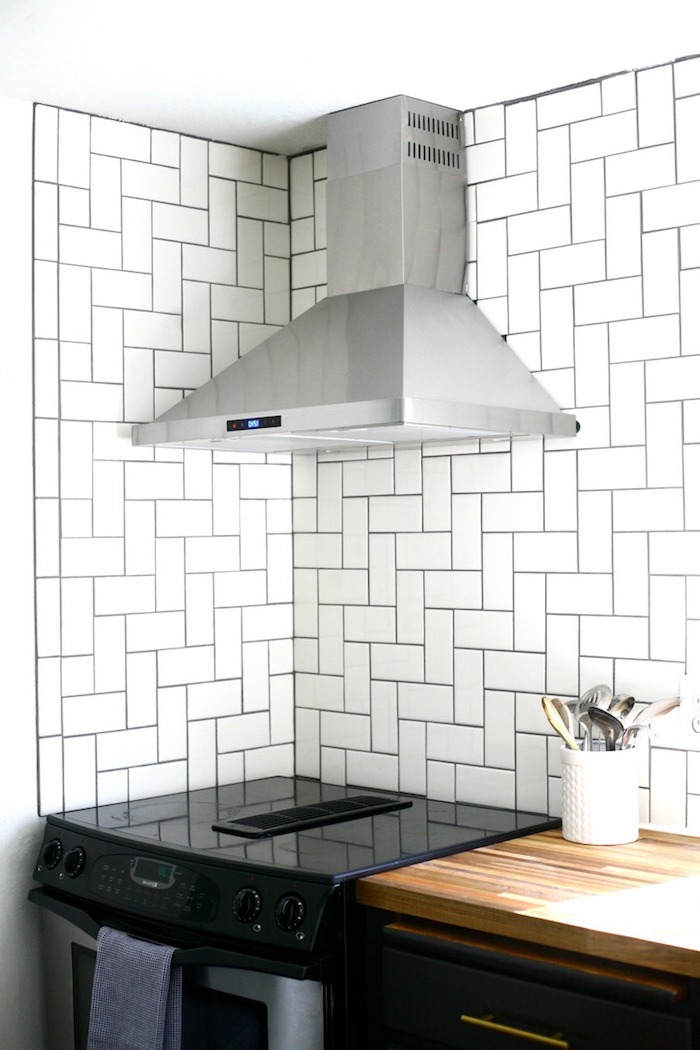
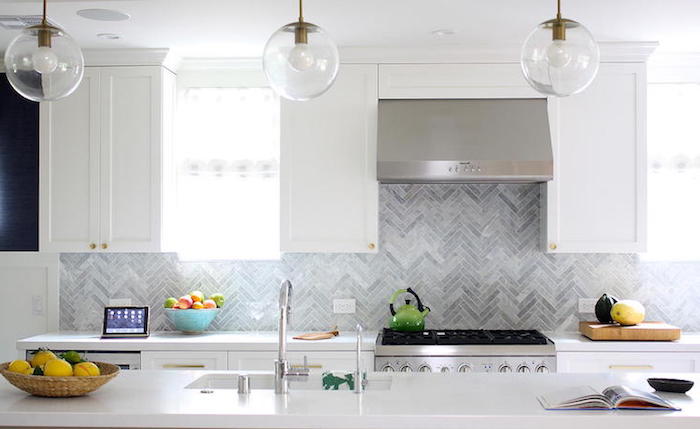
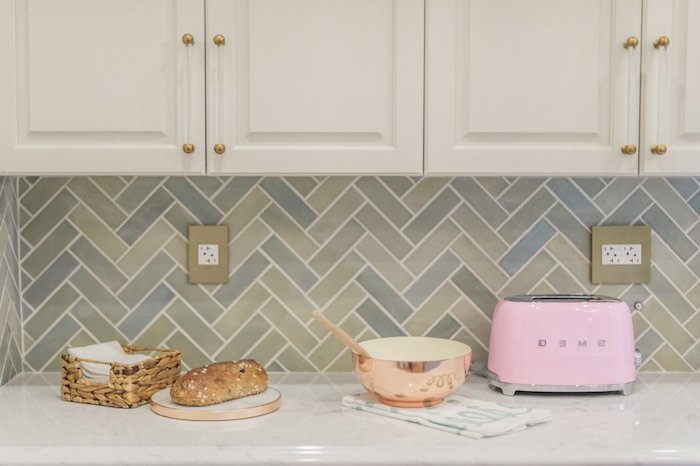
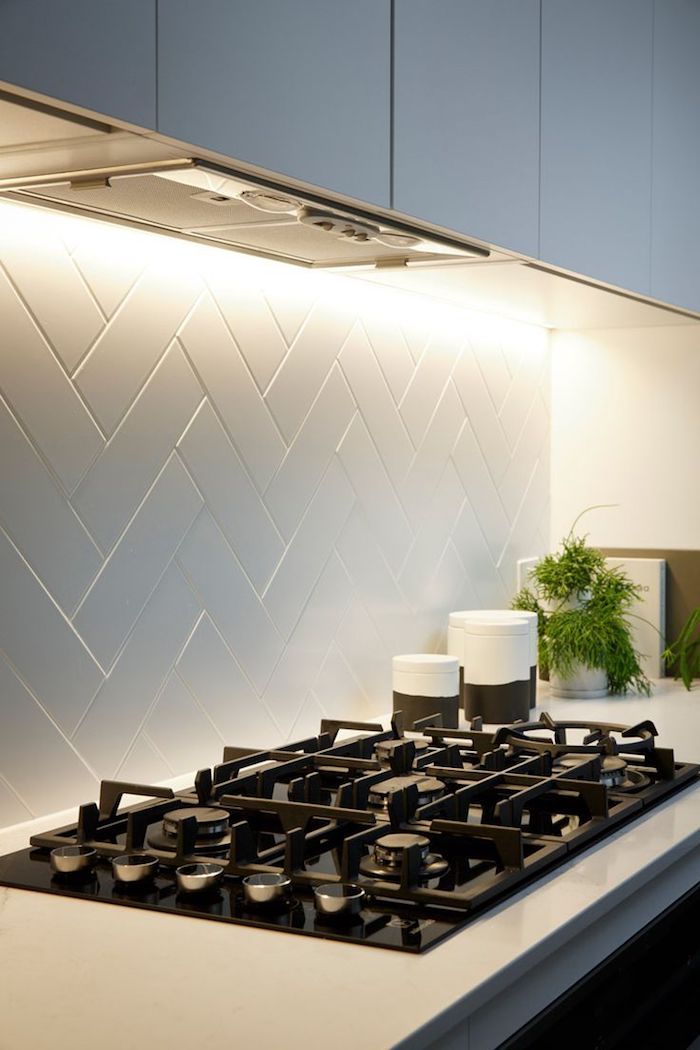
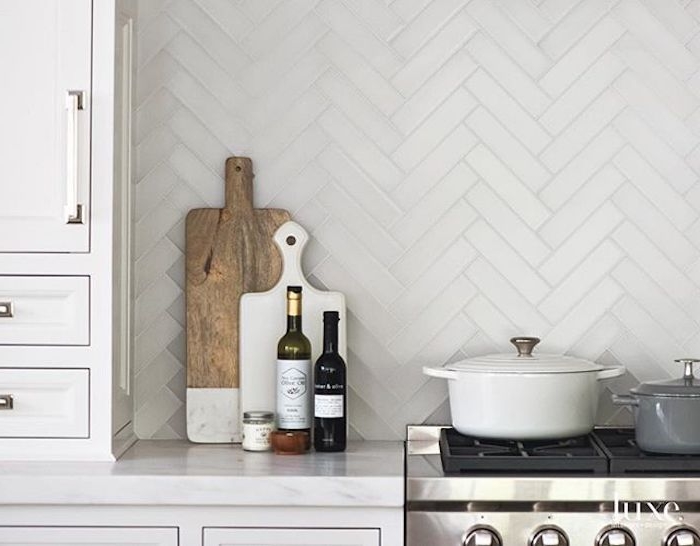
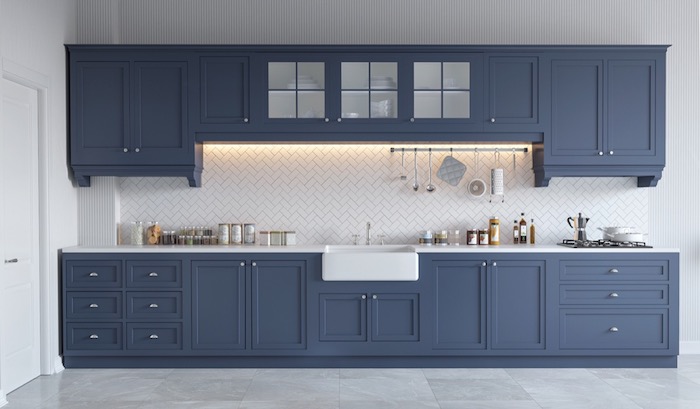
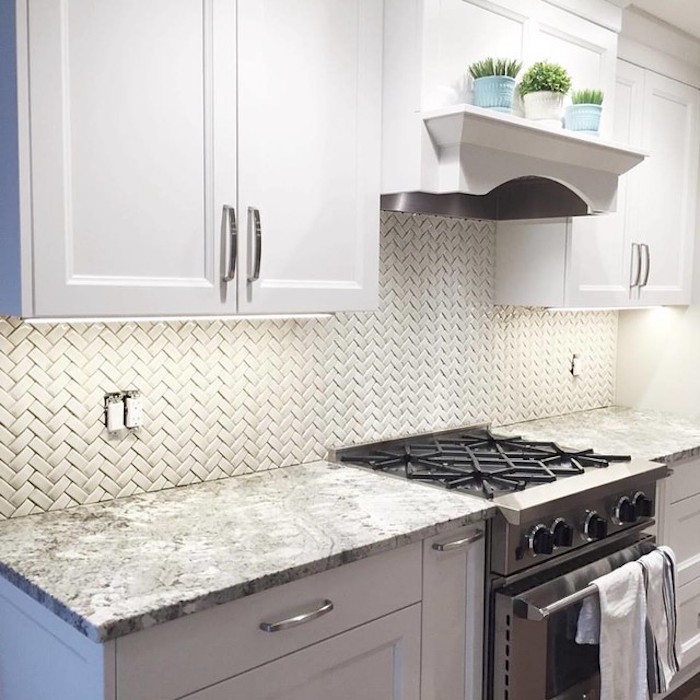
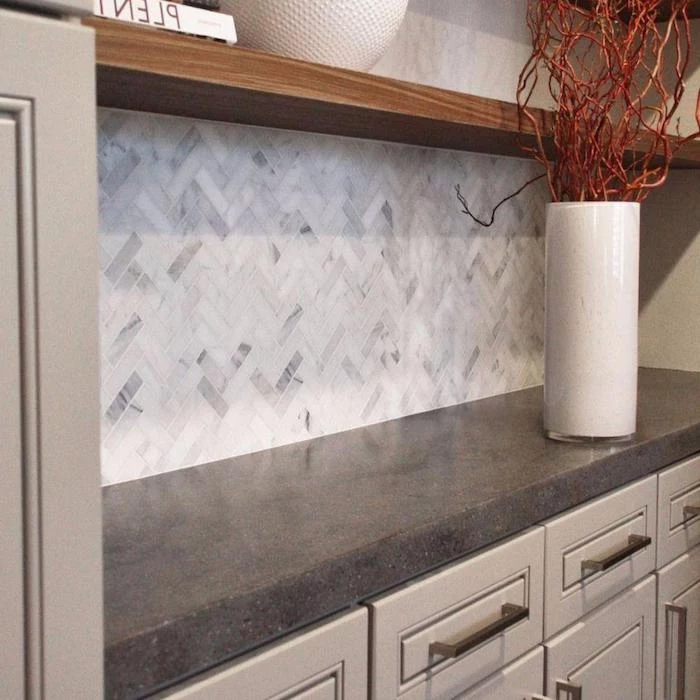
- Herringbone: This dynamic, zigzag pattern adds movement and a touch of European elegance. It requires more cuts and planning but delivers a stunning focal point.

The choice of finish—matte versus glossy—is about more than just looks; it’s about how your kitchen feels and functions. Glossy tiles, a popular choice for subway styles, bounce light around the room, creating a bright and energetic atmosphere. They are incredibly easy to wipe down. Matte tiles, on the other hand, absorb light, offering a softer, more contemporary and organic feel. They are excellent at hiding smudges and water spots but can have a slightly rougher texture.
A standard kitchen backsplash is 18 inches high, the typical distance between the countertop and the bottom of the upper cabinets.
A crucial step: Don’t forget to seal natural stone. Materials like marble, travertine, and slate are porous, meaning they can absorb liquids and stain easily. A high-quality penetrating sealer, such as 511 Impregnator Sealer, creates an invisible barrier without changing the look of the stone. Apply it after installation and before grouting, then re-apply every 1-2 years to keep your beautiful investment protected from cooking splatters.
Peel-and-stick tiles have come a long way from their flimsy origins. High-quality brands like Aspect and Tic Tac Tiles offer convincing 3D textures that mimic real ceramic, stone, and glass. They are a fantastic budget-friendly and renter-friendly option for a quick, high-impact update without the mess of mortar and grout. Just ensure your wall is clean, smooth, and dry before application for the best adhesion.
How high should my backsplash go?
While the standard is to the bottom of the upper cabinets, you have other options. For a dramatic statement, consider a ‘full-height’ or ‘feature wall’ backsplash that extends all the way to the ceiling, especially behind the range or sink. In kitchens without upper cabinets, tiling up to the height of a window frame or a floating shelf creates a polished, intentional look.

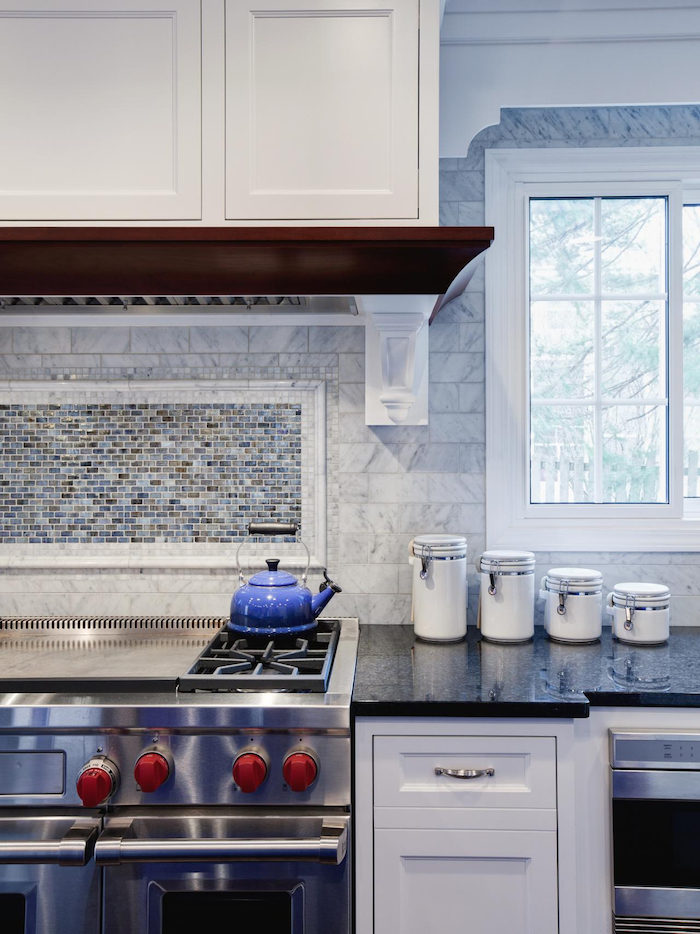
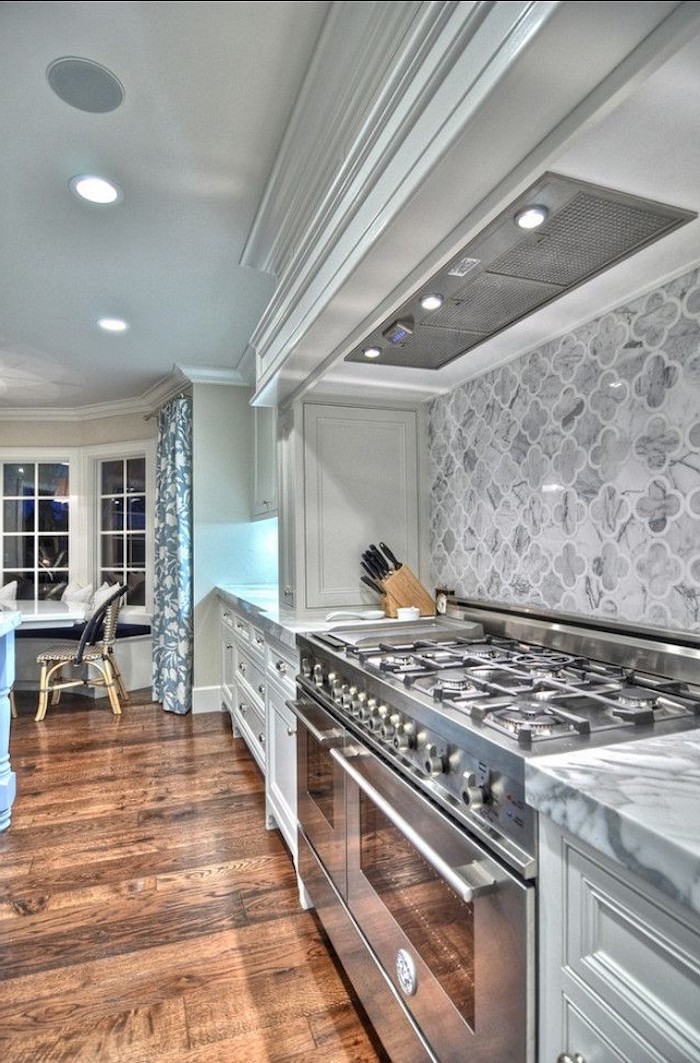
Look for inspiration in the beautifully detailed ‘azulejos’ of Portugal and Spain. These painted tin-glazed ceramic tiles, often in blue and white, tell a story. You can achieve a similar effect by creating a feature panel behind your stove with a few hand-painted decorative tiles, or by using a modern tile series like the ‘Artisan’ collection from Equipe Cerámicas, which emulates the color variation and charm of classic European tilework.
A common but subtle mistake is mismatching the undertones of the backsplash and countertop. A countertop with cool, blue-grey veining (like Carrara marble) might clash with a backsplash tile that has a warm, creamy-yellow undertone. To avoid this, always get samples of your final choices and view them together in your kitchen’s light, at different times of day, before committing.
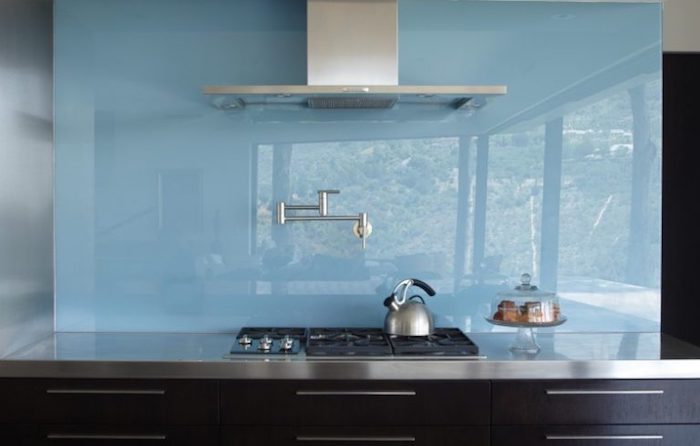
Glass Sheet: Custom-cut to fit your space, a single sheet of back-painted glass offers the ultimate sleek, modern look. There are no grout lines, making it exceptionally hygienic and easy to clean. It provides a glossy, reflective surface.
Glass Tile: Available in mosaics or larger formats, glass tiles offer more design flexibility in terms of color blends and patterns. They reflect light beautifully but do require grout, which needs regular cleaning.
Both options are great for a contemporary feel, with the sheet offering a more minimalist statement.
- Improves readability of cookbooks or recipes on the counter.
- Highlights the texture and color of your chosen tile.
- Acts as functional task lighting for food prep.
The secret is under-cabinet lighting. Whether you choose LED strips or pucks, this addition dramatically enhances the beauty and functionality of your backsplash, making it a true feature.
For a warm, inviting kitchen that feels grounded and earthy, consider terracotta. Whether in a classic square format or a more modern hexagonal shape, its rich, reddish-brown tones bring an organic, Mediterranean or Southwestern vibe. Pair it with white or dark green cabinets for a stunning contrast. Be sure to seal it properly, as it’s a naturally porous material.
Many modern porcelain tiles contain over 40% pre-consumer recycled material, making them an eco-conscious choice.
When shopping, look for tiles with certifications like Green Squared, which verifies that a product meets rigorous sustainability criteria from manufacturing to end-of-life. Brands like Crossville and Dal-Tile offer extensive collections with high recycled content, so you don’t have to sacrifice style for sustainability.

The final details elevate a good installation to a great one. Don’t overlook them.
- Caulk Line: Use a 100% silicone, color-matched caulk where the backsplash meets the countertop. This flexible joint accommodates tiny movements, preventing grout from cracking.
- Outlet Covers: Swap out standard plastic covers for something that complements your new look. Options exist in metal finishes, stone textures, or even paintable versions to match the tile perfectly.
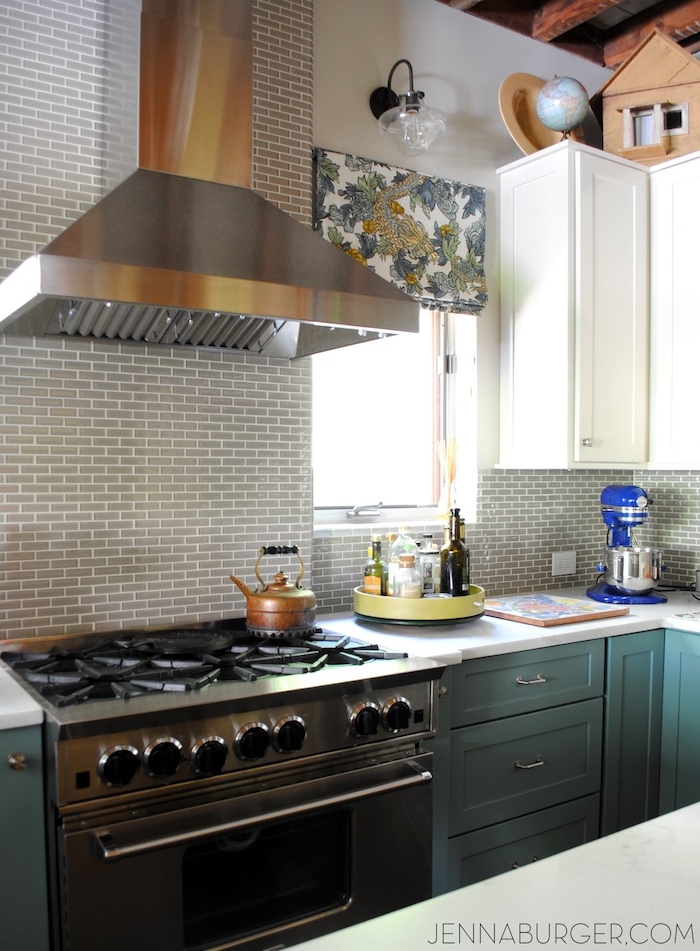
Using large-format tiles—think 12×24 inch or even larger—is a savvy design trick. Not only does it create a more seamless and modern look with fewer distracting grout lines, but it can also be more budget-friendly. Fewer grout lines mean less grout to buy and less labor-intensive work for you or your installer, potentially saving time and money on the project.
For a touch of cottage or modern farmhouse charm, beadboard paneling is an excellent and affordable alternative to tile. It’s easy to install and can be painted any color to match your decor. For kitchen use, be sure to use moisture-resistant MDF panels and finish with a durable, scrubbable semi-gloss or satin paint to ensure it stands up to splashes and is easy to clean.
A 2021 Houzz survey revealed that 89% of renovating homeowners updated their backsplash. Of those, nearly two-thirds chose ceramic or porcelain tile for its durability and versatility.
Can I use that beautiful porcelain floor tile for my backsplash?
Absolutely! The key is the tile’s rating. While you can’t use wall tile on the floor (it’s not strong enough to be walked on), you can almost always use floor tile on the wall. Floor tiles are dense and durable, making them a fantastic, hard-wearing option for a backsplash. This opens up a huge range of possibilities for size, texture, and style.


