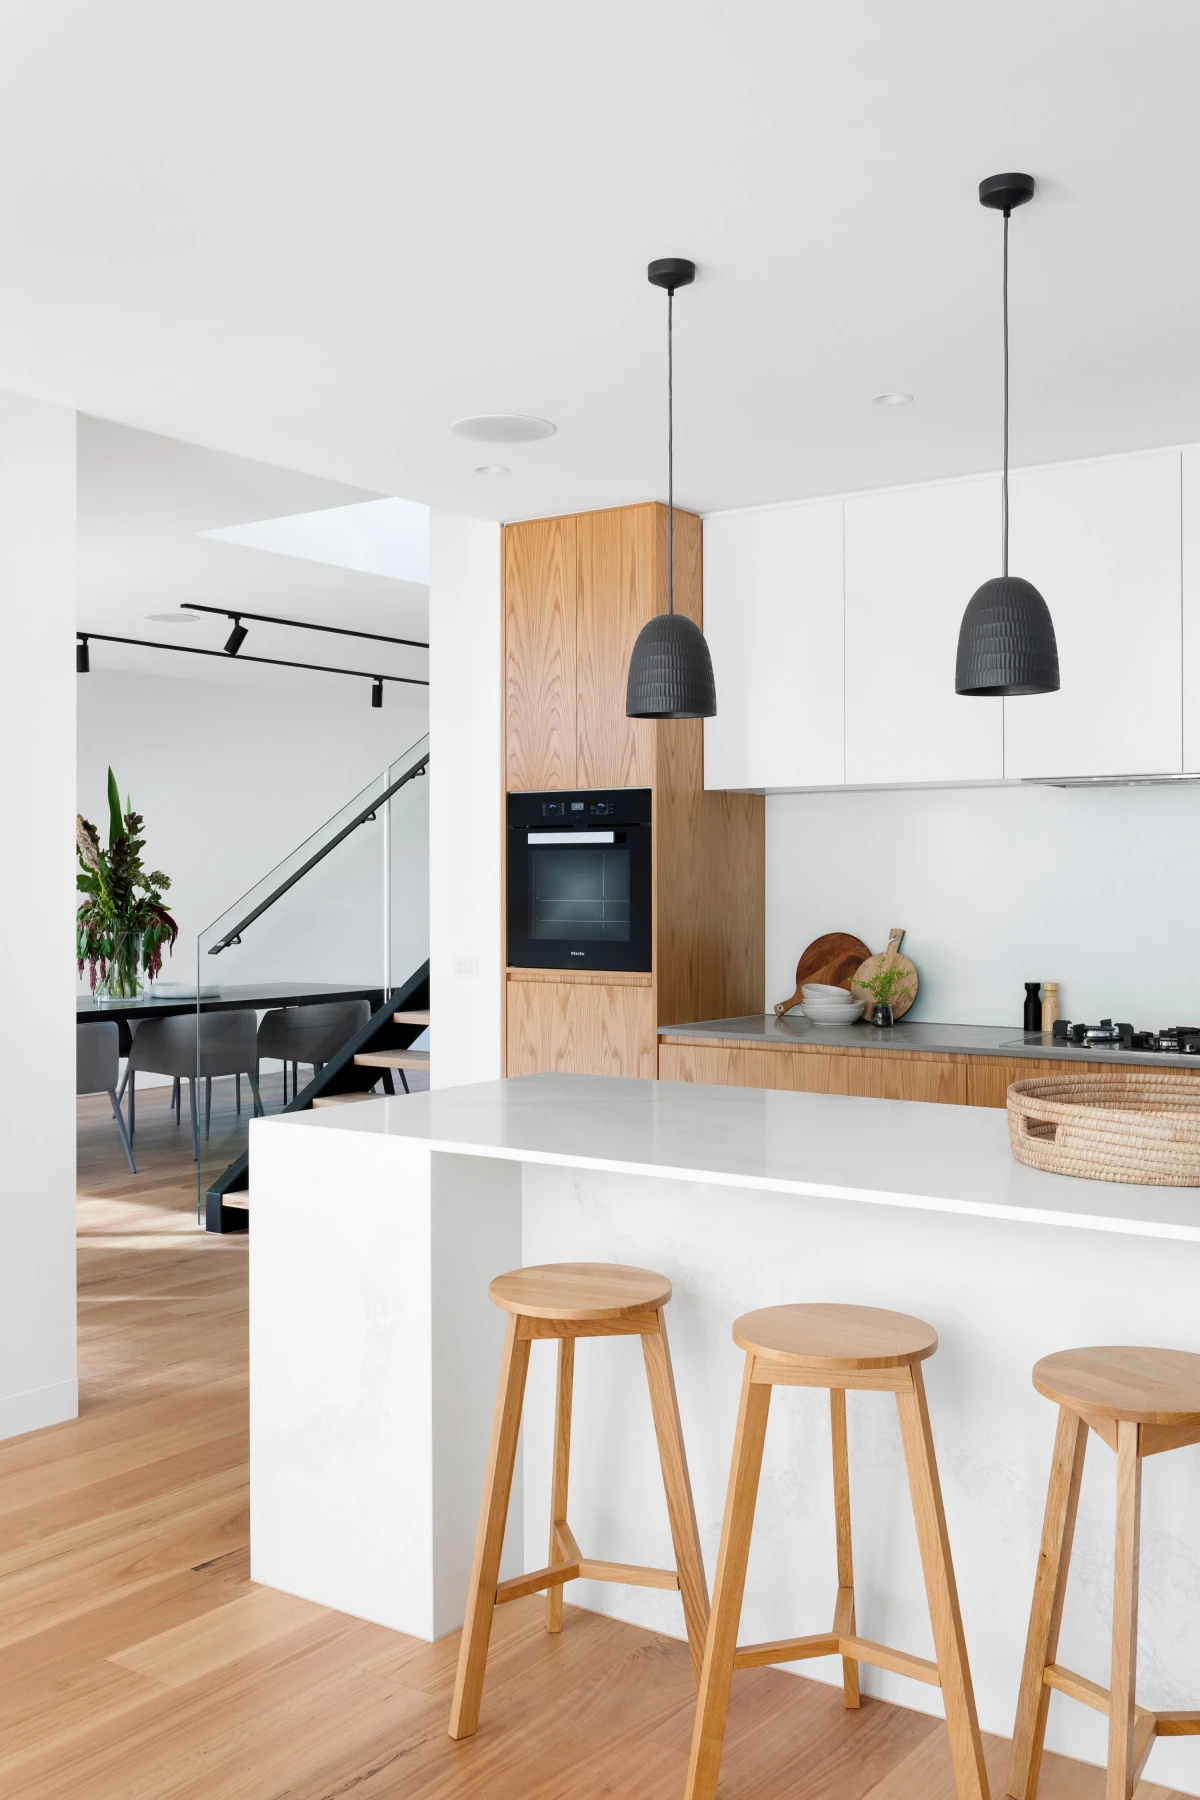
Your Kitchen Isn’t Too Small. It’s Just Set Up Wrong.
I’ve walked through more kitchens than I can count, from sprawling high-end models that are a nightmare to cook in to tiny, older galley kitchens that just… flow. The difference never comes down to the price tag or the square footage. It’s all about the system.
In this article
- 1. The Countertop Crisis: It’s a Workshop, Not a Warehouse
- 2. The Cabinet Conundrum: Organize by Action, Not by Item
- 3. The Black Hole Problem: Conquering Wasted & Corner Space
- 4. The Static Shelf Mistake: A Two-Minute Fix
- 5. The Drawer Dilemma: Beyond the Junk Drawer
- 6. The Decluttering Delusion: Beyond Just Tossing Trash
- Inspiration:
So often, people tell me, “I just need more space!” But after we chat for a bit, they realize what they actually need is a better layout. A messy kitchen isn’t a moral failing; it’s a design problem. It’s a sign that the space is actively fighting against the way you need to use it.
And let’s be real, organizing isn’t just about buying a bunch of matching bins. That’s the fun part you do at the end. True, lasting organization is about engineering your kitchen for efficiency. It’s about making the room work for you, not against you. Modern kitchens aren’t just a simple triangle anymore; they’re a collection of zones for prepping, cooking, cleaning, and storing. When those zones get jumbled, you end up doing laps around your kitchen island just to make a simple salad. This guide is about fixing those deep, frustrating problems for good.
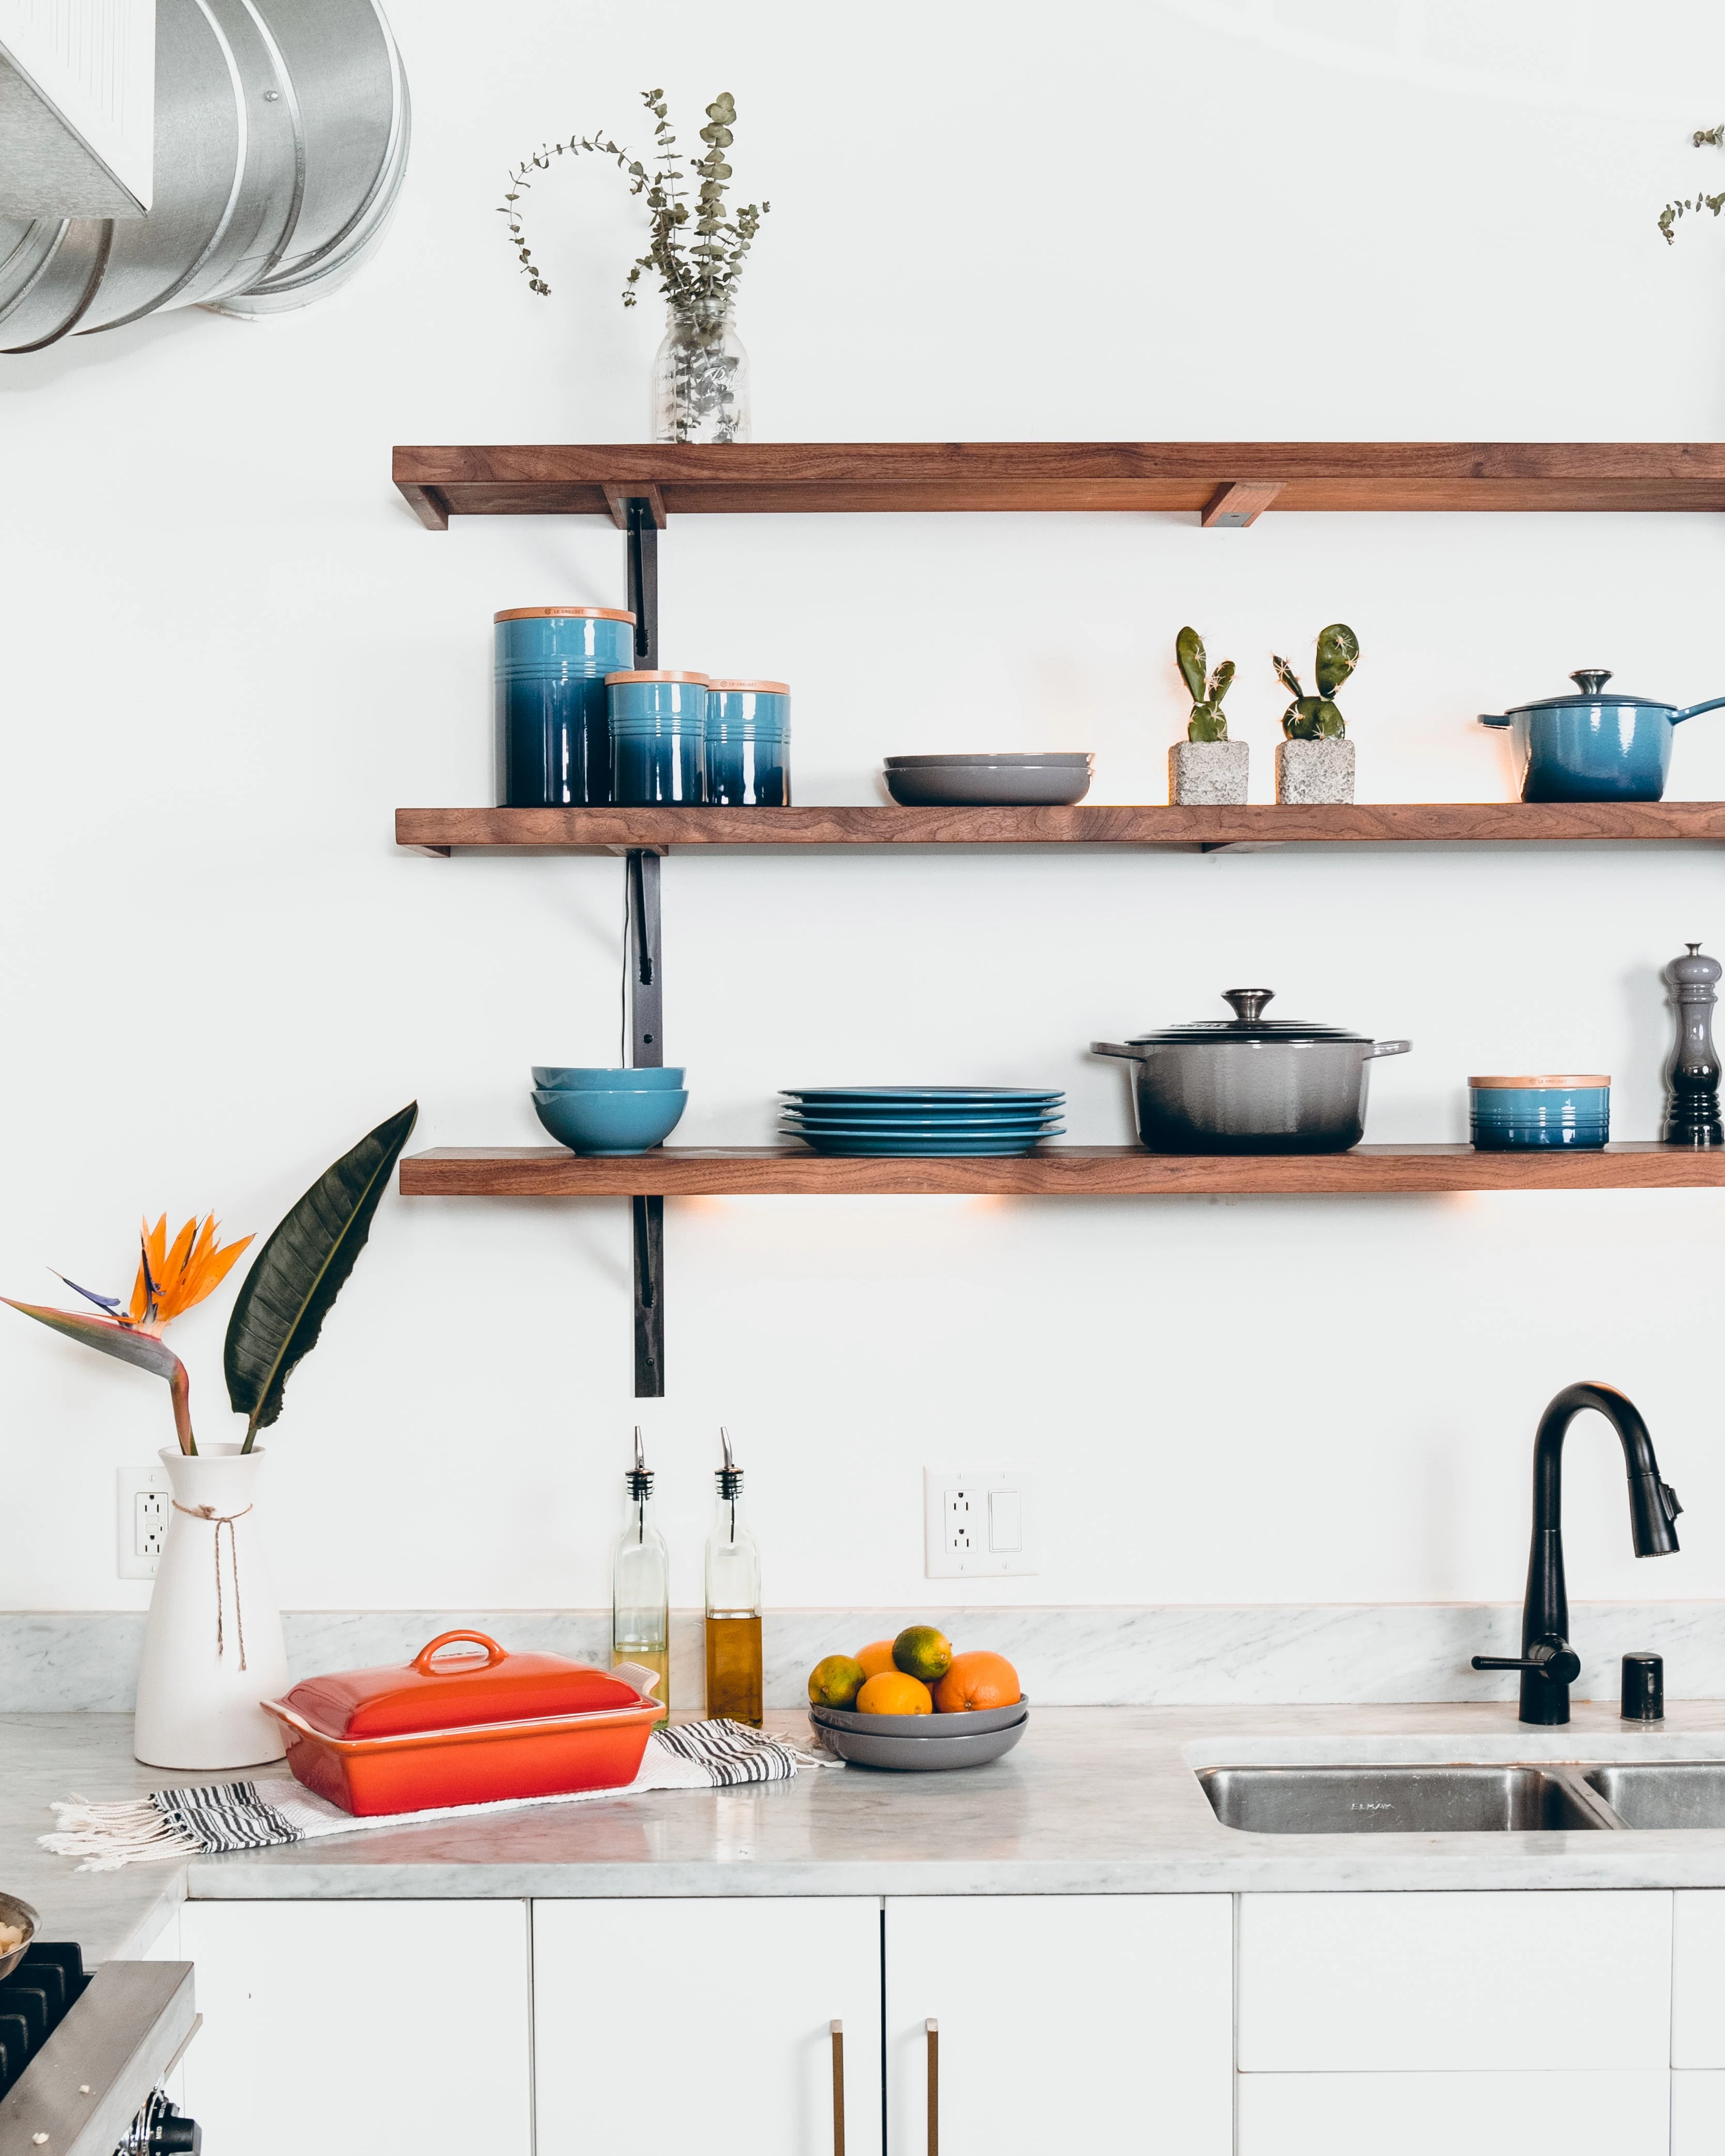
1. The Countertop Crisis: It’s a Workshop, Not a Warehouse
The number one complaint I hear? Cluttered countertops. It’s so common to see every single small appliance lined up like an army on display—the stand mixer, the blender, the air fryer, you name it. This leaves you with tiny, awkward patches of space to actually do any work.
Think of your countertop as your primary workshop. It needs to be clear so you have room for the real work of chopping, mixing, and plating. Leaving everything out is like a mechanic trying to fix an engine while it’s covered in every tool they own. It just doesn’t work.
Why Clear Counters Are a Safety Issue, Too
In the world of kitchen design, there’s this idea of “landing zones.” Basically, it’s just dedicated counter space next to your appliances. For example, you really want at least 15 inches of clear space next to your stove to safely set down a hot pan. And you need a good 18 to 24 inches next to the sink for a stack of dirty dishes or a rack of clean ones. The ideal prep space is a solid, continuous 36-inch stretch of counter.

When your appliances creep into these crucial zones, your kitchen becomes a hazard. I once heard a story about someone who, having no other clear spot, placed a screaming-hot pot onto a glass cutting board. The board shattered instantly, sending hot food flying everywhere. That’s a direct result of poor counter management.
The Frequency Audit: Your Path to Clear Counters
I don’t just tell people to put stuff away. Instead, we do a quick “frequency audit.” It’s simple: for one week, just jot down a note every time you use a small appliance. This gives you actual data on your habits. From there, we sort everything into three tiers:
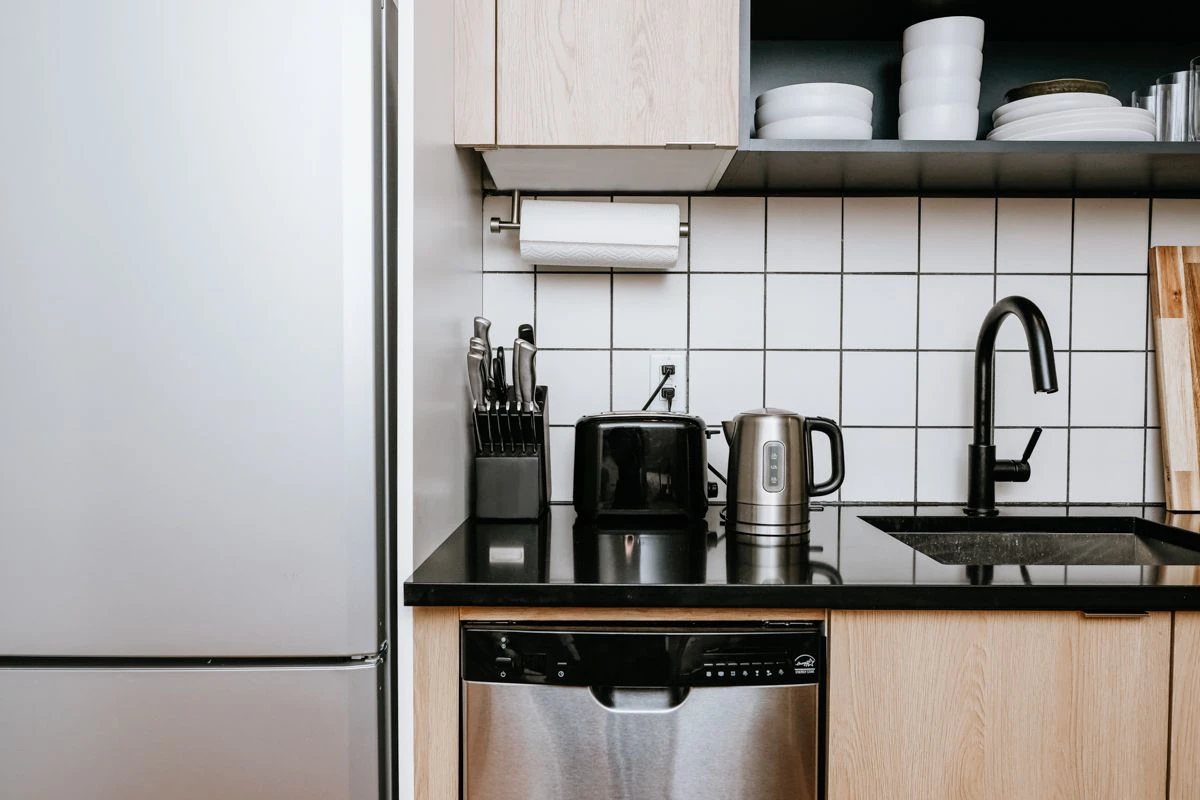
- Daily Drivers: These are the things that earn a spot on the counter. We’re talking about your coffee maker and maybe a toaster. They get used so often that putting them away would be more annoying than leaving them out.
- Weekly Warriors: This could be the blender you use for smoothies or a food processor. These guys need a home that’s super easy to get to, but not on the counter. A deep drawer or a low cabinet right in your prep area is perfect.
- Occasional Guests: Here’s where the stand mixer, waffle iron, and pasta maker live. These can be stored in less convenient spots—think the cabinet over the fridge, a high pantry shelf, or even a spot in a nearby closet.
Honestly, we usually find that about 80% of the clutter comes from things that are used less than once a month. This little audit clears the counters with purpose, not just guilt.
2. The Cabinet Conundrum: Organize by Action, Not by Item
The next big mistake is organizing cabinets by category. It sounds logical, right? All the glasses here, all the plates there. But it completely ignores how you actually move in your kitchen. If your coffee maker is on one side of the room but your mugs are on the other, you’re making two stops for one cup of coffee. It’s a small thing that adds up to a lot of wasted steps.
A Smarter System: The Zone Method
Your most valuable storage space is the area between your shoulders and your knees. This is the stuff you can grab without stretching or deep bending. That prime real estate should hold your most-used items. Instead of organizing by item, we organize by task.
- The Cooking Zone: In the cabinets and drawers around your stove, store your pots, pans, and baking sheets. Keep cooking utensils like spatulas and spoons in a crock on the counter or in the drawer right next to the stove. Spices and oils belong here, too.
- The Prep Zone: This is your main stretch of counter. The drawers and cabinets below should hold mixing bowls, measuring cups, and cutting boards. Your knives should live here as well.
- The Cleaning Zone: Around your sink and dishwasher, store dish soap and sponges (obviously). But here’s the game-changer: the cabinet right next to the dishwasher is the perfect home for your everyday plates, bowls, and glasses. Why? Because you can unload the dishwasher with a simple pivot. No walking required.
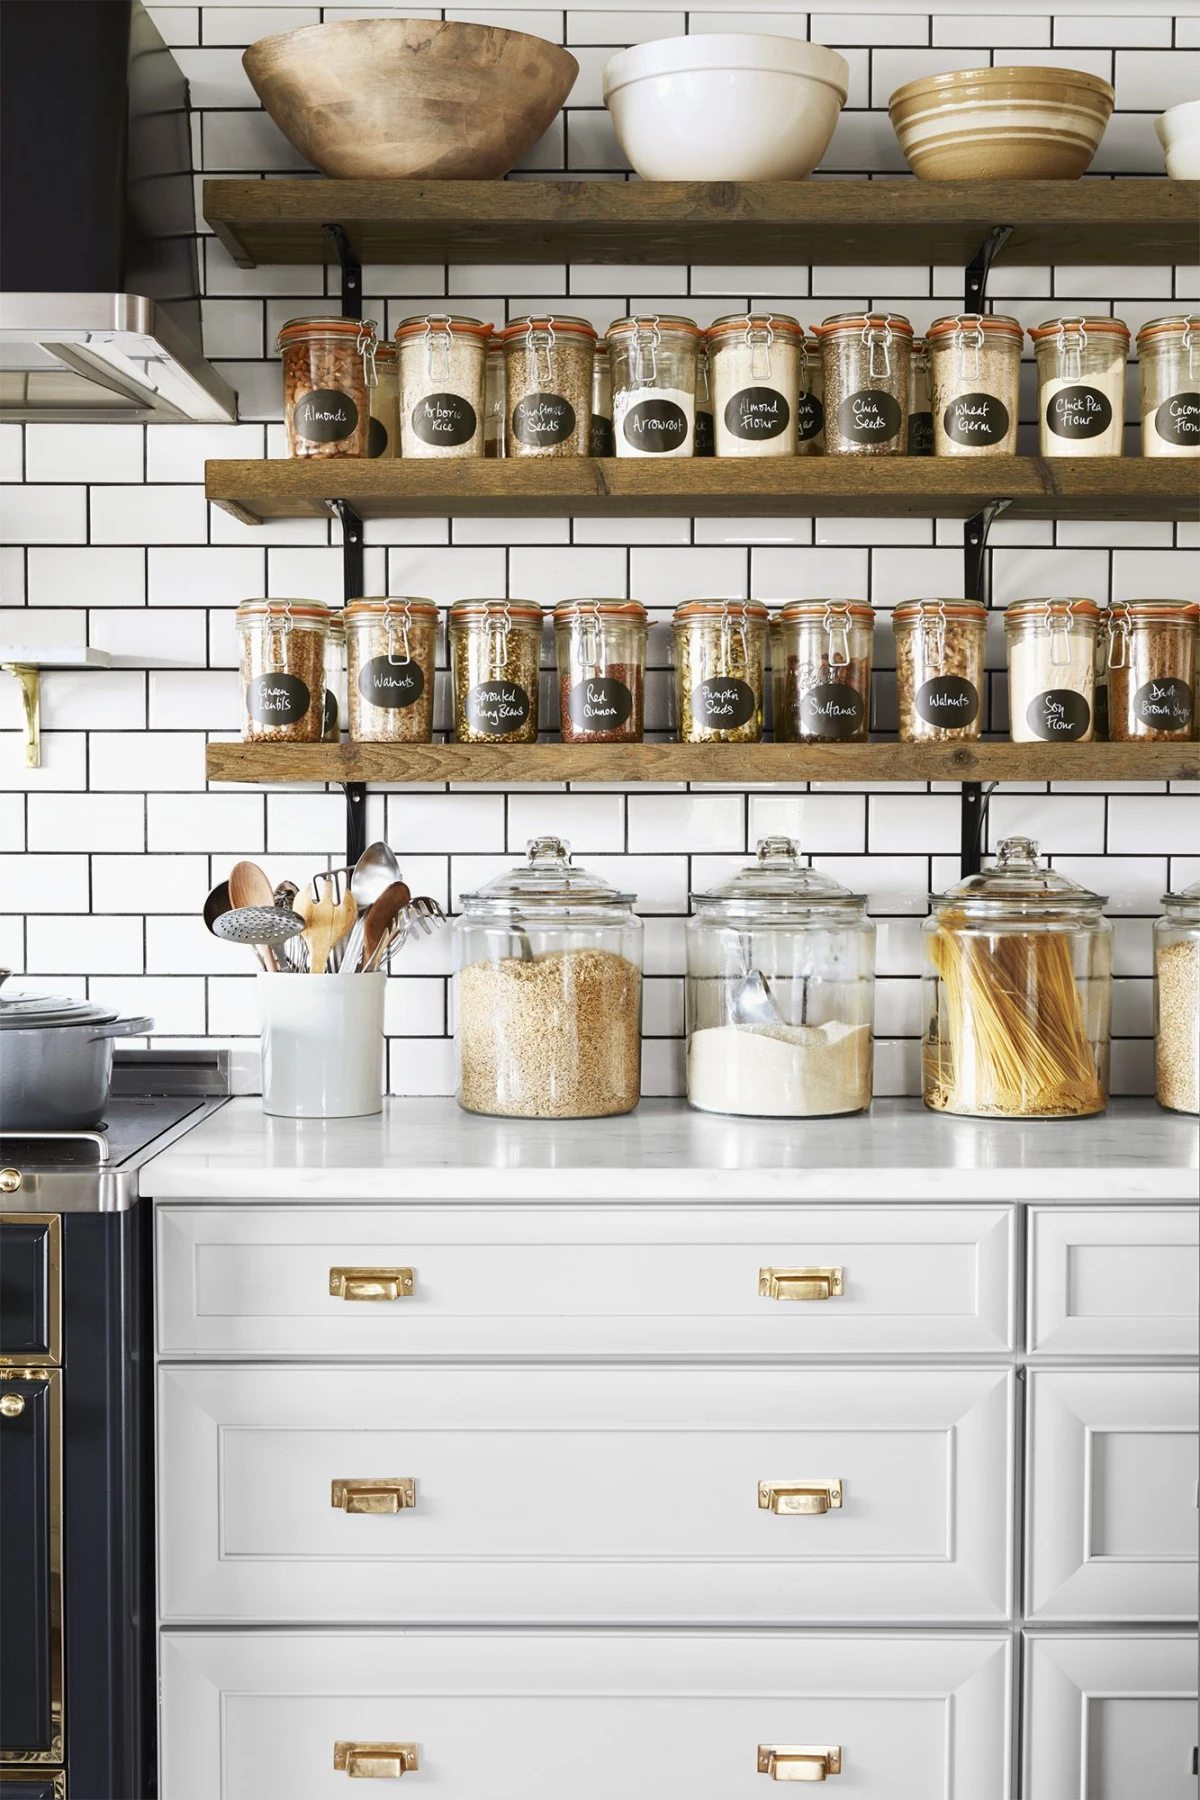
- The Consumables Zone: This is your pantry and fridge. Try to group items by meal—breakfast stuff together, dinner staples together. It makes writing a grocery list so much faster.
Heads up for awkward layouts: What if your kitchen is tiny and the sink is practically on top of the stove? Don’t panic. You can still apply the zone principle, just on a smaller scale. Your “prep zone” might just be one cutting board, but you can still make sure the knives, bowls, and salt are within arm’s reach of that spot. It’s about creating mini-stations, even if they overlap.
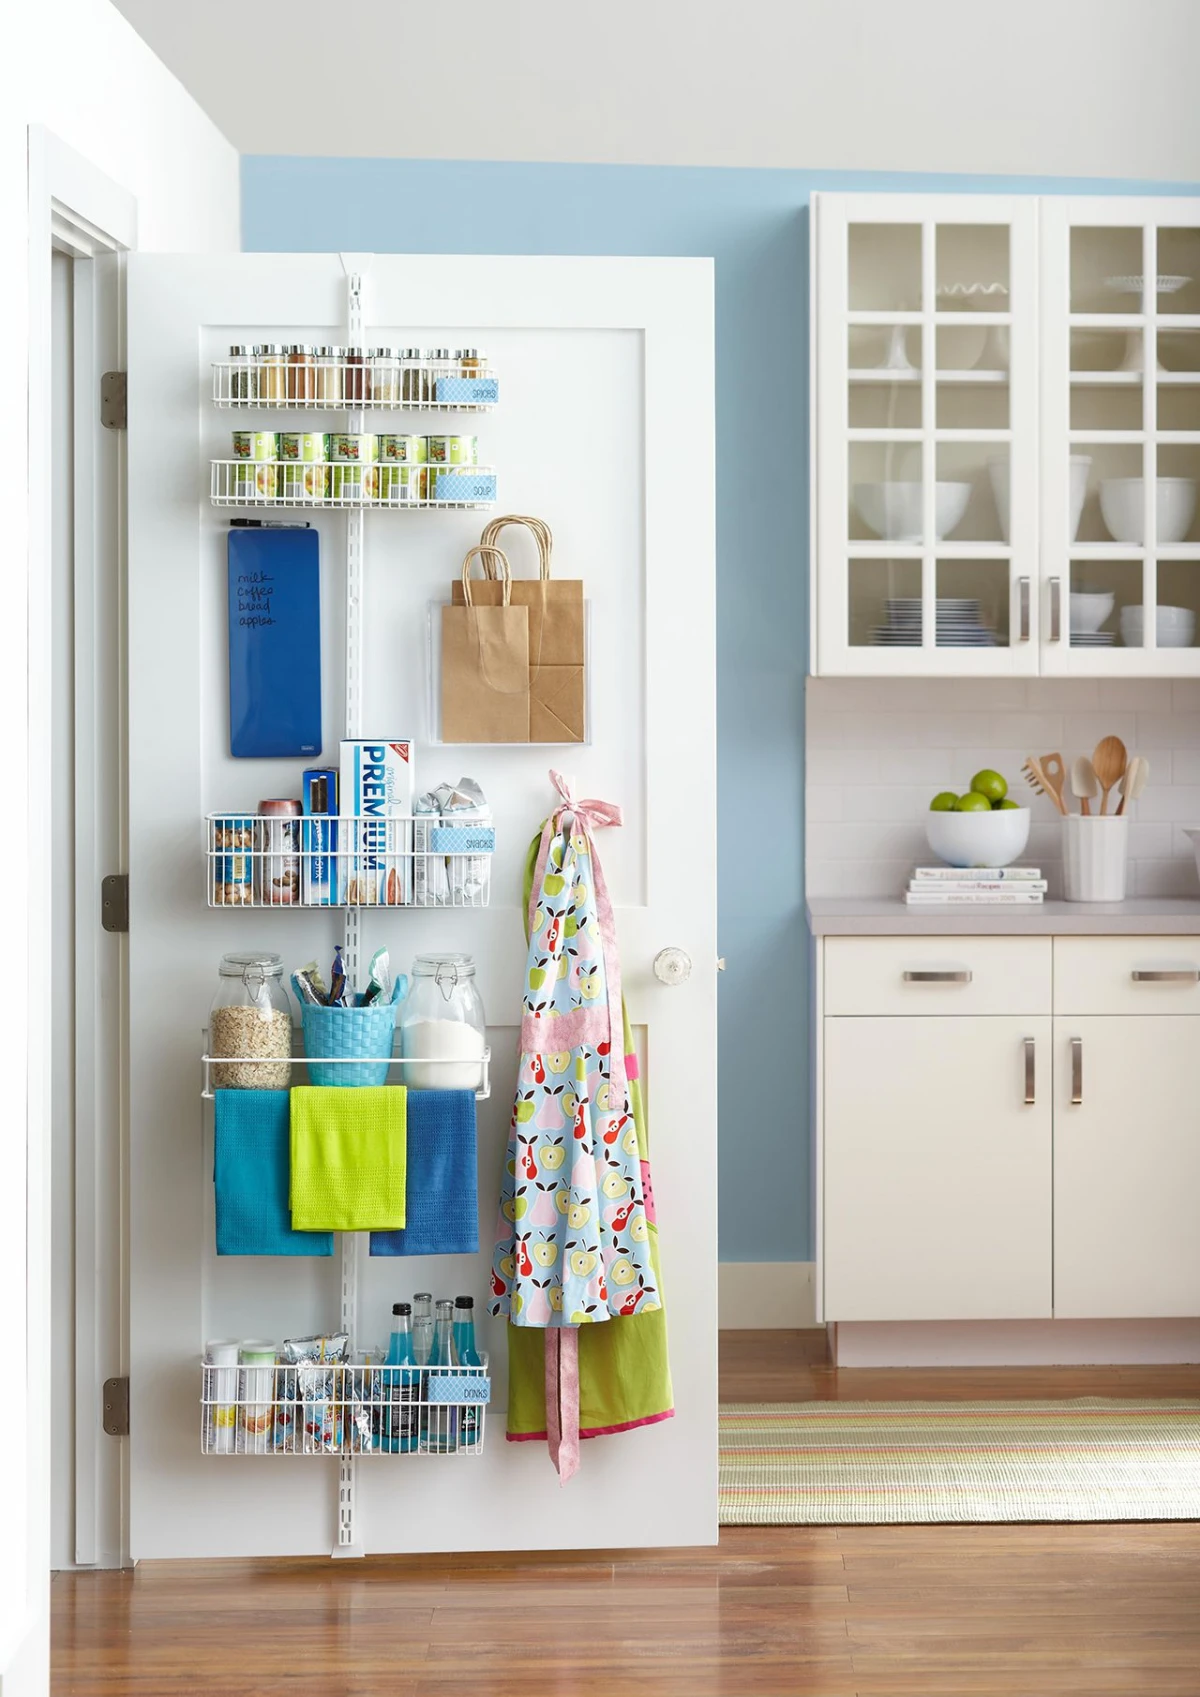
3. The Black Hole Problem: Conquering Wasted & Corner Space
When someone tells me they’ve run out of room, I can almost always find more. We’re often blind to the potential right in front of us—the 10 inches of dead air above our soup cans or the completely empty space inside a cabinet door.
Unlocking Hidden Storage
Let’s find you some more space without calling a contractor.
- Go Vertical with Shelf Risers: This is the single most effective, budget-friendly trick in the book. If you have tall shelves holding short items like mugs or cans, you’re wasting half the space. Simple wire shelf risers instantly double your storage. You can find them at Target or The Container Store for about $15 to $25 a set.
- Use Your Cabinet Doors: The inside of a cabinet door is a goldmine. You can add small racks for spices, a holder for pot lids, or a bar to hang spray bottles. Quick tip: After you install something, close the door slowly to make sure it doesn’t hit the items on your shelves. Don’t ask me how I know this.
- Look Up High: The space between your upper cabinets and the ceiling is perfect for long-term storage. This is for the big roasting pan, seasonal platters, or that huge punch bowl. Just be sure to put them in sealed containers to protect them from kitchen grease and dust.
And Now, For the Dreaded Corner Cabinet…
Ah, the corner cabinet. The place where Tupperware lids and forgotten gadgets go to die. You have two main options for taming this beast.
1. The Lazy Susan: This is the classic rotating tray. It’s affordable and makes it easy to spin things from the back to the front. The downside? Things can (and will) fall off the sides, getting lost in the abyss.
2. Blind Corner Pull-Outs: These are the more advanced solution. They are systems of shelves that articulate and slide completely out of the cabinet, bringing everything into the light. They are incredible but can be pricey and more complex to install.
4. The Static Shelf Mistake: A Two-Minute Fix
This one is so simple, yet almost nobody does it. Most people just accept the shelf height in their cabinets as a permanent feature. This leads to cereal boxes being shoved in sideways or a single row of cans with a foot of wasted air above them.
Most modern cabinets have adjustable shelves! Look inside—you’ll see a series of little holes. The shelves rest on tiny pins. Adjusting them is a total game-changer.
Your 15-Minute Challenge: Go pick ONE messy cabinet right now. Empty it completely. Take out the shelf, move the four little support pins up or down to better fit the height of what you’re storing (aim for just 1-2 inches of clearance), and put it all back. It’s a tiny task that will instantly show you the power of this method.
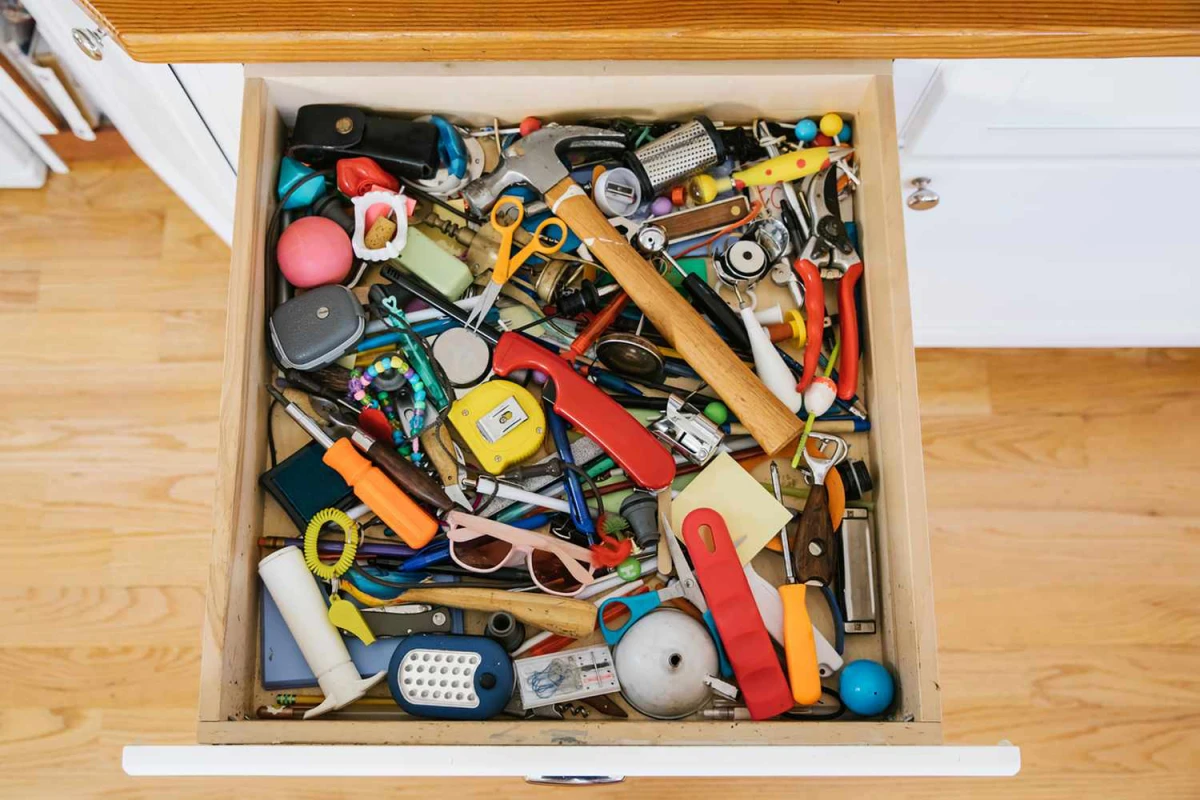
5. The Drawer Dilemma: Beyond the Junk Drawer
Every home has one: the junk drawer. It’s a tangled mess of pens, batteries, and mystery keys. While it feels convenient, it’s a black hole for valuable space. The goal isn’t to eliminate it, but to transform it.
Tame the Junk Drawer, Create a Utility Drawer
A single open drawer is an invitation for chaos. The solution is to subdivide it. I love using high-quality, interlocking drawer organizers (you can find great ones from brands like Madesmart or iDesign). Create a specific spot for pens, one for tape, one for batteries, etc. If something doesn’t have a designated spot, it doesn’t belong here.
Common Pitfall: Your new organizers are sliding all over the place. The fix is simple: a few dots of museum putty or a cut-to-fit non-slip liner underneath will hold them perfectly still.
The Magic of Deep Drawers
Honestly, the best thing to happen to kitchen design is the shift from lower cabinets with doors to deep drawers. With a traditional cabinet, you have to get on your hands and knees to find anything in the back. A full-extension drawer brings the entire contents of the cabinet out to you.
If you’re stuck with standard cabinets, you can retrofit them with pull-out shelves. It’s a weekend project a handy person can tackle in about two hours. Good hardware from a pro-level supplier can run $100-$300 per cabinet, but you can find more budget-friendly options at big-box stores like Home Depot or Lowe’s that do the job just fine. A quick tip: When measuring, be sure to measure the cabinet’s clear opening width, not the whole cabinet, because the hinges get in the way.
6. The Decluttering Delusion: Beyond Just Tossing Trash
Most people think decluttering is about finding things to throw away—the chipped mug or the expired spice. That’s part of it, but true decluttering is about getting rid of anything that obstructs your kitchen’s function, even if it’s a perfectly good item.
My Favorite Trick: The Purgatory Box
Getting rid of stuff is hard. So, I use a method called the “Purgatory Box.”
Here’s how it works: Find all the kitchen items you haven’t touched in at least six months. We’re not throwing them out. We’re putting them in a box, taping it shut, and writing today’s date on it. Then, we move that box to the garage or a closet.
If you need something from the box in the next six months, go get it! No guilt. But if the box is still sealed after that time, it gets donated or sold—without reopening it. This removes the anxiety of a permanent decision. And to be frank, 90% of the time, that box is never opened.

Oh yeah, a quick tip: If you’re putting a heavy item like a stand mixer in the box, store it on a low, easy-to-reach shelf in the garage, not buried in the attic. The easier it is to retrieve, the more honest you’ll be about whether you actually need it.
Ultimately, organizing your kitchen is about creating a system where the easiest choice is also the most efficient one. You don’t need a bigger kitchen; you just need a smarter one. When you fix these core problems, you stop fighting your kitchen and finally start enjoying it.
Inspiration:
How do you hide the stand mixer without breaking your back?
The answer lies within your cabinets, not on your counters. For heavy appliances like a KitchenAid mixer, look into installing a specialized appliance lift mechanism, such as the heavy-duty models from Rev-A-Shelf or Hafele. This hardware installs onto a cabinet shelf, allowing the entire platform to swing up and out to counter-height, locking securely in place. When you’re done, it gracefully retracts back into the cabinet. It’s a small investment in hardware that completely eliminates the struggle of lifting a 25-pound machine, making you much more likely to actually use it.


