The Unfiltered Guide to Black Kitchen Cabinets (From a Pro)
I still remember the first time a client came to me asking for black kitchen cabinets. It was a while back, and my main supplier literally raised an eyebrow. At the time, it felt like a pretty bold, almost radical choice. The world was swimming in white shaker doors and honey oak—the safe bets. Black was for high-end design magazines, not for a family home. Oh, how things have changed.
In this article
Today, black cabinets are a staple, a go-to for a sophisticated and timeless look. But here’s the honest truth: getting them right is so much more than just pointing to a dark swatch in a paint deck. Over my career building and fitting custom kitchens, I’ve seen black kitchens that are absolutely breathtaking. And, to be frank, I’ve also been called in to fix black kitchens that felt like a dark cave and showed every last fingerprint and smudge.
The difference is all in the details. It’s about how you manage light, picking the right materials for the job (which might surprise you), and choosing a finish that can actually handle daily life. This is about craft, not just trends. My goal here is to give you the practical, insider knowledge I’ve picked up, so you end up with a kitchen you’ll love for years, not just one that looks good on Instagram for a season.
First Things First: Let’s Talk About Light
Before we even think about wood or paint, we have to talk about light. This is, without a doubt, the most important piece of the puzzle for a successful black kitchen. White cabinets are great because they reflect light, bouncing it around and making a space feel bigger and brighter. Black cabinets do the exact opposite—they absorb it.
Think of it this way: the black surfaces are basically eating the light you pour into the room. This means a kitchen with black cabinets needs a LOT more light just to feel normal, let alone bright and welcoming. This is why your lighting plan isn’t the last thing you think about. It’s step one.
I always tell my clients we need three layers of light, and none are optional:
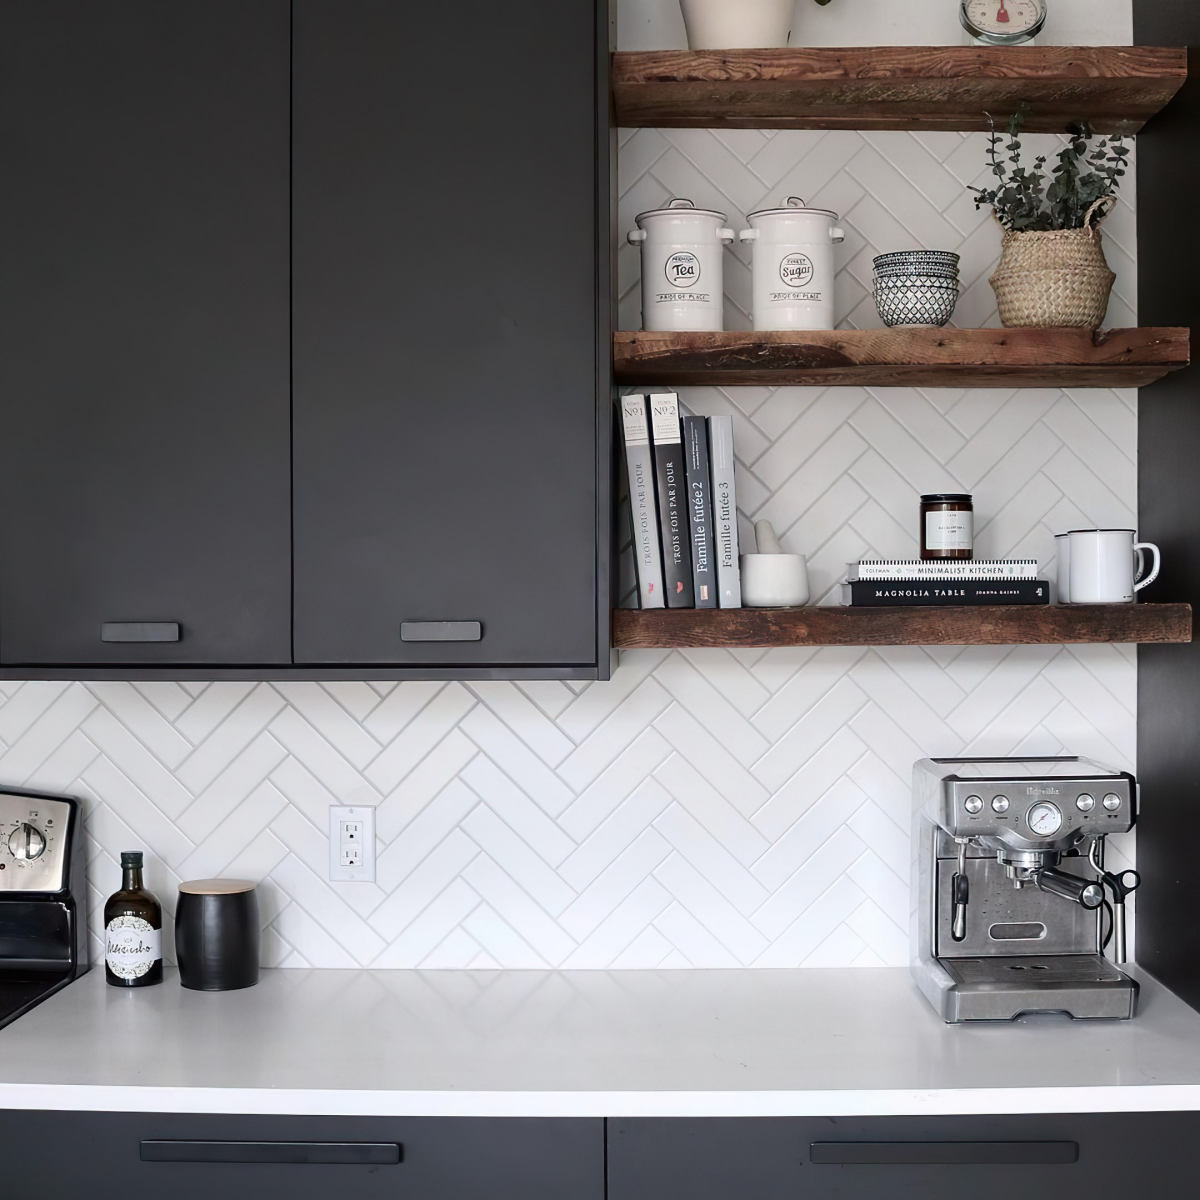
- Ambient (Overall) Lighting: This is your general room lighting. Recessed cans are the workhorse here. But don’t just dot them in the middle of the ceiling. A pro move is to place them strategically so they wash light down the face of the cabinets. Heads up: hiring an electrician to install recessed lighting can run you between $150 and $300 per light, so this needs to be in your budget from day one.
- Task Lighting: This is non-negotiable. Under-cabinet lighting is your best friend in a black kitchen. It lights up your countertops for chopping and prep, but it also casts a beautiful glow that prevents the upper cabinets from feeling like a looming black void. Modern LED strips are fantastic. Look for a high CRI (Color Rendering Index) of 90 or more, which ensures the light shows the true colors of your food and counters. I usually aim for a color temperature around 3000K for a clean, warm white that isn’t too yellow or harshly blue. Pro-grade LED strips can cost around $30 to $60 per linear foot installed, but they’re worth every penny.
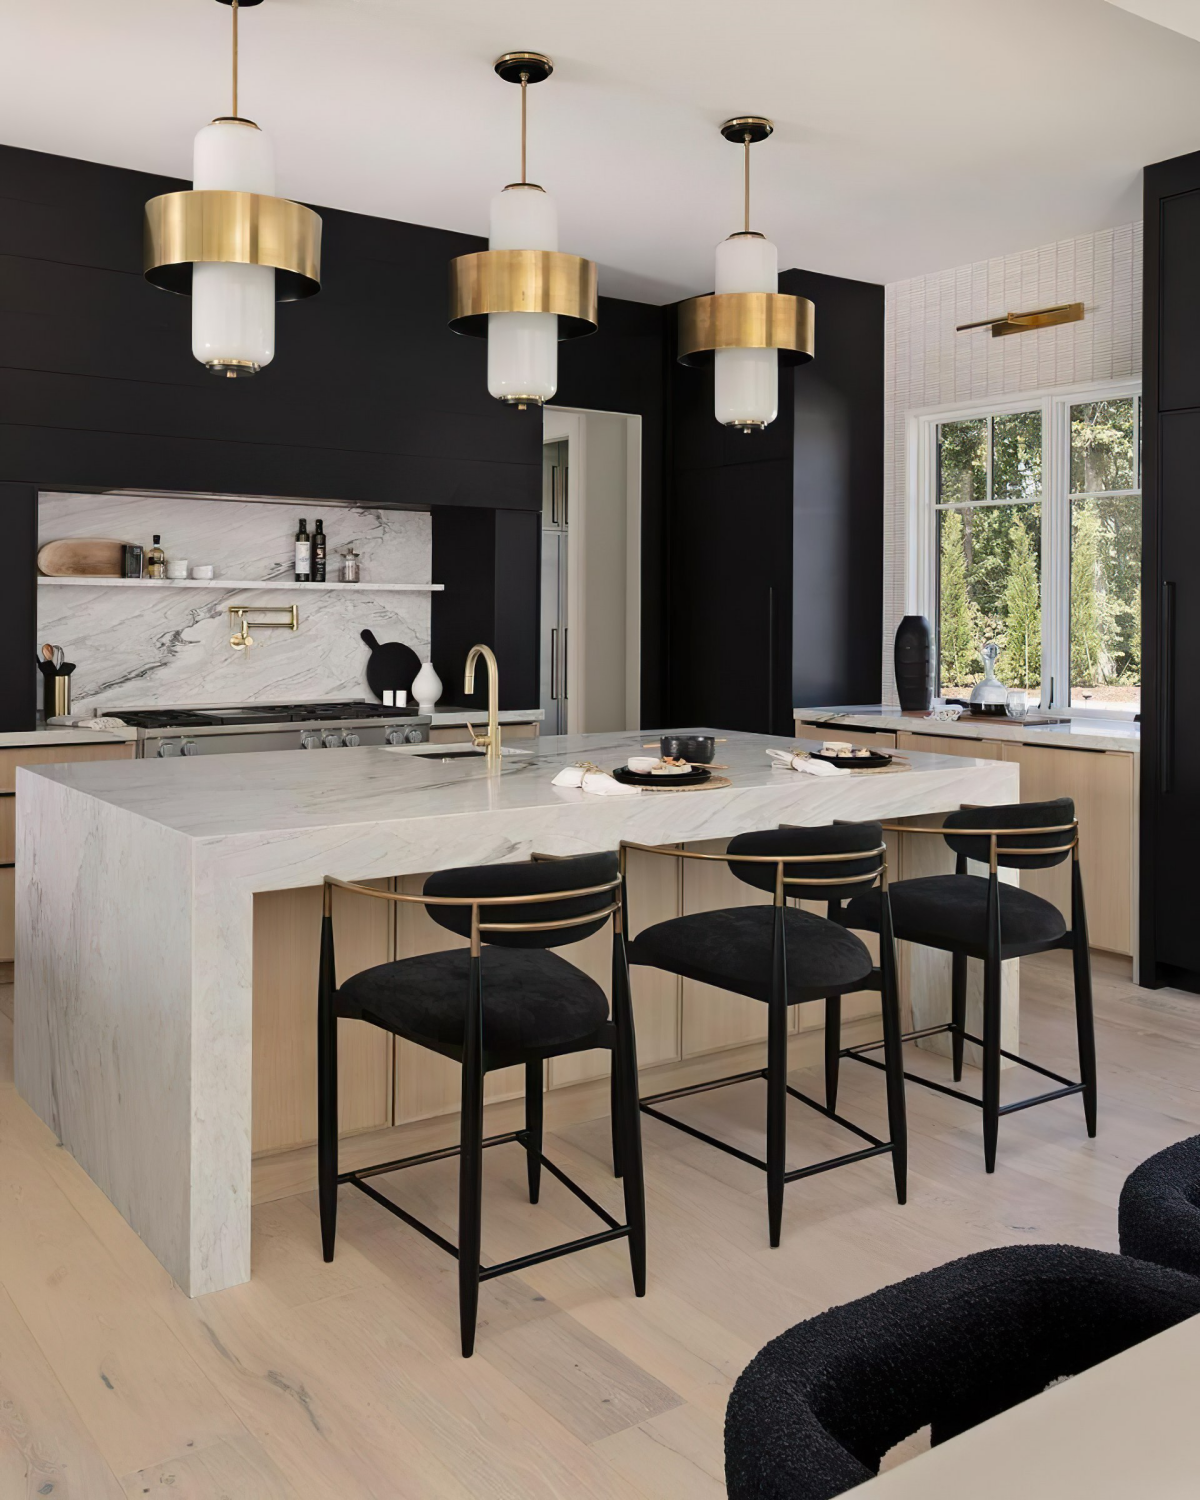
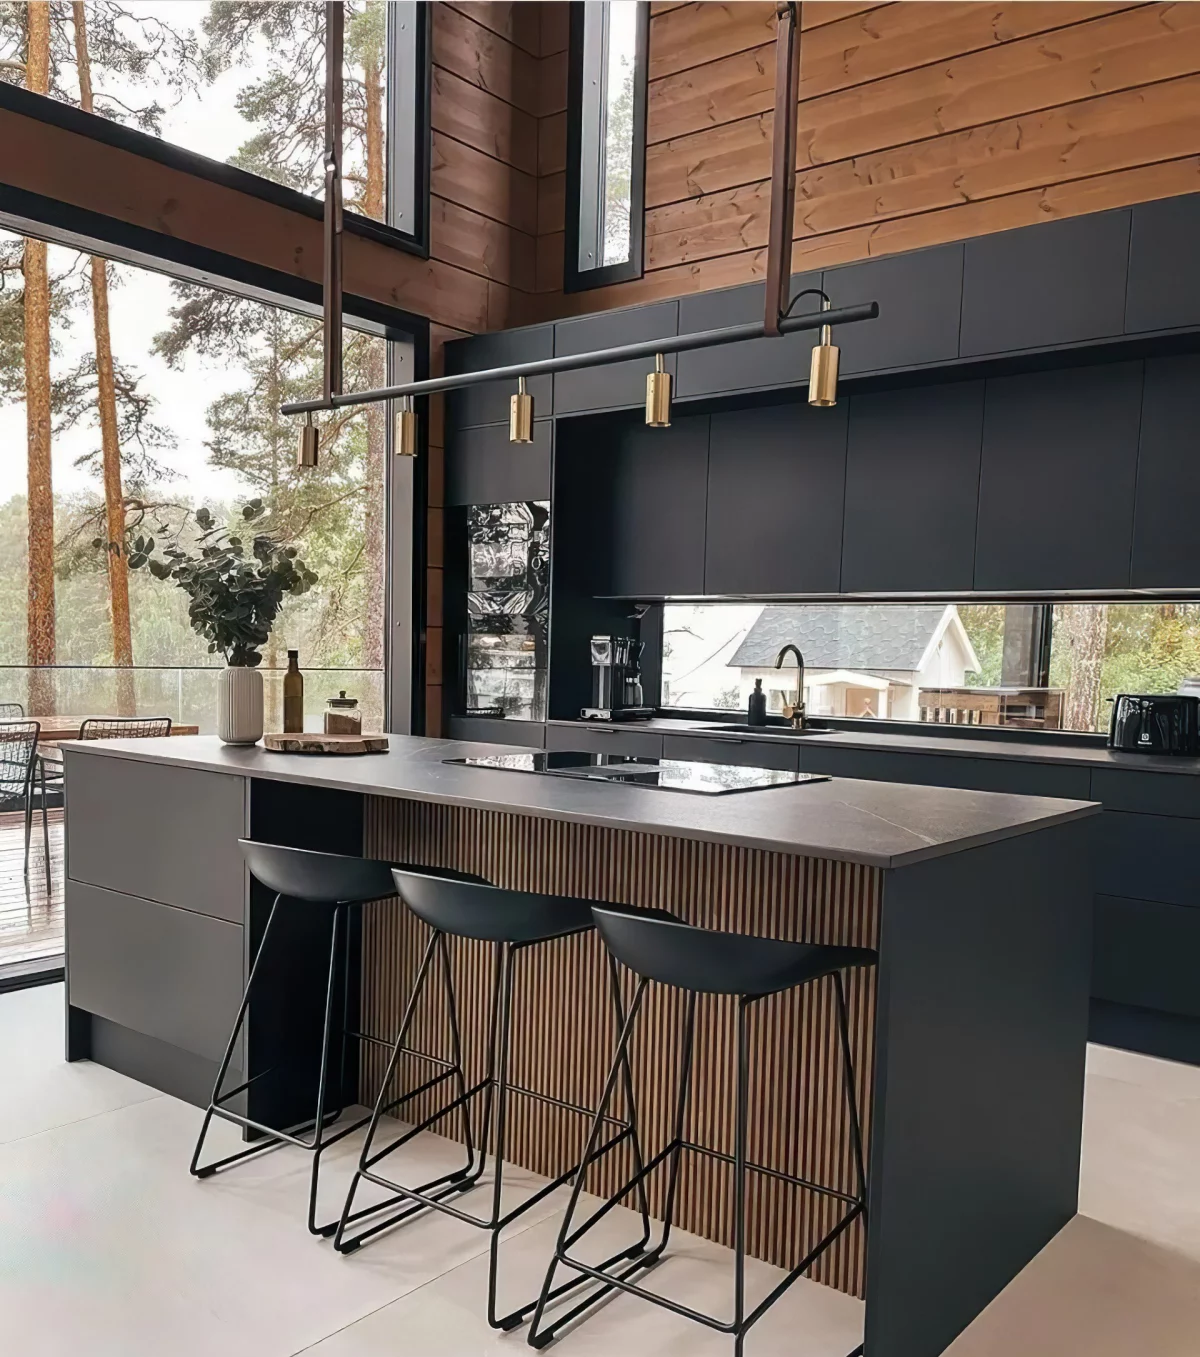
- Accent Lighting: This is the fun part—the jewelry. Think pendants over your island or a cool sconce above the sink. These fixtures add style, but they also serve as another source of light to break up the dark surfaces and add a bit of sparkle.
Seriously, this stuff matters. I once had a client who wanted matte black cabinets but only had one central light fixture. We mocked it up for her by putting a huge black panel in the space, and the mood just tanked. It felt heavy and sad. We ended up mapping out a plan with twelve recessed lights and full under-cabinet lighting. The difference was night and day. The kitchen felt chic and cozy, not cavernous.
What Your Cabinets Are Actually Made Of
A beautiful black cabinet is only as good as the box it’s built on and the door that’s hanging on it. The right choice here depends on your budget and the style you’re going for.
The Cabinet Doors: The Pro’s Secret
When you’re talking about a painted black cabinet, most people assume solid wood is the best material for the doors. It’s often not. Here’s why: wood naturally expands and contracts with changes in temperature and humidity. On a shaker-style door, this movement will eventually cause tiny hairline cracks in the paint right where the pieces of wood meet. On a white cabinet, you might not notice it. On a solid black cabinet? It sticks out like a sore thumb.
This is why so many high-end cabinet shops, including mine, prefer to use MDF (Medium-Density Fiberboard) for painted doors. Let’s do a quick smackdown:
- MDF for Painted Doors: It’s a super stable, single piece of material. There’s no wood grain and no joints that move, which means your beautiful, smooth paint finish is far less likely to crack over time. It provides that flawless, almost liquid-smooth surface you want for a modern black cabinet. The only real con is that some people mistakenly think of it as a ‘cheap’ material.
- Solid Wood for Painted Doors: It feels ‘premium’ and is incredibly strong. But, as I mentioned, that beautiful paint job is almost guaranteed to develop hairline cracks at the joints. The natural wood grain can also sometimes telegraph through the paint, creating a slightly textured look you might not want.
I’ve had to walk so many clients through this. They come in thinking MDF is a dirty word, but for a solid painted finish, it’s simply the superior material for performance and a lasting perfect look. For a stained cabinet where you want to see the wood grain? You need solid wood. For a painted one? MDF is the professional’s choice for doors, hands down.

The Finish: Why This Isn’t a Weekend DIY Project
The biggest difference between a black cabinet that looks incredibly high-end and one that looks cheap is the finish. A true professional-grade finish is not something you can achieve with a roller and a can of paint from Home Depot.
The gold standard in the industry is a conversion varnish. This is a special catalyzed lacquer that’s sprayed on in a clean, controlled spray booth. It’s what you get with good quality custom or semi-custom cabinets.
Here’s why it’s a game-changer:
- It’s Tough as Nails: Conversion varnish cures through a chemical reaction, creating an extremely hard, non-porous surface. It’s incredibly resistant to scratches, water, and common kitchen chemicals. I had a client who spilled nail polish remover on her new black island, and after she wiped it up, the finish was completely fine. Regular paint would have melted on the spot.
- It Looks Flawless: A sprayed finish is perfectly even and smooth. No brush marks, no roller texture. It gives you that furniture-quality look you’re paying for.
- You Can Control the Sheen: This is a big deal for black cabinets. You can dial in the exact sheen. A common choice for a modern look is a 20-degree sheen, which gives a rich satin or matte look. It’s much easier to clean than a completely flat (0-degree) finish, which can be a nightmare for smudges. A high-gloss finish is a whole other beast, involving a multi-step process and a ton of buffing, which is why it costs a premium.
A little friendly advice: If you’re on a tight budget, you might be tempted to paint your existing oak cabinets black yourself. I’ve seen it done, and it rarely ends well. The heavy oak grain texture almost always shows through, and the finish will likely start to chip and peel within a year, especially around the knobs. If you go this route, just be realistic about the results and how long it will last. A factory conversion varnish finish might cost 15-25% more than a standard painted finish, but it’s an investment in durability that pays off every single day.
Quick Tip: Before you commit to anything, try this. Go to an art supply store and buy the biggest piece of black foam core you can find. It’ll only cost you a few bucks. Tape it up over a section of your current cabinets. Live with it for a few days. See how you feel about it in the bright morning light versus at night under artificial light. It’s a cheap and easy way to test the waters.
Bringing It All Together: Design and Balance
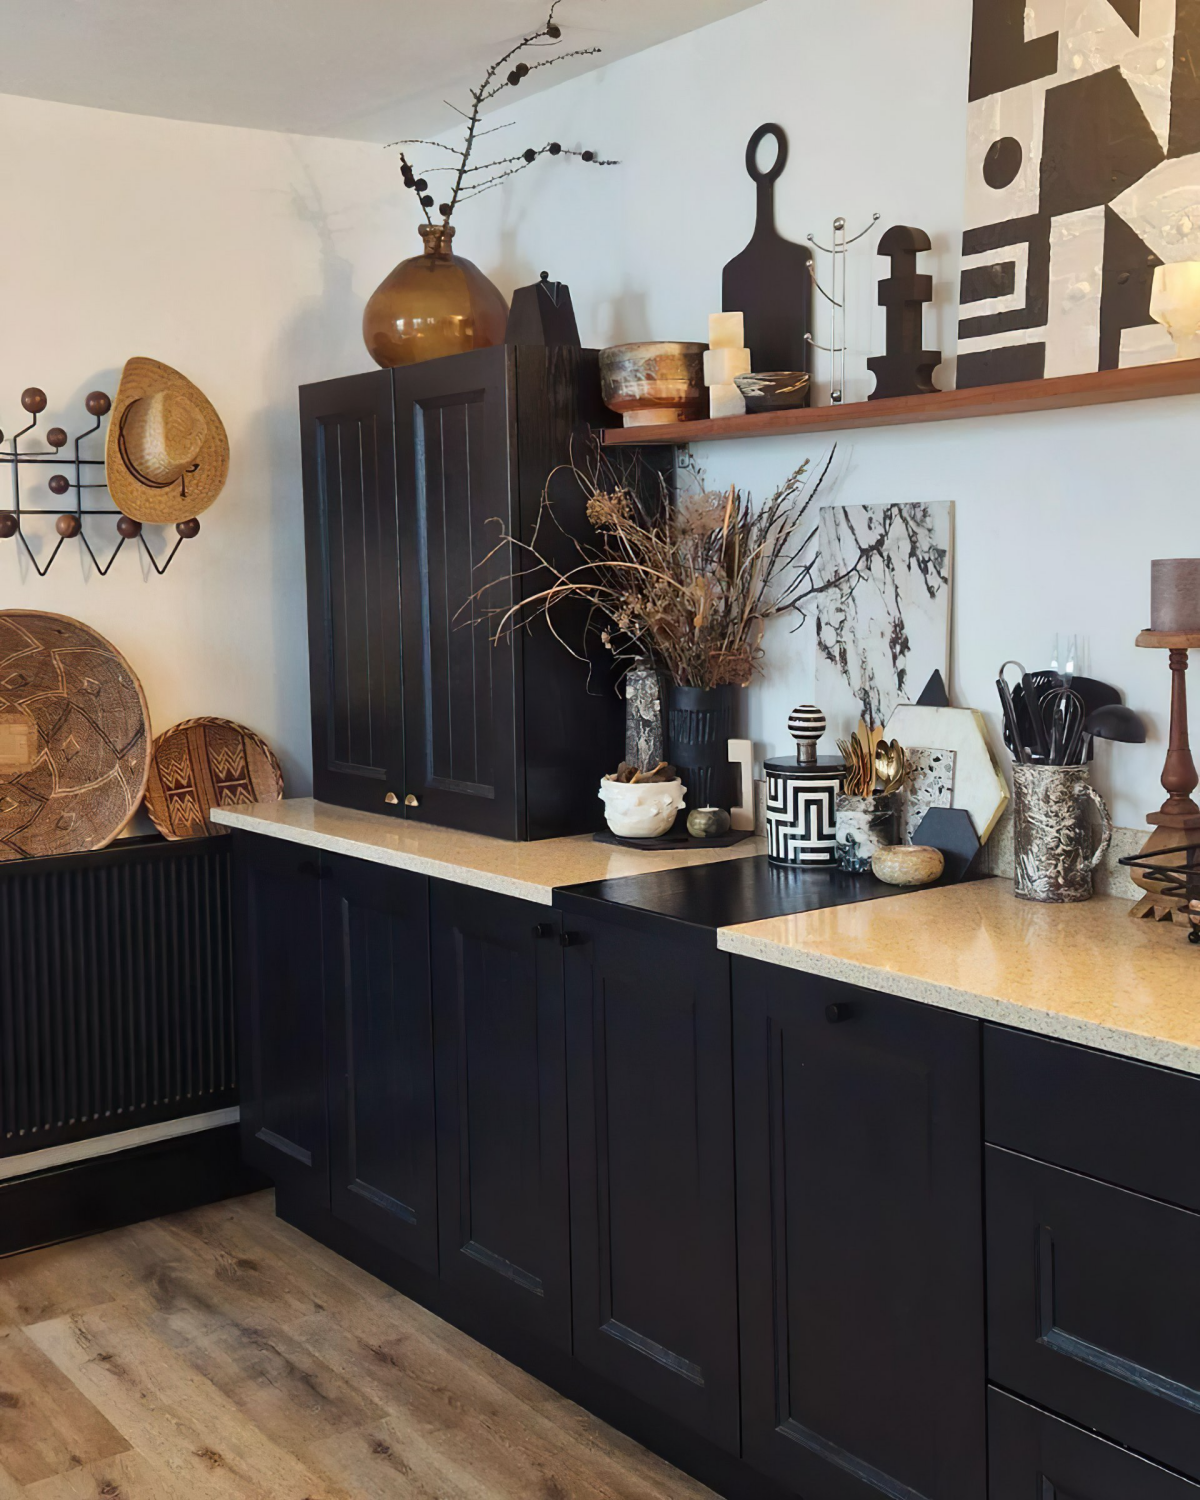
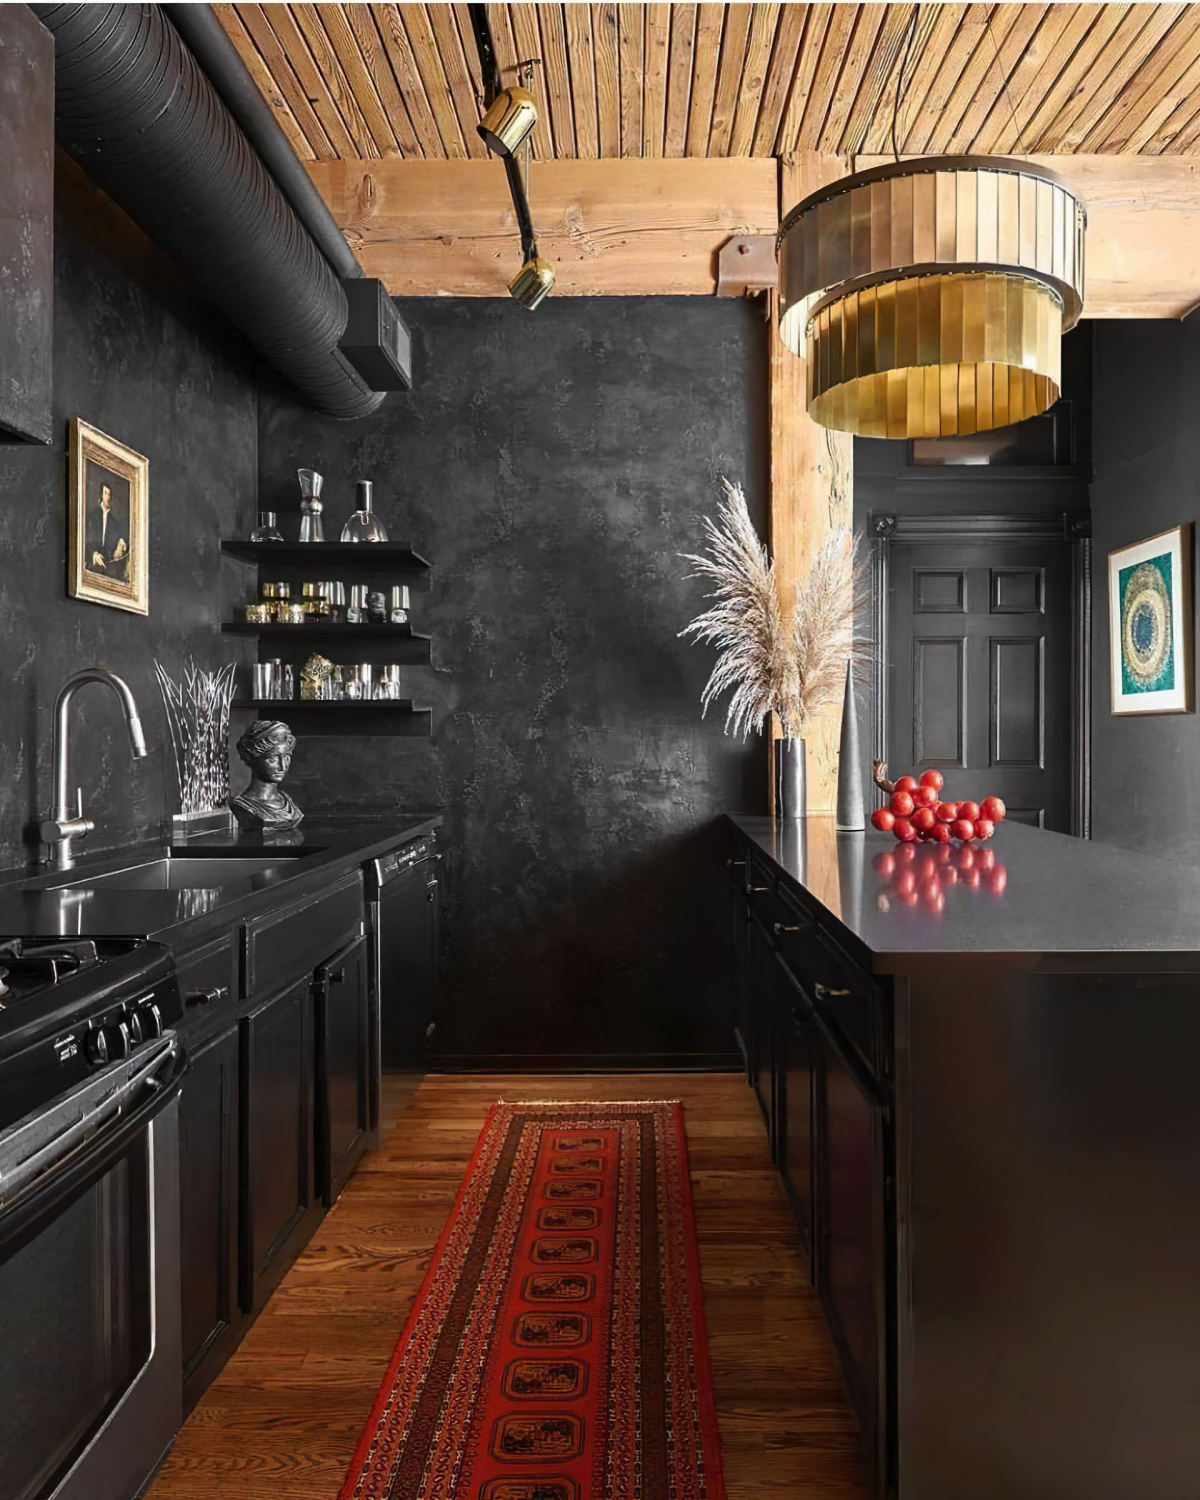
A kitchen full of black cabinets needs other elements to create balance and stop it from feeling oppressive. This is where you get to play with texture and complementary materials.
Countertops
This is the largest surface that will contrast with your cabinets, so it sets the tone for the whole room.
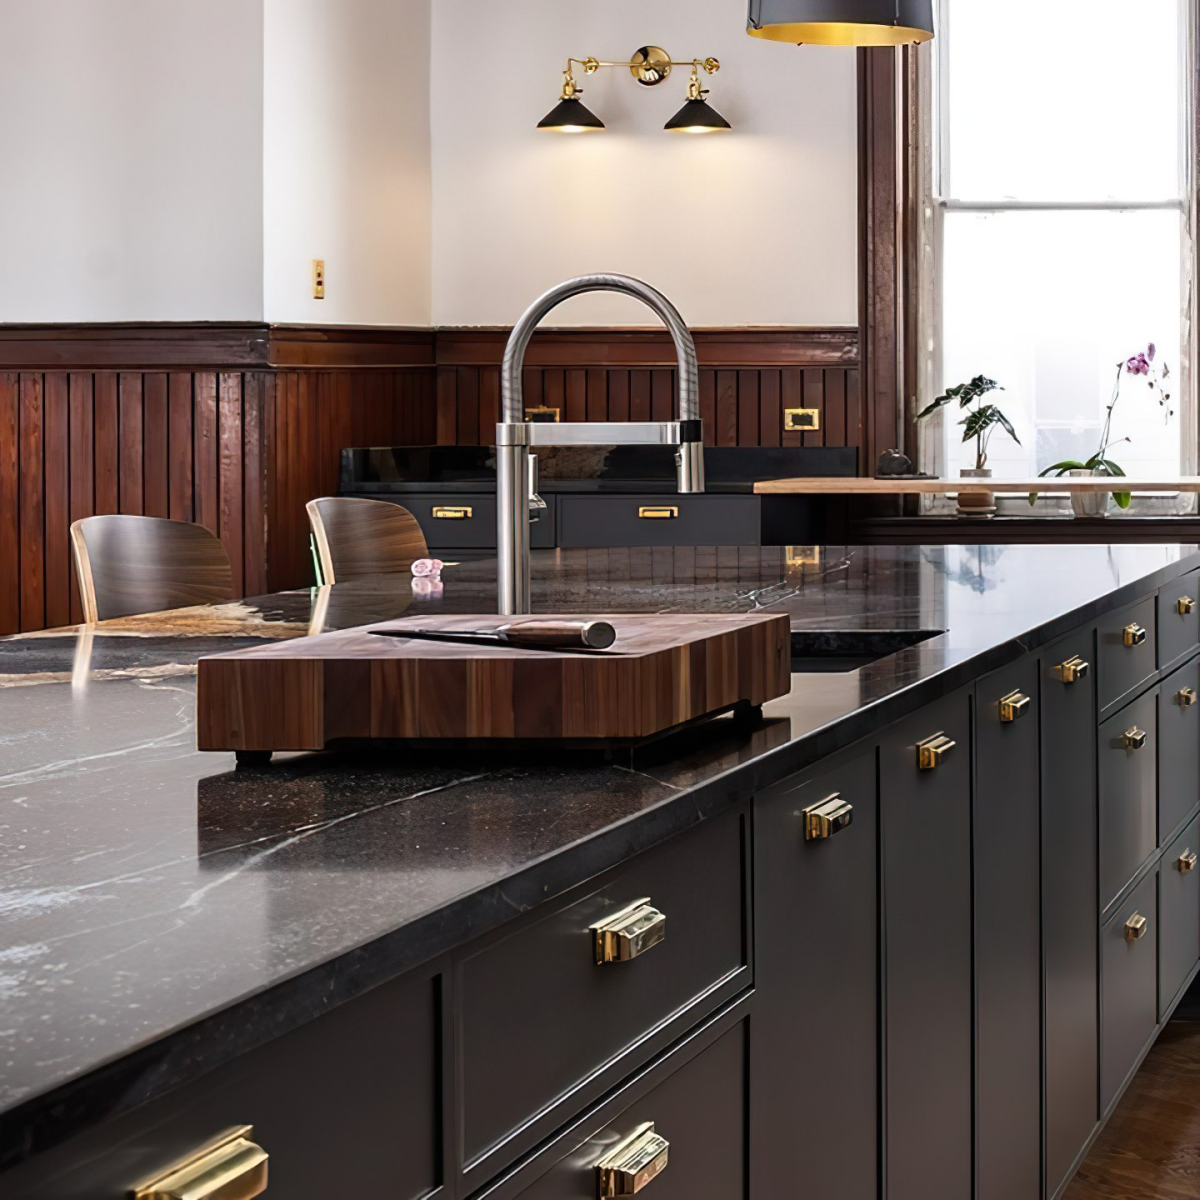
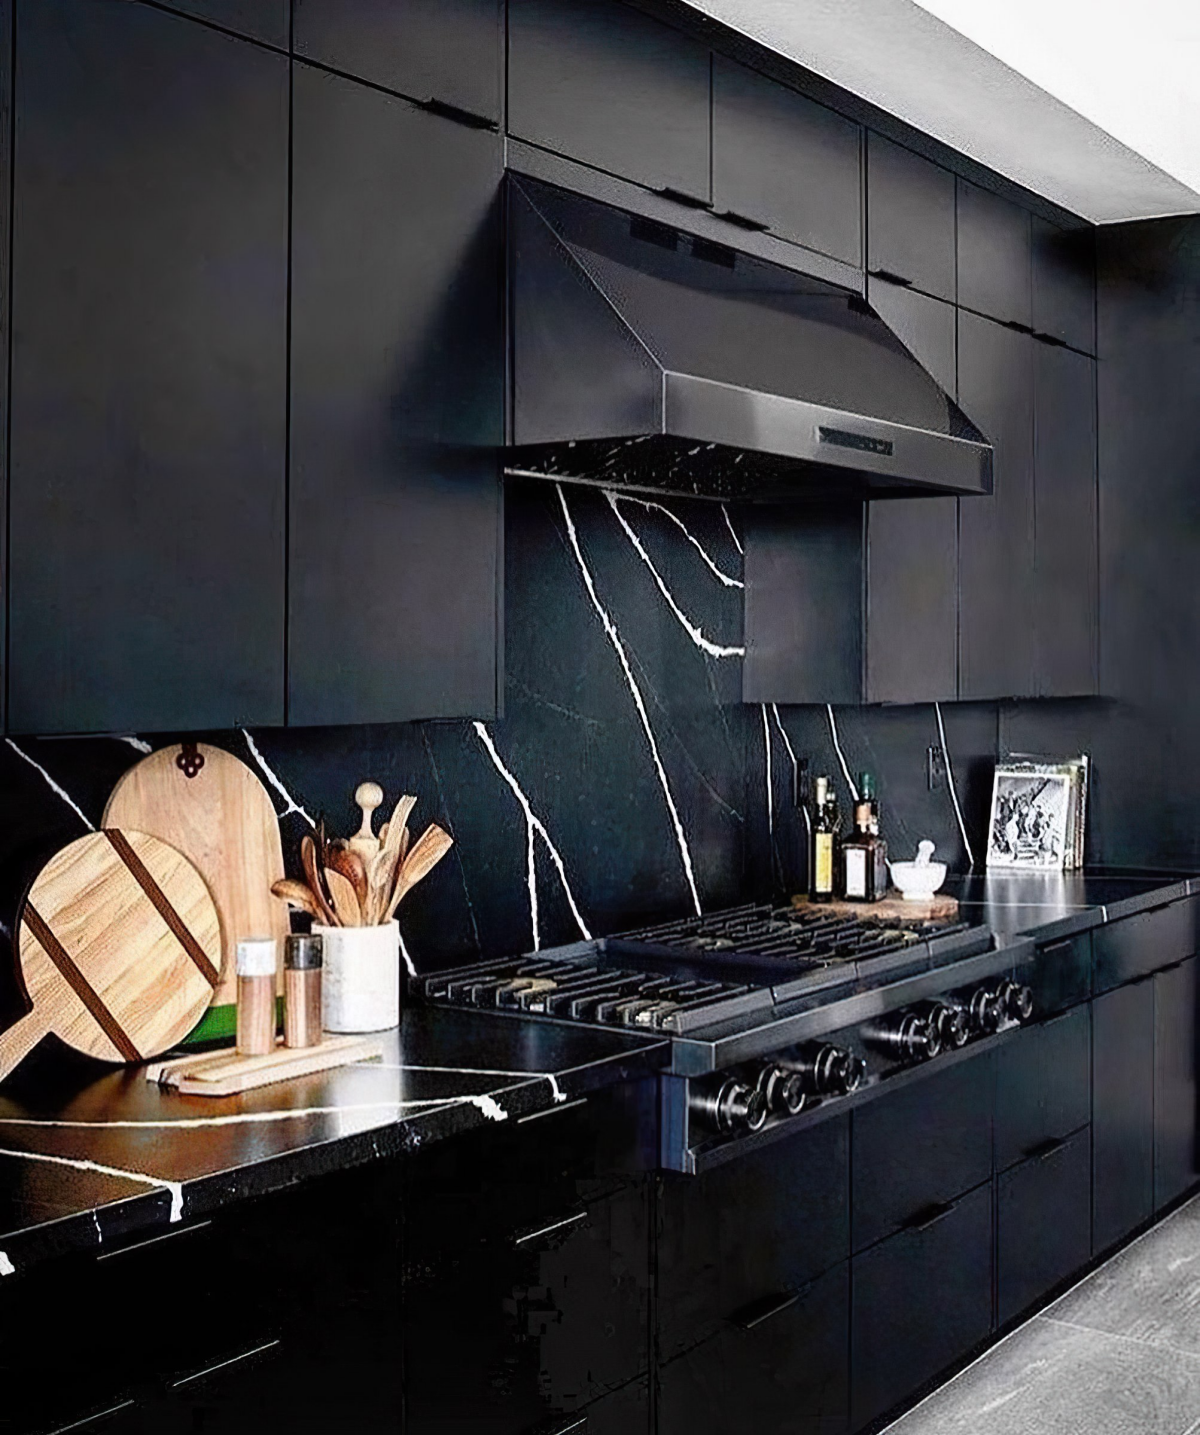
- Quartz: A fantastic all-rounder. It’s durable, non-porous, and comes in a million patterns. A quartz that mimics the look of Calacatta marble, with soft, warm gold or grey veining, is a classic pairing that adds a touch of luxury and warmth.
- Wood: A thick butcher block countertop in a warm wood like walnut or white oak is stunning against black. It’s a perfect fit for a modern farmhouse or more rustic style. Just know that it requires regular oiling and you have to be careful with water around the sink area.
- Soapstone: This is a traditional material that develops a beautiful, soft patina over time. It has a matte, organic feel that pairs wonderfully with black for a timeless, lived-in look.
Backsplash
The backsplash is your chance to inject some personality!
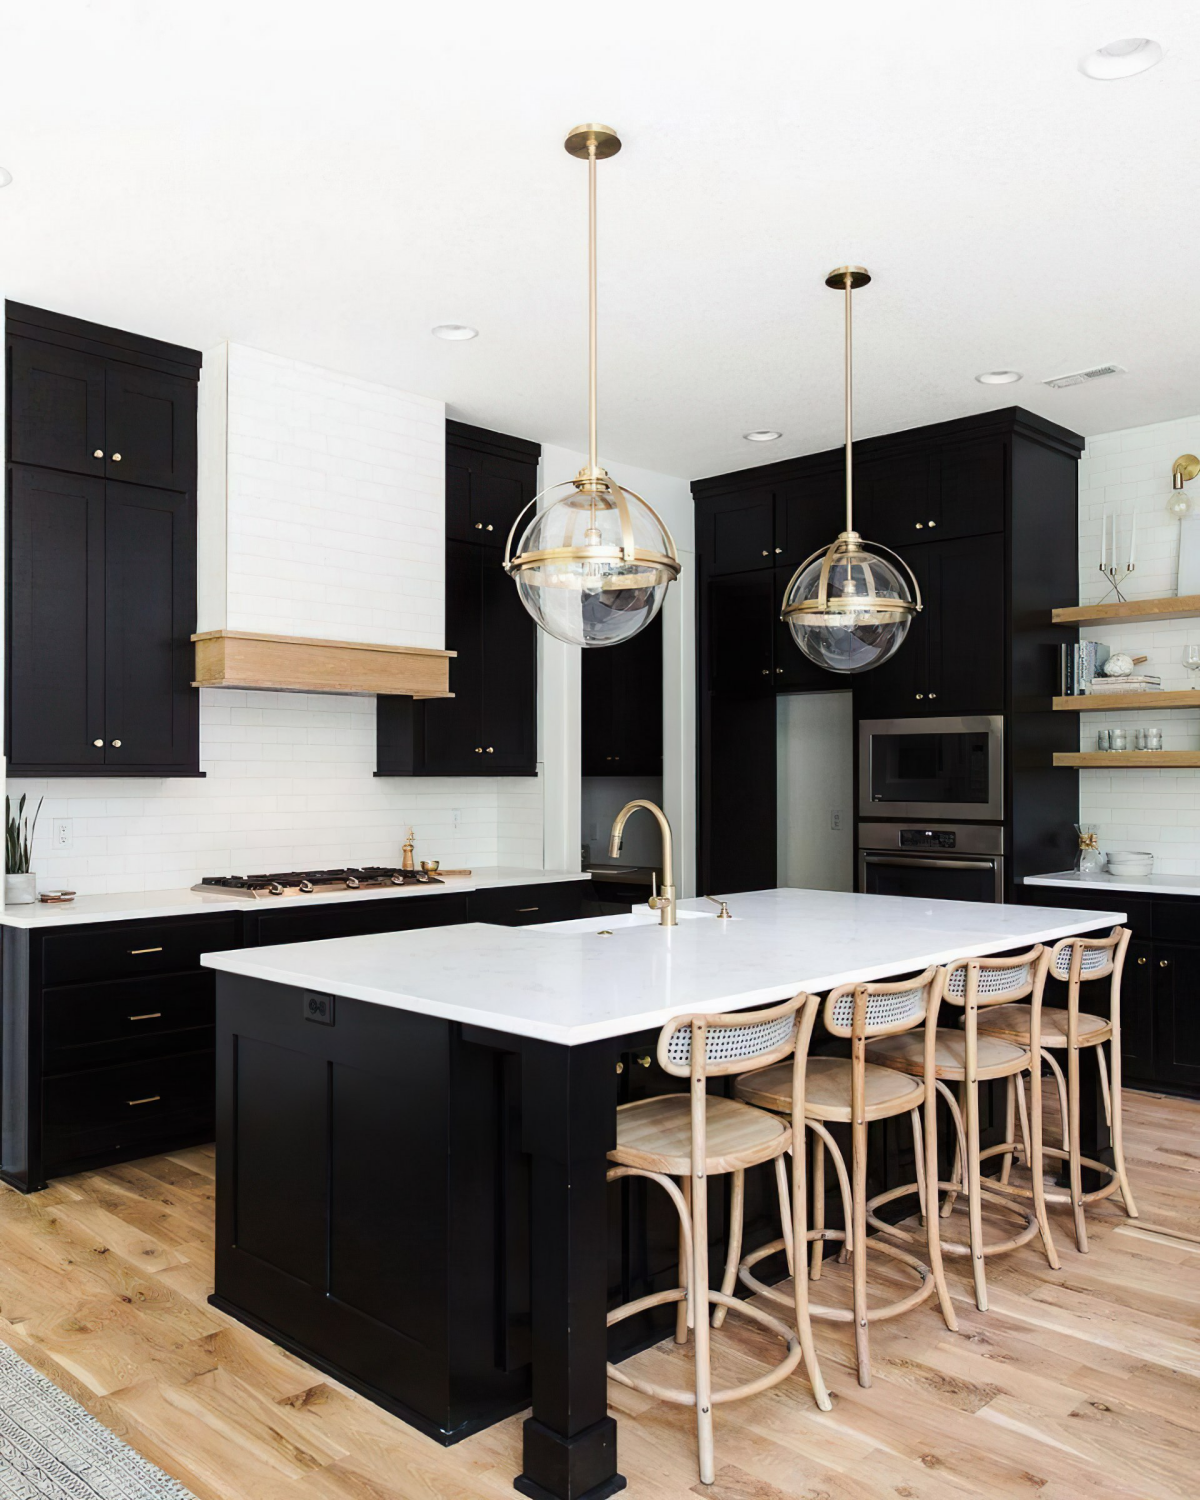
- Classic Subway Tile: A crisp white subway tile provides a clean, bright contrast. The grout is key here—white grout keeps it looking seamless, while a dark grey or black grout creates a bold, graphic pattern.
- Zellige Tile: These handmade Moroccan tiles are perfectly imperfect. Their uneven surface and glossy glaze catch the light in beautiful ways, adding a layer of rich texture that looks amazing next to sleek black cabinets.
- Stone Slab: For a really high-end, dramatic look, run the same material from your countertop right up the wall. It’s a bold statement that feels incredibly luxurious and gets rid of all grout lines.
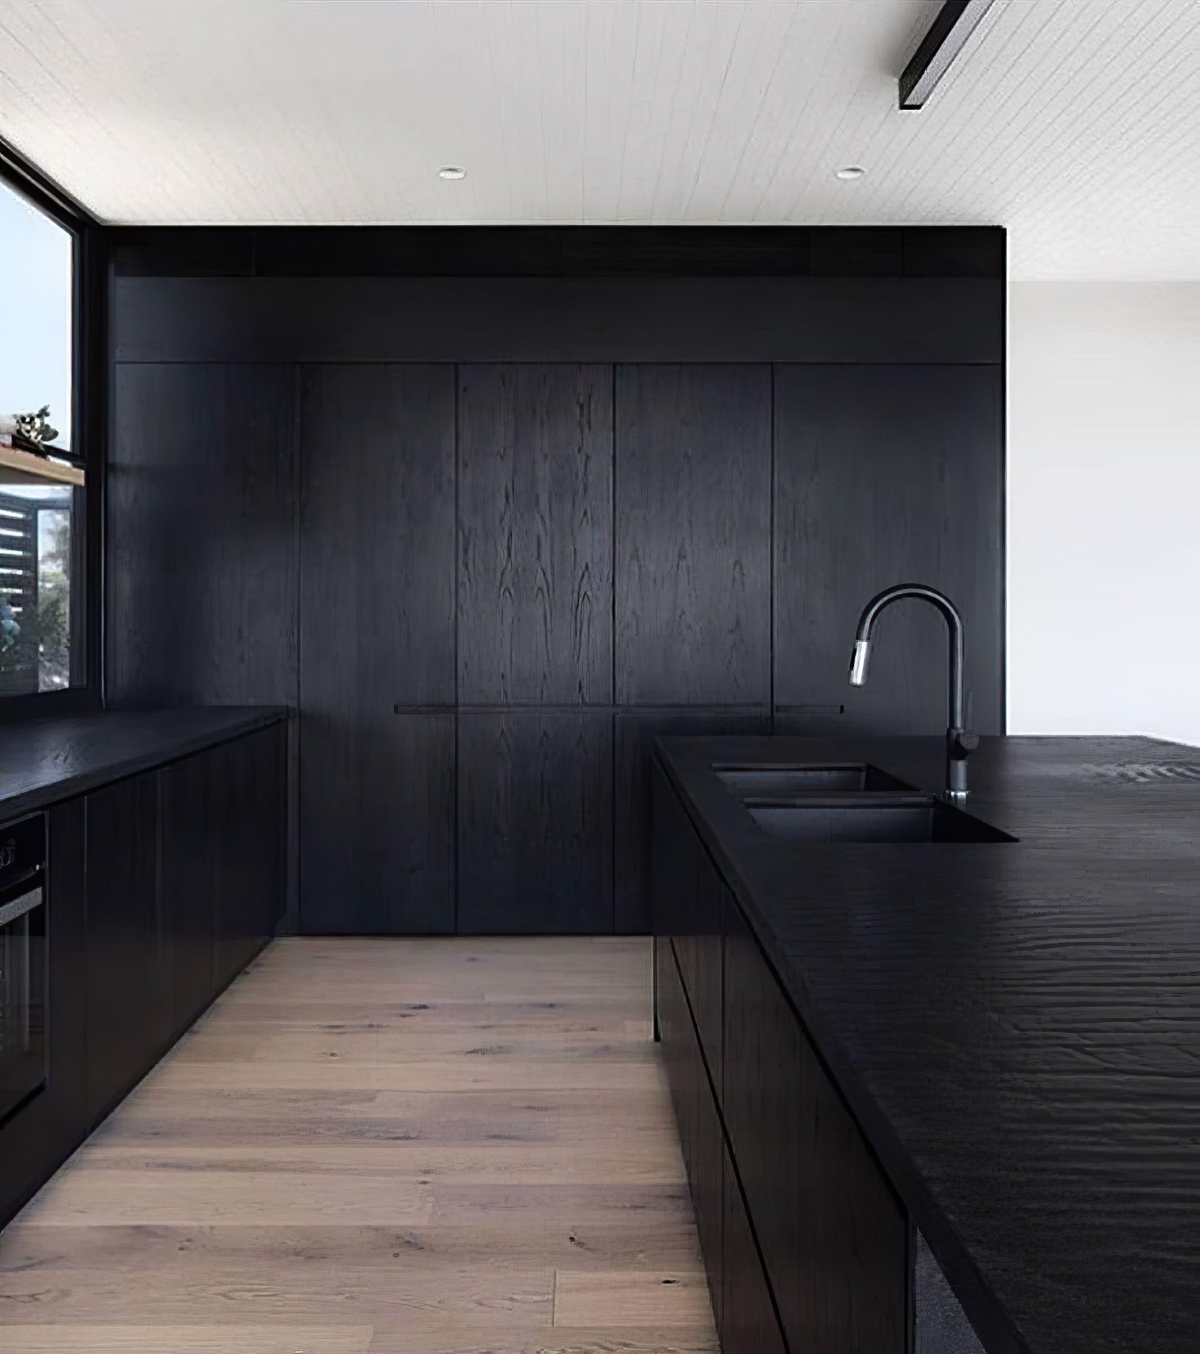
Flooring & Hardware
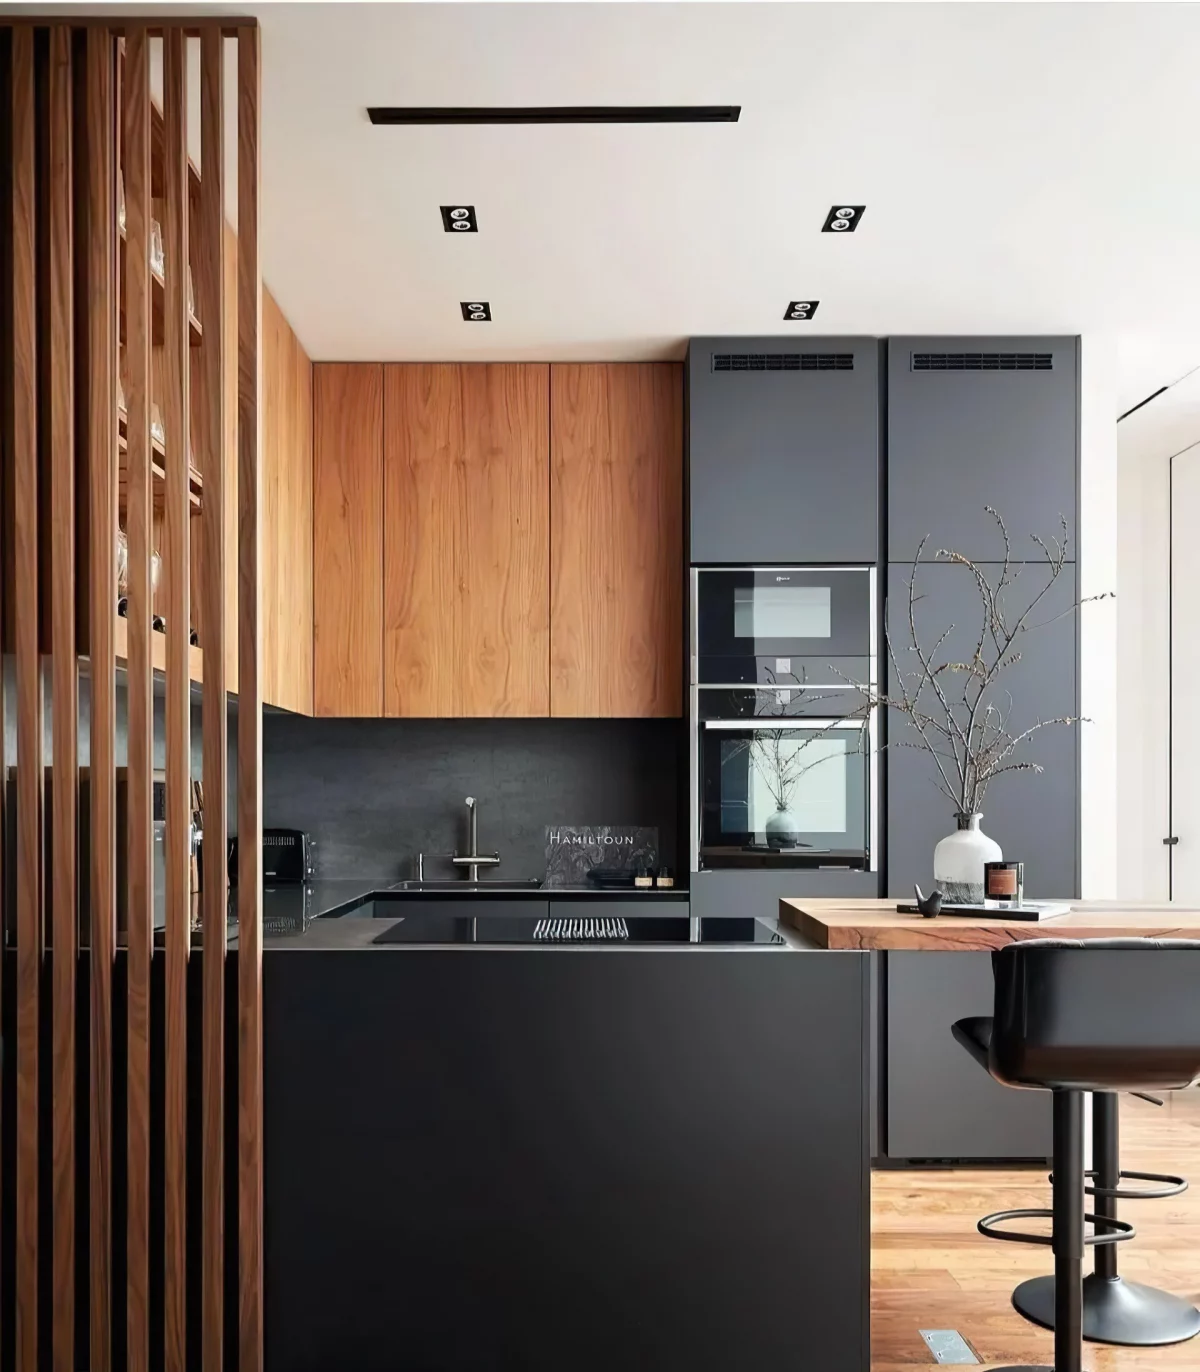
With dark cabinets, a lighter floor is usually the best move to keep the room from feeling like a dungeon. Light or natural white oak is a hugely popular choice right now for the warmth and texture it brings. And don’t forget the hardware! Think of it as the jewelry for your cabinets. Warm metals like brass or bronze, or even a classic polished nickel, really pop against black and add a layer of warmth and sophistication.
The Fingerprint Problem & Other Real-World Tips
Okay, let’s tackle the number one question I get: what about fingerprints? Especially on a matte finish, they can be a concern.
- The Sheen Matters: A satin finish (that 20-degree sheen we talked about) is your best friend. It’s matte enough to look modern but has just enough luster to make wiping away fingerprints much easier than a completely dead-flat finish.
- Hardware is Key: This is the easiest fix. Using pulls and knobs on all your doors and drawers means you aren’t touching the cabinet face itself nearly as often. Problem solved.
- Clean Smart: Ask your cabinet maker for their specific cleaning guide. But generally, a soft microfiber cloth dampened with a little water and maybe a single drop of mild dish soap is all you need. Never use abrasive sponges or harsh all-purpose cleaners—they can permanently dull or damage the finish.
Knowing When to Call a Pro
A kitchen remodel is a major project. Be honest about your own skills. Assembling and installing pre-made cabinet boxes can be a great DIY project for a handy person. But designing a truly functional layout, creating a lighting plan that works, and scribing cabinets perfectly to an old, uneven wall—those are skills that come from years of experience.
Remember that if you’re getting custom cabinets, you should plan for a lead time of anywhere from 6 to 12 weeks from final design approval to delivery. The actual installation by a professional crew for an average-sized kitchen usually takes about 2 to 5 days.
And if your project involves moving plumbing or electrical, you will need permits and licensed pros. This isn’t just bureaucratic red tape; it’s about making sure your home is safe, up to code, and holds its value. I once saw a homeowner who installed his own upper cabinets and didn’t anchor them into the wall studs properly. A week later, the whole unit, full of dishes, came crashing down. It’s a scary and costly mistake to make.
Black cabinets can be the foundation of a truly stunning kitchen—one that feels personal, sophisticated, and timeless. Just be sure to plan it thoughtfully. Get samples of everything—the cabinet finish, the countertop, the hardware, the floor—and look at them in your own home. A kitchen is a long-term investment. Planning it well ensures it’s one you’ll be happy with for a very, very long time.
Galerie d’inspiration
Matte Finish: The darling of design blogs, a true matte black offers a deep, velvety, light-absorbing surface that feels incredibly sophisticated. Its biggest drawback? It can be a magnet for fingerprints. To get the look without the constant cleanup, ask about high-tech materials like Fenix NTM, which uses nanotechnology to create a durable, anti-fingerprint surface.
Satin/Eggshell Finish: This is the pro’s workhorse. It has a slight sheen that’s far more forgiving than matte, making smudges less visible and wiping down much easier. A high-quality satin paint, like Benjamin Moore’s Advance in
More than 70% of the visual impact of a kitchen comes from the cabinet fronts.
This means the material you pair them with is what truly defines the space. Black cabinets are a versatile canvas, but they need a partner. For a warm, almost Japandi-inspired feel, contrast them with light oak or walnut countertops. To achieve a dramatic, high-contrast look, a durable quartz with bold white and grey veining, like Caesarstone’s Statuario Maximus, creates an artful statement. The choice you make here will shift the kitchen’s entire atmosphere from cozy to chic.