Don’t Just Paint Your Kitchen—Transform It. Here’s How.
I’ve walked through hundreds of kitchens in my career, and the story is often the same. Some are stunning new builds, but most are the heart of a home—well-loved, a bit tired, and crying out for an update that doesn’t involve a sledgehammer and a five-figure bill. The first thing everyone asks is, “What can I paint to get the biggest bang for my buck?”
In this article
It’s a fantastic question. Paint is powerful, but it’s not magic. A kitchen paint job that truly lasts has very little to do with the color you pick. It’s all about understanding the surfaces, the tough environment of a kitchen, and using the right stuff for the job.
Honestly, I’ve seen the good, the bad, and the ugly. I’ve been called in to fix DIY cabinet projects where paint was literally peeling off in sheets because of hidden grease. I’ve seen painted backsplashes look sharp for about a month before chipping away behind the sink. But I’ve also witnessed projects that completely revitalized a space for a tiny fraction of a remodeling cost. The difference, every single time, is the prep work and the knowledge behind it. This isn’t just about looks; it’s about creating a tough, functional finish that can handle steam, grease, heat, and constant scrubbing.
So, let’s get into the nitty-gritty. This is the real-deal advice I share with my own clients—what you can paint, what you probably shouldn’t, and the exact steps the pros take to make sure it all lasts.
The Right Tools: Why Kitchen Paint Isn’t Just… Paint
Before you even think about colors, you have to accept that a kitchen is the most hostile room in your house for paint. Think about it: grease from frying becomes an invisible spray that coats every surface. Steam from boiling pasta can raise the humidity in seconds. This is what you’re up against.
Choosing Your Paint for a War Zone
For the longest time, oil-based (or alkyd) paints were the only option for a rock-hard finish on cabinets and trim. They level out beautifully. The downside? They come with a heavy odor, take forever to dry, and tend to yellow over time—a real problem in kitchens that don’t get a ton of natural light. Plus, cleanup requires mineral spirits, which is a messy hassle.

But things have changed. Modern water-based paints have come a long way. I almost exclusively use high-end water-based acrylic or urethane-modified enamels now. These are sometimes called “water-based alkyds” and they are fantastic. You get the hardness and smooth-leveling finish of an oil paint, but with easy water cleanup and low fumes. They’re designed for high-traffic areas and are incredibly scrubbable once they’re fully cured.
Sheen isn’t just a style choice here; it’s a practical one.
- For Walls: Go with a top-quality matte or eggshell finish. Believe it or not, some modern matte paints are washable, but an eggshell or satin gives you that extra bit of protection against moisture and makes cleanup a breeze. I’d avoid flat paint in a kitchen at all costs. It just grabs onto dirt and you can’t scrub it without messing up the finish.
- For Cabinets & Trim: Satin or semi-gloss are your best friends. They create a hard, durable shell that’s easy to wipe down. A semi-gloss will reflect more light (and also show more imperfections), while satin offers a more modern, subtle look with nearly the same toughness.
Primer: The Unsung Hero of the Kitchen
I can’t stress this enough: paint is only as good as the surface it’s sticking to. Primer is the essential bridge between the old surface and your new paint. It helps the paint stick, blocks ugly stains from bleeding through, and gives you a clean, uniform canvas to work on. In a kitchen, skipping primer is asking for failure.
You’ll likely encounter two main types of primers:
- Stain-Blocking Primers: Kitchens are full of stains waiting to ruin your day—grease spots, old water marks, and even natural tannins from wood knots can bleed right through your new paint. For this, a shellac-based primer is the gold standard. It seals everything. The only catch is the strong alcohol smell, so you absolutely need great ventilation. An oil-based primer is a decent runner-up.
- Bonding Primers: Got slick, shiny surfaces like laminate cabinets or ceramic tile? You need a primer that can really bite into the surface. A water-based bonding primer is specifically designed for this. It creates a powerful chemical grip that stops the paint from just scratching right off.
Using the wrong primer—or worse, no primer at all—is the #1 reason kitchen paint jobs go wrong. Don’t try to save a few bucks here. It’s not worth it.
Kitchen Cabinets: The Ultimate High-Impact Project
Painting your cabinets will change your kitchen more than anything else, short of a full renovation. It can take a dated, dark wood kitchen and make it feel bright, modern, and new. But let’s be real: this is not a casual weekend project. A professional cabinet job takes between 40 and 60 hours of focused labor. Be honest with yourself about the time and energy you have.
Real Talk on Costs
You’re probably wondering what that kind of labor means in dollars. Hiring a pro to paint your cabinets can run anywhere from $3,000 to $7,000, depending on the size of your kitchen and where you live. It’s a serious investment.
But what about doing it yourself? Your materials—a top-shelf primer, a gallon of that tough urethane enamel paint, good sandpaper, tape, and brushes—will likely land you in the $200 to $400 range. Seeing that price difference is what convinces most people to give it a shot!
Step 1: Know What You’re Working With
First, figure out what your cabinets are made of. This changes everything.
- Solid Wood or MDF: Perfect. These are the best candidates for painting. They’re stable and give paint a great surface to grab onto after proper prep.
- Laminate or Melamine: These are paintable, but it’s a tricky process. You absolutely must use a high-adhesion bonding primer. Even then, the finish will be more prone to chipping than on wood.
- Thermofoil: This is that thin vinyl film wrapped over an MDF core. I usually advise against painting thermofoil. If it’s already peeling or bubbling, you have to remove all of it first, which is a nightmare. Painting over stable thermofoil is risky; adhesion is a huge problem. You’re often better off looking into refacing the doors.
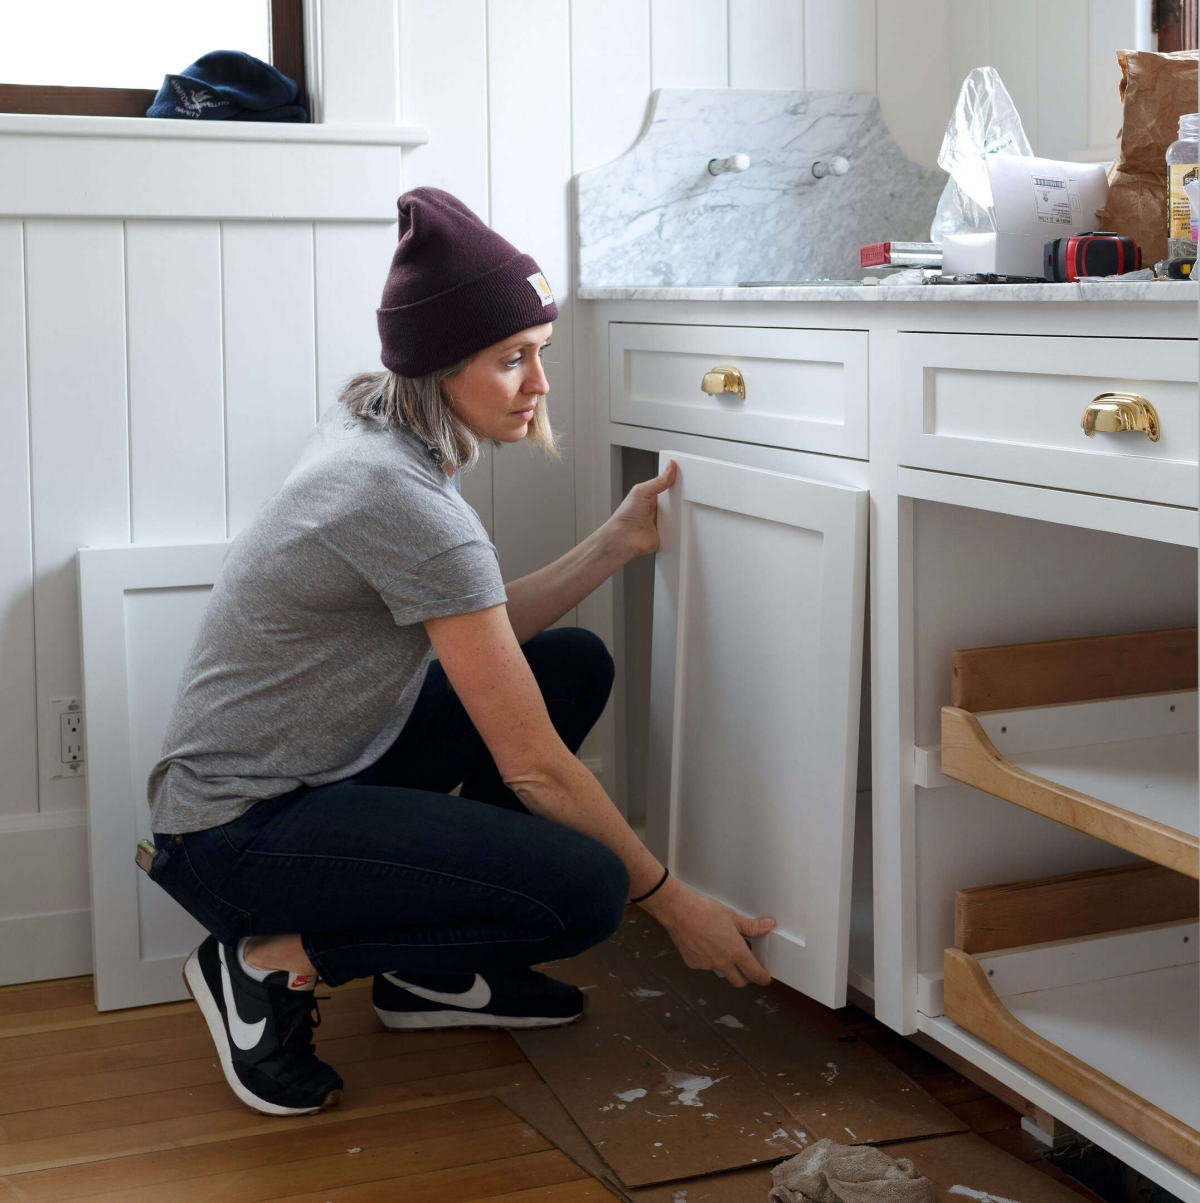
Step 2: The Pro Prep Process (Where the Magic Happens)
This is where 90% of the work is. Do not rush this.
- Disassemble and Label Everything. Remove all doors and drawers. Take off every hinge, knob, and pull. Immediately create a labeling system. I stick small pieces of painter’s tape inside the hinge pockets with a simple code (like U1 for the first upper door, L2 for the second lower). Toss all your screws and hardware into labeled baggies. It feels tedious, but it will save your sanity during reassembly.
- Clean Like Your Life Depends On It. This is the most important step. You have to remove years of invisible cooking grease. I use a TSP (Trisodium Phosphate) substitute or another strong commercial degreaser. Wear gloves and scrub every single inch of the cabinet boxes, doors, and drawer fronts. Then, rinse thoroughly with a clean, damp cloth and let it all dry completely.
- Sand for Grip. You are not sanding to strip the old finish off. You are “scuff-sanding” to create a microscopic texture for the primer to grip. For a previously finished surface, a light pass with 120- to 150-grit sandpaper is perfect. After sanding, vacuum all the dust, then wipe every surface with a tack cloth to pick up the last bit of residue.
Oh, and a quick tip for oak cabinets: Got that heavy, deep grain from traditional oak cabinets? If you want that ultra-smooth, factory-finish look, you’ll need an extra step. After cleaning and scuff-sanding, apply a water-based grain filler with a putty knife. Scrape it flat against the grain, let it dry, sand it perfectly smooth with fine-grit sandpaper, and then you’re ready for primer. It adds a few hours, but it’s the secret to making old oak look brand new.
Step 3: Time to Prime and Paint
Set up a paint station in a garage or basement—somewhere with good ventilation and minimal dust. Lay your doors and drawers flat on painter’s pyramids to keep them off the ground and avoid drips.
For most wood cabinets, I start with a shellac-based primer to block any potential wood tannins from bleeding through. Apply one thin, even coat. After it’s dry, give it a very light sanding with 220-grit sandpaper to create a glass-smooth foundation for your paint.
Then, it’s time for the topcoats. The absolute best finish comes from an HVLP (High-Volume, Low-Pressure) sprayer. It gives you that flawless, no-brush-marks look. But if you’re not ready for that, you can still get amazing results with a high-quality 2-inch angled brush and a small, 4-inch high-density foam or mohair roller. Use the brush for the detailed parts and the roller for the flat panels. Apply at least two thin topcoats, sanding lightly with 220-grit paper between coats for maximum smoothness.
By the way, if you’re curious about spraying, you can often rent an HVLP sprayer from a local tool rental shop for about $50-$75 a day. Just make sure to practice on some big cardboard pieces first to get your spray pattern and flow rate right. It’s much faster than a brush, but it has a learning curve and requires more prep to mask off everything you don’t want painted!
Step 4: The Agony of Waiting (aka Curing Time)
Heads up! This is the part everyone gets wrong. Paint dries to the touch in a few hours, but it takes up to a full month to cure. Curing is the chemical process where the paint hardens to its maximum durability. During this 30-day window, your beautiful new finish is vulnerable. You can carefully reinstall the doors and drawers after a couple of days, but you have to be gentle. Avoid any aggressive scrubbing or banging them around for that first month. It’s all about managing expectations and protecting your hard work.

A common mistake I see: People complain that their new white paint is chipping around the knobs after just a month. This is almost always a sign that some grease was left behind. The oils from your hands are enough to break the paint’s bond over time. The only real fix is to sand that specific area back down, clean it with denatured alcohol, re-prime, and re-paint. This is exactly why that initial degreasing step is EVERYTHING.
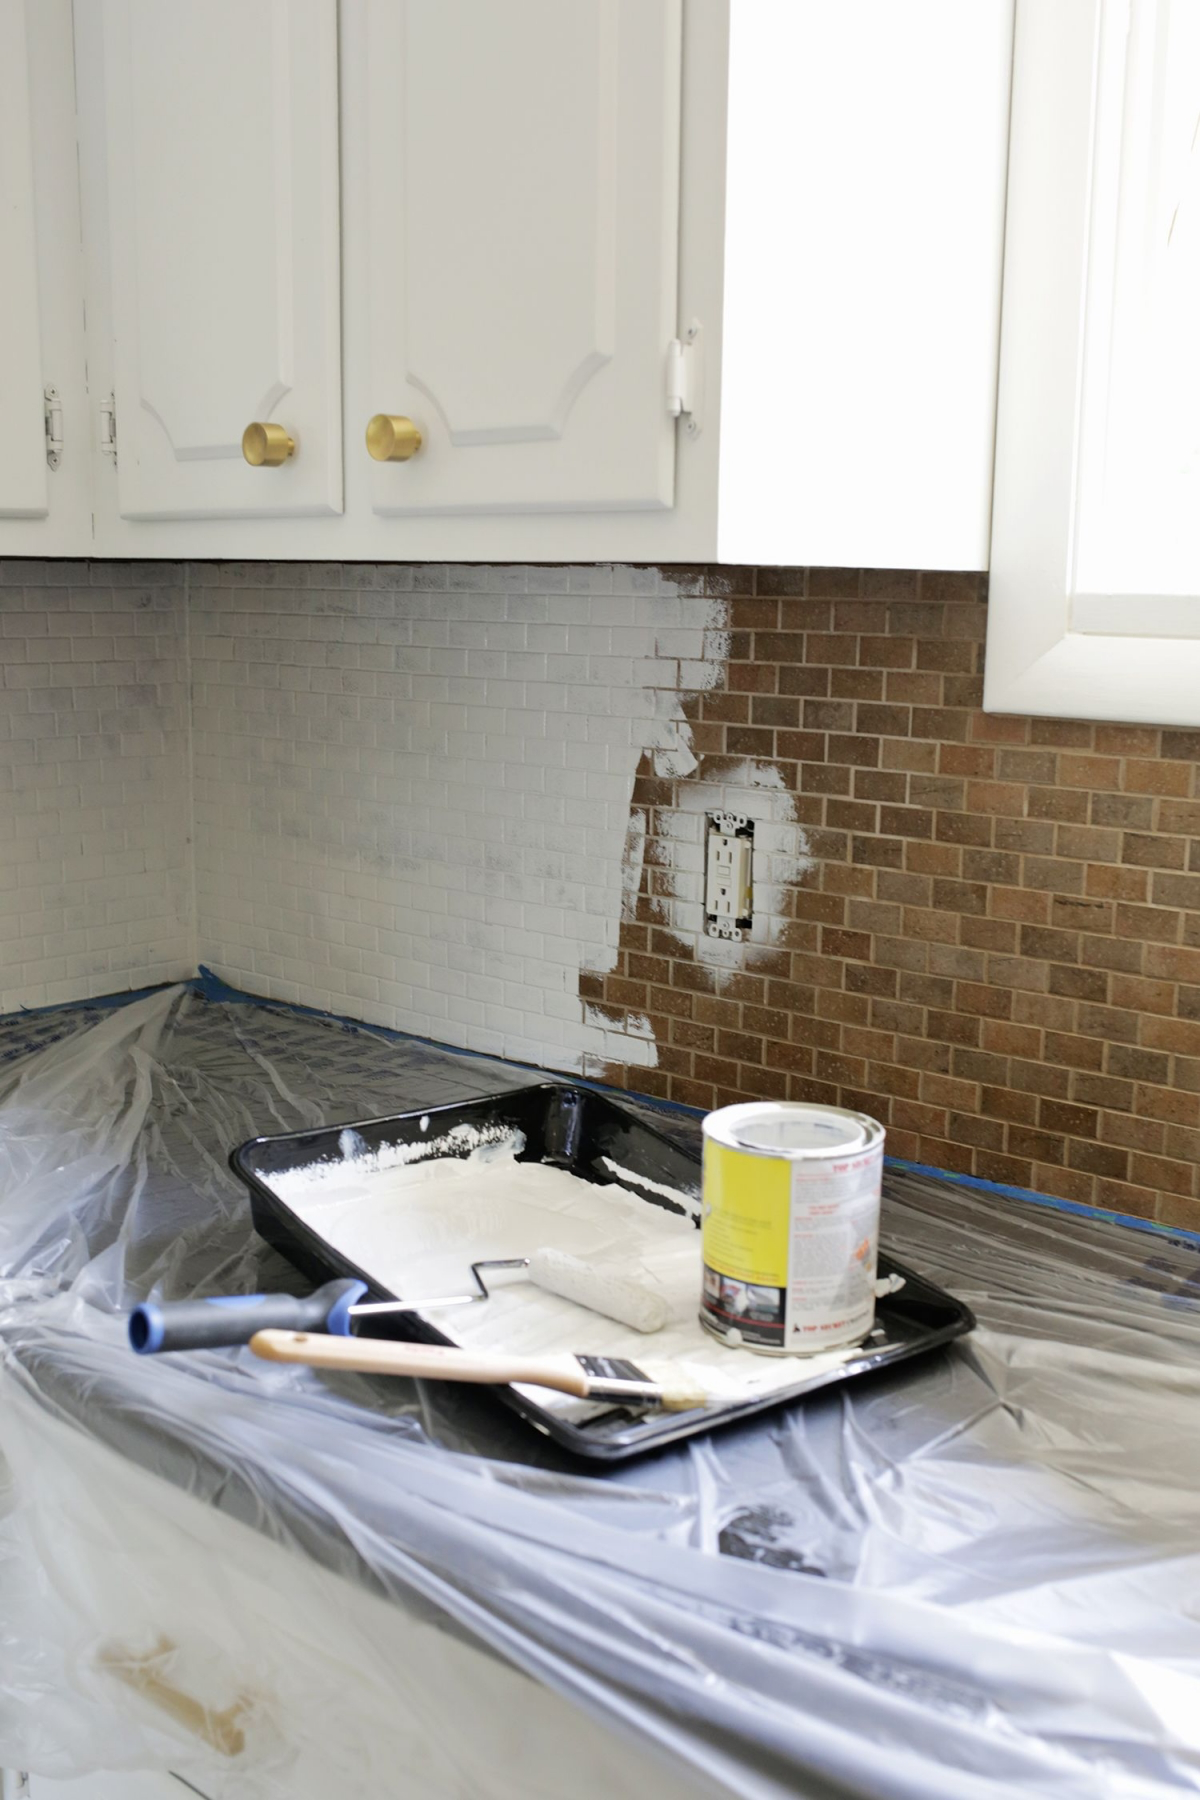
Backsplashes: A Budget Fix with Big Warnings
Painting a tile backsplash is a tempting idea. It seems like a quick and cheap way to cover up dated tile, and it can be. But you have to go into it with your eyes wide open. This is a temporary solution, not a forever fix.
It works best on standard ceramic or porcelain tiles. I would never, ever suggest painting natural stone like marble or granite—you’ll just devalue an expensive material. It’s also incredibly difficult to get paint to stick to glass tile.
The biggest problem is durability. The area behind your sink is constantly wet, and the spot behind your stove gets hit with grease splatters and needs heavy scrubbing. A painted finish is always going to be a weak spot in these areas.
If you’re still determined, the prep has to be perfect. Clean the tile and grout with a heavy-duty degreaser, sand the glossy finish off the tiles, and then use a high-adhesion bonding primer. For the paint, you really should use a specialty tub-and-tile refinishing kit, which is usually an epoxy-based product. Standard wall paint will fail, guaranteed.
What About Other Surfaces? (And a Quick Win Project)
Not ready to tackle the whole kitchen? You can still make a huge difference with smaller projects.
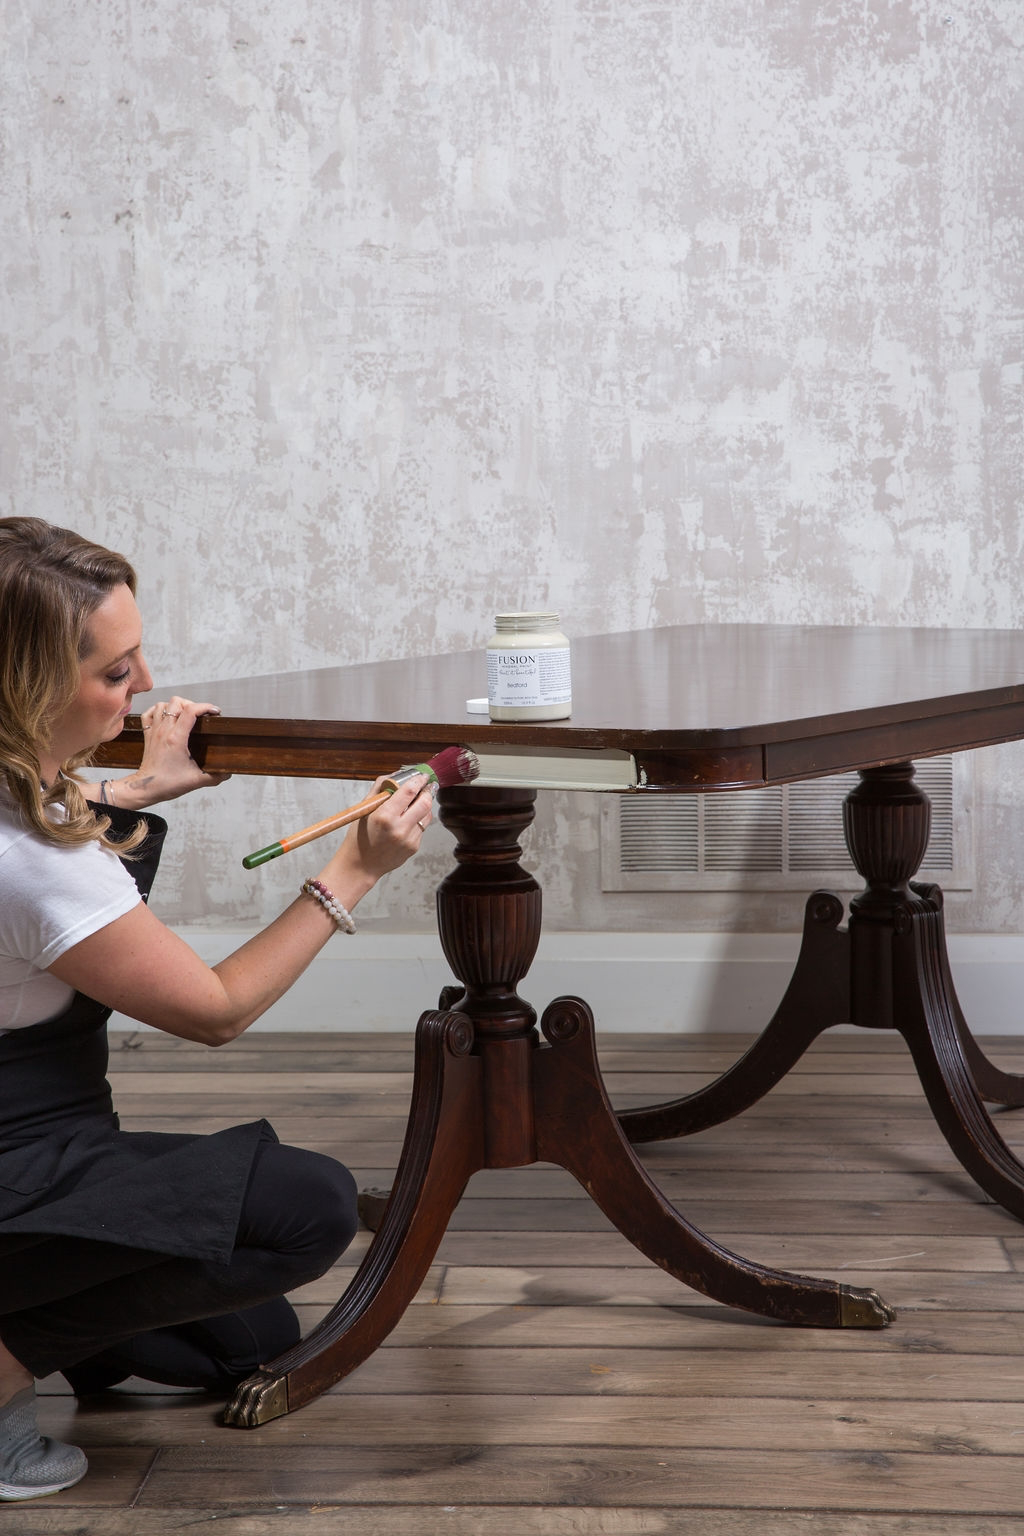
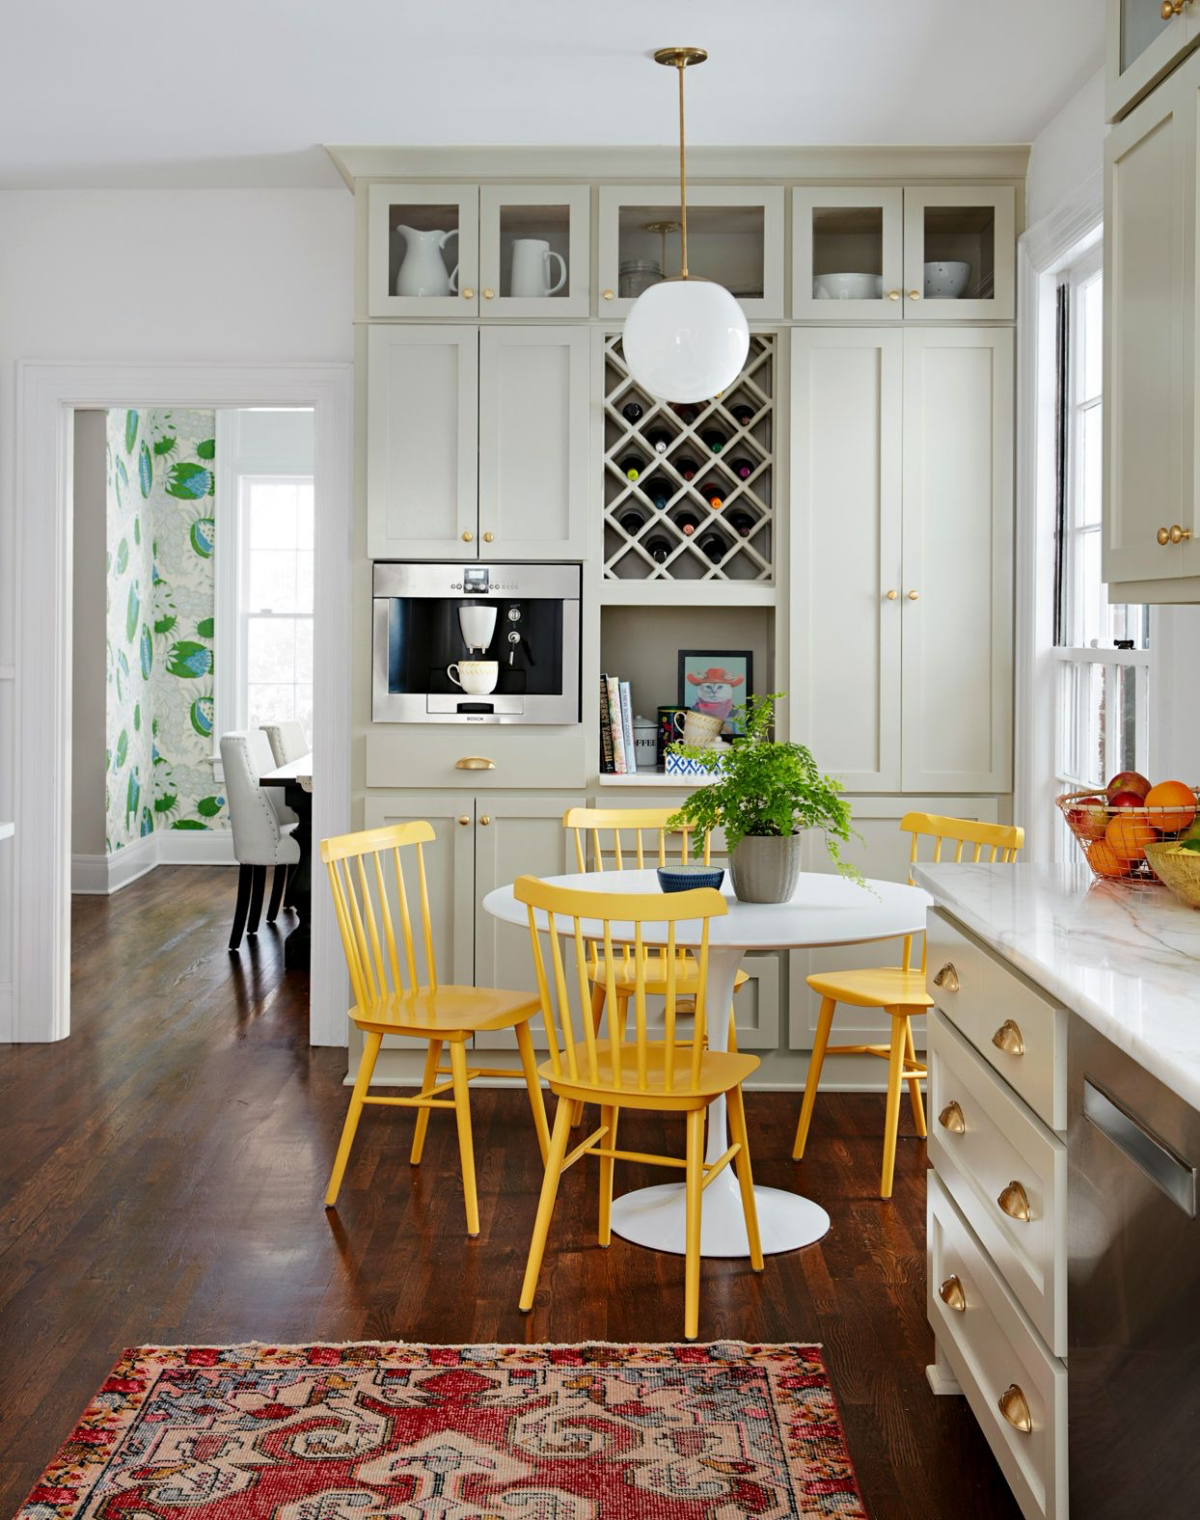
If you want a great starter project, find an old wooden table or a set of chairs. The process is the same as for cabinets: clean, sand, prime, and paint. For a tabletop that will see a lot of wear and tear, I highly recommend adding two or three coats of a clear, water-based polyurethane in a satin finish after painting. It adds a super tough, non-yellowing protective layer.
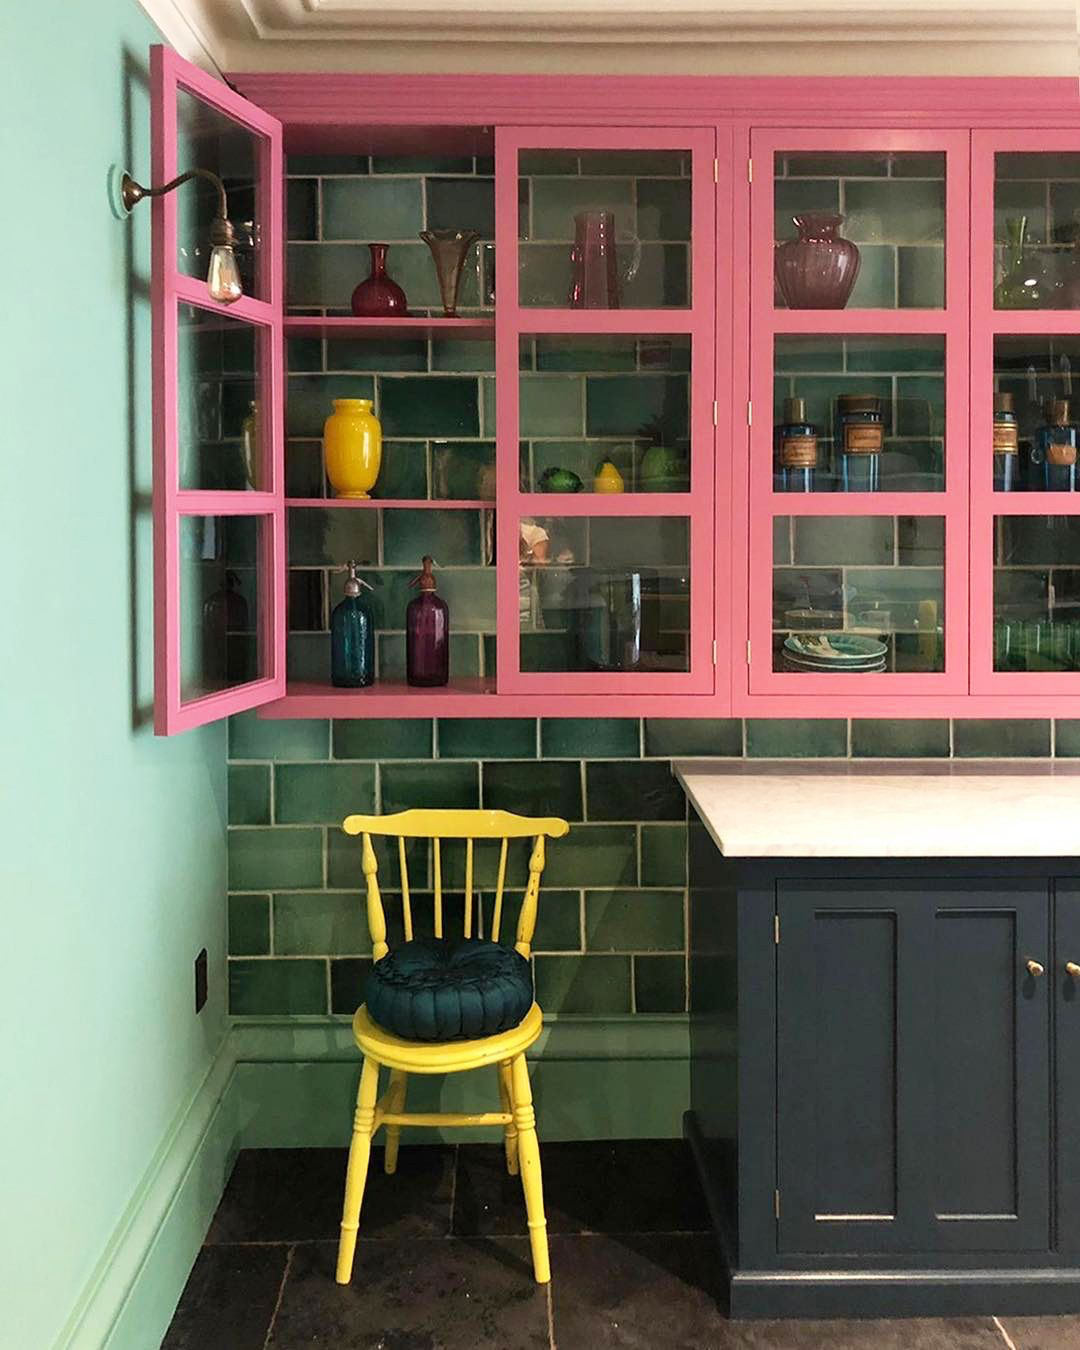
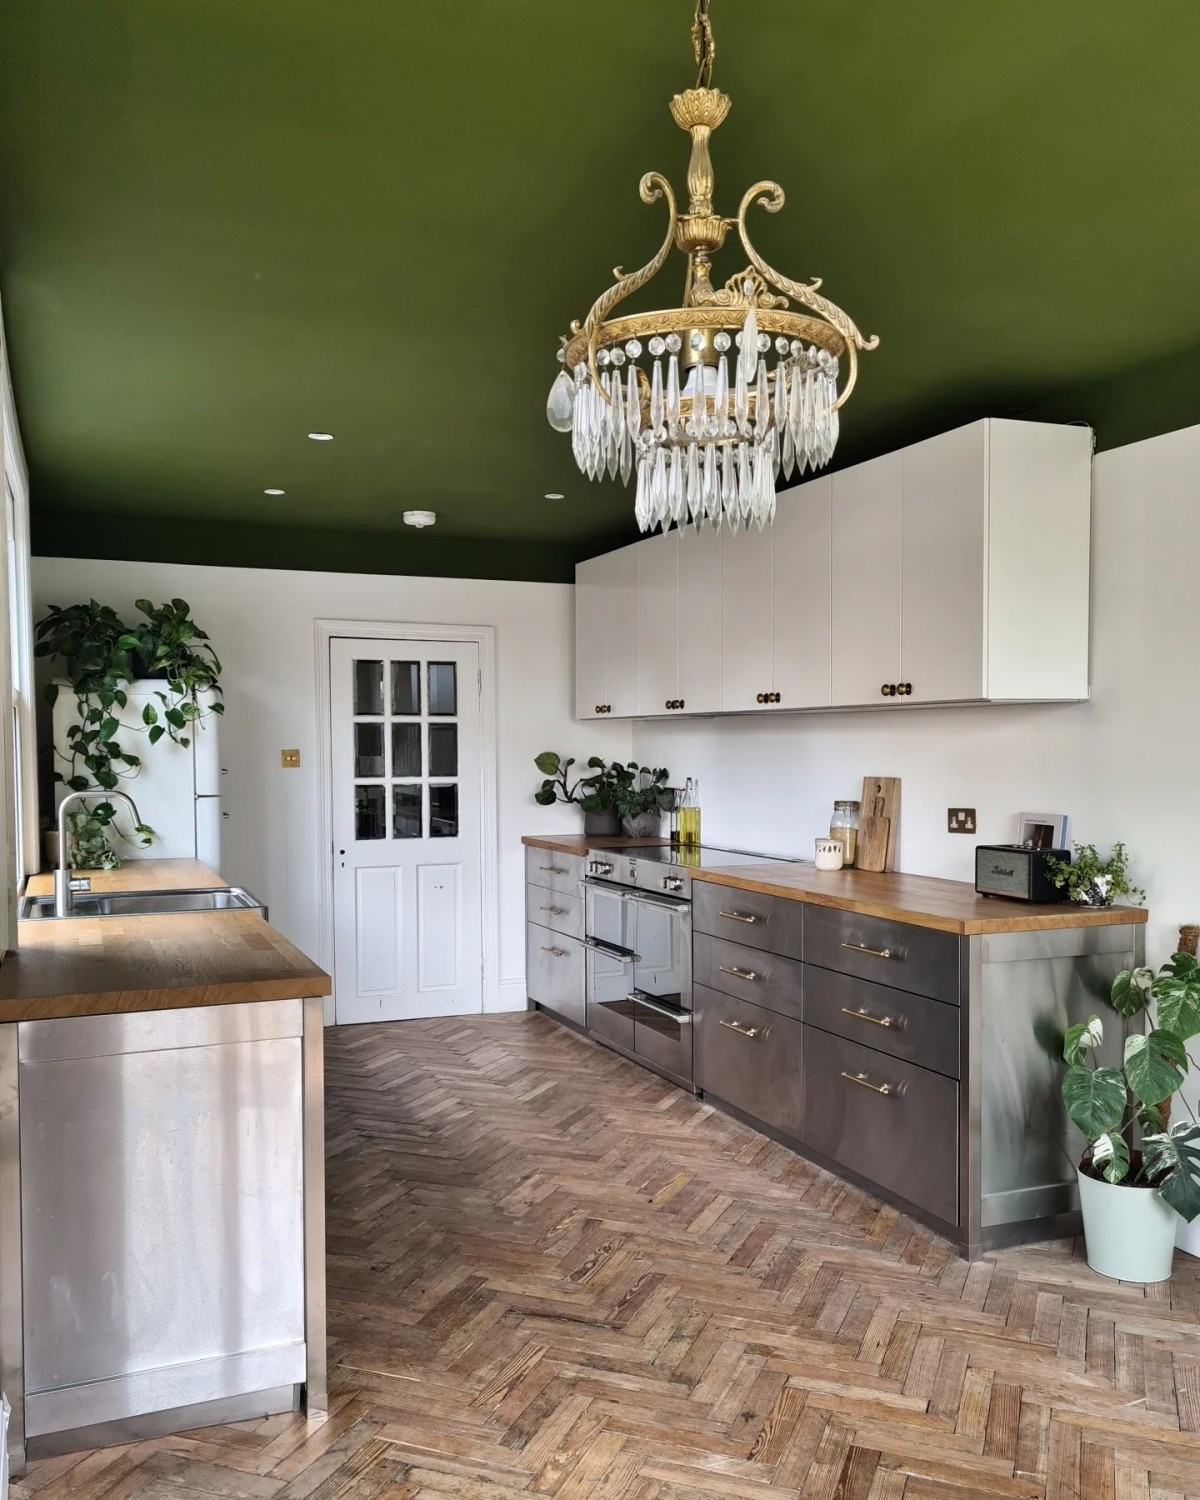
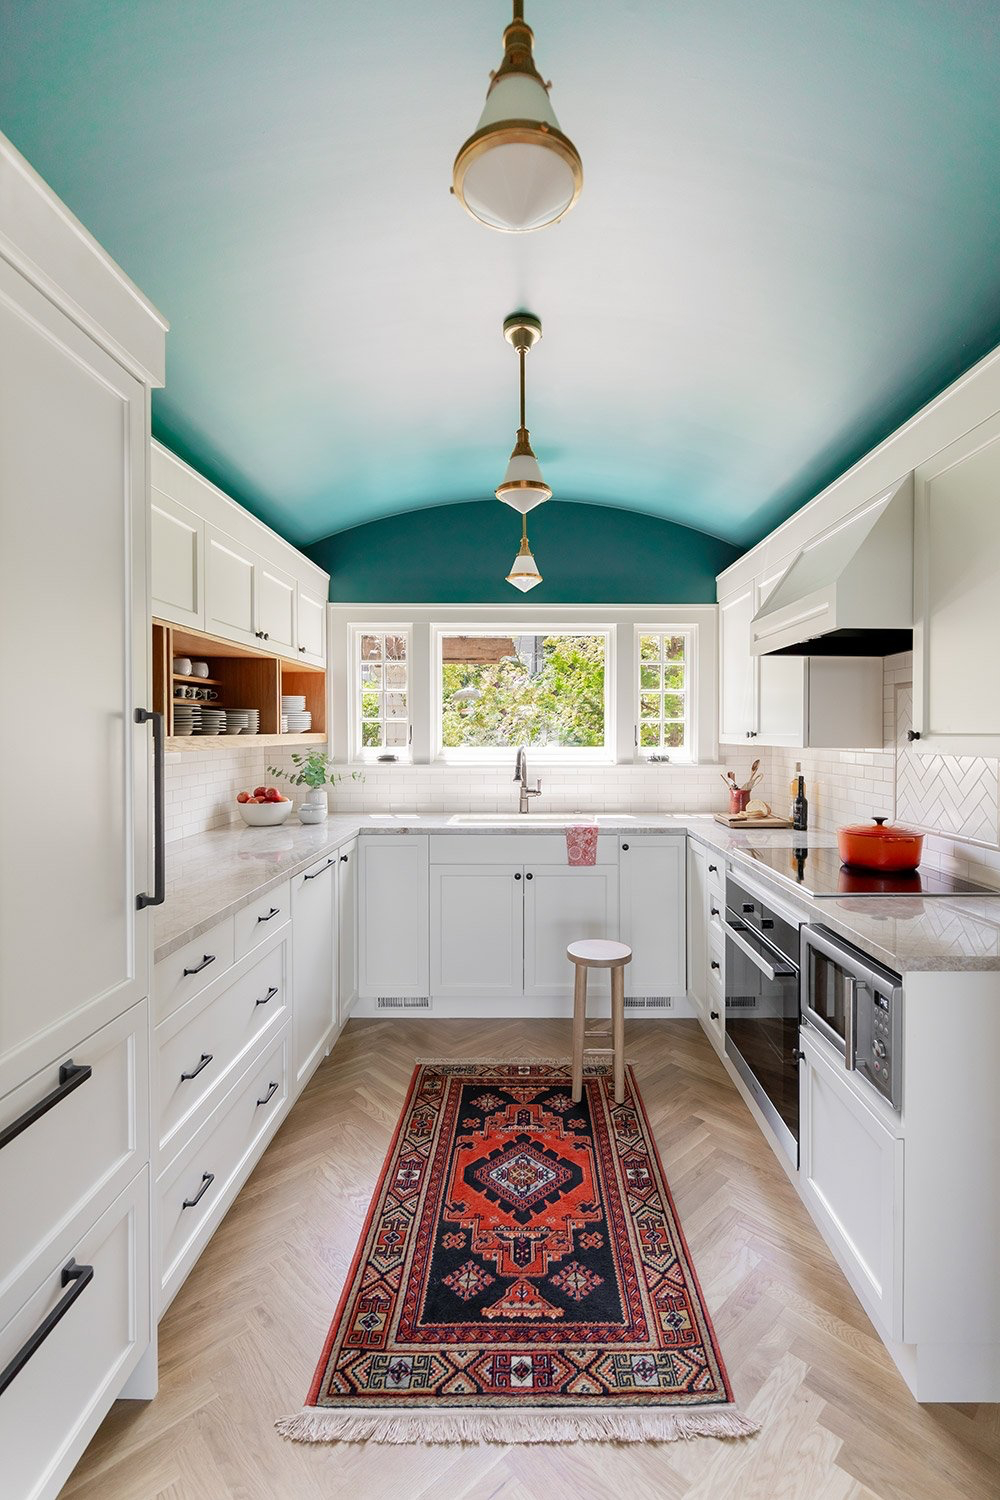
Don’t forget the fifth wall—the ceiling! In a kitchen with high ceilings, painting it a darker, dramatic color can make the space feel cozier and make your cabinets pop. As for walls, feel free to use color, just make sure it’s in a washable sheen.
A quick safety note: If you’re refinishing a surface that will come in direct contact with food, like a butcher block island, you must use a food-safe finish. Look for products like mineral oil, beeswax, or specific food-grade hardwax oils. Most paints, even when cured, are not designed for this.
What NOT to Paint: My Professional Warning List
Part of being a true expert is knowing when to put the brush down. Some surfaces are popular to paint online but are almost guaranteed to fail in the real world.
- Countertops: Just don’t. Please. There are epoxy kits that promise a granite-like finish, and I’ve seen countless failed attempts. The finish never holds up. It scratches, it can’t handle a hot pan, and it stains. Within a year, it will look awful. A new set of laminate countertops is a far better investment and will actually last.
- Sinks and Appliances: Sinks take way too much abuse from water, cleaners, and dropped dishes to hold a painted finish. And while appliance paint exists, it’s very hard to get a smooth result without it looking cheap.
- Hardware: Spray painting your old knobs and pulls is a temporary fix at best. The paint will wear off the most-touched areas in a matter of weeks. New hardware is a relatively small expense—you can find great options for $3-$8 a piece—that makes a huge, lasting impact.
Final Thoughts: Patience Is Your Best Tool
A successful kitchen paint project is really a testament to patience. The excitement is in the new color, but the quality is born in the hours you spend cleaning, sanding, and priming. Understand what your kitchen demands, choose products designed to handle it, and be realistic about the work involved.
And know your limits. A full cabinet job is a marathon. If you don’t have the time, space, or patience, hiring a pro is a smart move. Fixing a failed DIY job often costs more than hiring someone to do it right the first time. But if you’re ready for the challenge, there’s nothing more satisfying than stepping back and seeing a beautiful new kitchen that you brought back to life yourself.
Inspiration:
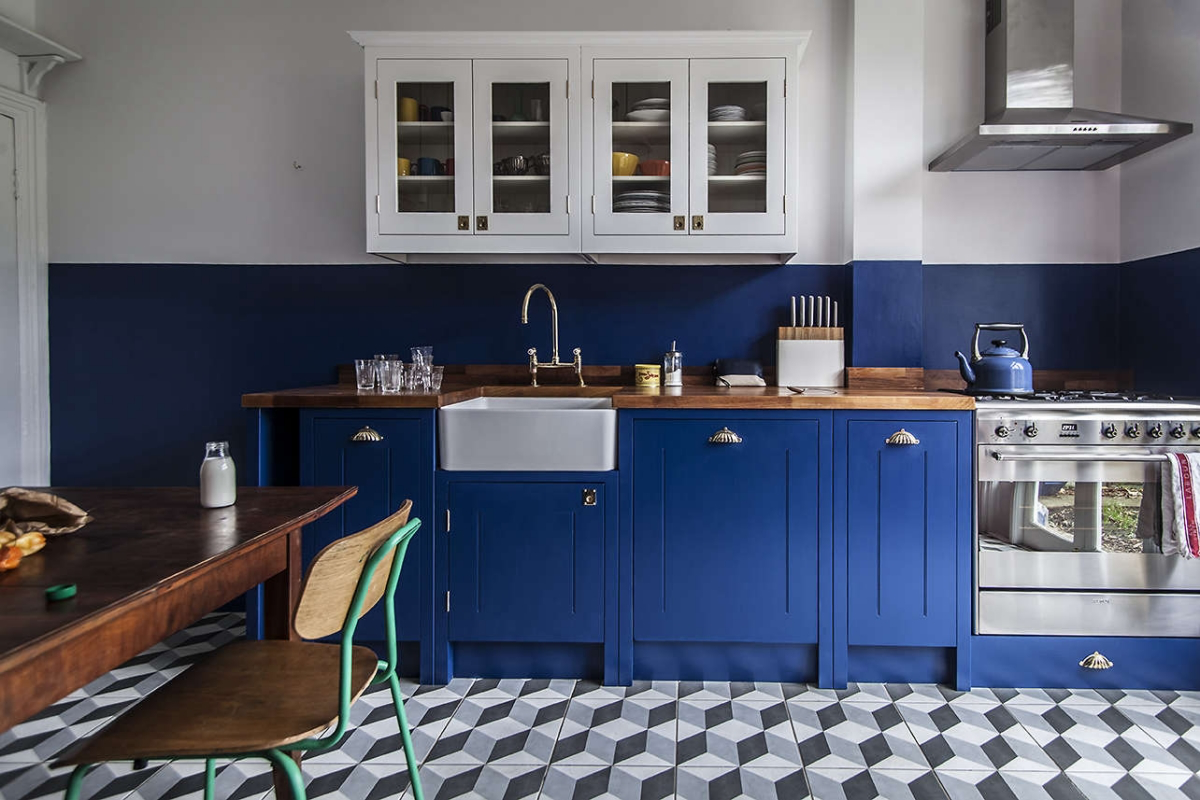
Did you know that certain colors can actually influence your appetite? While bold reds can stimulate it, calmer blues can have the opposite effect.
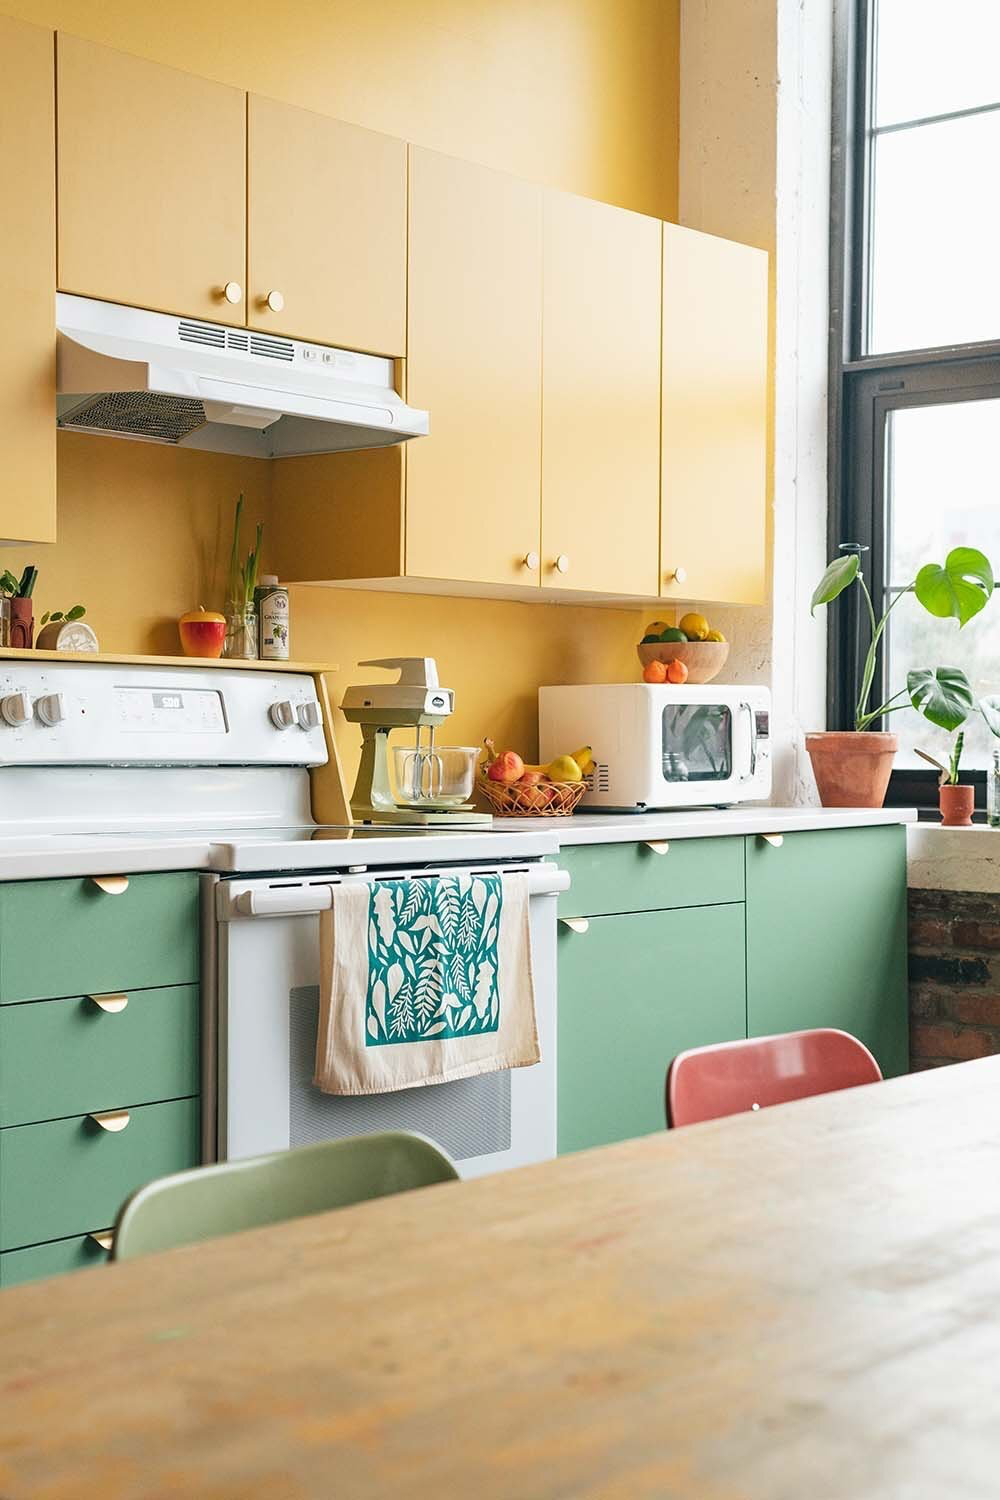
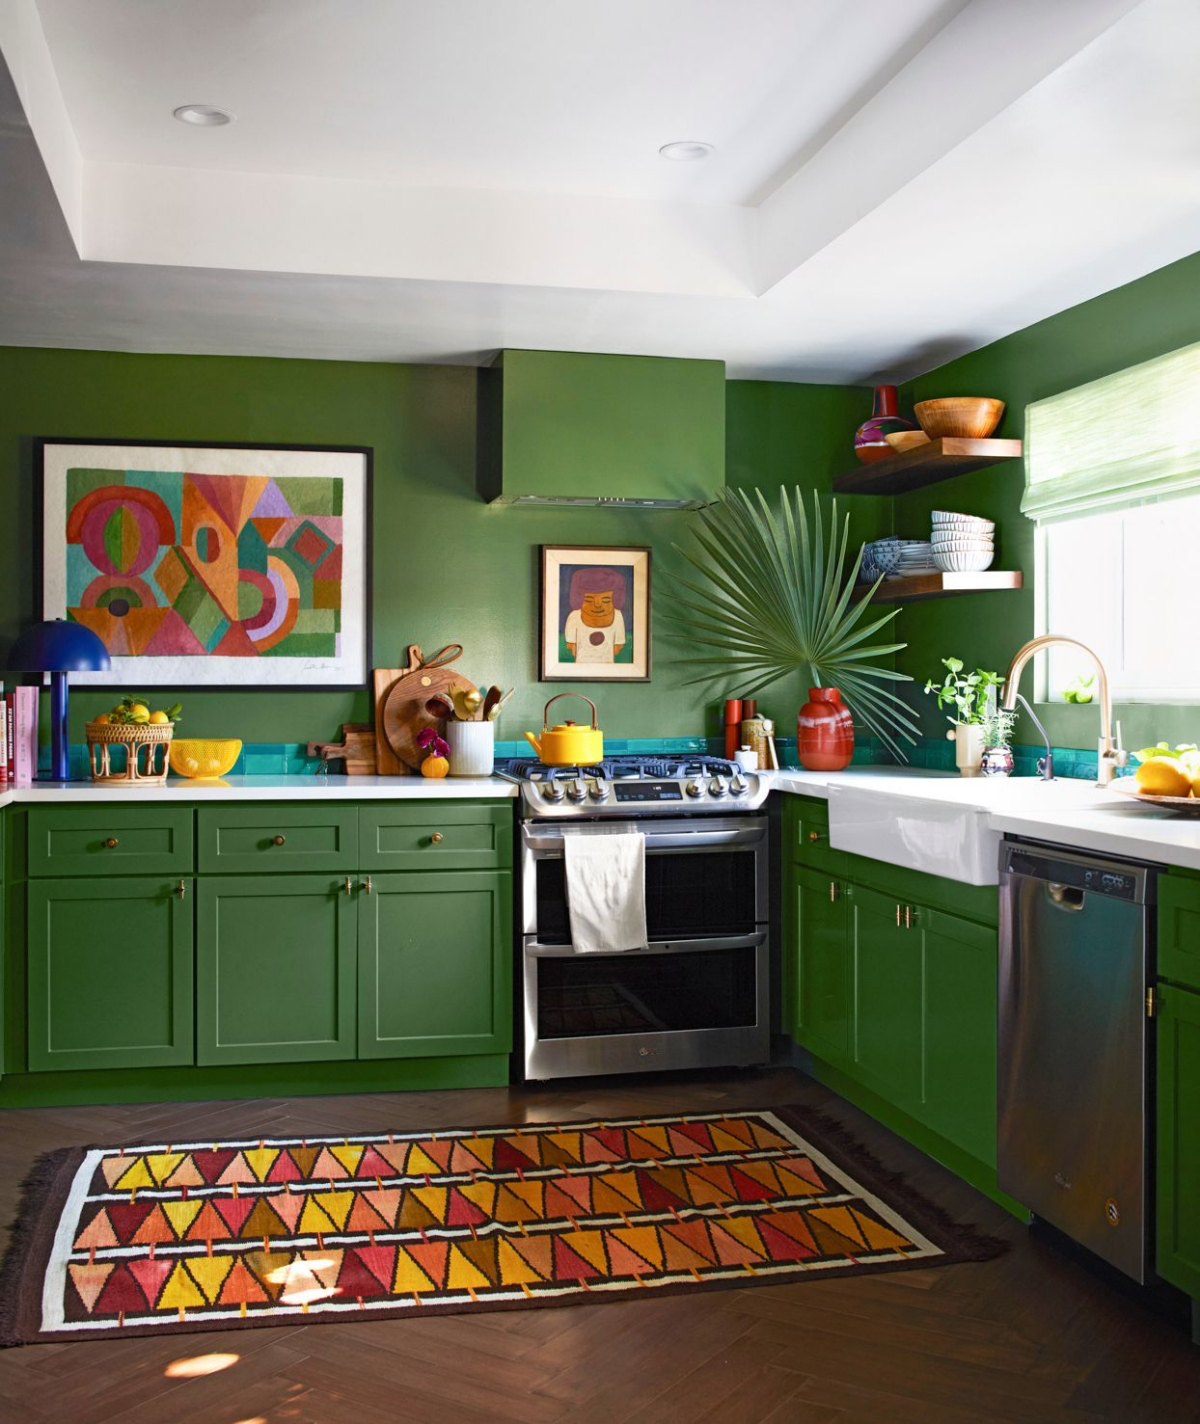
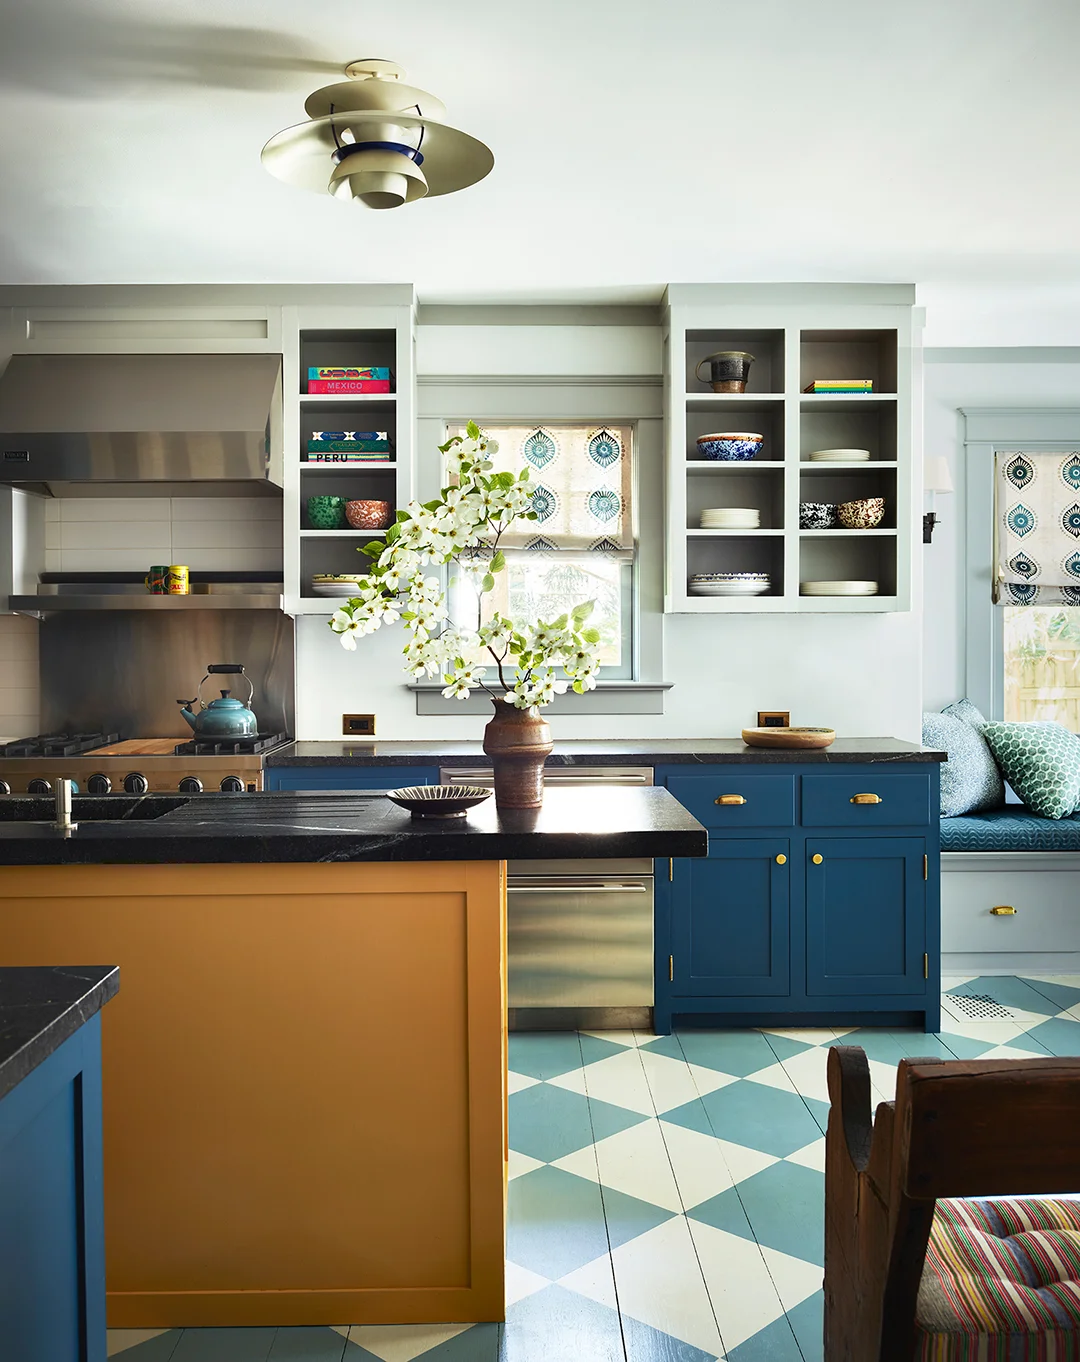
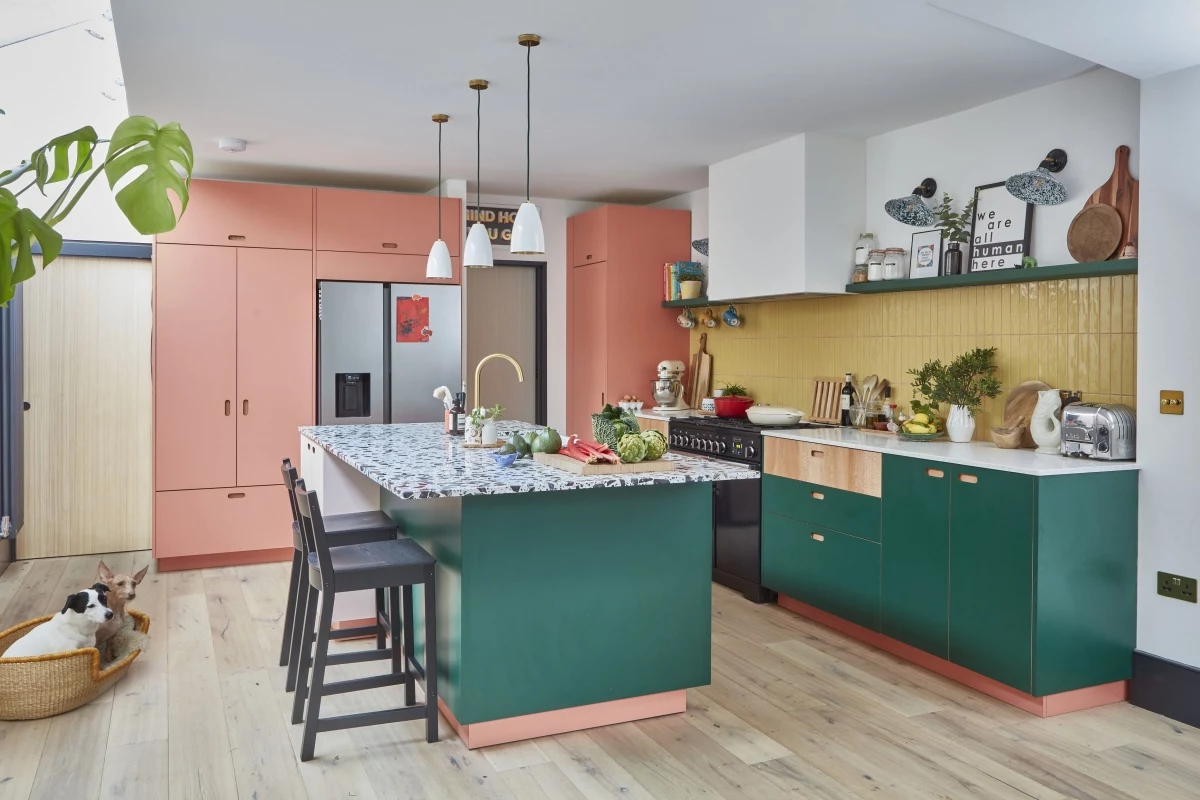
When choosing a kitchen color, think beyond pure aesthetics. Soft greens like Farrow & Ball’s ‘Teresa’s Green’ or a warm, earthy terracotta can create a welcoming, nourishing atmosphere. These mid-tones are fantastic for hiding minor splashes and scuffs, and they pair beautifully with wood, brass, and stainless steel, making them incredibly versatile for cabinets or accent walls.
Can you really paint a tile backsplash?
Yes, but with a major caveat: it’s a stop-gap, not a permanent solution. For it to have any chance of survival, you absolutely must use an extreme bonding primer made for glossy surfaces, like Zinsser B-I-N or Insl-X Stix. After priming, topcoat with a durable cabinet or epoxy-based paint. Be prepared for potential chipping in high-use areas, especially behind the sink, but for a low-cost, temporary update, it can be surprisingly effective.
The Final Sheen: It’s More Than Just Looks
- Satin/Semi-Gloss: These are the workhorses for kitchen cabinets and trim. They offer a durable, scrubbable surface that’s easy to clean without being overly shiny. Benjamin Moore’s ADVANCE in a satin finish is a professional favorite for its hard, furniture-like cure.
- Matte/Eggshell: While beautiful on walls, these lower-sheen finishes are less forgiving on high-touch surfaces. They can be harder to clean and may show grease marks more easily. Reserve them for walls that are further away from the main cooking zone.


