Don’t Touch Your Kitchen Until You Read This: A Pro’s Guide to a Remodel That Lasts
After spending a good chunk of my life building and fixing homes, I can tell you one thing for sure: the kitchen is a different beast entirely. It’s where everyone gathers, sure, but it’s also the most complicated room in your house. Think about it—you’ve got plumbing, heavy-duty electrical wiring, and maybe even gas lines all crammed into one tight spot. It’s easy to get swept away by glossy photos of new cabinets and countertops, but a truly great kitchen remodel is all about respecting the stuff you can’t see behind the drywall.
In this article
Honestly, I’ve lost count of how many times I’ve been called in to rescue a project that went off the rails. The homeowners had picked out gorgeous, expensive tile but had no plan for the right waterproof underlayment. Or they bought a beast of a gas range without thinking about proper ventilation or if the existing gas line could even handle it. Those kinds of mistakes cost a fortune to fix—way more than just planning it right the first time. This guide is built on all that hard-won experience. Let’s walk through it.

First Things First: Your Game Plan and Your Budget
Okay, before you even think about calling a contractor or stepping into a showroom, you need a plan. And a realistic budget. The number one question is always, “How much is this going to cost?” A full-gut kitchen remodel can range wildly, but for a mid-range project, you could be looking at anywhere from $25,000 to $75,000+, depending on your location and choices. A high-end custom job? The sky’s the limit.
A huge mistake I see is not planning for the unexpected. You should ALWAYS have a contingency fund—at least 15-20% of your total budget set aside. Trust me, we almost always find something hiding in the walls. It could be old, leaky pipes, outdated knob-and-tube wiring that needs a full replacement for safety, or even termite damage. This fund isn’t for upgrading your faucet; it’s for dealing with the problems that will inevitably pop up.
And let’s talk permits. If you’re moving walls, changing plumbing, or altering electrical circuits, you will need a permit from your local building department. This isn’t just red tape; it’s a safety net. It means a neutral third-party inspector will come out to verify that the work was done to code, ensuring your family’s safety. Skipping this can cause major headaches when you eventually sell your home.
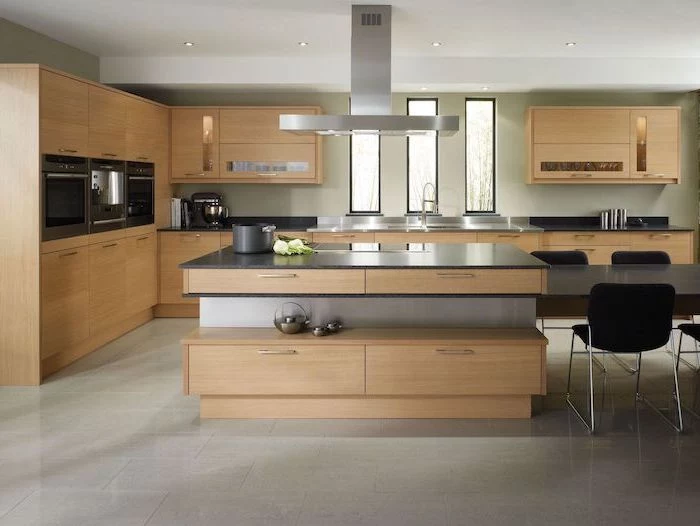
The Kitchen’s Foundation: Layout and Flow
The single biggest way to keep your budget in check is to work with your kitchen’s existing footprint. Keeping the sink, dishwasher, and stove in their current spots saves a ton of money because you’re not moving the complex mechanical systems that serve them.
Just moving a sink, for example, sounds simple. But is it? Not really. A plumber has to make sure the new drainpipe has the perfect downward slope—usually a quarter-inch drop for every foot of pipe—so that water actually drains away. If the new spot is too far, you might have to cut into the floor joists, which could compromise the structure of your floor. It’s a classic example of a small change creating a big, expensive problem.
The Work Triangle vs. Modern Zones
You’ve probably heard of the classic “kitchen work triangle,” which connects the sink, fridge, and stove. It’s a solid concept that still works, aiming to make the path between these key areas short and clear. But kitchens are bigger now, and we use them differently. I prefer to think in “work zones.”
- Prep Zone: A good stretch of counter, ideally right between your sink and fridge. This is where the magic happens—all the chopping and mixing.
- Cooking Zone: Your stove and oven, with at least 15 inches of clear counter space on either side as a “landing zone” for hot pots and pans. This is non-negotiable for safety.
- Cleaning Zone: The sink and dishwasher, right next to each other. Pro tip: put your pull-out trash and recycling bins in this zone. It makes scraping plates and cleaning up so much smoother.
- Storage Zone: Your pantry and fridge. It’s a good idea to have this zone near the entrance of the kitchen to make unloading groceries less of a chore.
Thinking in zones helps create a natural workflow and stops people from constantly bumping into each other. It’s just more practical for how families live today.
A Word of Warning: Is That Wall Load-Bearing?
Ah, the dream of the open-concept kitchen. It often starts with, “Let’s just take out this wall.” This is the moment to hit the brakes. Hard. Some walls are just dividers. Others are load-bearing, meaning they are literally holding up the ceiling or the floor above. Removing one without a solid plan to redistribute that weight is courting disaster.
If you even suspect a wall is load-bearing, you need a structural engineer or a very experienced contractor to look at it. There’s no room for guesswork here. The fix for getting this wrong costs three times as much as doing it right from the start. Don’t risk it.
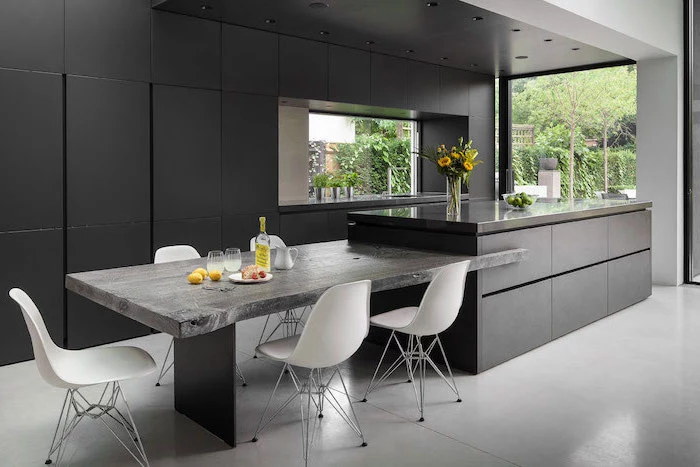
Choosing Your Materials Like You’ve Done This Before
Materials give a kitchen its personality, but they also dictate how well it will hold up over time. You have to think about moisture, heat, and the abuse of daily life.
Cabinets: The Backbone of Your Kitchen
Your cabinets are a huge chunk of your budget, so you want them to last. The real difference in quality is the box construction.
- Particleboard/MDF: This is what you’ll find in most budget, off-the-shelf cabinets. It works, but it’s like a sponge around water. One small, unnoticed leak under the sink can cause it to swell and completely fall apart.
- Plywood: This is the professional standard for a reason. Boxes made from 1/2-inch or 3/4-inch plywood are way more rigid, durable, and water-resistant. They also hold screws better, so your doors won’t start sagging. Expect plywood to add about 15-25% to your cabinet cost, but believe me, it’s an investment you won’t regret.
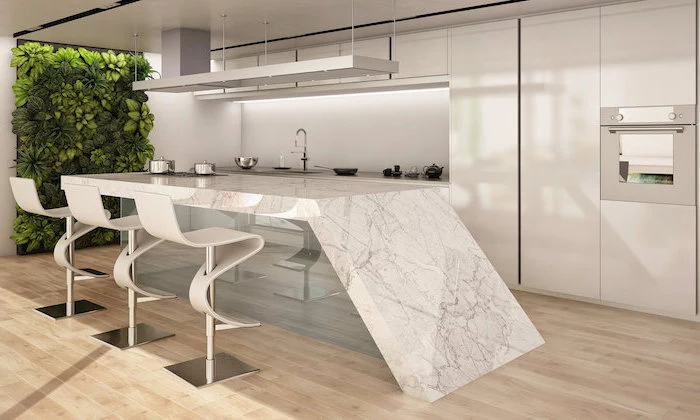
Countertops: Finding the Sweet Spot Between Beauty and Brawn
Your countertop is your primary work surface, so it has to be tough. Here’s a quick rundown with some ballpark figures to help you budget. Keep in mind, prices vary by region and quality.
- Laminate: The most budget-friendly choice, often running $20-$50 per square foot installed. Modern versions look great, but they can scratch and will burn if you put a hot pan on them.
- Granite: A natural stone that’s a real workhorse. It’s very heat-resistant, but it is porous, so you’ll need to seal it about once a year to prevent stains. It typically costs between $50 and $100 per square foot.
- Quartz: This is an engineered stone and probably the most popular choice right now. It’s non-porous (so no sealing needed!) and incredibly durable. The only catch is that the resins can be damaged by extreme heat, so use a trivet. Expect to pay anywhere from $60 to $120+ per square foot.
- Butcher Block: Wood adds incredible warmth and is great for prep areas. But it needs regular oiling to keep it from drying out and will absolutely show knife marks and stains over time—some people call this “character.”
Flooring: The Hardest-Working Surface
Kitchen flooring has to be durable, water-resistant, and comfortable to stand on for long periods.
- Tile: Porcelain or ceramic tile is waterproof and tough as nails. The downside? It’s hard, cold, and anything you drop will shatter. Grout lines also need sealing to keep them from getting grimy.
- Luxury Vinyl Plank (LVP): This stuff has gotten so good. It’s 100% waterproof, softer underfoot than tile, and many styles are shockingly convincing mimics of real wood or stone. It’s a fantastic, practical choice for a kitchen.
- Hardwood: It’s a beautiful, classic look. But solid hardwood and water are not friends. A dishwasher leak can be catastrophic. If you must have wood, go with engineered hardwood, which has a plywood core that makes it much more stable in a kitchen environment.
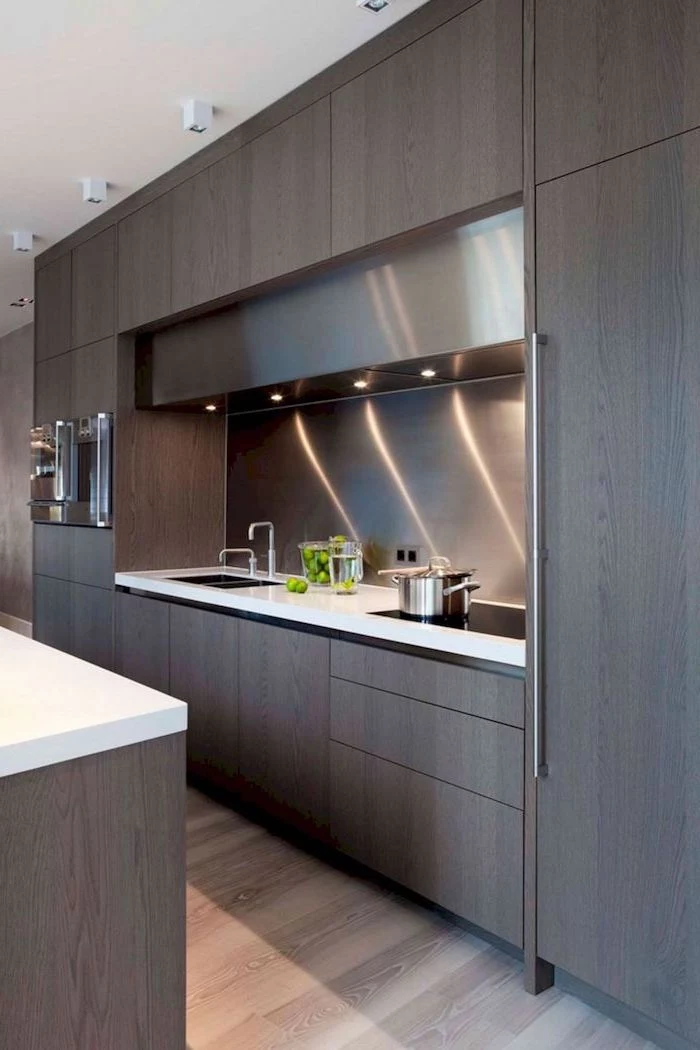
The Finishing Touches That Make All the Difference
Lighting Isn’t an Afterthought
Good lighting is a game-changer. I always plan for three layers:
- Ambient: General room lighting, usually from recessed can lights in the ceiling.
- Task: This is the most important! Under-cabinet LED lighting is a must. It lights your counters so your own body doesn’t cast a shadow on what you’re doing.
- Accent: The fun stuff, like pendant lights over an island or a cool fixture over the sink.
Quick Win: If you’re not ready for a full remodel but want a huge upgrade, add under-cabinet lighting. You can buy good quality LED strip kits for under $100 at places like Home Depot and install them in an afternoon. It will completely transform how you use your kitchen.
Ventilation: It’s About More Than Smells
A range hood isn’t just for show; it removes grease, smoke, and moisture from your home. Always go for a ducted hood that vents to the outside if you possibly can. A ductless one just filters and recirculates the air, which is mostly useless.
Heads up! If you install a powerful vent hood (over 400 CFM), building codes in many areas now require a “makeup air” system. This system actively pulls fresh air into your tightly sealed home to replace the air being blown out. Without it, the powerful fan can create negative pressure and actually pull dangerous carbon monoxide back into your house from your furnace or water heater. It’s a critical safety feature many people miss.
Getting It Done: The Process and How to Survive It
A full kitchen remodel is messy and disruptive. A typical timeline is 6 to 12 weeks, and anyone promising to do it in two is either a magician or cutting major corners. Here’s a pro tip that will save your sanity: set up a temporary kitchen somewhere else in the house. A folding table with a microwave, a coffee maker, and your old fridge can be a lifesaver and will stop you from blowing your budget on takeout.
Finding the Right Help (and Avoiding the Wrong Kind)
Unless you’re a trained professional, do not DIY your own electrical or plumbing. The risk of fire or flood is just too high. When hiring a general contractor, your job is to vet them thoroughly. Get a detailed, written contract, and check their license and insurance (both general liability and worker’s comp).
When you call their references, don’t just ask if they were happy. Ask the tough questions:
- Did they show up on time and communicate clearly?
- Did they protect your floors and clean up the job site every day?
- And most importantly: when something went wrong—because something always goes wrong—how did they handle it?
Their answer to that last question will tell you everything you need to know. A great kitchen remodel is a huge undertaking, but with smart planning and the right team, it’s an investment in your home and your daily happiness that will pay off for years to come.


