Your Kitchen Has More Space Than You Think. Here’s How to Unlock It.
I’ve been on the inside of more kitchens than I can count, building and installing custom cabinets for years. I’ve seen everything from shoebox-sized galleys to massive open-plan spaces. And you know what? The number one complaint is always the same: “I just don’t have enough storage.”
In this article
But after all this time working with wood, hardware, and frustrated homeowners, I can tell you something with total confidence: the problem is almost never the amount of space you have. It’s how you’re using it.
So many people rush out to buy bins and gadgets, hoping to organize their way out of the chaos. But they’re just adding more stuff on top of a broken system. Real, lasting kitchen organization starts with understanding the bones of your kitchen—the cabinets themselves. It’s about creating logical systems that actually line up with how you cook and live your life. This isn’t a quick fix, I’ll be honest. But the payoff is a kitchen that feels calm, works for you, and makes you feel like a genius.
First Things First: Know Your Cabinets
Before you even think about buying a single organizer, you’ve got to get to know what you’re working with. Not all cabinets are built the same, and their construction has a massive impact on your storage options. Here in North America, you’re usually dealing with one of two types.
Traditional Face-Frame Cabinets
This is the classic American style. Open your cabinet door. Do you see a solid wood frame, usually about 1.5 inches wide, around the opening? That’s a face-frame cabinet. The doors hang on this frame. It’s a super sturdy build, but that frame creates a small lip that gets in the way of storage. You can’t just slide a wide basket straight in; organizers have to be a bit narrower to clear the opening.
Heads up! This is a big one for DIY projects. If you want to install pull-out shelves, the slides can’t just screw into the cabinet wall. They need to sit flush with the frame. This means you have to “shim” the base by adding thin strips of wood to raise the mechanism. It’s a critical step that many tutorials just gloss over, but it’s the difference between a smooth pull-out and a useless one.
Modern Frameless (Euro-Style) Cabinets
These are the standard in modern kitchens. When you open the door, there’s no frame—you just see the edge of the cabinet box. The hinges mount directly to the inside walls, giving you full, unobstructed access. It’s a dream for installing hardware.
Most of these use what’s called the “System 32” method. See those neat rows of little holes spaced out perfectly? They’re designed for easy adjustment of shelves and hardware. It’s a fantastically flexible system.
Why Your Cabinet Material REALLY Matters
Okay, let’s talk about what holds everything up. The material of your shelves and cabinet box determines how much weight they can handle without turning into a sad, sagging frown. I’ve been called out to fix shelves that have completely collapsed, and it’s no joke.
- Plywood & Solid Wood: These are the champions. Plywood, with its cross-laminated layers, is incredibly resistant to sagging. It’s what the pros use for high-quality cabinets for a reason. It can handle your heavy stoneware or that collection of cast-iron pans without breaking a sweat. It’s more expensive, but it’s built to last.
- MDF (Medium-Density Fiberboard): MDF is smooth and stable, which makes it great for painted doors. But for shelves? It’s not as strong as plywood and really doesn’t like water. An MDF shelf of the same thickness will start to sag with much less weight than a plywood one.
- Particleboard: This is what you’ll find in most budget or flat-pack cabinets. It’s basically wood chips and sawdust pressed together with glue. It’s the least strong and most likely to sag or get ruined by a small leak. A quick tip from experience: if you have a particleboard shelf that’s wider than 30 inches, you absolutely need a center support bracket to keep it from slowly giving up on life. I once had a client whose entire dish set crashed through a particleboard shelf at 2 AM… trust me, you don’t want that phone call.

The Pro Method: A Strategic Takedown
Now that you’re an expert on your cabinets, the real work begins. We don’t just tidy up; we do a full-on assessment. This means emptying every single cabinet and drawer. I know, it sounds like a nightmare. You should probably plan for a full weekend and maybe some pizza. But you simply can’t build a good system until you see everything you own in one place.
Step 1: The Great Purge and Grouping
Put everything out on your counters, the dining table, wherever you have space. This is your moment of truth. Be ruthless. Toss anything expired. Donate that bread maker you haven’t touched in three years. Let go of chipped plates and warped pans.
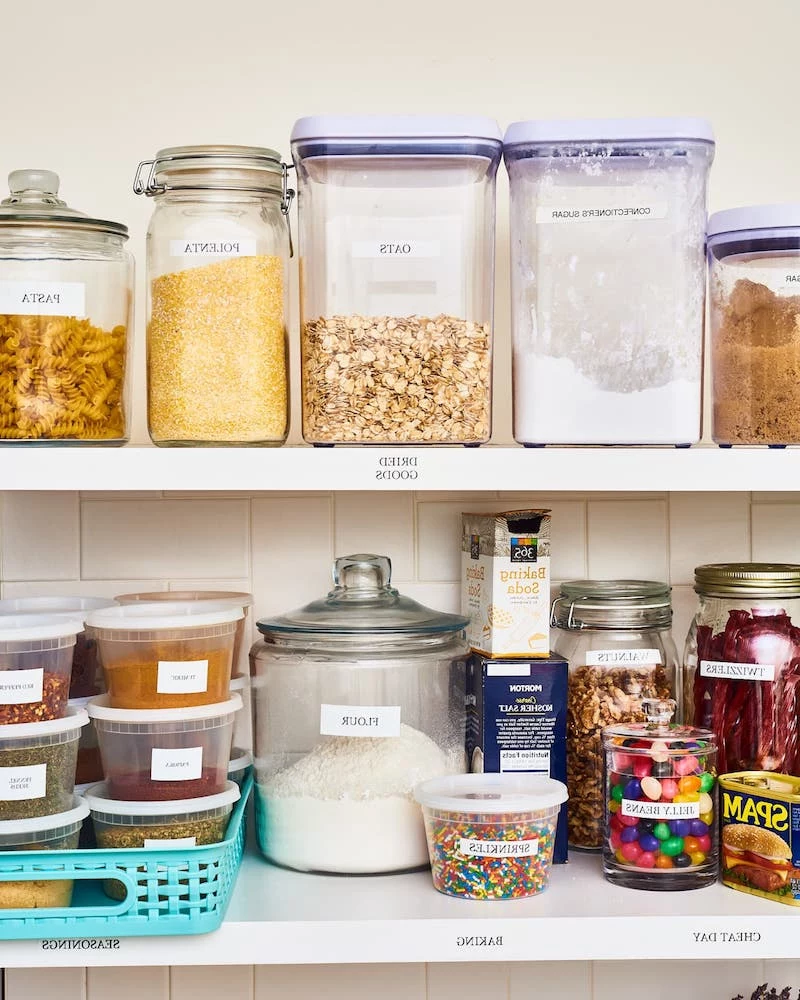
Next, group like with like. And I mean really specific groups. All your baking supplies in one pile. All your oils and vinegars in another. Spices, canned goods, breakfast stuff—give each category its own zone. This visual map is powerful; it tells you exactly how much space each part of your life actually needs.

Step 2: Map Your Kitchen’s Work Zones
A kitchen is a workshop, plain and simple. And every good workshop has stations for specific tasks. Think about your daily routines. Where do you make coffee? Where do you chop veggies? The answers tell you where things should live. The main zones are:
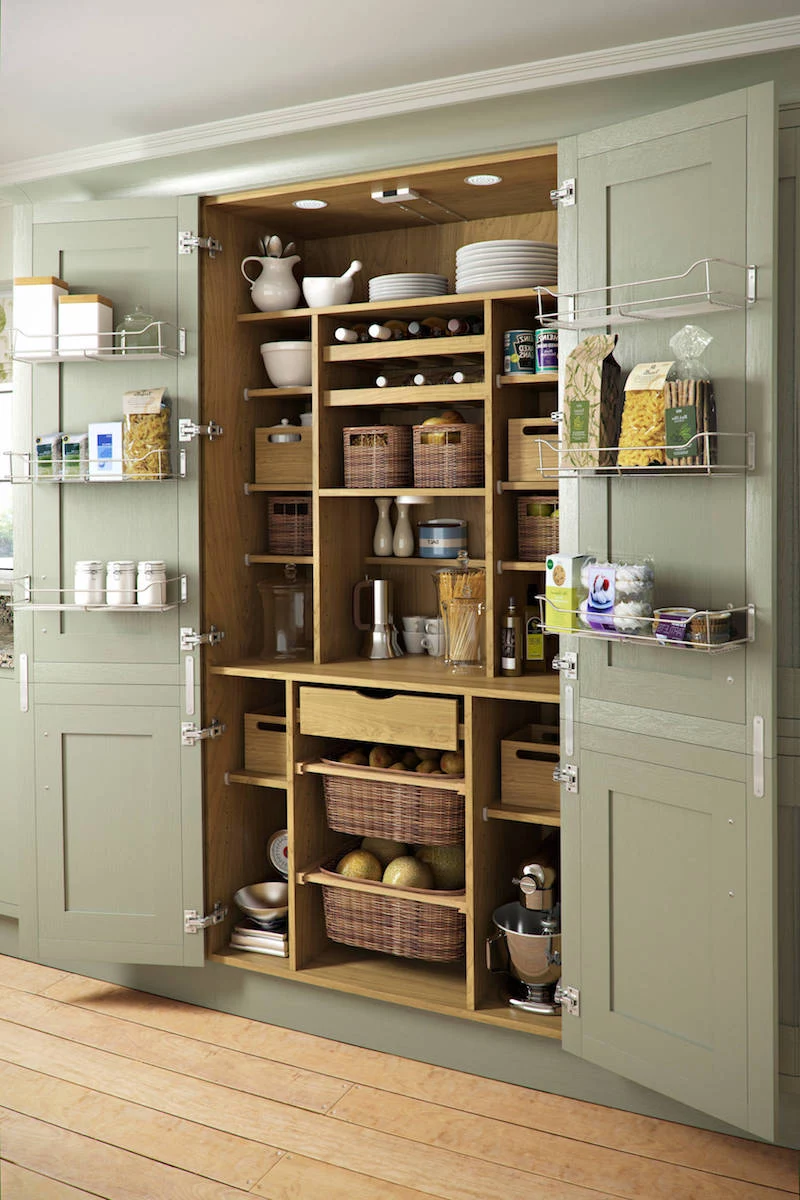
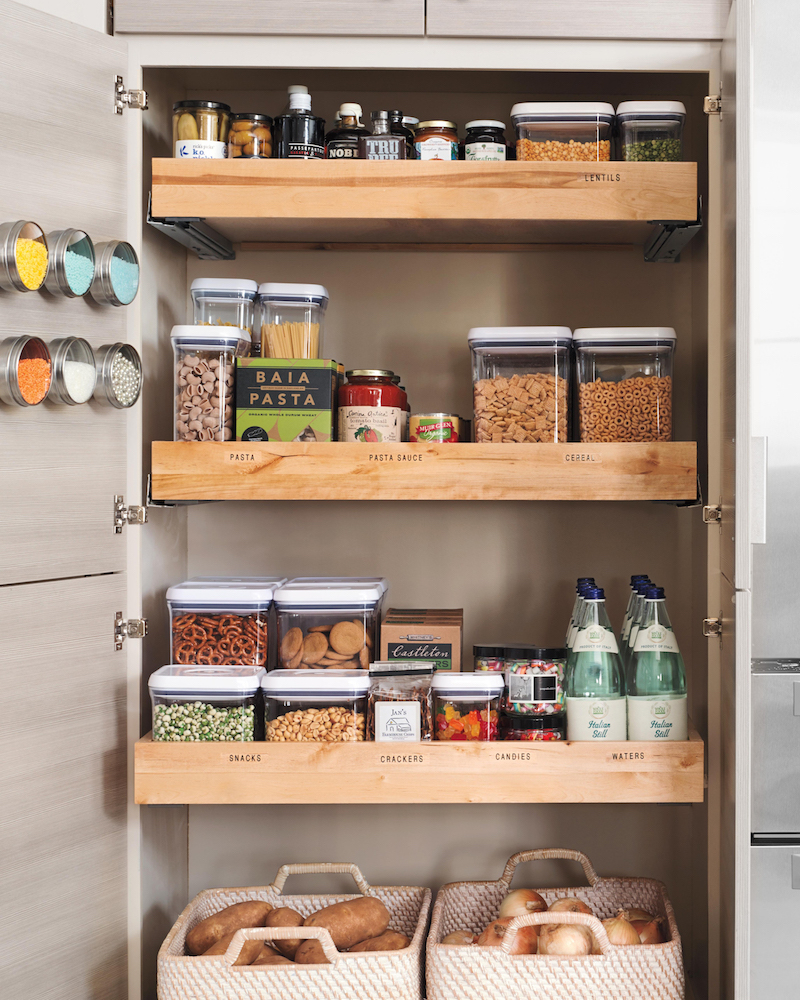
- The Consumables Zone: Pantry items, spices, snacks. Usually in a tall pantry or upper cabinets.
- The Non-Consumables Zone: Plates, bowls, glasses. Should be right near the dishwasher to make unloading a breeze.
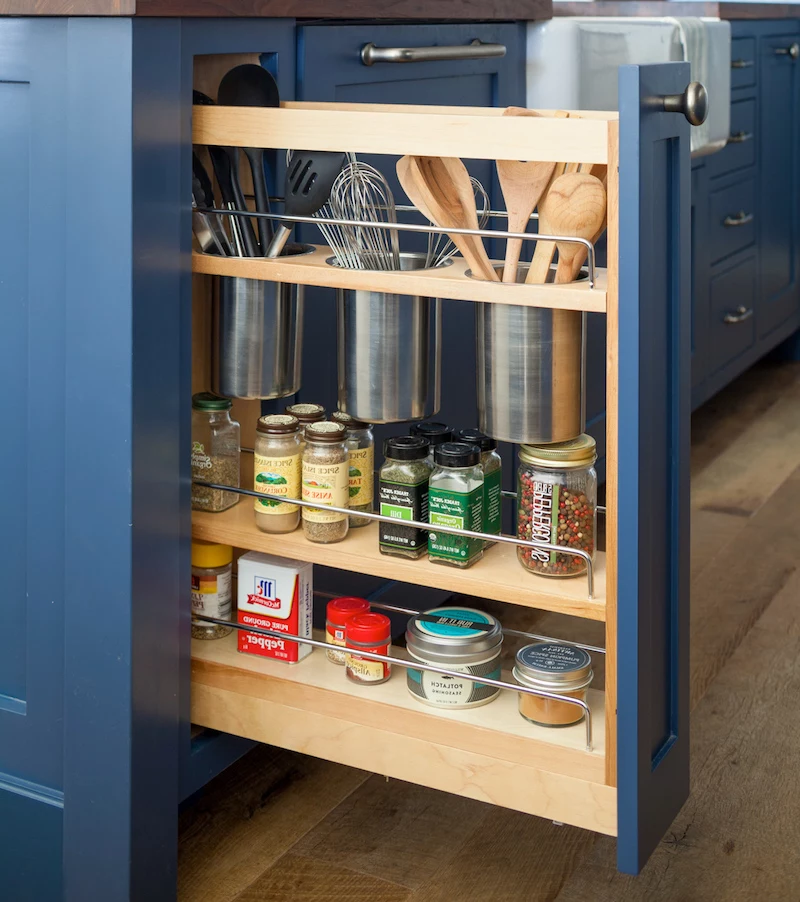
- The Prep Zone: This is next to your biggest clear stretch of counter. Home to mixing bowls, cutting boards, knives, and measuring tools.
- The Cooking Zone: The area immediately around your stove and oven. Think spatulas, tongs, pots, pans, and baking sheets.
- The Cleaning Zone: The space under and around your sink for soaps, supplies, trash, and compost.
By the way, try this right now: Grab a piece of paper and sketch a rough layout of your kitchen. Label these five zones. See where they overlap or where you have to walk across the entire room to get from one to the other. This 5-minute exercise is your treasure map to a more efficient layout.
Game-Changing Upgrades: Solutions That Actually Work
With your map in hand, you can start building your new system. The most effective changes you can make involve the core of your cabinets—the shelves and drawers.
Making Your Shelves Work Harder
Most kitchens come with one lonely shelf per cabinet, wasting a massive amount of vertical space. Adding shelves is one of the cheapest, highest-impact upgrades you can make. If you have those modern frameless cabinets with the pre-drilled holes, you’re golden. Just measure the inside, have a lumberyard cut you some 3/4-inch plywood shelves, grab a bag of shelf pins for about $5, and you’re done.
For face-frame cabinets, you can buy a shelf pin drilling jig. These handy tools, which you can find online or at a home improvement store for around $30, clamp to your cabinet and guide your drill bit to create perfectly level holes. It’s a 30-minute job per cabinet that gives you a totally professional result.
The Magic of Pull-Outs
Lower cabinets are black holes. The best way to fix this is by installing pull-out shelves that bring the contents to you. They are a game-changer. If you’re going to invest in them, here’s what to look for:
- Full-extension ball-bearing slides. They’re smoother, stronger, and let the shelf pull all the way out. Worth the extra cost over basic roller slides.
- A 100-pound load rating. Standard slides are often rated for 75 pounds, which is fine for lighter stuff. But if you’re storing a stand mixer or cast iron, go for the 100-pound rating. The rating is usually stamped right on the slide.
- A smart shopping list: For a single 18-inch pull-out shelf, expect to spend between $80 and $150. If you have face-frame cabinets, add a $5 pack of thin poplar wood strips for shims and maybe $10 for the right screws. Plan for about an hour or two for your first installation.
Honestly, I have never, ever had a client regret installing good pull-outs. They make life so much easier.
Drawers: The King of Lower Cabinets
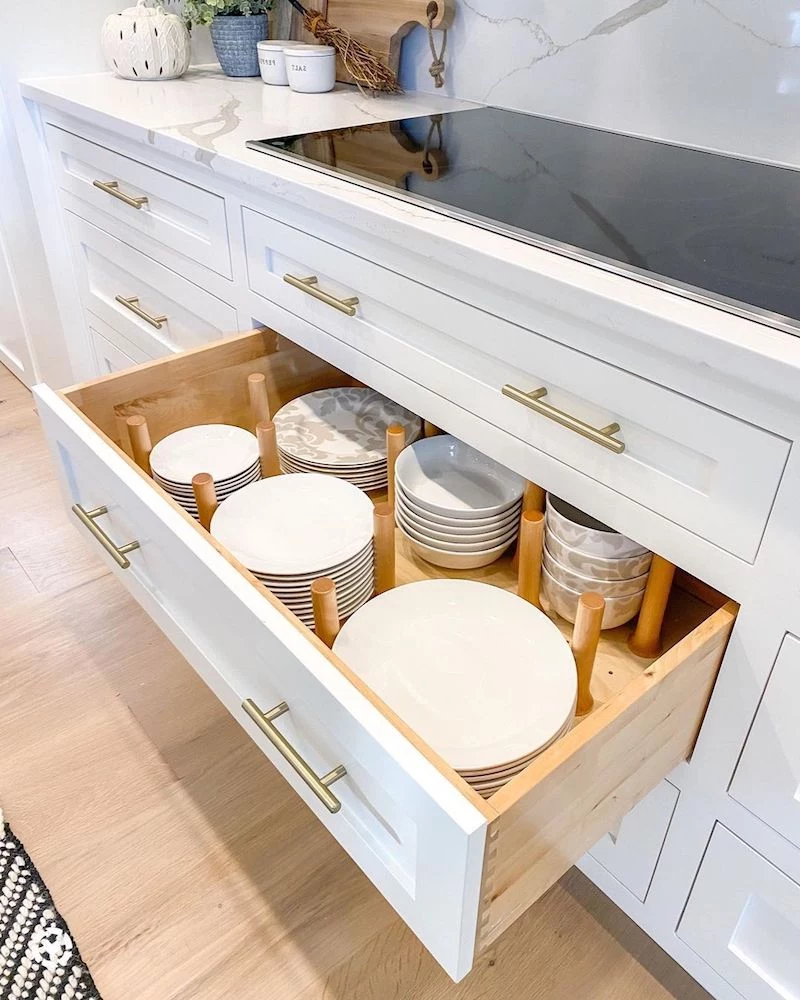
If I were designing a kitchen from scratch, I’d put drawers in almost all the lower cabinets. They beat doors and shelves every time. One pull and you can see everything inside from above—no more kneeling on the floor to find a lid.
You can make them even better with good dividers. A pegboard insert for a deep drawer is fantastic for dishes; you place dowels to cradle your plates so they don’t slide around. Or you can get adjustable tension spring dividers to section off things like food containers or baking pans stored on their side.
Quick Wins: 5-Minute Fixes for a Better Kitchen Today
Feeling overwhelmed? Don’t be. Here are a few super-easy things you can do right now for an instant improvement.
- Hang your spray bottles. Install a simple tension rod (like for a shower curtain) high up in your under-sink cabinet. Hang your spray bottles by their triggers to free up the whole floor of the cabinet.
- Use vertical file holders. Those metal or plastic office file holders are perfect for storing baking sheets, cutting boards, and pan lids on their side.
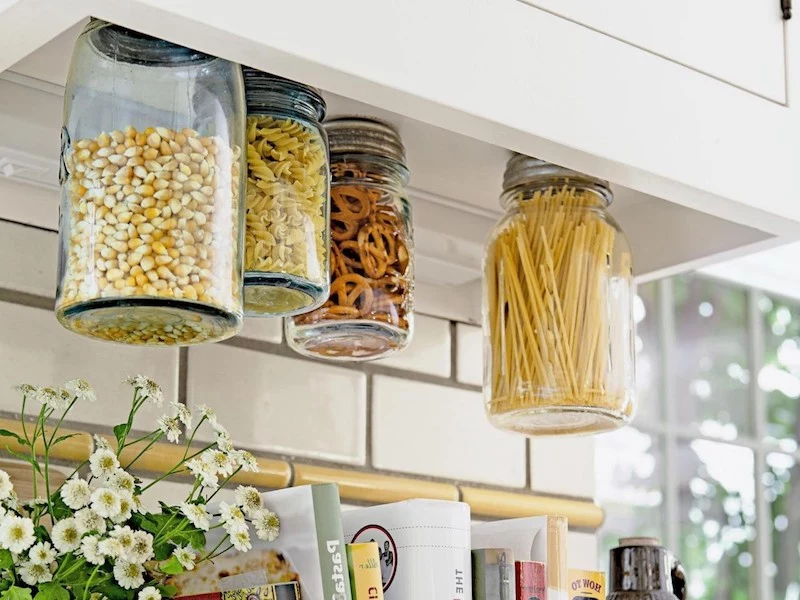
- Add magnetic spice tins. Stick them to the side of your fridge to get all your little spice jars out of a valuable cabinet or drawer.
- Put a turntable in a deep cabinet. A simple lazy susan, which can cost as little as $10, makes it easy to get to oils, vinegars, or condiments without knocking everything over.
- Use museum putty. A tiny dab of this stuff on the bottom corners of a drawer organizer will stop it from sliding around every time you open the drawer. It’s a small thing that feels like a luxury.
Tackling the Toughest Spots
Every kitchen has them: the dreaded corner cabinet and the plumbing jungle under the sink. These need special tactics.
Conquering the Corner
The blind corner cabinet is the worst. A classic Lazy Susan is one option, but even better are the advanced blind corner organizers. These are incredible hardware systems with shelves that pull out and pivot, bringing everything from the back of the cabinet right out to you. They can be pricey—a good system can run you anywhere from $300 to over $800—and they really require precise, professional installation. This is not a beginner project, so if you’re not confident, it’s worth hiring a handyperson.
Taming the Under-Sink Chaos
The plumbing—especially the garbage disposal and the P-trap (that U-shaped pipe under your sink)—makes this space a mess. The key is to work around it. After hanging your spray bottles on a tension rod, look for two-tier pull-out organizers specifically designed for sinks. They usually have a narrower top basket to clear the plumbing. Quick tip: Take a photo of your pipe setup and measure it before you go shopping. It’ll save you the headache of returning an organizer that doesn’t fit.
A well-organized kitchen isn’t about being perfect, it’s about being practical. It’s about creating a system that honors the work you do there every day. By starting with the foundation and making smart upgrades, you can build a kitchen that truly works for you for years to come.
Inspirational Gallery

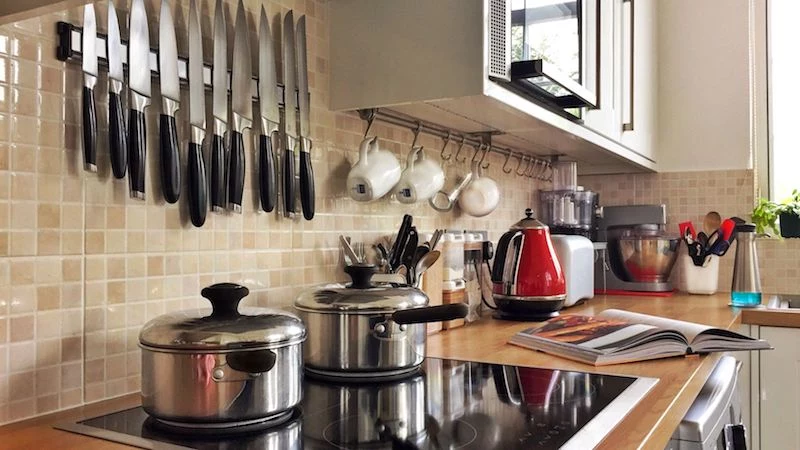
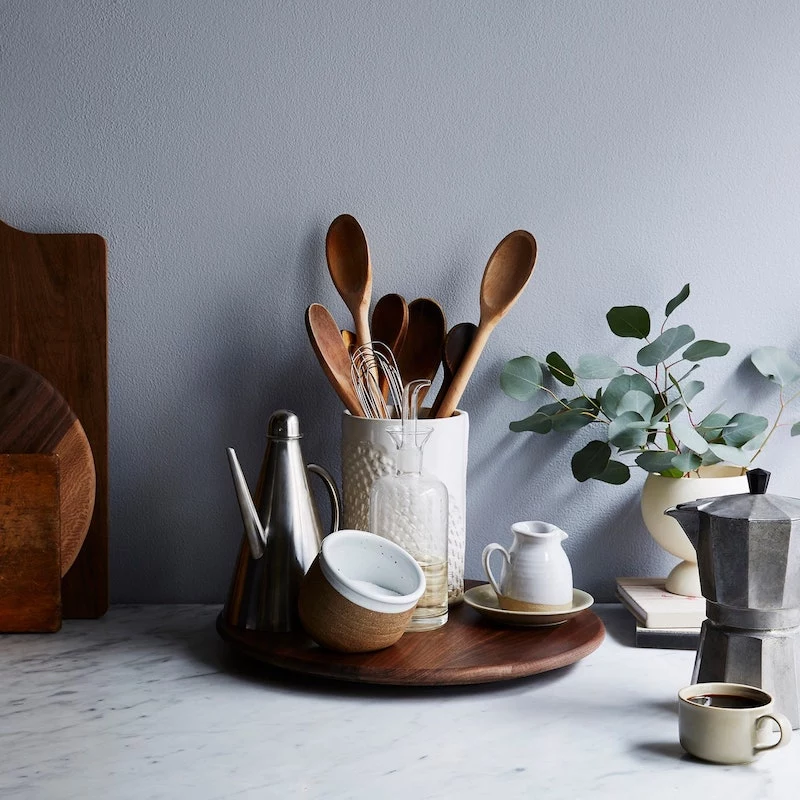
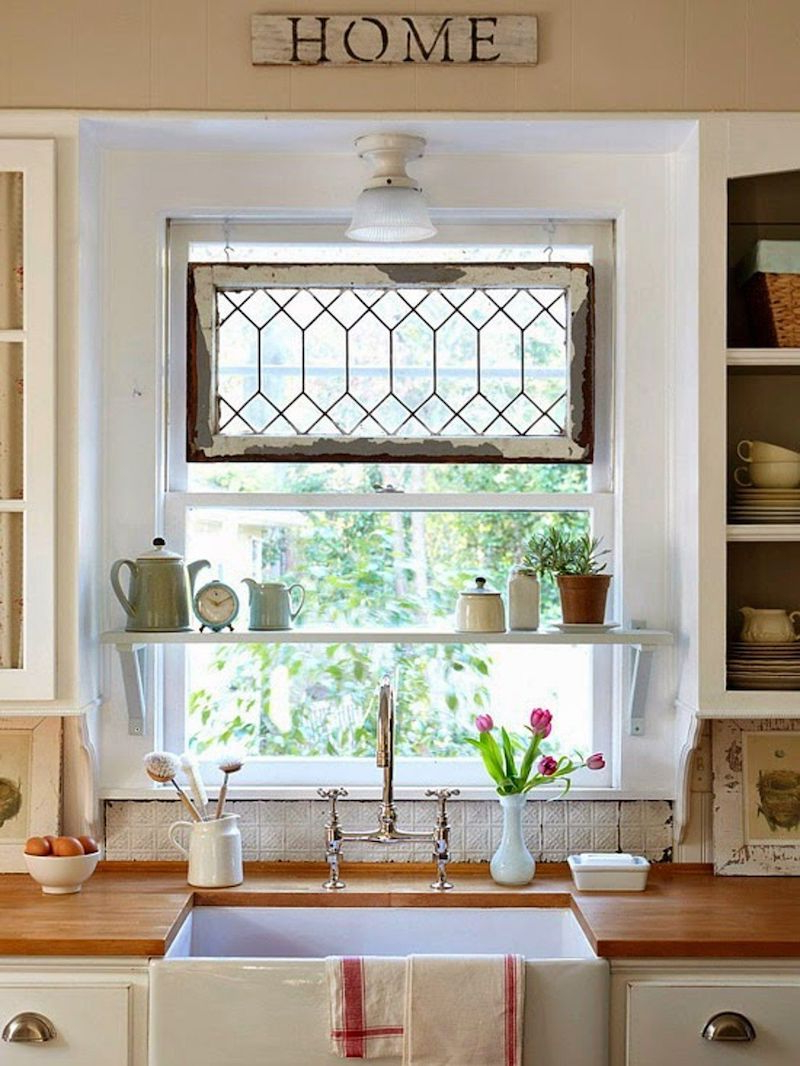
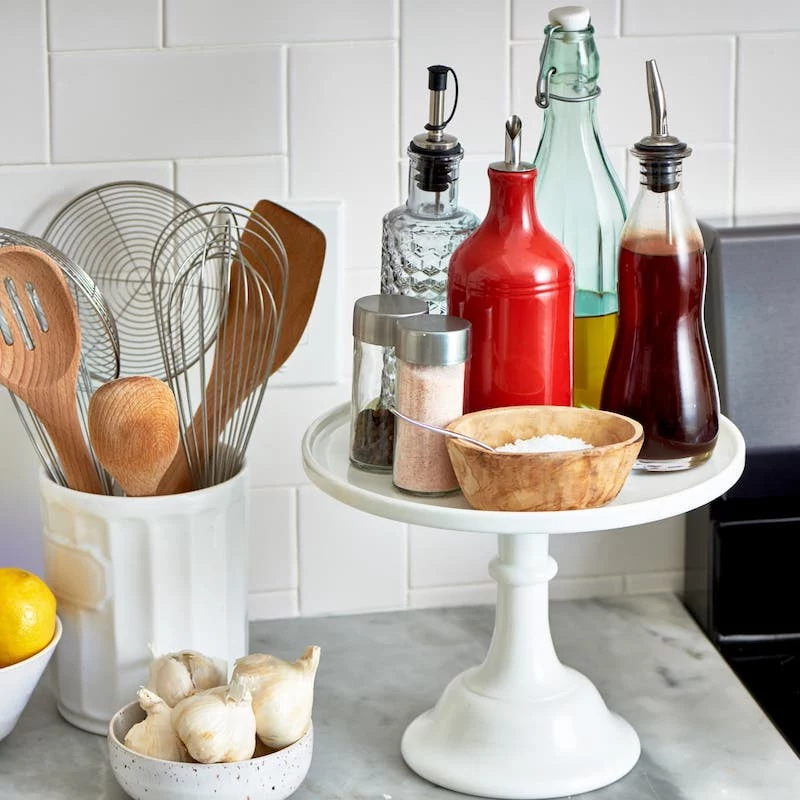
Think of your kitchen in zones, just like a professional chef. The ‘prep zone’ around your main countertop should have knives, cutting boards, and mixing bowls. The ‘cooking zone’ by the stove needs oils, spices, pots, and pans. Storing items where you use them isn’t just organizing; it’s redesigning your kitchen’s workflow.
The average American home contains over 300,000 items. Much of the kitchen clutter isn’t a lack of space, but a surplus of things we rarely use.
This is why the first, non-negotiable step is to declutter. Before buying a single organizer, empty one cabinet at a time. Be ruthless. If you haven’t used that bread maker in two years, it’s taking up prime real estate. Donate or sell it, and reclaim your space.
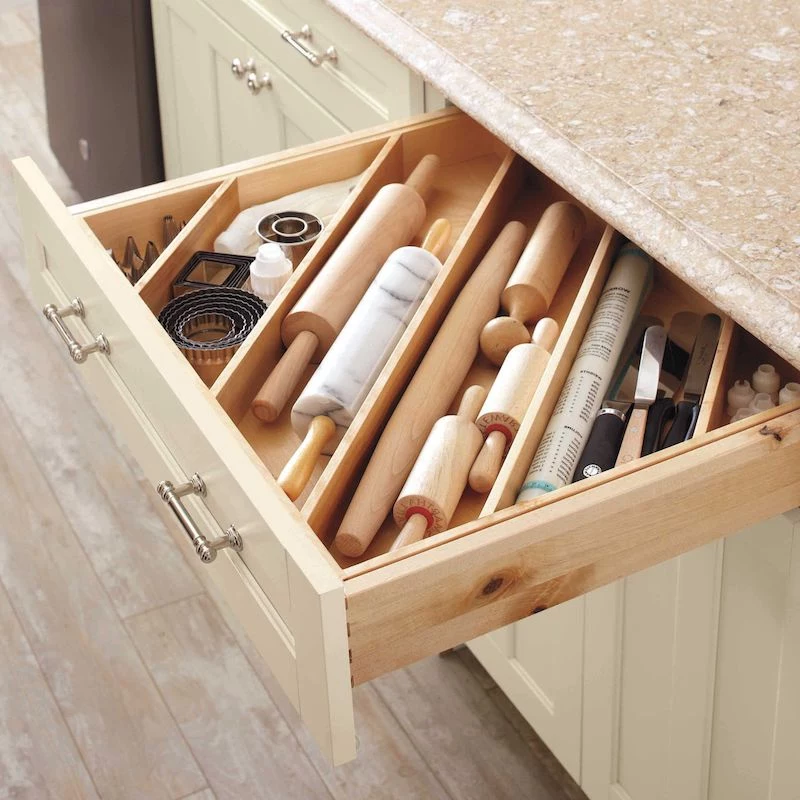
The humble drawer divider is your best friend for taming chaos. Forget single-piece cutlery trays; modern systems offer true customization.
- Tension Spring Dividers: Perfect for creating long, adjustable channels for utensils, wraps, or foil.
- Modular Bins: Small, individual acrylic or bamboo boxes from brands like The Container Store or madesmart let you create a custom grid for gadgets and junk drawers.
- Peg Systems: Ideal for deep drawers, these use movable pegs to securely hold stacks of plates or bowls, preventing them from sliding around.
Are those high-end pull-out systems really worth the investment?
It depends on your goal. For a ‘forever home,’ a professionally installed system from Rev-A-Shelf or a custom cabinet maker offers incredible durability and smooth, soft-close mechanisms that feel luxurious. However, for a budget-friendly but massive upgrade, IKEA’s VARIERA or SEKTION internal organizers provide 80% of the function for a fraction of the cost. The key is what problem you’re trying to solve: long-term value or immediate functionality.
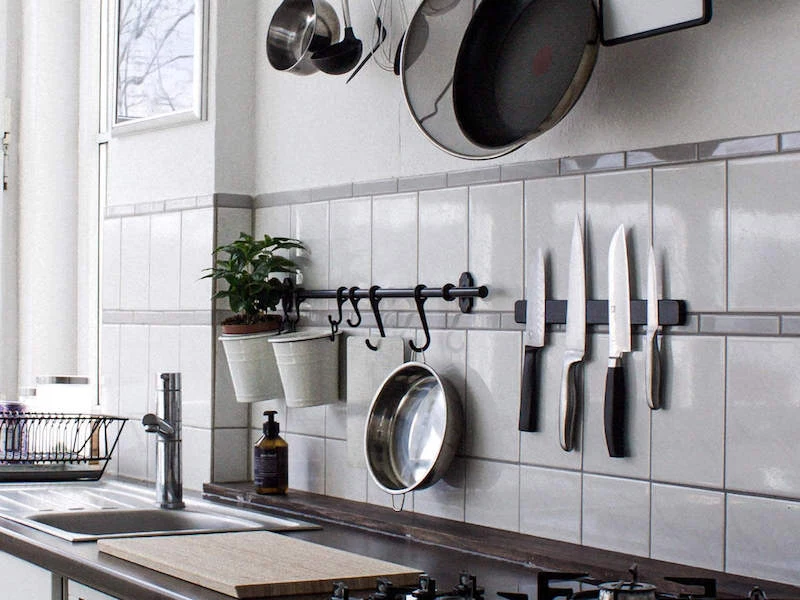
- Frees up valuable counter space.
- Keeps sharp blades safely out of drawers and away from small hands.
- Prevents blade edges from dulling by knocking against other utensils.
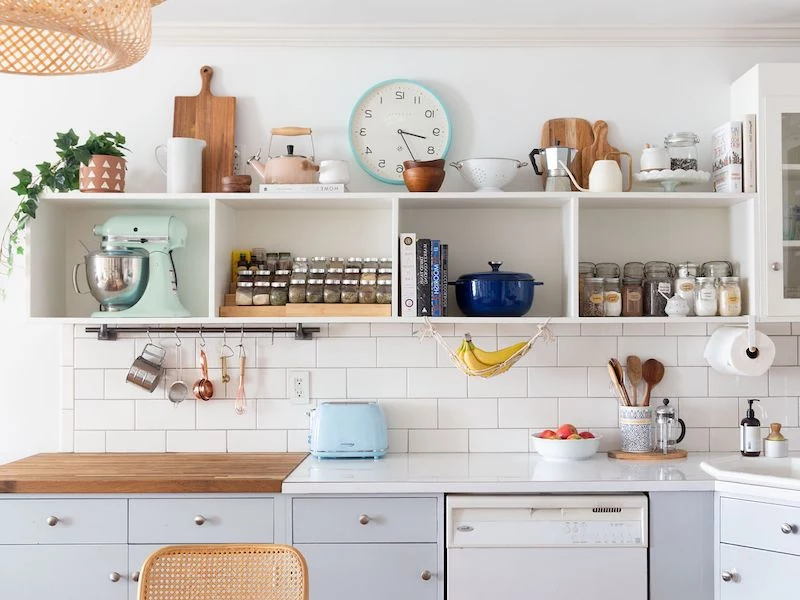
The secret? A wall-mounted magnetic knife strip. It’s an elegant and practical solution used in restaurant kitchens for a reason—it’s simply more efficient.
Acrylic Organizers: Sleek, modern, and transparent. The main benefit is visibility—you can see everything at a glance, which is perfect for pantries or deep drawers. They are easy to wipe clean but can sometimes scratch over time.
Bamboo Organizers: Warm, natural, and eco-friendly. They offer a high-end, custom look and are extremely durable. A great choice for adding a touch of organic texture to your drawers and shelves.
For a clean, minimalist aesthetic, go with acrylic. For a warmer, more integrated look, choose bamboo.
The Golden Rule of Inserts: Measure three times, buy once. When measuring for a pull-out shelf or drawer organizer, don’t just measure the cabinet’s internal width. Measure the actual opening of the cabinet frame, which is often narrower. Then, measure the depth, being careful to account for any pipes or internal braces. Finally, measure the height, especially noting where your hinges are—they are the number one obstacle for roll-out trays!
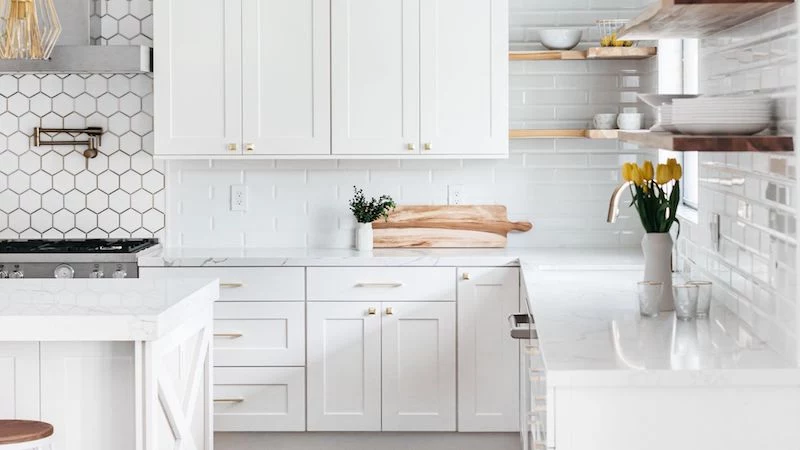
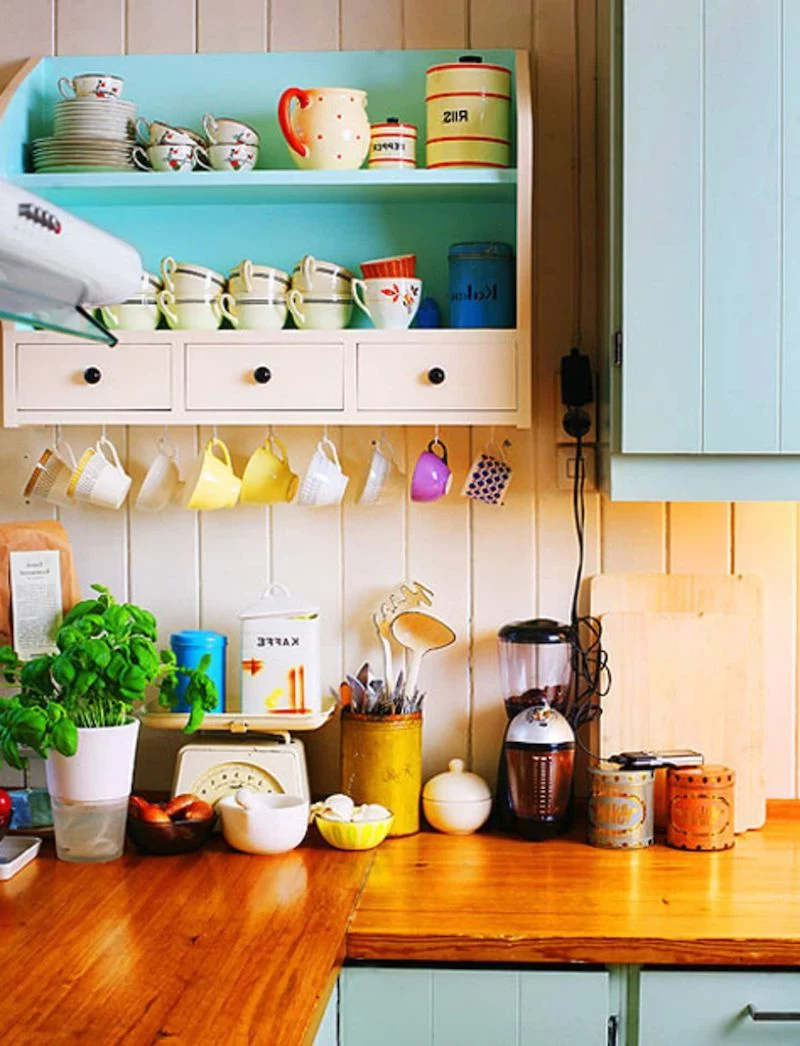
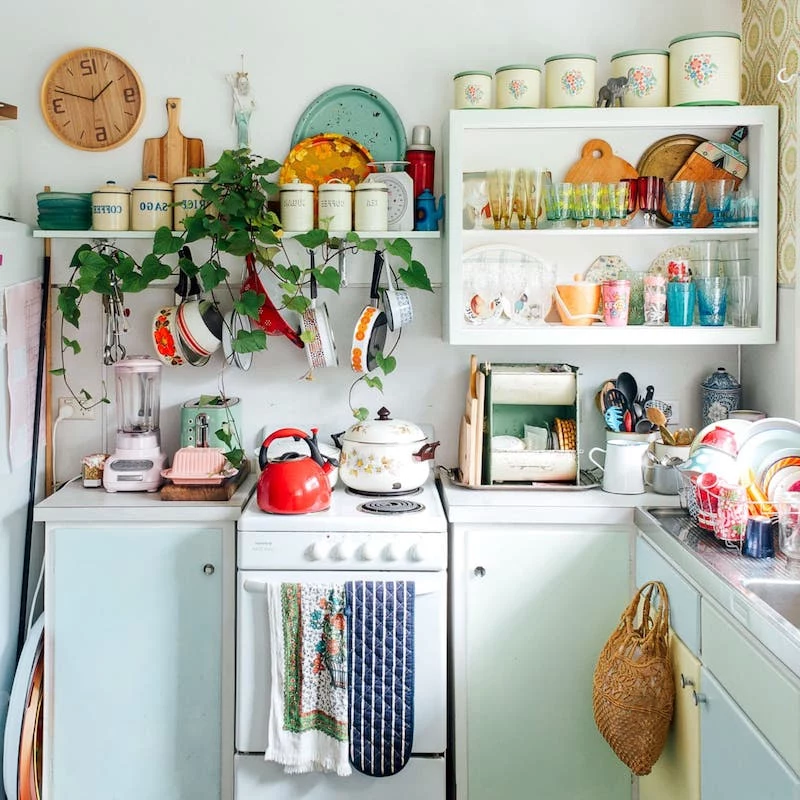
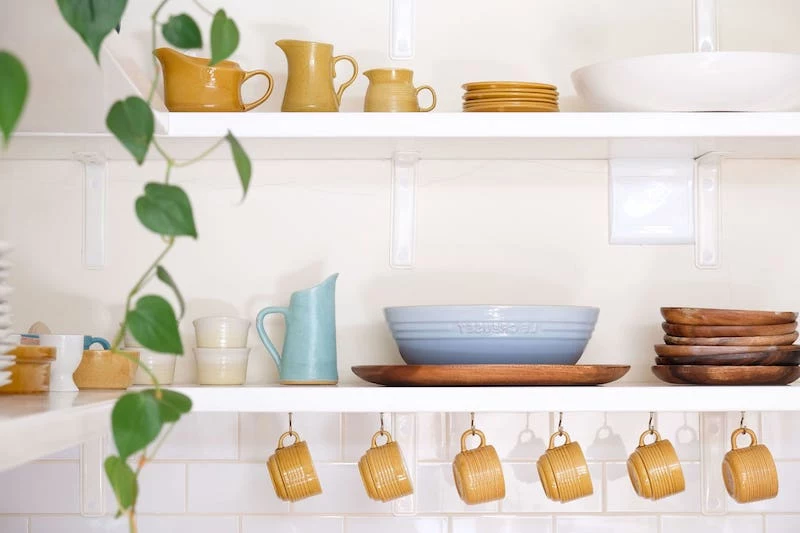
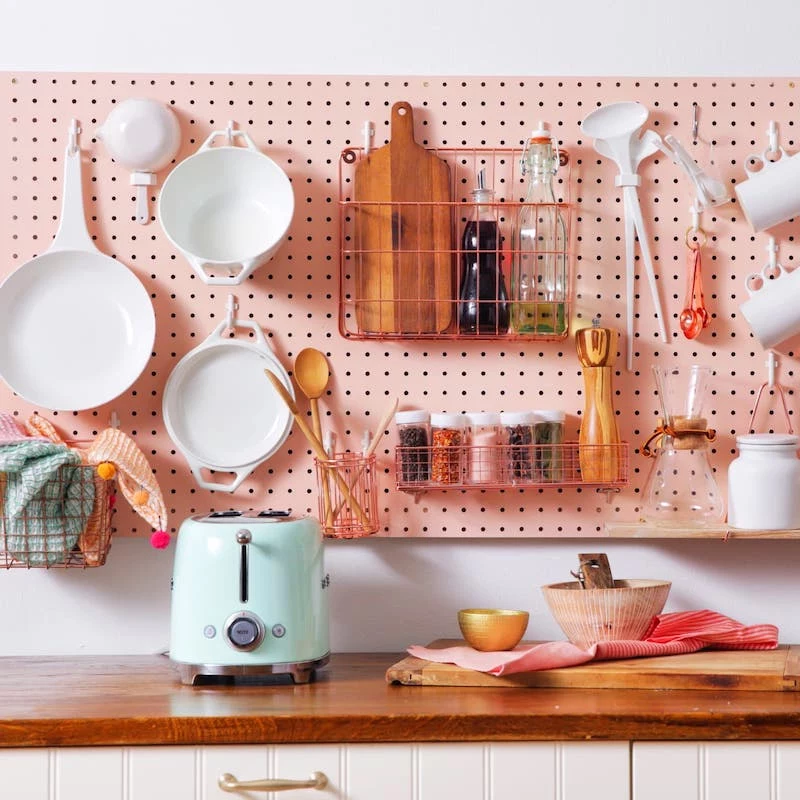
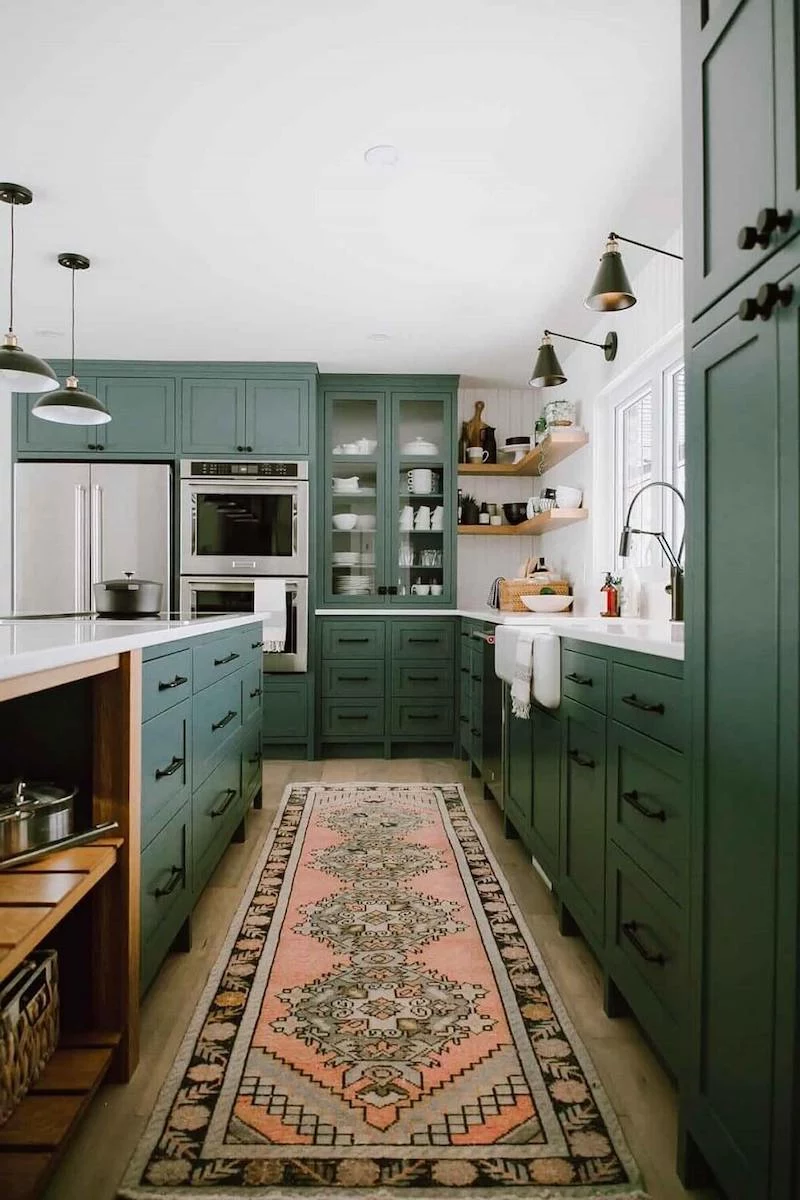
Go vertical! Wall space is the most underutilized asset in most kitchens. A simple pegboard, like the metal ones from Wall Control or a classic wooden one, can be customized with hooks and small shelves to hold everything from spice jars and utensils to small pots and mugs. It turns your storage into a dynamic, visual feature wall.
That awkward cabinet above the fridge—what’s its true purpose?
Stop thinking of it as a graveyard for forgotten appliances. It’s the perfect spot for long-term, ‘archival’ storage. Use it for seasonal items like holiday-themed platters, the turkey roasting pan you use once a year, or bulk paper towel supplies. Pro tip: Use vertical tray dividers here to store baking sheets and large platters on their side, making them much easier to slide out.
- Pot and pan lids that never stack neatly.
- The chaotic jumble of water bottles and travel mugs.
- The leaning tower of baking sheets and cutting boards.
- The tangled mess of food processor attachments.

A blind corner cabinet can render up to 70% of its potential storage space unusable or difficult to access.
This is where specialized hardware becomes a game-changer. While a basic Lazy Susan is good, a ‘LeMans’ style pull-out system from a brand like Kesseböhmer is revolutionary. The shelves swing completely out of the cabinet, bringing every last item into full view and easy reach. It’s a significant investment that truly unlocks your kitchen’s hidden corners.
Don’t overlook the space on the inside of your cabinet doors. It’s a goldmine for small-item storage. Use simple, stick-on acrylic holders for spice jars, a mounted rack for aluminum foil and plastic wrap boxes (like those from Simplehuman), or even small wire baskets to hold cleaning sponges and brushes under the sink. It’s a quick, no-drill way to add an extra layer of organization.
Toe-Kick Drawers: These are shallow drawers hidden behind the baseboard of your cabinets, perfect for flat items like baking sheets, serving platters, or even pet food bowls.
The Side of the Island: A blank island end-panel is a blank canvas. Add a few shallow shelves for cookbooks, a towel bar, or a magnetic/chalkboard panel for notes.
Create a dedicated ‘charging drawer’. Instead of having a tangle of cords on your counter, drill a small hole in the back of a utility drawer and fit it with a multi-port USB power strip. It keeps your phones, tablets, and watches juiced up and out of sight, instantly reducing visual clutter.


