How to Actually Weatherproof Your Outdoor Space (So It Doesn’t Fall Apart)
I’ve spent years building and, more often, fixing outdoor spaces. I’ve seen it all—from gorgeous, high-end patios that look like a warzone after just a few seasons, to simple, smartly-built decks that are still going strong a decade later. The difference? It’s not about how much money you throw at it. It’s about knowing what you’re up against and building smart from the ground up.
In this article
- Let’s Start with the Ground Floor: Your Deck or Patio
- Why Things Fall Apart: The Big Three Enemies
- 1. For wood, moisture leads to rot and mold. It soaks in, swells the fibers, and when it dries, the wood shrinks. This constant back-and-forth is what causes boards to warp and split. For concrete and stone, water gets into tiny pores. When it freezes, it expands by almost 10% and acts like a tiny jackhammer, slowly cracking the material from the inside out. This is called the freeze-thaw cycle, and it’s brutal. UV Light from the sun is relentless. It basically sandblasts your deck on a microscopic level. It breaks down the natural glue in wood, which is why unprotected wood turns that fuzzy, silver-gray color. On plastics and composites, it shatters the polymer chains, making them brittle and fading the color. Temperature Swings cause everything to expand and contract. A dark composite deck in the summer sun can get hot enough to seriously burn your feet. This constant movement puts a ton of stress on every joint and fastener. This isn’t just a science lesson. It’s the reason why throwing a cheap plastic tarp over your stuff can actually be worse than leaving it uncovered—it traps moisture underneath. It’s why the color pigment in your stain is just as important as the sealant itself. Every decision you make is a direct response to these forces. Getting Your Wood Deck Ready for Battle I tell every new builder I work with the same thing: a great deck finish is 90% preparation. You can go out and buy the most expensive, high-tech stain on the market—a gallon might run you $60 to $80—but if you slap it on a dirty, damp deck, you’ve just wasted a weekend and a pile of cash. It will fail. Step 1: The Deep Clean (The Right Way) You have to get rid of all the gunk—pollen, dirt, and any old, flaky sealant. A pressure washer is the tool for the job, but it can also cause serious damage if you’re not careful. I once saw a deck a homeowner had “cleaned” with a red, zero-degree nozzle tip. It looked like a tiger had been let loose on it, with deep gouges carved into every board. We had to sand the entire thing down. A costly mistake. Heads up! Never use that red tip on wood. For softwoods like pine or cedar, stay under 1,500 PSI. Use a wider fan tip (25 or 40 degrees) and keep the wand moving constantly. After washing, you might need a cleaner. I’d recommend an oxygen-based cleaner (sodium percarbonate) over basic chlorine bleach. Bleach kills mildew, but it doesn’t really clean and it’s harsh on wood fibers. Oxygen bleach cleans more effectively and is gentler. After cleaning, the wood has to be BONE DRY. This can take two or three hot, sunny days. Don’t rush it. Here’s a pro trick: splash a little water on the boards. If it soaks in immediately, you’re good to go. If it beads up, give it another day. Staining damp wood is the
- Protecting Your Patio and Concrete Surfaces
- Choosing Furniture That Will Actually Survive
- The Ultimate Upgrade: Overhead Shelter
- A Few Common DIY Mistakes to Avoid
- A Final Word on Safety and When to Call for Help
- Inspirational Gallery with Photos
An outdoor living area that truly lasts is a whole system. The patio, the furniture, and any cover you have need to work together. You’re not trying to beat Mother Nature—that’s a losing battle. The real goal is to create something so well-planned that she just leaves it alone. This guide is all about the lessons I’ve learned on the job, fixing the mistakes that cost people time, money, and a whole lot of frustration.
Let’s Start with the Ground Floor: Your Deck or Patio
Everything begins with the surface you’re walking on. Whether it’s wood, composite, or stone pavers, this is the part of your outdoor space that takes the most direct hit from the elements. Protecting it isn’t just a good idea; it’s the single most important thing you can do to make your investment last.

Why Things Fall Apart: The Big Three Enemies
To protect your space, you have to know what’s trying to wreck it. It boils down to three main culprits: water, sun, and temperature changes.
- Water is Public Enemy
1.
For wood, moisture leads to rot and mold. It soaks in, swells the fibers, and when it dries, the wood shrinks. This constant back-and-forth is what causes boards to warp and split. For concrete and stone, water gets into tiny pores. When it freezes, it expands by almost 10% and acts like a tiny jackhammer, slowly cracking the material from the inside out. This is called the freeze-thaw cycle, and it’s brutal. - UV Light from the sun is relentless. It basically sandblasts your deck on a microscopic level. It breaks down the natural glue in wood, which is why unprotected wood turns that fuzzy, silver-gray color. On plastics and composites, it shatters the polymer chains, making them brittle and fading the color.
- Temperature Swings cause everything to expand and contract. A dark composite deck in the summer sun can get hot enough to seriously burn your feet. This constant movement puts a ton of stress on every joint and fastener.
This isn’t just a science lesson. It’s the reason why throwing a cheap plastic tarp over your stuff can actually be worse than leaving it uncovered—it traps moisture underneath. It’s why the color pigment in your stain is just as important as the sealant itself. Every decision you make is a direct response to these forces.
Getting Your Wood Deck Ready for Battle
I tell every new builder I work with the same thing: a great deck finish is 90% preparation. You can go out and buy the most expensive, high-tech stain on the market—a gallon might run you $60 to $80—but if you slap it on a dirty, damp deck, you’ve just wasted a weekend and a pile of cash. It will fail.
Step 1: The Deep Clean (The Right Way)
You have to get rid of all the gunk—pollen, dirt, and any old, flaky sealant. A pressure washer is the tool for the job, but it can also cause serious damage if you’re not careful. I once saw a deck a homeowner had “cleaned” with a red, zero-degree nozzle tip. It looked like a tiger had been let loose on it, with deep gouges carved into every board. We had to sand the entire thing down. A costly mistake.
Heads up! Never use that red tip on wood. For softwoods like pine or cedar, stay under 1,500 PSI. Use a wider fan tip (25 or 40 degrees) and keep the wand moving constantly. After washing, you might need a cleaner. I’d recommend an oxygen-based cleaner (sodium percarbonate) over basic chlorine bleach. Bleach kills mildew, but it doesn’t really clean and it’s harsh on wood fibers. Oxygen bleach cleans more effectively and is gentler.
After cleaning, the wood has to be BONE DRY. This can take two or three hot, sunny days. Don’t rush it. Here’s a pro trick: splash a little water on the boards. If it soaks in immediately, you’re good to go. If it beads up, give it another day. Staining damp wood is the
1 way to guarantee your new stain will peel off by next year.
Step 2: Choosing Your Armor (The Stain)
Okay, the deck is clean and dry. Time to pick your protection. Here’s the honest breakdown:
- Clear Water Sealers: Honestly, these are mostly useless for sun protection. They’ll stop water for a bit, but offer almost zero UV defense. The only time I’d use one is if someone loves the natural gray look of weathered wood but wants to reduce splitting. Expect to reapply it every single year.
- Semi-Transparent Stains: This is the sweet spot for most people. They have color pigment, and that pigment is your sunblock. You can still see the beautiful wood grain, but you get solid protection. A quality semi-transparent stain from a brand like Cabot or Behr, when applied right, should last you 2 to 4 years. This is my go-to recommendation.
- Solid Color Stains: Think of this as a thin paint. It completely covers the wood grain, offering the best possible UV and water protection. It’s fantastic for restoring old, beat-up decks. The downside? When it fails, it peels like paint, and prepping for a recoat is a major chore. But a good application can last 5-7 years.
When you apply it, use a staining pad on a pole. A key pro technique is “back-brushing.” If you use a sprayer to go faster, have someone follow right behind you with a brush to work the stain into the wood and smooth out any puddles. Too much stain is just as bad as too little—it gets sticky and never cures properly.
By the way, here’s a rough shopping list for a typical deck staining project:
- Deck Cleaner (Oxygen-based): around $25
- Pressure Washer Rental: about $75 for the day
- Quality Semi-Transparent Stain (1 gallon): $45 – $70
- Staining Pad with Extension Pole: $30
- Good 4-inch trim brush: $15
- Gloves, glasses, tape, and plastic sheeting: $20
Protecting Your Patio and Concrete Surfaces
Stone and concrete are tough, but they’re not invincible. The main enemies here are stains (from things like spilled wine or greasy food) and freeze-thaw damage. The answer is a good sealer, which makes the surface less porous. Think of it like Scotchgard for your patio.
You’ve got two main choices:
- Penetrating Sealers: These are my preference for most jobs. They soak into the material without leaving a shiny film on top. You get great protection, but the look and feel of your stone or concrete stays natural.
- Film-Forming Sealers: These leave a protective sheen, often a “wet look,” which can really make the colors in pavers pop. They’re great for stain protection but can get slippery when wet and may need to be stripped and reapplied every few years if they start to yellow or flake.
Quick Tip: If you have a paver patio, the sand between the joints is absolutely critical. Don’t just use regular sand, which will wash out. Always use polymeric sand. It’s fine sand mixed with a polymer that hardens when you mist it with water. It locks pavers together, stops weeds, and keeps ants from moving in. A bag costs around $25-$35 and is worth every penny. When you wet it, use the ‘mist’ setting on your hose. A strong jet of water will wash the good stuff right out of the sand before it can set.
Choosing Furniture That Will Actually Survive
I’ve seen so many people drop a couple of thousand dollars on a beautiful outdoor furniture set, only to watch it rot or rust away. Think of it as an investment and choose materials that can handle your climate and your tolerance for maintenance.
Here’s a realistic look at your options:
- Wood: Teak is the gold standard for a reason. It’s packed with natural oils that fight rot. It’s a ‘buy it once, cry once’ material, often the most expensive choice. Other woods like acacia are cheaper but demand annual sealing to survive.
- Metal: Powder-coated aluminum is my top pick. It’s light, strong, and won’t rust. It hits a great balance of cost and durability. Wrought iron is classic and heavy (great for windy spots), but the second it gets a chip in the paint, rust will start to creep in.
- All-Weather Wicker: This isn’t your grandma’s natural wicker. It’s a tough synthetic resin woven over a sturdy aluminum frame. It’s easy to clean and handles the elements beautifully.
- HDPE Lumber: You might know this as Polywood or Trex furniture. It’s made from recycled plastics and is nearly indestructible. The color runs all the way through, it won’t rot, and you can leave it out all year. It’s heavy and often pricey, but the maintenance is basically zero.
No matter what you buy, covers are your best friend. But don’t grab a cheap blue plastic tarp! It will trap moisture and create a moldy swamp. Spend the $50-$150 on a proper, heavy-duty cover made of a breathable, waterproof fabric. Look for ones with air vents and straps to keep them tied down.
Want a quick win? Take 10 minutes and go inspect your metal furniture right now. See any little rust spots? A quick scrub with some sandpaper and a shot of Rust-Oleum today can save that chair from the scrap heap next year.
The Ultimate Upgrade: Overhead Shelter
Putting a roof over your patio is what transforms it into a true, four-season extension of your home. But this is where things get serious.
CRITICAL WARNING: Before you build any kind of roofed structure, you have to check with your local building department. You will almost certainly need a permit. They have strict rules about how deep your footings need to be, how much snow the roof has to hold, and how it’s secured against wind. Don’t even think about skipping this step.
Here are your main options, from simplest to most involved:
- Retractable Awnings: A great choice for sun and light rain. Modern ones use durable fabrics (look for the Sunbrella brand name) that resist fading. They’re a solid mid-range option, often running $1,500 to $5,000 installed, but you must retract them in high winds or heavy snow.
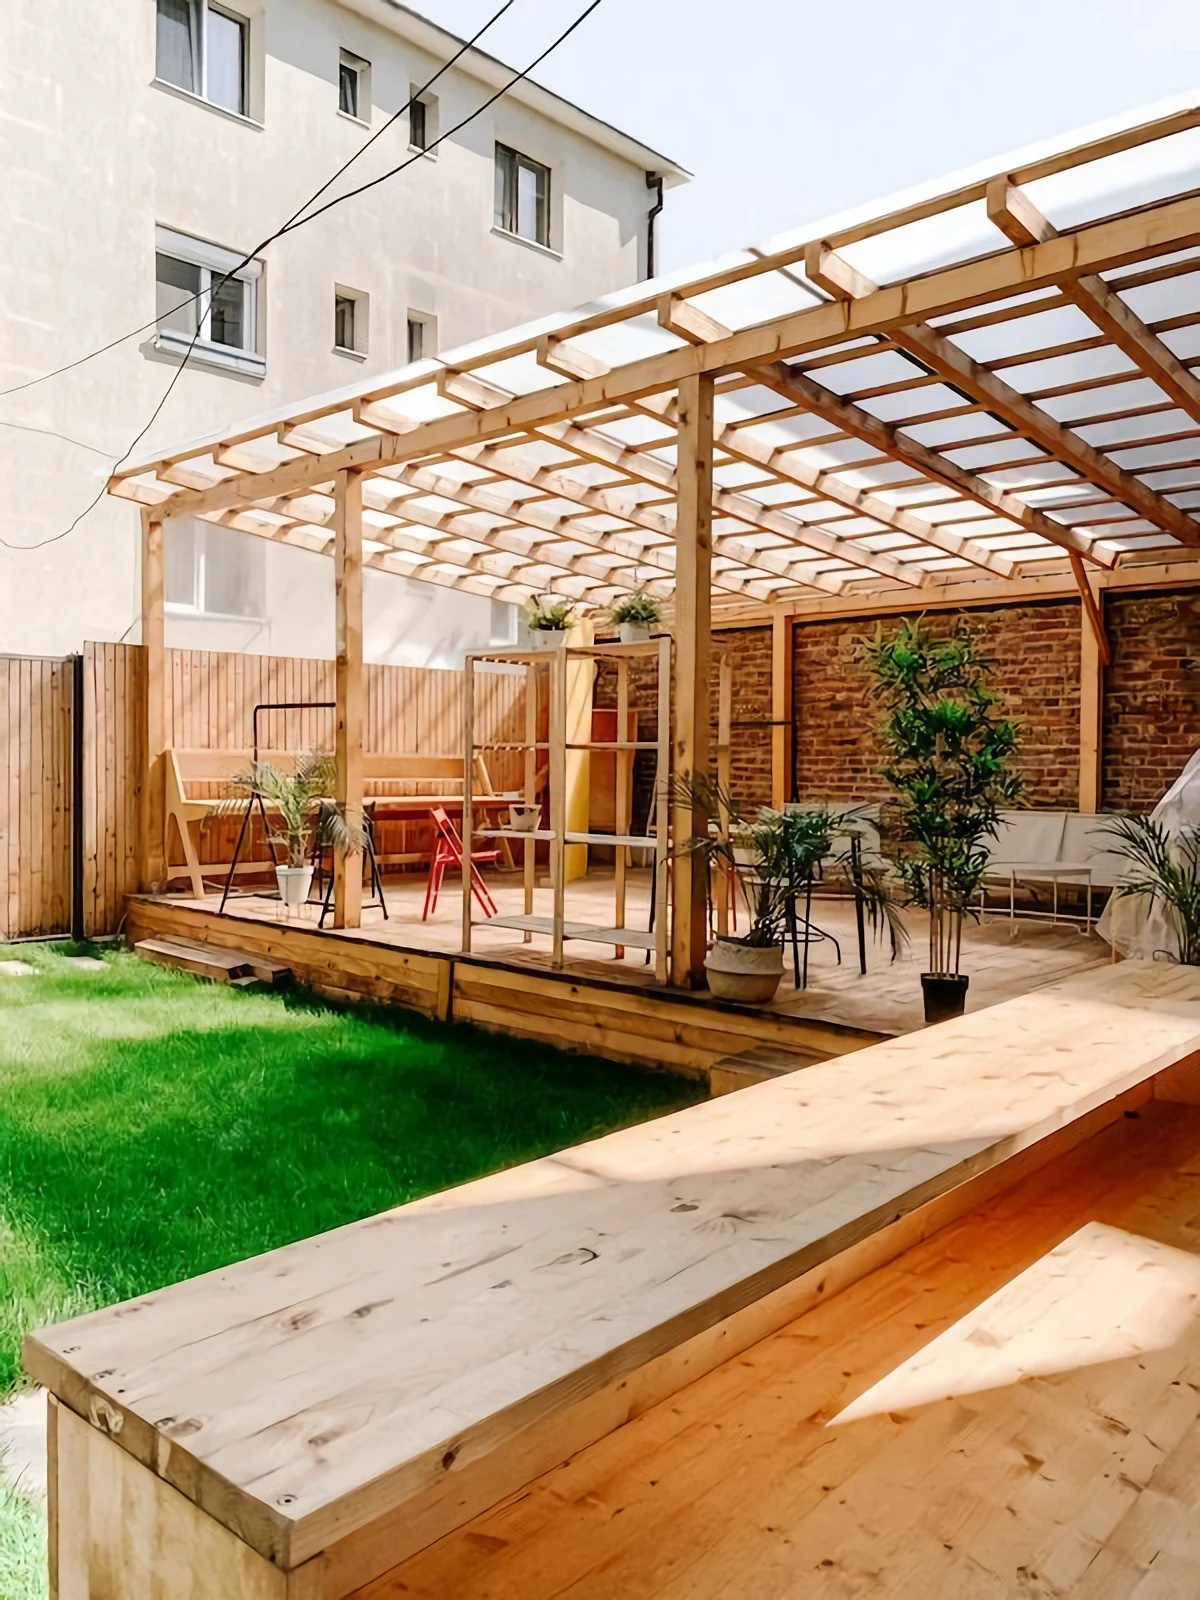
- Pergolas: Beautiful, but on their own, they don’t offer much shelter. To make one weatherproof, you can add clear polycarbonate panels on top. This blocks rain and UV while letting light through. It’s a popular and effective solution.
- Fixed Roof Pavilions: This is the top-tier option—a permanent, freestanding outdoor room. It’s a serious construction project that requires a proper foundation and a frame built like a house. This is the most expensive route, easily starting at $10,000, but it gives you a space you can use in almost any weather.
A Few Common DIY Mistakes to Avoid
I see these over and over again. Dodge these pitfalls and you’ll be way ahead of the game.
- Applying stain to a damp or dirty deck. It’s a total waste of time and money; the finish will fail.
- Using a cheap, non-breathable plastic tarp to cover furniture or a deck, which traps moisture and causes mold.
- Skipping polymeric sand for paver joints, leading to wobbly pavers, weeds, and ant hills.
- Forgetting to back-brush stain. This simple step is the difference between a professional-looking finish and a sticky, uneven mess.
- Ignoring local building codes for any overhead structure. This is a huge safety and financial risk.
A Final Word on Safety and When to Call for Help
This kind of work involves power tools, harsh chemicals, and heavy structures. Be smart about it.
When you’re dealing with cleaners and stains, wear your safety glasses and gloves. And I’ll say it one more time: for any structure with a roof or anything attached to your house, please hire a licensed and insured professional. I’ve seen decks collapse. It’s a terrifying and completely preventable event.
And unless you are a licensed electrician, do not run your own 120-volt wiring outside. Water and electricity are a deadly mix. Low-voltage lighting kits are great for DIY, but leave the serious electrical work to the pros. It’s just not worth the risk to your family.
Taking the time to do this right isn’t an extra cost—it’s an investment that pays you back every time you step outside, no matter the weather, and feel that sense of pride in the amazing space you’ve created.
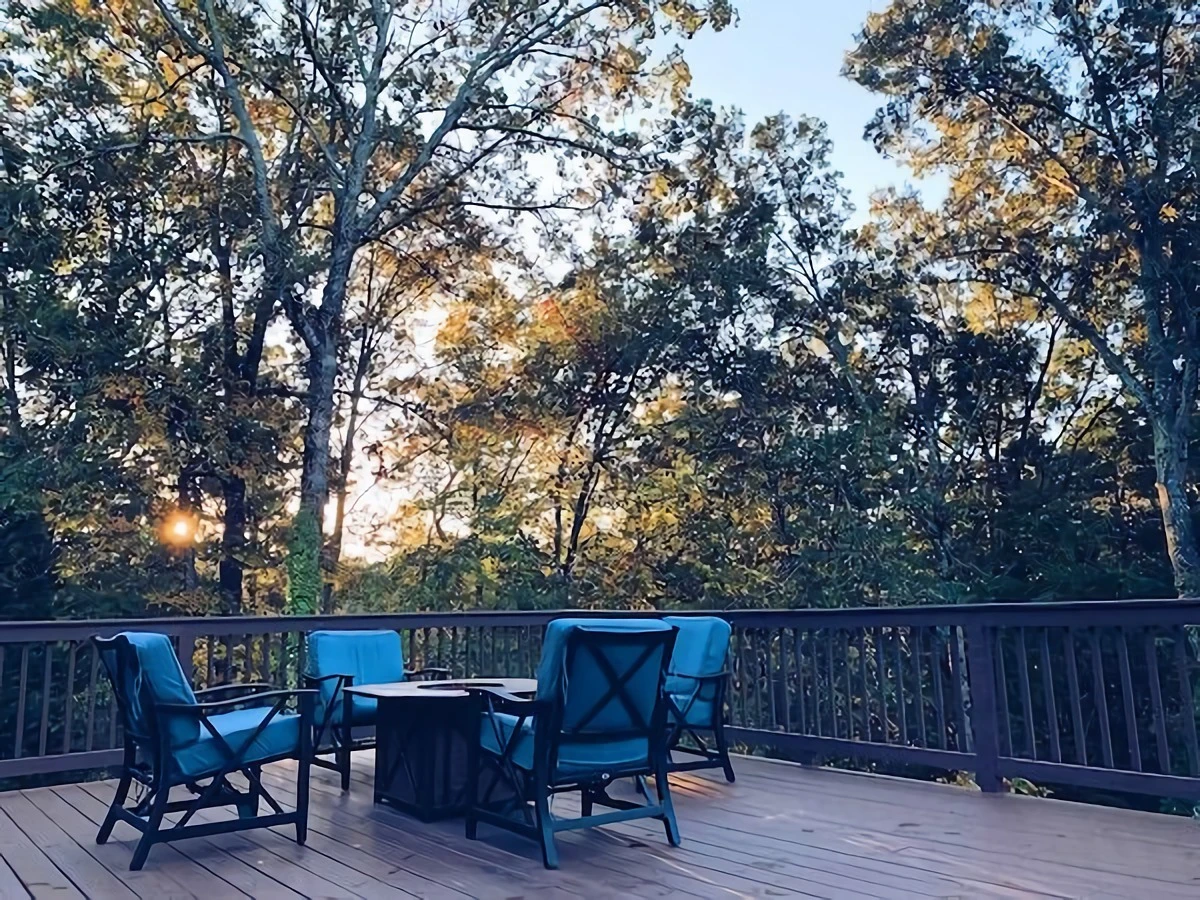
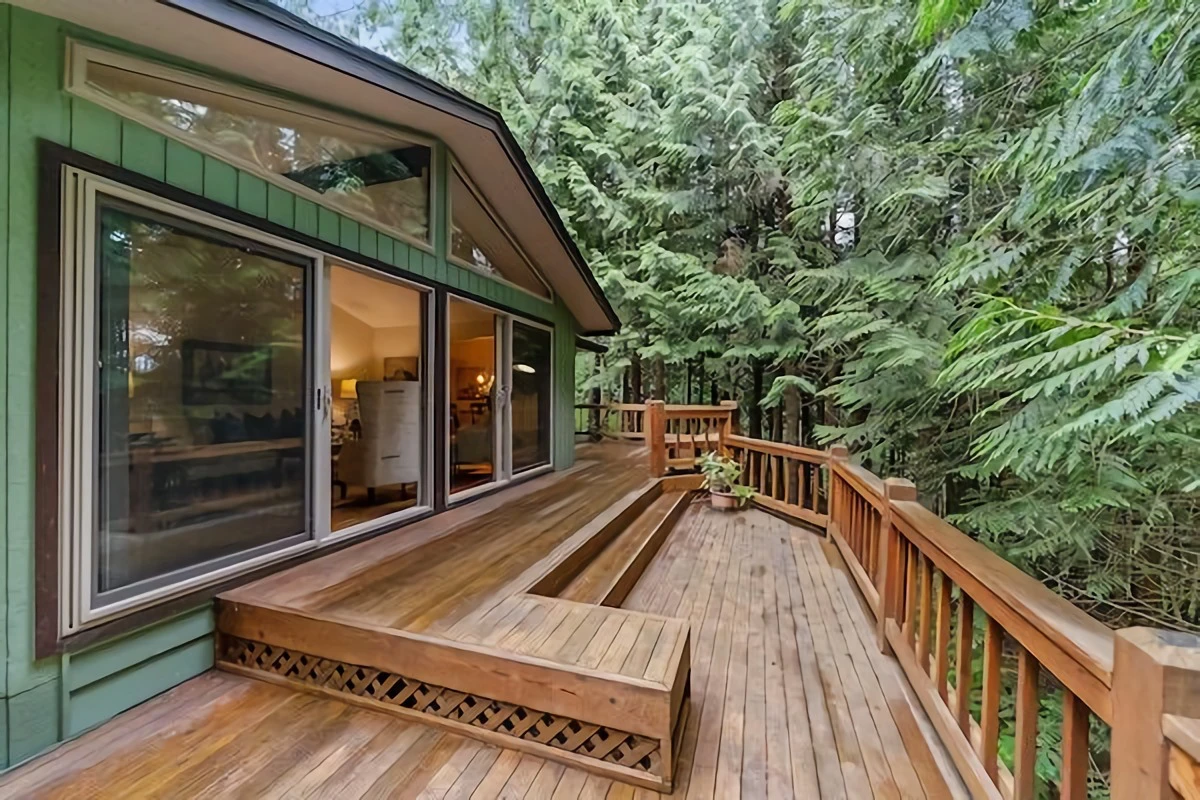
Inspirational Gallery with Photos
Penetrating Oil vs. Film-Forming Sealant: For wood decks, penetrating oils (like those from Penofin or Cabot) soak into the wood fibers, nourishing them from within and providing a natural-looking finish that won’t peel or flake. They require more frequent reapplication. Film-forming sealants (like a polyurethane or a solid acrylic stain) create a protective layer on the surface, offering robust protection but can crack and peel over time, making refinishing a bigger job. Your choice depends on whether you prefer lower-effort annual maintenance or a more intensive refresh every few years.
Not all stainless steel is created equal. For coastal areas or anywhere salt is used in winter, insist on 316-grade (or “marine-grade”) stainless steel for all your hardware, from screws to hinges.
That small difference in composition—the addition of the element molybdenum—provides significantly greater resistance to corrosion from salt and chlorides. Using standard 304-grade stainless can result in unsightly rust stains and eventual fastener failure, compromising the entire structure you worked so hard to protect.
Thinking about a dark-colored composite deck?
While deep browns and charcoals are visually stunning, they absorb far more solar radiation. On a hot summer day, a dark composite board from a brand like Trex or Fiberon can reach temperatures exceeding 175°F (80°C), making it impossible to walk on barefoot. Lighter colors like tans, grays, or whites reflect more sunlight, staying significantly cooler to the touch and reducing the stress of thermal expansion on the deck structure.
- Resists rot and insects naturally
- Develops a beautiful, silvery patina without splintering
- Stays dimensionally stable, reducing warping
The secret? Choosing the right wood from the start. While pressure-treated pine is common, investing in naturally durable species like Ipe, Cumaru, or even domestic Black Locust provides a chemical-free, long-lasting solution that stands up to the elements with minimal intervention.
The biggest mistake DIYers make with a pressure washer is using a zero-degree (red) nozzle tip. This concentrated jet of water is powerful enough to carve into wood, shredding the surface fibers. This not only looks terrible but it opens up the wood, making it act like a sponge for moisture and accelerating rot. Always use a wide-angle (25 or 40-degree) fan tip and keep the nozzle at least 12 inches from the surface.
Don’t forget the feet: Most outdoor furniture damage starts from the ground up. Constant contact with a damp patio surface wicks moisture into metal and wood legs, causing rust and rot. The simple solution is to add adjustable furniture glides or small plastic feet. This tiny elevation gap breaks the chain of moisture, dramatically extending the life of your chairs and tables.
Solution-dyed acrylic fabrics, like those from Sunbrella, can retain over 90% of their original color after 1,500 hours of direct UV exposure.
For a truly weatherproof structure, look beyond wood to the world of powder-coated aluminum. Used for modern pergolas and high-end outdoor furniture frames, this material is lightweight, completely rust-proof, and the powder-coating finish is far more durable than standard paint. It resists chipping and fading, ensuring your investment looks sharp for years with nothing more than an occasional cleaning with soap and water.
Before winter arrives, give your weatherproof gear a fighting chance. Proper storage is about more than just keeping things dry.
- Clean First: Remove all dirt, pollen, and bird droppings from cushions and covers. Stains can set permanently over winter.
- Ensure Dryness: Never store cushions or covers damp. Allow them to air dry completely to prevent mold and mildew growth in storage.
- Use Breathable Containers: Avoid sealing cushions in plastic bags, which trap moisture. Vented deck boxes or breathable storage bags are ideal.
Inspired by the ancient Japanese art of `shou sugi ban`, charring wood is a stunningly beautiful and effective weatherproofing technique. The process involves carefully burning the surface of cedar or cypress planks, which creates a carbonized layer. This layer is naturally resistant to water, insects, and even fire, all while providing a deep, dramatic black finish that can last for decades with minimal maintenance.


