How to Clean Laminate Floors So They Actually Last (A Pro’s Guide)
I’ve worked with floors for a long time, and I’ve seen laminate evolve from a cheap alternative into something genuinely beautiful. I’ve put it down in busy family homes and quiet condos, and I’ve seen what it looks like years down the road. Some floors still look brand new, while others… well, they didn’t fare so well.
In this article
Honestly, the difference almost always boils down to one simple thing: how they were cleaned.
People think laminate is invincible. It feels tough, and that top layer is made to take a beating. But here’s the catch: you can’t sand and refinish it like you can with real hardwood. Once that top layer is shot or the core gets wet, the damage is pretty much permanent. That’s why I teach people how to preserve their floors, not just clean them. The goal is a floor that looks fantastic for the next 15 years, not just for today.
First, Know What You’re Actually Cleaning
Before you even think about mopping, you have to understand what a laminate plank is. It’s basically a layered sandwich, and each layer has a critical job. Knowing this is the key to not accidentally destroying your investment.
- The Wear Layer: This is the transparent top coat you walk on. It’s a super tough, resin-based layer that gives the floor its scratch resistance. This is what you’re actually cleaning, and protecting it is priority number one.
- The Image Layer: Right underneath is a high-res photo of wood, stone, or whatever design you chose. If you damage the wear layer, you expose this photo, which can then get stained or scuffed easily.
- The Core: This is the most important—and most vulnerable—part. It’s made of High-Density Fiberboard (HDF), which is basically wood dust and resins smashed together under incredible pressure. It’s stable and strong, but if water hits it, it acts like a sponge. It will swell, bubble, and basically disintegrate. This is why water is the absolute number one enemy of laminate flooring.
- The Backing Layer: The bottom layer provides stability and a bit of moisture protection from underneath, helping to keep the plank straight.
A little trick I use with new apprentices is to have them soak a scrap piece of laminate in a bucket of water. Within an hour, they see the edges puff up like a soggy cracker. It’s a powerful visual. Every single cleaning step we take is designed to keep water away from that HDF core.
Your Daily and Weekly Floor-Saving Routine
When it comes to laminate, consistency beats intensity every time. A little bit of cleaning every day is so much better than a heavy-duty, wet-mopping session once a month. You’re fighting two different battles: a daily fight against grit and a weekly fight against grime.
Daily Task: Get the Grit Off
The tiny bits of sand and dirt you track in on your shoes are like sandpaper for your floor’s finish. Every footstep grinds these particles into the wear layer, creating thousands of micro-scratches. Over time, this is what makes a floor look dull and cloudy. So yeah, getting them off daily isn’t just a good idea; it’s essential.
- The Broom: A simple, soft-bristle broom works great for quick pickups. Avoid those cheap, stiff plastic brooms that just flick dirt around.
- The Vacuum (with a BIG warning): A vacuum is fine if you use it correctly. You absolutely MUST turn off the rotating beater bar. The stiff, spinning bristles are for digging into carpet and will dull or even scratch your laminate finish over time. Quick tip: Check your vacuum right now. See that button with the brush icon? Turn it off. You’ve just made your vacuum floor-safe in 10 seconds. Ideally, use a hard floor head attachment.
- The Microfiber Dust Mop (The Pro’s Choice): For daily upkeep, nothing beats a wide microfiber dust mop. It uses static to grab dust and pet hair instead of kicking it into the air. It’s way faster than sweeping and safer than vacuuming. A quick pass every evening takes two minutes and makes a world of difference.
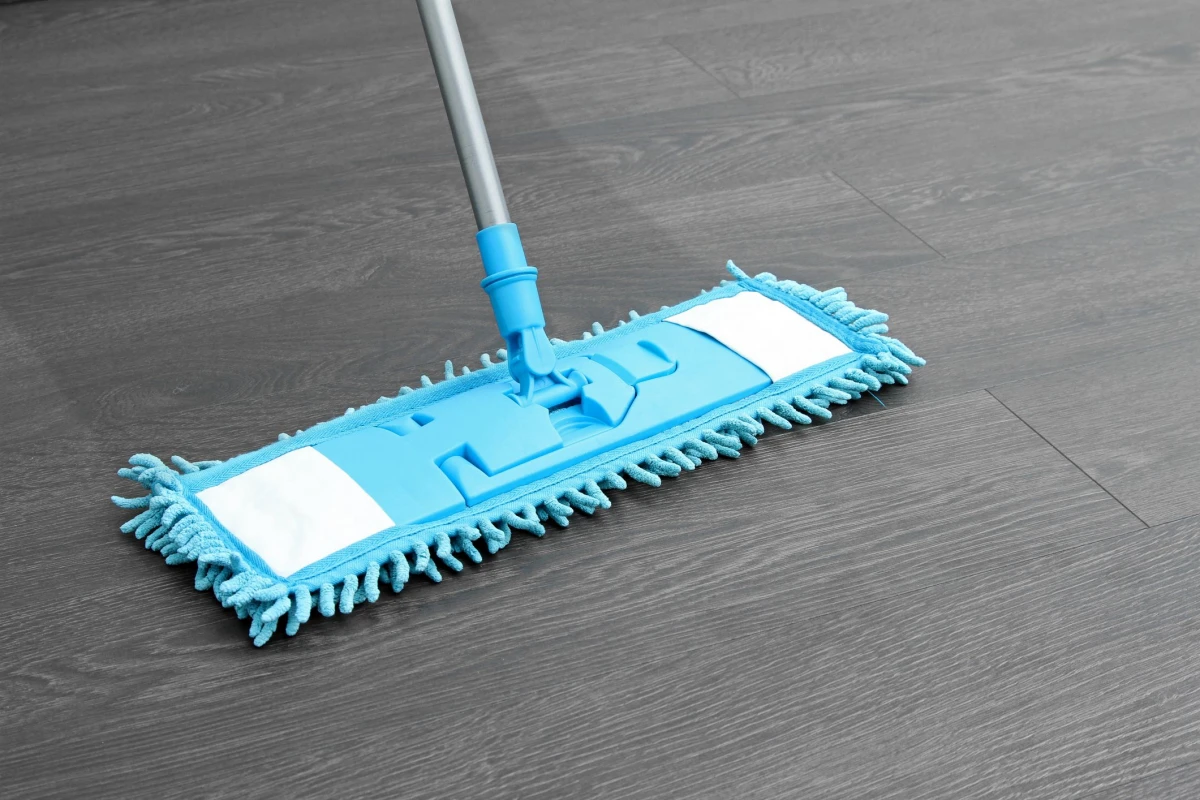
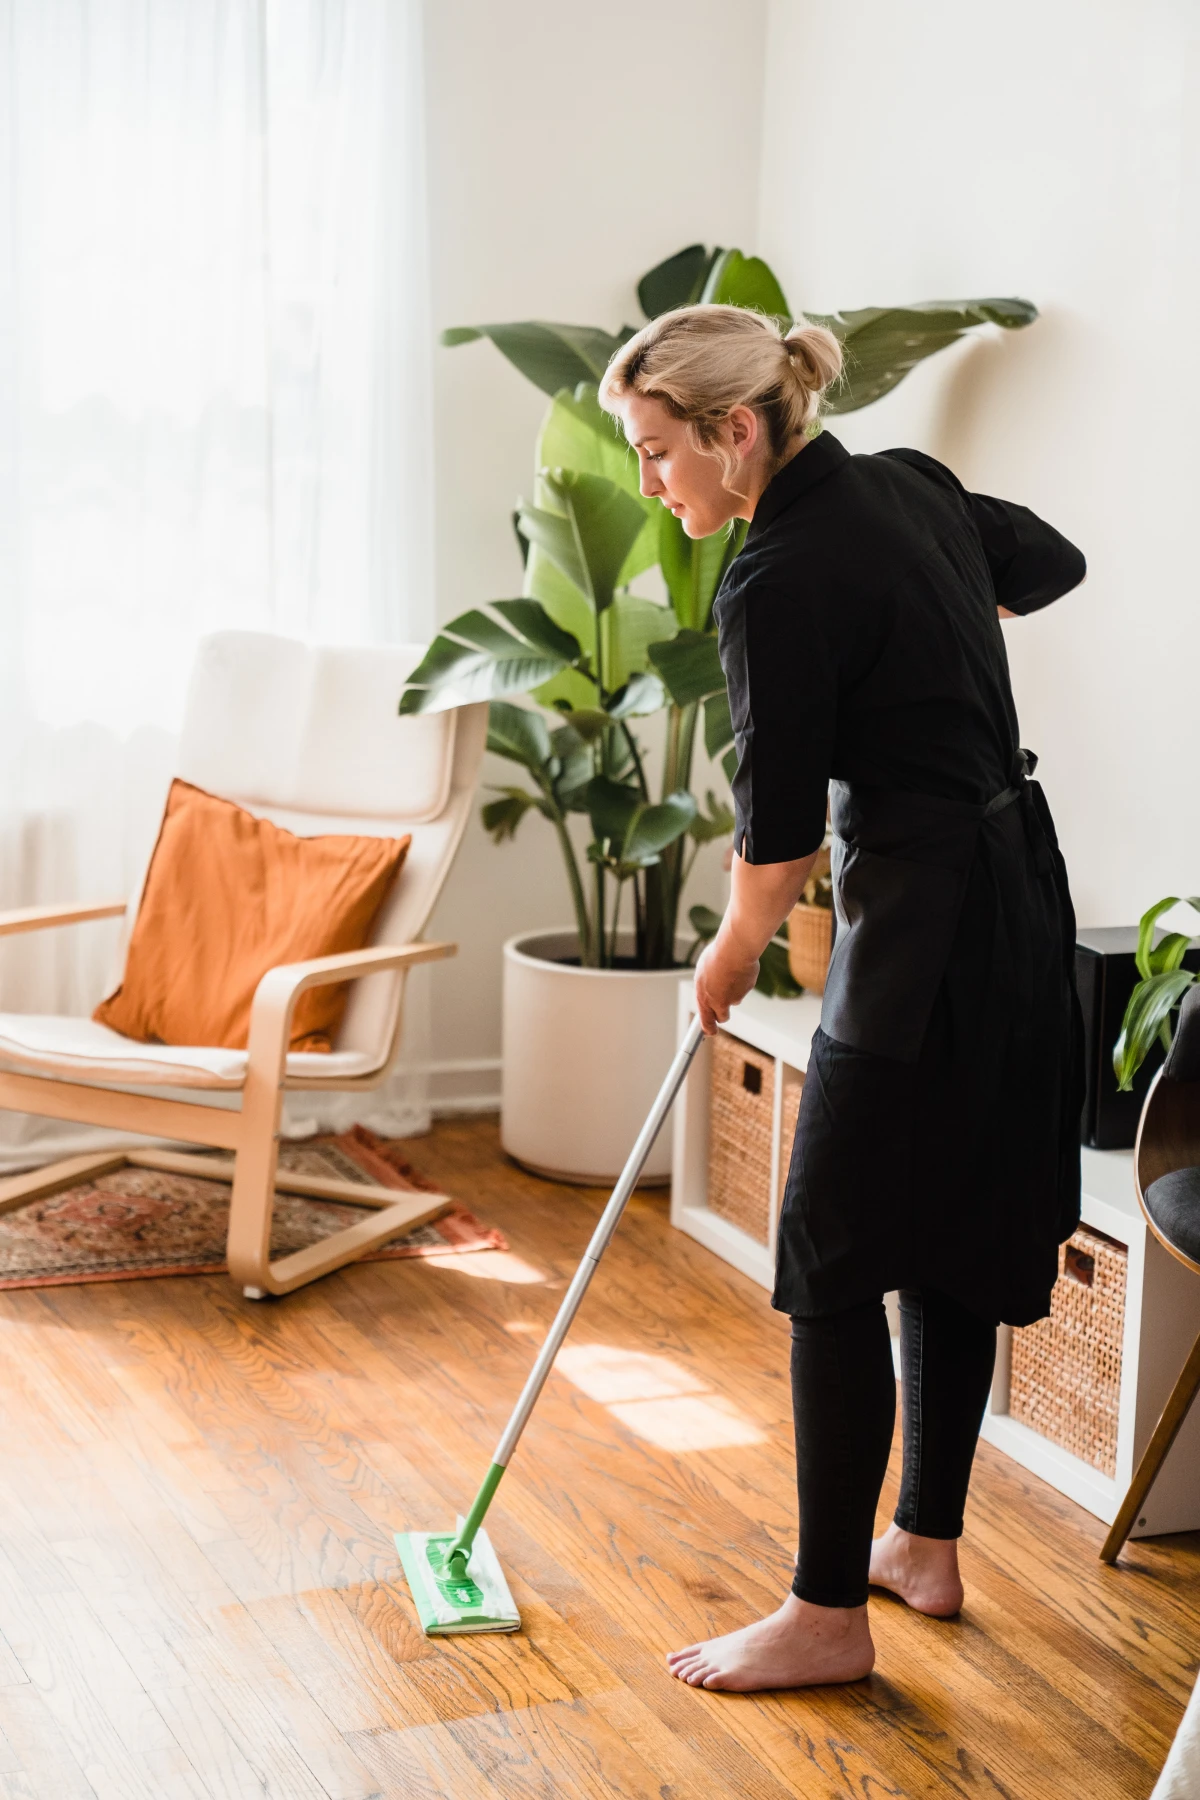
Weekly Task: The “Barely Damp” Mop
Okay, this is where most people get it disastrously wrong. They hear “mop,” grab a string mop and a bucket of sloshing water, and go to town. This will ruin a laminate floor. I’ve personally seen floors that were only a couple of years old start to buckle and peel because of this.
Your new mantra: DAMP, NOT WET.
For tools, you’ll want a flat-head mop with a washable microfiber pad—they’re designed to clean with minimal water. And I can’t recommend the two-bucket system enough. One bucket gets your cleaning solution, the other gets clean rinse water. You dip your mop, wring it out, clean a small section, then rinse the dirty pad in the rinse bucket before putting it back in the clean solution. This stops you from just smearing dirty water all over your floor, which is what causes streaks.
Here’s the technique:
- Dip the microfiber pad in your cleaning solution (use cool water, not hot).
- Now, wring it out. Seriously. Then wring it out again. The pad should feel barely damp. If you can squeeze a single drop of water from it, it’s still too wet.
- Mop in smooth strokes, following the direction of the planks to avoid streaks.
- Work in small, 5×5 foot sections. After mopping a section, immediately buff it with a separate, completely dry microfiber cloth. Your floor should be dry to the touch in 30-60 seconds. If it’s not, you’re using too much water.
It sounds complicated, but once you get the hang of it, the whole process for an average-sized living room shouldn’t take more than 15-20 minutes. And for those really busy weeks? Here’s the busy person’s shortcut: just doing a quick pass with a barely damp microfiber mop is 80% of the benefit and a million times better than letting grime build up.
Choosing a Cleaner: Don’t Overthink It
The cleaning aisle is overwhelming, but for laminate, the choice is simple. You need a cleaner that is pH-neutral. This just means it isn’t too acidic or too alkaline, so it won’t slowly eat away at your floor’s finish. I’ve seen clients have great luck with brands like Bona or Zep, which you can find at Home Depot or online for about $15 a bottle. Follow the instructions; more cleaner doesn’t mean more clean, it just means more residue.
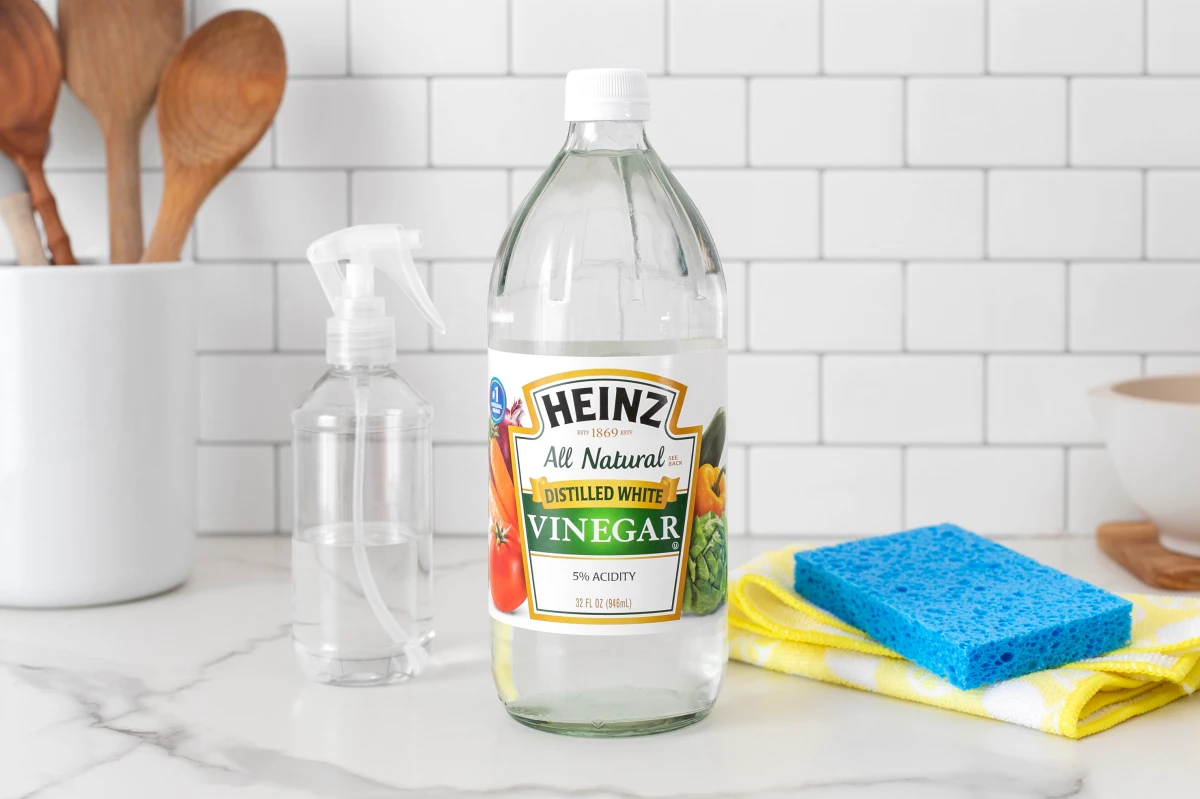
And what about the classic DIY vinegar and water solution? I’m cautious about it. Vinegar is an acid, and while a very diluted solution probably won’t cause immediate harm, I worry about its long-term effects. Plus, some flooring manufacturers will actually void your warranty if you use it. To be frank, it’s a backup, not a primary choice.
The Absolute “Do Not Use” List
This is non-negotiable. Using any of these will likely damage your floor. I’ve seen the aftermath, and it’s not pretty.
- Steam Mops: The #1 floor killer. Heat and pressurized steam force moisture deep into the plank seams and core. It’s a guaranteed way to make your floor swell and bubble.
- Oil-Based Cleaners: Things like Murphy Oil Soap are for real wood. On laminate, they leave a greasy, dull film that shows every single footprint.
- “Mop and Shine” or Wax: Laminate is not meant to be polished. These products create a sticky coating that’s a nightmare to remove.
- Abrasive Cleaners or Pads: I once had to fix a floor where a client used a green kitchen scouring pad to get off some dried paint. It took the finish right off and left permanent dull scratches. No powdered cleaners, steel wool, or scouring pads. Ever.
- Ammonia or Bleach: Too harsh. They can strip the finish over time.
Handling Spills, Stains, and Scuffs
Accidents happen. The key is to act fast.
For general spills like water or juice, wipe them up immediately with a dry cloth. Don’t let liquid sit on a seam! For greasy spots, use a drop of your pH-neutral cleaner on a damp cloth to break it down, then wipe with a clean, water-dampened cloth and buff dry.
For tough stuff like ink or marker, you can dab (don’t rub!) the spot with a bit of rubbing alcohol on a white cloth. For scuff marks from shoes, a simple pencil eraser or a clean tennis ball often works wonders. And for sticky things like gum or wax? Harden it with an ice cube in a plastic bag, then gently pry it off with a plastic scraper or the edge of a credit card—never anything metal.
The Best Defense is a Good Offense
Preventing damage is so much easier than fixing it. Here’s your floor-saver’s shopping list—a few small investments that make a huge difference.
First, get high-quality mats for every exterior door. You need a coarse one outside (plan on spending $15-$30) to scrape off the big stuff, and an absorbent one inside ($10-$25) to catch moisture and fine grit. Next, buy a bulk pack of felt pads for about $10 and put them on the feet of every single piece of furniture. Check them once a year. Finally, if you have an office chair with caster wheels, a polycarbonate chair mat is a must. A good one will run you $40-$70, but it’s cheaper than a new floor. And of course, always lift furniture, don’t drag it.
When You Have to Call in a Pro
Sometimes, a problem is beyond a DIY fix. If you’ve had a major leak and your floor is swelling or buckling, the planks are damaged and need to be replaced. For deep gouges that go through the top layer, the only real fix is also plank replacement.
Heads up! Replacing a single plank in the middle of a floor is a very tricky job that requires special tools. Trying it yourself can easily lead to damaging the surrounding planks. Be prepared, hiring a pro to replace even one or two planks can run you $100-$300 because it’s such a finicky, skilled task.
At the end of the day, laminate is a fantastic product if you respect its two weaknesses: grit and water. By following these methods, you’re not just cleaning; you’re ensuring that floor stays beautiful for years to come. Just be careful—a freshly mopped floor can be slippery, so always watch your step until it’s completely dry!
Inspiration:


The cleaning products that secretly ruin your floor: That DIY vinegar solution you love? It’s far too acidic for laminate’s wear layer and will dull the finish over time. Oil soaps and wax-based polishes are even worse; they don’t absorb and leave a sticky, cloudy film that attracts more dirt. Always opt for a pH-neutral cleaner specifically formulated for laminate, like those from brands such as Bona or Black Diamond Stoneworks, to keep that protective top layer pristine.
Nearly 80% of laminate flooring damage is caused by water or improper cleaning methods, not foot traffic.
This statistic from flooring industry reports highlights a crucial fact: the biggest threat to your floor isn’t your kids or your pets, but the mop and bucket. A simple switch from a soaking wet mop to a barely damp microfiber cloth significantly reduces the risk of water seeping into the vulnerable core, preventing the bubbling and peeling that can permanently ruin the planks.


