Forget the Chemicals: How to Steam Clean Your Grout Like a Pro
I’ve spent more time on my hands and knees with tile and grout than most people spend in their cars. For the longest time, cleaning grout was a miserable job that involved two things: heavy-duty chemicals and a whole lot of elbow grease. We’re talking acidic cleaners that would singe your nose hairs and alkali solutions that would eat holes in your jeans. It was just part of the gig.
In this article
Then, a while back, a client with some serious allergies threw us a curveball. They needed a bathroom floor restored, but with absolutely zero chemicals. To be honest, I thought they were dreaming. How could you possibly cut through years of built-up gunk without a potent formula? But a colleague had just gotten his hands on a commercial-grade steam cleaner and brought it over. I watched, completely mesmerized, as it melted away years of grime, turning dark, dingy grout lines back to their original color. There was no smell, just the hiss of steam. That was a game-changer for me. It proved that pure heat and pressure could outperform the harshest chemicals when you know what you’re doing.
But let’s be clear: a steam cleaner isn’t a magic wand. It’s a serious tool, and you need to understand the why behind it to get great results.
So, Why Does Steam Actually Work?
It all comes down to some pretty simple physics. Grout, especially the common cement-based kind, is basically a hard sponge filled with microscopic pores. Over time, those pores get packed with dirt, soap scum, skin cells, and kitchen grease. It’s gross, I know.
When you blast that surface with high-temperature steam—we’re talking over 220°F (105°C)—you’re hitting that trapped grime with a thermal shock. The heat makes the dirt and grease particles expand instantly, breaking their bond with the grout. At the same time, the machine is forcing that steam out at high pressure, usually 40 to 60 PSI for a decent unit. This pressurized vapor gets deep into the pores and literally blasts the loosened gunk out onto the surface where you can finally wipe it away for good.

Oh, and by the way, the high heat does more than just clean. It sanitizes. Mold and mildew can’t survive temperatures that high, so you’re actually killing them at the root. Most chemical cleaners just bleach the surface, leaving the problem to grow right back. Steam cleaning gives you a truly healthier surface, which is a huge selling point for anyone with kids or respiratory issues.
Choosing Your Weapon: Not All Steamers Are Created Equal
The market is flooded with gadgets labeled “steam cleaners,” but a lot of them are just not up to the task of deep-cleaning grout. Using a wimpy steamer is a one-way ticket to frustration. You have to look at the specs, not the flashy marketing.
Here’s what really matters:
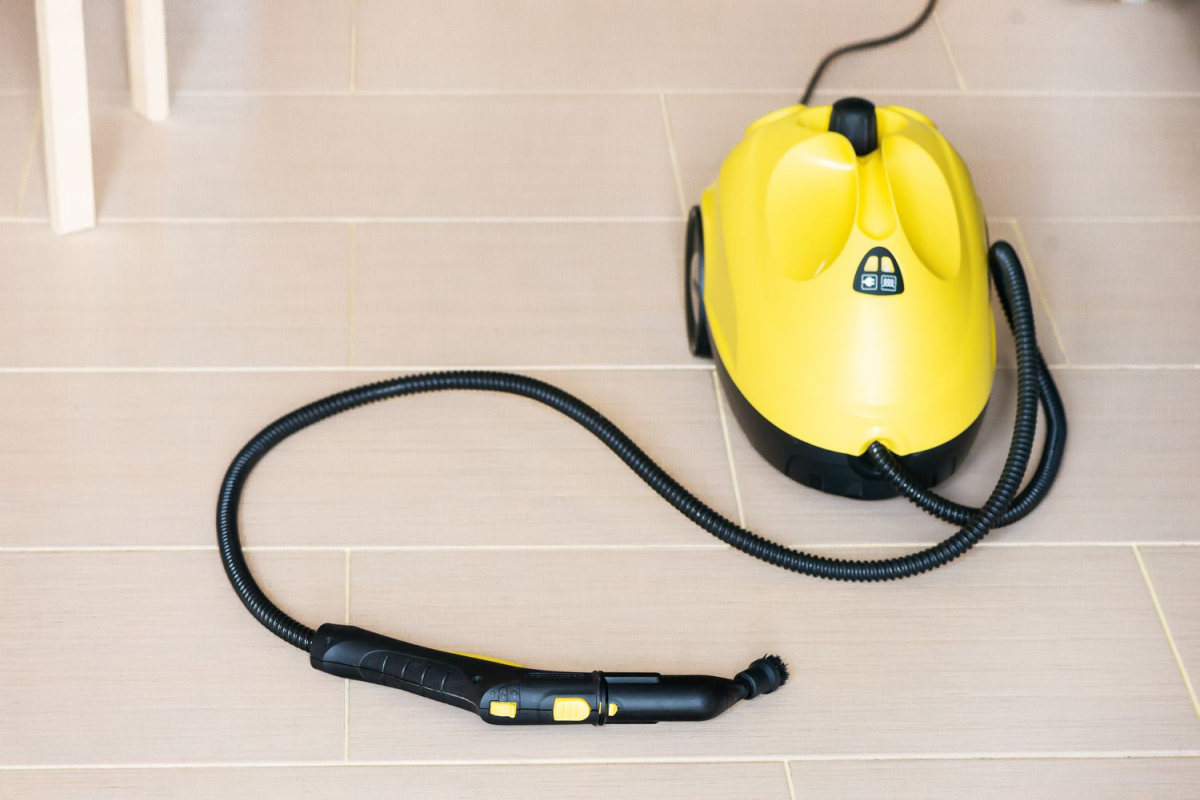
- Pressure and Heat are EVERYTHING. This is non-negotiable. You need a machine that delivers at least 40 PSI of pressure and maintains a boiler temperature over 220°F. Many cheap handhelds or steam mops just produce weak, wet steam that soaks your grout without the power to clean it. For home use, something like a McCulloch MC1375 or a Dupray Neat will do the job. Expect to pay between $150 and $250 for a canister unit that actually has the guts to clean grout effectively.
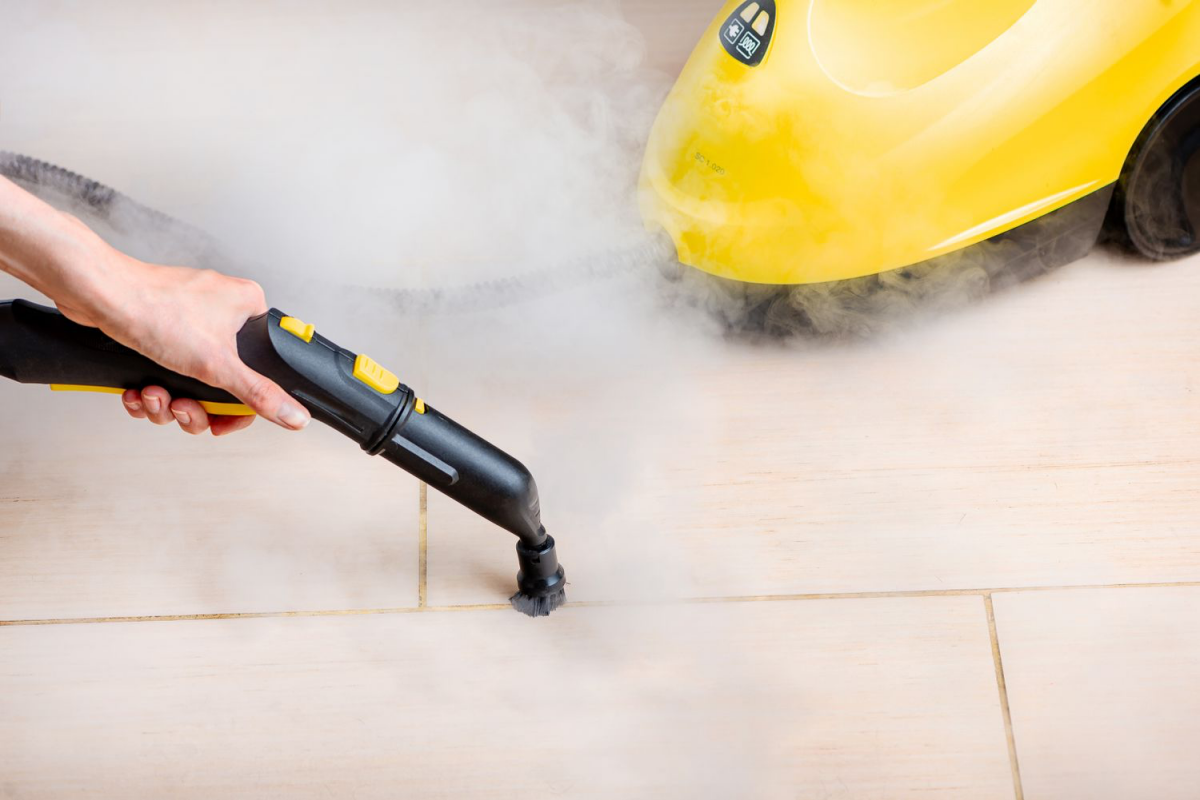
- The Right Attachments. A steamer is useless without the right tools. For grout, you absolutely need a small detail nozzle to concentrate the spray. You’ll also need small, stiff brushes that attach to that nozzle.
Let’s talk brushes for a second. Your go-to will be the nylon brushes. They’re stiff enough to provide good agitation but gentle enough that they won’t wreck most ceramic and porcelain tile. You’ll go through these, so buy a pack of extras.
Now, you might also see brass brushes. Heads up! These are for emergencies only. They are extremely aggressive and can easily scratch softer tiles and even wear down the grout itself. I only ever consider using them on ancient, horribly stained grout on a super durable porcelain tile, and even then, I test it in a closet first. For homeowners, my advice is simple: just avoid them.
Before You Start: Your Shopping List & A Reality Check
Walking into a project prepared is half the battle. Here’s a quick list to make sure you have everything before you start.
- A quality canister steam cleaner
- A gallon of distilled water (trust me on this)
- A pack of nylon detail brushes
- A stack of clean microfiber cloths (at least 5-10)
- Safety glasses
- A good penetrating grout sealer for when you’re done
- A small brush or roller for applying the sealer
Good to know: When should you just hire a pro?
If you’re looking at vast areas of tile (like 1,000+ sq. ft.) or if your grout is cracked and crumbling all over the place, it might be worth calling in a professional. The cost for a pro service can range from around $0.75 to $2.00 per square foot, depending on how bad the situation is. For a single bathroom or kitchen backsplash, DIY is very manageable.
The Step-by-Step Method for a Perfect Finish
Alright, let’s get to it. Rushing this will leave you with a blotchy, disappointing result. Follow these steps, and you’ll be golden.
Step 1: Inspect and Test (Don’t Skip This!)
Before you even plug in the steamer, look closely at your grout. Is it standard cement-based grout? Or is it a plasticky-looking epoxy grout? This method is for porous, cement-based grout. Also, check for any areas where the grout is cracked or missing. Blasting pressurized steam into a crack will just blow more grout out and make the problem worse. Any damage needs to be repaired before you steam. Always, and I mean ALWAYS, test your steamer in a hidden spot first—like in a closet or behind the fridge.
Step 2: Prep the Area
Get rid of all the loose dirt. I do a first pass with a broom and dustpan, followed by a thorough vacuum. If you don’t, you’re just making mud. Also, get some air moving. Open a window or turn on an exhaust fan. You’re about to add a lot of moisture to the room. If you’re working near painted baseboards or wood cabinets, you might want to tape up a little plastic to protect them from the heat.
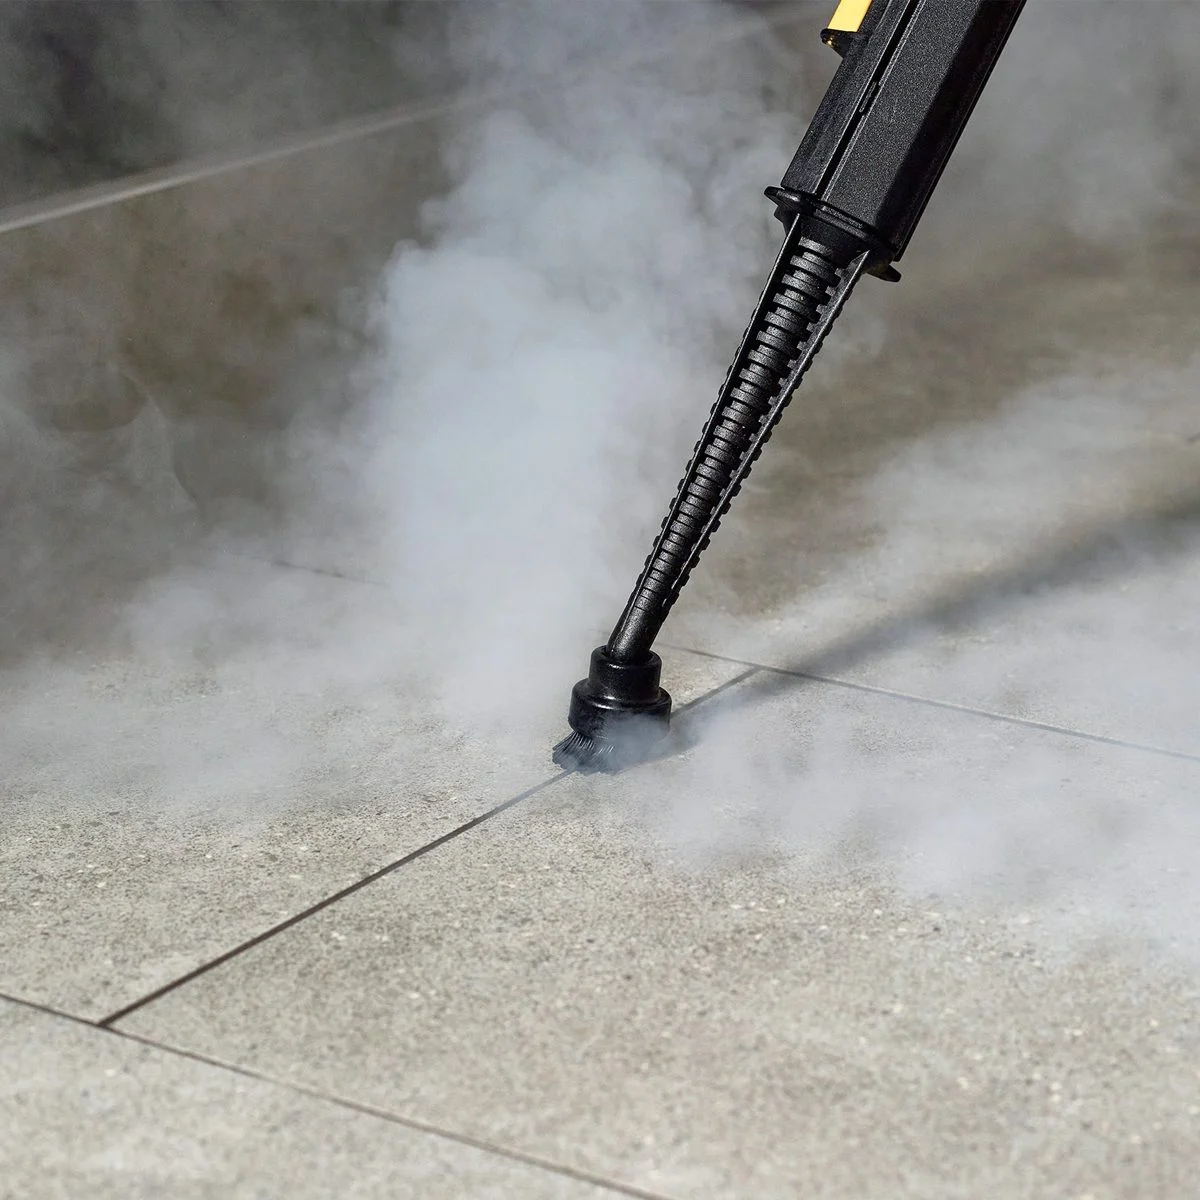
Step 3: The Steaming Technique
Work in small, manageable grids, maybe 3×3 feet at a time. This prevents dirty water from drying on a section you just cleaned. Hold the nozzle about an inch from the grout line at a 45-degree angle. Move slowly—about an inch or two per second. You need to give the heat time to work. You should literally see the gunk bubbling out.
For a beginner, tackling a standard 5×8 bathroom floor might take about 2-3 hours of actual steaming, plus another hour for prep and cleanup. Don’t rush it!
Step 4: The Immediate Wipe-Down
This is the step everyone gets lazy on, and it’s critical. As soon as you steam a line, immediately wipe up the dirty water with a clean, damp microfiber cloth. If you let that slurry dry, the dirt just sinks right back into the grout. Have a bucket of clean water nearby to rinse your cloth frequently. Once your cloth looks dirty, grab a fresh one.
Step 5: Final Rinse and Dry
Once you’re all done, I recommend mopping the entire floor one last time with fresh, clean water. This picks up any lingering residue. Then, let it dry completely. This can take up to 24 hours. Aim a fan at the floor to speed things up.
Troubleshooting Common Problems
Even with a perfect technique, some stains are stubborn. For a deep-set oil or dye stain, you may need a pre-treatment. You can use a quality, pH-neutral tile and grout cleaner—some enzymatic cleaners work great for this. Let it sit for 5-10 minutes to break down the stain chemically before you hit it with steam.
A quick tip: If you have hard water, use distilled water in your steamer. It costs a couple of bucks a gallon at the grocery store and will prevent mineral scale from building up and clogging your machine. I learned that one the hard way.
And be EXTREMELY careful with natural stone like marble or travertine. If the stone isn’t sealed perfectly, the steam can force moisture into it and cause discoloration. Honestly, for unsealed or delicate stone, the risk often isn’t worth it.
Safety First, Always
I’m not kidding around here. The steam coming out of that nozzle is hotter than boiling water and can give you a nasty burn in a split second. Never, ever point it at a person or a pet. Always wear safety glasses—you don’t want gritty gunk flying into your eye. And since you’re working with water and electricity, plug your machine into a GFCI outlet (the kind with the little test/reset buttons). It’s designed to cut the power if there’s a short, and it’s a lifesaver in wet areas.
The Final Step: Protect Your Hard Work
You didn’t do all that work for nothing, right? After the grout is perfectly clean and has had at least 24-48 hours to dry completely, you need to seal it. Sealing fills in those microscopic pores, creating a barrier against future dirt and stains.
I’ve had great results with high-quality penetrating sealers like Aqua Mix Sealer’s Choice Gold or 511 Impregnator. They soak into the grout rather than just sitting on top. Use a small artist’s brush to carefully paint it onto the grout lines. Wipe any excess off the tile face before it dries. This one step will make future cleanups a breeze and keep your grout looking fresh for years.
Galerie d’inspiration

My grout is sparkling clean… so now what?
Don’t let your hard work go to waste! Freshly steamed grout is pristine but also porous and vulnerable. This is the perfect time to apply a quality penetrating grout sealer. It creates an invisible barrier that repels dirt and moisture, making future clean-ups a simple wipe-down instead of another deep scrub. It’s the pro secret to keeping that “just-cleaned” look for months, not weeks.
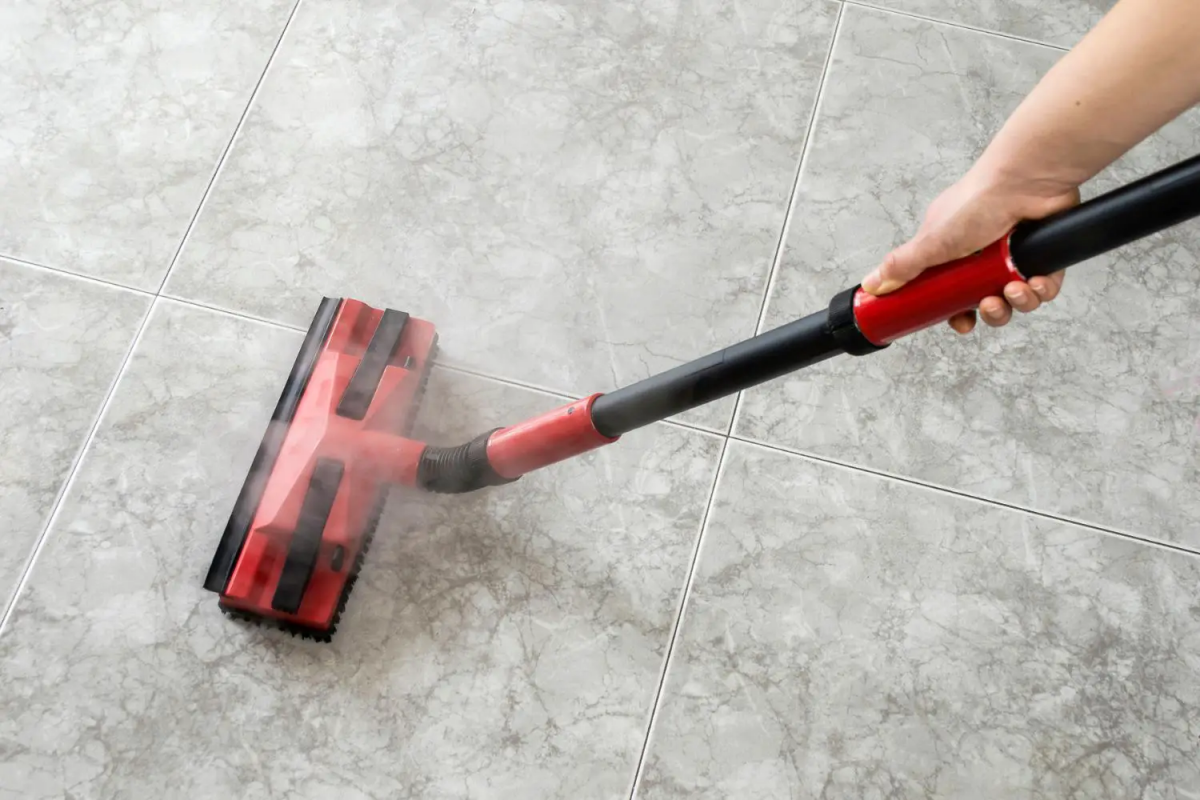
The Canister Powerhouse: For large areas and deep-seated grime, a canister model like the McCulloch MC1375 is your best ally. It offers higher pressure (PSI), larger water tanks for longer cleaning sessions, and a wide array of attachments for floors, corners, and more.
The Handheld Hero: For quick touch-ups, tight spaces like showers, or smaller apartments, a handheld unit like the Bissell SteamShot is incredibly convenient. It heats up in seconds and is easy to maneuver, perfect for tackling spills and mildew spots as they appear.


