Stop Overpaying to Cool Your Home: An HVAC Pro’s Real-Talk Guide
I’ve spent more summer days than I can count in scorching hot attics, figuring out why a family’s air conditioner just couldn’t keep up. After decades in the heating and cooling business, I’ve seen what actually works to keep a home comfortable without that gut-punch of a utility bill.
In this article
A lot of articles give you the same old tips, but they often miss the big picture—why your house gets so hot in the first place. My goal here is to share what I’ve learned out in the field. We’re going to look at your home as a whole system, and trust me, once you understand how heat is getting in, you can make smarter fixes that deliver real results.
First, Why Is Your House So Hot? (The Quick & Dirty Science)
Before we jump into solutions, let’s quickly cover the three ways heat sneaks into your house. Don’t worry, there won’t be a quiz. Understanding this just makes all the advice make sense.
- Conduction: This is heat moving through solid things. Think of the sun baking your roof shingles, and that heat slowly traveling through the wood, insulation, and drywall into your living room.
- Convection: This is heat moving through air. Hot air from outside leaking in through a gap under your door is a perfect example. It’s an unwanted guest bringing its heat with it.
- Radiation: This is heat traveling as a wave, like the warmth you feel from the sun on your skin. This is the heat that beams through your windows and cooks your interior.
Most homes are fighting a losing battle on all three fronts. So, our job is to build a better defense, focusing on your home’s outer shell and the AC system itself.
Part 1: Your Home’s Armor – The Building Envelope
Listen, your air conditioner can only do so much. If your home is basically a sieve for heat, your AC will run itself into the ground and you’ll still be sweating. The best and most lasting savings come from beefing up your home’s defenses. I always tell my clients, “Don’t pay to air condition the neighborhood.”

Insulation: The Best Defense You’re Probably Missing
Insulation is your number one tool against heat conduction. Its power is measured in R-value—the higher the number, the better it is at resisting heat flow. The most important place for this is your attic. On a sunny day, your roof can easily hit 150°F or more. Without enough insulation, that heat is coming straight for you.
Honestly, at least half the homes I visit are seriously under-insulated. For most climates, experts recommend an attic insulation level of R-38 to R-60. What does that actually look like? For the common fluffy blown-in fiberglass, that’s about 13 to 20 inches deep. If you have cellulose, it’s closer to 10 or 16 inches.
Quick Attic Check: Safety first! Only go up there if you have solid footing on the joists—never step on the drywall between them. Grab a ruler and a flashlight. If you can see the tops of your wooden ceiling joists, you absolutely need more insulation. It’s that simple.

So what are your options? Here’s the breakdown:
- Fiberglass (the pink stuff): It’s common, effective, and you can get it in big rolls (batts) or blown-in. It’s a solid, budget-friendly choice, though it can be itchy to work with.
- Cellulose (recycled paper): This is usually blown-in and is fantastic at filling all the little nooks and crannies. It has a similar R-value to fiberglass and is a great all-around performer.
- Spray Foam (the premium choice): This is the superstar. It insulates and air-seals in one go. I’ve seen closed-cell spray foam on the underside of a roof deck completely change a home. It’s not a DIY job and it costs a lot more, but it solves multiple problems at once.
Good to know: For a professional job, expect to pay somewhere between $1.50 and $3.50 per square foot for blown-in fiberglass or cellulose. Spray foam is much more, often starting around $4.00 per square foot and going up from there. But the return on investment is huge. I once had a client who spent a fortune on a new high-efficiency AC, but their bills didn’t budge. Their attic had four inches of old, matted insulation. We brought it up to 16 inches, and their summer electric bill dropped by 30% the next year. The problem was never the AC; it was the house.

Air Sealing: Plugging the Hidden Holes
Think of your home as a bucket you’re trying to keep full of cool air. Air leaks are the holes in that bucket. I’ve used professional tools to test homes for air leakage, and the results are always shocking. Most houses have so many little gaps that all the cool air gets replaced by hot outdoor air every hour or two.
Common culprits include: gaps around windows, plumbing pipes coming through walls, electrical outlets, and especially the attic access hatch. That little square of plywood is often a major source of heat gain.
You can tackle this yourself with a trip to Home Depot. A tube of caulk and some weatherstripping for that attic hatch is a five-minute job that pays off. Oh, and here’s a pro tip: for sealing bigger gaps between your living space and attic (like around pipes), look for the ‘fireblock’ expanding foam. It’s usually bright orange and is designed for this purpose for safety reasons.
Windows: Your Personal Greenhouses
Sunlight streaming through a window is pure heat. A single south- or west-facing window can let in as much heat as a small space heater. While blinds and curtains help, they block the heat after it’s already inside. The real game-changers are on the outside.
- Solar Screens: These are custom-fit mesh screens that can block up to 90% of the sun’s heat before it even touches the glass. They’re amazing for those brutal afternoon sun-blasted windows. Depending on the size, they can run you $50 to $150 per window, and in my opinion, they are worth every penny.
- Window Film: A less expensive option is a reflective film you apply to the inside of the glass. Just be sure to check your window warranty, as some manufacturers don’t love them.
Your Weekend Warrior Checklist: 3 Changes for Under $50
Feeling overwhelmed? Don’t be. Here are three cheap and easy things you can do this Saturday to feel an immediate difference.

- Weatherstrip Your Attic Hatch. A roll of adhesive foam weatherstripping costs less than $10. Just clean the edge of the hatch and the frame, then stick it on. You’ve just plugged a huge thermal hole.
- Buy Foam Outlet Gaskets. For about $5, you can get a pack of foam gaskets to put behind the faceplates of every electrical outlet and light switch on your exterior walls. It takes seconds per outlet and stops dozens of tiny air leaks.
- Gently Clean Your Outdoor AC Unit. Turn the power off at the breaker first! Then, use your garden hose on a gentle “shower” setting to rinse all the dirt, dust, and grass clippings off the metal fins. Heads up! Do NOT use a high-pressure jet—you’ll bend the delicate fins and choke your AC’s ability to breathe.
Part 2: Making Your HVAC System Work Smarter
Okay, stop reading for a second. Go check your air filter. Seriously. A clogged filter is the #1 reason I get emergency calls on the hottest day of the year. This article will be here when you get back.
…Back? Great. Once your house is reasonably sealed up, we can focus on the machine itself.
What a REAL AC Tune-Up Looks Like
An annual AC tune-up isn’t just a filter change. A true professional service takes at least an hour. If a tech is in and out in 20 minutes, you didn’t get your money’s worth. A proper tune-up, which should run you between $80 and $150, must include:
- Deep Cleaning the Coils: Both the indoor and outdoor coils need to be cleaned. A dirty outdoor coil can’t release heat, forcing your system to work way harder.
- Checking Refrigerant Levels: If your system is low on refrigerant, it has a leak. Period. A technician who just “tops it off” without fixing the leak is just kicking the can down the road and costing you money, especially since older types of refrigerant are incredibly expensive now.
- Flushing the Condensate Drain: This little pipe drains away all the humidity your AC pulls from the air. It gets clogged with gunk, and I’ve seen overflows cause thousands in water damage.
- Inspecting Electrical Parts: We check components like capacitors that are prone to failing on hot days. Replacing a $20 part during a tune-up is much better than paying for a $200 emergency call later.
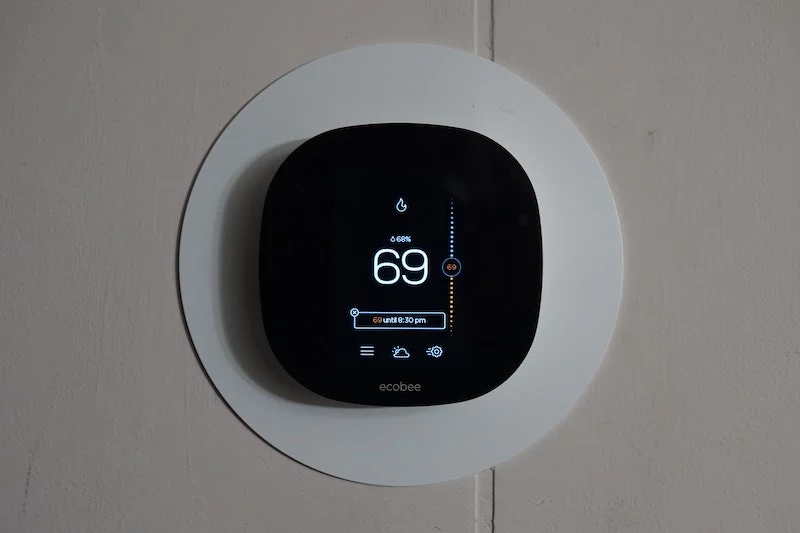
Thermostat Strategy: Cool Smarter, Not Harder
Here’s the biggest mistake people make: cranking the thermostat way down to 68°F, thinking it will cool the house faster. It won’t. Your AC works at a constant speed. Setting it lower just makes it run for a much longer time.
A better strategy? Set it to a comfortable temperature like 76-78°F when you’re home, and let it rise to 82-84°F when you’re away. The goal is to reduce the total hours the system runs, not to create massive temperature swings it has to fight against.
A Quick Word on Fans
Ceiling fans are awesome. But remember, they cool people, not rooms. They create a wind chill effect on your skin. This means you can set your thermostat a few degrees higher and feel just as cool. But a fan spinning in an empty room is just wasting electricity. Turn them off when you leave!
Part 3: The Deeper Dives
Leaky Ductwork: The Invisible Energy Hog
This is one of the biggest energy wasters I find, especially for ducts running through an attic. Studies show that a typical duct system leaks 20-30% of the very air you just paid to cool… right into your attic. I once fixed a single duct joint that had completely separated in a customer’s attic. It solved their “one hot room” problem and their high bill in one shot. Pro sealing uses a pasty sealant called mastic and special metal tape—that gray cloth duct tape is useless for this, as it dries out and fails.
System Sizing & That ‘Clammy’ Feeling
Bigger is not better when it comes to air conditioners. An oversized unit cools the air so fast that it shuts off before it has a chance to do its other critical job: dehumidifying. This leaves you with air that feels cool but damp and clammy. A properly sized unit runs longer, which is actually more efficient and does a much better job controlling humidity.
Sizing requires a professional calculation (they call it a Manual J load calculation). Don’t let the fancy name scare you. Any reputable HVAC contractor will do this as part of a quote for a new system. If they just guess based on your home’s square footage, that’s a huge red flag—show them the door.
Know When to DIY and When to Call a Pro
You can definitely handle some of this yourself, but other tasks are strictly for the pros.
Your To-Do List:
- Change that air filter monthly.
- Keep the area around your outdoor unit clear of debris.
- Do some basic air sealing and check your insulation.
Call a Pro For:
- Anything involving refrigerant (it requires a license).
- Anything with high-voltage electrical parts. Your AC has components that can hold a lethal charge even with the power off.
- Deep cleaning of the indoor unit or serious duct repair.
- Diagnosing a system that isn’t working right.
And a final piece of advice: when you hire someone, look for a company that’s licensed, insured, and employs certified technicians. You can search online for a “NATE-certified technician locator” to find qualified pros in your area. Investing in quality work is an investment in your comfort and long-term savings. It’s the smartest move you can make.


