Don’t Paint Your Front Door Until You Read This: A Pro’s Guide
I’ve been painting houses for a long, long time, and if there’s one thing I’ve learned, it’s that a front door isn’t just a piece of wood or metal. It’s the handshake of your home. It’s the first thing guests touch and the focal point that greets you every single day. Getting it right is about so much more than grabbing a color you like from a tiny paper swatch.
In this article
Honestly, I’ve seen it all. I’ve seen homeowners giddy with joy over a simple color change, and I’ve seen others who regretted their choice the second it dried. I learned these lessons on a ladder, not in a design studio, and I want to share what really works so your door looks amazing for years, not just for a season. This isn’t about fleeting trends; it’s about making a smart, durable choice that makes you happy every time you pull into the driveway.
First Things First: The Science Behind a Lasting Finish
Before you even dream of colors, you need to understand what you’re up against. Your front door faces a battle every day: scorching sun, driving rain, freezing cold, and grubby hands. Paint isn’t just decoration; it’s a shield. Choosing the right one is a technical call.
Why Your Door’s Direction Matters (A LOT)
Every paint color has something called a Light Reflectance Value, or LRV. It’s a scale from 0 (think absolute black) to 100 (pure white), and it measures how much light a color bounces back. This isn’t just for designers; it’s a critical detail for your door’s survival.
Dark colors with a low LRV, like a trendy black or deep navy, soak up solar energy like a sponge. I once had a client with a beautiful new-build home. They had a fiberglass door that got blasted by the sun all afternoon, and they were dead set on painting it black. I warned them about the heat absorption, but they loved the look. Six months later, I got the call. The door had warped so badly from the heat that it wouldn’t even close anymore. The manufacturer’s warranty? Voided. It was right there in the fine print about not using colors with a low LRV. We had to replace the entire door slab.
The lesson here is simple: If your door gets hours of direct sun, especially if it’s fiberglass or steel, a dark color is a huge risk. If you must have that dramatic look, be sure your door is protected by a deep porch or a big awning.
What’s Your Door Made Of?
The material of your door dictates everything—the prep, the primer, and the paint. The same can of paint will act completely differently depending on the surface.
- Wood Doors: Ah, the classic. Wood is beautiful but a bit high-maintenance. It expands and contracts with the weather. Some woods, like cedar or redwood, have natural oils called tannins that can bleed right through your paint, leaving ugly yellow or brown stains. You absolutely need a high-quality, stain-blocking oil-based primer to seal those in before your color coat goes on.
- Fiberglass Doors: These are super stable and great insulators. The trick with fiberglass is getting the paint to stick. The surface is non-porous, so you have to clean it like you mean it to get rid of any factory residue. Then, use a special bonding primer made for slick surfaces. If you skip this, your beautiful new paint job could peel off in a single sheet. Trust me, I’ve seen it happen.
- Steel Doors: They’re tough, but they can dent and rust. If you see even a tiny speck of rust, you have to sand it off completely and immediately coat that spot with a rust-inhibiting metal primer. A regular latex primer will actually make it worse.
Choosing Your Sheen: More Than Just Looks
The finish of your paint, or its sheen, is a key part of its toughness. More sheen means a harder, more washable surface. It’s a trade-off between hiding flaws and being easy to clean.
So, what’s the real difference between the two best options, semi-gloss and high-gloss? Think of it this way. Semi-gloss is your reliable workhorse. It’s the professional standard for doors and trim for a reason. It offers fantastic resistance to moisture and scuffs, it’s easy to wipe clean, and it has a lovely sheen that makes colors look rich without being a mirror. It’s forgiving and practical.
On the other hand, high-gloss is the showstopper. It creates a slick, dramatic, almost liquid-like finish that can be absolutely stunning. But here’s the catch: it highlights every single imperfection. Every tiny dent, bump, or stray brush stroke will be magnified under a high-gloss finish. If you go this route, your prep work has to be flawless. No shortcuts allowed.
The Weekend Warrior’s Game Plan
Okay, let’s get practical. A pro-level paint job is totally doable for a DIYer, but you have to be prepared. Rushing the prep is the single biggest mistake people make, and it guarantees a finish you’ll hate.
Your Shopping List & Budget
Before you start, get everything you need in one trip. It makes the whole process smoother. You’ll likely spend between $100 and $150 for top-notch materials. Remember, good tools make the job easier and the results better.
- High-Quality Primer: One quart will do. Look for brands like Zinsser or STIX. ($20-$30)
- Premium Exterior Paint: You only need one quart! A standard door almost never needs more for two full coats. I trust paints like Benjamin Moore’s Aura Grand Entrance or Sherwin-Williams Emerald Urethane Trim Enamel. They’re formulated specifically for doors and trim and are worth every penny. ($30-$40)
- A Great Brush: Don’t cheap out here. A quality 2.5-inch angled sash brush will give you clean lines and a smooth finish. ($15-$25)
- Prep Supplies: Sandpaper (120 and 220-grit), painter’s tape, a TSP substitute for cleaning, and tack cloths. ($20)
- Safety Gear: Gloves, safety glasses, and a dust mask for sanding. ($15)
Heads Up! Check the Weather Forecast
This is a step people always forget. Don’t paint if it’s super humid, below 50°F (10°C), or about to rain. Paint needs time to cure properly. High humidity can dramatically slow down drying time and even cause weird streaks to appear. The ideal condition is a dry, overcast day with low humidity and mild temperatures.
The Pro-Level Process: Step-by-Step
Plan for this to take a weekend. Seriously. A couple of hours for prep on Saturday morning, then painting and drying time through Sunday. Trying to do it all in one afternoon is a recipe for disaster.
Step 1: The All-Important Prep
A great paint job is 90% preparation. The absolute best way to do this is to take the door off its hinges and lay it across a pair of sawhorses. This lets you work flat and prevents drips. Remove all the hardware—the doorknob, lock, everything. Taping around it looks sloppy and is where peeling always starts.
Next, clean the door like crazy with a TSP substitute and a scrub brush. Get rid of all the grime and hand oils. Rinse it thoroughly with clean water and let it dry completely. And I mean completely. Trapped moisture is the #1 cause of paint bubbling.
Once dry, it’s time to sand. The goal isn’t just to smooth it out; it’s to create a slightly rough texture, or ‘tooth,’ for the new paint to grab onto. A light scuff-sanding with 220-grit paper is usually enough. After sanding, vacuum up the dust and wipe the whole thing down with a tack cloth to pick up any remaining particles.
Oh yeah, what if you can’t take the door off the hinges?
Let’s be real, most people can’t leave a gaping hole in their house overnight. If you have to paint the door in place, you can still get great results. Just be patient. Use painter’s tape to meticulously mask off the hinges and the threshold. Lay down a drop cloth to protect your floor inside and out. The hardest part is not closing it too soon. You’ll need to leave it open for several hours as it dries, then you can carefully close it, but don’t latch it. A common trick is to use tape over the latch plate so the bolt can’t fully engage and stick to the fresh paint on the door jamb.
Step 2: Priming, The Unsung Hero
Skipping primer is like building a house without a foundation. It ensures your paint sticks, blocks stains, and gives you an even, beautiful final color. Apply one thin, even coat of the right primer for your door type to all six sides—front, back, and all four edges. Sealing the top and bottom edges is especially critical for wood doors to keep them from absorbing moisture and swelling shut.
Step 3: The Art of Application
Here’s the method the pros use for a brush-and-roller finish that looks flawless. I always tell my apprentices to follow this order to avoid marks:
- Paint the inset panels first. Use your brush to cut in the detailed areas.
- Then, paint the horizontal cross-pieces (the rails).
- Finish with the long, vertical pieces (the stiles). Always brush in the direction of the grain (even if it’s a fake grain on a fiberglass door).
The secret is two thin coats, not one thick one. Let the first coat dry completely—check the can, but plan for at least 4-6 hours. Then, give it a whisper-light sanding with 220-grit paper to knock down any dust bumps before applying your final coat. And here’s a critical timing tip: wait at least 24-48 hours before you reinstall hardware or let the door fully close and latch. Fresh paint can feel dry to the touch but can remain soft and sticky for a day or two.
Finally! How to Pick a Color You’ll Love
The Only Swatch Test That Works
Please, never, ever choose a color from that little paper chip in the store. The fluorescent lights in a hardware store are nothing like the natural light on your porch. A warm gray can look purple in the evening shade. A soft beige can look blindingly yellow in the direct sun.
Here’s what you do instead. Go buy sample pots of your top two or three colors. They’re cheap, maybe $5-$8 each. Paint each color on a large piece of foam board—at least two feet by two feet. Prop these boards up against your door and live with them for a few days. Look at them in the morning, at high noon, and in the evening. This is the only way to know how you’ll really feel about the color.
Quick tip: Not ready for the whole project yet? Do this today. Go buy those sample pots and paint the boards. It’s the single most important step, and it only takes 20 minutes.
Don’t Forget the Storm Door
If you have a glass storm door, be careful. The space between the glass and your main door can turn into a little oven on a sunny day, causing the exact same heat damage and paint failure I mentioned earlier. This is especially true for dark colors. As for the storm door’s color, you generally have two good options: match it to your house trim to frame the front door, or match it to the front door itself for a unified block of color. The first option is usually the safest and most elegant choice.
When Things Go Wrong: A Quick Troubleshooting Guide
- Peeling: This means the surface wasn’t clean, dry, or dull enough. It’s an adhesion failure, pure and simple.
- Blistering: Little bubbles under the paint are almost always caused by trapped heat or moisture.
- Weird Streaks: Ever see brownish, soapy streaks on a newly painted door after the first rain? It’s called surfactant leaching. It looks scary, but it’s just soap-like ingredients from the paint coming to the surface. It will usually wash away on its own or can be gently rinsed off after the paint has fully cured for a few weeks.
A Final Word on Safety & Cost
One last thing, and it’s a big one. If your home was built in the era when lead paint was common, you have to assume your door has it. Sanding or scraping lead paint creates toxic dust. You can buy a lead test kit at any hardware store for about $10. If it tests positive, please stop. This is not a DIY job. You need to hire a certified lead-safe professional who has the right equipment to handle it safely.
So, is it worth it? Doing it yourself will run you that $100-$150 in materials and a good chunk of your weekend. Hiring a pro for a standard door could be anywhere from $400 to $700, depending on your location and the door’s condition. You’re paying for a flawless prep job, guaranteed results, and none of the headaches.
But when you get it right, the payoff is huge. It’s a weekend of work that can totally transform your home’s curb appeal and bring a little jolt of pride every time you come home. Take your time, do the prep, and buy the good paint. Your door will thank you for it.
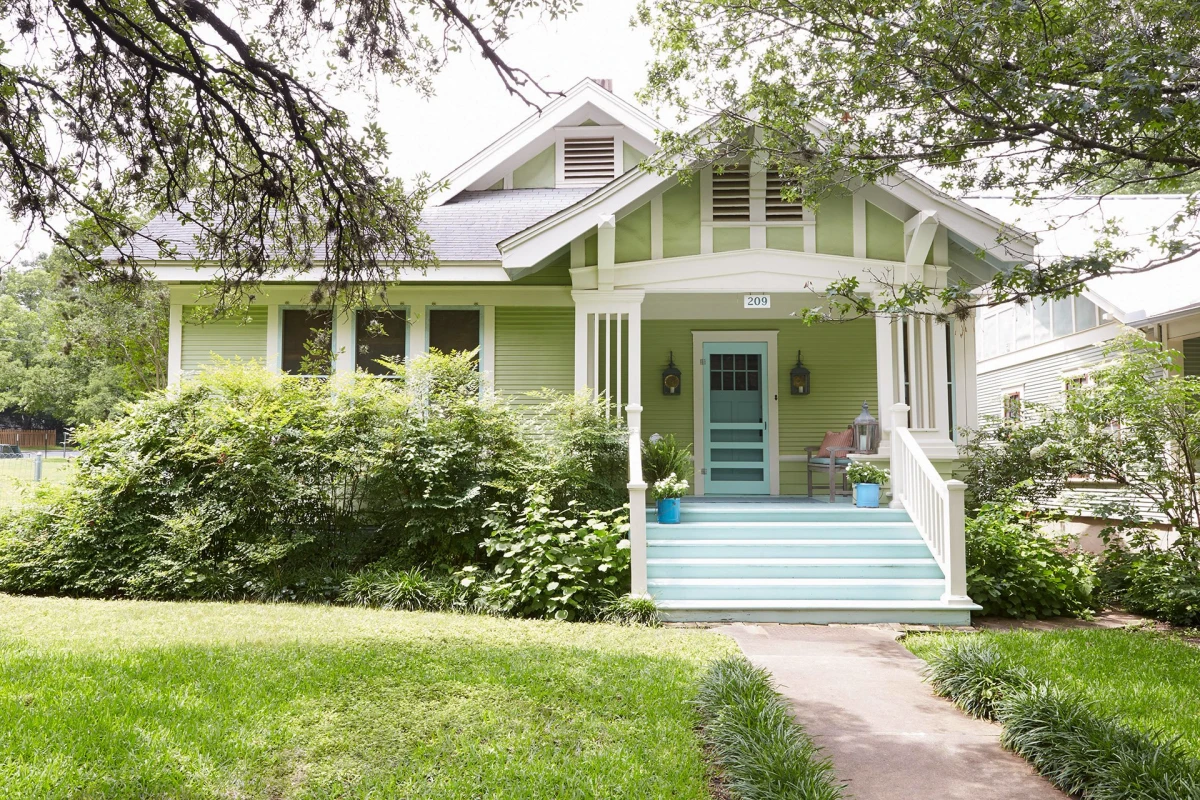
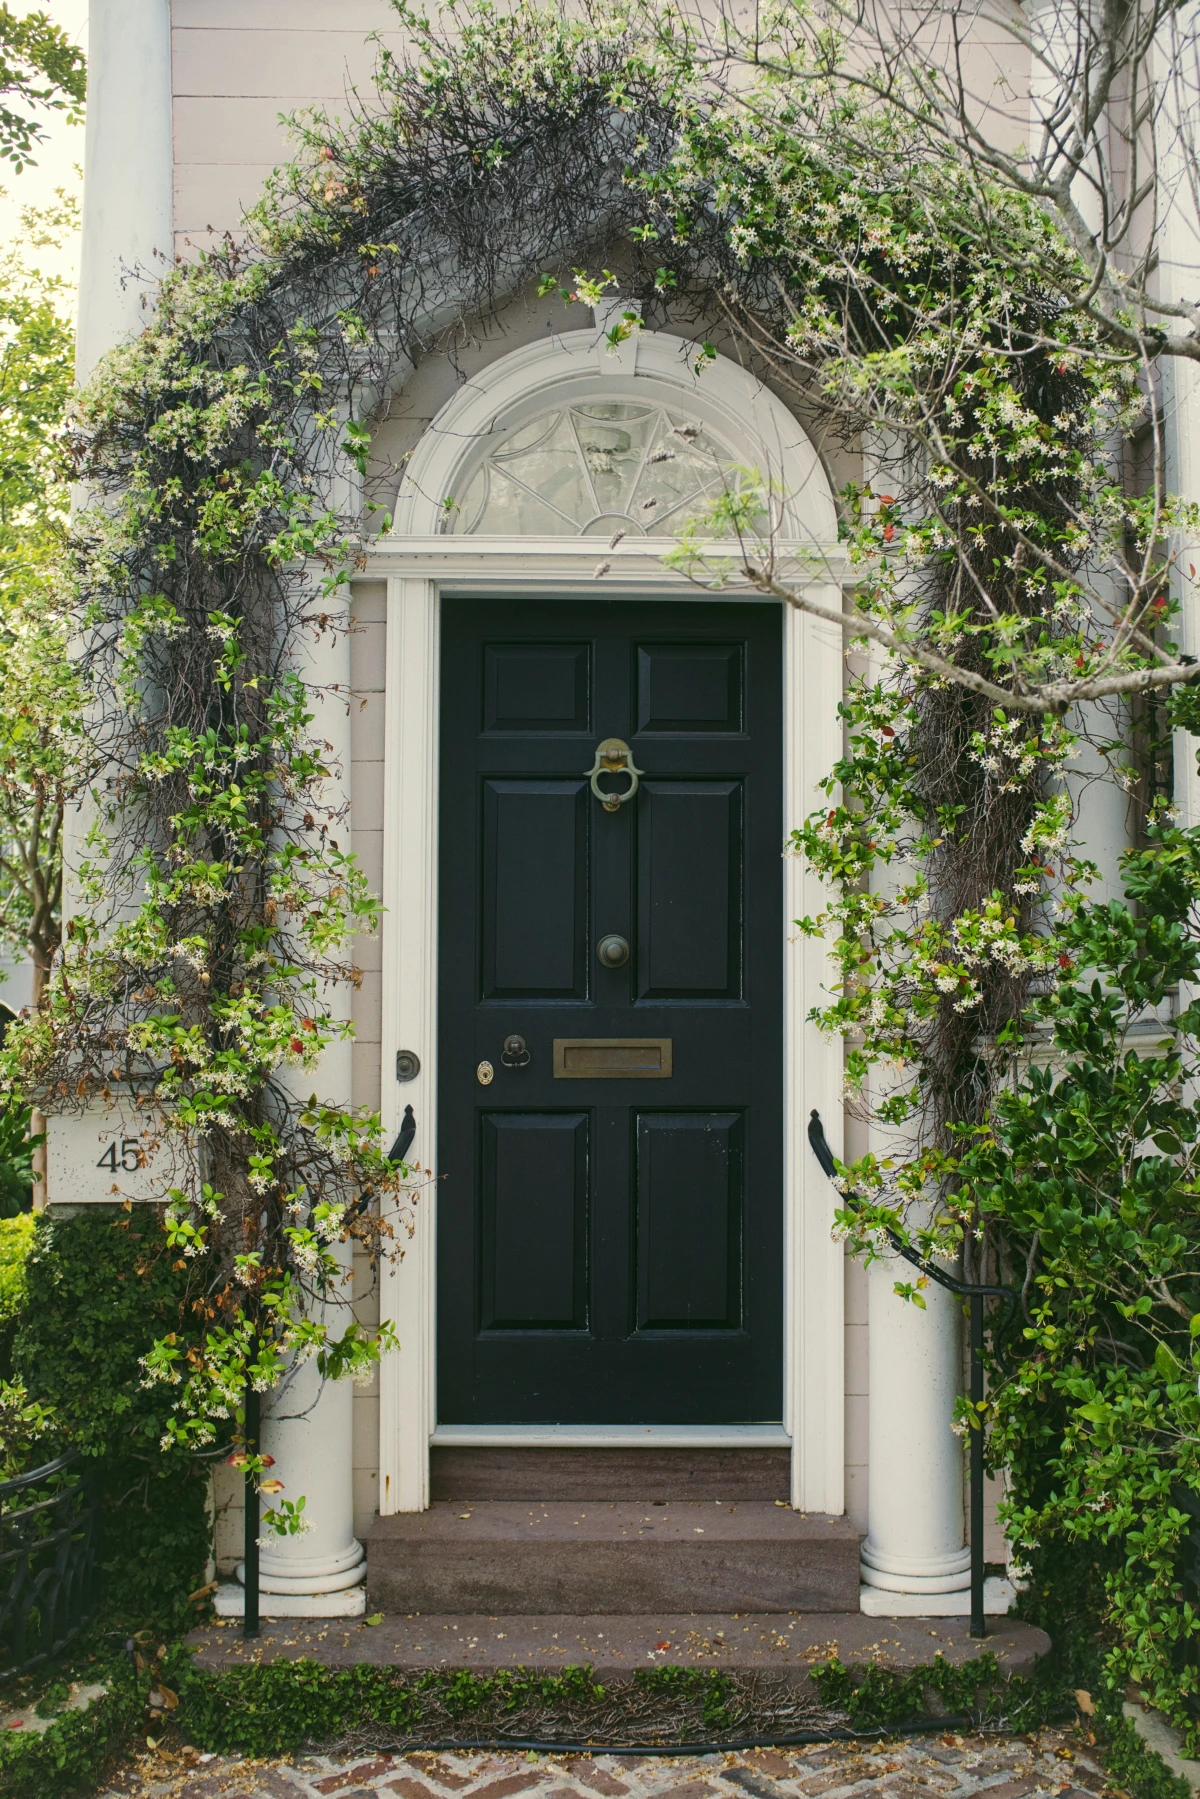
Inspirational Gallery with Photos
Timing is everything. For the smoothest application and best curing, aim for a day with low humidity and temperatures between 50-90°F (10-32°C). Avoid painting in direct, hot sunlight, which can cause the paint to dry too quickly, leaving behind unsightly brush marks and bubbles.
Traditional Oil-Based Enamel: Delivers a rock-hard, durable finish with a beautiful, smooth leveling. However, it has strong odors, longer dry times, and can yellow over time in the absence of UV light.
Modern Water-Based Acrylic Enamel: Products like Sherwin-Williams’ Emerald Urethane Trim Enamel offer excellent durability, low odor, and fast cleanup. They resist yellowing and are more flexible, preventing cracking with temperature changes.
For most DIY projects today, a high-quality water-based enamel is the professional’s choice.
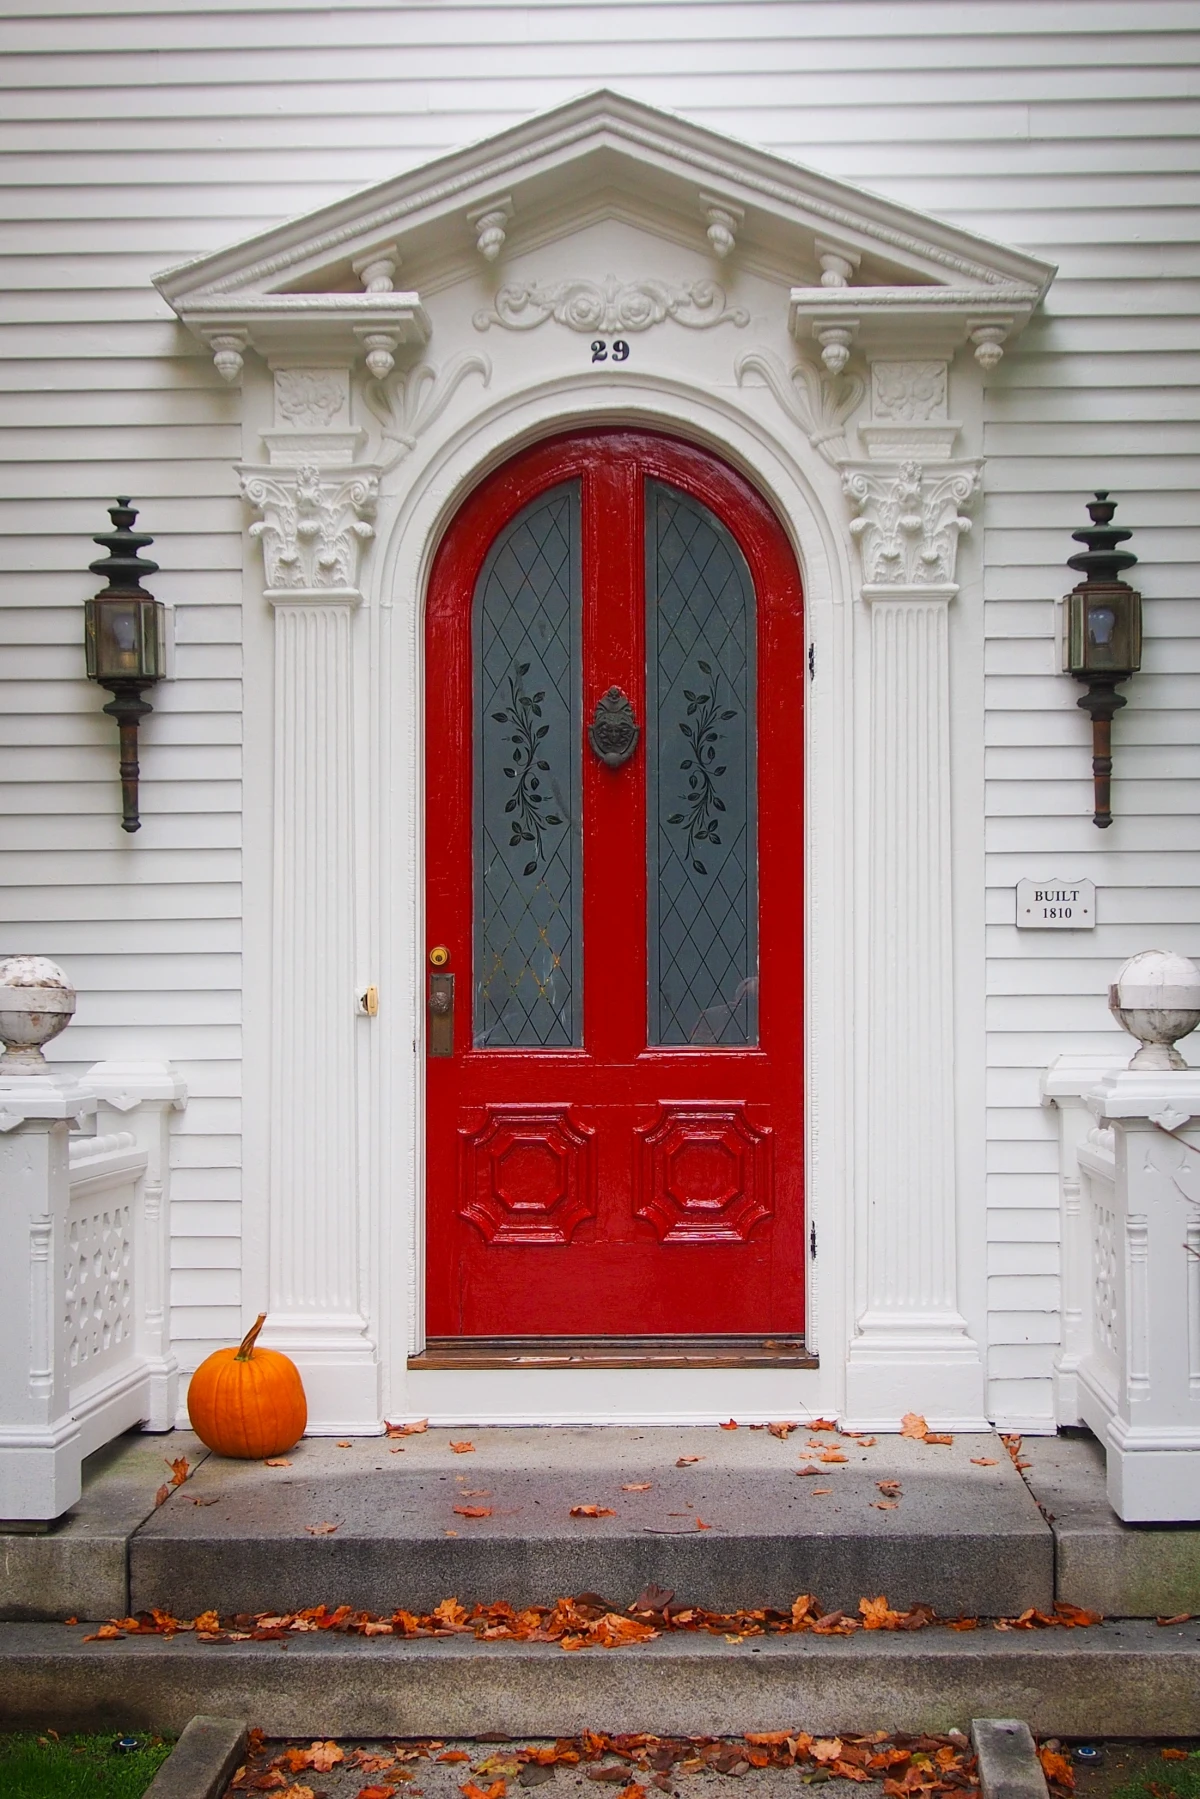
In color psychology, a red front door has historically signified a safe haven or a welcoming home. In early American tradition, it meant ‘welcome’ to tired travelers.
A perfect finish is 90% preparation. Don’t skip these steps:
- Remove all hardware: doorknobs, knockers, and locks. Taping is never as clean.
- Clean the surface thoroughly with a TSP substitute to remove decades of grease and grime.
- Scuff sand the entire surface with 180-220 grit sandpaper to give the new paint something to grip.
- Wipe away all dust with a tack cloth before you even think about opening the primer.
Gloss, Satin, or Matte? Which sheen is best for a front door?
While a matte finish can be chic, it’s often difficult to clean and can scuff easily—a real problem for a high-traffic area. High-gloss makes a dramatic, elegant statement and is the most durable and easiest to clean, but it highlights every single imperfection. For the best of both worlds, a Satin or Semi-Gloss finish offers excellent durability and washability with a subtle sheen that helps hide minor flaws.
The Pro’s Non-Negotiable Rule: Always remove the door from its hinges and lay it flat to paint. This prevents drips and runs, allowing the paint to self-level for a factory-like finish. It’s an extra step that separates an amateur job from a professional one.
According to a Zillow study, homes with black or charcoal gray front doors sold for as much as $6,271 more than expected.
This isn’t just about color, it’s about perceived value. A bold, well-maintained front door signals that the entire home is cared for. Just remember the article’s warning about LRV—if your door is sun-drenched, this high-value trend could come at a cost to the door itself. A deep porch is your best friend here.
- A rich, deep color that doesn’t require a dozen coats.
- A remarkably smooth, high-end finish that looks sprayed on.
- Incredible resistance to fading, cracking, and peeling, even in harsh weather.
The secret? Investing in a specialized door and trim paint. Products like Benjamin Moore’s Aura® Grand Entrance are formulated specifically for this task, offering a unique resin technology for a finish that truly lasts.
Looking for color inspiration beyond the paint swatch wall? Cast your eyes globally.
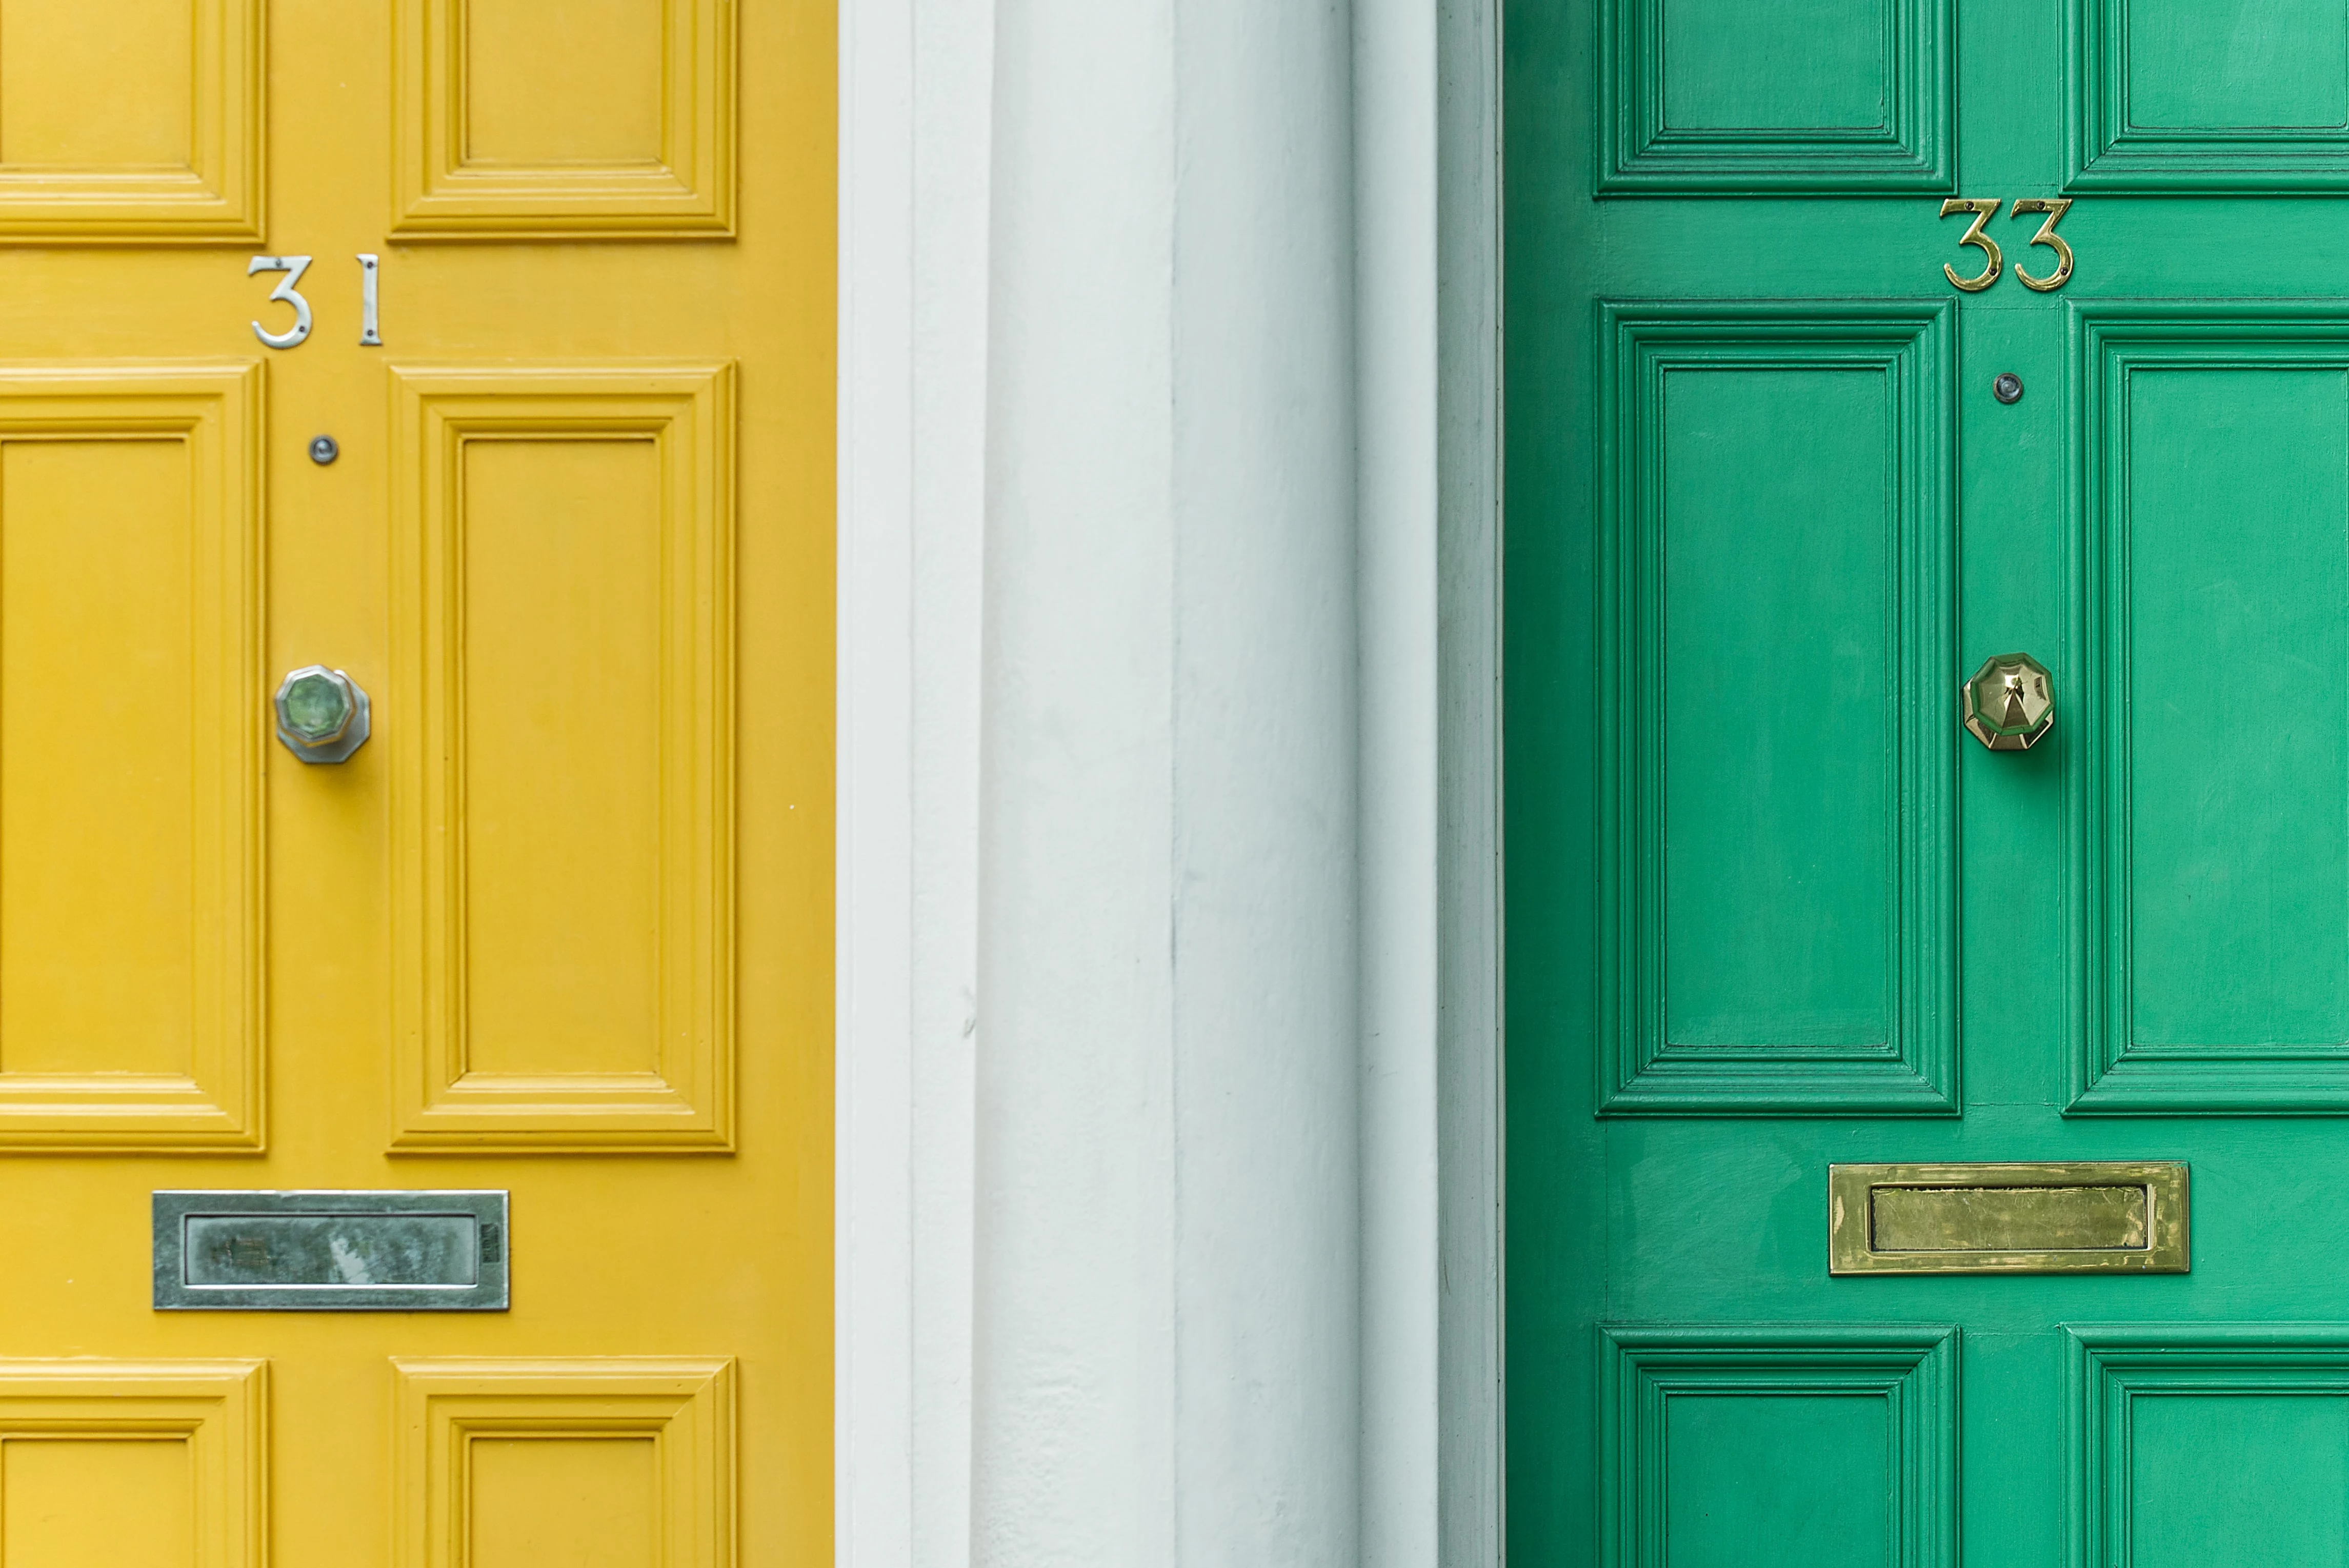
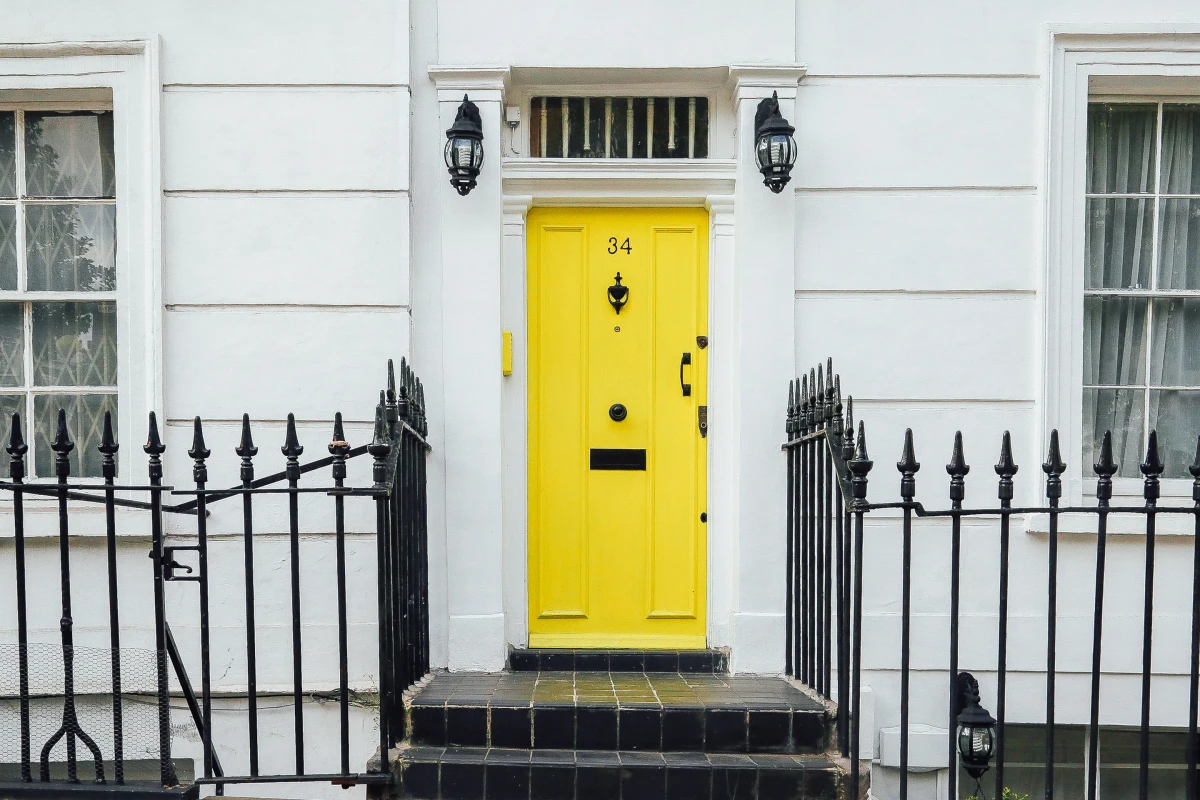
- Dublin, Ireland: Famous for its brightly colored Georgian doors in reds, yellows, and blues—each a bold statement of individuality.
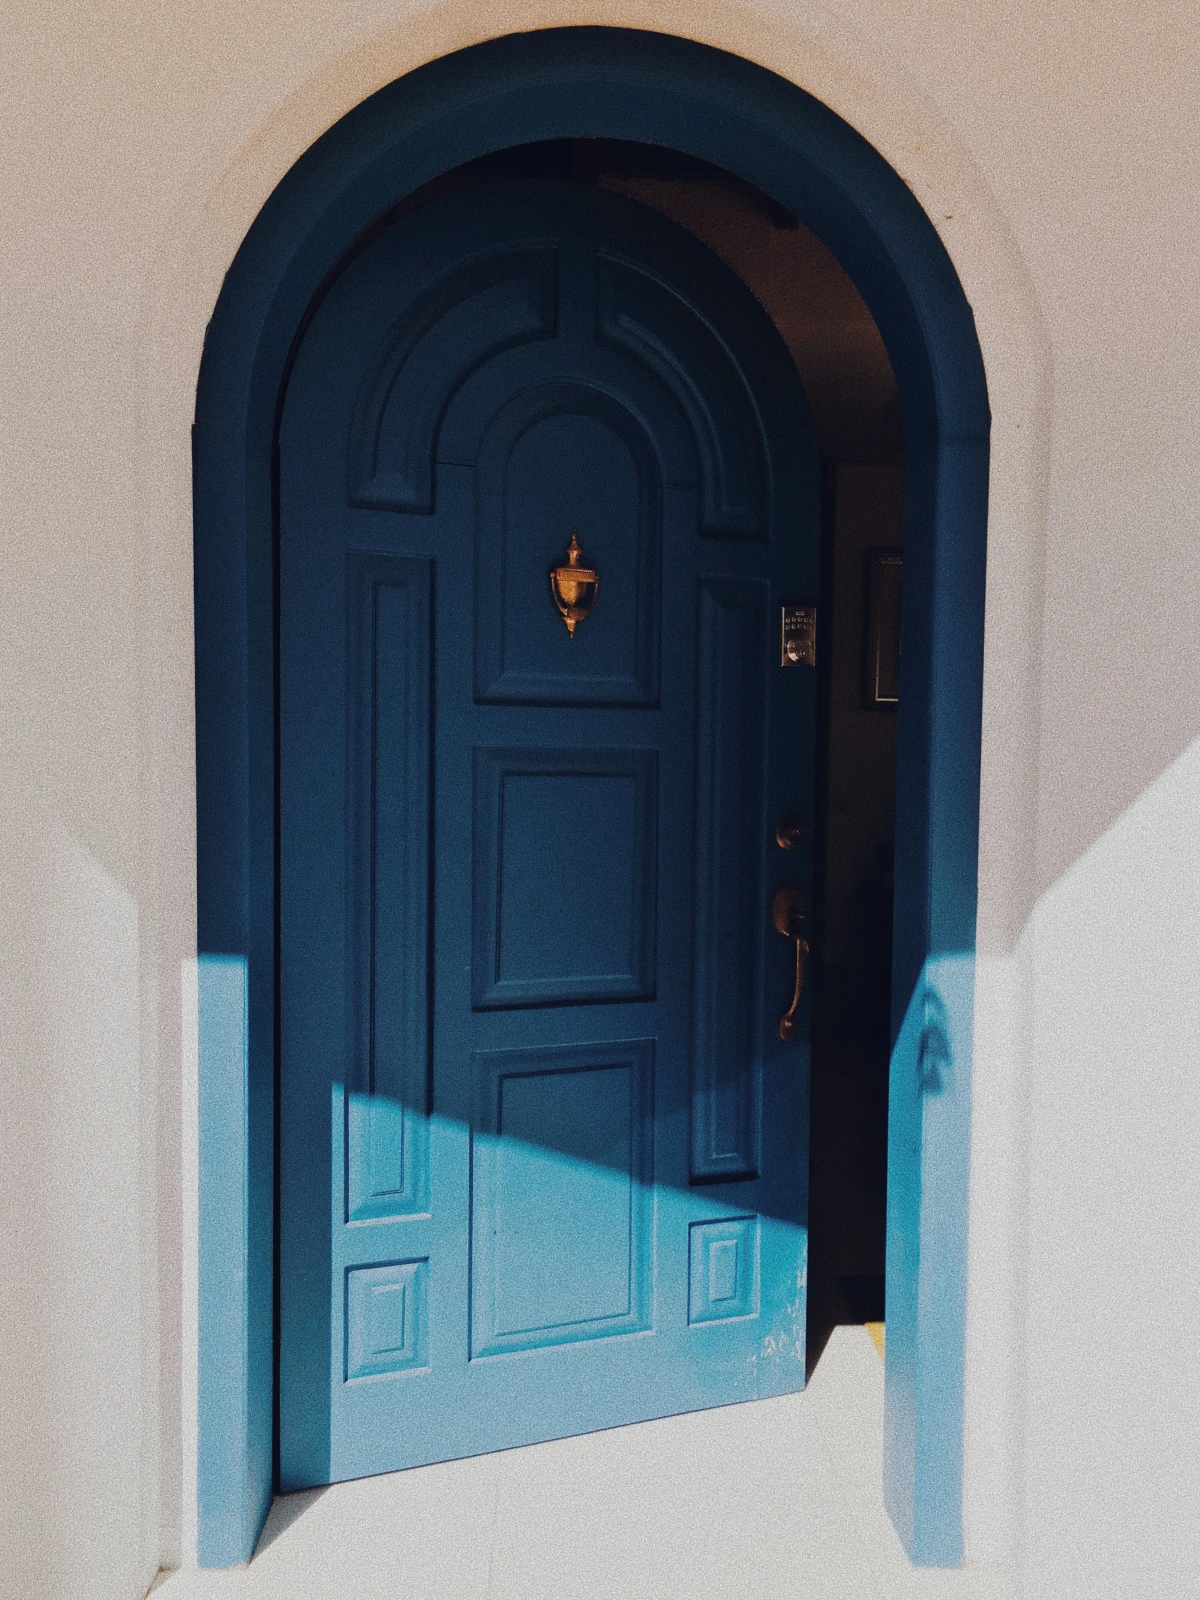
- Santorini, Greece: The iconic brilliant blue pops against whitewashed walls, designed to reflect the sea and sky.
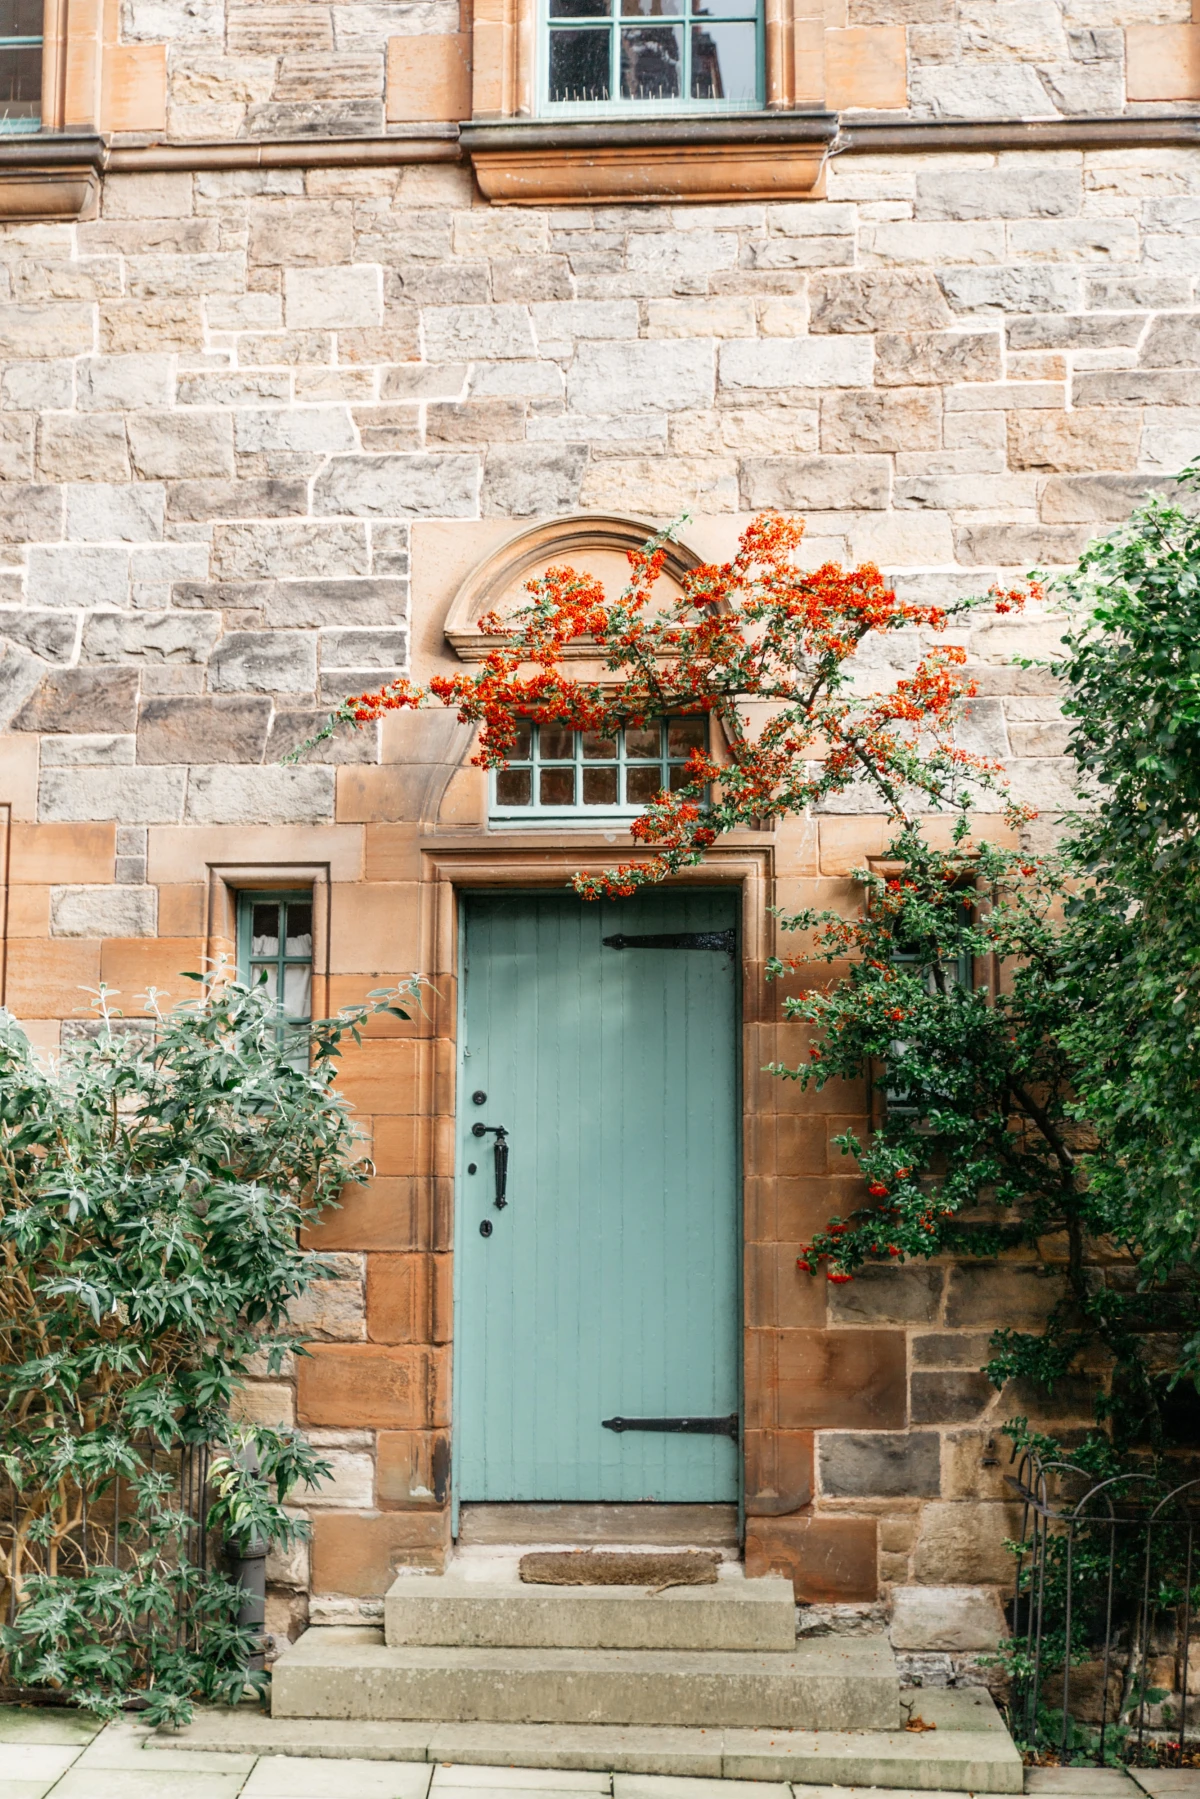
- Charleston, USA: Discover soft, welcoming shades of ‘Haint Blue’ on porch ceilings and doors, a tradition rooted in folklore to ward off spirits.
Your beautiful new finish needs a little care to stay vibrant. Avoid harsh chemical cleaners or abrasive sponges, which can dull the gloss and scratch the paint. A simple solution of mild dish soap and warm water applied with a soft microfiber cloth is all you need for routine cleaning. Annually check for any nicks or chips, especially along the bottom edge, and touch them up immediately to prevent moisture from getting under the paint film and causing it to peel.


