A Pro’s Guide to Building a Privacy Fence That Actually Lasts
I’ve spent more time than I can count building fences. I’ve dug post holes in thick clay that sucks your boots right off and in loose, sandy soil that feels like it’s collapsing as you work. I’ve seen brand-new fences, built with all the best intentions, start to lean in less than a year. And I’ve also repaired old fences that have stood their ground for decades. If there’s one thing I’ve learned, it’s that a fence that lasts has nothing to do with fancy post caps or the trendiest color.
In this article
It all comes down to what’s happening three feet underground and the hardware you use to hold it all together. A gorgeous fence that sags after the first big windstorm is just an expensive failure. But a simple, sturdy fence that stands tall for years? That’s a real success story.
People always want to know what the “best” fence is. Honestly, there isn’t one. The right fence for you depends on your yard, your budget, how much maintenance you’re willing to do, and even your local climate. This isn’t just a gallery of pretty ideas; this is a real-world guide to the materials and methods we use in the field. Let’s dig into what works, what doesn’t, and why, so you can build something you’ll be proud of for a long, long time.

It All Starts with the Posts (Don’t Skip This Part!)
Before you even think about pickets or panels, we have to talk about posts. The posts do all the heavy lifting—they fight against gravity, wind, and shifting soil. If your posts fail, your whole fence comes down with them. This is the one place you absolutely cannot cut corners.
Think of it this way: a privacy fence is basically a giant sail. A single 6-foot-tall, 8-foot-wide panel catches a massive amount of wind, creating hundreds of pounds of force that all gets transferred to just two posts. The concrete footing below ground is the only thing stopping that force from knocking it all over. In colder climates, you also have to worry about frost heave, where freezing, expanding soil can literally push posts right out of the ground. This is why you MUST check your local building codes for the required frost line depth in your area. It might be 18 inches in a mild climate, but it could be 48 inches or more in the north.
Digging and Setting Posts the Right Way
For a standard 6-foot fence, a good rule of thumb is to bury about one-third of the post. So, for a common 8-foot post, you’re aiming for at least 2.5 feet in the ground. I personally prefer to go a full 3 feet deep for extra peace of mind, especially if the soil is soft. The hole should be about three times the width of your post—so for a 4×4 post (which is actually 3.5 inches square), you’ll want a 10- to 12-inch diameter hole. This leaves plenty of room for a solid concrete collar.
Heads up! Before you dig a single hole, you have to call 811. It’s the national “call before you dig” hotline. They’ll send crews out to mark all the underground utility lines for free. I once saw a DIYer hit a water line with a power auger, flooding their entire yard. It’s a simple call that can save you from a dangerous and incredibly expensive disaster.
Once the hole is dug, toss about 6 inches of gravel in the bottom. This is a pro tip for wood posts, as it helps with drainage and prevents water from pooling at the base and causing rot. Place your post in the hole, use a post level (the kind that straps on and reads two sides at once) to get it perfectly plumb, and then brace it. The easiest way to do this is to hammer two wooden stakes into the ground on opposite sides of the post, then screw a scrap 2×4 from each stake to the post. It’ll hold it perfectly still while the concrete sets.
Now for the concrete. For a typical 10-inch wide, 3-foot-deep hole, plan on using two 80-pound bags of concrete mix. At about $6 a bag from a place like Home Depot, that’s a key part of your budget right there. I prefer to mix it in a wheelbarrow to a thick, oatmeal-like consistency—a watery mix is a weak mix. Shovel it in, poke a stick in and out to remove air pockets, and slope the top of the concrete away from the post to shed water. Let it cure for a solid 24 to 48 hours before you even think about hanging anything on it.
Choosing Your Fence Material: A Realistic Breakdown
With your posts solidly in the ground, you can finally think about the fun part. Let’s break down the most common options by what really matters: cost, durability, and how much of your weekend it’s going to steal for maintenance.
1. Classic Wood (The Timeless Choice)
Wood is traditional for a reason—it’s beautiful, versatile, and offers a natural look no other material can quite match. But not all wood fences are created equal.
The Deal with Wood: Cedar is the go-to for a premium look. It’s naturally resistant to rot and insects and weathers to a lovely silver-gray. Pressure-treated (PT) pine or fir is your budget-friendly workhorse. It’s treated with chemicals to resist decay, but it’s heavy and very prone to warping, twisting, and cracking as it dries. You have to let it dry out for a few months before you can even think about staining it.
The Cost: For a DIY project, expect to spend around $20 to $35 per linear foot for a pressure-treated pine fence. For a nicer Western Red Cedar fence, you’re looking at $35 to $50 per foot. Professional installation will add quite a bit to that.
The Maintenance: This is the trade-off. To keep it looking good and protect it from sun and rain, you’ll need to clean and apply a good quality stain or sealer every 2 to 4 years. It’s a commitment.
Quick Tip: Use the right screws! Never use plain drywall or electro-galvanized screws. They’ll rust and leave ugly black streaks down your fence. You MUST use hot-dip galvanized or, even better, stainless steel fasteners. They cost more, but they’re essential for a long life.
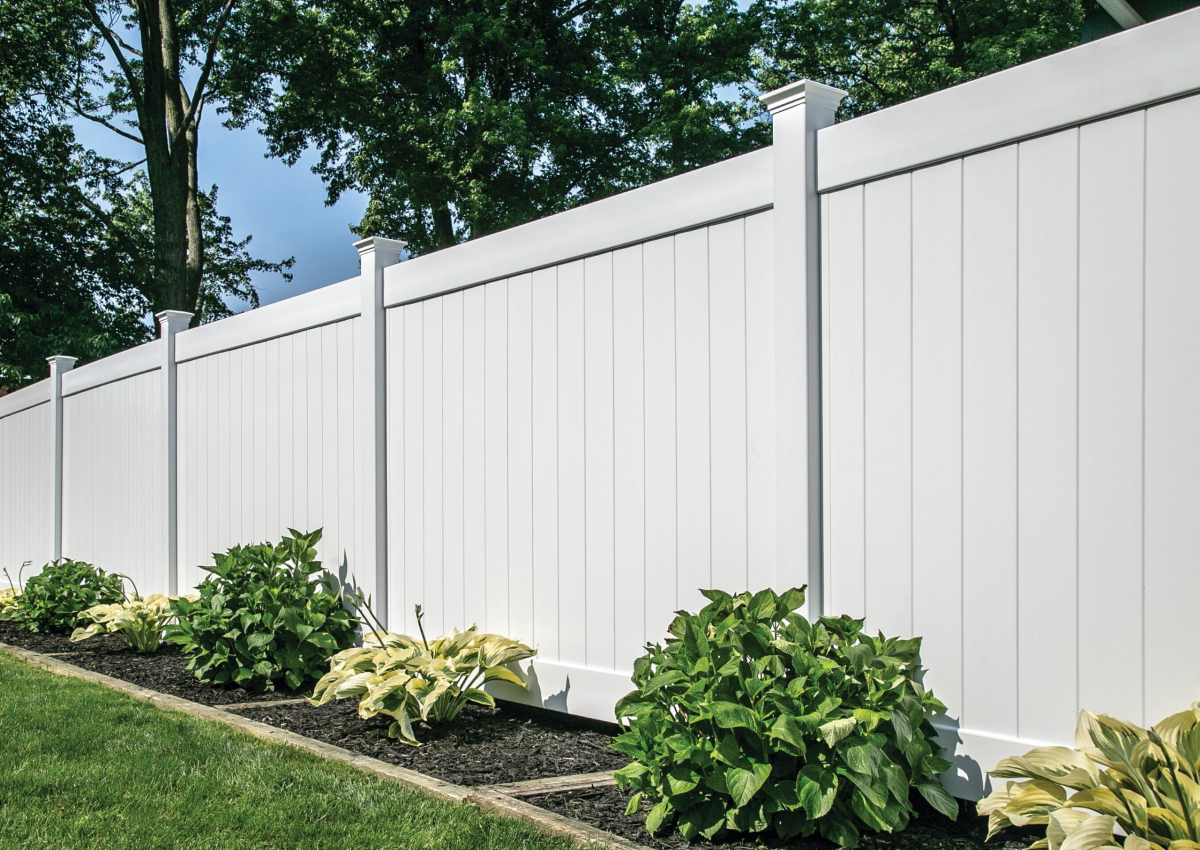
2. Modern Vinyl/PVC (The “Set It and Forget It” Option)
If you want a fence but you don’t want another chore, vinyl is your answer. Its main selling point is incredibly low maintenance.
The Deal with Vinyl: A good vinyl fence looks clean and uniform, and installation is a neat system of locking rails into posts. But not all vinyl is the same. Cheaper versions have thinner walls and less UV protection, which can lead to yellowing and cracking over time. Look for products that meet professional standards to ensure you’re getting a quality material.
The Cost: DIY materials for a vinyl fence will run you about $30 to $45 per linear foot. Because it’s a bit more specialized, many people opt for pro installation, which can bring the total to between $40 and $60 per foot.
The Maintenance: Almost zero. Just wash it down with a hose and maybe a soft brush and some mild soap to get rid of dirt or mildew. No staining, ever.
3. Composite (The Best of Both Worlds?)
Composite fencing, made from wood fibers and recycled plastic, tries to give you the rich look of wood without the demanding upkeep.

The Deal with Composite: Modern composite materials are fantastic, but they are heavy and pricey. The best ones are “capped,” meaning they have a protective outer shell that resists stains and fading much better than older, uncapped versions. It offers a very convincing wood-like appearance.
The Cost: Get ready for some sticker shock. Composite is a premium product, easily costing $50 to $75+ per linear foot just for the materials. It’s a major upfront investment.
The Maintenance: Just like vinyl, composite just needs an occasional cleaning with soap and water to look its best. You save all that money and time you would have spent on staining.
Don’t Make These Common (and Costly) Mistakes
Building a fence is more than just digging holes. Here are a few rookie mistakes I see all the time.
- Mistake
1: Guessing on the Property Line.
Seriously, don’t just trust the old fence line or your memory. Accidentally building even six inches onto your neighbor’s property is a legal and financial nightmare to fix. A property survey might cost a few hundred dollars, but it’s the cheapest insurance you can buy for this project. - Mistake
2: Forgetting the Gate. The gate is the only moving part of your fence and the most common point of failure. A sagging gate is a classic DIY blunder. Your hinge post—the post the gate hangs on—needs a bigger, badder concrete footing than all the others. Give it an extra 6 inches of depth and width to handle the extra load. And always build the gate frame with a diagonal brace running from the bottom hinge corner up to the top latch corner to prevent sagging.
- Mistake #3: Panels vs. Stick-Building. Pre-made panels from big-box stores are tempting. They’re great if your yard is perfectly flat and you want to finish fast. But if you have any kind of slope, stick-building (installing posts, then rails, then each picket one-by-one) is far superior. It gives you a stronger, seamless fence that perfectly follows the contour of your land.
So, Can You Really DIY This? An Honest Assessment
Building a fence is a totally achievable DIY project if you’re realistic. It is heavy, repetitive work that will likely take a few full weekends for a typical backyard.
To tackle it, you’ll need a solid beginner’s toolkit: a string line and stakes, a post-hole digger (or a rented power auger, which is worth every penny), a 4-foot level, a wheelbarrow for concrete, a circular saw, and a good impact driver for all those screws.
You should probably call a professional if your yard is on a steep slope, you need a structural retaining wall, or you simply don’t have the time or physical ability for the job. Professional labor can add 50-100% to the total project cost, but what you’re paying for is speed, the right equipment, and the peace of mind that comes from a job done right the first time.

At the end of the day, a fence is a big investment. By focusing on that rock-solid foundation and choosing the right materials for your needs, you can be sure that investment will pay off for decades to come.
Galerie d’inspiration

Did you know that temperature and humidity cycles can cause nails to gradually work their way out of wood? This phenomenon, known as
What’s the best wood for my fence boards?
The two most common choices offer a clear trade-off between cost and stability. Pressure-Treated (PT) Pine is the budget-friendly workhorse, chemically treated to resist rot and insects. Its main drawback is its tendency to warp, crack, or twist as it dries. For best results, let it acclimate on-site for a few weeks before installing. On the other hand, Western Red Cedar is the premium choice. It’s naturally stable and contains oils that make it inherently resistant to decay and pests. While more expensive upfront, its longevity and lower maintenance needs often make it a better long-term value.


