Your Fail-Proof Guide to a Gorgeous Fall Porch That Actually Lasts
We’ve all seen them, right? Those stunning fall porches on social media, overflowing with perfect pumpkins and cascades of colorful mums. You get inspired, head to the store, and try to recreate it. Then, a week later, the pumpkins are getting soft, the mums are crispy, and the whole thing looks… well, a little sad. I’ve been designing seasonal displays for years, for everything from cozy home porches to grand hotel entrances, and I’ve learned the hard way what works and what’s just a waste of money.
In this article
Creating a beautiful fall display that lasts all season—from the first crisp days of September clear through Thanksgiving—is about more than just piling stuff by your front door. It’s about a little bit of planning, choosing the right materials, and a few pro tricks. Forget the frustrating, short-lived attempts. Let’s walk through how to build a welcoming autumn scene that’s both gorgeous and durable.
First Things First: A Plan Beats a Pumpkin Pile
Before you even think about shopping, take 20 minutes to actually look at your space. I promise, this simple step saves hours of work and prevents you from over or under-buying. Measure the width of your steps or porch, note the height you have to work with, and consider the color of your front door.
A symmetrical, formal brick house often looks best with a balanced design, while a rustic farmhouse can rock a more casual, asymmetrical look. You don’t need to be an artist; just sketch a few boxes and circles on a piece of paper to get a feel for scale. This helps you visualize where the big, medium, and small pieces will go.
So, what’s the plan going to cost? A good rule of thumb is to budget between $75 and $100 for a really solid, beautiful display with a few high-quality elements. If you want to go all out with lots of layers and lighting, you could be looking at $200 or more. As for time, plan on about an hour for shopping and another one to two hours for setup and arranging everything just right.
The Secret Is in the Shopping Cart: Choosing Materials That Endure
The real difference between a display that lasts one week and one that lasts two months is the quality of your materials. Knowing what to look for at the farm stand or nursery is the single most important skill to learn.
How to Pick Pumpkins That Won’t Rot
Here’s the deal: not all pumpkins are created equal. Those classic, bright orange pumpkins sold everywhere for carving are grown to have thin skins and soft flesh. Great for carving, terrible for longevity. They start to decay almost immediately, especially once cut.
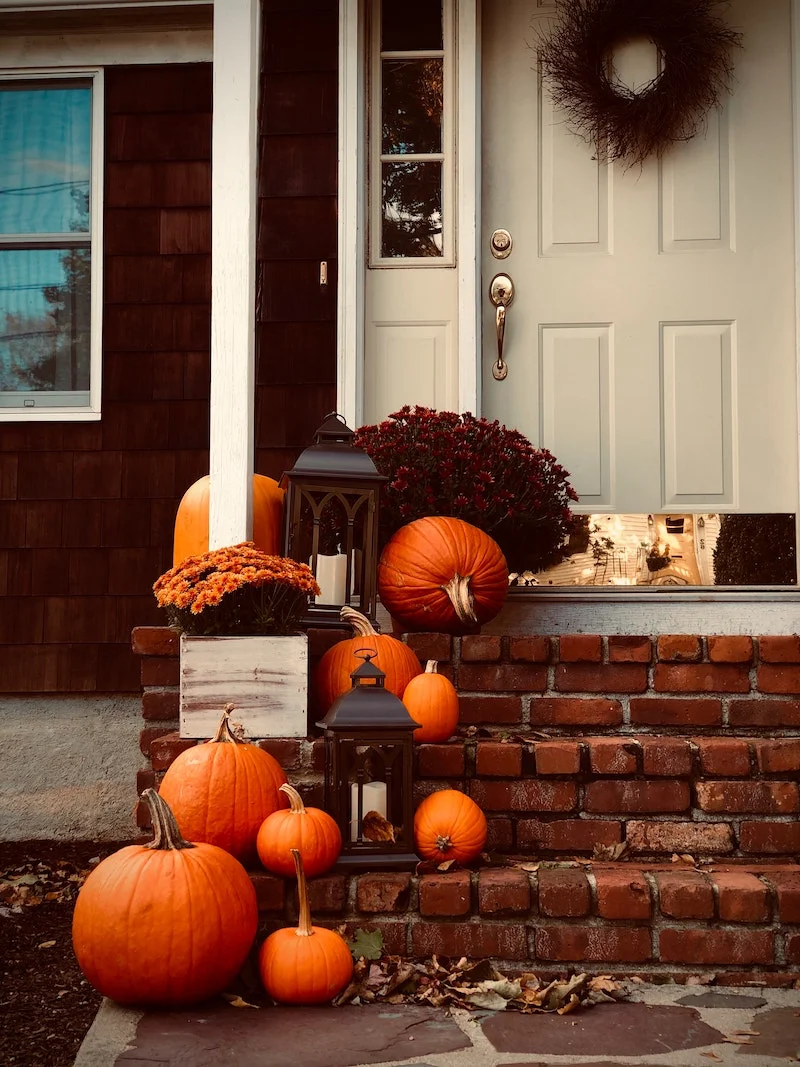
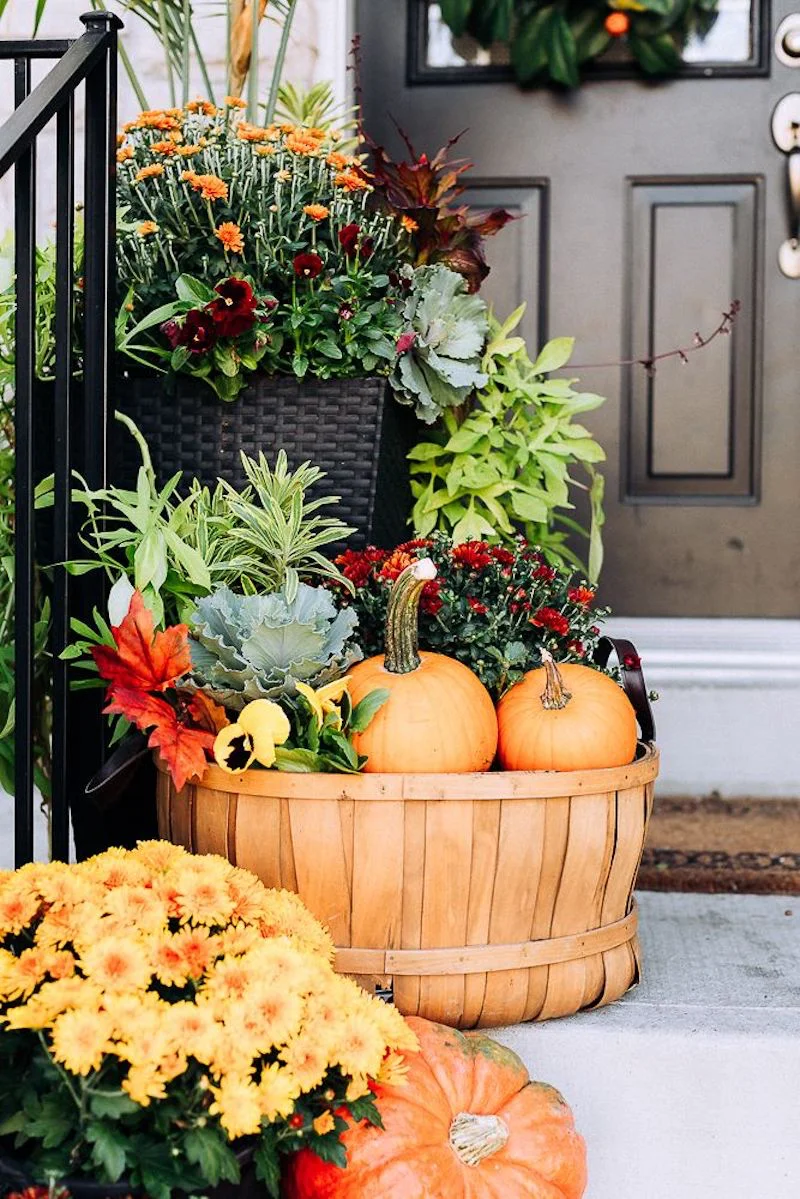
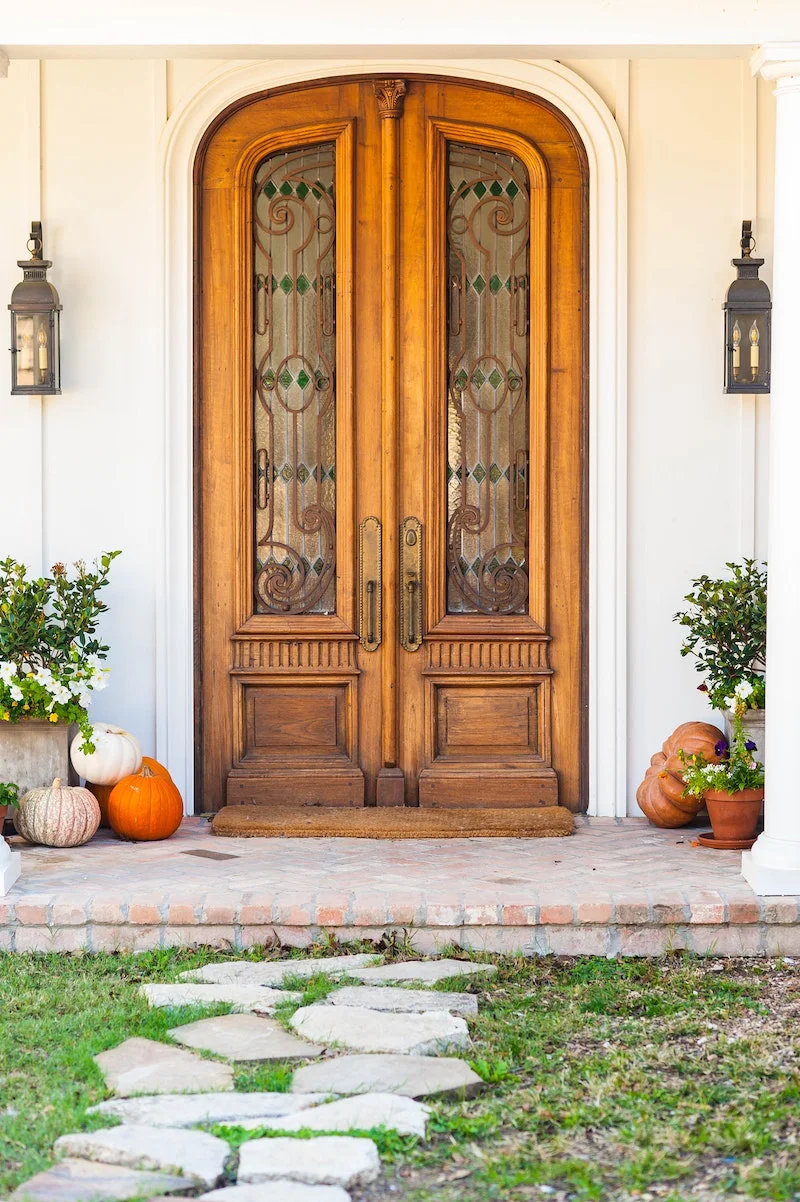
For a lasting display, you want to hunt down the specialty or “heirloom” varieties. Think of the reddish-orange, flatter “Cinderella” types, the gorgeous blue-gray ones, or even the bumpy, warty-looking gourds. These are more like winter squash, with thick, hard skins that protect them. An unbruised, hard-skinned pumpkin can easily last for two months. Always look for one with a solid, dry stem attached; a soft or missing stem is a red flag for rot. Give the bottom a gentle press—if it feels soft, put it back.
Quick Tip: Give Your Pumpkins a Spa Day. This is a non-negotiable step for me and it can double the life of your gourds. Mix up a simple solution of about one tablespoon of household bleach in a gallon of water. Put on some gloves, dip a soft cloth in the mix, and gently wipe down the entire surface of each pumpkin. This kills any existing mold or bacteria. Let them air dry completely before arranging them. It’s a 10-minute job that adds weeks to your display.
The Truth About Mums
Ah, mums. The quintessential fall flower that so many people (unsuccessfully) try to keep alive. The problem is usually where you buy them. The big-box and grocery stores often sell what are called “florist mums.” They’ve been forced to bloom all at once in a greenhouse and look spectacular in the store, but they have weak roots and aren’t meant to survive the elements. Think of them as a long-lasting bouquet, not a hardy plant.
What you want are “hardy mums” or “garden mums,” which you’re more likely to find at a local nursery or garden center. They may cost a little more—say, $15 to $25 compared to the $10 grocery store version—but they are perennials bred to live outside. When picking one out, choose a plant with more tight buds than open flowers. That way, you get to enjoy the blooms for much longer. And remember, mums are thirsty! Water the soil directly whenever the pot feels light.
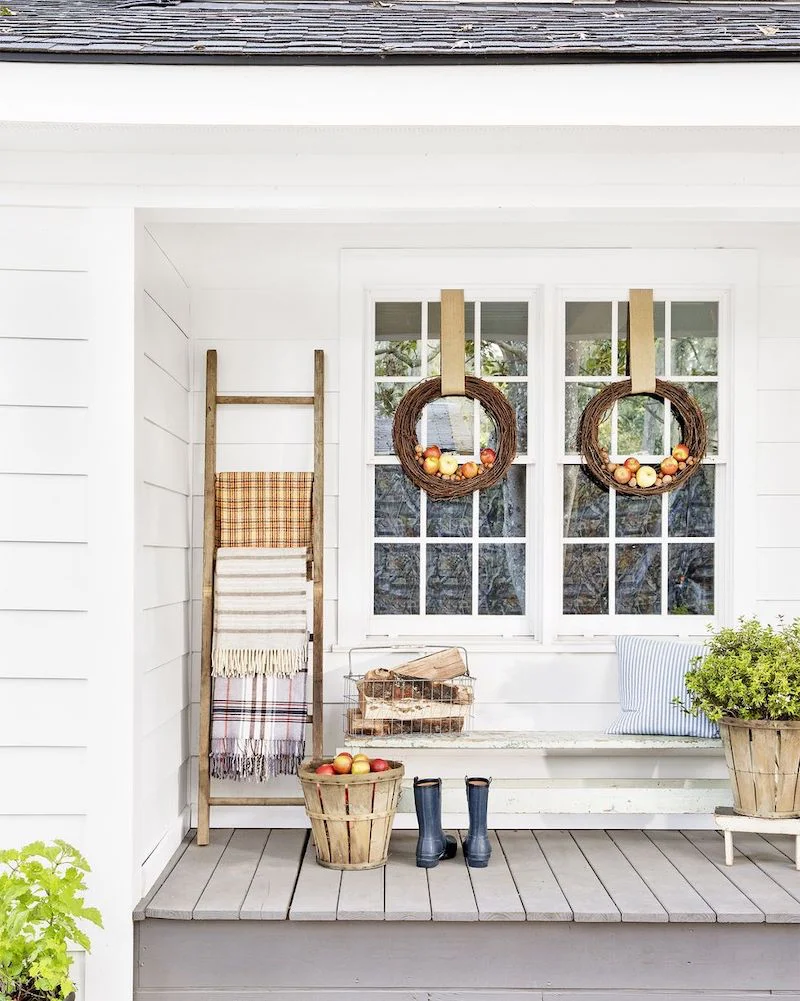
Building a Foundation: Corn Stalks and Bales
Corn stalks and bales add that wonderful height and rustic texture. For the best value, try to get corn stalks from a local farm or feed store. They’re often fuller, taller, and cheaper (around $8-$12 a bundle) than the sad-looking ones at craft stores. A good bundle will have 8-10 sturdy stalks.
When it comes to bales, it’s important to know the difference between straw and hay. For decorating, you want straw, which is the hollow stalk of a grain plant. It’s less likely to contain seeds that will sprout everywhere. Hay is dried grass used for animal feed, and it’s a magnet for moisture, mold, and critters looking for a snack and a home.

Heads up! A critical safety warning: Straw is extremely flammable. I once saw a display where a bale was placed too close to an old outdoor light, and it started to smolder. NEVER place bales near heat sources, including old light bulbs. Stick to cool-running LEDs for lighting. Also, be aware that bales can attract mice, so if that’s a concern in your area, maybe opt for wooden crates or benches to create height instead.
Putting It All Together Like a Pro
Once you have all your goodies, it’s time for the fun part. Arranging everything with a bit of intention is what separates a professional look from a random jumble.
Use the “Thriller, Filler, Spiller” Method
This is a classic container gardening rule, but it works perfectly for a porch. The idea is to create visual interest on three different levels.
- Your Thriller: This is the tall, vertical element that draws the eye upward. A bundle of corn stalks tied to a post is a perfect thriller. A tall, skinny gourd or a small evergreen in a pot also works.
- Your Filler: This is the main body of your display that adds bulk and color. Mums, medium-sized pumpkins, and ornamental cabbage are fantastic fillers.
- Your Spiller: These are the elements that cascade down or spread out in front, softening the edges. Think small gourds, trailing ivy, or mini pumpkins scattered down the steps.
Using this simple framework instantly makes your arrangement look more cohesive and thoughtfully designed.

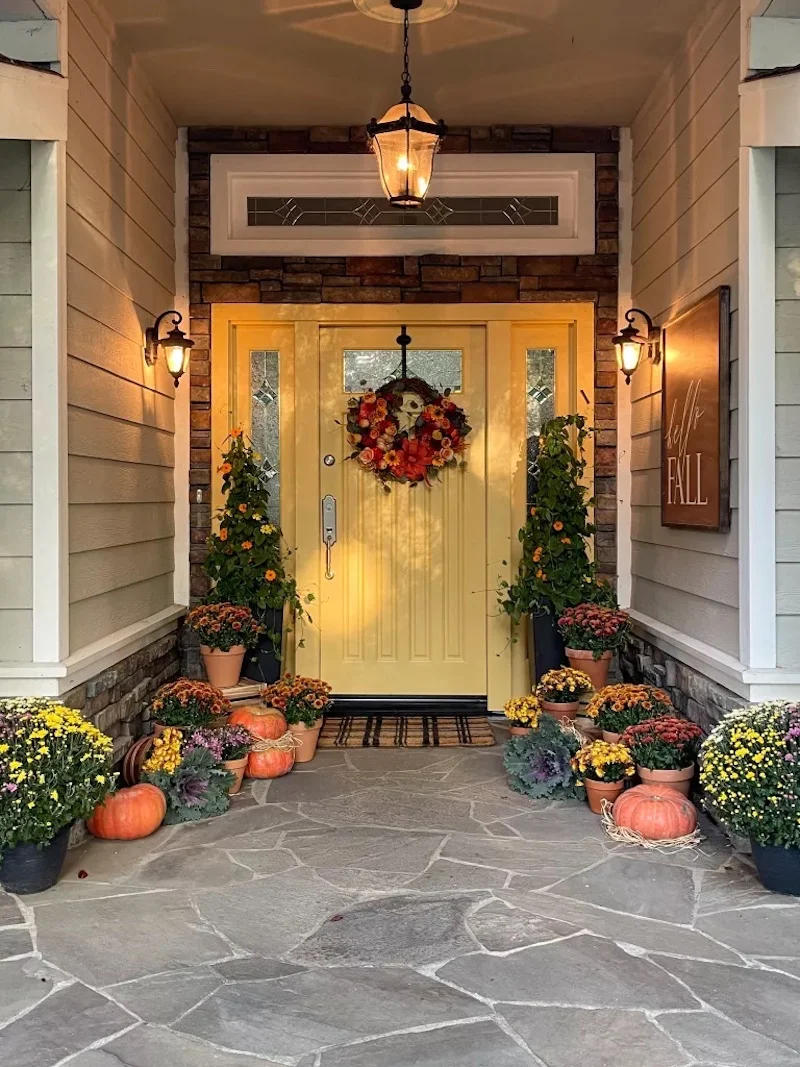
Create Layers and Go for Asymmetry
A flat display is a boring display. The key is to create different levels. Use those straw bales, an old wooden crate, or even an upside-down metal bucket to give some of your items a lift. Place your biggest elements (like a large mum on a crate) in the back, and work your way forward and down with smaller items.
While a perfectly symmetrical design can look very formal and classic, I find that a slightly asymmetrical layout often feels more natural and interesting. Try clustering the bulk of your display on one side of the door—maybe the corn stalks, a big mum, and a stack of pumpkins. Then, create balance on the other side with just one large, beautiful pumpkin and a lantern.
A Few Pro-Tips for Your Climate
What works in sunny Arizona will be a disaster in rainy Seattle. Adapting to your local weather is essential for a long-lasting display.
- For Wet, Rainy Areas: Moisture is your enemy. Pumpkins sitting on wet concrete will rot from the bottom up. The solution is elevation. Use small, hidden blocks of wood or buy a few terracotta “pot feet” at a garden center. By the way, a few hidden bottle caps work just as well to lift your pumpkins an inch and let air circulate.
- For Hot, Sunny Climates: The sun can literally cook your pumpkins. If your porch gets blasted with afternoon sun, try to create some shade with your corn stalks. Mums will also need a ton of water, maybe even twice a day.
- For Windy Regions: Wind can undo your hard work in minutes. Use green or brown zip ties to discreetly lash corn stalks to porch railings. For pumpkins on a sloped walkway, just wedge a small, hidden rock behind the downhill side to keep them from rolling away.
Feeling Overwhelmed? Try the 15-Minute Porch Glow-Up
Don’t have a lot of time or a big budget? You can still make a huge impact. Just grab one beautiful, interesting heirloom pumpkin and one pot of hardy mums. Place the mum on an upside-down crate or bucket, and set the pumpkin slightly in front of it and to the side. Boom. Instant style in under 15 minutes for about $30.
A Final Word on Lighting and Maintenance
To make your display pop at night, add some lighting. But please, and I can’t stress this enough, never use real candles. The fire risk with all that dry material is just too high. Stick to outdoor-rated, cool-to-the-touch LED spotlights or string lights. Make sure any extension cords are for outdoor use and plugged into a GFCI outlet (the kind with the test/reset buttons) for safety.
Check on your display every few days. Pull off any spent mum flowers to encourage new blooms, and immediately remove any pumpkin that shows soft spots. One rotten pumpkin will quickly take its neighbors down with it. With just a little bit of care, you can create a warm, welcoming entrance that celebrates the season and makes you smile every time you come home.

Inspiration:
My beautiful mums look crispy and dead after just one week. What am I doing wrong?
This is the most common fall porch frustration! The problem often starts at the nursery. Most mums sold are already root-bound in tiny plastic pots and forced into full bloom. To give them a fighting chance, immediately repot them into a slightly larger container with fresh potting soil. This gives the roots space to breathe and absorb water. Water them thoroughly every other day (or daily in warm weather) by soaking the soil at the base, not the flowers. Avoid buying plants that are already at their peak bloom; choose ones with plenty of tight buds instead.
According to the U.S. Department of Energy, a significant portion of the 1.3 billion pounds of pumpkins produced in the U.S. each year ends up in landfills.
Don’t let your beautiful display contribute to waste. When the season ends, give your decor a second life. Uncarved pumpkins and gourds are perfectly edible—roast the flesh for pies or soups and toast the seeds for a snack. Corn stalks and straw can be used as mulch in your garden beds. Many of your potted plants, like mums and heuchera, are perennials that can be planted directly in your garden to enjoy for years to come.
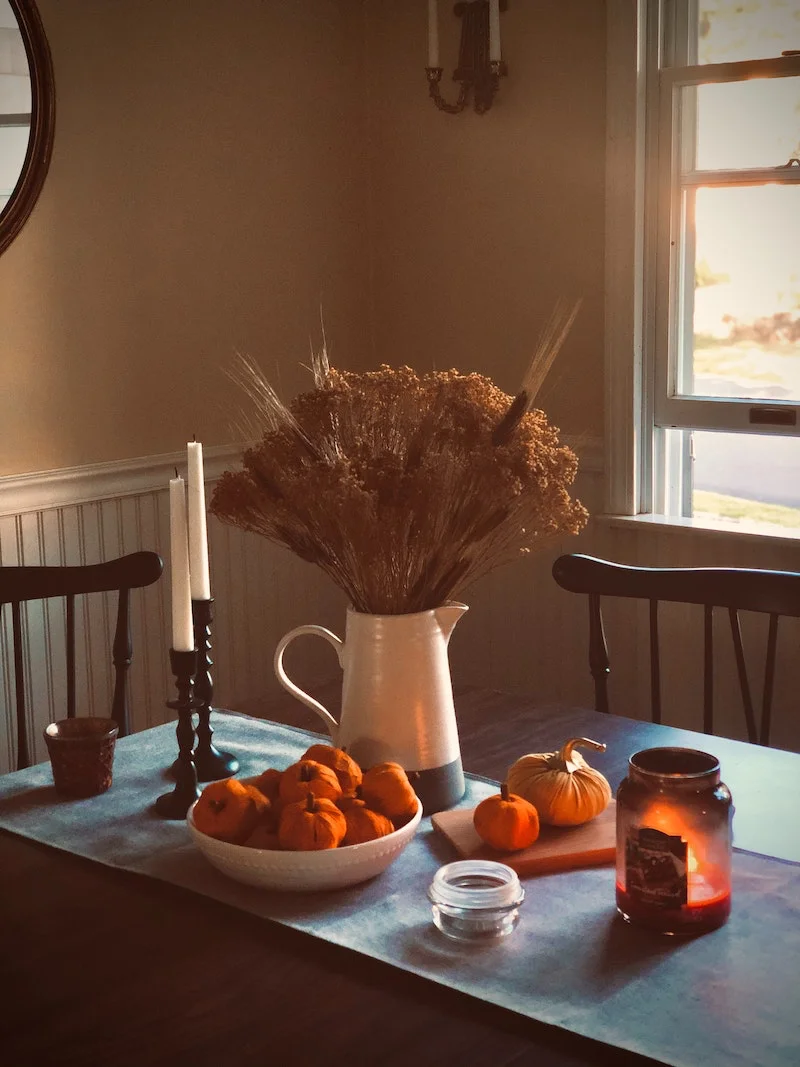
For texture that truly lasts, think beyond the usual suspects. Layering in different natural elements is the secret to a professional-looking display that won’t wilt.
- Corn Stalks: Tying a few bundles to your porch columns or framing your door adds instant height and a rustic feel.
- Dried Gourds: Unlike pumpkins, they are already cured and will last for months, adding interesting shapes and colors.
- Ornamental Grasses: A potted feather reed grass like ‘Karl Foerster’ provides soft, feathery texture that moves beautifully in the breeze.
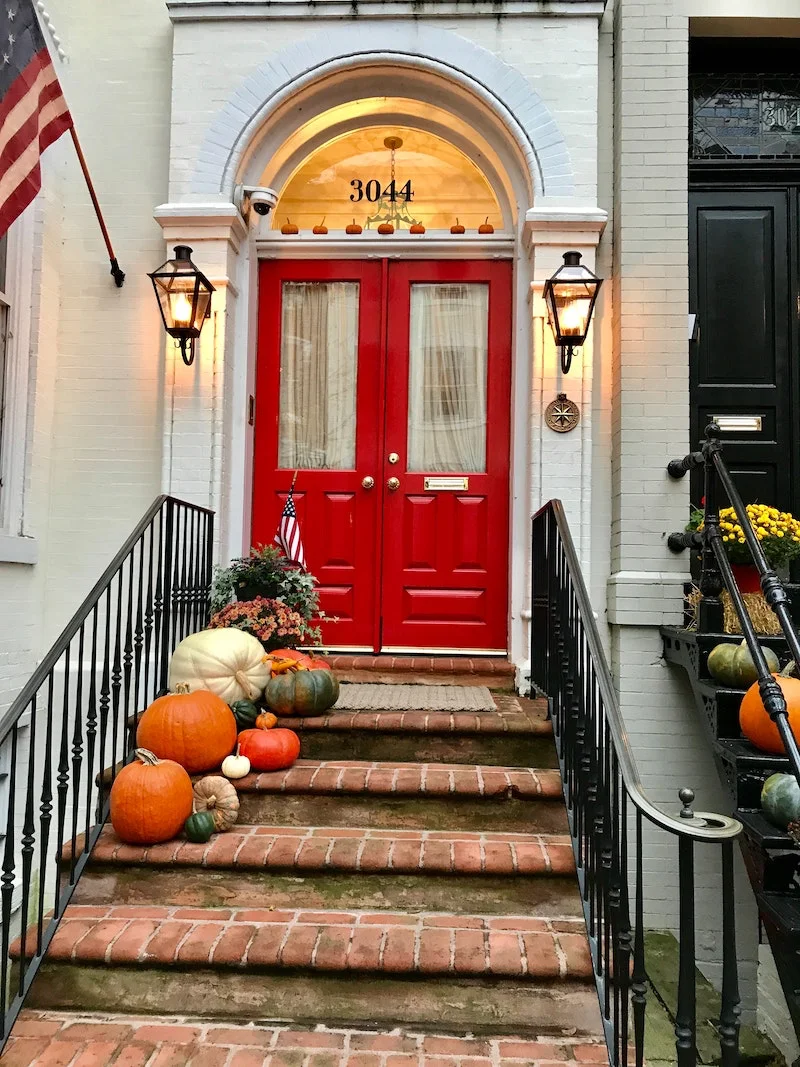
Traditional Harvest: Think warm and classic. This palette leans on fiery oranges, deep reds, and golden yellows. It’s the quintessential autumn look, pairing beautifully with brick homes. Use classic ‘Jack-o’-lantern’ pumpkins and vibrant orange or yellow mums.
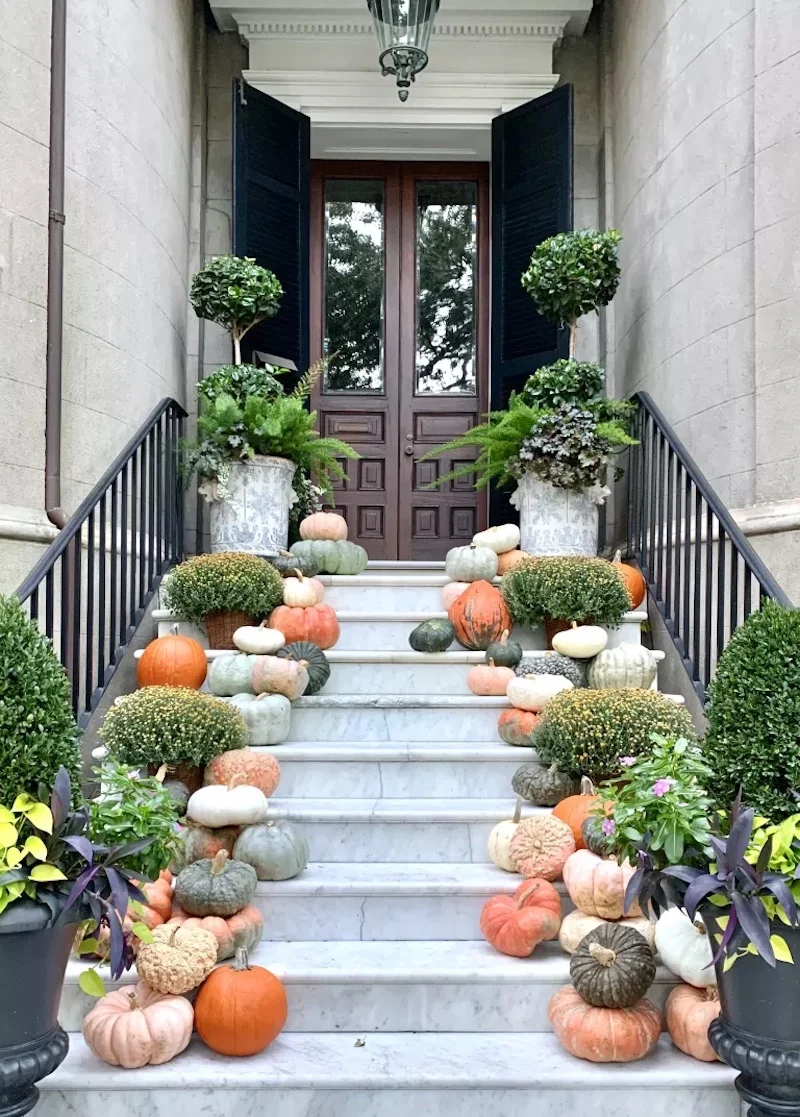
Modern Muted: For a more contemporary feel, try a palette of muted greens, creamy whites, and dusky purples. It’s stunning against modern gray or white siding. Look for ‘Jarrahdale’ or ‘Fairytale’ pumpkins and pair them with white mums and deep purple ornamental kale.


