Your No-Stress Guide to an Unforgettable Thanksgiving Turkey
I’ve been there. Staring at a giant, raw bird on the counter, feeling the weight of the entire holiday meal on my shoulders. My first-ever turkey was a tragic, dry affair that needed a swimming pool of gravy to be even remotely edible. That disaster taught me something crucial: a truly great turkey isn’t about some secret, complicated recipe. It’s about understanding a few key techniques and, honestly, having the right tools for the job.
In this article
- First Things First: Your Turkey Toolkit & Timeline
- Choosing Your Bird: More Than Just Size
- The Prep Work: Your Insurance Policy for a Juicy Bird
- The Cook: Ovens, Temps, and a Pro-Level Secret
- The Finish Line: Resting, Gravy, and Carving
- Turkey 911: Last-Minute Fixes for Common Problems
- Inspiration Gallery
So, this isn’t just another recipe. I want to walk you through the ‘why’ behind each step, giving you the confidence to roast a bird that’s juicy, flavorful, and has that perfectly crisp, golden-brown skin. Let’s make this the year you nail it.
First Things First: Your Turkey Toolkit & Timeline
Before we even talk about the bird, let’s get prepared. Rushing is the enemy of good turkey. Here’s a quick shopping list of things that will make your life infinitely easier:
- A Real Digital Thermometer: Not the pop-up timer that comes with the turkey. A good instant-read or leave-in probe thermometer is the single most important tool you can own. Expect to spend between $20 for a solid basic model and up to $100 for a fancy wireless one. This is non-negotiable!
- A Roasting Pan with a Rack: This allows hot air to circulate all around the bird. Don’t have one? No problem. A quick tip: you can create a ‘vegetable rack’ by laying thick slices of onion, carrots, and celery on the bottom of a sturdy baking pan. It works just as well and flavors your pan drippings.
- Butcher’s Twine: For trussing the legs. You can find this at most grocery stores for about $5.
- Heavy-Duty Poultry Shears: Only if you plan to try the spatchcocking method. They’ll run you about $25 at a kitchen supply store or online, and they’re incredibly useful for other things, too.
And here’s a simple timeline to keep the panic at bay:
The Weekend Before: Buy your frozen turkey.
Sunday/Monday: Move the turkey from the freezer to a pan in the fridge to start thawing.
Wednesday: Prep your dry brine. Get it on the bird and let it sit uncovered in the fridge.
Thanksgiving Morning: Let the bird sit at room temp for an hour, prep it for the oven, and get roasting!
Choosing Your Bird: More Than Just Size
A great meal starts with a great ingredient, so let’s head to the store. The choice you make here sets the stage for everything else.
Fresh vs. Frozen: Honestly, both can be fantastic. A fresh turkey has never been chilled below 26°F, which can sometimes result in a more tender texture since ice crystals haven’t formed in the meat. They’re convenient but pricier. Frozen turkeys are flash-frozen, more affordable, and widely available. The key is proper thawing to prevent moisture loss. Don’t let anyone tell you a frozen bird can’t be amazing.
Standard vs. Heritage: Most of us grew up with the Broad-Breasted White, the classic supermarket turkey bred for a huge breast. It has a mild flavor and is very reliable. Heritage breeds are older, more traditional types. They have a richer, gamier flavor and a leaner build because they grow more slowly. They’re a real treat but come with a higher price tag—and they cook faster, so you have to watch them!
Good to know: When it comes to cost, expect a big difference. A standard frozen bird might be around $1.99 per pound, while a fresh, organic, or Heritage turkey can easily be $5.99 per pound or even more.
How much to buy? The golden rule is 1.5 pounds of turkey per person. This accounts for bone weight and ensures everyone gets plenty, with some left over for those glorious next-day sandwiches. If your family is big on leftovers, I’d even bump it to 2 pounds per person.
The Prep Work: Your Insurance Policy for a Juicy Bird
The 24-48 hours before roasting are where the magic really happens. This is what separates a decent turkey from a spectacular one.
Thawing Done Right
This is the most critical safety step. You need to get the bird thawed without letting it sit in the temperature ‘danger zone’ (40°F to 140°F), where bacteria thrive.
The Refrigerator Method (The Only One I Recommend): It’s slow, but it’s foolproof. Just place your wrapped turkey on a rimmed baking sheet (to catch drips!) and stick it in the fridge. The formula is simple: allow one full day of thawing for every 4-5 pounds of turkey. So, a 16-pound bird needs about 4 days. Easy.
The Cold Water Method (Emergency Use Only): In a pinch? Okay, this works, but it needs your full attention. Submerge the wrapped turkey in a sink full of cold tap water. You absolutely must change the water every 30 minutes to keep it cold. This takes about 30 minutes per pound.
Brining: The Secret to Flavor and Moisture
I almost always brine my birds. For years I wrestled with giant buckets of saltwater (wet brining), but now I’m a total convert to dry brining. It gives you incredibly juicy, well-seasoned meat and much, much crispier skin with way less mess.
A dry brine is basically a salt rub that works over a day or two. The salt draws out moisture, which then dissolves the salt, creating a super-concentrated brine that gets reabsorbed into the meat. It’s brilliant.
Here’s my go-to dry brine mix. For a 14-16 pound turkey, I combine:
- 3 tablespoons of kosher salt (Morton or Diamond Crystal)
- 1 tablespoon of freshly cracked black pepper
- 2 teaspoons of smoked paprika
- 1 teaspoon of garlic powder
- (Optional: 1 teaspoon dried thyme or rosemary)
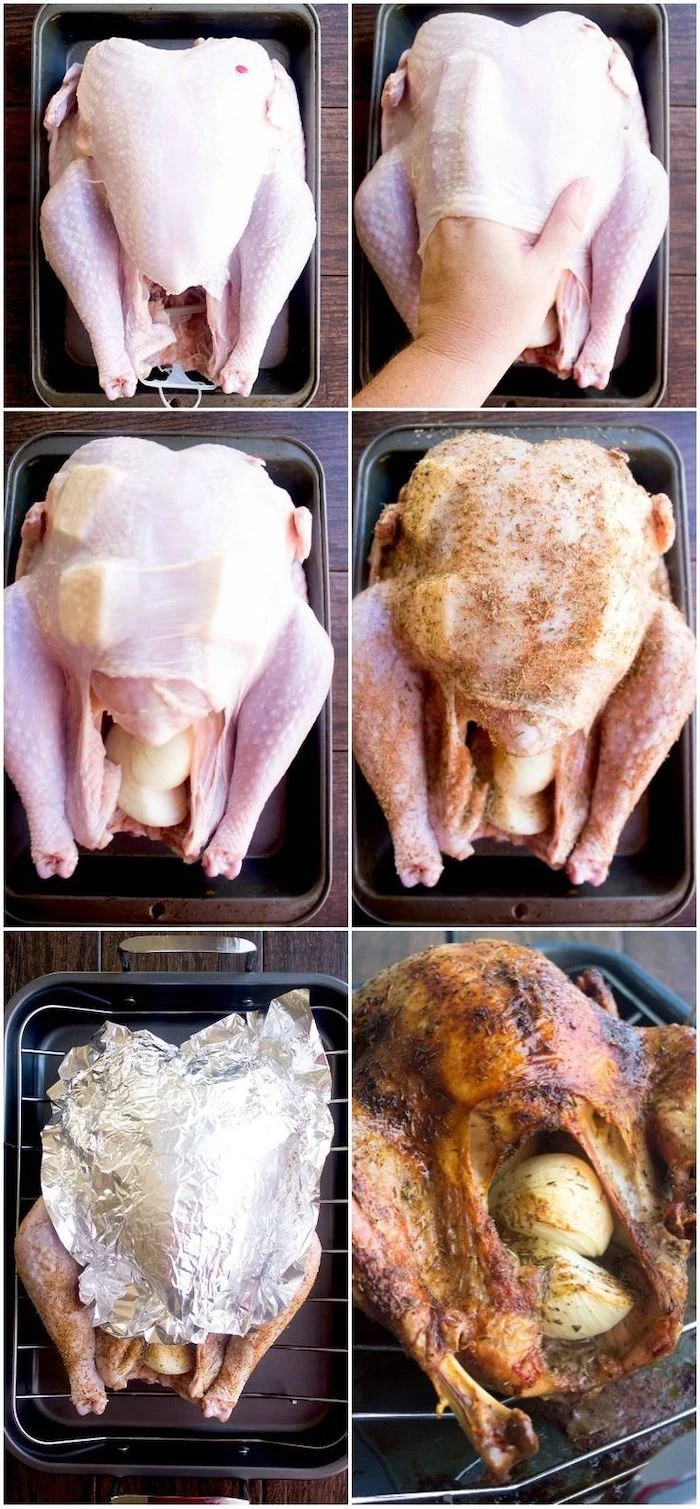
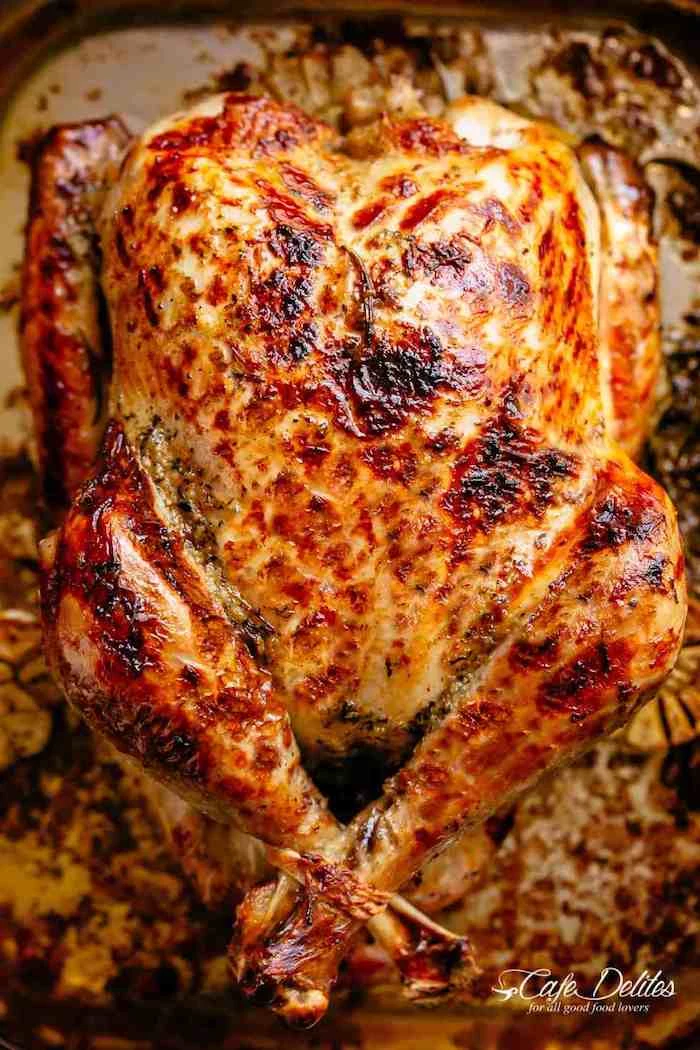
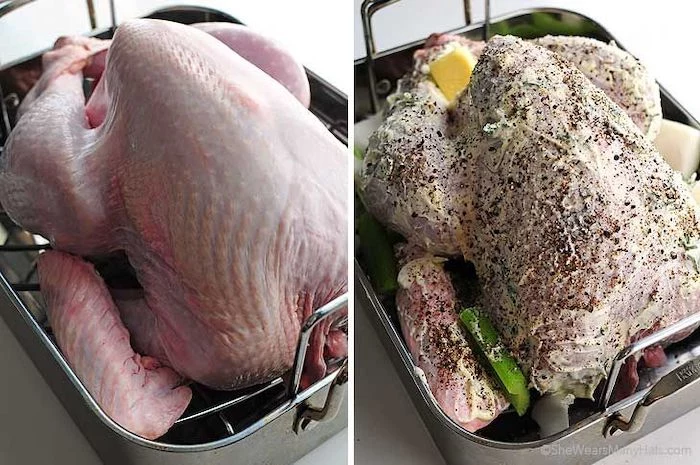
Pat the thawed turkey completely dry with paper towels. Gently separate the skin from the breast and thigh meat and rub about half the salt mixture directly onto the meat. Rub the rest all over the skin and inside the cavity. Place the turkey on a rack in a roasting pan and leave it uncovered in the fridge for 24 to 72 hours. The skin will look a bit dry and strange, but trust the process! Don’t rinse it before roasting.
Final Touches Before Roasting
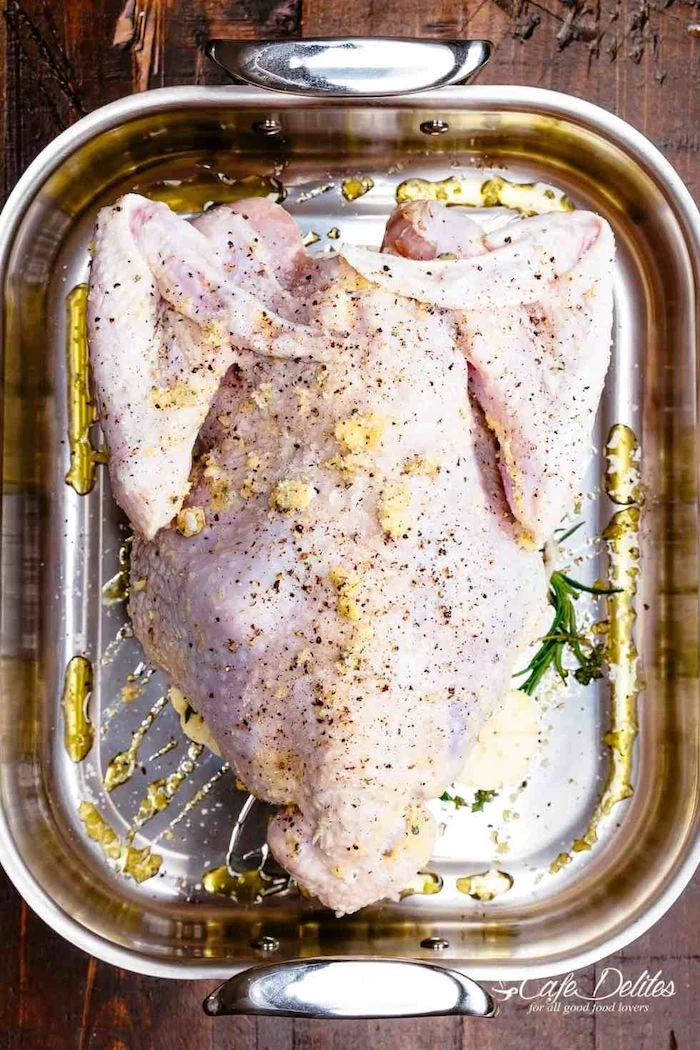
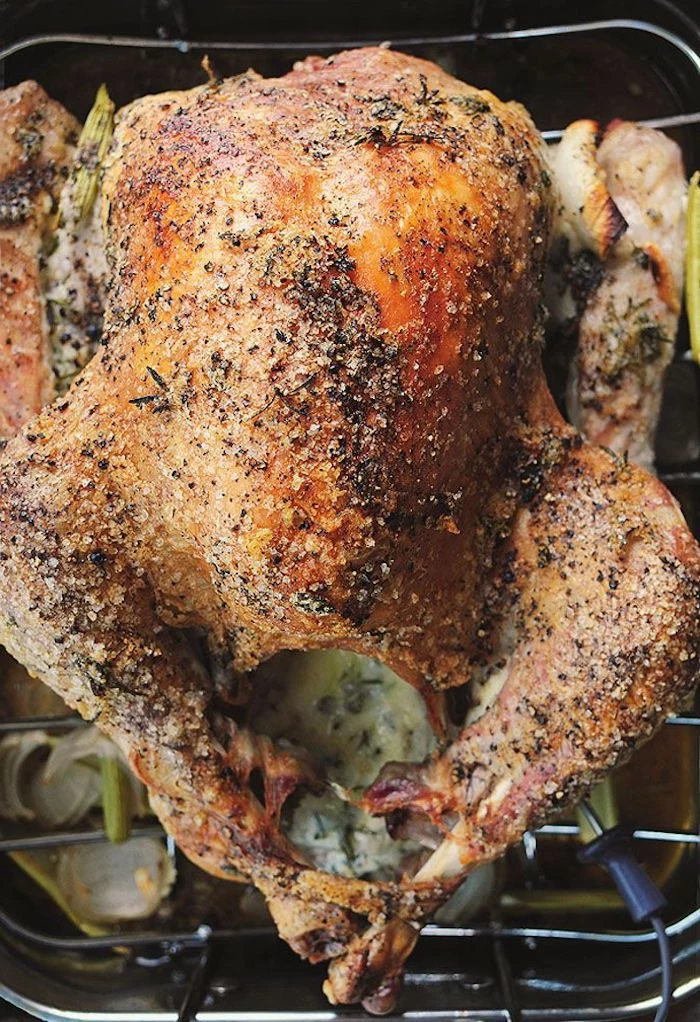
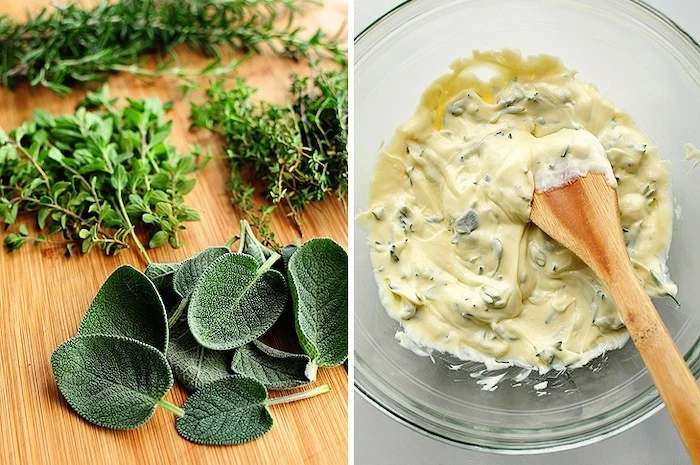
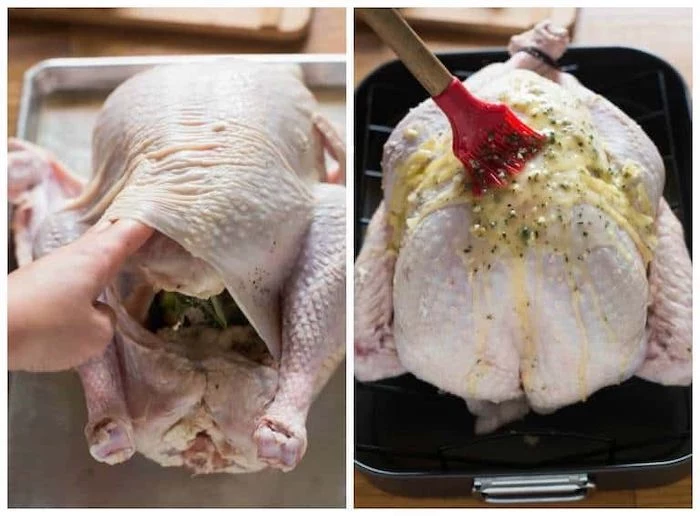
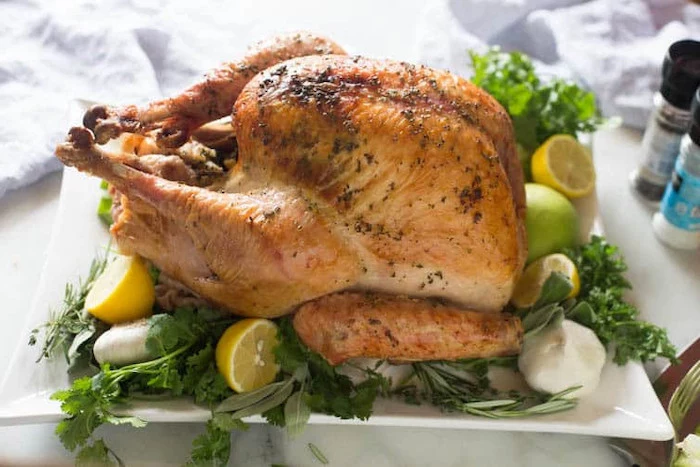
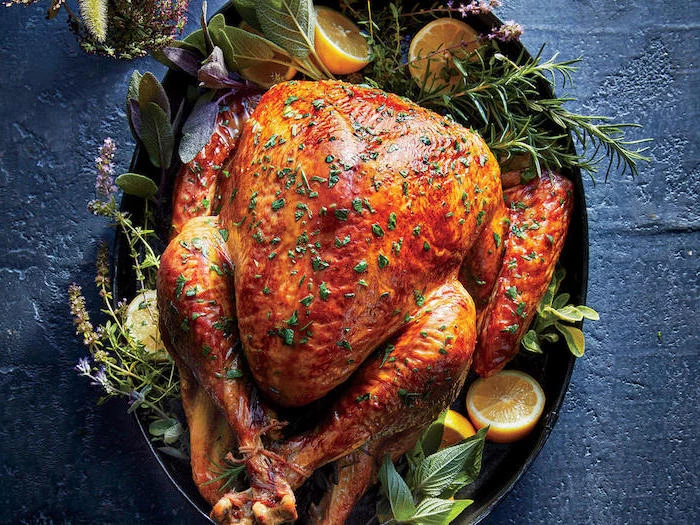
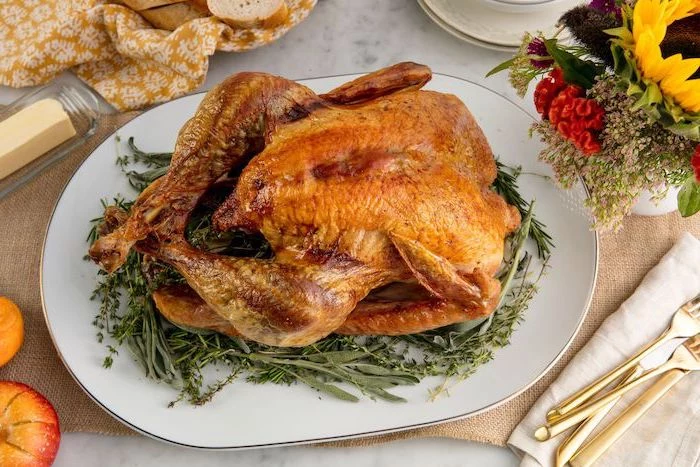
Okay, it’s go-time. Before it heads into the oven, give your turkey a little spa treatment. Pat the skin one last time to make sure it’s bone-dry. Then, rub it all over with softened butter or oil. I love making a compound butter with softened butter, minced sage, thyme, and rosemary, and pushing it under the skin.
A simple truss is a good idea. Just tie the legs together with butcher’s twine and tuck the wing tips under the body. This helps it cook more evenly. Finally, stuff the cavity with some aromatics—a quartered onion, a lemon cut in half, a head of garlic, and a few sprigs of fresh herbs. This isn’t for eating; it’s just to gently flavor the bird from the inside out.
The Cook: Ovens, Temps, and a Pro-Level Secret
Your prep work is done. Now, let’s talk about the roast itself. The most important thing to remember? Cook to temperature, not to time.
Traditional Roast vs. The Spatchcock Shortcut
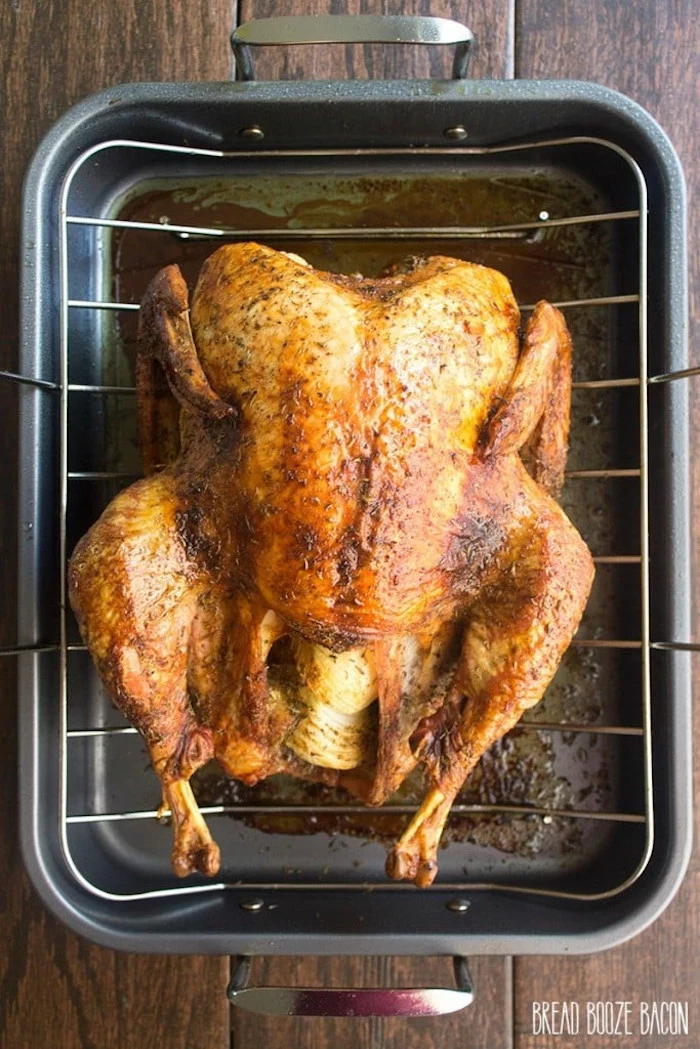
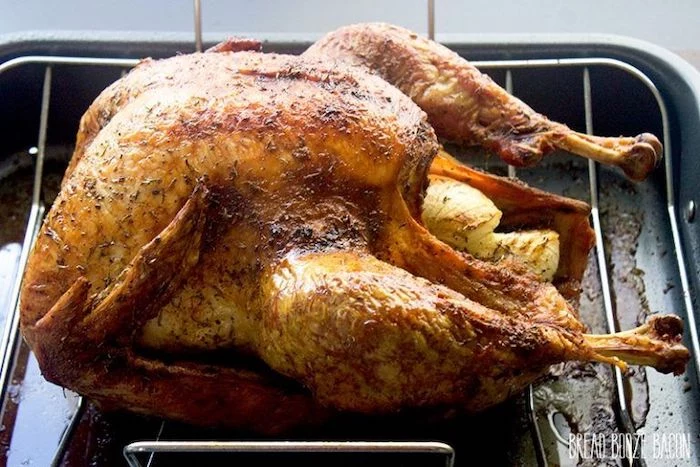
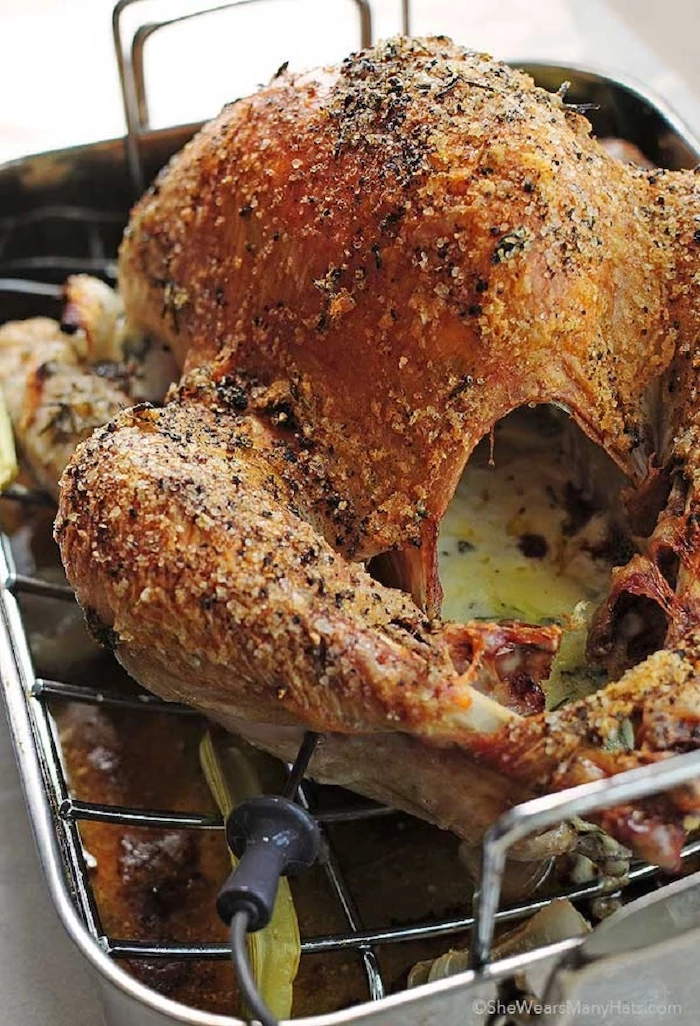
For a traditional roast, my favorite method is to start hot, then go low. I’ll blast the turkey at 425°F for 30 minutes to get the skin browning, then reduce the heat to 325°F-350°F to finish cooking gently. As a general guide for an unstuffed bird at 325°F, you’re looking at about 13-15 minutes per pound. But remember, this is just an estimate! Your thermometer is the boss.
But… want to know a secret? If you want the fastest, most evenly cooked turkey with ridiculously crispy skin all over, you should spatchcock it. This means cutting out the backbone and flattening the bird. It looks a little wild, but the results are incredible because all the meat is on the same plane, cooking at the same rate. A 12-pound spatchcocked turkey can be perfectly cooked at 425°F in as little as 90 minutes. It’s a game-changer.
Your Thermometer is Your Best Friend
Seriously, go check if you have a real instant-read thermometer. If not, order one right now. That $20 tool is the best insurance policy for your $50+ turkey. Forget wiggling the leg or checking for clear juices—those methods are notoriously unreliable.
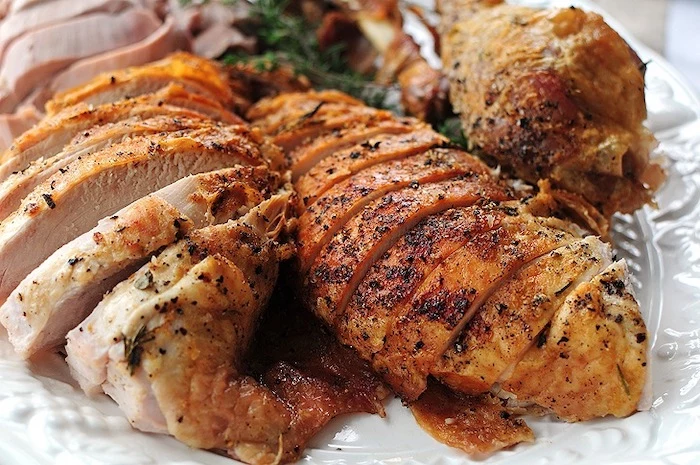
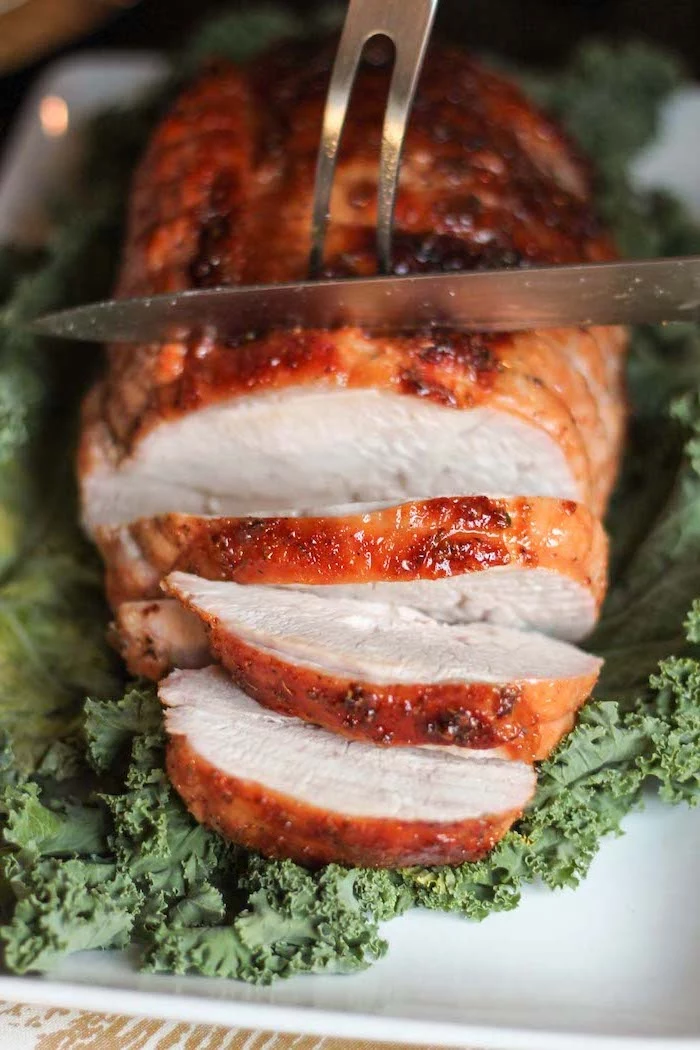
Insert the thermometer into the thickest part of the thigh, making sure not to touch the bone. We’re looking for a target temperature between 160°F and 165°F. The breast will be a bit lower, maybe around 155°F, which is perfect. Why pull it out before it hits 165°F? Because of something called carryover cooking. The bird will continue to cook as it rests, and the temp will rise another 5-10 degrees, bringing it to a perfectly safe and juicy final temperature.
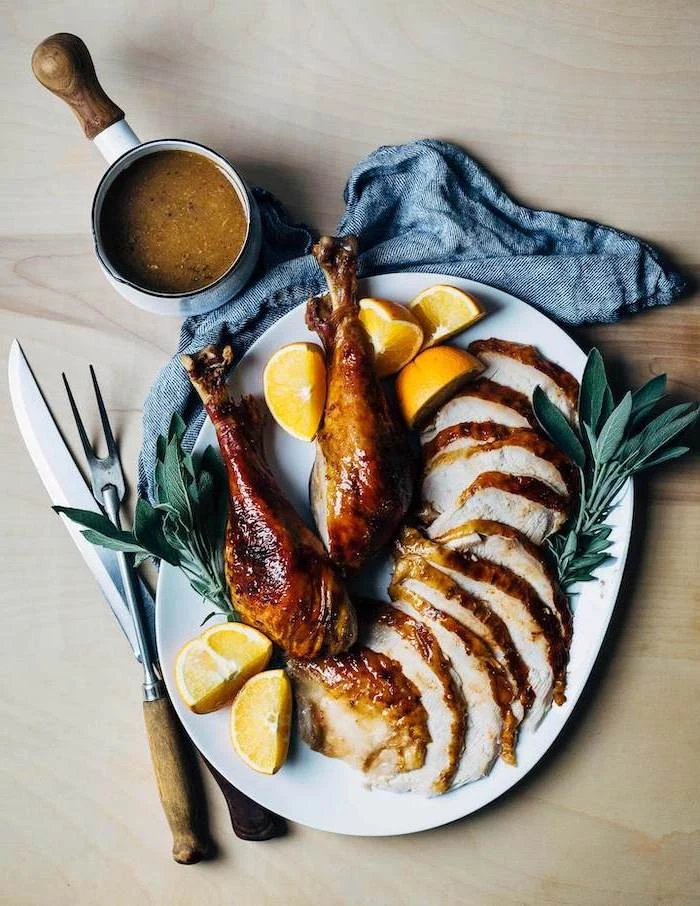
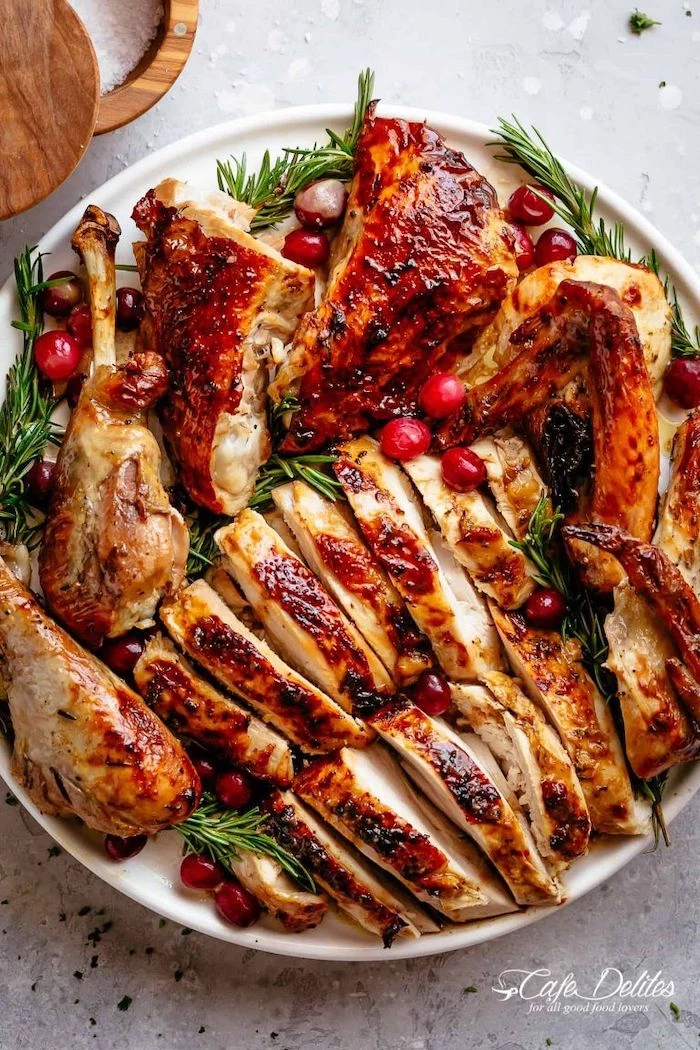
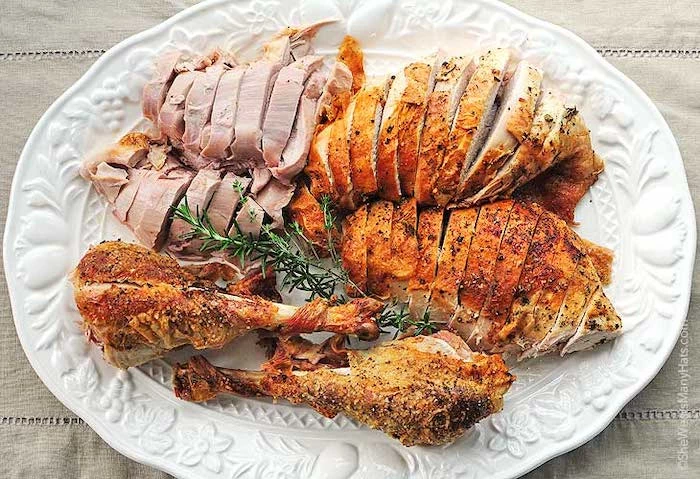
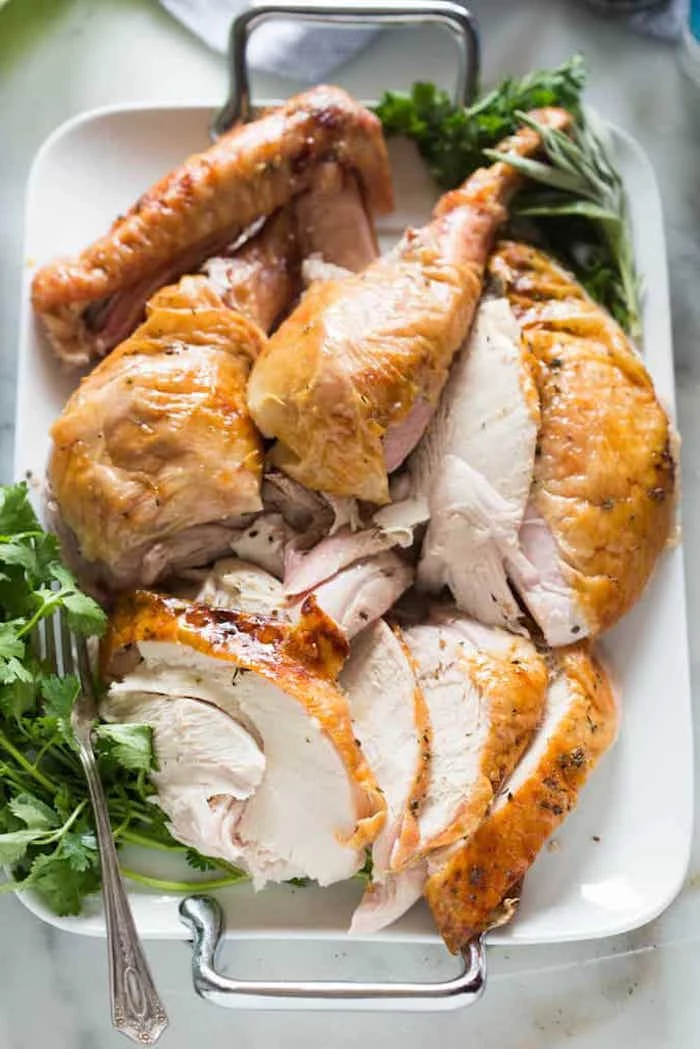
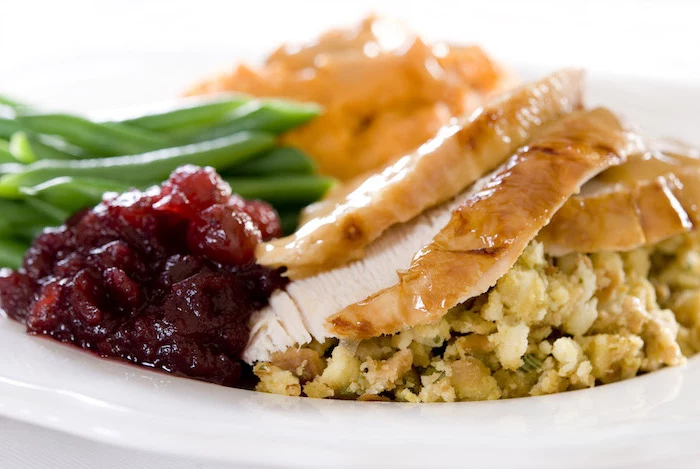
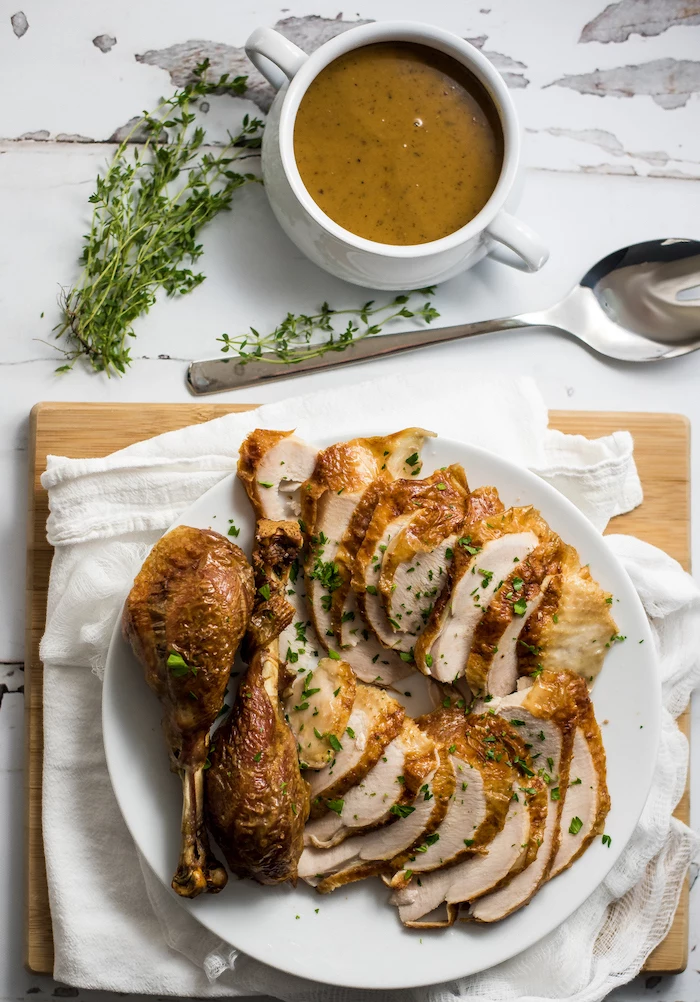
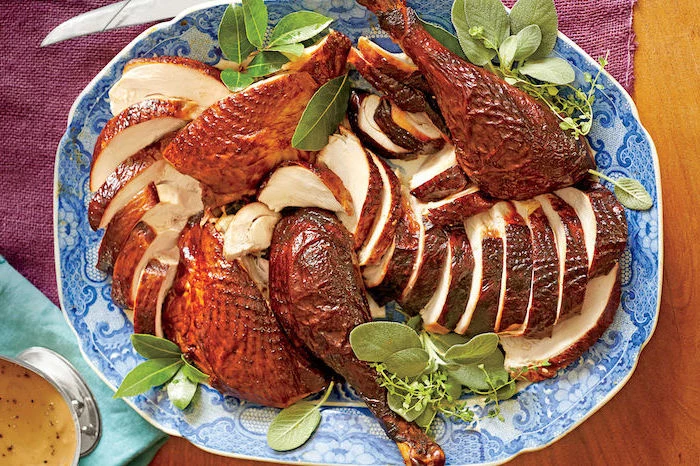
The Finish Line: Resting, Gravy, and Carving
You did it! A gorgeous bird is out of the oven. But don’t you dare cut into it yet.
Resting is NOT Optional: I learned this the hard way. I once got impatient at a party and carved a turkey straight from the oven. The initial ‘oohs’ and ‘aahs’ died down as a giant puddle of juice flooded the cutting board, leaving the breast meat disappointingly dry. Don’t be me. Let it rest! Tent the turkey loosely with foil and let it sit for at least 30 minutes. A big bird can easily rest for 45 minutes and still be perfectly hot.
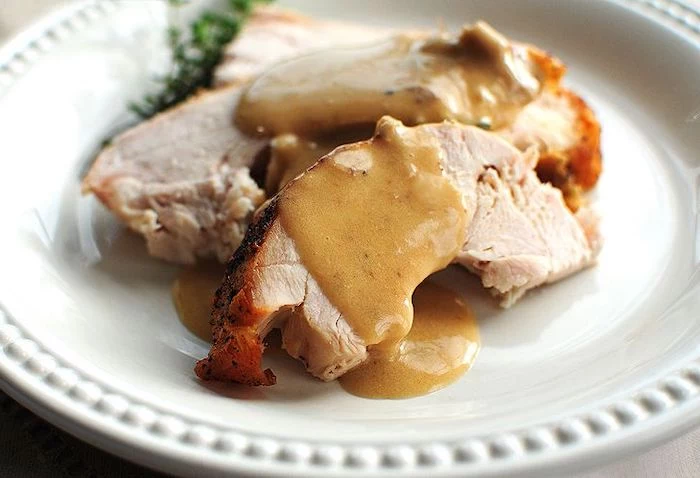
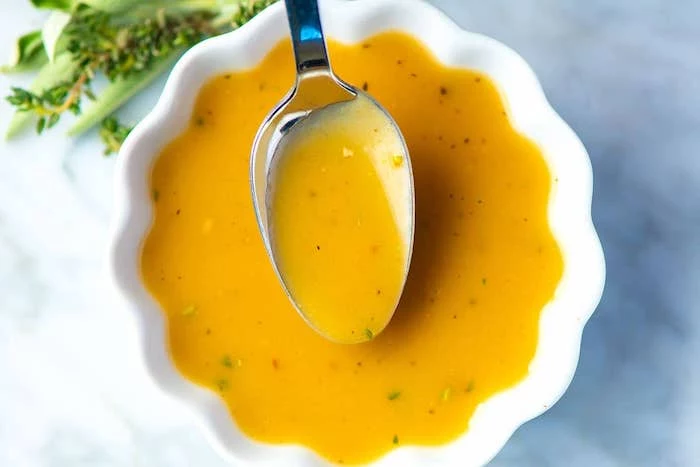
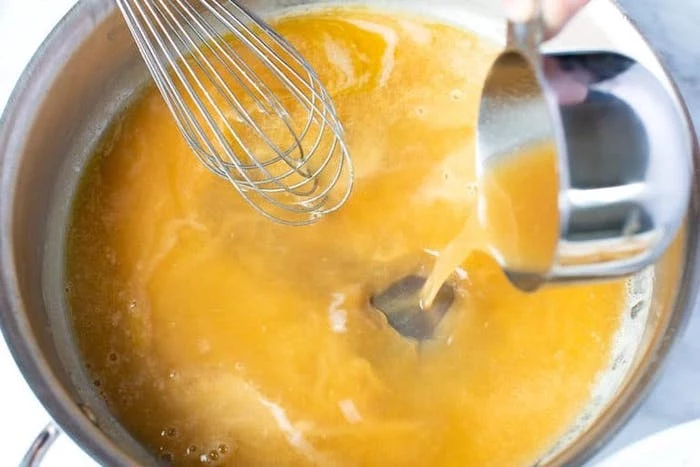
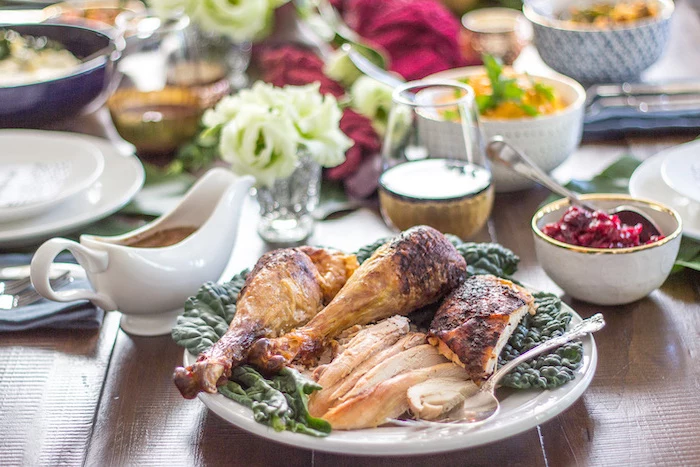
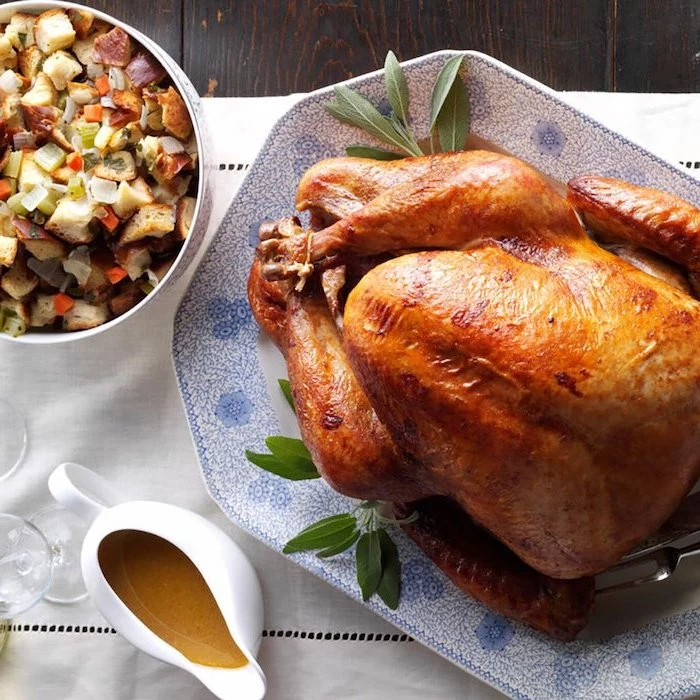
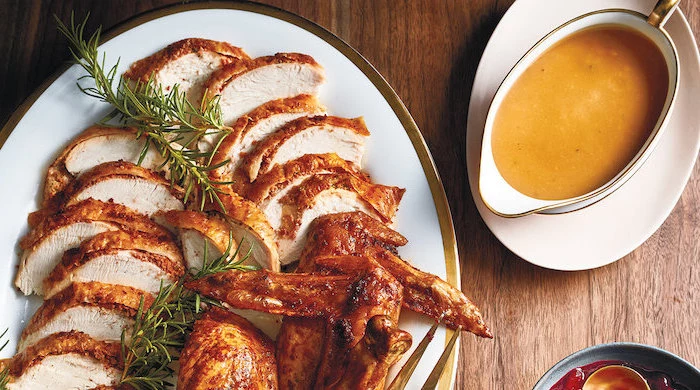
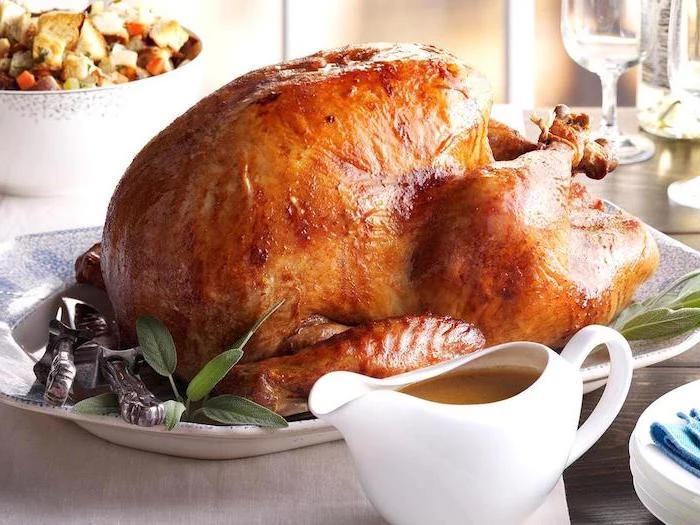
That Liquid Gold Gravy: While the turkey rests, make your gravy. Those browned bits (the ‘fond’) in the bottom of the roasting pan are pure flavor. Don’t throw them away!
A quick pro tip: Did you save the backbone from spatchcocking or the neck from the giblet bag? While your turkey was roasting, you could have put that in a small pot with an onion, a carrot, and some water. Let it simmer for an hour or two, and you’ve just made a super-rich, homemade stock for the best gravy of your life.
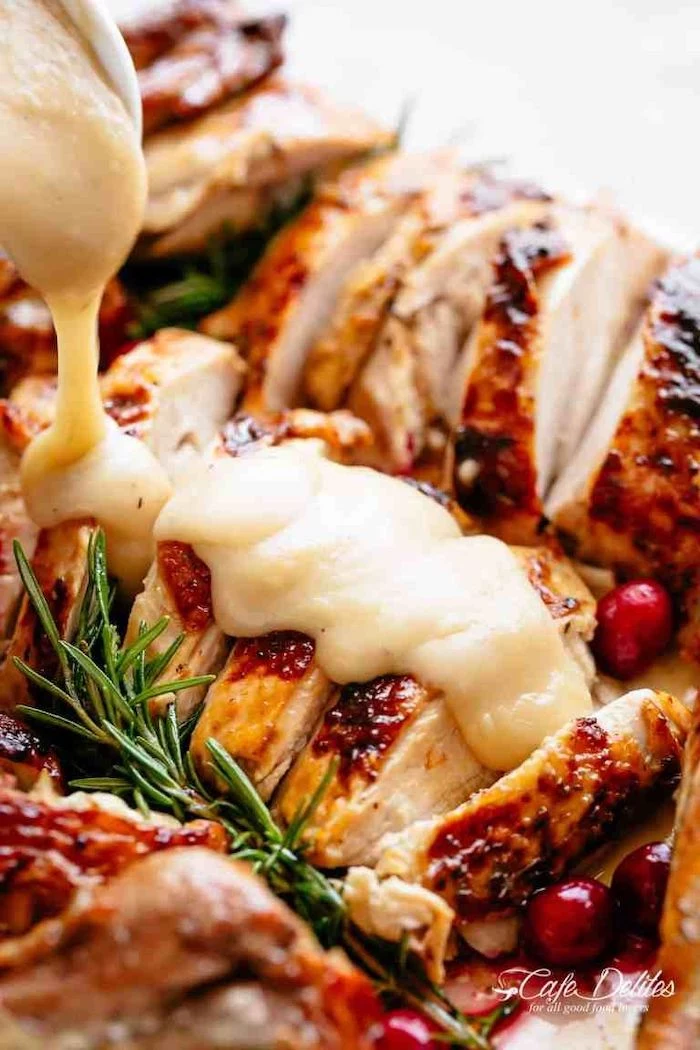
To make the gravy, just pour off most of the fat from the roasting pan, leaving a few tablespoons. Put the pan over a burner, whisk in an equal amount of flour to make a paste (a roux), and then slowly whisk in your warm homemade stock (or store-bought, that’s fine too!). Scrape up all the brown bits and simmer until it thickens. Season, and you’re a hero.
Turkey 911: Last-Minute Fixes for Common Problems
Even the pros run into issues. Here’s a quick guide for when things go a little sideways.
- The Problem: The skin is getting too dark, but the meat isn’t cooked.
The Fix: Easy. Just tent the browning parts (usually the breast) with a small piece of aluminum foil. This shields it from the direct heat while the rest of the bird catches up. - The Problem: The turkey is done an hour early!
The Fix: Don’t panic. This is actually a good thing! Let it rest for the full 30-45 minutes. Then, carve the meat, arrange it on a serving platter, pour a little warm chicken broth over it, and cover it tightly with foil. You can keep it in a warm oven (around 170°F) for up to an hour. - The Problem: My gravy is lumpy.
The Fix: The quickest solution is to pour it through a fine-mesh sieve. No one will ever know. If you have an immersion blender, a quick blitz will smooth it out instantly.
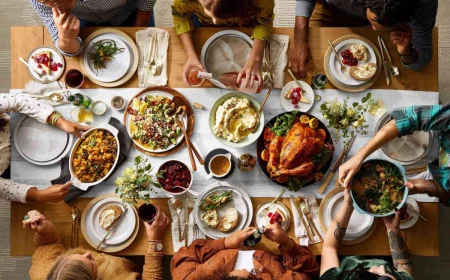
At the end of the day, cooking a Thanksgiving turkey can feel like a high-pressure performance. But I promise you, the most memorable meals aren’t about absolute perfection. They’re about sharing food you’re proud of with people you love. So take a deep breath, trust these techniques, and get ready to earn some serious bragging rights.
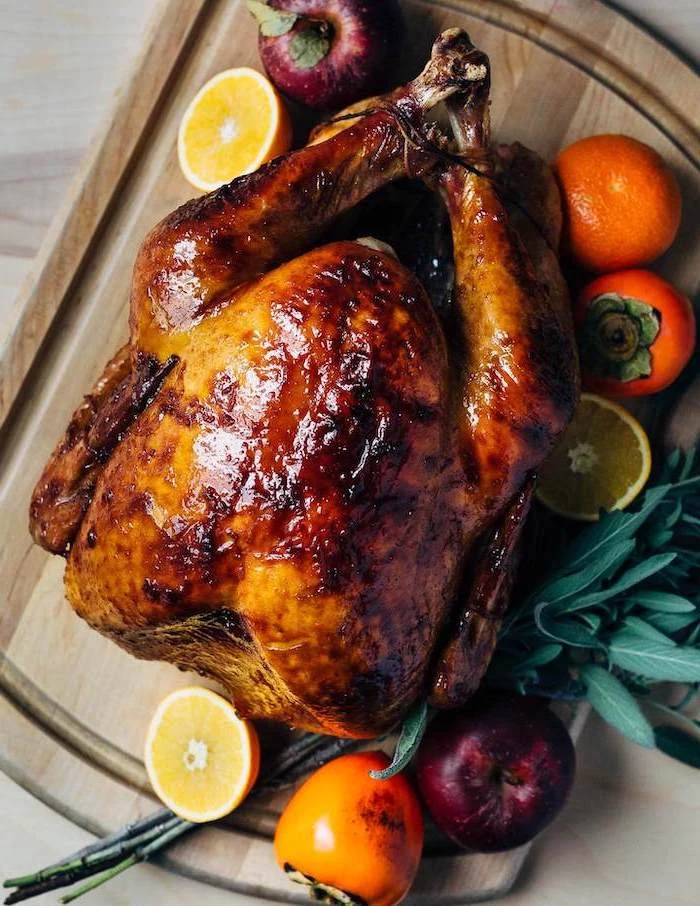
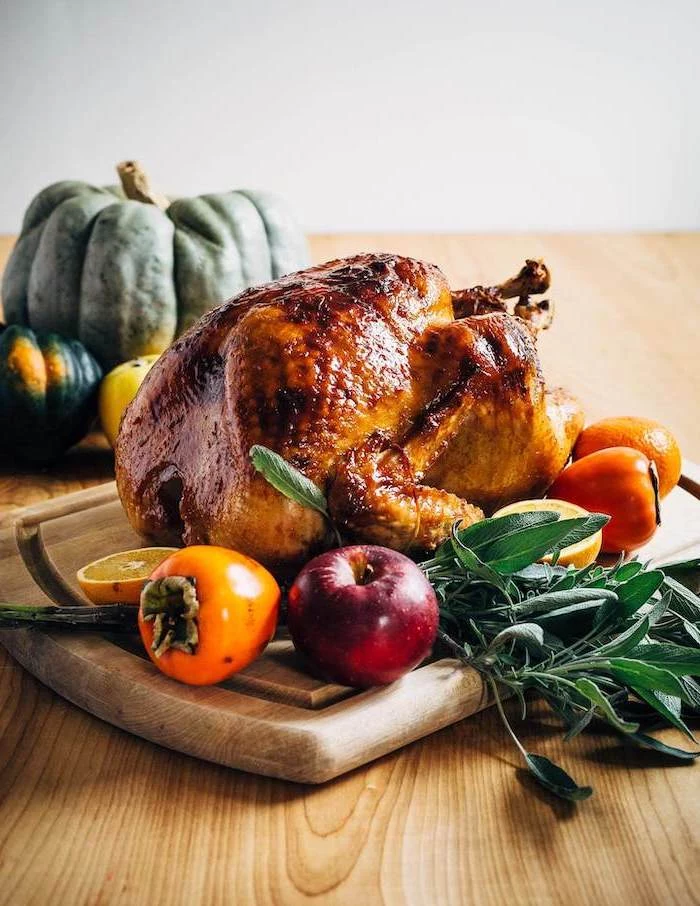
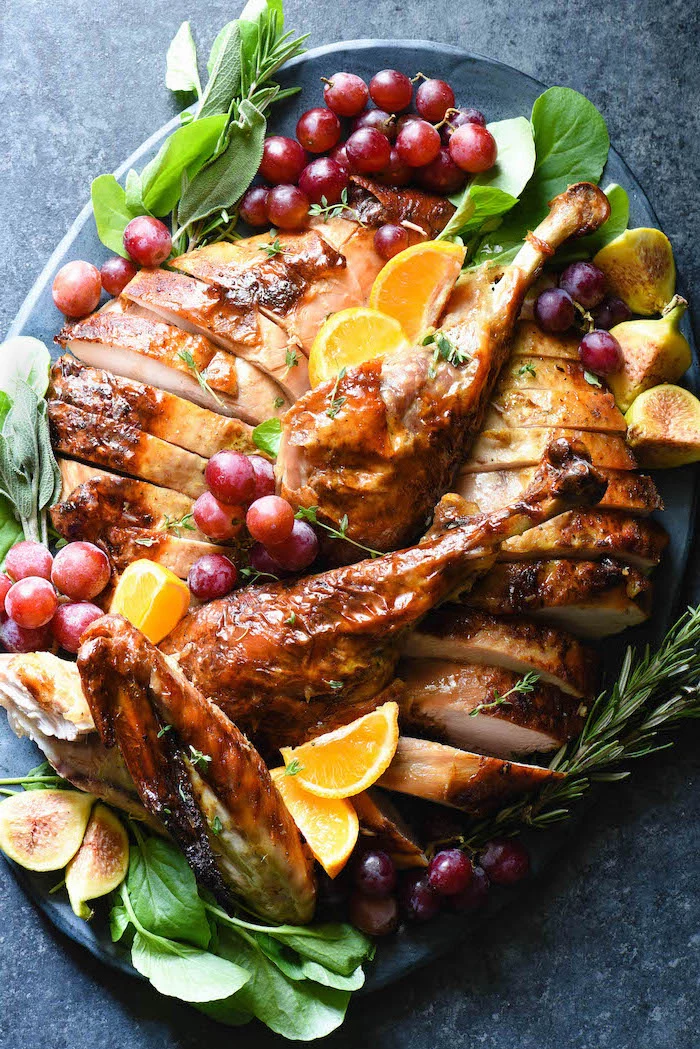
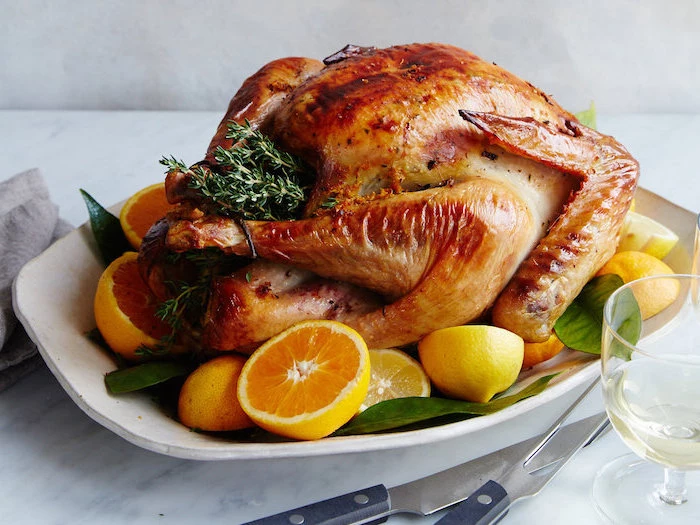
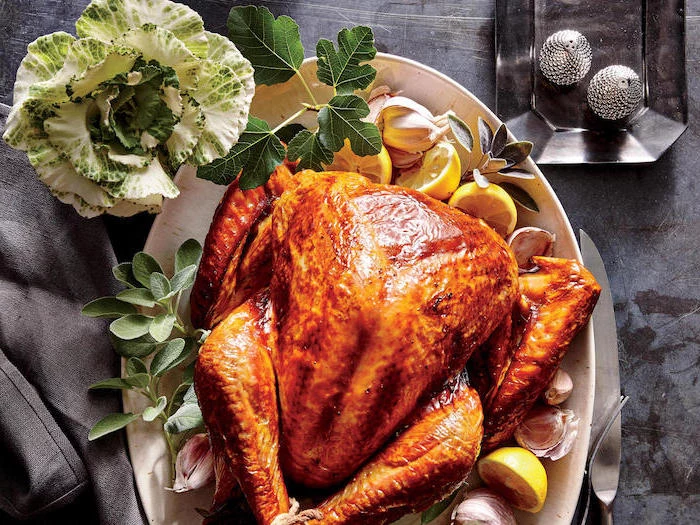
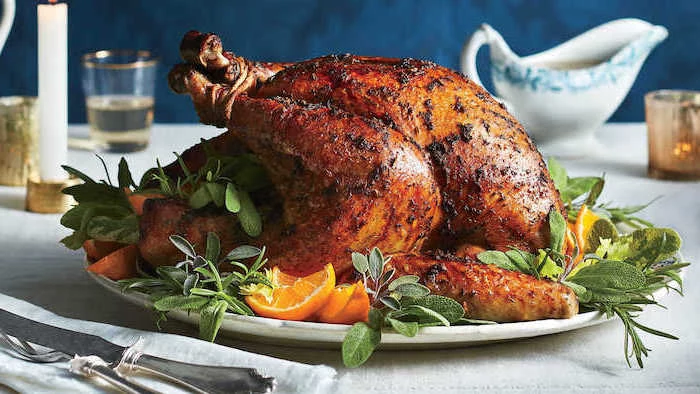
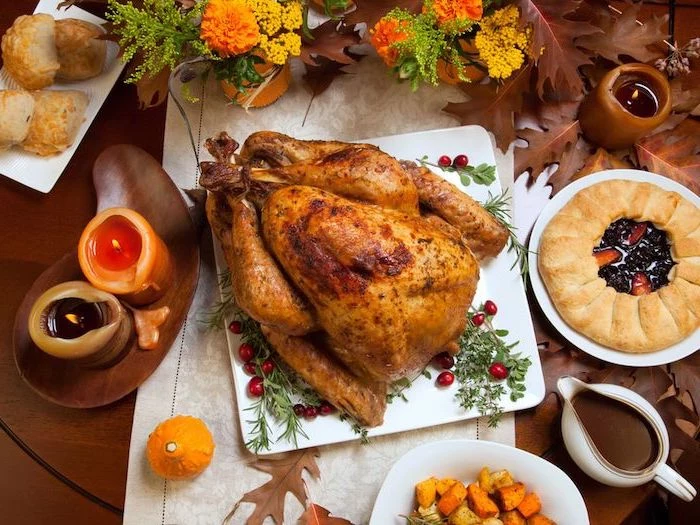
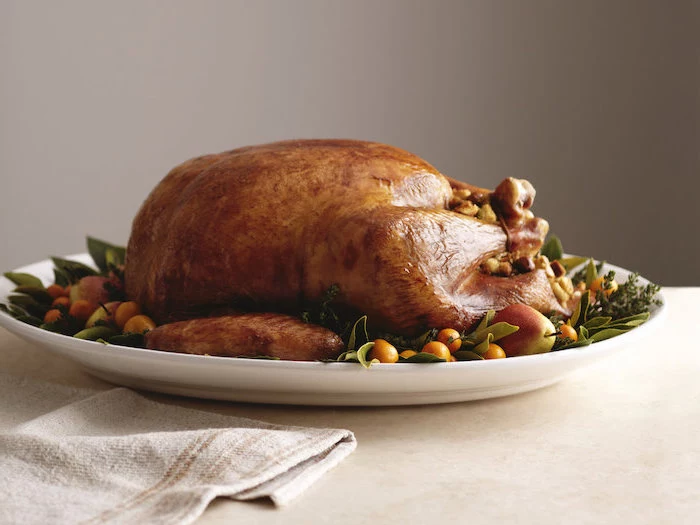
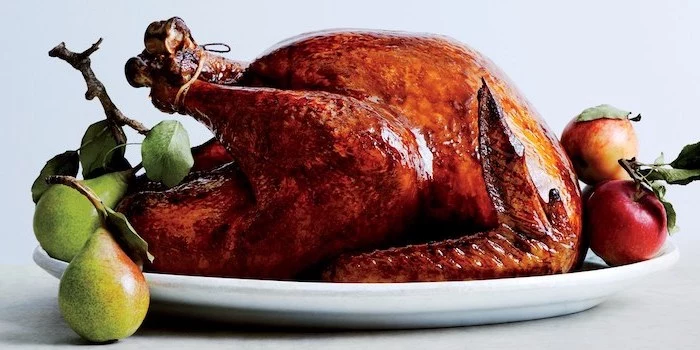
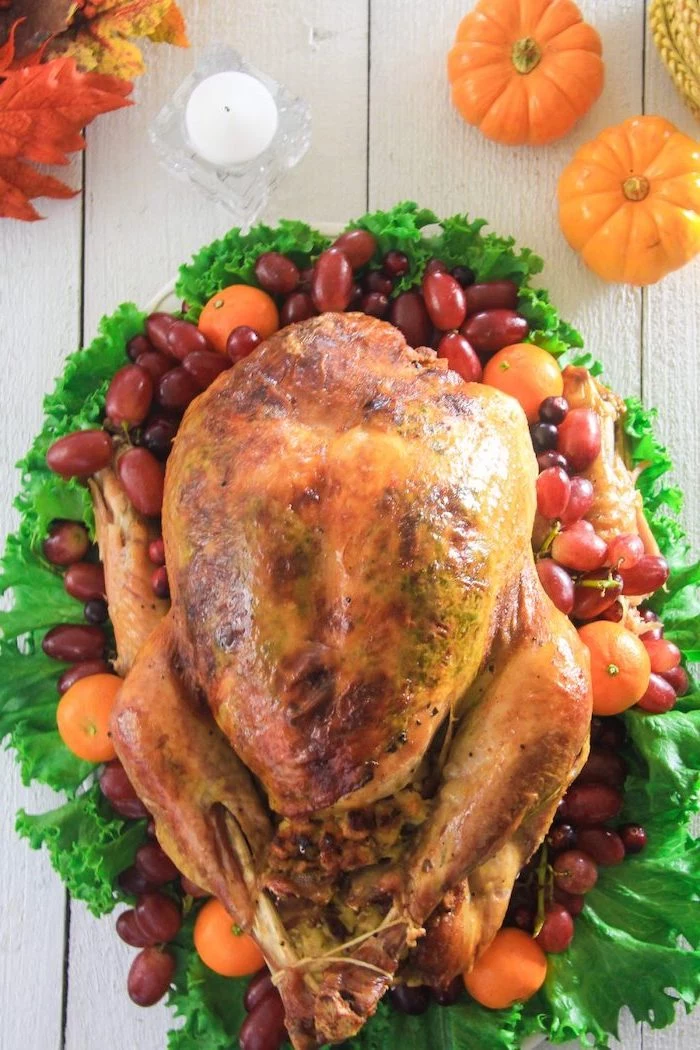
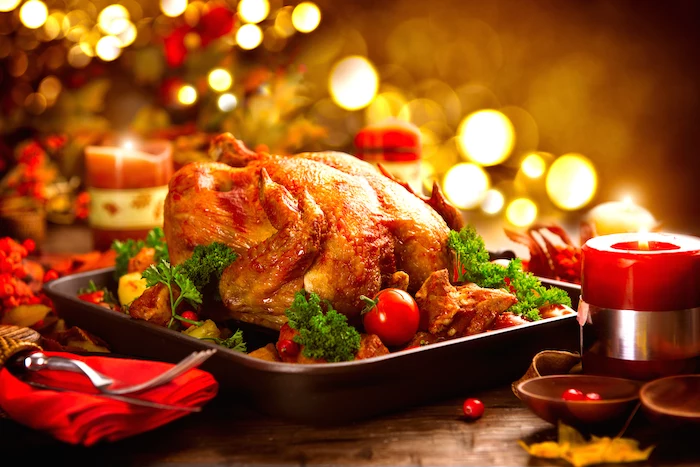
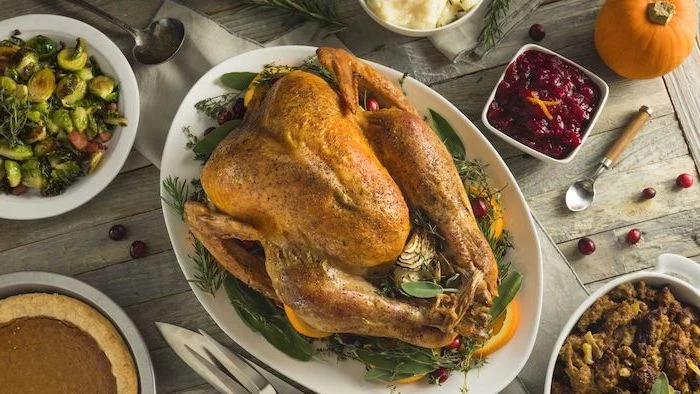
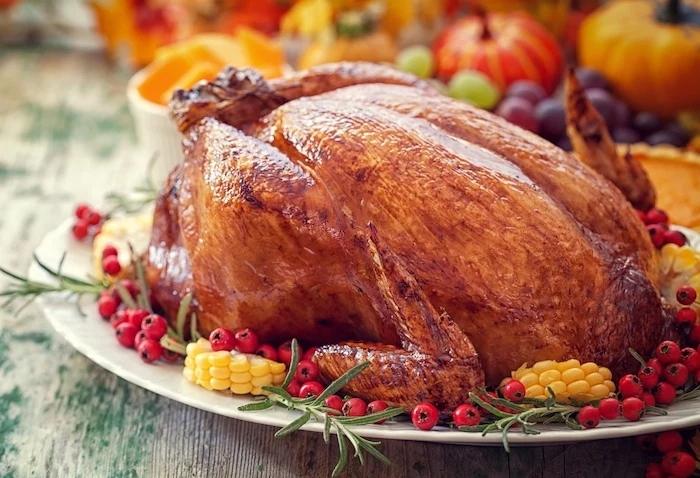
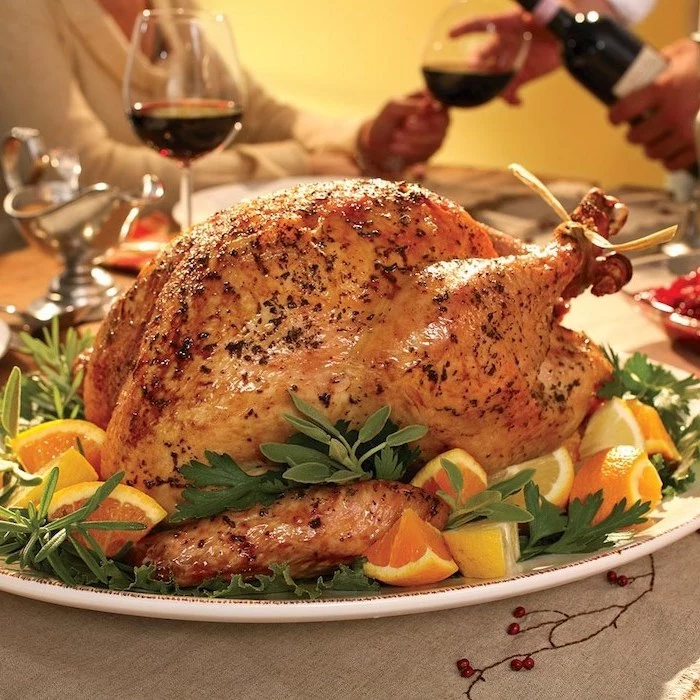
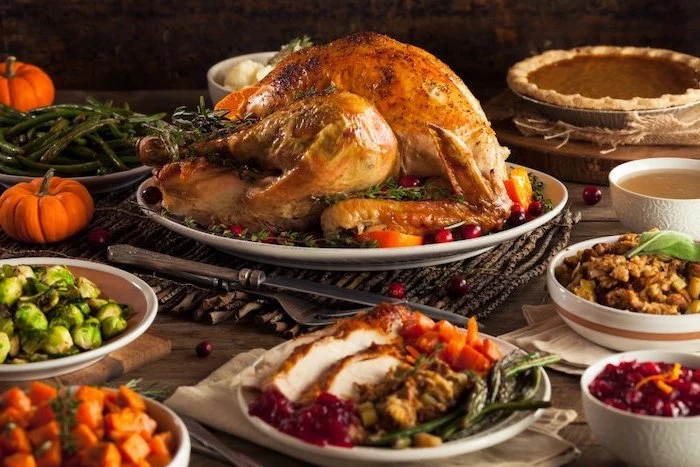
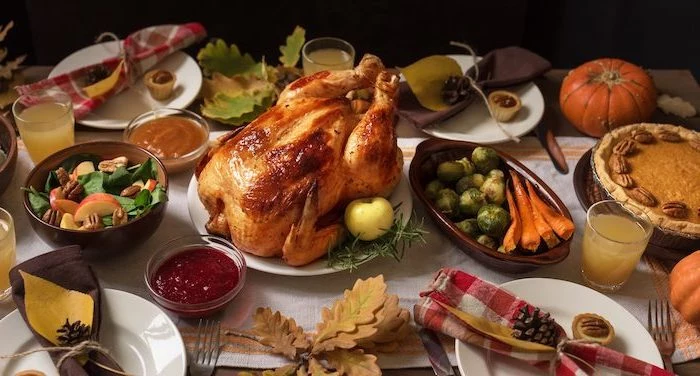
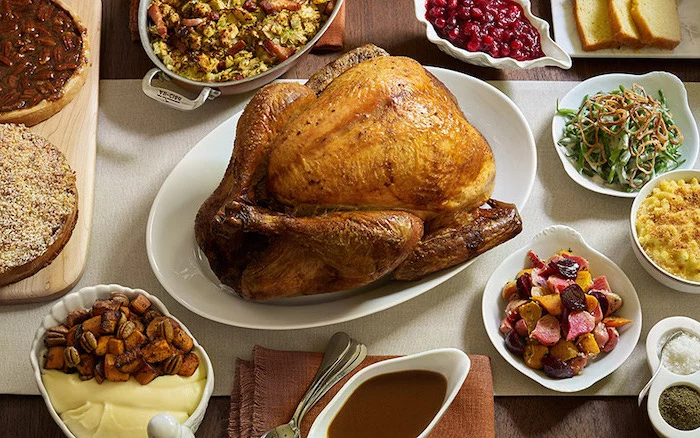
Inspiration Gallery

The Golden Rule of Resting: Once your turkey is out of the oven, your work isn’t over. It absolutely must rest for at least 30-45 minutes before carving. Tent it loosely with foil to keep it warm. This allows the juices, which have been pushed to the surface by the heat, to redistribute throughout the meat. Skipping this step is the #1 cause of a dry turkey, no matter how perfectly you cooked it.
- Create a flavor-packed compound butter by mixing softened, unsalted butter with minced fresh herbs like sage, thyme, and rosemary.
- Add finely zested lemon or orange peel for a bright, citrusy note that cuts through the richness.
- A few cloves of crushed garlic and a pinch of smoked paprika can add incredible depth and color.
The secret? Gently separate the skin from the breast meat and massage this butter directly onto the meat before roasting for maximum flavor penetration.
A note on brining: If you’ve purchased a standard supermarket turkey, like a Butterball or similar brand, check the packaging carefully. Most are pre-injected with a saline solution. Brining these birds will result in an overly salty, sometimes spongy result. Save your brining efforts for fresh, all-natural, or heritage birds.
An estimated 88% of Americans eat turkey on Thanksgiving. That’s approximately 46 million turkeys!
This tradition is so ingrained that the meal has become synonymous with the bird itself. Choosing to perfect your turkey is about more than just food; it’s about mastering the centerpiece of a cherished national ritual.
Should I brine my turkey?
Absolutely, if you have an all-natural bird. Brining is a game-changer for moisture and flavor. It’s essentially a marinade of salt, sugar, and water that seasons the meat from the inside out and helps it retain moisture during the long cooking process. Even a simple 12-hour brine can make a world of difference between a dry bird and a succulent one.

Don’t throw away that little bag of parts from the turkey’s cavity! The giblets (heart and gizzard) and neck are flavor gold. Simmer them in water with an onion, a carrot, and a celery stalk while the turkey roasts. This creates a deeply flavorful homemade broth that is the ultimate secret weapon for spectacular gravy.
Heritage Turkey: These breeds are closer to wild turkeys. They have a richer, more complex, and sometimes gamier flavor. The meat is leaner with a higher ratio of dark to white meat. They are more expensive and cook faster due to less fat.
Supermarket Turkey (Broad-Breasted White): This is the turkey most of us know. Bred for a large amount of breast meat, it’s milder in flavor and more forgiving to cook. It’s widely available and more budget-friendly.
For a true gourmand experience, try a heritage bird. For a classic, crowd-pleasing result, the supermarket turkey is a reliable choice.
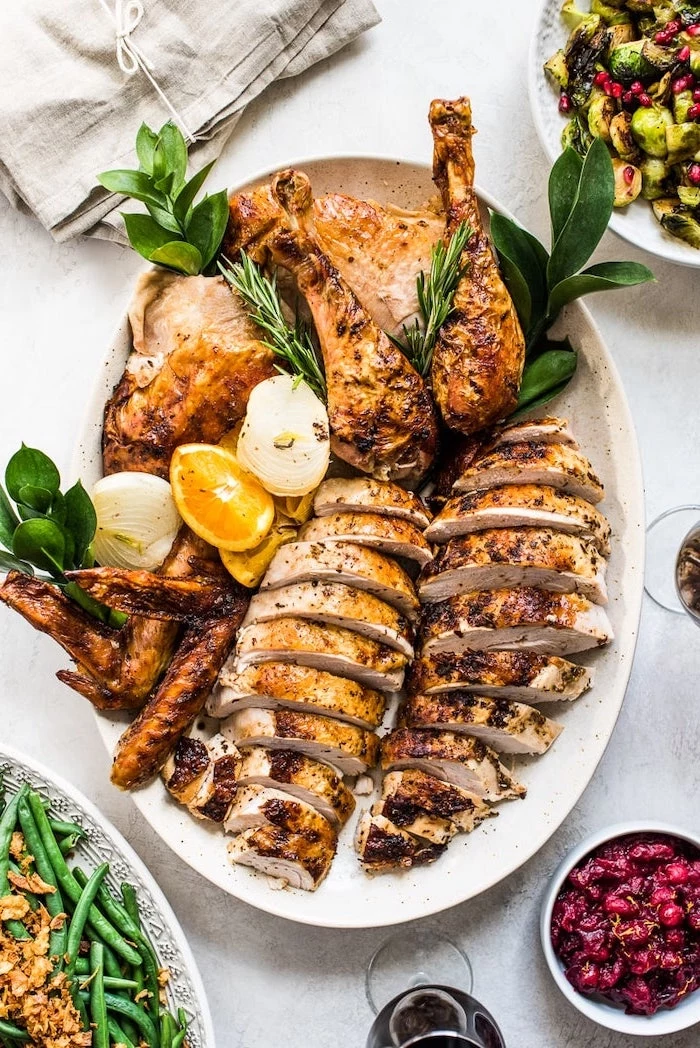
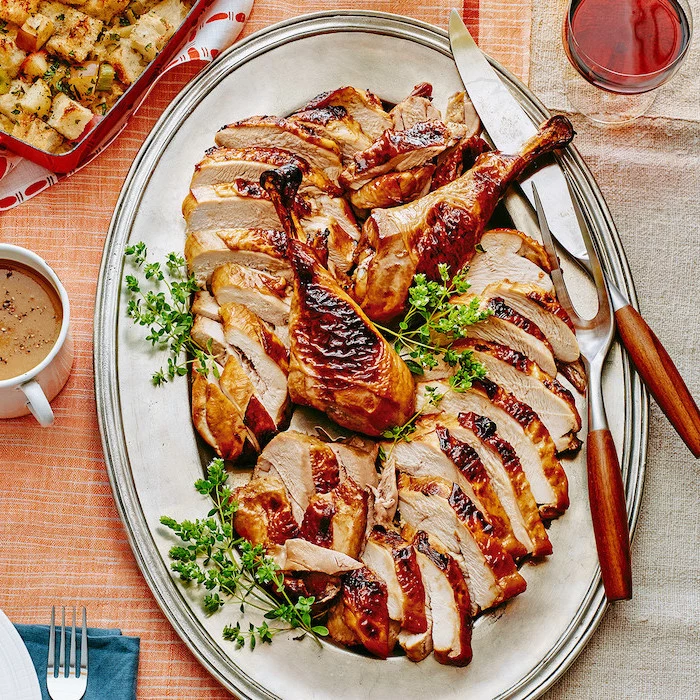
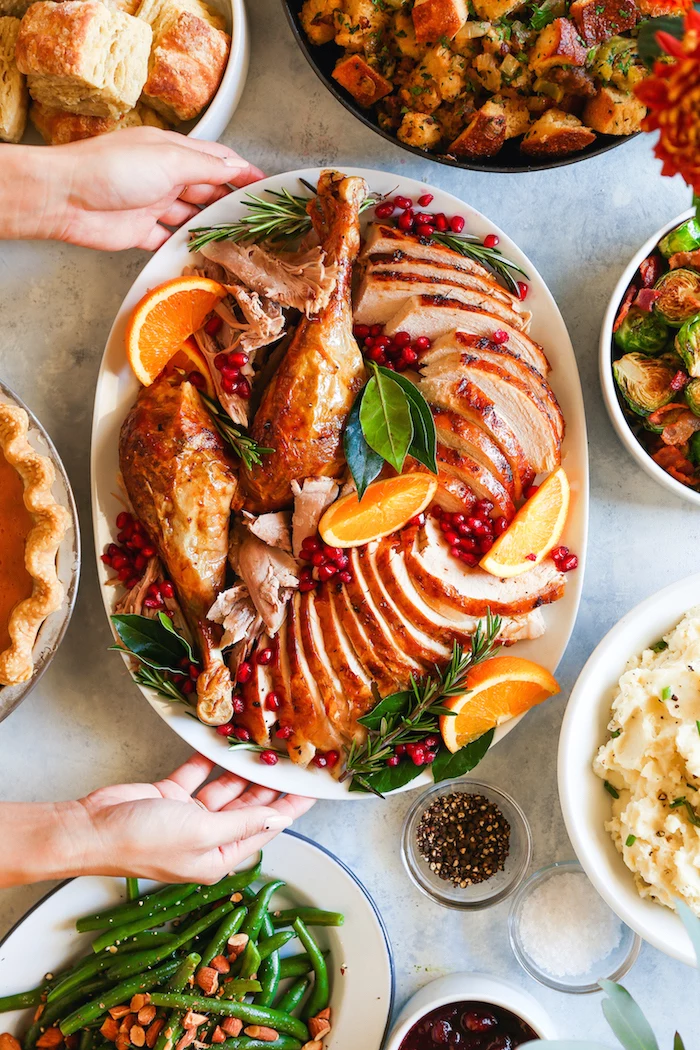
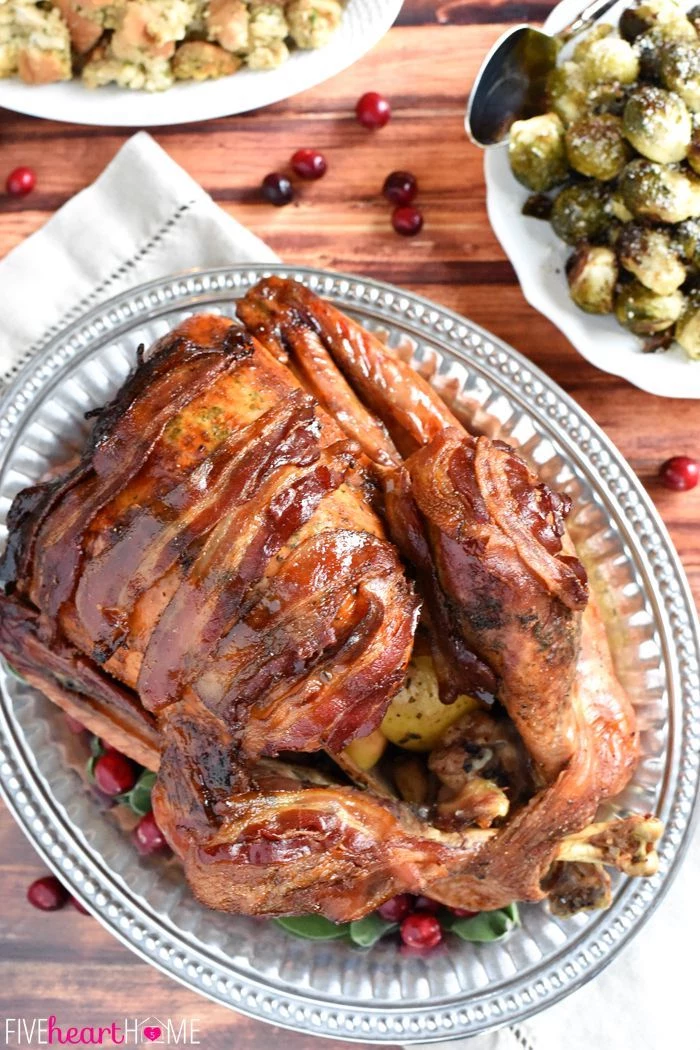
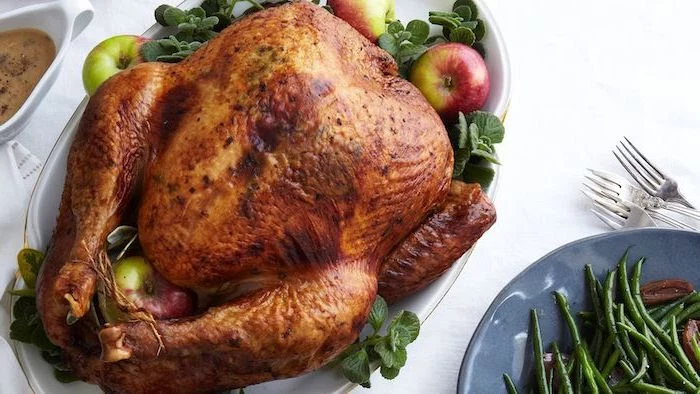
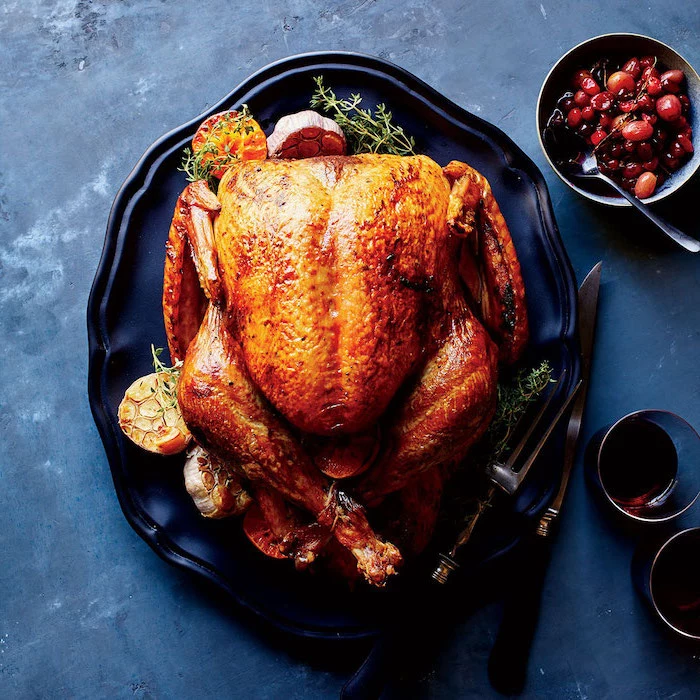
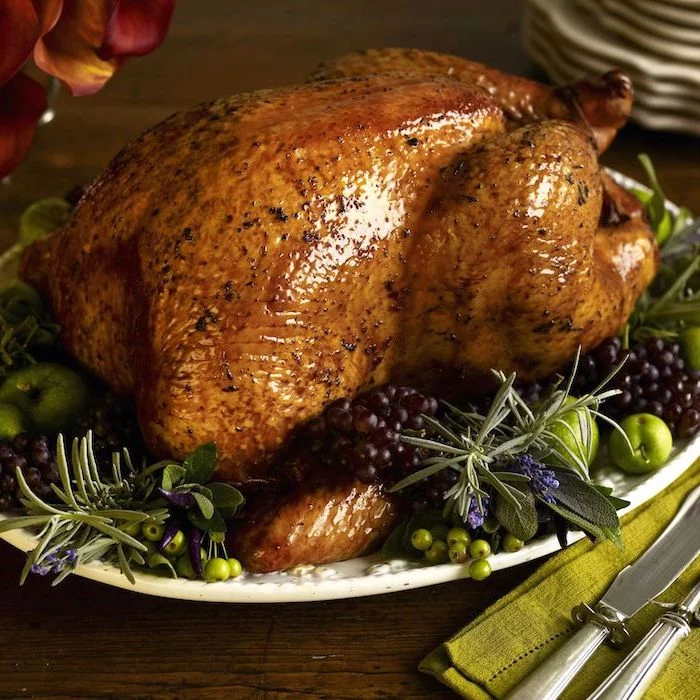
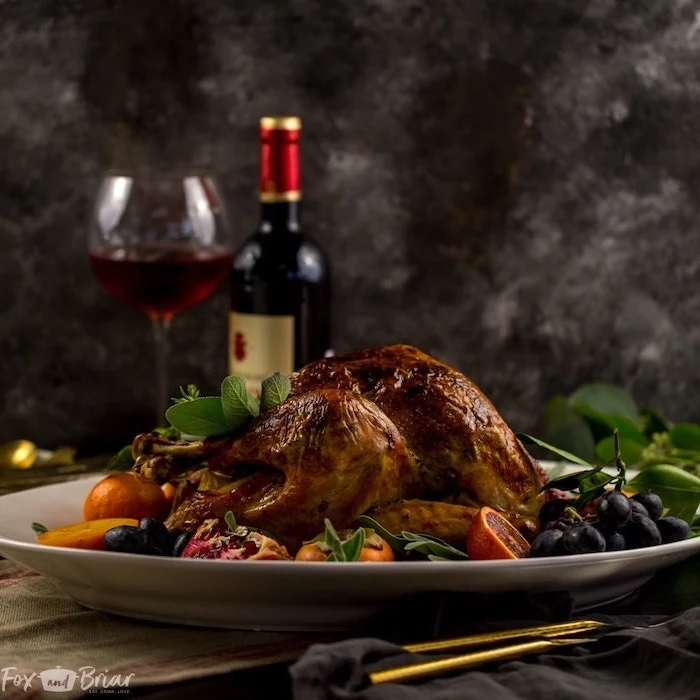
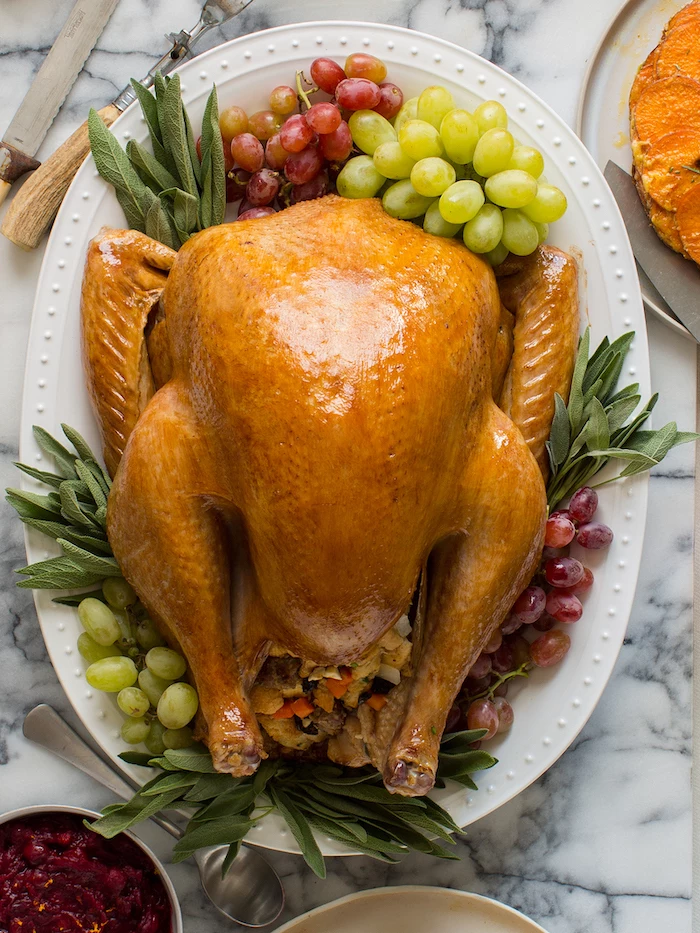
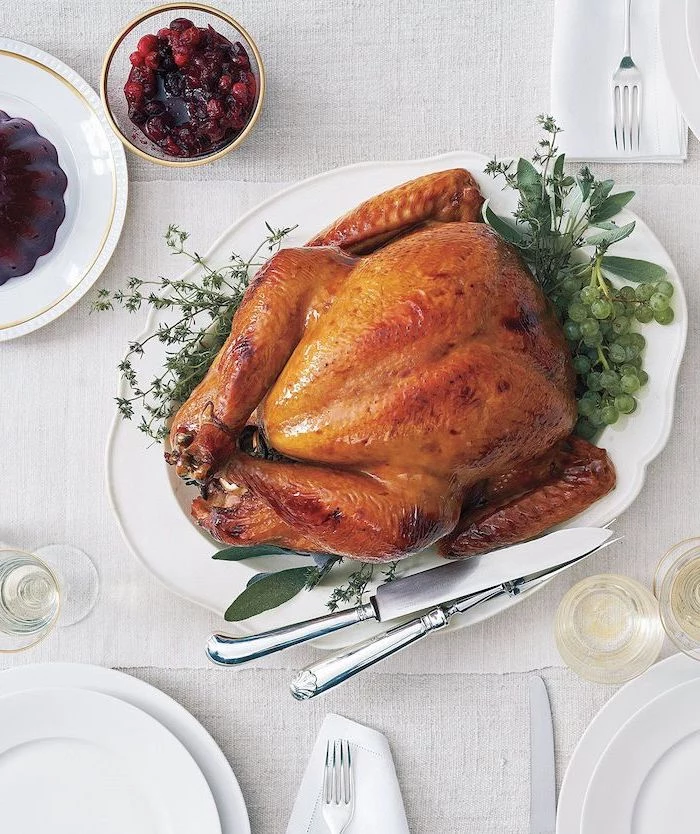
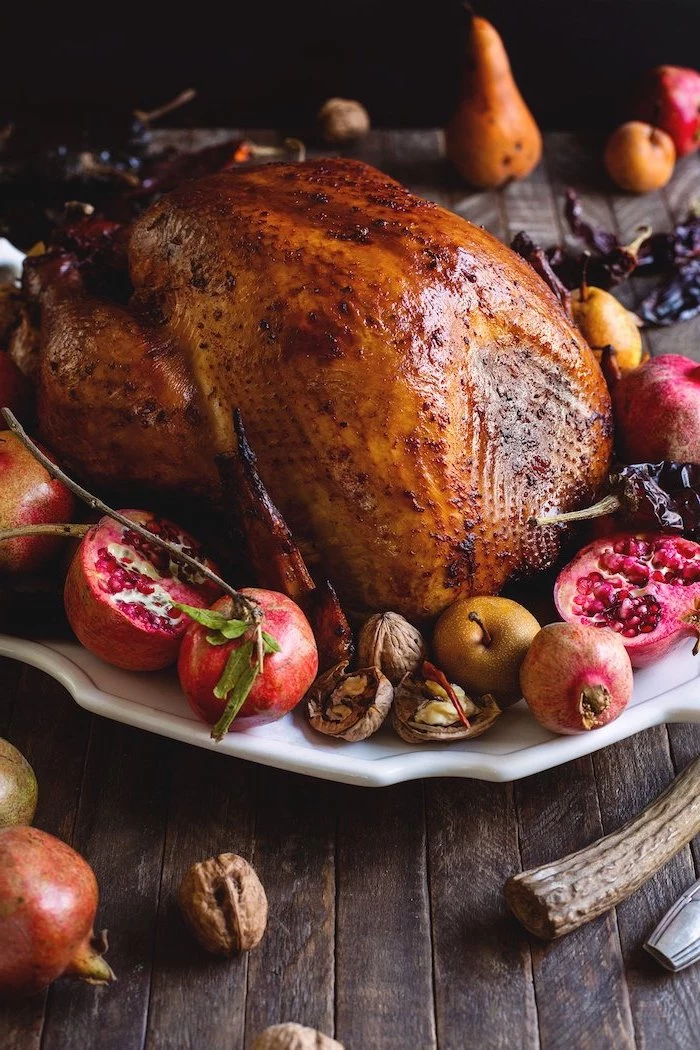
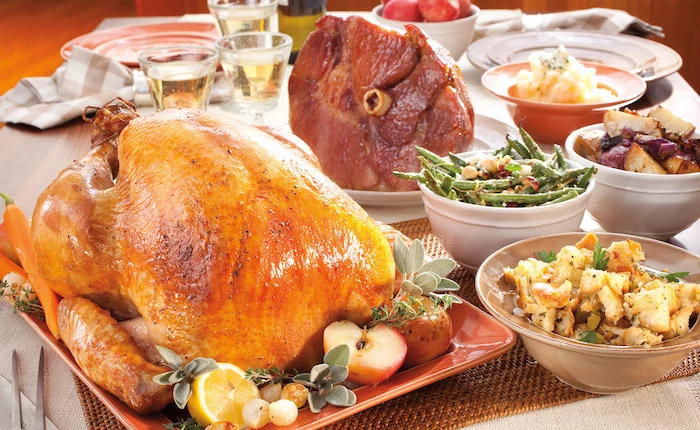
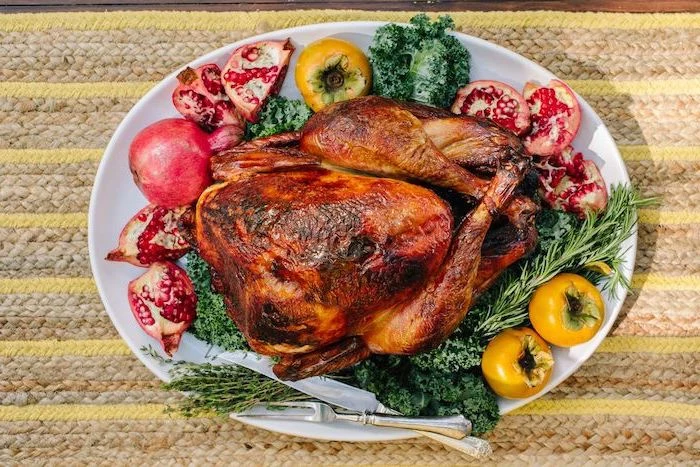
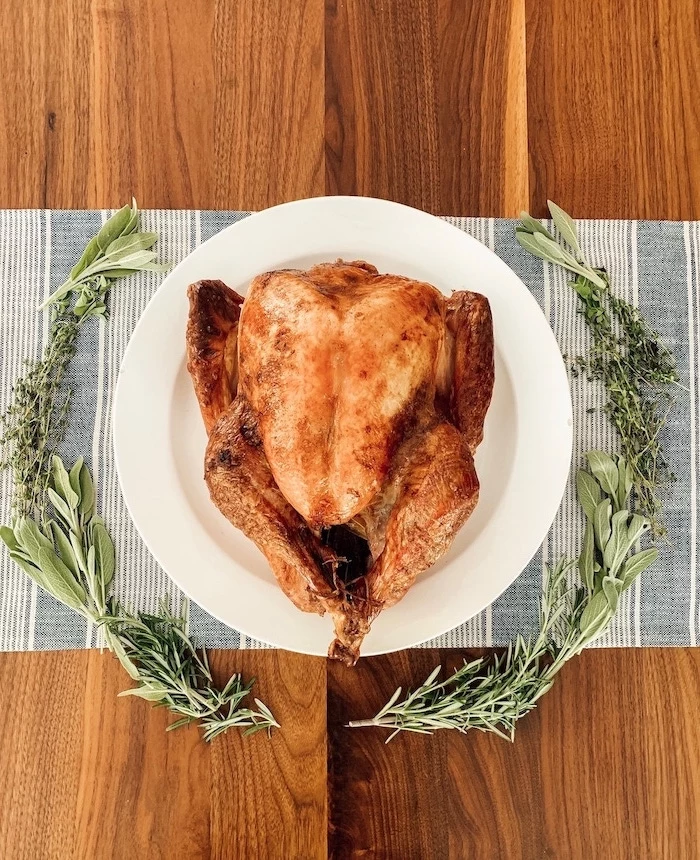
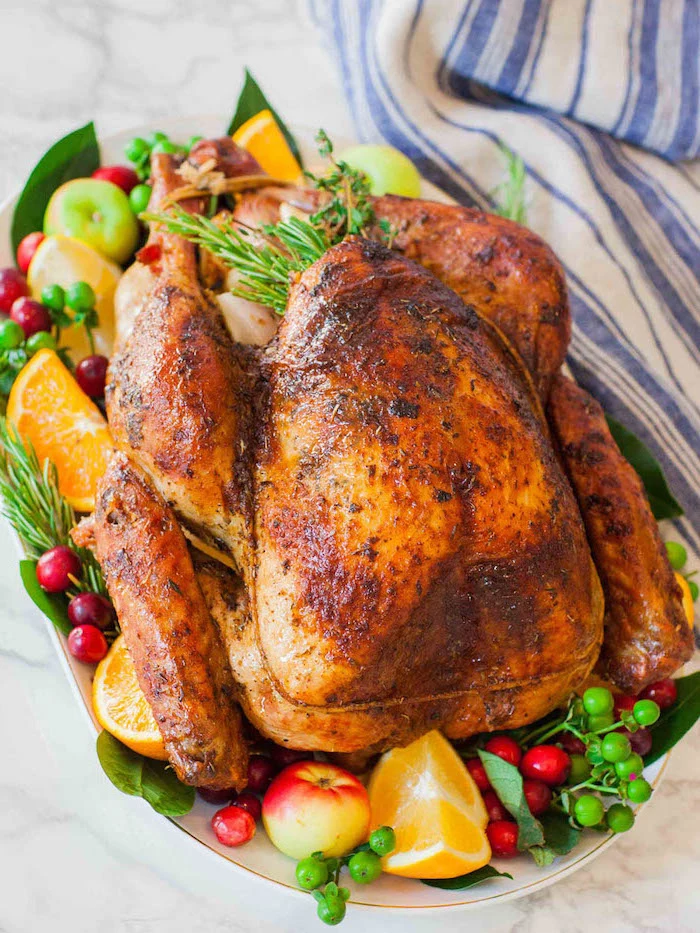
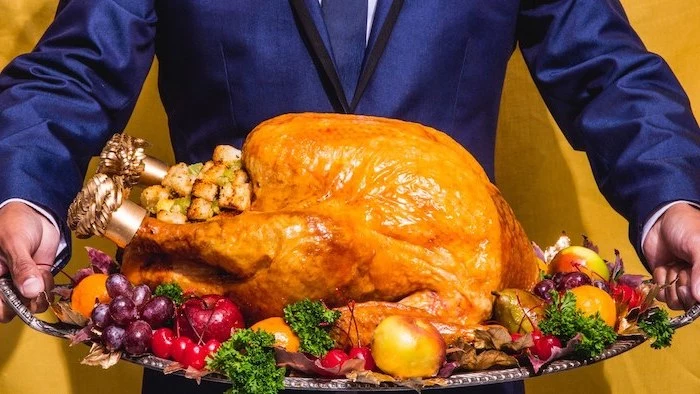
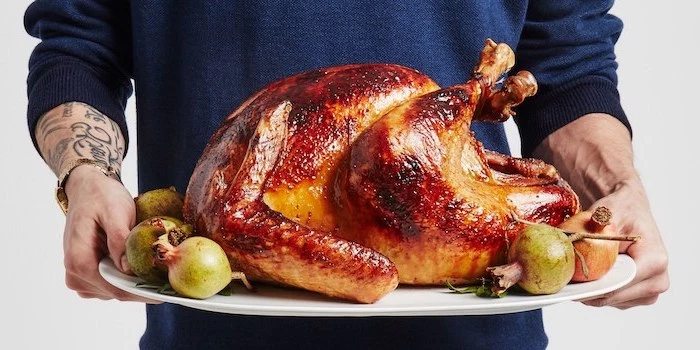
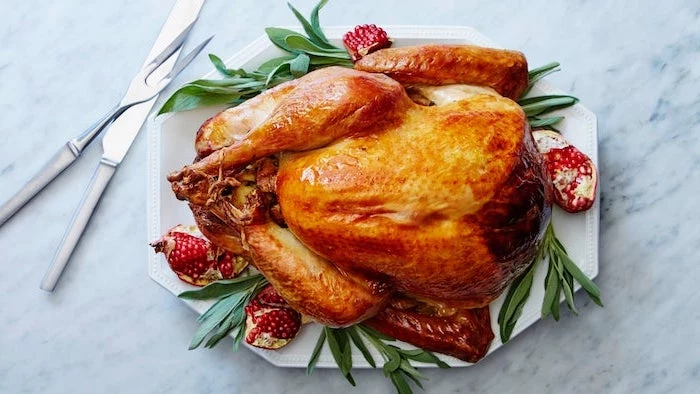
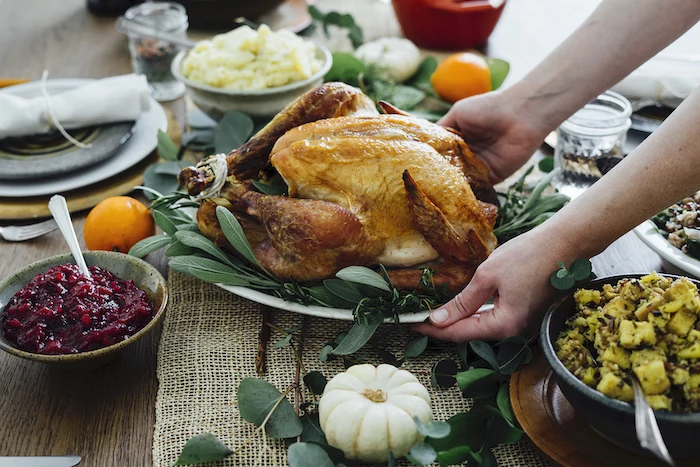
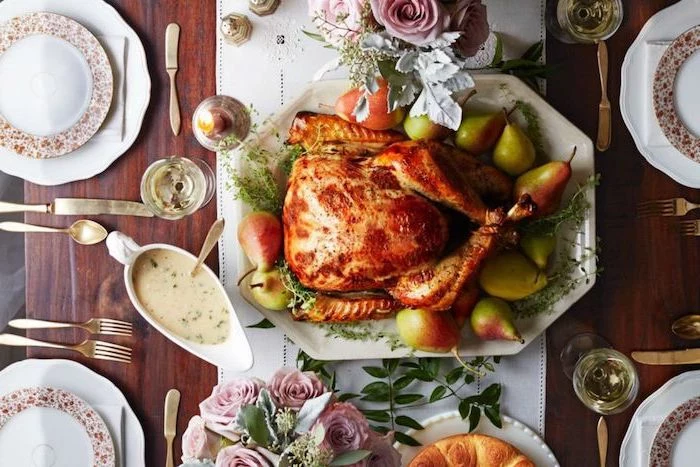
- It adds a stunning visual appeal to your holiday table.
- Fresh herbs and fruits complement the savory flavors of the turkey.
- It fills in empty space on the platter, making the spread look more abundant.
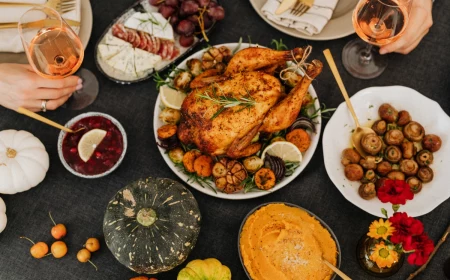
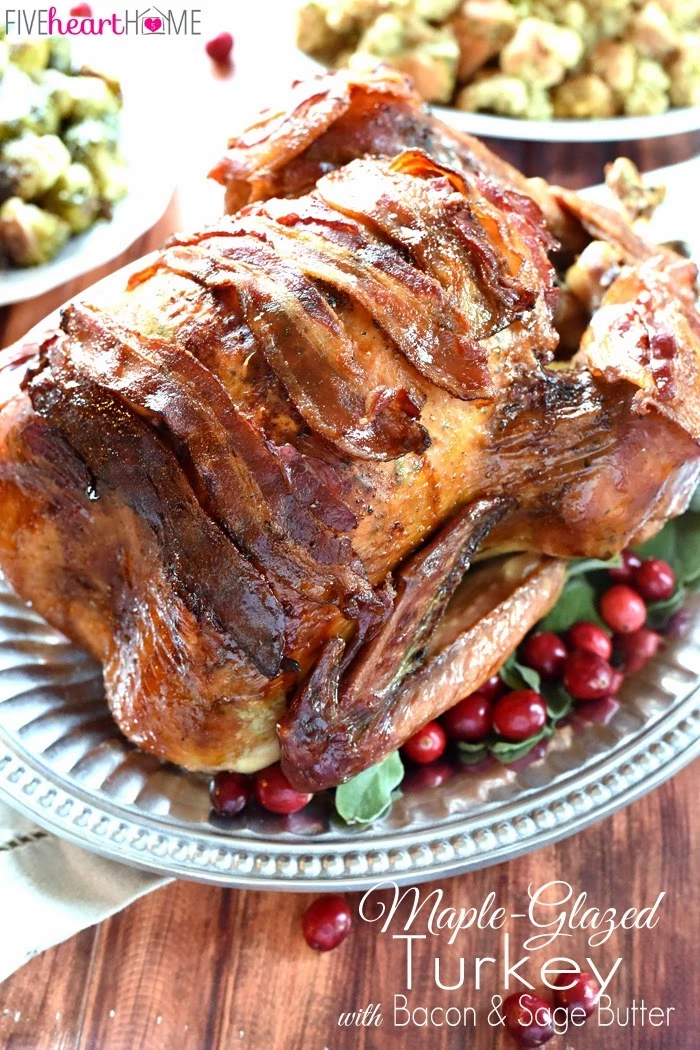
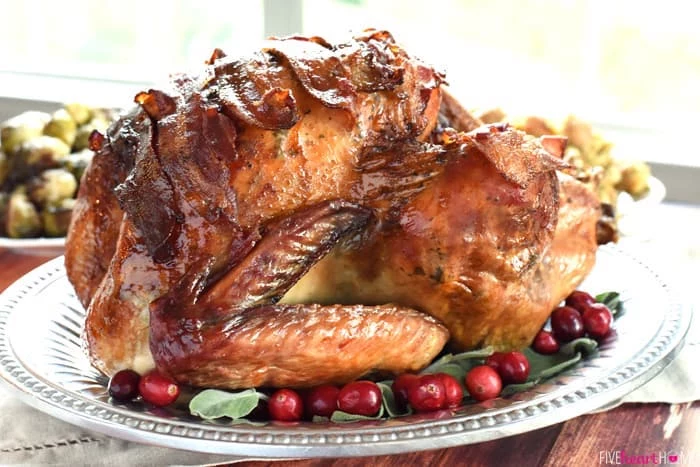
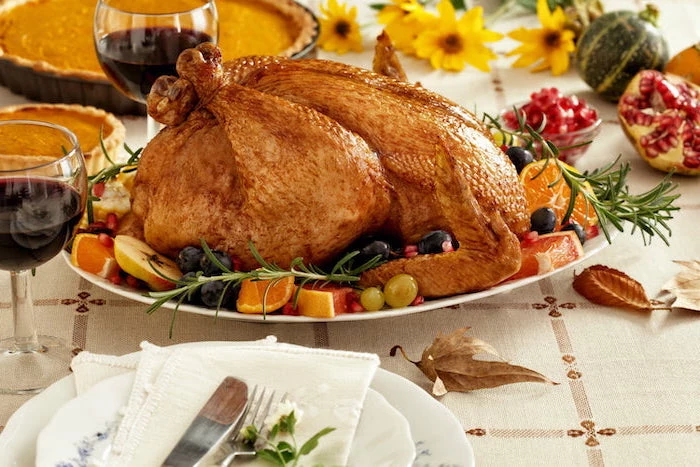
The art of presentation? A few well-placed bunches of fresh sage, sprigs of rosemary, and scattered seasonal fruits like cranberries or halved pomegranates can transform your turkey from a simple meal to a show-stopping centerpiece.
The debate over basting is a heated one in the culinary world. While it seems intuitive, opening the oven door every 30 minutes to baste the turkey can drastically lower the oven temperature, extending your cooking time and potentially leading to uneven results. A good layer of fat (like that compound butter!) under and over the skin is often more effective at keeping the meat moist without the constant fuss.
Is spatchcocking worth the effort?
For a guaranteed juicy bird with ultra-crispy skin, yes! Spatchcocking means removing the backbone and flattening the turkey. This increases the surface area exposed to heat, drastically cuts down on roasting time (often to under 90 minutes), and ensures both the white and dark meat cook evenly. It requires a sturdy pair of poultry shears and a bit of confidence, but the results are consistently fantastic.
Dry Brine (Salting): This involves rubbing the turkey all over with a salt and spice mixture and letting it rest in the fridge for 1-3 days. It draws moisture out of the skin, making it incredibly crisp, while seasoning the meat deeply. It’s less messy and requires less space than a wet brine.
Wet Brine: This involves fully submerging the turkey in a saltwater solution. It’s excellent for adding moisture to the meat but can sometimes result in a slightly water-logged texture and less crispy skin if not dried properly before roasting.
The aromatic blend of roasting poultry, savory herbs like sage and thyme, and sweet onions creates a scent that is pure holiday nostalgia. This isn’t just about cooking; it’s about creating an atmosphere. The smell that fills your home becomes a sensory backdrop for the day, building anticipation and making memories long before the meal is served.
Important: The
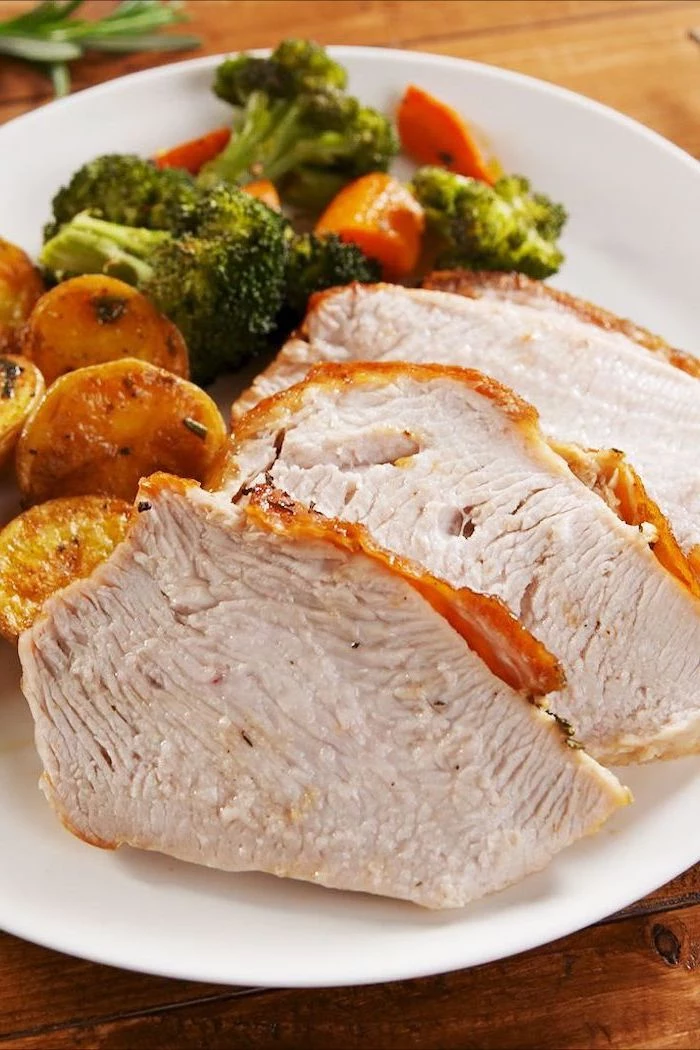
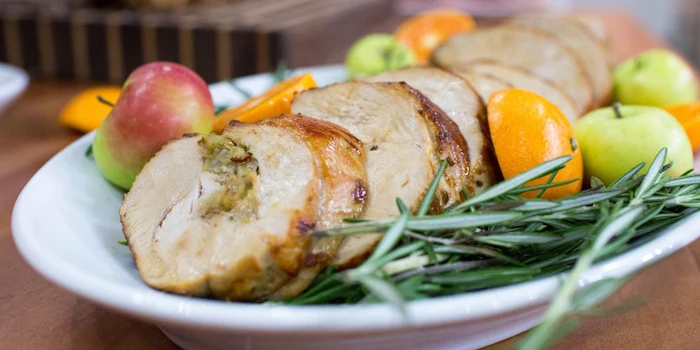
- Roast a turkey breast instead of a whole bird. It’s faster and perfect for smaller gatherings.
- Buy a high-quality bone-in, skin-on turkey breast for the best flavor and texture.
- Consider roasting just turkey legs and thighs if your family prefers dark meat.
My skin isn’t getting brown, but the temperature is almost there! What do I do?
Don’t panic! If you have about 15-20 minutes of cooking time left, you can increase the oven temperature to 425-450°F (220-230°C). Watch it very closely to avoid burning. This final blast of high heat will help crisp and brown the skin beautifully without overcooking the meat. This is a much better solution than overcooking the whole bird just to get a golden color.
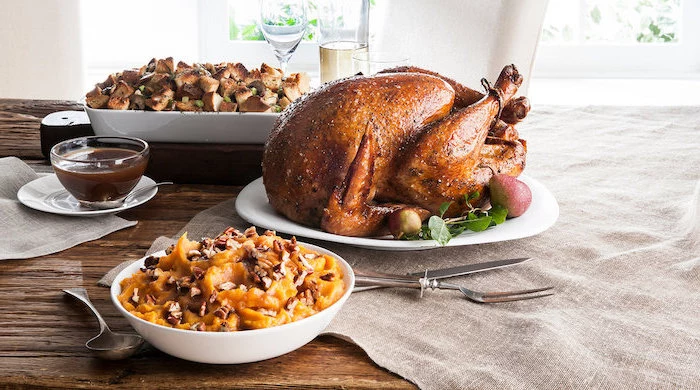
Don’t underestimate the power of your pan drippings. For a truly memorable gravy:
- After removing the turkey, pour the drippings from the roasting pan into a glass measuring cup. Let the fat rise to the top.
- Spoon off a few tablespoons of that flavorful fat and use it to make your roux (the flour-and-fat base), instead of plain butter.
- Use the homemade stock you made from the giblets as your liquid. This layering of turkey flavors is what separates good gravy from great gravy.
Contrary to popular belief, turkey was likely not on the menu at the 1621 harvest meal we call the ‘First Thanksgiving’. Venison, duck, goose, and seafood were the documented centerpieces.
Roasting: The classic method. It creates a beautiful, whole-bird presentation and a house filled with festive aromas. It allows for pan gravy from the drippings, a Thanksgiving staple.
Smoking: This method imparts a deep, smoky flavor that is unparalleled. It frees up your oven for side dishes but requires a smoker and several hours of attention. The skin is usually dark and flavorful but not as crisp as a roasted bird’s.
Choose roasting for tradition and killer gravy; choose smoking for a bold, unforgettable flavor profile.
To stuff or not to stuff?
Modern food safety guidelines strongly advise against stuffing the turkey’s cavity. It’s very difficult for the stuffing to reach a safe temperature (165°F) without overcooking the breast meat. Instead, cook your stuffing in a separate baking dish. You can still get that turkey flavor by moistening it with some of the pan drippings or that giblet broth you made!
- It results in deeply seasoned, juicy meat.
- It produces incredibly crispy skin.
- It’s far less messy than a wet brine.
The secret? A dry brine! Simply rub a mixture of kosher salt (we recommend Diamond Crystal for its texture), a little sugar, and your favorite dried herbs all over the turkey. Let it rest uncovered in the fridge for 24-72 hours. The salt works its magic, giving you a perfect bird with minimal effort.
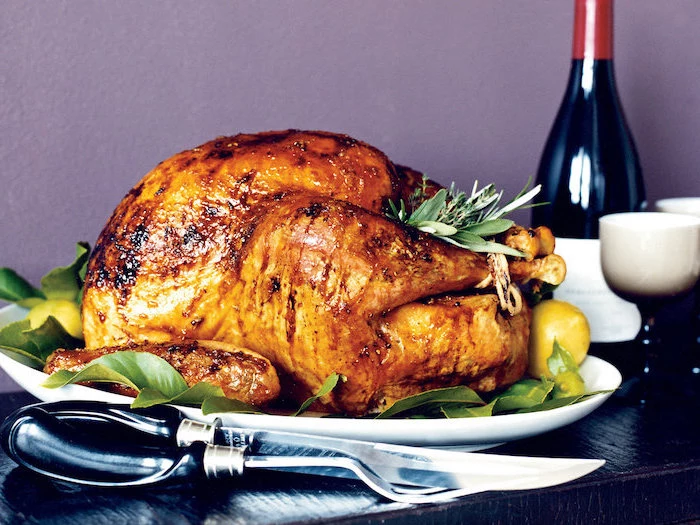
Your wine choice can elevate the entire meal. Look for versatile wines that won’t overpower the variety of flavors on the table.
- For white wine lovers: A dry Riesling or a rich, oaked Chardonnay balances the savory meat and sweet side dishes.
- For red wine lovers: A light-bodied Pinot Noir or a fruity Beaujolais offers bright acidity and soft tannins that complement turkey without overwhelming it.
The problem: Lumpy gravy. The quick fix: Pour the gravy through a fine-mesh sieve to strain out the lumps. For a smoother texture, you can also use an immersion blender directly in the pot for a few seconds. The key to preventing lumps in the first place is to cook your flour-and-fat roux for at least a minute before *slowly* whisking in your warm liquid.
A single turkey carcass can produce 2-3 quarts of rich, gelatinous stock for almost no cost.
Don’t throw away the frame! After carving, place the carcass in a stockpot, cover with water, and add vegetable scraps (onion peels, carrot ends, celery tops). Simmer for a few hours. This liquid gold can be frozen and used for months to make incredible soups, stews, and sauces, stretching your holiday dollar further.
Think beyond American Thanksgiving for inspiration. In Mexico, holiday turkey might be served with a complex, dark mole sauce. In the UK, a Christmas goose is more traditional, but turkey is often served with sausage-meat stuffing and ‘pigs in blankets’ (sausages wrapped in bacon). Borrowing an element, like a spicy glaze or a savory side, can add a personal and unexpected twist to your feast.