How to Make a Holiday Vegetable Platter That People Actually Want to Eat
For years, I’ve been the person in the back of the kitchen prepping for big holiday feasts. I’ve seen it all, from countless turkeys to mountains of pies. And through it all, one of my most important missions was always the humble vegetable platter.
In this article
So many people treat it like an afterthought, right? Just something to put out before the real food arrives. But in a professional kitchen, we see it as the unsung hero of the meal. It’s that moment of cool, crisp freshness that cuts through all the rich, heavy holiday food. A well-made platter isn’t just a pile of carrots; it’s a sign that the host really cares.
Think about it. The clean crunch of a cucumber is the perfect reset button for your palate after a bite of creamy gravy. It’s also a beautiful, edible centerpiece before the main event. I want to walk you through the pro techniques I’ve learned, and honestly, they’re not complicated. They’re just based on understanding how to make vegetables taste their absolute best. Let’s build a platter that looks and tastes like it came from a high-end caterer.
The Simple Science Behind a Perfectly Crisp Veggie
The difference between a sad, floppy veggie tray and a vibrant, crisp one comes down to a little bit of kitchen science. We use these tricks every day to get consistent results, and you can, too.
First up is something called turgor pressure. Sounds fancy, but it just means a crisp vegetable is one that’s full of water. When the plant cells are plump with water, they’re firm and snappy. When they lose water, they get limp and sad—think rubbery celery. The fix? Store your cut veggies like carrots, celery, and jicama submerged in a container of cold water in the fridge. They’ll absorb that water and be extra-crisp when you serve them. This is our go-to trick for prepping a day or two in advance.
Then there’s the browning issue. Ever cut a potato or jicama and watched it turn an unappetizing brown? That’s just oxidation—enzymes in the veggie reacting with air. To stop this, we use what’s called acidulated water. Just mix a quart of cold water with the juice of half a lemon or about two tablespoons of white vinegar. Plop your cut veggies in there while you work. The acid stops the browning reaction in its tracks. Just give them a quick rinse before plating so they don’t taste like lemon.
The Magic of Blanching and Shocking
Some vegetables are just too tough or fibrous to be enjoyable raw. I’m looking at you, broccoli, cauliflower, and green beans. The pro solution is a quick two-step process: blanching and shocking.
You simply boil the vegetables for a super short time, then immediately plunge them into an ice bath. This does a few amazing things. It tenderizes them just enough, brightens their color (especially for green veggies), and deactivates the enzymes that make them go bad faster. The ice bath—the “shocking” part—is critical. It stops the cooking instantly, so you get a tender-crisp texture, not mush.
Getting Your Gear and Prep Timeline Sorted
In a commercial kitchen, timing is everything. A veggie platter is the perfect thing to prep ahead, freeing you up on the big day. Here’s how we do it.
Your Must-Have Tools
You don’t need a ton of fancy gadgets, just a few key items that make the job way easier (and safer).
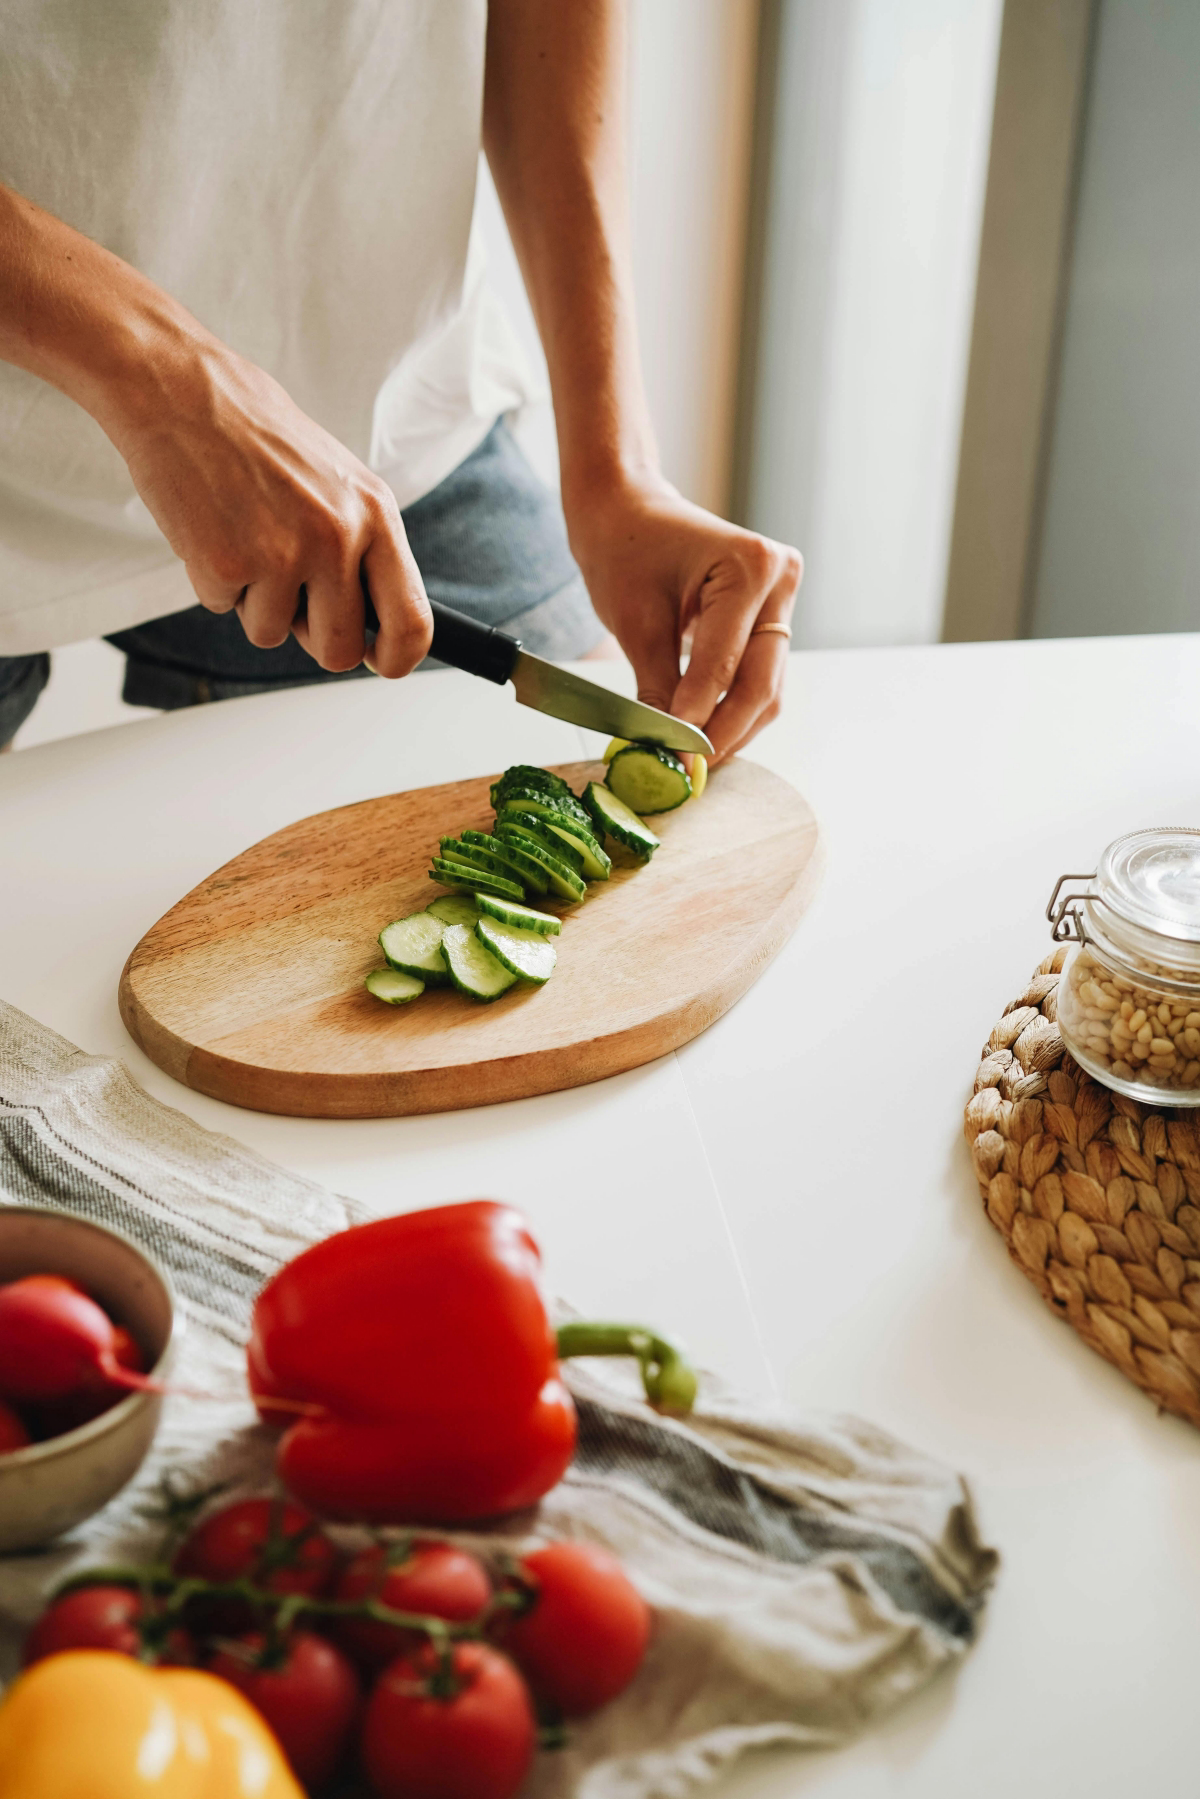
- A Sharp Chef’s Knife: An 8-inch chef’s knife is your best friend. A sharp knife is actually safer because it won’t slip. A good one can run you anywhere from $50 to $150, but it’s an investment that will last for years.
- A Big Cutting Board: Make sure it’s stable. Quick tip: Place a damp paper towel underneath it to keep it from sliding around on your countertop.
- A Large Pot: For blanching, you need a big stockpot. Don’t crowd the veggies! They need room to swim around, or they’ll steam instead of boil.
- A Spider Strainer: This is a game-changer. It’s a long-handled, basket-shaped strainer that lets you pull all the veggies out of the boiling water at once. So much better than a slotted spoon. You can find one for about $15 online or at a kitchen supply store.
- Large Bowls: You’ll need at least two—one for the ice bath and one to hold the veggies after they’re drained.
A Quick Guide to Blanching Times
Timing is everything here. Use a large pot of rapidly boiling, salted water. And by salted, I mean about 1 tablespoon of salt per gallon of water—it should taste lightly seasoned, not like the ocean.
- Broccoli & Cauliflower Florets: 1-2 minutes. The broccoli will turn a vibrant green.
- Green Beans: 2-3 minutes, until tender-crisp.
- Asparagus Spears: 1.5-2 minutes, depending on how thick they are.
- Snap Peas or Snow Peas: Just 30-45 seconds. They barely need any time.
As soon as the timer goes off, get them into the ice bath immediately. Let them chill for about the same amount of time they were in the hot water, then drain them thoroughly and pat them dry. So important!
My Make-Ahead Holiday Timeline
Let’s say the big dinner is on a Thursday. Here’s how you can prep without any last-minute stress.
- Tuesday: Go shopping for all your veggies and dip ingredients. That evening, wash, cut, and prep your hardiest vegetables. Carrots, celery, and bell peppers can be cut. Store the carrots and celery in cold water, and the peppers in an airtight container lined with a damp paper towel.
- Wednesday: This is blanching day. Blanch your broccoli, cauliflower, and green beans, then dry them completely and store them in airtight containers in the fridge. This is also the perfect day to make your dips. Most homemade dips taste even better after the flavors have a day to meld.
- Thursday (Go Time!): Your only job today is to assemble the platter. Drain your water-stored veggies, pat everything dry, and arrange it all beautifully. Your stovetop and your sanity will thank you.
Let’s Talk Ingredients and Budget
A platter is only as good as what’s on it. Being selective and smart about your ingredients is what takes it to the next level.
How Much to Buy? (And How to Save Money)
This is the number one question I get. For a holiday appetizer, I plan on about a half-pound of assorted vegetables per person (before trimming). So for 10-12 guests, you’ll want about 5-6 pounds of produce total.
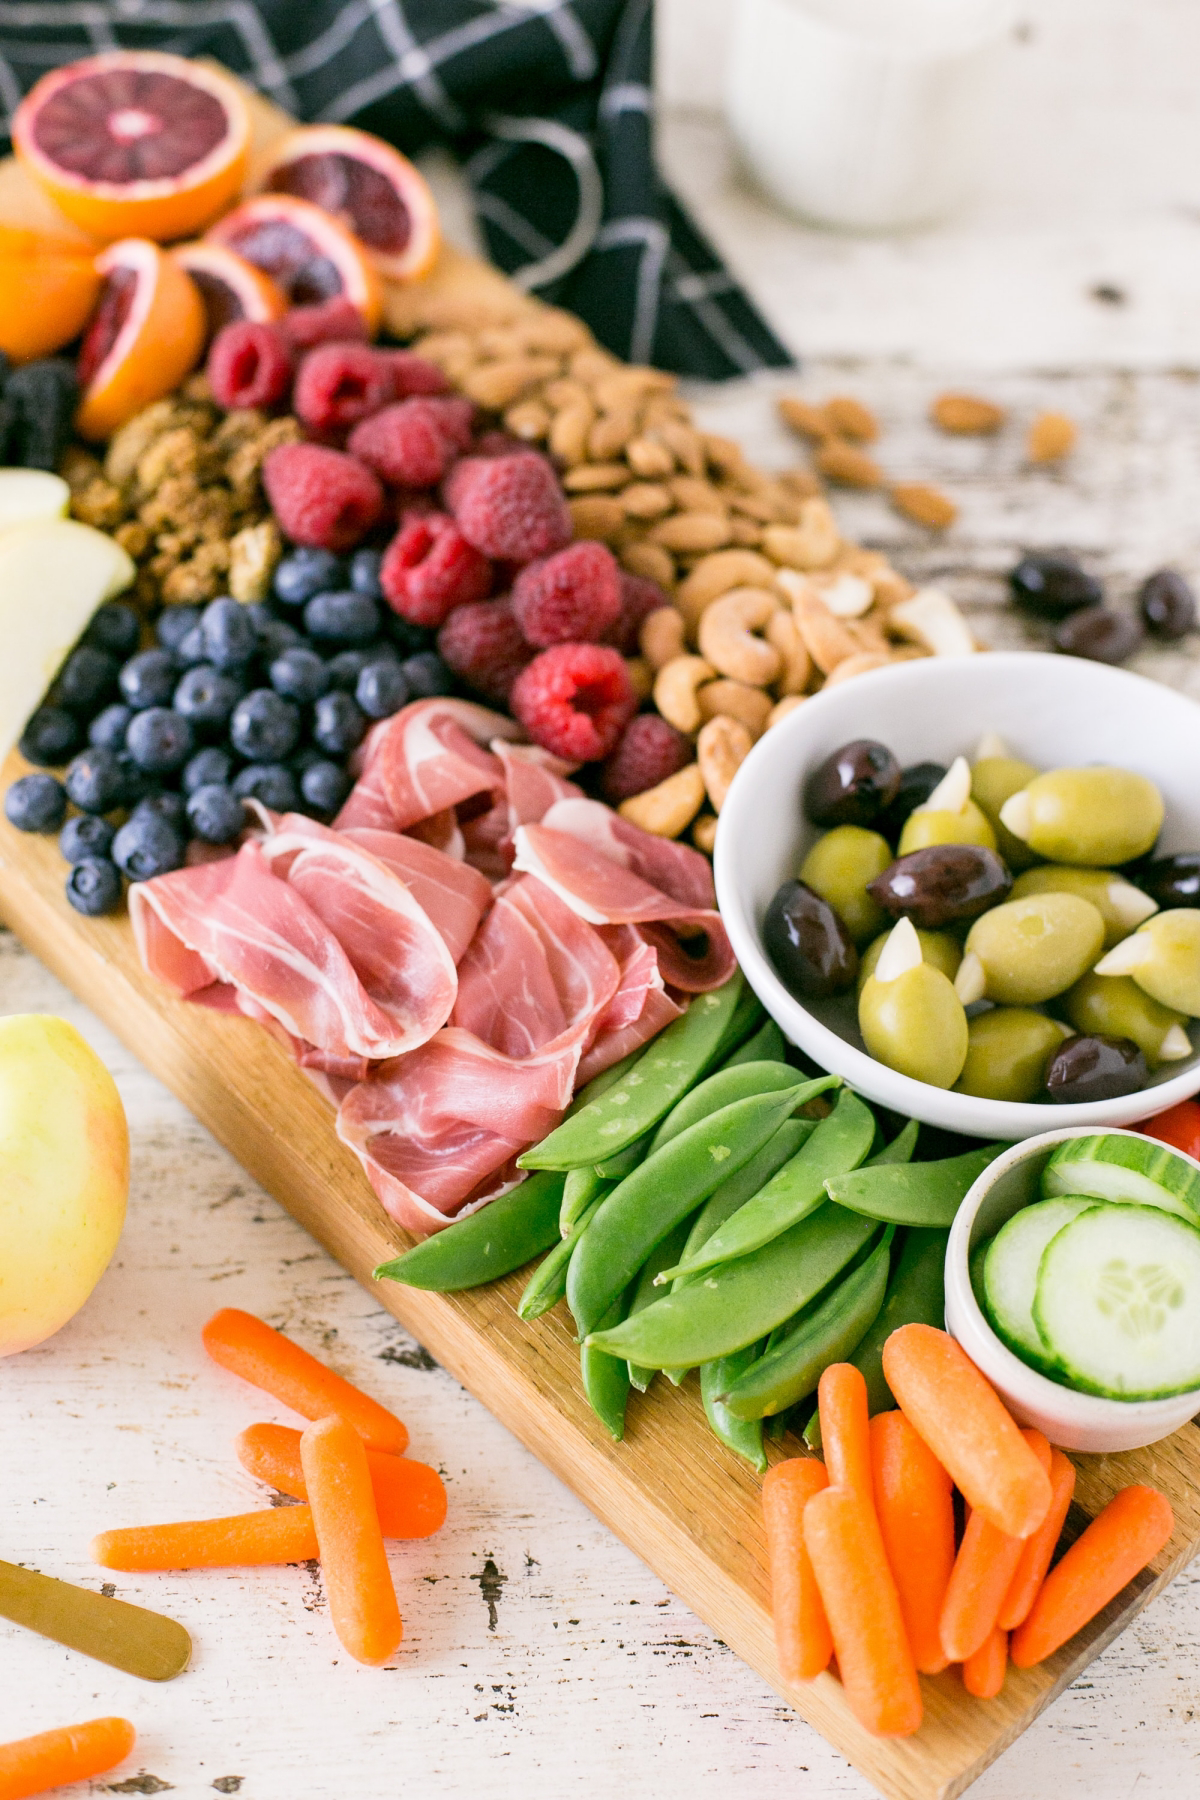
To save money, lean into the cheaper staples. Carrots, celery, and cucumbers are always budget-friendly. You can supplement with smaller amounts of the pricier stuff, like asparagus, sugar snap peas, or fancy mini peppers. A gorgeous platter for 10-12 people can easily be made for between $25 and $40, especially if you make your own dips.
By the way, some veggies just don’t belong on a raw platter. I’d avoid things like raw potatoes, eggplant, or winter squash. They’re just not pleasant to eat uncooked.
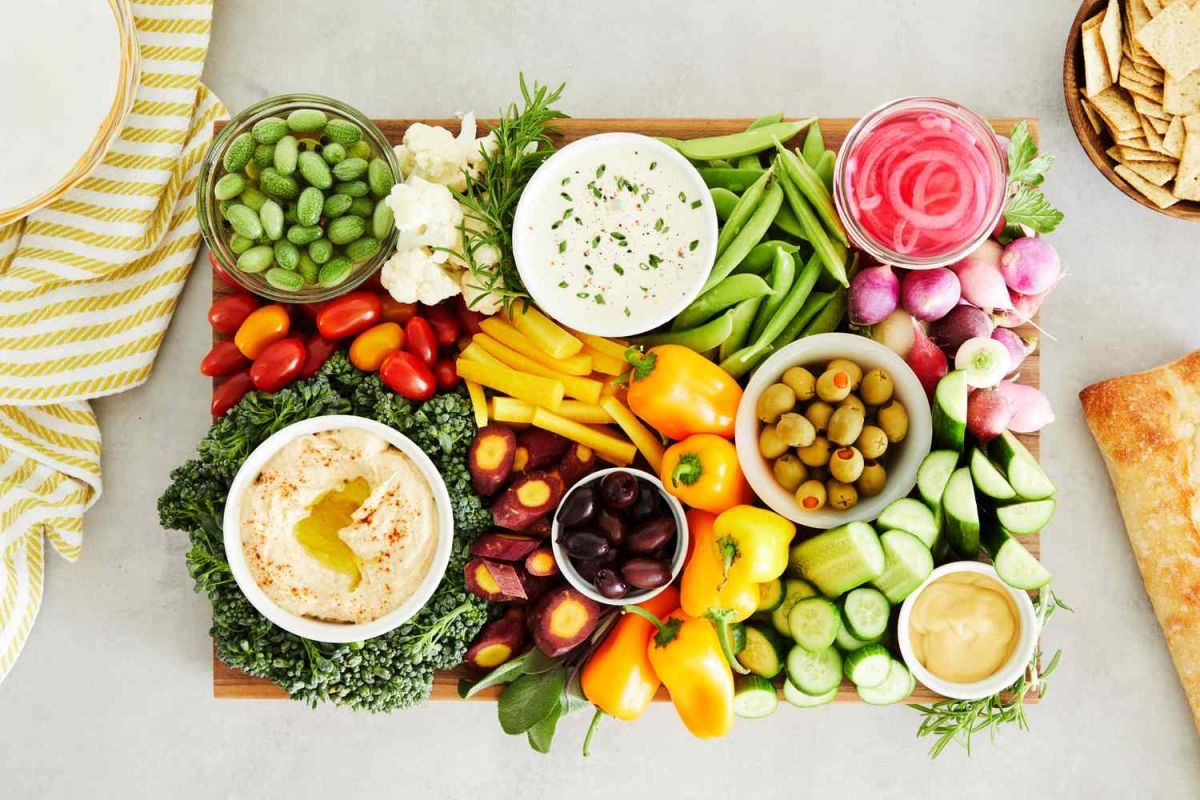
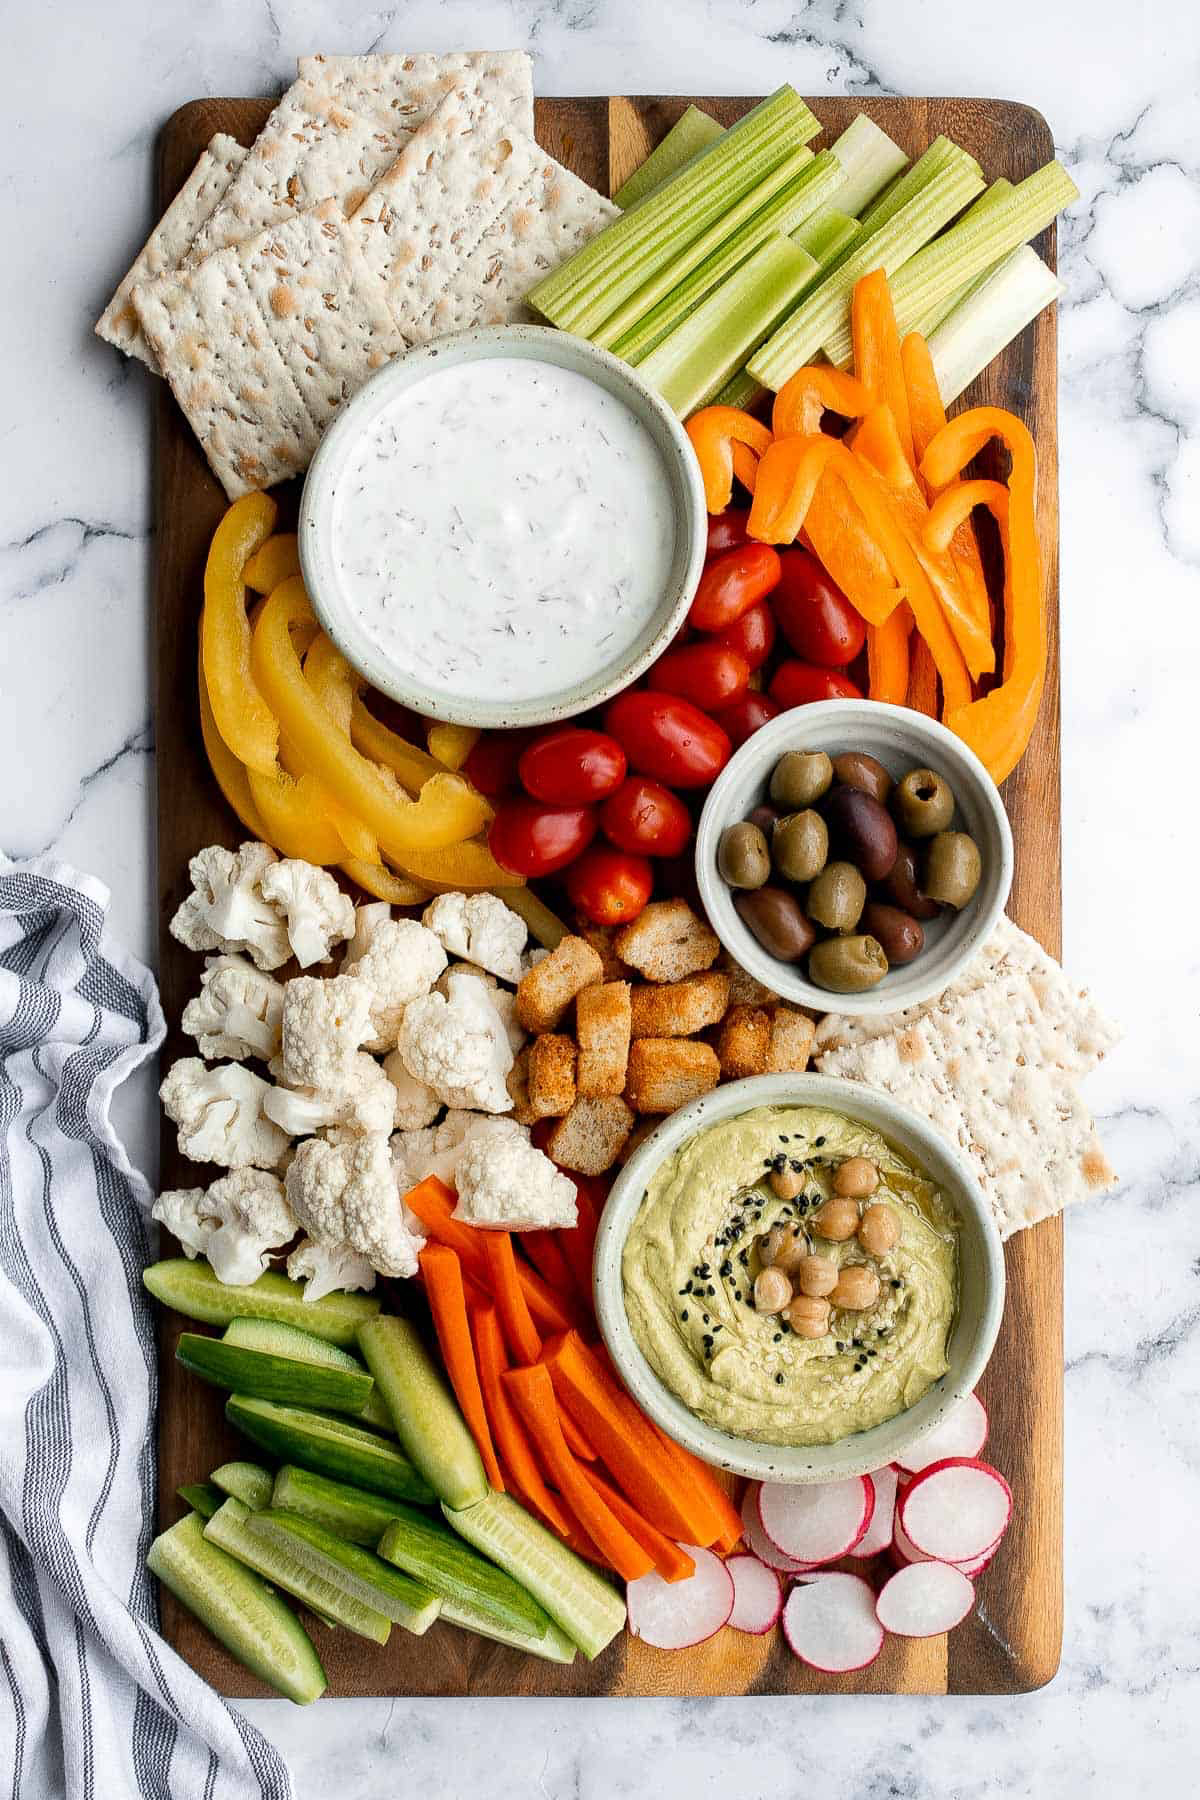
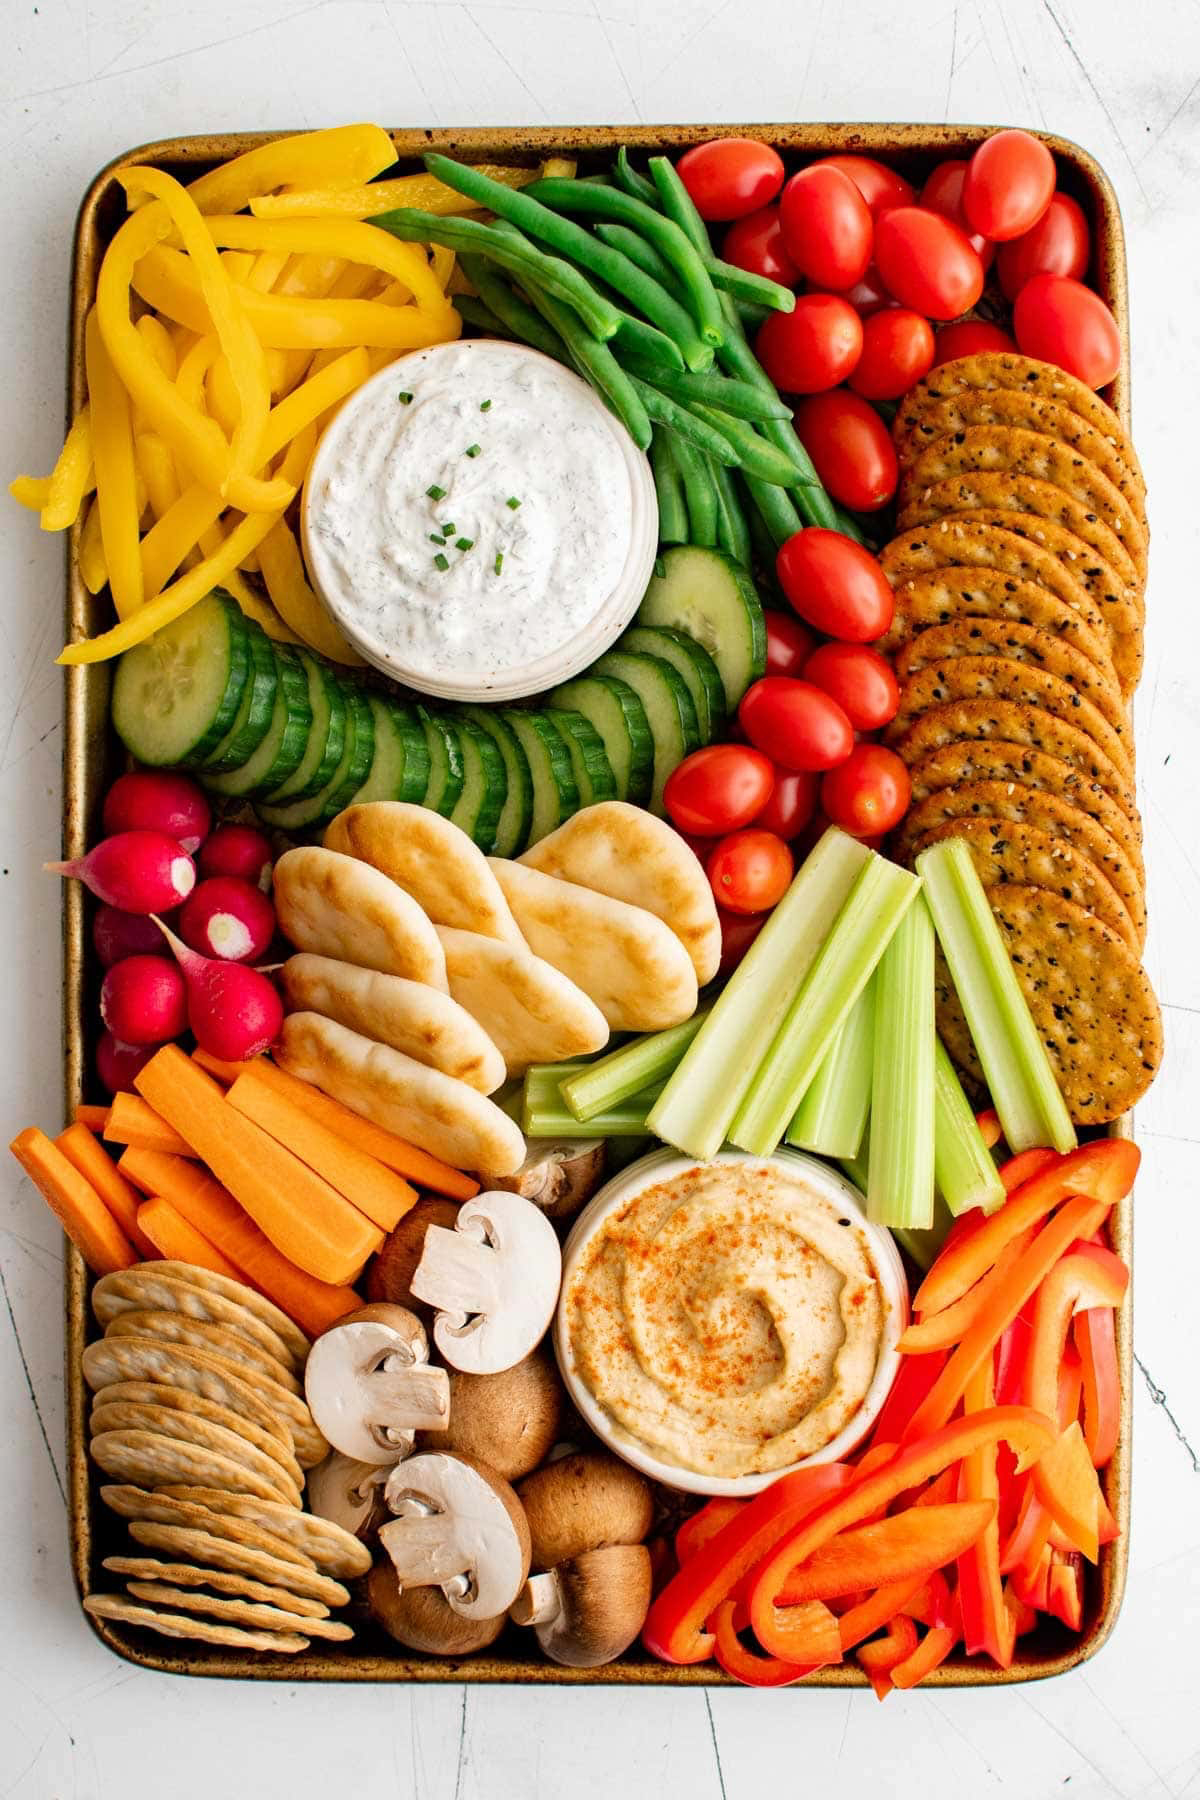
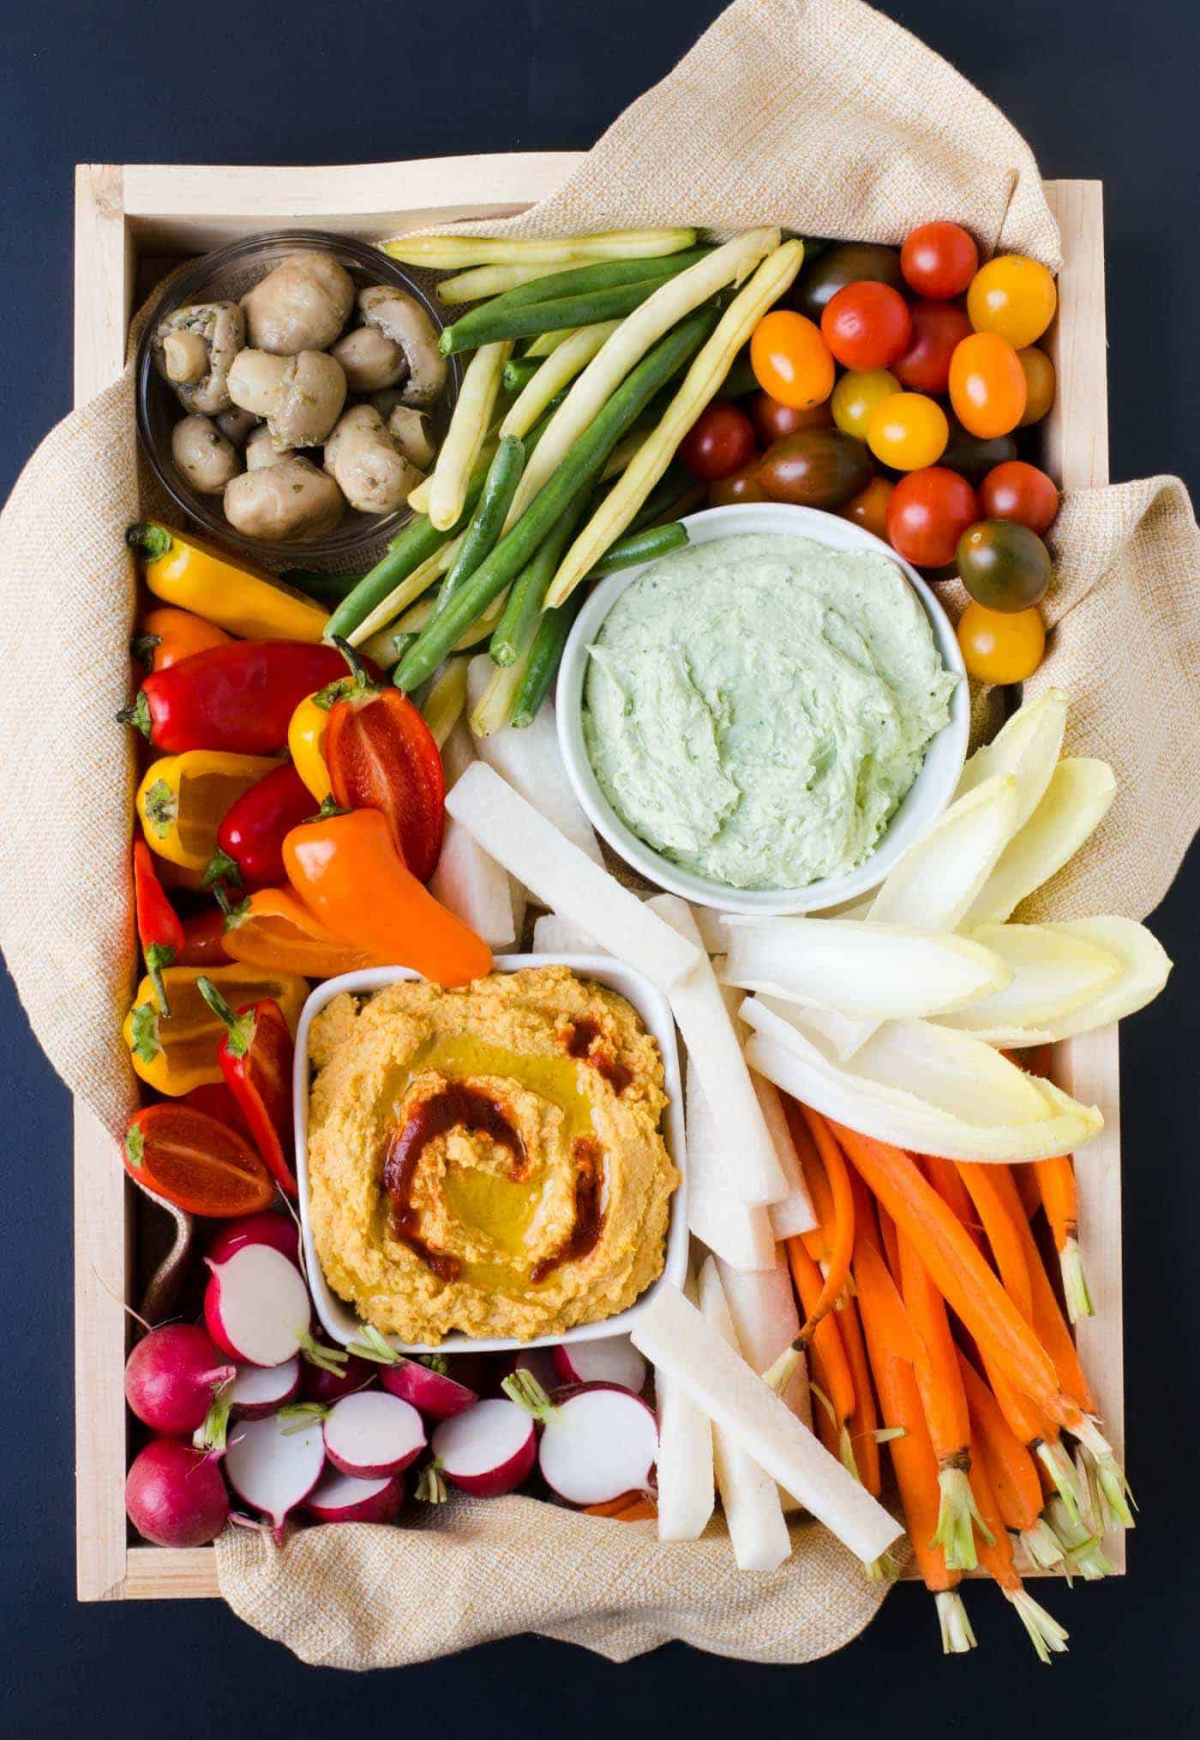
The Best Dips for the Job
A great dip is non-negotiable. And while store-bought is fine, homemade is on another level. I always suggest having two options: one creamy and rich, and one that’s a bit lighter and herb-focused. Here’s a foolproof recipe for a classic crowd-pleaser.
Recipe: Classic Dill Dip
- 1 cup sour cream
- 1 cup mayonnaise
- 1/4 cup chopped fresh dill (or 1.5 tbsp dried)
- 2 tbsp chopped fresh parsley
- 1 tbsp minced onion or shallot
- 1 tsp onion powder
- 1/2 tsp garlic powder
- Salt and pepper to taste
- A squeeze of fresh lemon juice (this is the secret ingredient!)
Just mix everything together in a bowl. For the best flavor, make it the day before you plan to serve it. The flavors really need time to get to know each other. Before serving, give it a stir and taste it—it might need another pinch of salt or a little more lemon juice to brighten it up.
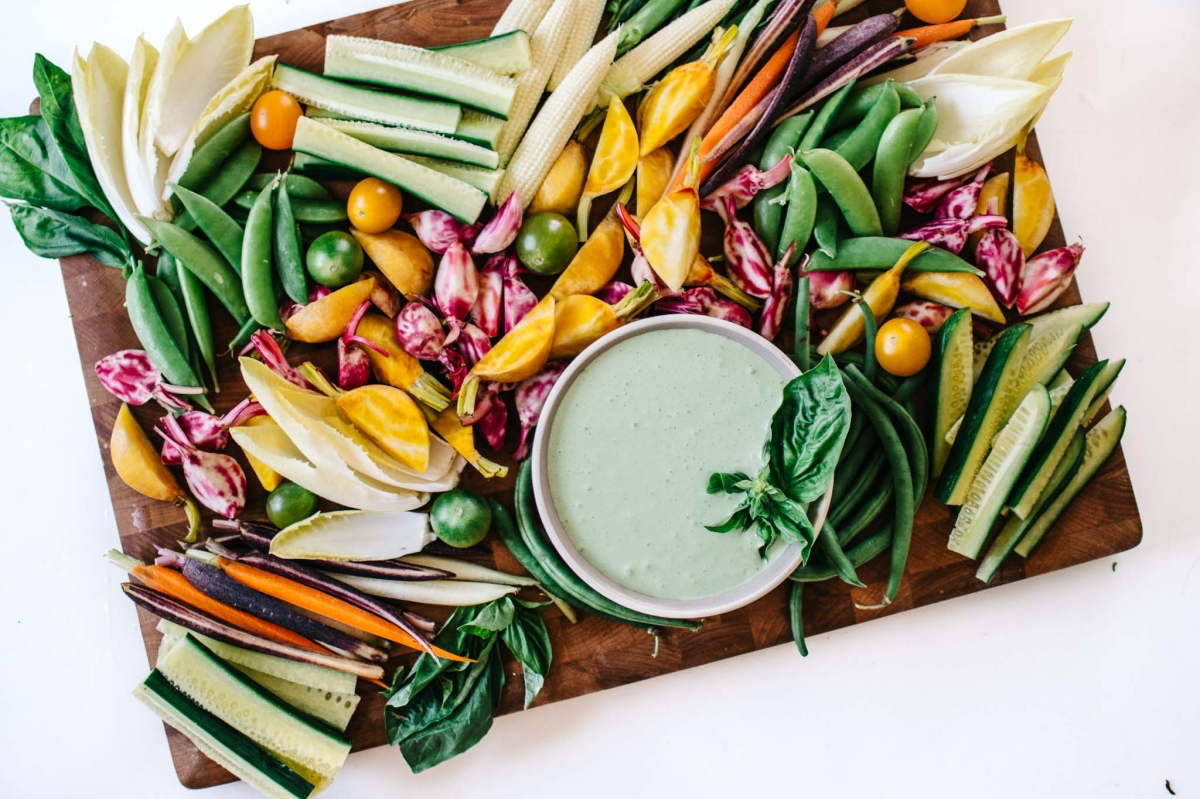
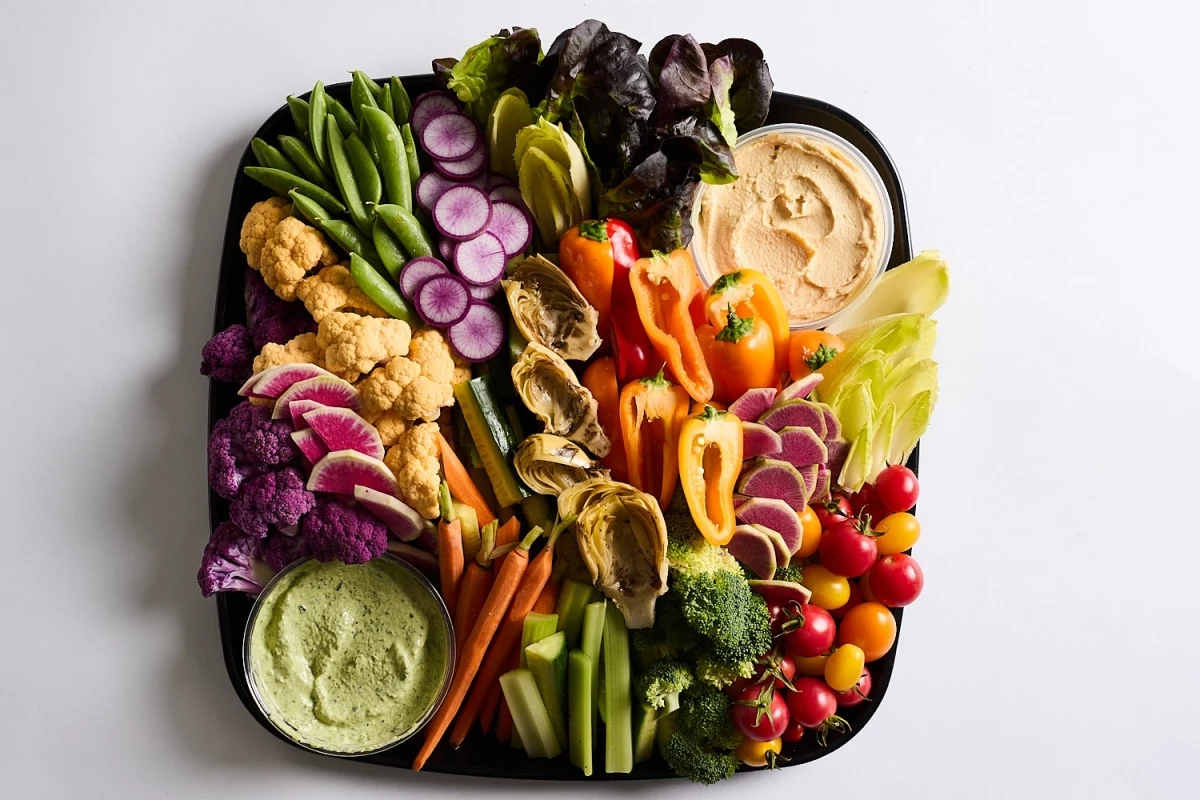
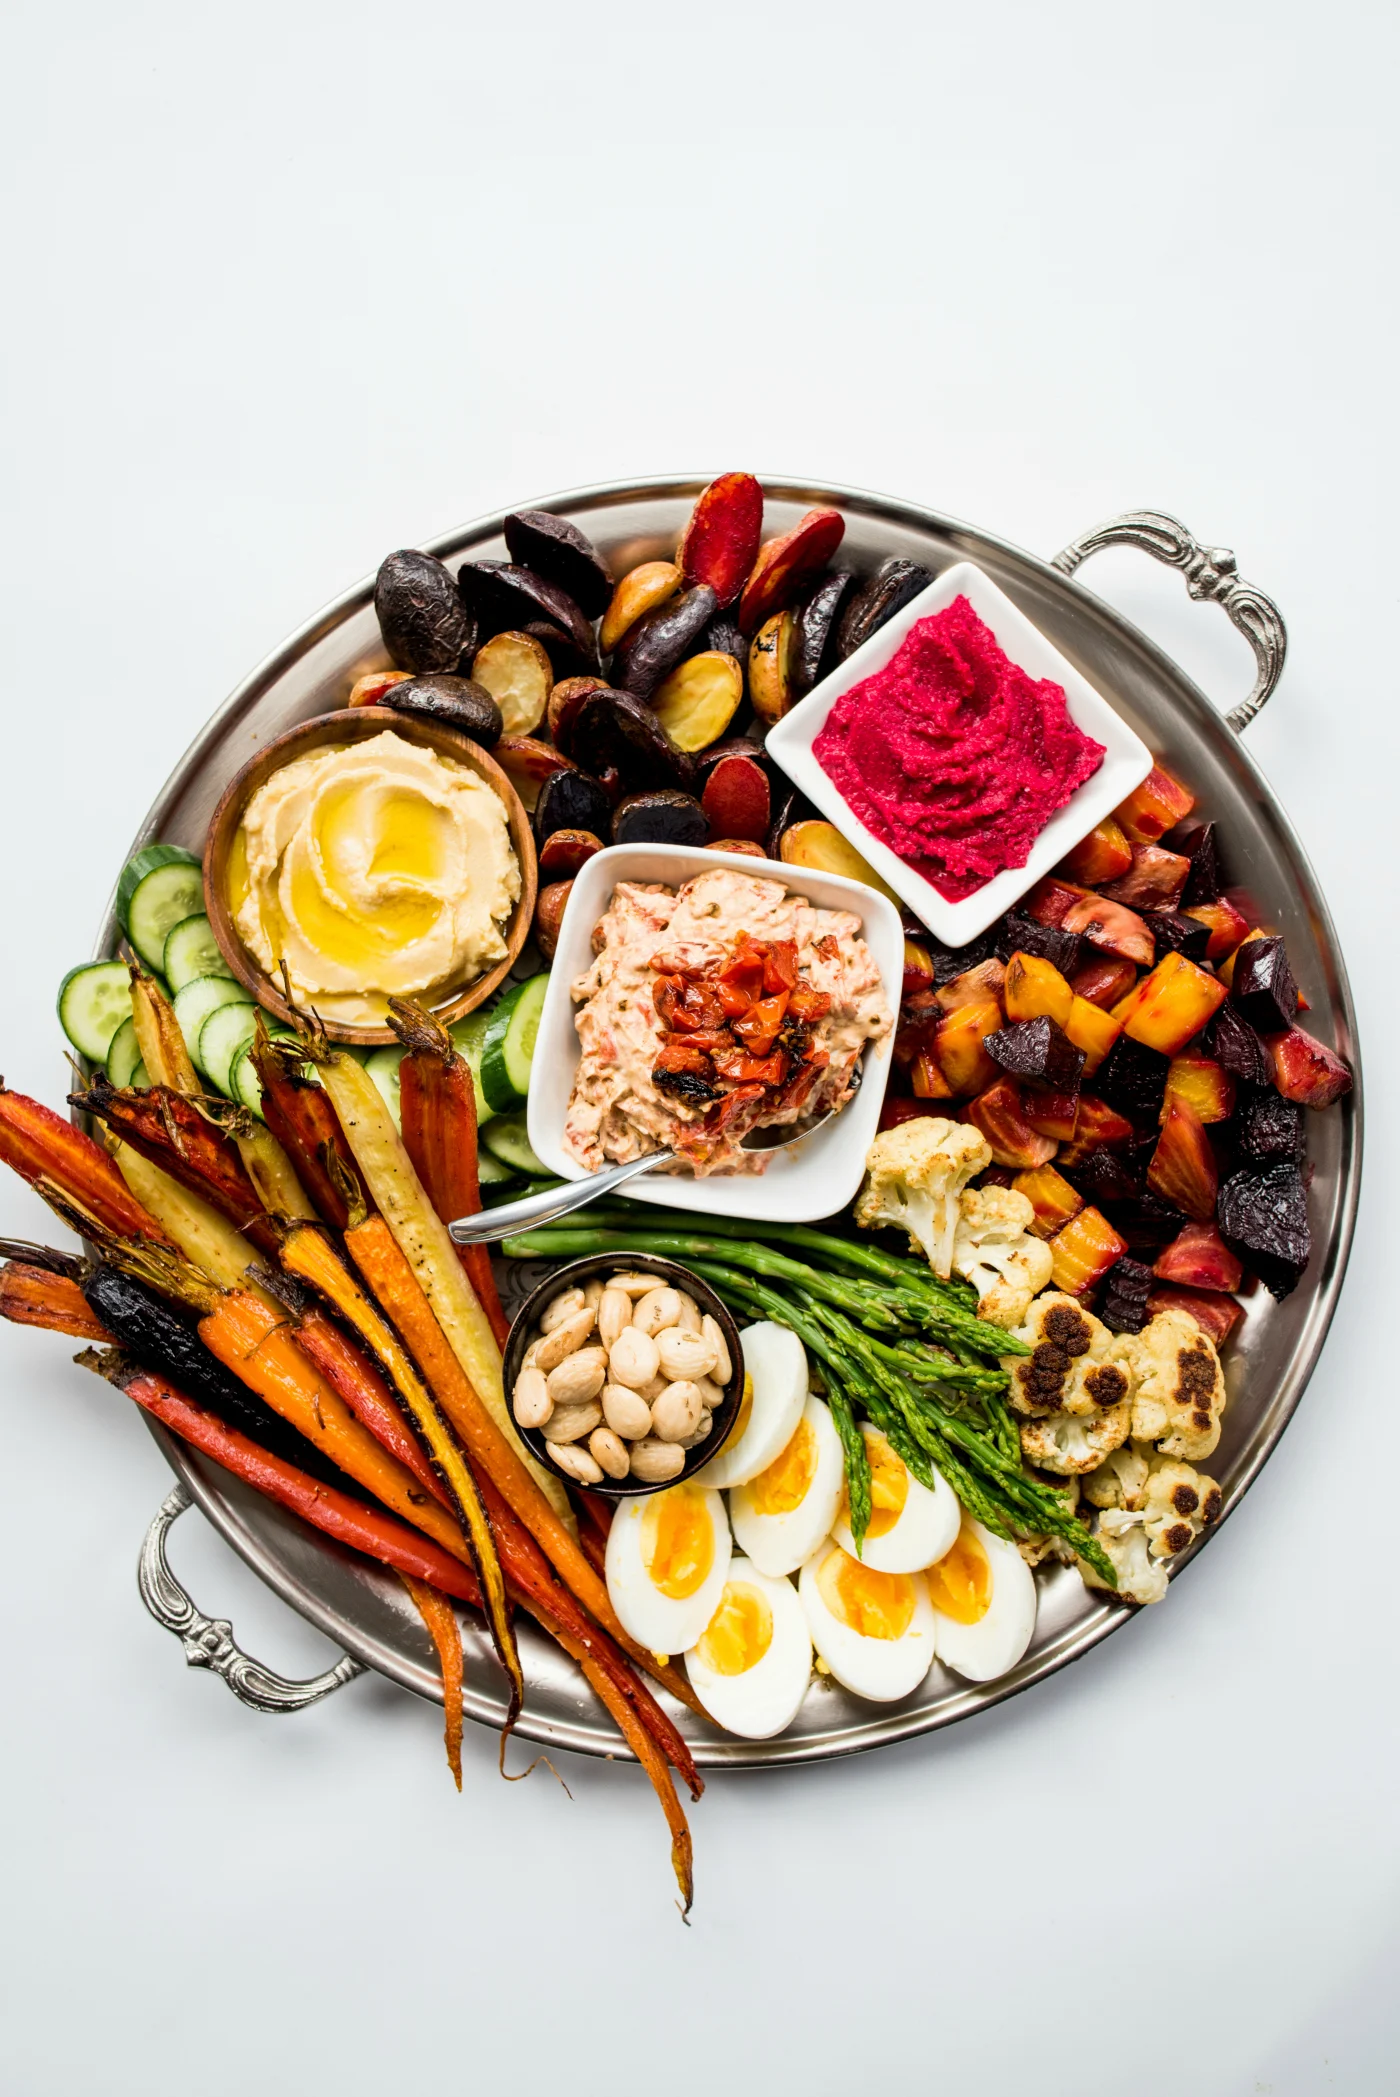
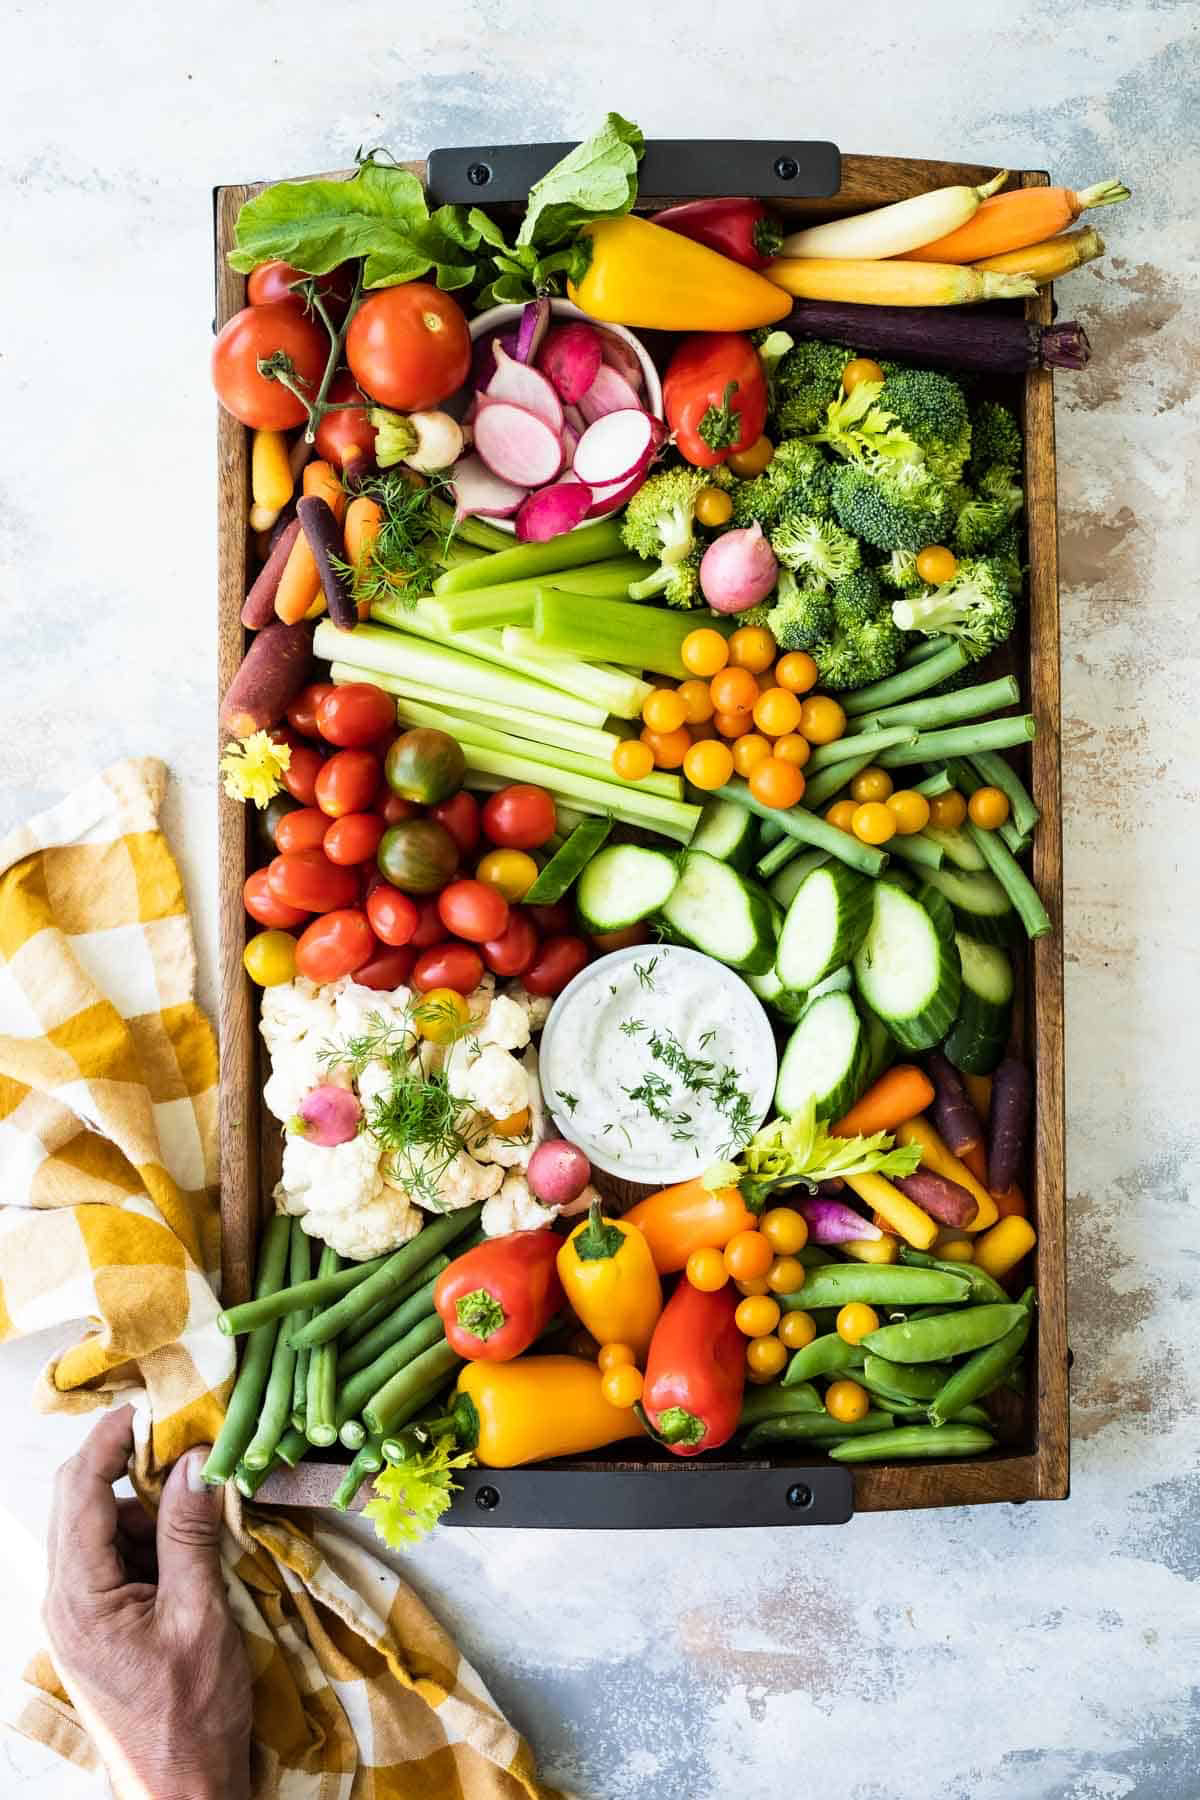
The Art of Assembly: Make It Beautiful
Okay, this is the fun part. Let’s build this thing. Think like a painter, focusing on color, shape, and flow.
- Choose Your Canvas: The platter itself matters. A big wooden cutting board gives a rustic, warm vibe. A white ceramic platter looks clean and modern. A dark slate tile makes the colors of the veggies pop. Whatever you use, make sure it’s big enough so you’re not cramming everything together.
- Place Your Anchors: Put your dip bowls on the platter first. Don’t just stick them in the center! Try placing two or three small bowls in a loose triangle or along a gentle curve. This instantly creates visual interest and gives you sections to fill.
- Create Flow and Color: Now, start arranging the vegetables. Work from the dip bowls outward. Instead of making separate piles, create sweeping lines and curves. Let the carrot sticks flow into the bell pepper strips. Fan your cucumber slices. Group things by color—put the green broccoli and snap peas next to the pale white cauliflower to make both colors stand out more.
- Vary Shapes and Textures: Place long, thin carrot sticks next to round radishes and chunky broccoli florets. This contrast is what makes the platter look dynamic and abundant. Tuck in some sprigs of fresh herbs like dill or parsley to fill any gaps and add a final touch of green.

Quick Troubleshooting & Final Tips
Things can go wrong. It happens! Here are a few common issues and how to fix them.
- “My veggies are mushy!” Ugh, the worst. This usually means you blanched them too long or your ice bath wasn’t cold enough. Next time, set a timer and make sure you have plenty of ice.
- “My dip is bland!” This is a common problem if you taste it right after mixing. Let it sit overnight! If it’s still bland, it almost always needs more salt and a squeeze of fresh lemon juice or a splash of vinegar to wake up the flavors.
- “I’m in a huge rush!” We’ve all been there. My quick-win platter: Grab a bag of baby carrots, a cucumber, some sugar snap peas, and a pint of cherry tomatoes. Give them a 30-minute soak in ice water to make them super crisp. Pat dry and serve with a high-quality store-bought hummus and that Classic Dill Dip you made yesterday. Done.
So there you have it. With a little bit of prep and a few pro tricks, you can totally transform your holiday veggie platter from a boring obligation into a fresh, delicious highlight of the meal. Enjoy!
Galerie d’inspiration
Choosing the right dip is as crucial as prepping the vegetables. It sets the tone for the entire platter. The choice often comes down to two paths:
The Creamy Classic: Think rich and comforting. Instead of a standard ranch, elevate it by using a base of Greek yogurt and sour cream, then blitzing in fresh dill, chives, and a little garlic powder. For a shortcut that still feels luxurious, whip a block of Boursin cheese with a splash of milk until it’s perfectly dippable.
The Vibrant Modern: Go for bold color and flavor. A bright pink beet hummus or a zesty muhammara (roasted red pepper and walnut dip) adds visual excitement. These dips, often based on vegetables or legumes, offer a lighter, more complex counterpoint to the raw veggies.
The best choice? Offer one of each to truly impress your guests.
More than 40% of food waste in the U.S. happens at home. A well-planned veggie platter is a great way to use up those odds and ends in the crisper drawer before a big holiday meal.
That lone carrot, the half-cucumber, those few remaining radishes? They are perfect candidates for your platter. This isn’t just about saving money; it’s about smart, sustainable cooking. Blanching tougher vegetables like broccoli florets or green beans for 60 seconds not only makes them more tender and vibrant but also makes them more palatable, ensuring every last piece gets eaten.