Tired of Boring Wreaths? Here’s How to Make a Thanksgiving Doorpiece That Actually Looks Pro
I’ve been creating seasonal decor for a long time, and I’ve seen Thanksgiving trends come and go. But honestly, what people want when they walk up to a front door never really changes. They’re looking for a feeling of warmth, of coming home. That vibe doesn’t come from a generic, store-bought wreath that looks just like the one next door. It comes from something built with care and a bit of personality.
In this article
Making a beautiful doorpiece for Thanksgiving is a bit more involved than just gluing a few leaves to a hoop—think of it as a mini construction project. It’s all about understanding your materials, balancing weight, and making sure it lasts. Get it right, and your creation will look amazing from the first crisp autumn days right through to Thanksgiving dinner. Get it wrong, and you’re looking at a saggy, faded mess… or worse, one that falls and damages your door. This guide is packed with the real techniques the pros use, including the mistakes I’ve made and the lessons I’ve learned along the way.
First Things First: Your Base and Tools
Before you even think about pumpkins or pretty ribbons, you have to choose your foundation. This decision shapes the whole project, from how you build it to how you hang it. In the professional world, we generally stick to three main types of bases.
So, which base is right for you? Let’s break it down:
- Grapevine Wreaths: This is my go-to recommendation for almost everyone, especially beginners. They have a wonderfully wild, natural look that’s perfect for fall. When you’re shopping for one at a place like Michaels or Joann, give it a little shake. If it feels flimsy or drops a ton of debris, pass. A good one, which usually costs between $15 and $25, will be tightly wound. For a standard 36-inch door, an 18-inch or 24-inch wreath is the perfect size.
- Wire Frames: These are the simple metal rings you often see used for Christmas wreaths, but they are fantastic for fall, too. The big advantage here is that you can build a much fuller, more symmetrical piece by packing the frame with a base like sphagnum moss. Heads up, though: a fully packed 24-inch wire frame gets HEAVY. I’ve seen people try to hang these with a flimsy plastic hook, only to hear a crash in the middle of the night. You absolutely need a heavy-duty magnetic hook (rated for at least 15 pounds) or a proper over-the-door hanger for these.
- Swag and Garland Bases: Sometimes, a circle just doesn’t work. A vertical swag or a garland draped around the doorframe can make a huge statement. You can buy a pre-made pine or eucalyptus base or make your own by wiring sturdy branches together. A word of warning: this is a more advanced technique. My first attempt failed because the branches were too fresh; they shrank as they dried and the whole thing fell apart. Now I know to use partially dried branches. A fresh branch feels damp and bends like a noodle; a totally dry one will snap. You want that sweet spot in between where it feels dry to the touch, holds a curve, but won’t break unless you really force it.
The Tools You Actually Need
You don’t need a massive workshop. Just a few key tools will make the job cleaner, safer, and give you that professional finish. Here’s what’s always on my workbench:
- Paddle Wire: This is your best friend, seriously. It’s thin, flexible wire on a little spool. I use 22-gauge green wire for almost everything. It’s strong enough to hold small gourds but thin enough to disappear into the arrangement. You can grab a spool for about $5.
- Florist’s Snips or Pruners: Please, do not use your good kitchen scissors for this. You need a sharp, tough blade to get through woody stems and wire. Clean cuts are safer for your hands and help your materials last longer.
- High-Temperature Glue Gun: For a bond that actually holds, a high-temp gun is a must. The bond is way stronger, especially on porous stuff like pinecones and wood. Low-temp glue is fine for ribbon, but it won’t hold a mini pumpkin on a cold, damp porch. A hard-learned lesson: be careful! A high-temp glue burn is no joke. I always keep a small bowl of cold water nearby, just in case.

Quick Win: The 15-Minute Door Swag
Don’t have a lot of time or just want something super simple? I get it. Try this: grab three nice stems of preserved eucalyptus, maybe from a craft store or an online shop like Afloral. Hold them together so they cascade down nicely, and then wrap paddle wire tightly around the top of the stems. To hide the wire, just tie a big, beautiful burlap or velvet ribbon over it. Hang it from a nail or hook, and you’re done! It’s elegant, simple, and takes less than 15 minutes.
Let’s Build a Classic Grapevine Wreath (The Pro Way)
Ready to tackle a full-on project? Let’s build a classic 24-inch grapevine wreath. This is a perfect weekend project. Plan for about 2-3 hours, especially for your first one, and put on some good music. The whole thing should cost you between $40 and $60, depending on the materials you choose.
Here’s your shopping list:
- 24-inch Grapevine Wreath: $15 – $25
- One or two bunches of preserved greenery (like eucalyptus or oak leaves): $15 – $20
- 3-5 Mini Pumpkins or Gourds (real or faux): $5 – $10
- Accent pieces (pinecones, berry sprigs, feathers): $5 – $10
- 22-gauge Paddle Wire: ~$5
- High-Temp Glue Sticks: ~$5
Okay, let’s get started.
- Make a Hanger First: Before you add a single leaf, create a strong hanging loop. Don’t just trust the grapevine. Take a 12-inch piece of sturdy wire, loop it around the thickest part of the wreath frame at the top, and twist it on itself until it’s rock-solid.
- Build Your Greenery Base: Start with your largest leaves, like preserved magnolia. Tuck their stems deep into the grapevine, following the natural swirl of the vines. Add a dab of high-temp glue where the stem meets the wreath for extra security. Layer in your other greenery to create depth. Pro tip: don’t cover the entire wreath! A common mistake is to completely hide the beautiful grapevine base. Let it peek through.
- Wire Your Heavy Stuff: Never, ever just glue heavy items like pumpkins on. It’s a recipe for disaster. For a mini pumpkin, push a sturdy piece of wire all the way through the bottom third. Then, do it again with a second piece of wire to form an ‘X’ inside. You should now have four wire “legs” coming out the back. Twist these together to create a single anchor, then thread that anchor through the grapevine and twist it tightly at the back to secure it.
- Place Your Focal Points: Attach your biggest items first, like a cluster of three pumpkins on the bottom-left for a modern, asymmetrical look. Once they’re wired on, hang the wreath up for a second to check the balance. It’s a pain to fix a lopsided wreath after everything is glued down.
- Fill in with Accents: Now for the fun part. Use hot glue to add your lighter elements. Tuck in small clusters of pinecones. Add sprigs of faux berries for a pop of color. Maybe some pheasant feathers for height and texture. Step back every few minutes to look at the overall design. Knowing when to stop is half the battle.
Using What’s Around You (And How to Prep It)
One of the best parts of seasonal design is using what’s local. The materials you’ll find in New England are completely different from what’s available in the Southwest, and your decor can reflect that.
- In the Northeast and Midwest, you’ve got classic fall covered with oak leaves, maple leaves, and all kinds of gourds. Dried corn husks add amazing texture. (By the way, if you find bittersweet vines, use a good faux version—the real berries are toxic to pets).
- Down South, magnolia leaves are the star. Their big, glossy leaves have a beautiful velvety brown underside that’s perfect for autumn. Bundles of longleaf pine needles and cotton bolls also add a unique regional touch.
- Out West and in the Southwest, the color palette shifts to dusty reds, ochres, and deep greens. I’ve seen stunning designs made with dried grasses, tumbleweeds (carefully!), and even strings of dried red chiles.
A Quick Guide to Prepping Foraged Goodies
Bringing nature indoors is awesome, but you don’t want to bring in pests like spiders or mites. First, give everything a good shake outside. For hard items like pinecones and acorns, you can bake them on a foil-lined sheet at 200°F (about 93°C) for 30-45 minutes. This kills any creepy crawlies and helps finish drying them out. And for the love of all that is good, set a timer! The smell of burnt pinecones is not the holiday scent you’re going for, trust me. For leaves, a quick spray with a clear acrylic sealant helps preserve their color and keeps bugs away.
Staying Safe and Making It Last
Don’t skip this part! This is what separates a one-season craft from a piece you can use for years.
- Fire Safety: If you add lights, ONLY use outdoor-rated LEDs. They produce almost no heat. Old-school incandescent mini lights can get hot enough to ignite dry leaves or corn husks. This isn’t just a theory; it’s a real risk.
- Door Hanger Weight: Your finished wreath can easily weigh 10-15 pounds. Most cheap plastic door hangers are only rated for 5 pounds. Invest in a solid metal one or a high-strength magnetic hook that can handle the weight.
- Pest Watch: Even with prep, natural materials like dried grains can attract pantry moths. If you ever see fine webbing or tiny moths, it’s time to take the wreath outside and probably say goodbye.
- Pet and Kid Safety: Be mindful of your materials. Many common plants like yew, ivy, and bittersweet are toxic if eaten. When in doubt, high-quality fakes are your friend.
To make your masterpiece last, give it a light spray with a clear matte-finish sealant. This helps it stand up to moisture and sun. And when it’s time to put it away, don’t just shove it in a box. Store it in a cool, dry place like a closet, either in a proper wreath bag or just hanging on a hook on the wall. Laying it flat can crush it over time.

Ultimately, making something for your own door is a way to slow down and connect with the season. Whether you go for a simple swag or an elaborate wreath, you’re creating the very first welcome your guests will receive. It’s a beautiful way to say, “Come on in, we’re so glad you’re here.”
Galerie d’inspiration

How do I keep my beautiful creation from looking faded and weather-beaten by Thanksgiving Day?
The secret weapon used by floral designers is a protective finishing spray. Before assembling your wreath, take your dried elements—like seed pods, pinecones, and even faux foliage—and lightly mist them with a clear matte sealant. A product like Krylon’s UV-Resistant Clear Coating is perfect. It creates an invisible barrier against moisture and, crucially, prevents the sun’s rays from bleaching those rich autumn colors. Just be sure to spray in a well-ventilated area and let everything dry completely.
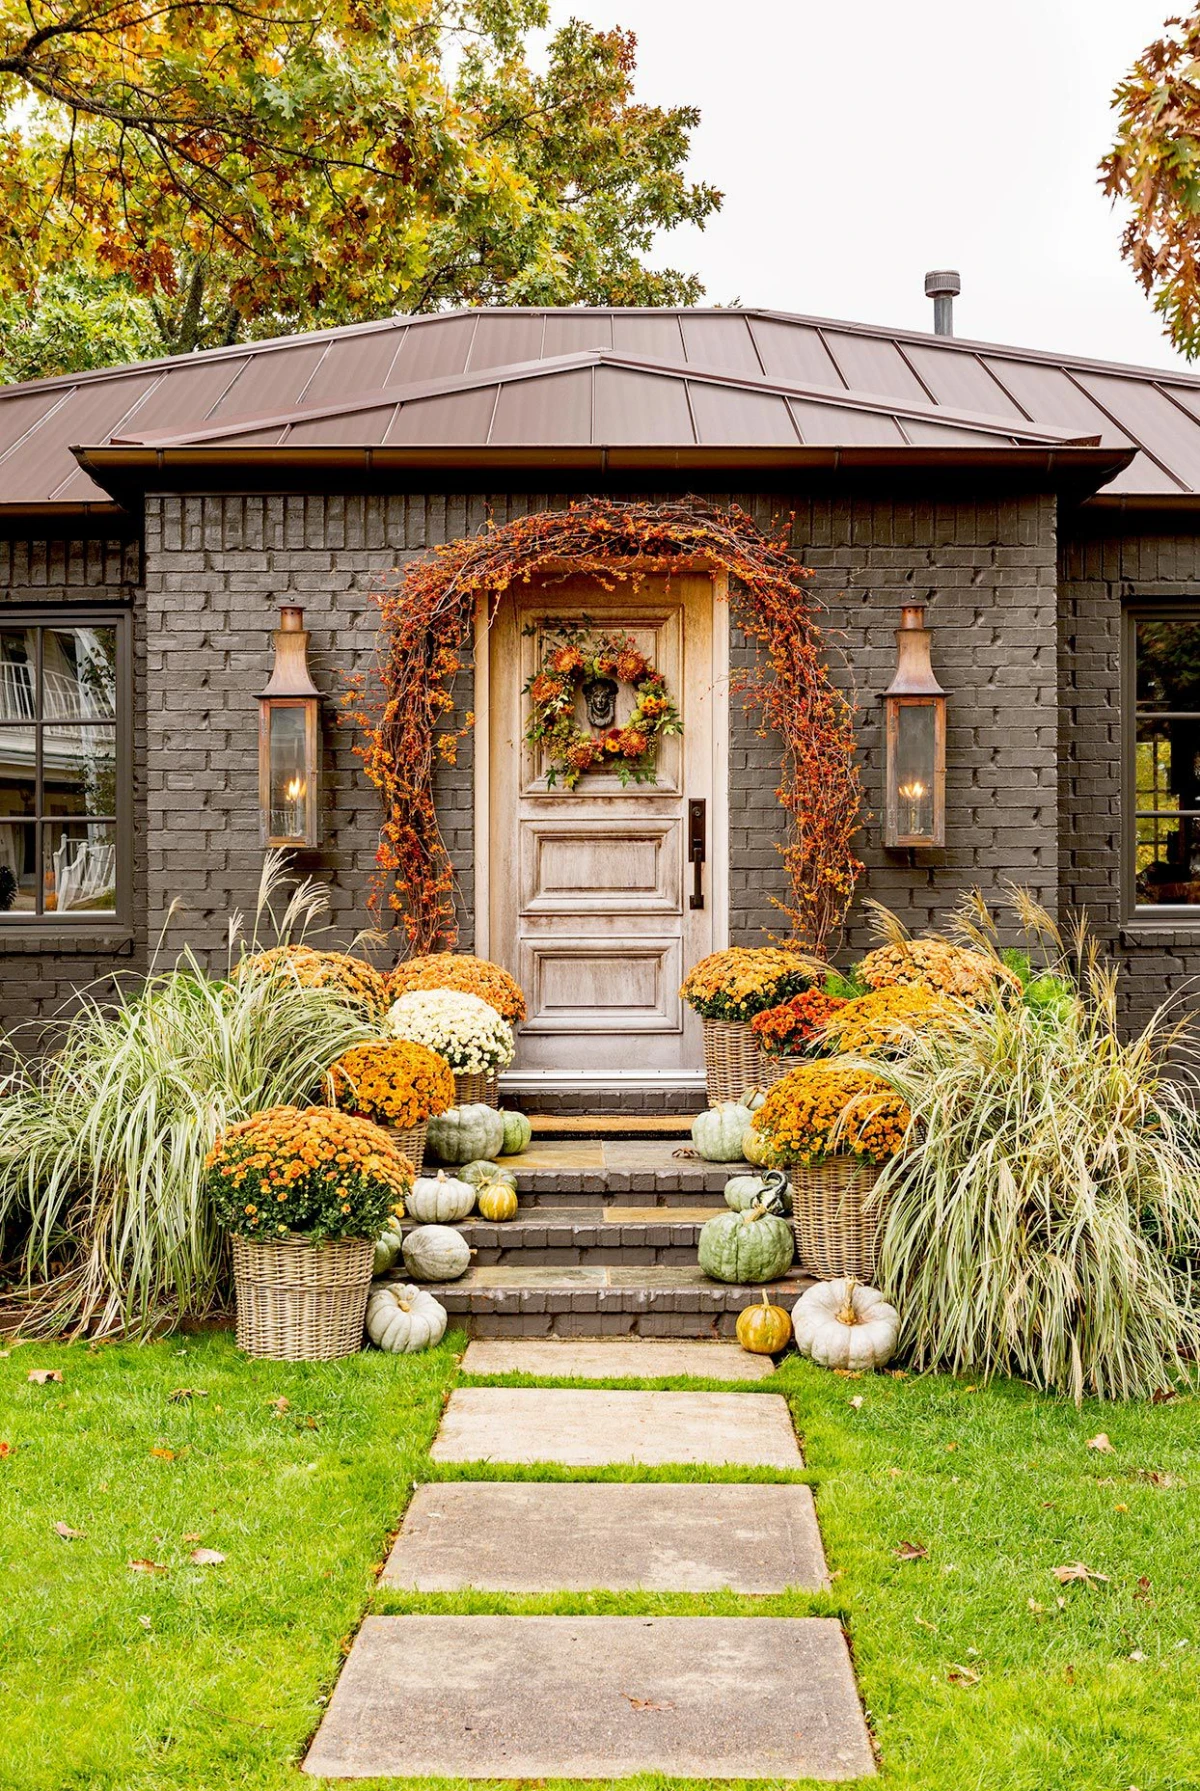
More than 40% of a home’s curb appeal comes from the front door and entryway.
This statistic highlights why investing a little extra effort into your Thanksgiving doorpiece pays off. It’s not just a decoration; it’s the first impression your home makes. A unique, handcrafted arrangement signals warmth and attention to detail before guests even ring the bell, setting the entire tone for their visit.
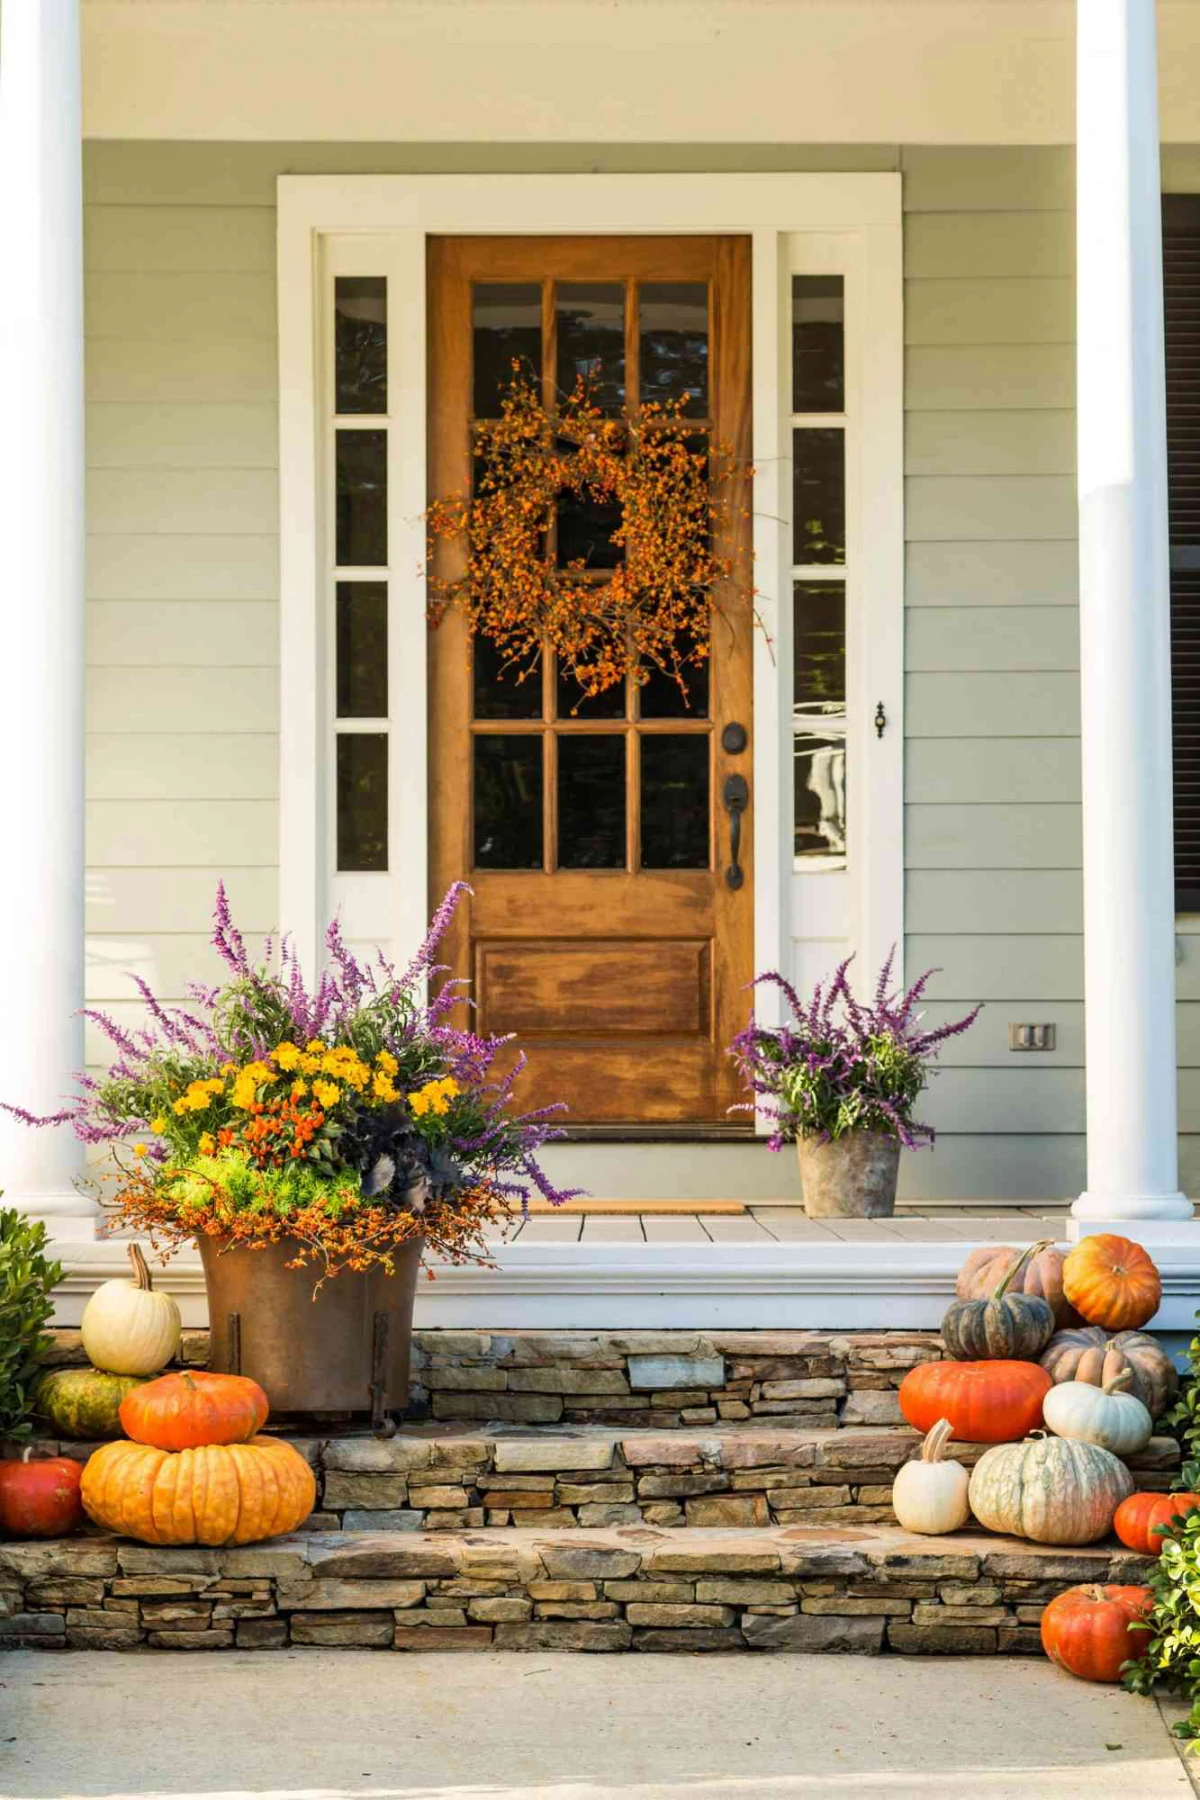
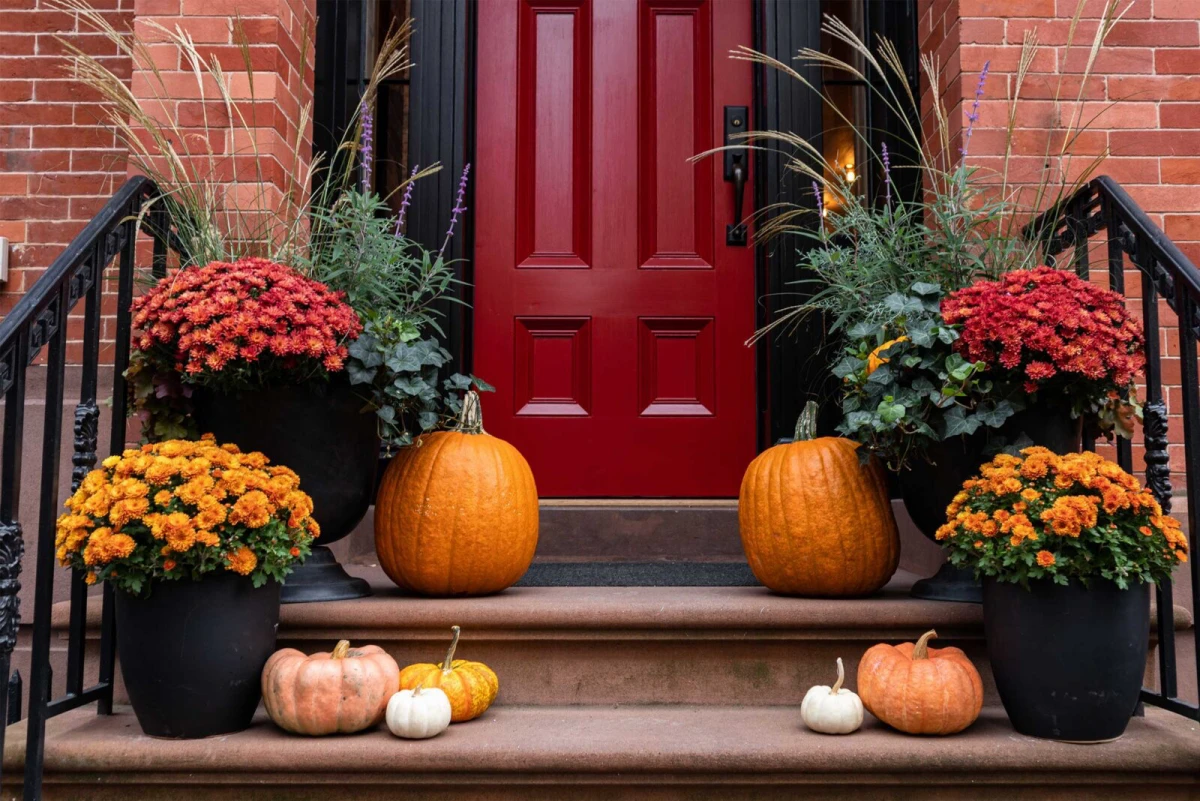
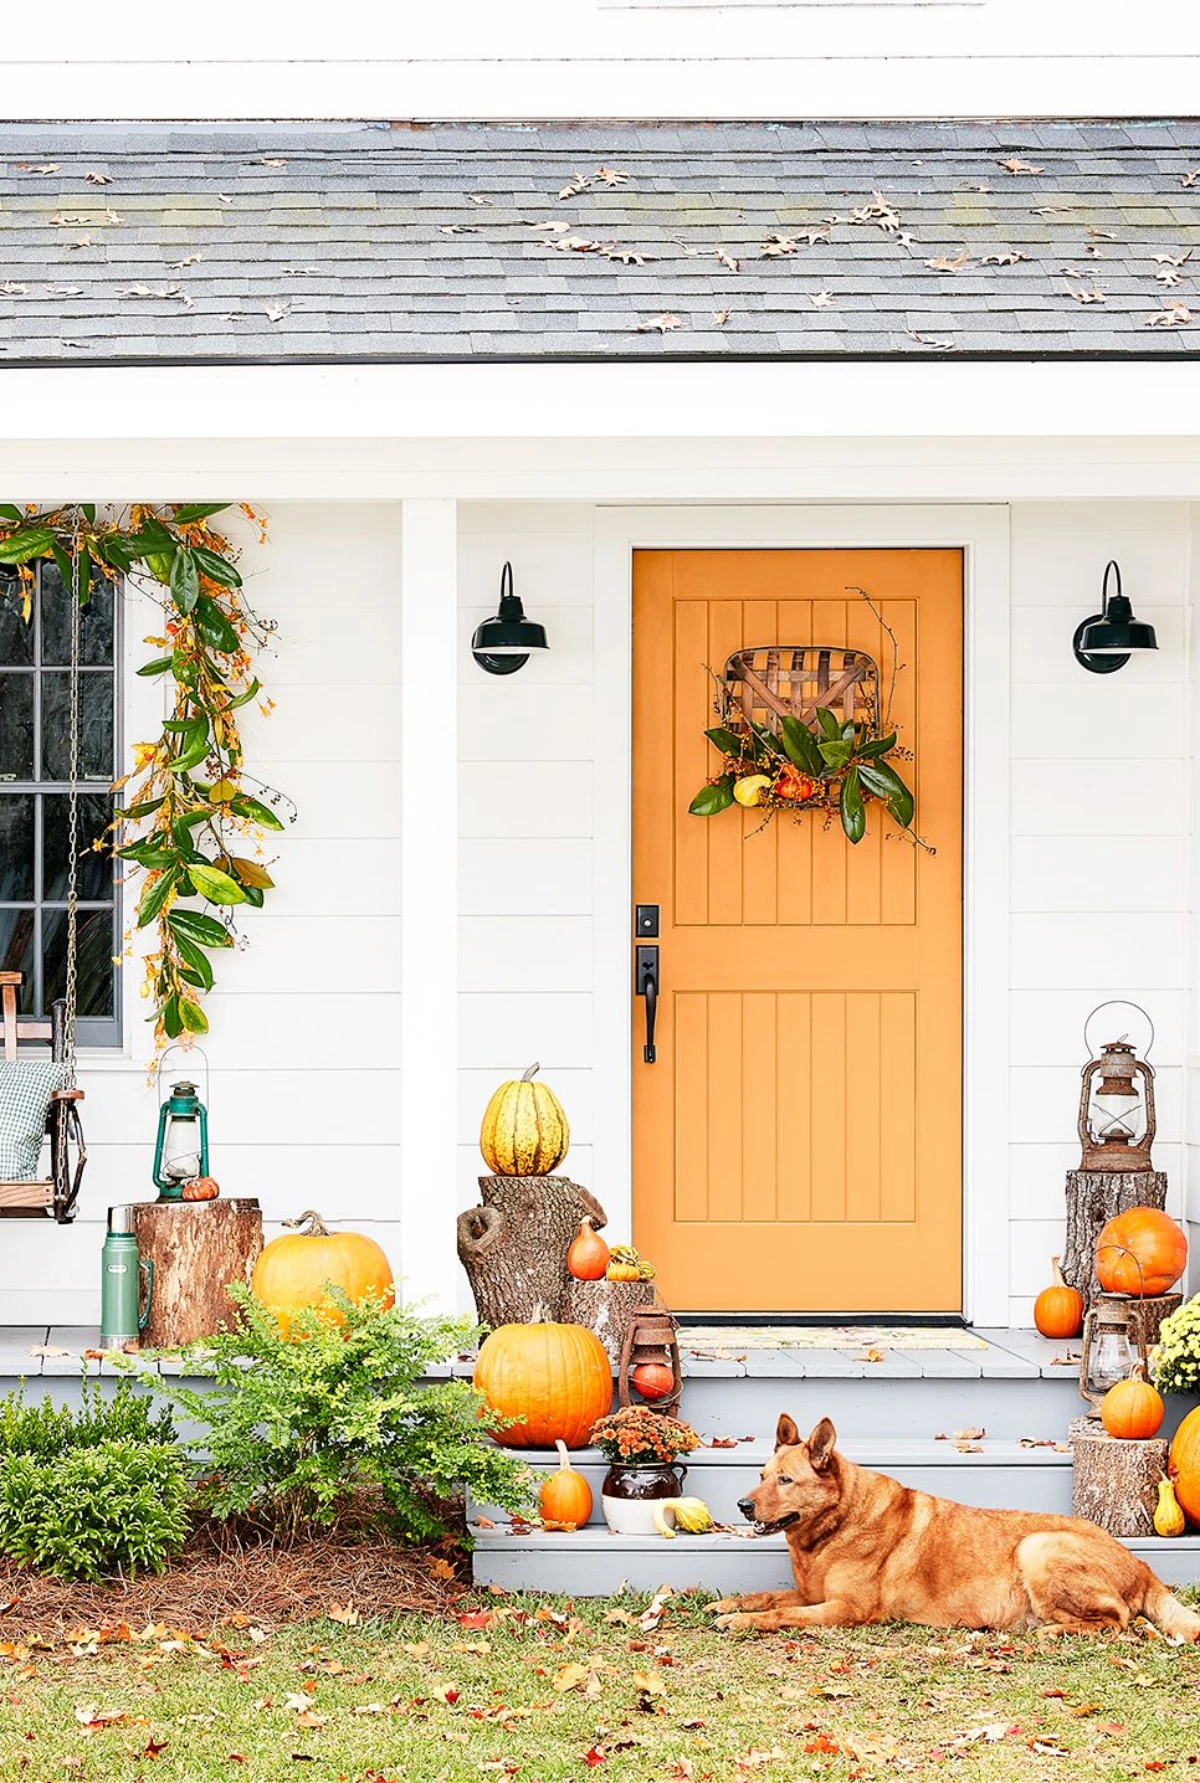
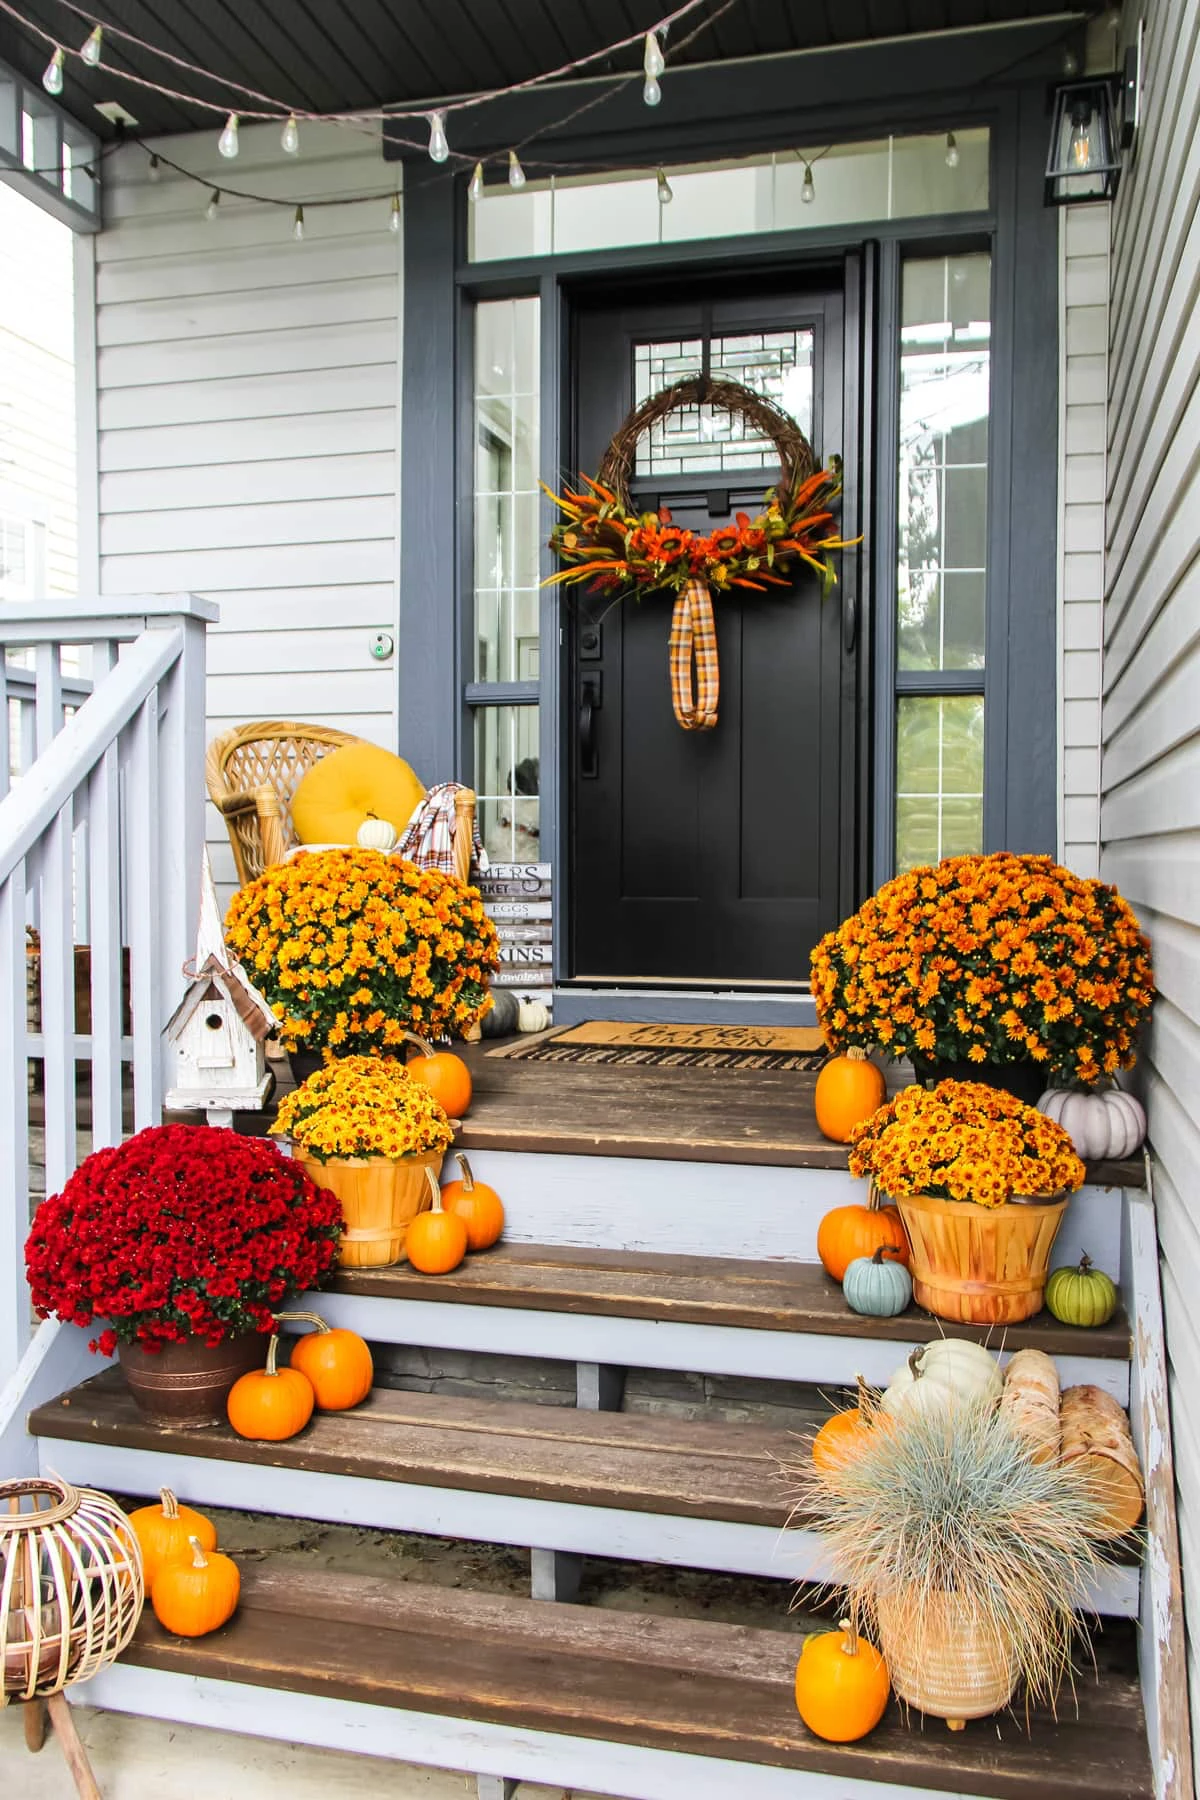
Classic Harvest Palette: This timeless choice leans into warmth. Think deep oranges of bittersweet berries, the rich reds of crabapples and oak leaves, and the golden yellows of mums and dried corn husks. It’s cozy, traditional, and pairs beautifully with brick or dark-colored doors.
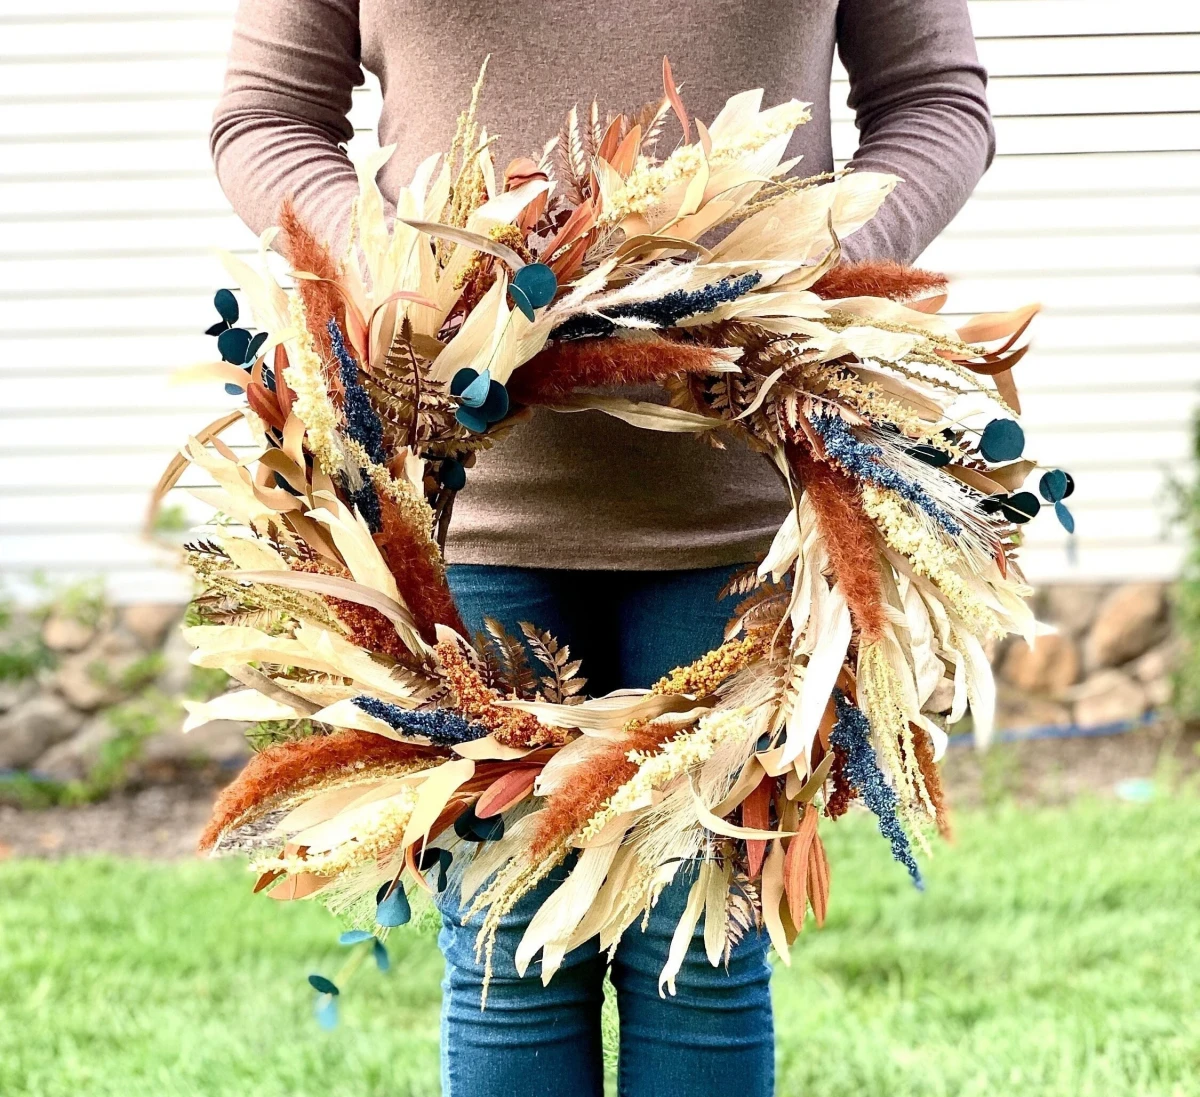
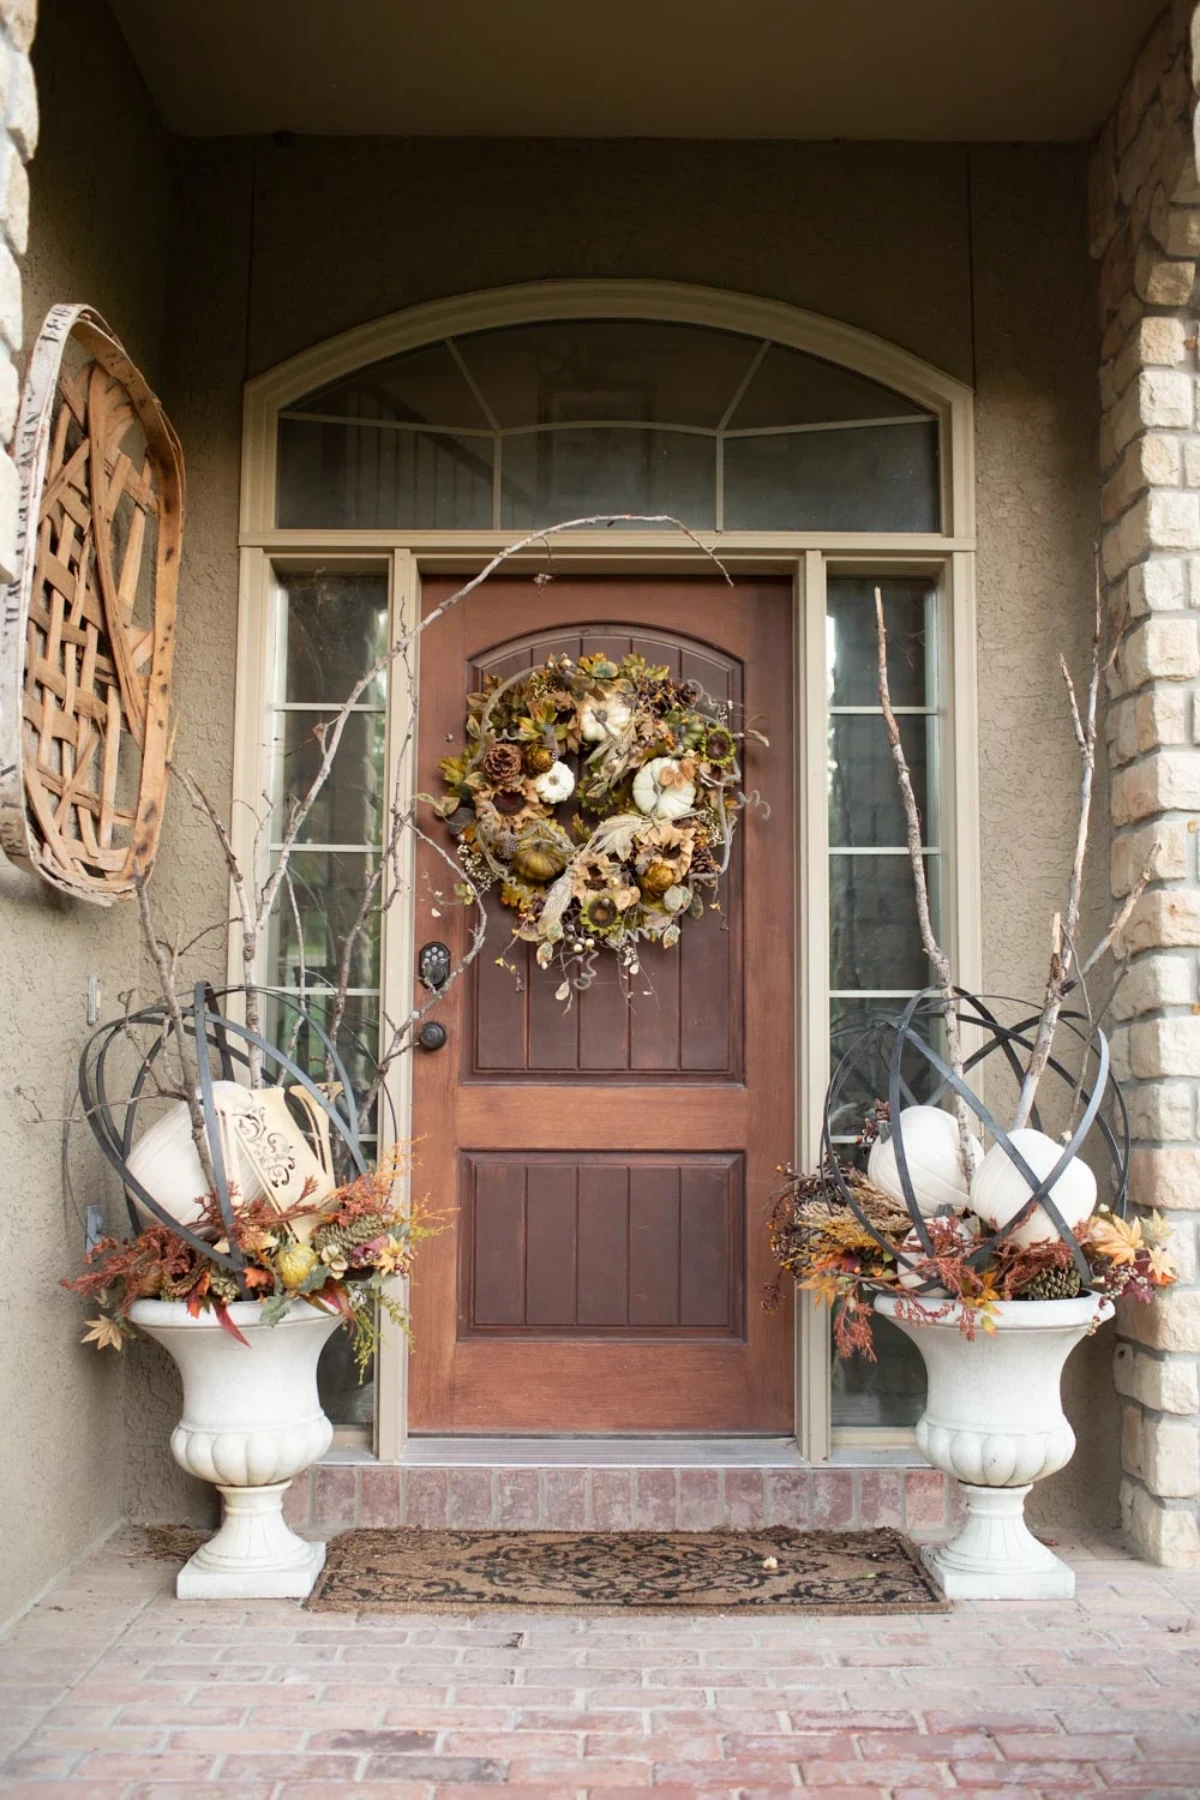
Modern Autumn Palette: For a more contemporary feel, build your design around muted tones. Start with silvery greens from eucalyptus or dusty miller, add creamy white mini pumpkins (the ‘Baby Boo’ variety is a favorite), and introduce sophisticated accents with pheasant feathers or copper-painted seed pods. This palette is stunning against white, gray, or black doors.