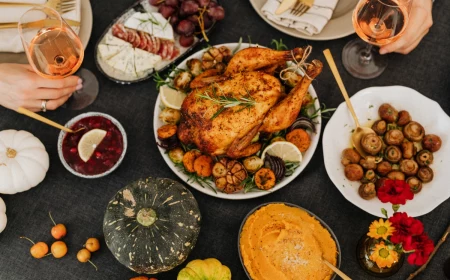
How to Set a Thanksgiving Table That Actually Feels Like You (and Doesn’t Break the Bank)
I’ve spent years designing event spaces, from huge, splashy parties to really personal family dinners. And honestly, out of all of them, Thanksgiving is the one that gets me. It’s not about being over-the-top; it’s about creating a vibe of genuine warmth and welcome. The food is obviously the star, but the table? That’s the stage where it all happens.
In this article
I figured out a long time ago that a well-set table does so much more than just hold the plates. It’s a quiet way of telling your guests, “Hey, you’re welcome here. We’re so glad you came.”
But I get it. A lot of us get completely overwhelmed by the decorating part. We see these picture-perfect tables in magazines and assume it takes a massive budget or some secret design degree. That’s just not true. A beautiful Thanksgiving table is really about a few simple ideas, not a pile of expensive stuff. It all comes down to balance, texture, and a little bit of smart planning. Let’s walk through the exact same process the pros use, and I’ll give you the confidence to pull together a table that looks stunning but feels completely personal—mostly using things you already have or can find easily.
First Things First: The ‘Why’ Behind a Great Table
Before you even think about placing a single pumpkin, it helps to know the basic principles of design. When a table just feels right, it’s usually because it’s following a few simple rules of composition. Getting a handle on these ideas is what takes a table from a random collection of stuff to a cohesive, intentional design.
Finding Your Balance
Every table needs a sense of balance, but that doesn’t always mean perfect, mirror-image symmetry. You’ve basically got two choices here:
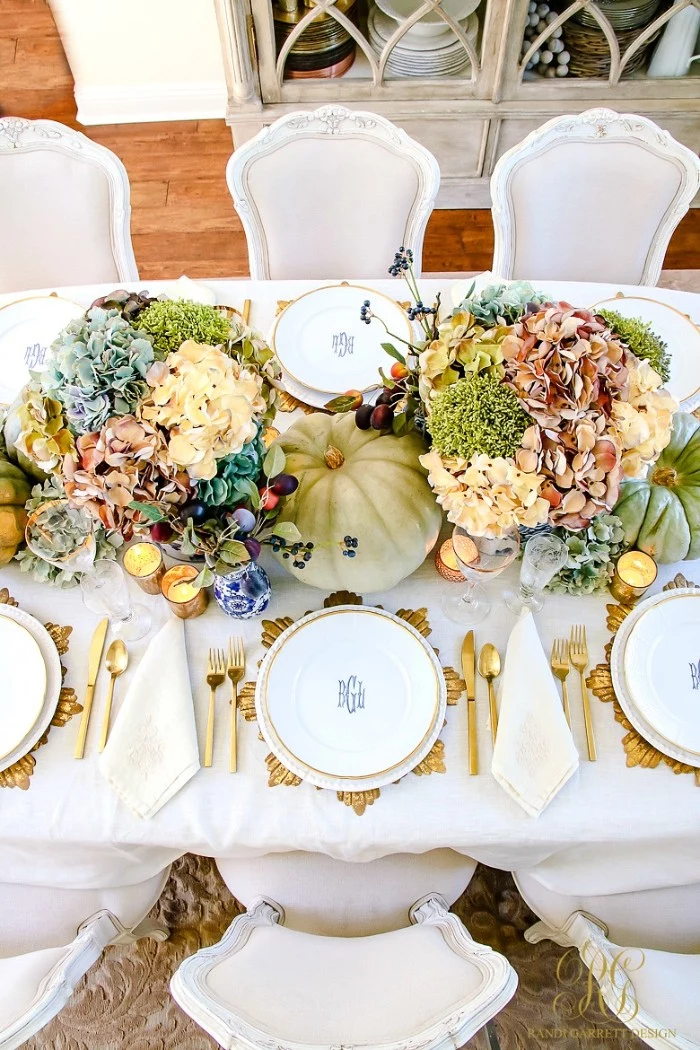
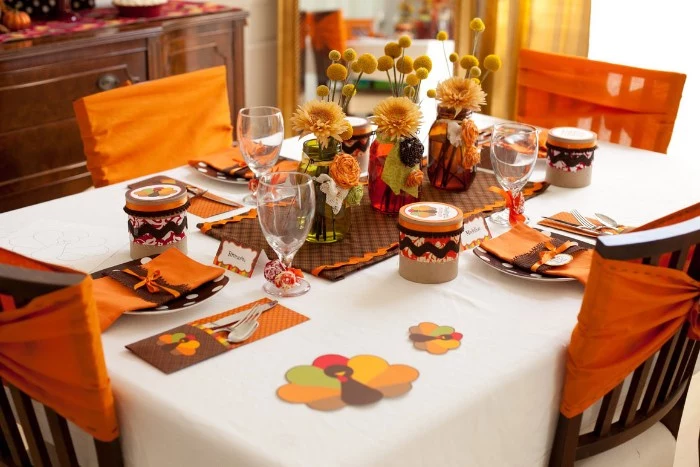
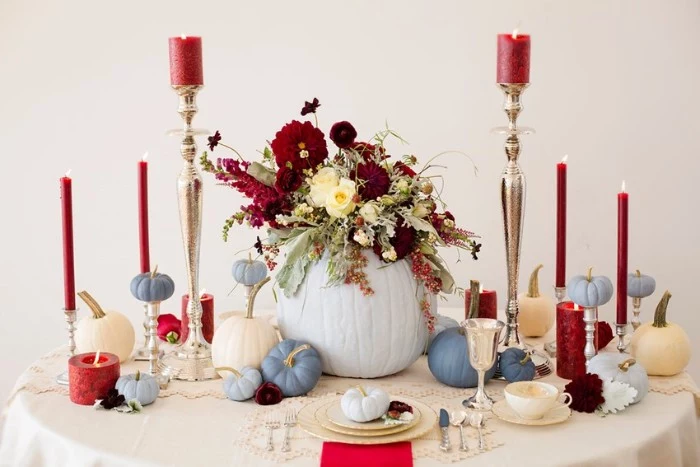
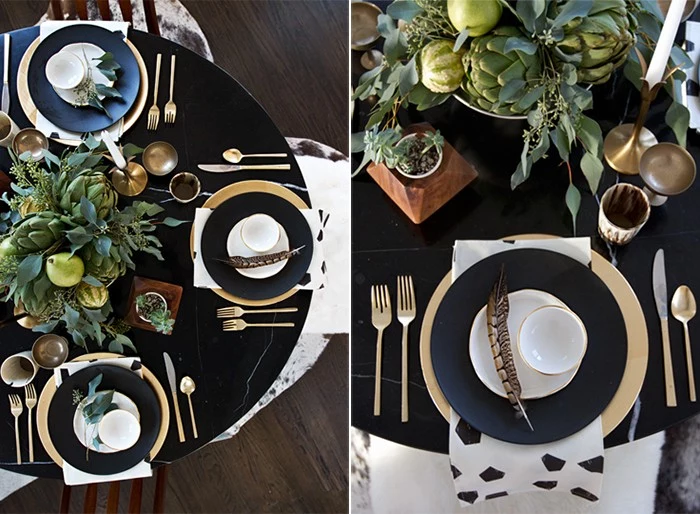
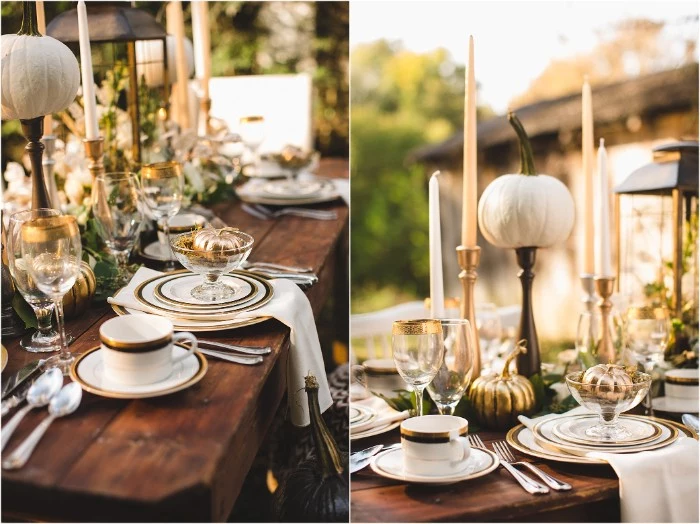
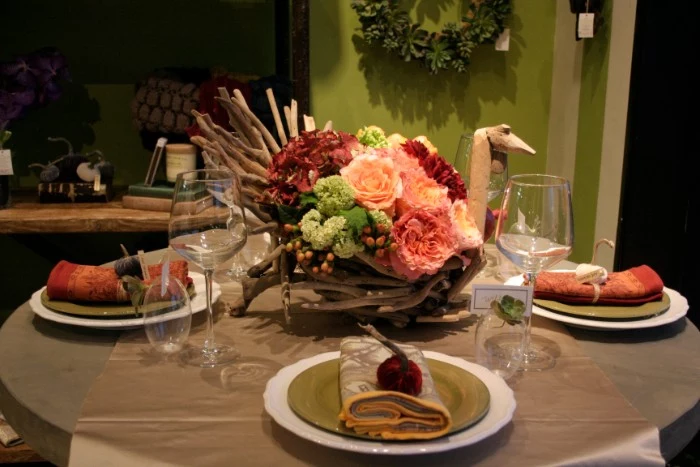
- Symmetrical Balance: This is the classic, more traditional route. You have one big centerpiece smack in the middle, and everything on the left side is a mirror image of the right. Think of a big floral arrangement with two identical candlesticks on either side. It feels formal, orderly, and calm. This look is perfect for round tables or more formal dining rooms.
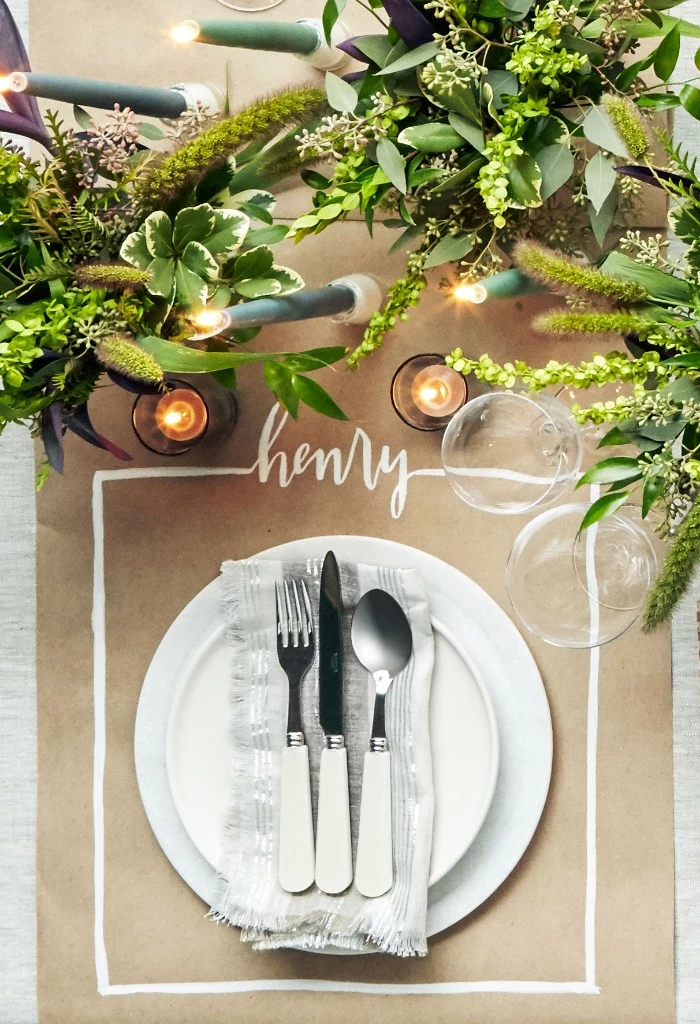
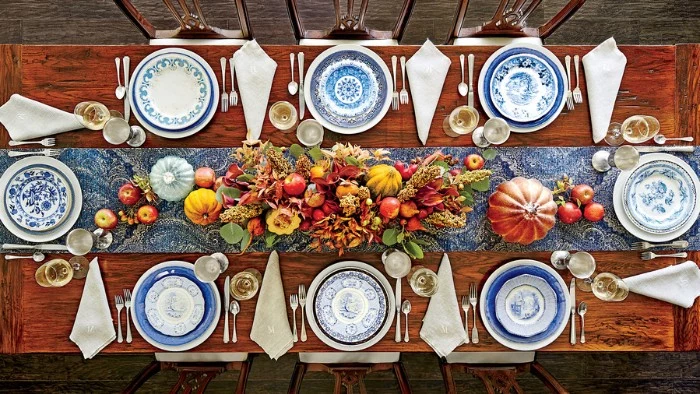
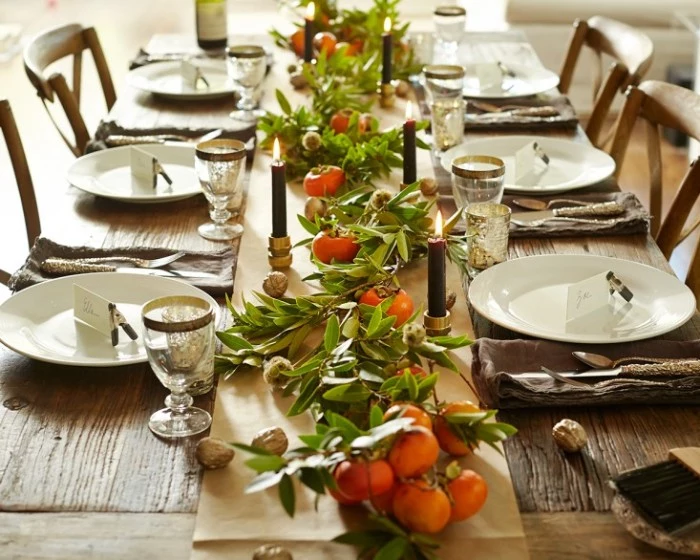
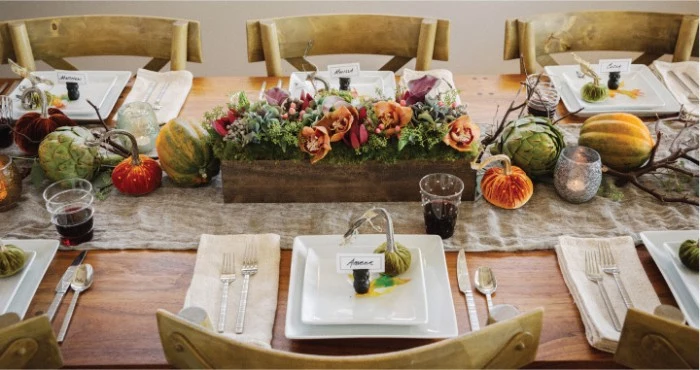
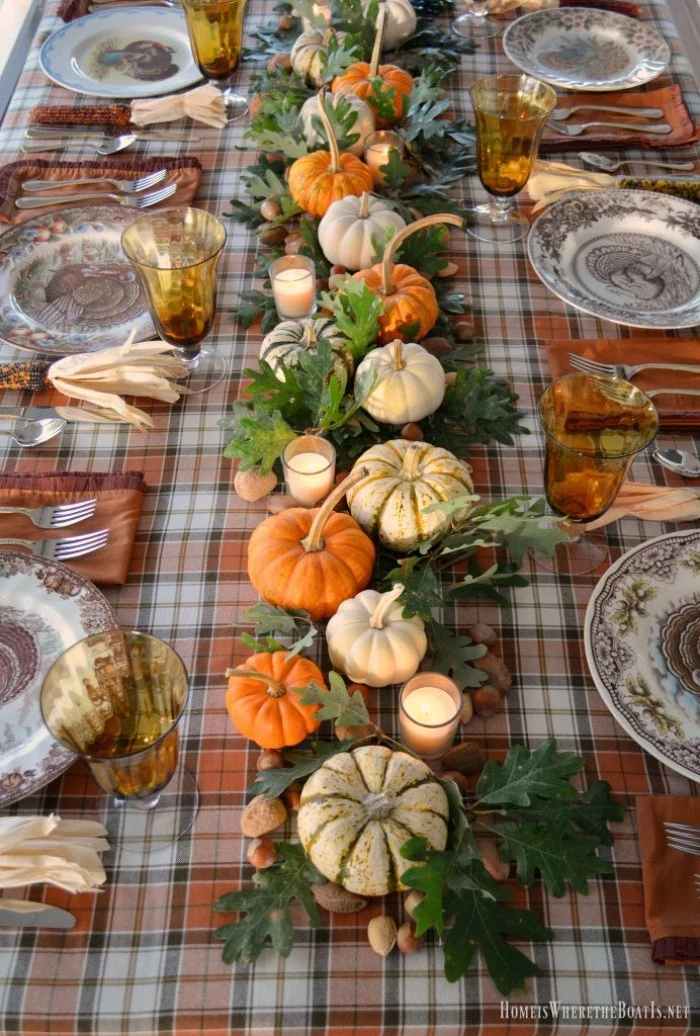
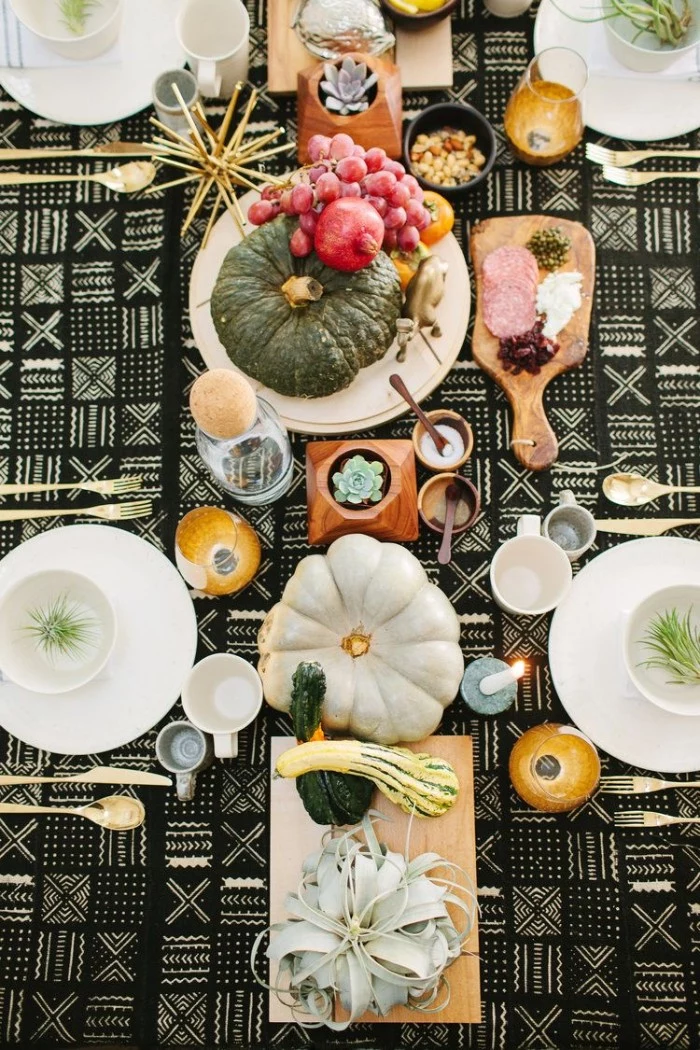
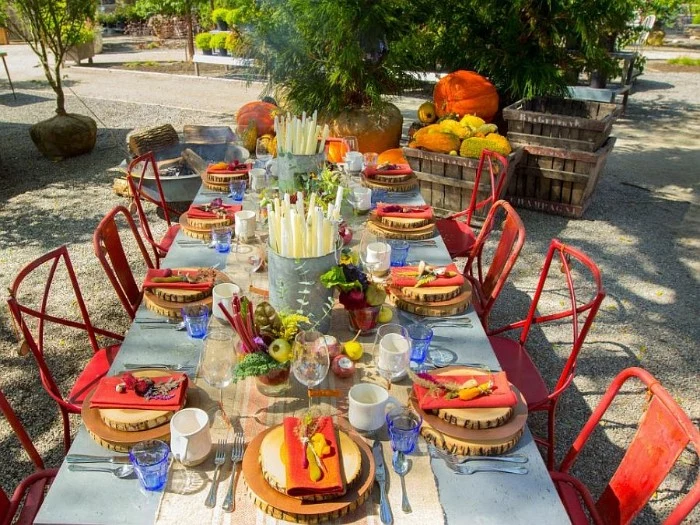
- Asymmetrical Balance: This approach feels more modern, relaxed, and a little more dynamic. Instead of one single focal point, you spread the visual interest down the length of the table. A great example is a long, flowing garland of greenery with pumpkins, candles, and fruit tucked in. It’s not identical on both sides, but it feels balanced because the visual weight is distributed evenly. This is a fantastic look for those long, rectangular farmhouse tables.
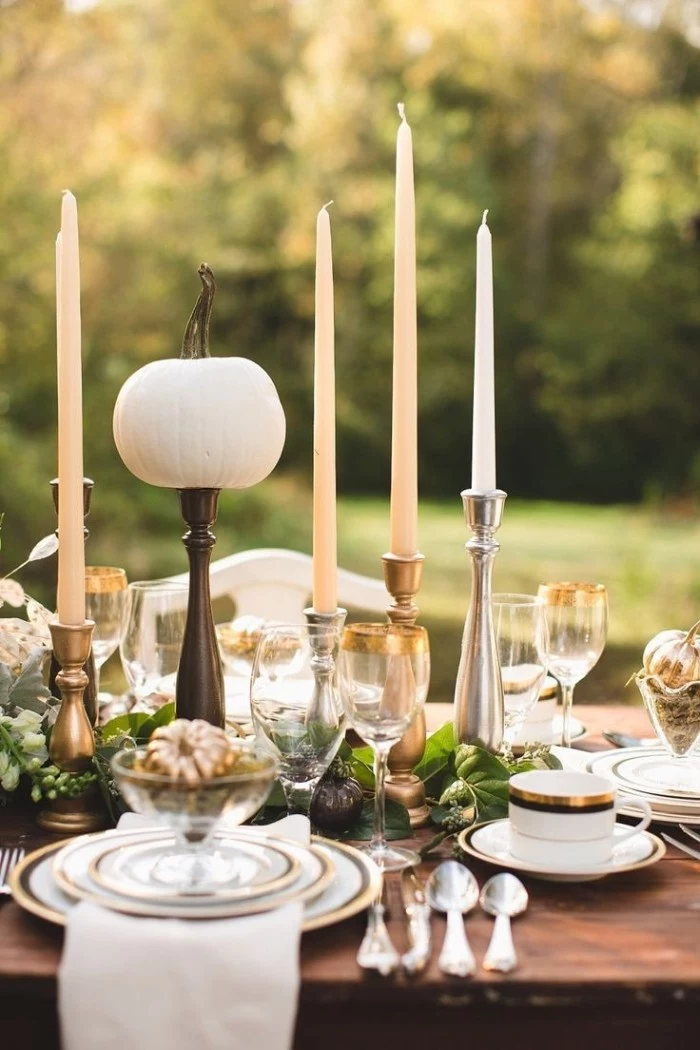
Heads up! A super common mistake is making the centerpiece too tall. A good rule of thumb is to keep everything under 12 inches high. Your guests need to be able to see each other and have a conversation without peering around a giant bouquet. Before you call it done, sit down at the table and check the sightlines from a guest’s point of view.
Picking a Color Palette
Sure, you can just go with “fall colors,” but getting a little more specific can make your table look incredibly sophisticated. What’s the mood you’re going for? Warm and energetic, or calm and elegant?
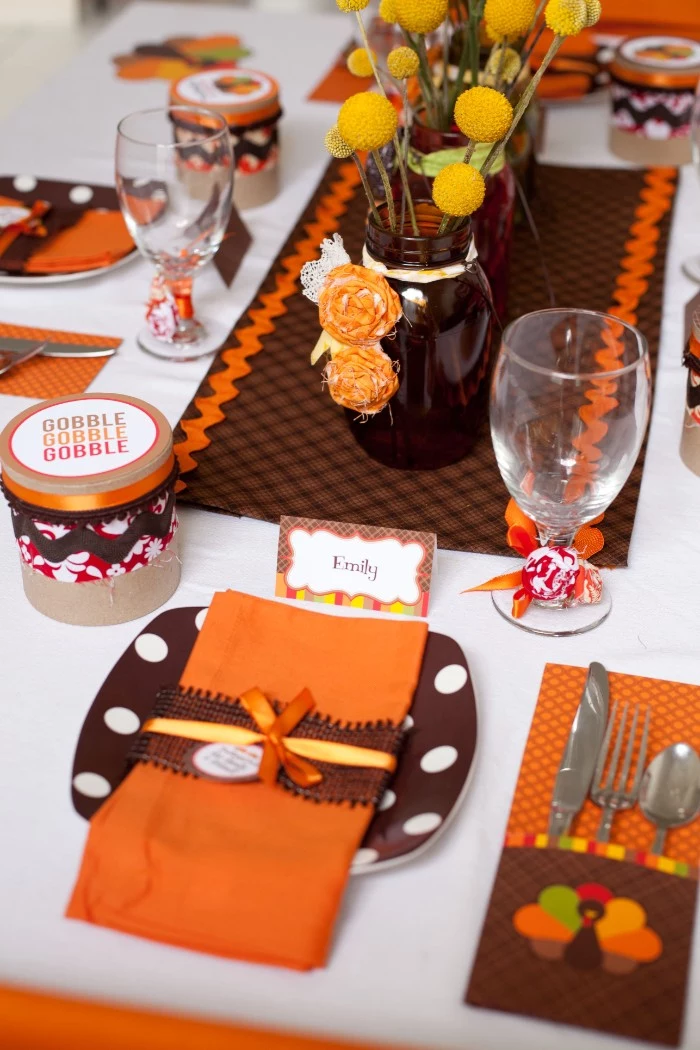
- The Classic (Analogous): This is your go-to warm and inviting look, using colors that are neighbors on the color wheel—think reds, oranges, and yellows. It’s timeless for a reason!
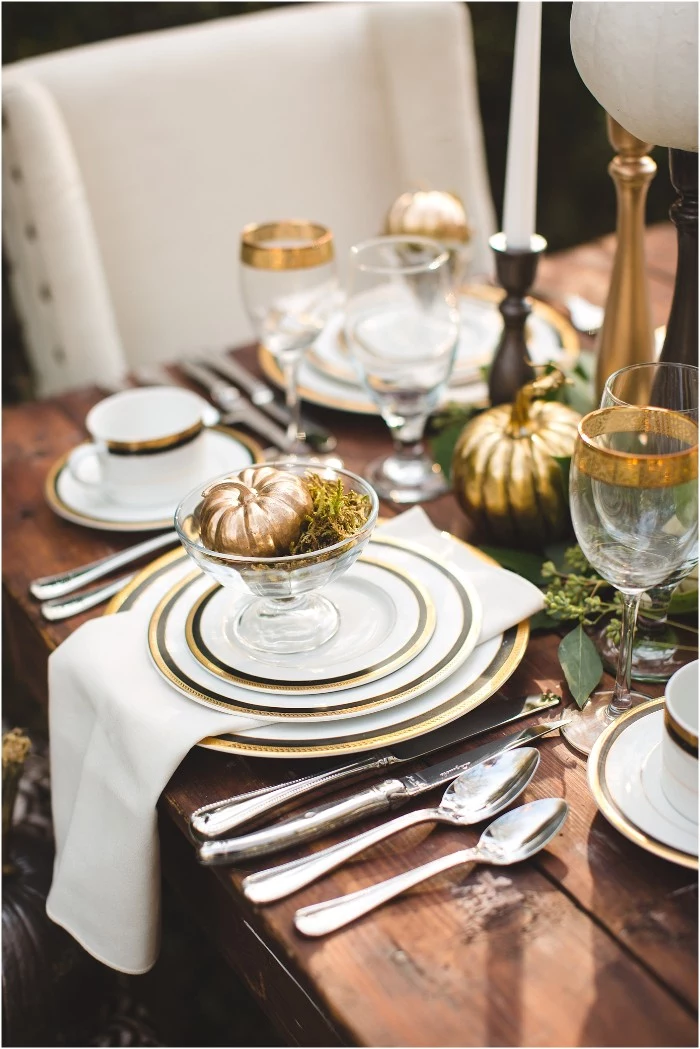
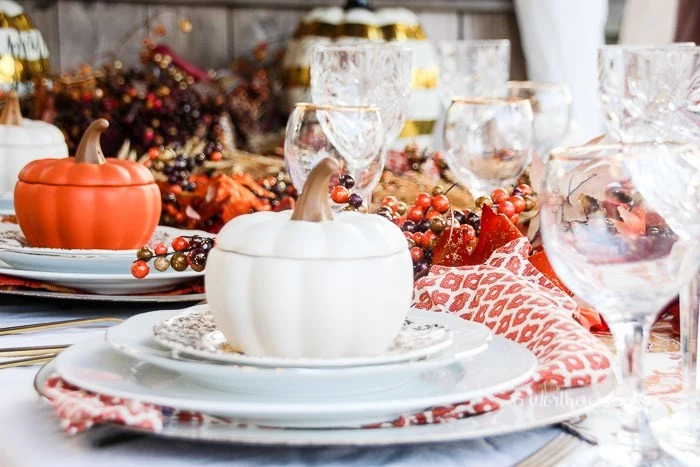
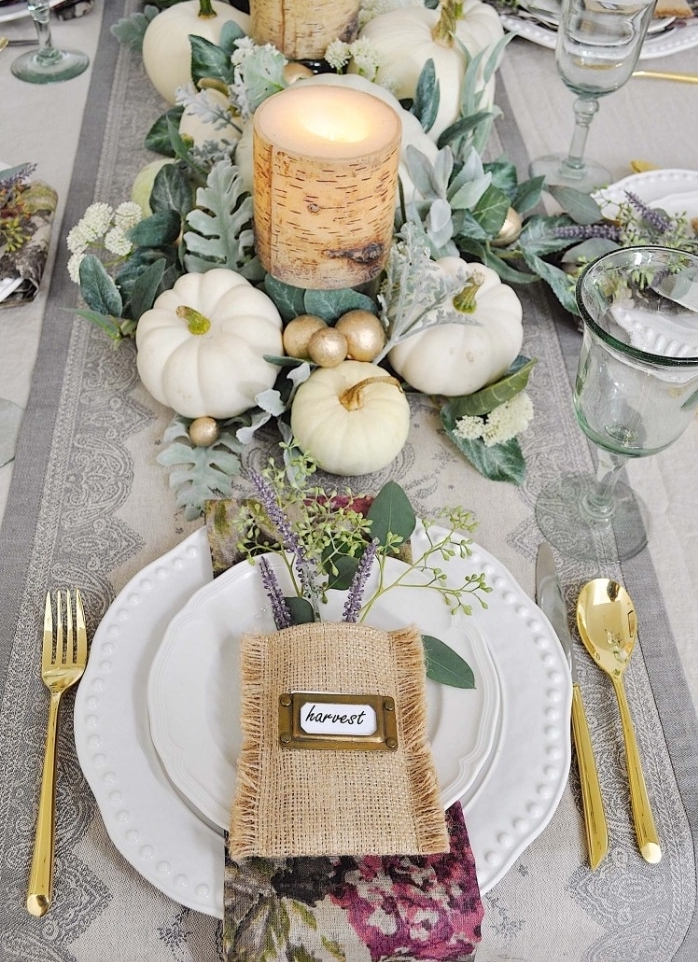
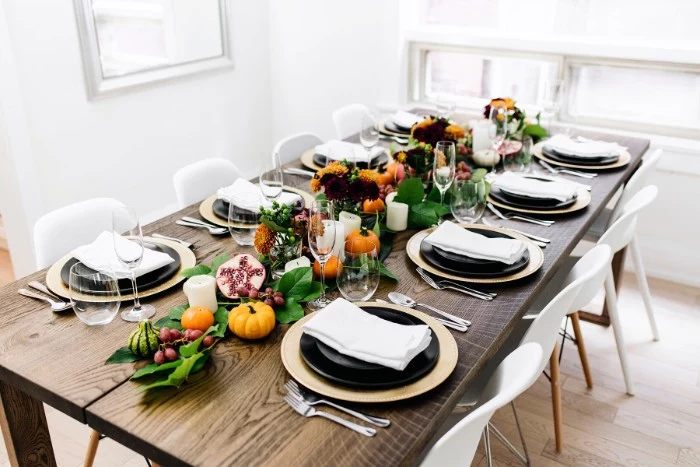
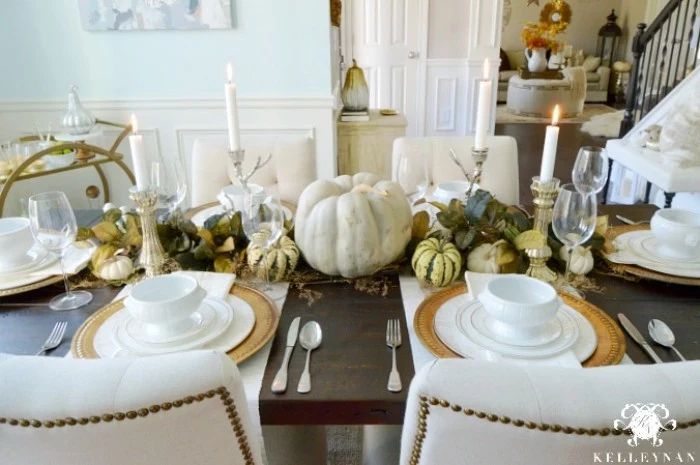
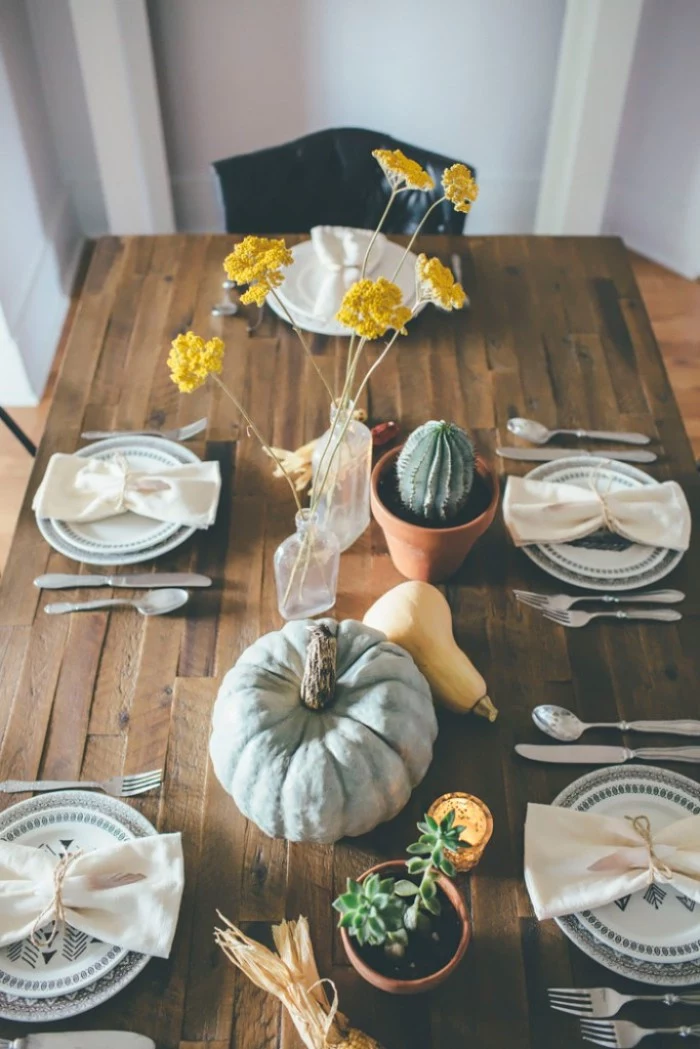
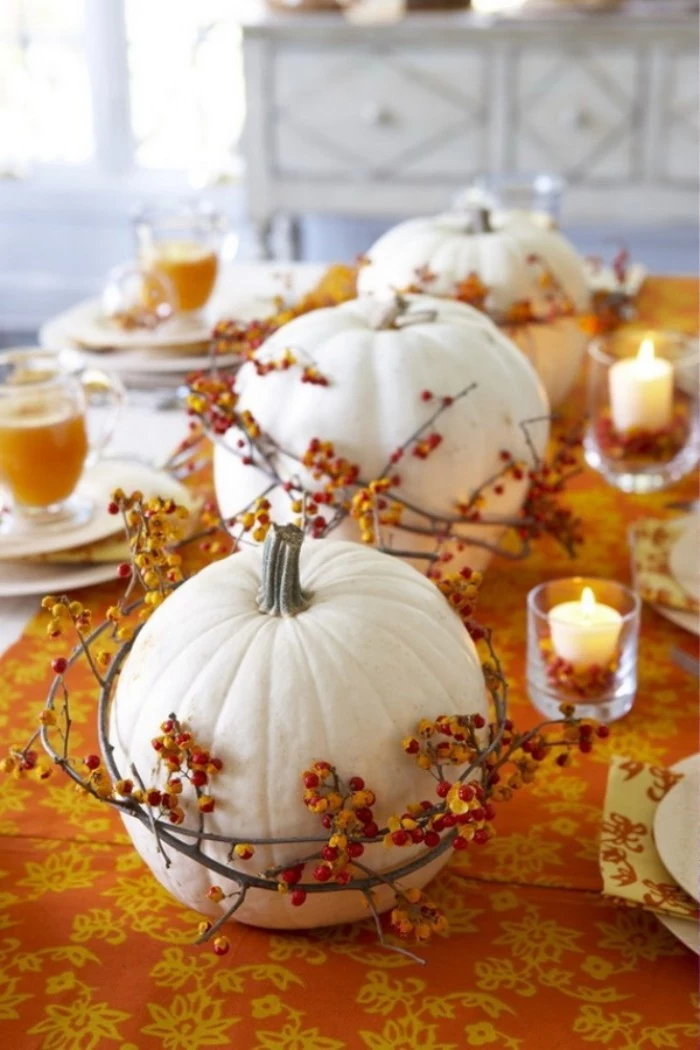
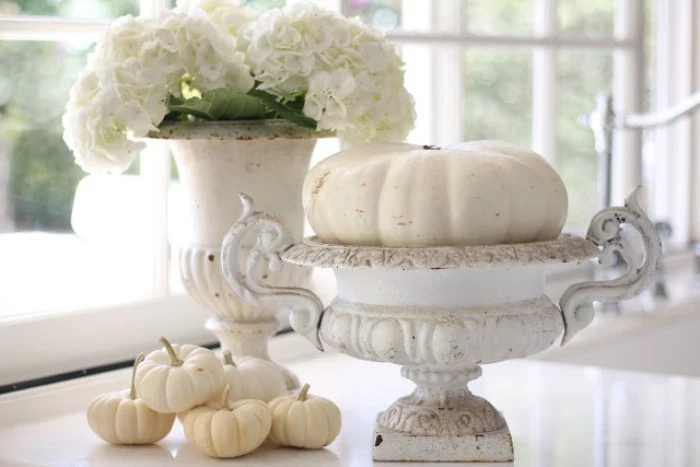
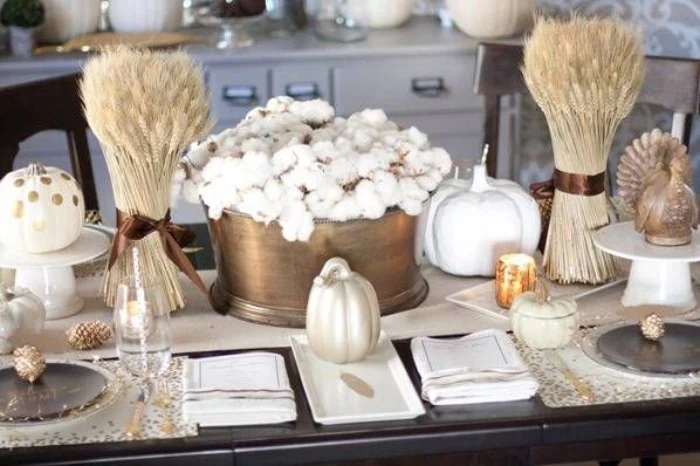
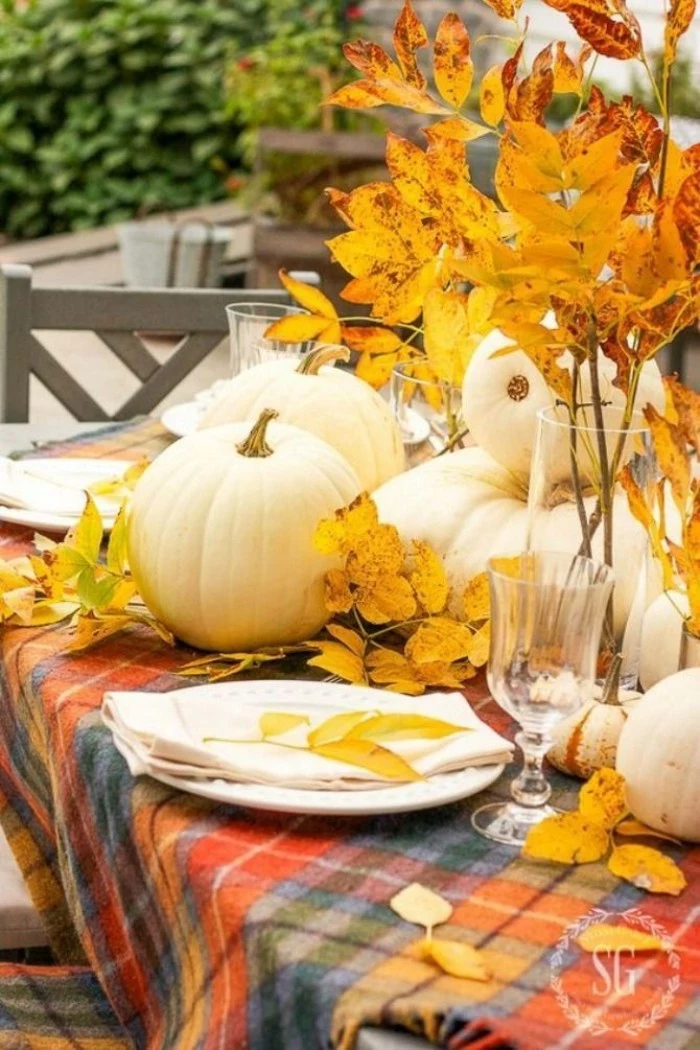
- The Elegant (Monochromatic): This is a really chic and modern take. You use different shades and tones of just one color. Imagine a table with only whites and creams: white pumpkins, cream linens, birch bark, and white flowers. When you go this route, texture becomes your best friend.
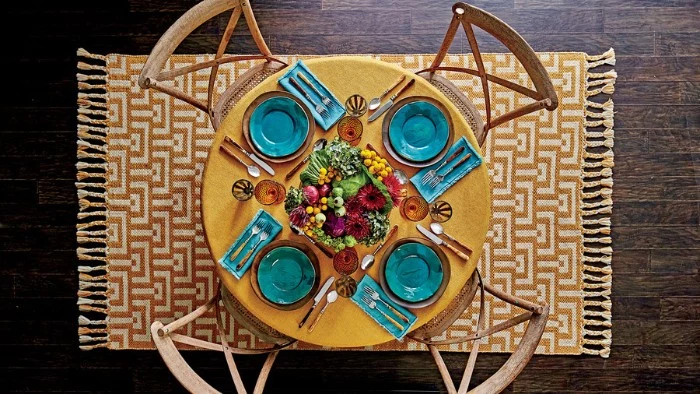
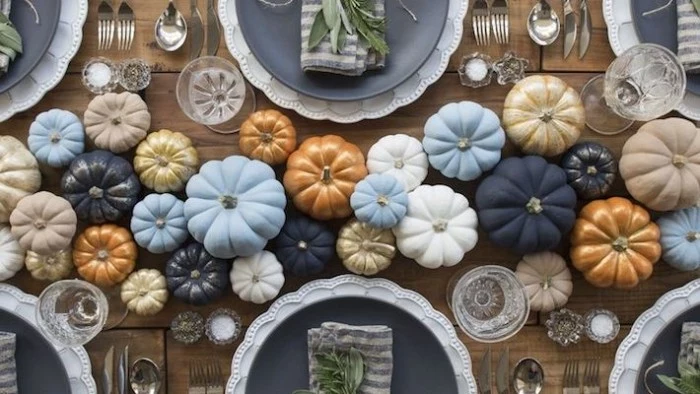
- The Bold (Complementary): Want a little drama? Use colors from opposite sides of the color wheel. The complement to orange is blue. A table with deep orange pumpkins against dusty blue napkins or a runner can be absolutely stunning. It’s unexpected but totally works because it’s grounded in color theory.
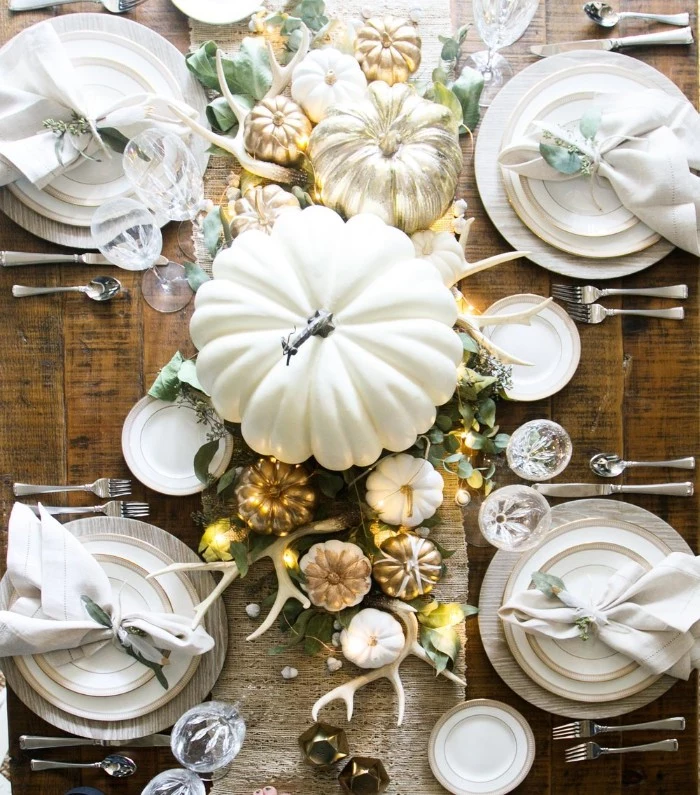
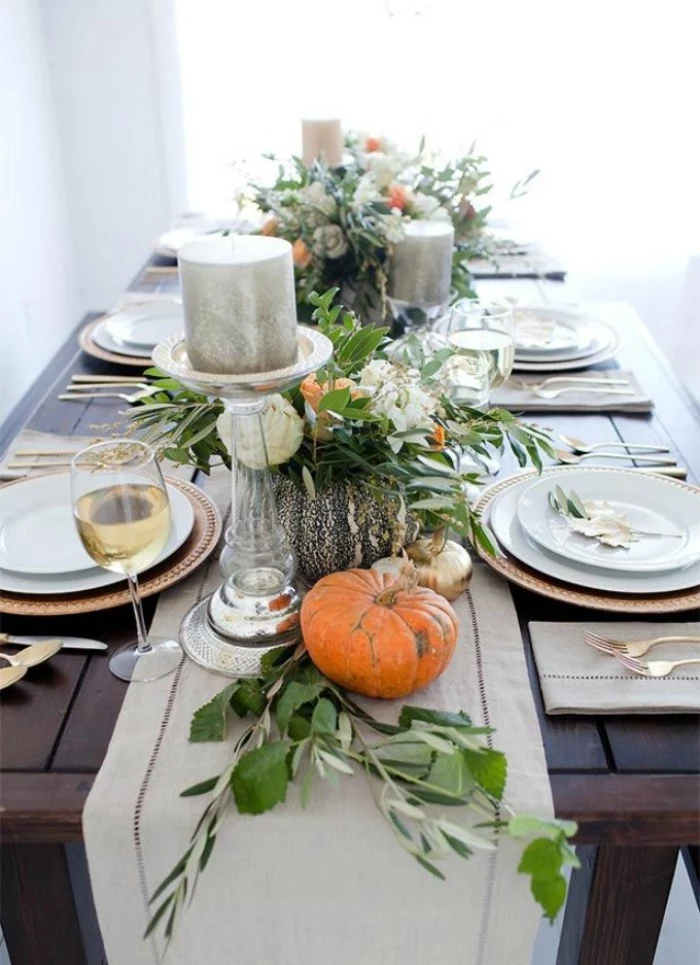
The Secret Weapon: Texture
To be frank, texture is what separates the amateurs from the pros. It’s what makes a table interesting to touch and look at. A one-color table with a ton of different textures is way more engaging than a colorful but flat-looking design. Think about layering different surfaces.
Try mixing rough with smooth, and soft with hard. For example:
- A rough, nubby linen runner
- Smooth, polished wood chargers
- Soft, folded cotton napkins
- Hard, waxy gourds
- Glossy, fresh cranberries
- Fuzzy stems of dried pampas grass
This mix creates so much depth and makes the table feel rich and thoughtfully put together, even if you used simple, cheap items.
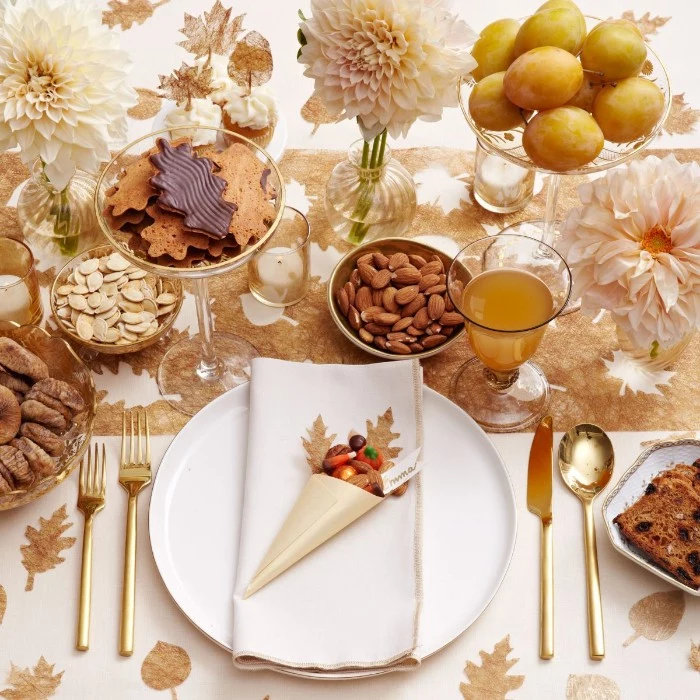
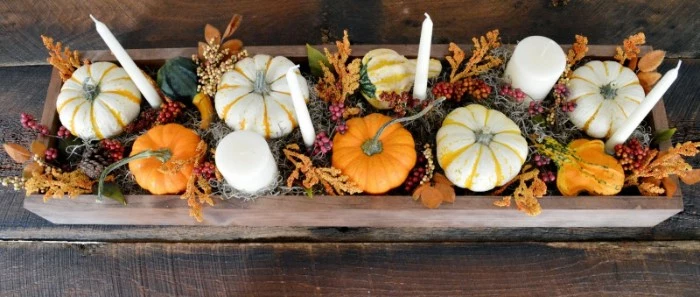
Pro-Level Tricks for Building Your Centerpiece
Okay, with those principles in mind, let’s get our hands dirty. Building a great centerpiece is a step-by-step process. If you just throw things on the table, it’s going to look cluttered.
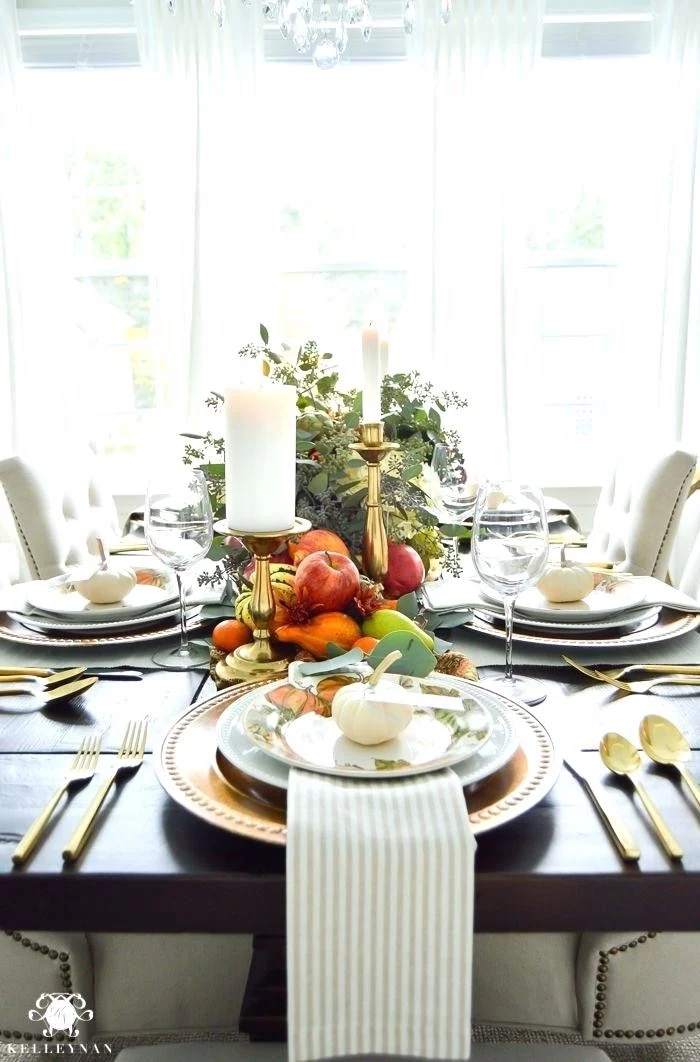
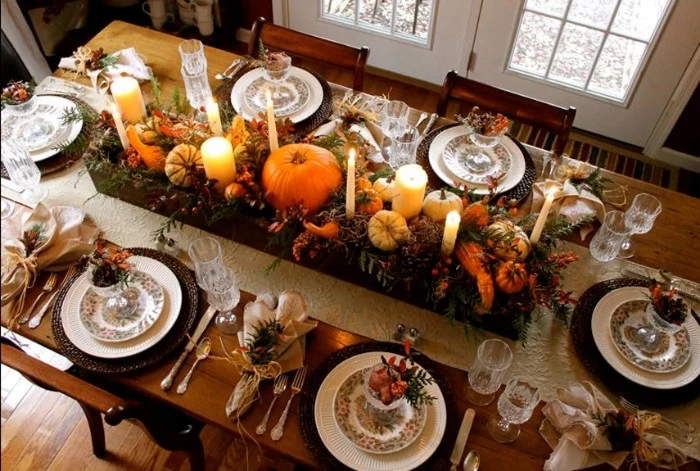
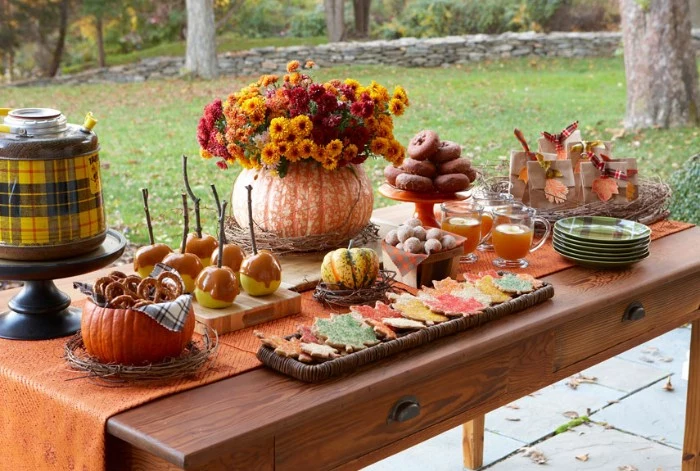
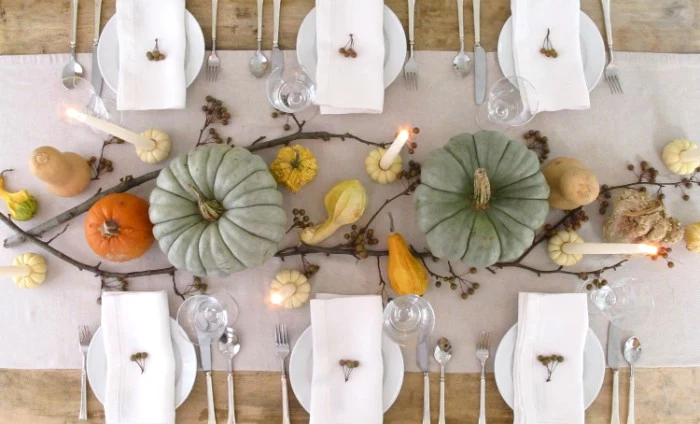
Method 1: The Runner as Your Guide
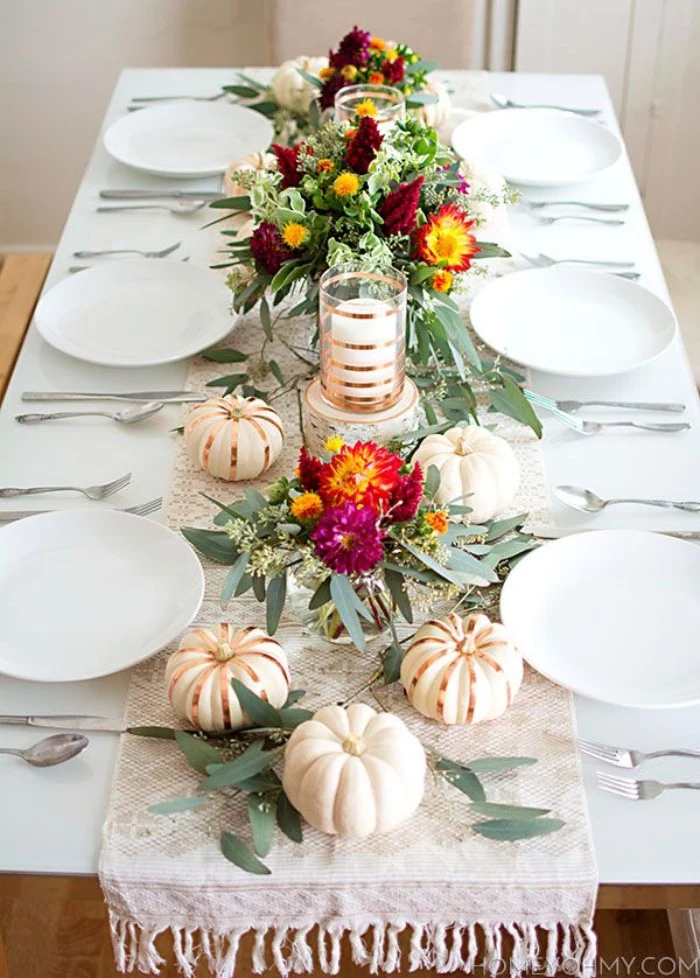
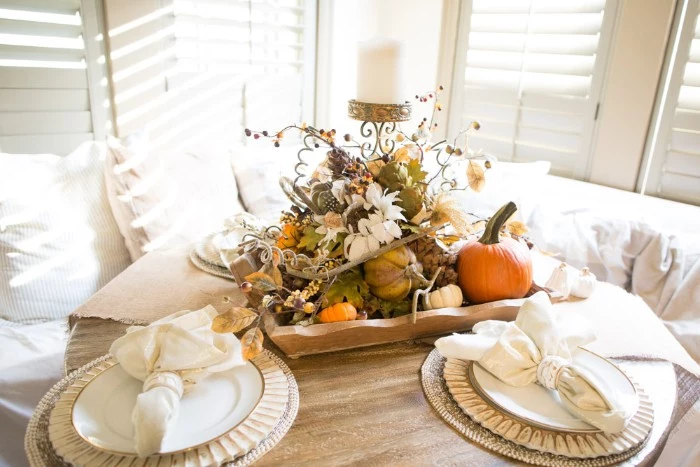
This is my favorite, nearly foolproof technique for rectangular tables. The runner acts like a spine, giving you a clear path to follow.
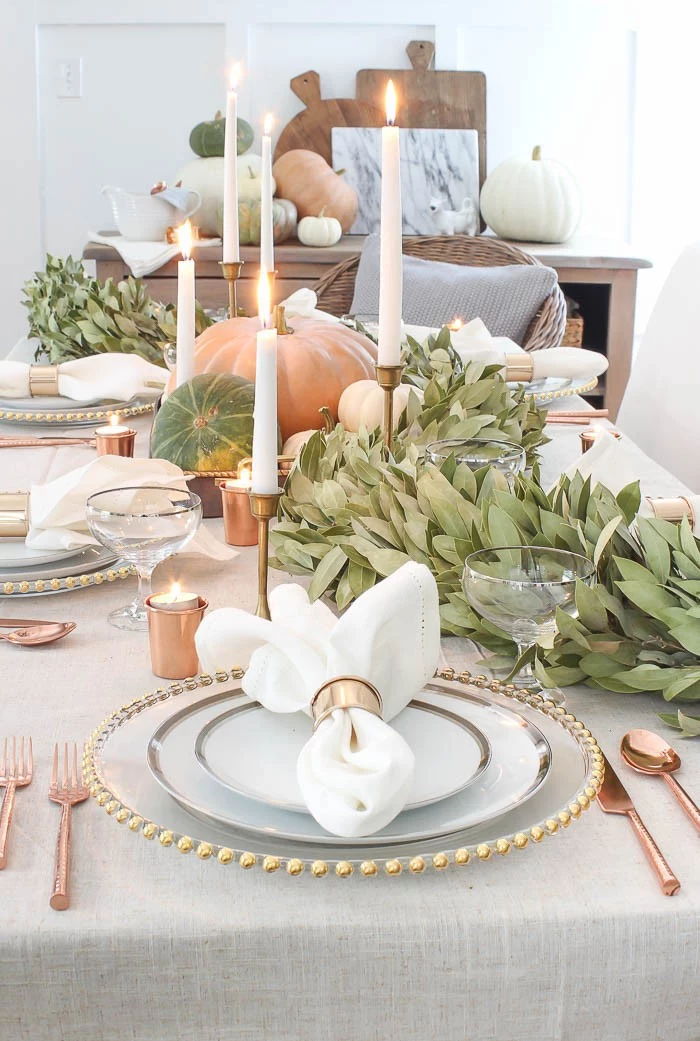
1. Lay Down Your Runner: This sets the entire mood. It could be a simple fabric runner—burlap, cheesecloth, or linen work great and are usually under $20 at places like HomeGoods or on Amazon. Or, you could create a ‘runner’ from natural greenery like eucalyptus or magnolia branches.
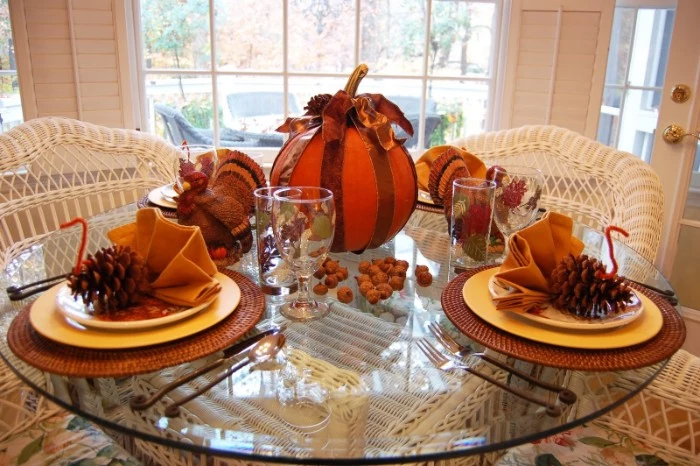
2. Place Your ‘Anchors’: These are your biggest items. Place 3 to 5 of them down the length of the runner, staggering them a bit so they aren’t in a perfect line. What’s an anchor? Think items that are about the size of a grapefruit—a medium pumpkin, a small lantern, or even a stack of two old books.
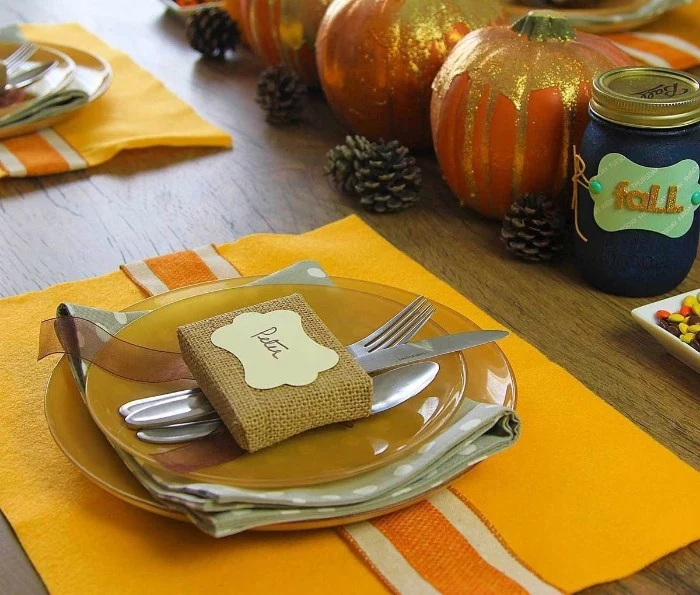
3. Add Filler: Now, fill in the gaps around your anchors with medium-sized objects. This is where small gourds, pomegranates, artichokes, or pears come in. Tuck them into the greenery or cluster them in groups of three. Odd numbers are just more visually appealing.
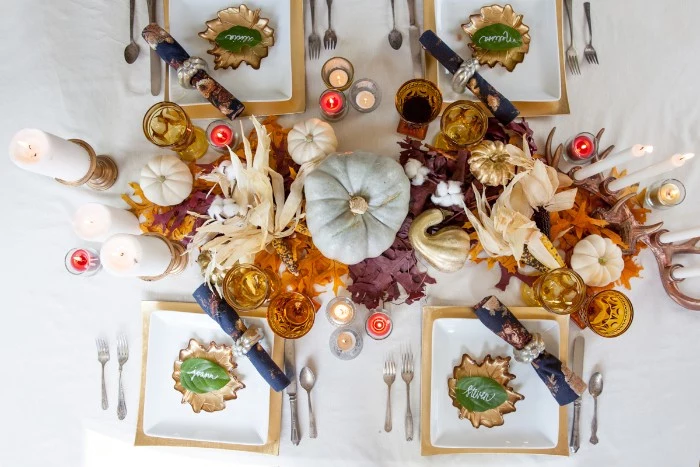
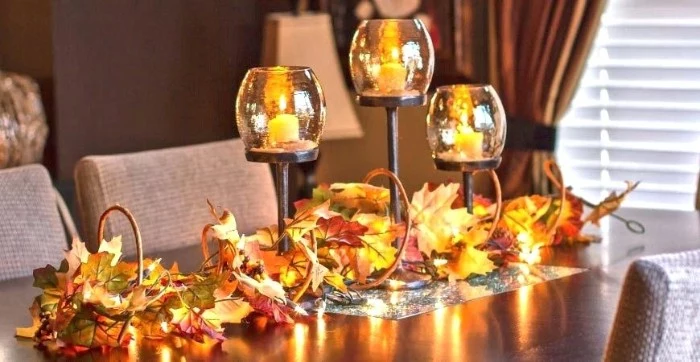
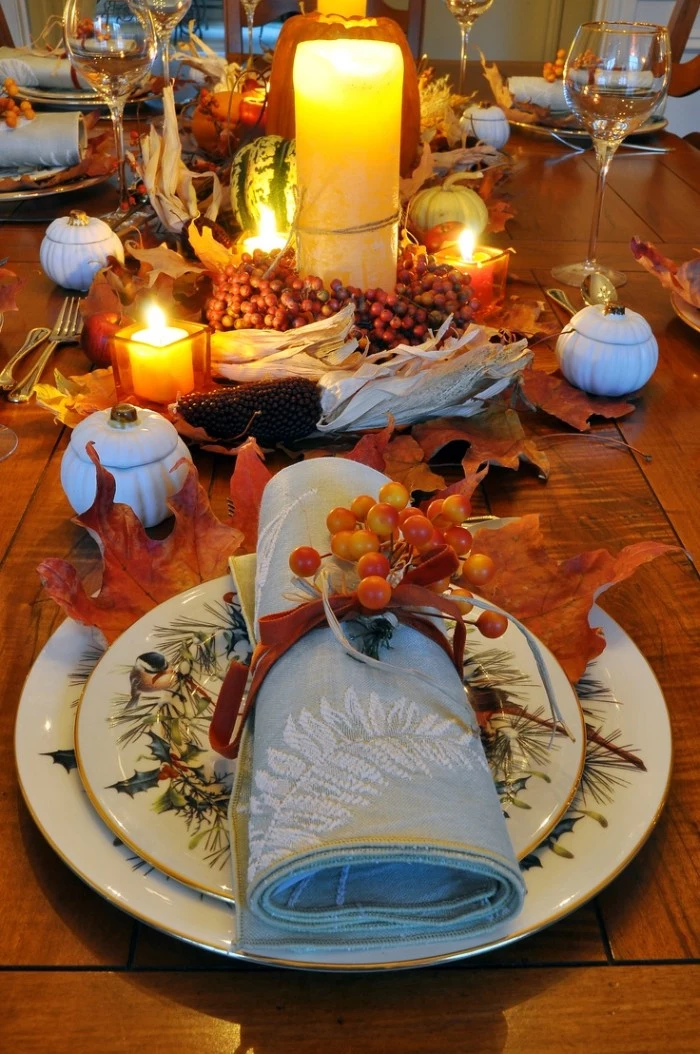
4. Scatter and Add Height: The final layer is for the tiny details and some vertical interest. Scatter unshelled nuts, acorns, or fresh cranberries along the runner. Then, add height with taper candles in holders or small votives. The candlelight is what will make all those textures pop.
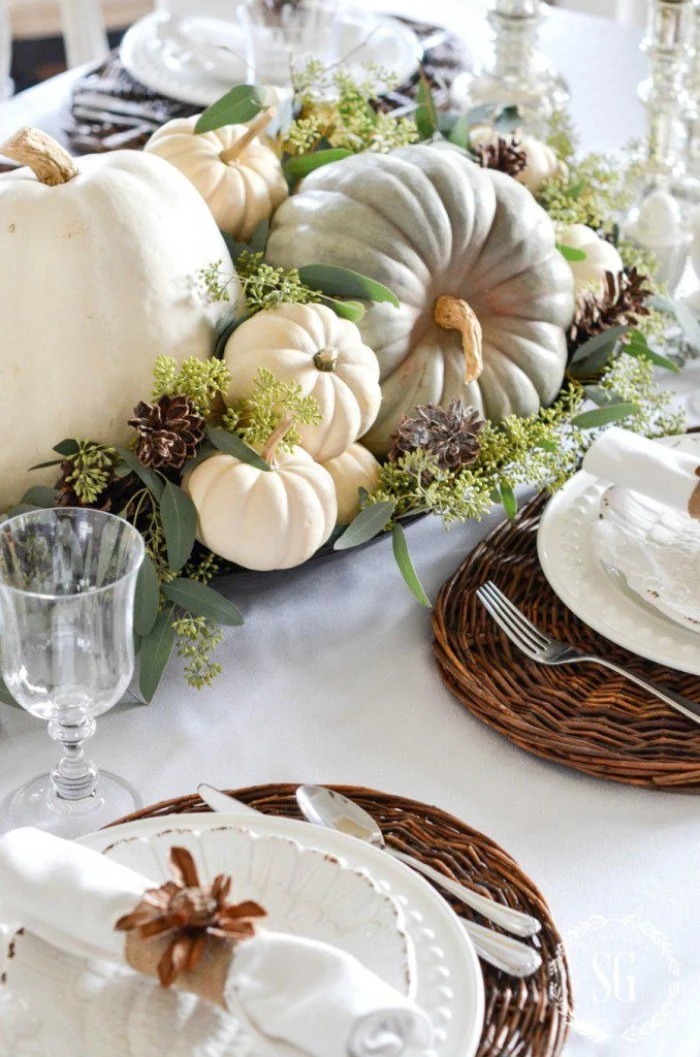
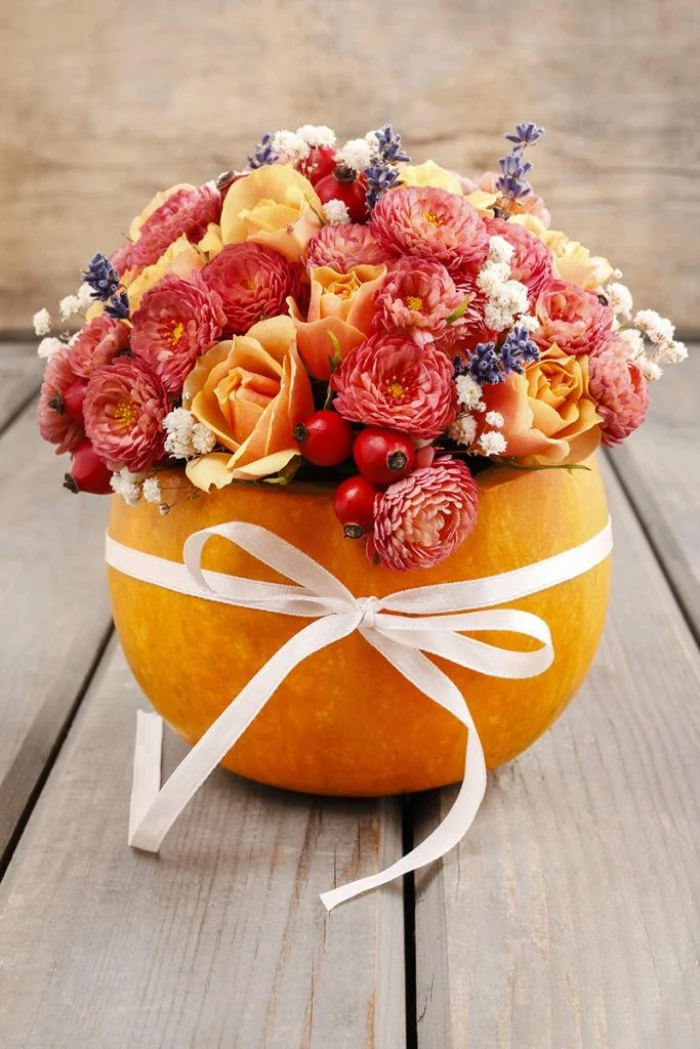
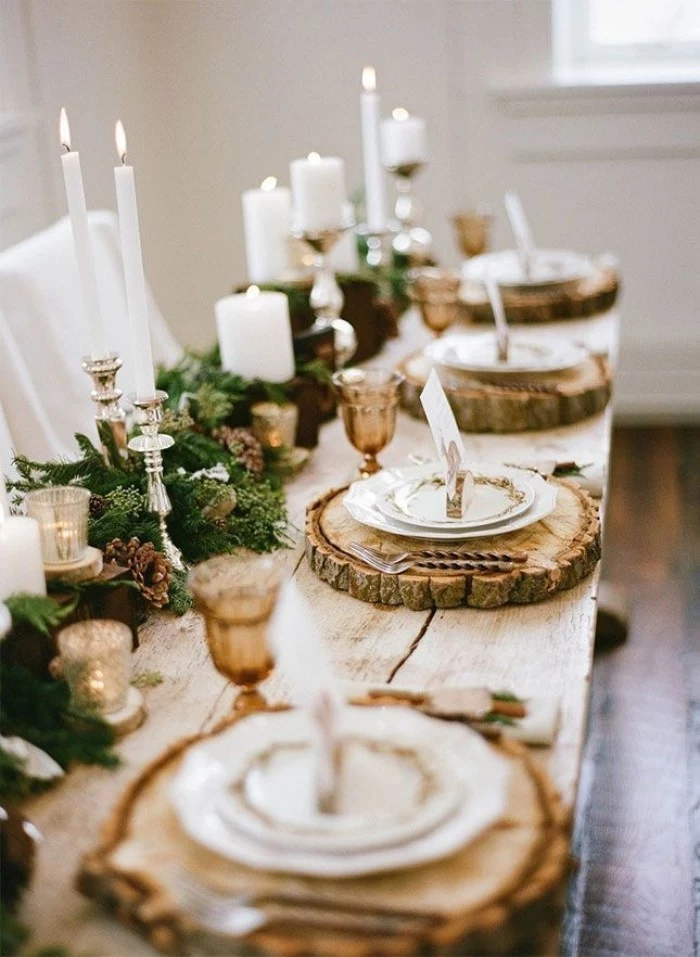
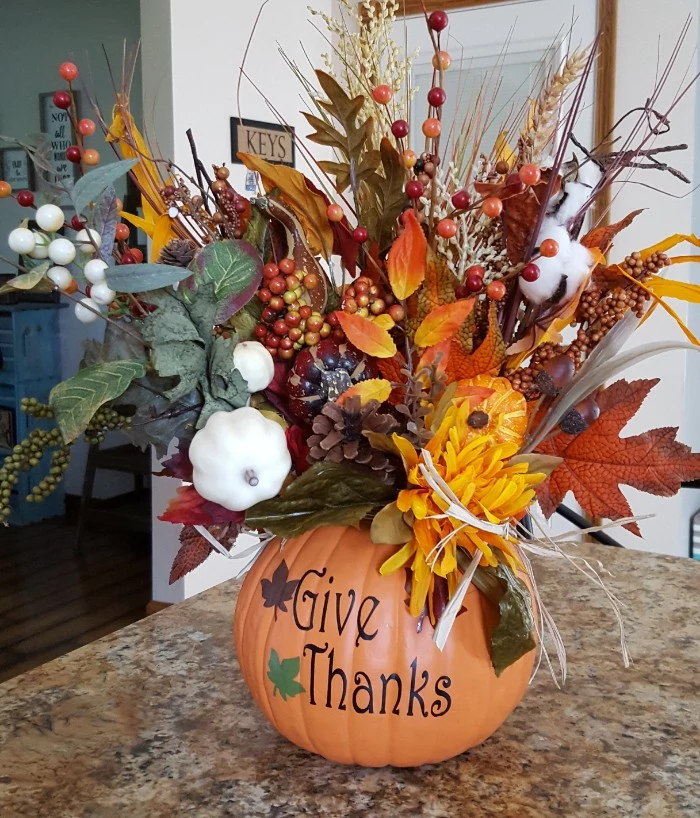
Method 2: The Pumpkin Vase (Done Right)
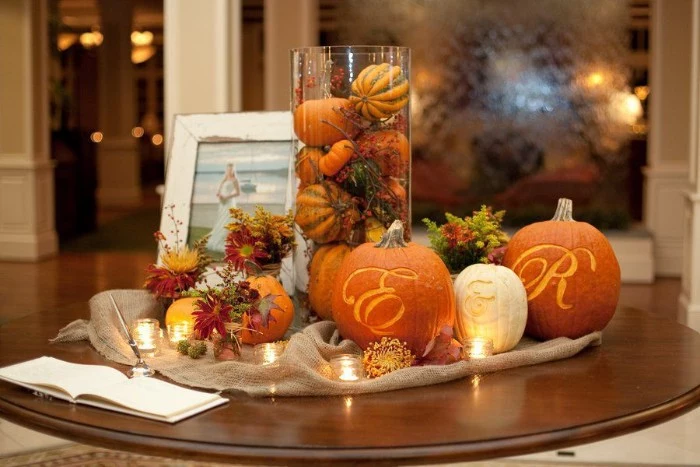
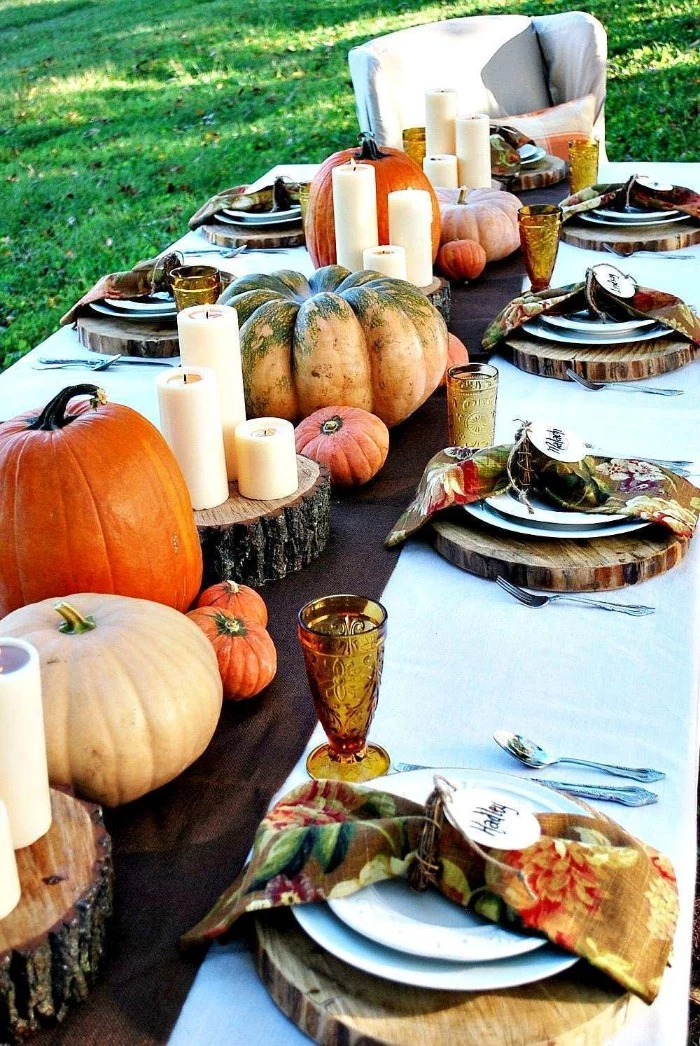
Using a hollowed-out pumpkin as a vase is a classic, but I’ve seen them turn into a soggy, collapsing mess. The key is in the prep.
1. Pick the Right Pumpkin: Skip the tall, thin carving pumpkins. You want a squat, wide one like a Cinderella or Fairytale pumpkin. They’re more stable and look better. You can usually find one for about $8-$12 at a pumpkin patch or even the grocery store.
2. Hollow It Out PROPERLY: Cut a nice wide opening at the top and scrape the inside completely clean. Get all that stringy pulp out. Any gunk left inside will make it rot faster. Pat the inside dry with a paper towel.
3. Use a Liner! (This is the most important step): Never, ever put water directly into the pumpkin. It will turn to mush in a day. Instead, place a small plastic container or glass jar inside. The top of the jar should be just below the pumpkin’s opening.
4. Arrange Your Flowers: For beginners, grab some hardy flowers that last. A bunch of mums and some alstroemeria are perfect—they’re cheap, you can find them anywhere, and they can last over a week. Add some seeded eucalyptus for greenery. All in, your flowers might cost you $15 from a place like Trader Joe’s. A well-made pumpkin vase like this should look great for 3 to 5 days.
What About Regional Style?
The most authentic and beautiful tables often reflect the world right outside your door. It makes sourcing materials way easier and cheaper, too.
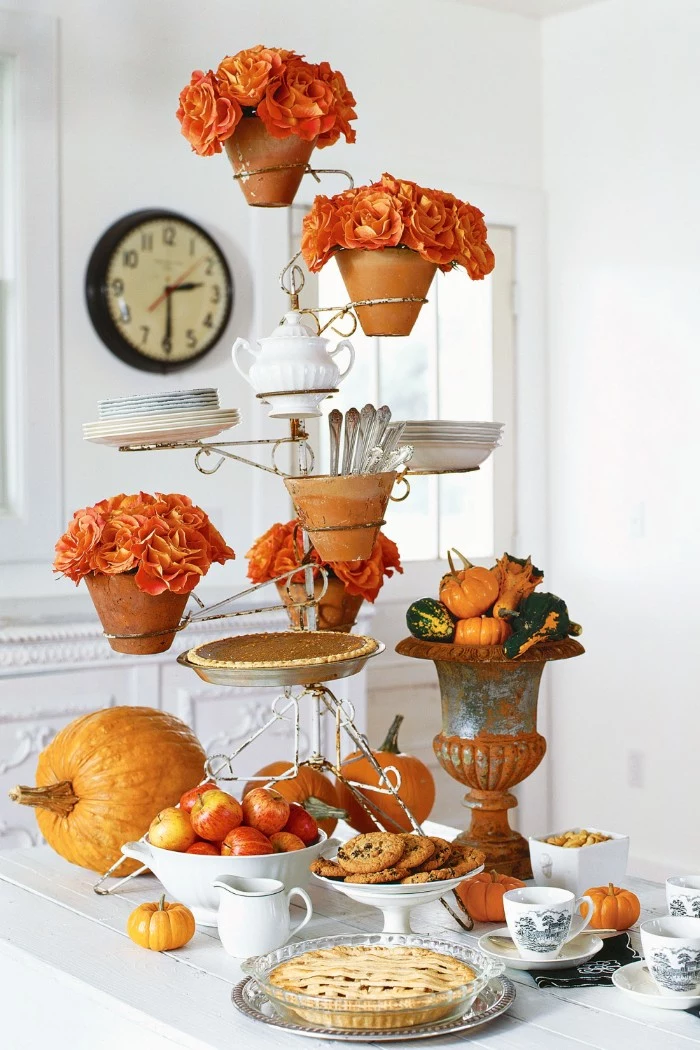
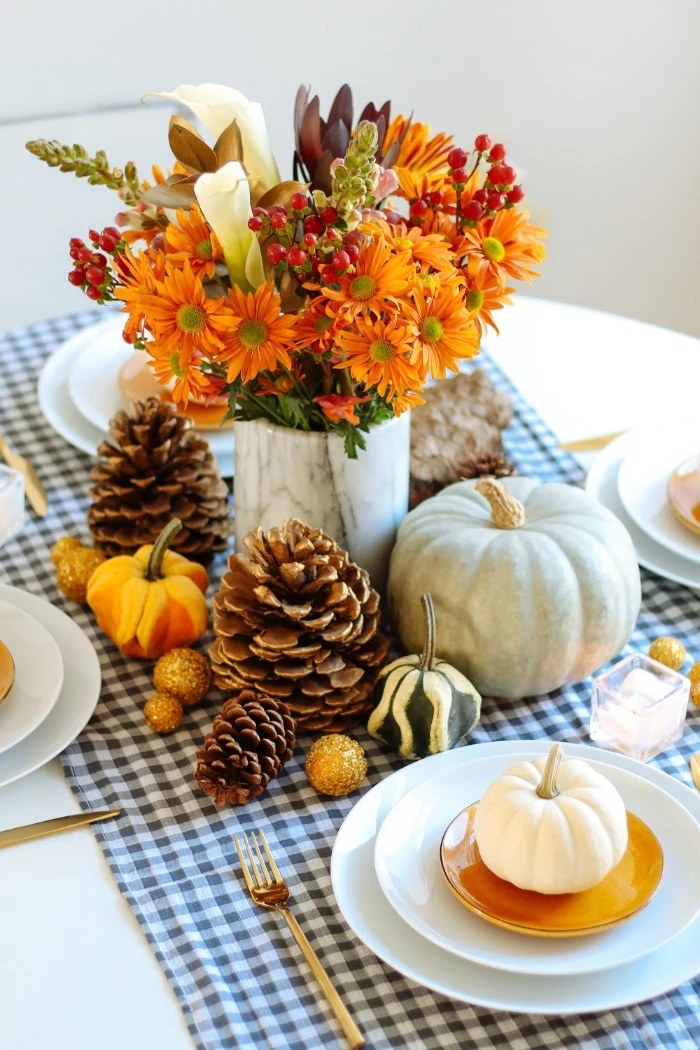
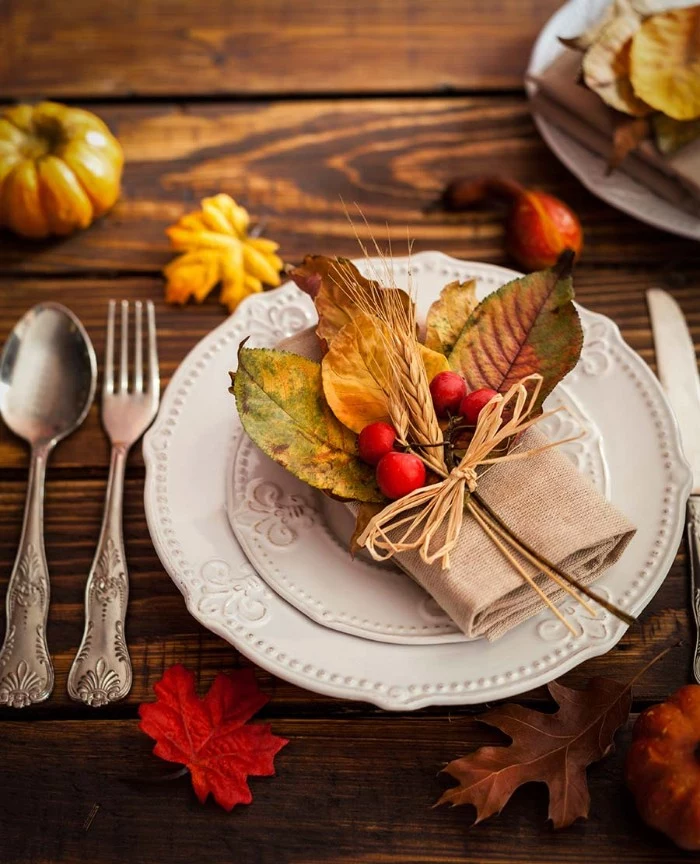
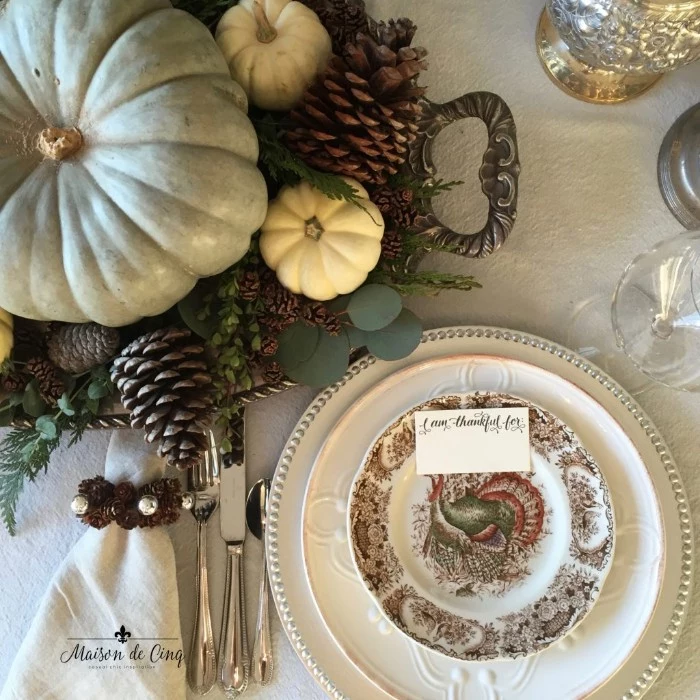
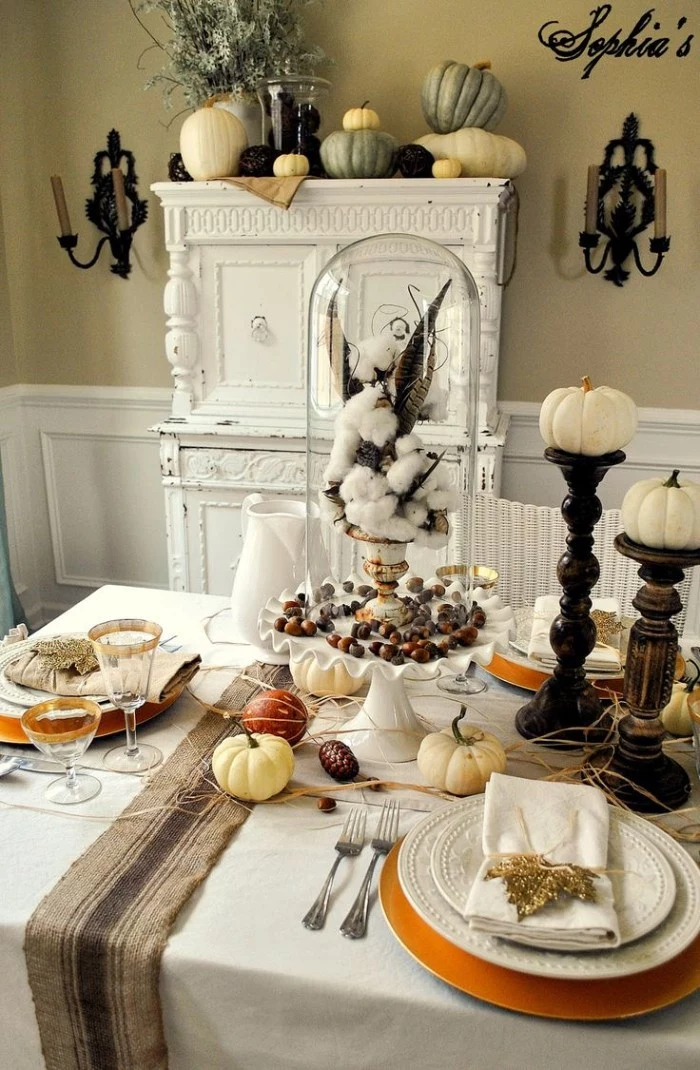
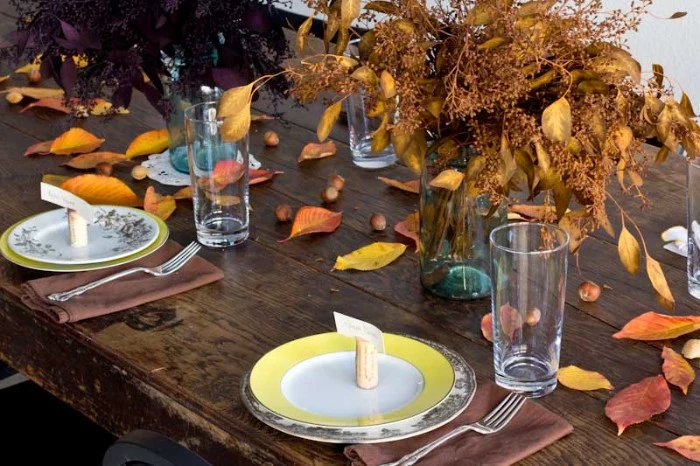
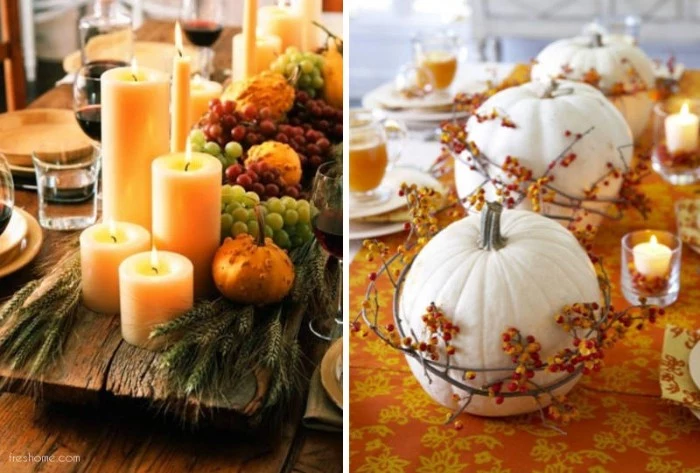
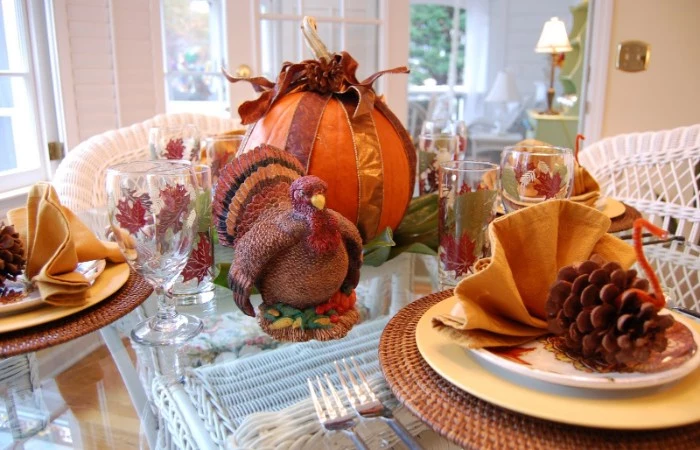
- New England Harvest: This is that super traditional, cozy style. Think pressed maple leaves, fresh cranberries, apples, and maybe some birch bark. The colors are deep reds, burnt oranges, and rich browns.
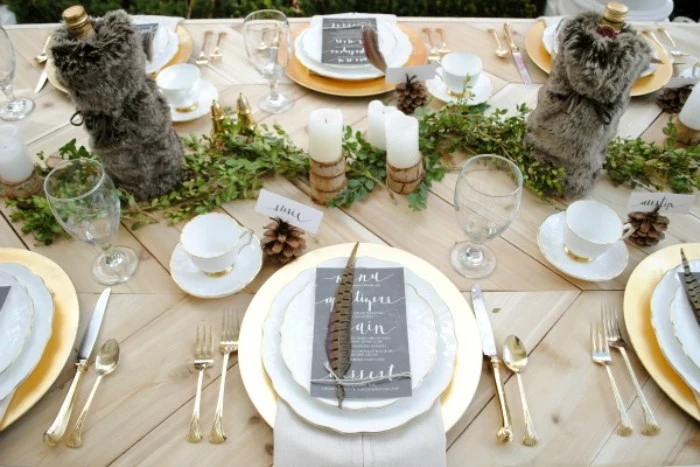
- Southern Elegance: This look blends rustic with refined. Magnolia leaves are a must—their glossy green tops and velvety brown undersides are gorgeous. Add in some cotton stems, pecans, and maybe some silver candlesticks for a touch of class.
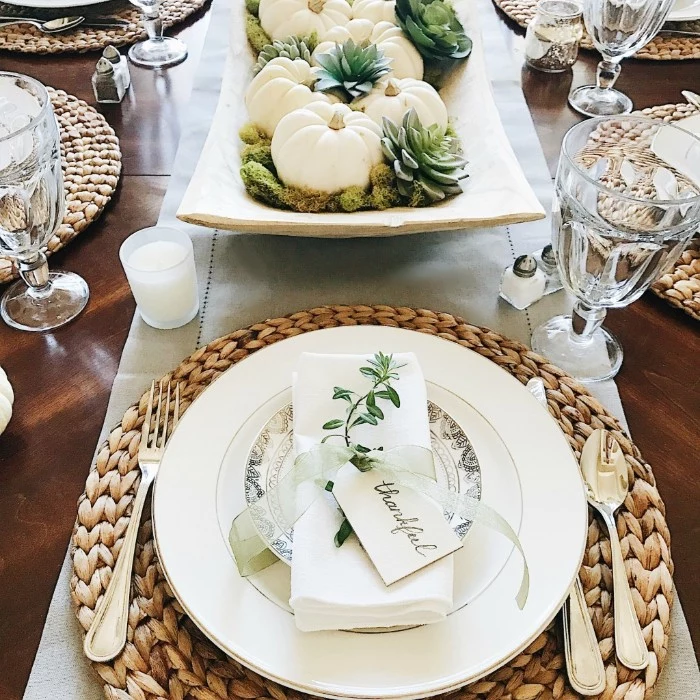
- West Coast Natural: This style is often lighter and more organic. We’re talking eucalyptus, olive branches, succulents, and even artichokes. White or unique blue-gray pumpkins are very popular here.
- Midwest Heartland: Let’s not forget the heartland! This look is all about rustic bounty. Think dried cornhusks tied around napkins, stalks of wheat, pheasant feathers (ethically sourced, of course), and a warm, golden color palette. It’s earthy and incredibly welcoming.
- Southwest Spirit: For a vibrant and unique feel, draw from the Southwest. Use a woven textile as a runner, and decorate with small terracotta pots holding succulents, dried chili ristras for a pop of red, and a color scheme of terracotta, turquoise, and sand.
Let’s Talk Budget (and Sanity)
You absolutely do not need to spend a fortune. Some of the best tables rely on creativity, not cash. And more importantly, you don’t need to stress yourself out.
The 5-Minute Quick Win
No time? No problem. Grab a scarf from your closet (a plaid or solid color works great) and use it as a runner. Line up 3 to 5 apples, pears, or oranges from your fruit bowl down the middle. Tuck a few tea lights in glass holders in between them. Done. It takes five minutes and looks incredibly intentional.
DIY vs. Store-Bought: Where to Spend Your Time
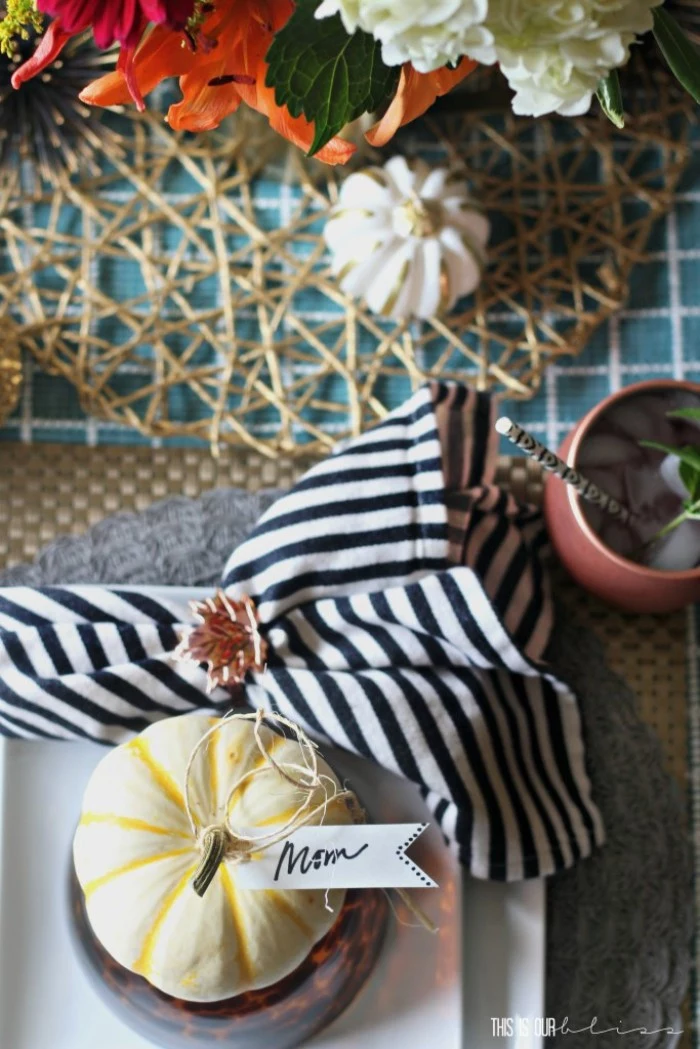
Personal touches are great, but you have to decide what’s worth your time. Let’s take place cards, for example. You can absolutely write names on big magnolia leaves with a metallic pen for a beautiful, free option. Or tie a paper tag to a pear stem. It’s a lovely personal touch.
But… if you’re already stressed about cooking, is it worth it? To be frank, spending $10 on a pack of simple, elegant place cards from a craft store might be the best money you spend all week. You’re not just buying cards; you’re buying back your time and peace of mind.
Forage and Shop Smart
Your backyard and the grocery store produce aisle are your best friends.
- From the Yard: Branches, pinecones, and cool leaves are free! Quick tip: Always prep your foraged goodies. Bake pinecones on a foil-lined sheet at 200°F for about 30 minutes to kill any lingering bugs or spiders. Yikes.
- From the Grocery Store: The produce aisle is a goldmine. Pomegranates, pears, artichokes, persimmons, and even heads of purple kale or cabbage make stunning, inexpensive decorations. A handful of these can cost you less than $10 and add a true feeling of bounty. Plus, you can eat them later!
Setting the Places (The Easy Way)
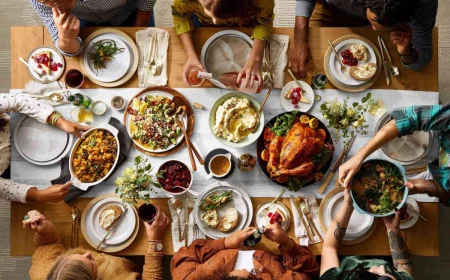
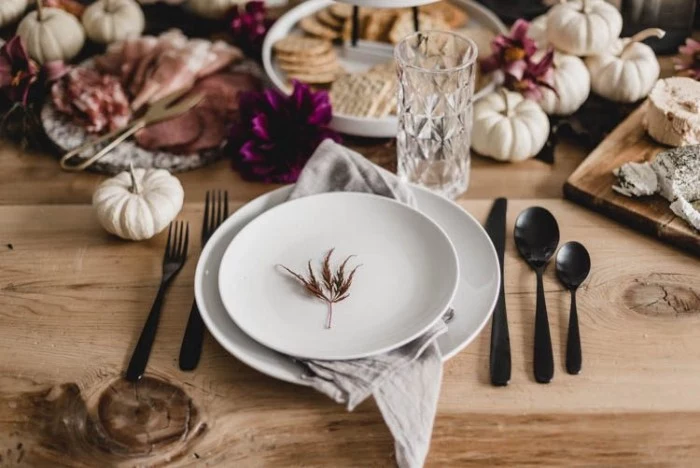
A properly set place just shows you care. It doesn’t have to be fussy. For a normal Thanksgiving meal, a dinner fork on the left, plate in the middle, and knife (blade facing in) and spoon on the right is perfect. Water glass goes above the knife. Done. Consistency is what matters—just make each setting the same.
By the way, if you’re feeling a little extra this year and want a more formal setting, the salad fork goes to the left of the dinner fork. The dessert spoon and fork go horizontally above the plate. Easy peasy.
And Finally… The Safety Stuff Pros Never Skip
A beautiful table is a safe table. This is the non-negotiable part of the checklist.
Fire Safety is No Joke
Candlelight is gorgeous, but it’s also a real risk. I once saw a guest’s flowy sleeve catch fire when they leaned over a low votive. It happens terrifyingly fast.
- The 12-Inch Rule: Keep anything flammable (dried leaves, paper, gauzy runners) at least a foot away from any open flame.
- Use Proper Holders: Never put a candle directly on a table. Tapers need sturdy holders they can’t wobble out of. Votives need glass cups that are taller than the flame.
- Consider High-Quality LEDs: Flameless candle technology is amazing now. Look for ones made of real wax with a ‘flicker effect.’ Brands like Luminara are top-tier, but you can find surprisingly realistic ones at Target or on Amazon for a good price. They are the absolute best choice if you have kids at the table or lots of dry decor.
- Never leave lit candles unattended. Period.
Food Safety with Your Decor
If you’re using non-edible decor, be smart about it.
- Don’t place anything painted or sprayed (like some craft store items) directly on plates where people will eat.
- Gently wash and dry any fresh produce you use on the table.
- Be 100% certain that any greenery you foraged isn’t poisonous. Many common decorative plants, like holly berries, are toxic. When in doubt, just stick to things from the grocery store.
Timing is Everything
Don’t try to do all of this on Thanksgiving morning. That’s a one-way ticket to Stressville.
- 1-2 Days Before: Set the whole table. Put down the runner, chargers, plates, and silverware. Assemble the non-perishable parts of your centerpiece.
- The Morning Of: Add the fresh stuff. Arrange flowers in your pumpkin vase. Add fruit to the centerpiece. Fill the water glasses.
- Right Before Guests Arrive: This is the final, magic touch. Light the candles. It’s the signal that the celebration is officially about to begin.
Creating a beautiful Thanksgiving table is really an act of love. It’s how you build an atmosphere of celebration before a single bite of turkey is served. Start with the basics, build with intention, and always, always put safety first. You’ve got this.
Inspiration Gallery
The personal touch is everything: Instead of a generic centerpiece, place a small, framed photo of a past family gathering or a beloved grandparent in the middle of the table. It’s a beautiful, quiet nod to your family’s history and a natural conversation starter.
More than 80% of our taste perception is actually determined by smell.
Avoid heavily scented candles that will compete with the aroma of the turkey and pies. Instead, simmer a small pot of water on the stove with cinnamon sticks, orange peel, and cloves. Or, for a tableside scent, tuck a single sprig of fresh rosemary or thyme into each guest’s napkin ring.
How do I make my table feel full and lush without a huge floral budget?
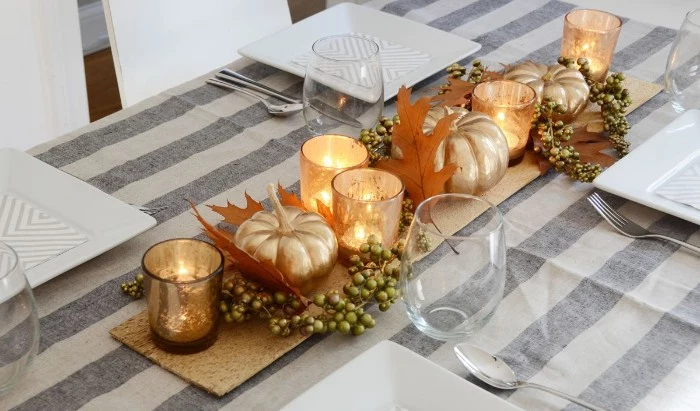
Think in layers and levels. Start with a fabric runner—even an inexpensive scrap of cheesecloth or linen works wonders. Then, use a mix of heights. Place a few pillar candles on simple ceramic holders, weave in some lower votives, and scatter a handful of seasonal fruits like pomegranates, pears, or persimmons directly on the runner. The variation creates visual richness.
- Adds an instant layer of texture and warmth.
- Protects your table from minor spills and heat.
- Creates a defined zone for each guest’s setting.
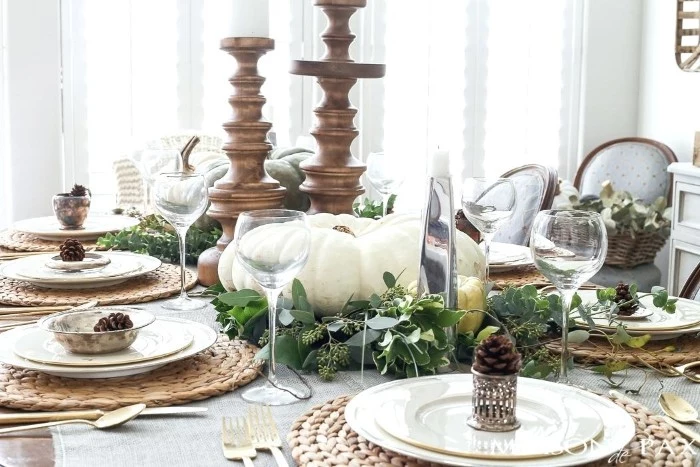
The secret? Woven placemats. Whether round water hyacinth mats from a brand like Crate & Barrel or simple jute ones from Target, they provide an earthy, organic foundation that makes any plate pop.

Move beyond the expected orange and brown. A sophisticated Thanksgiving palette can be built around muted tones that let the food shine. Consider a deep navy blue runner paired with brushed gold or copper cutlery for a touch of drama. Or, try a serene sage green and cream combination, using green eucalyptus branches and white mini-pumpkins for a modern farmhouse feel.
Don’t let your centerpiece block the conversation. A common rule of thumb for florists and event planners is to keep arrangements under 12 inches high.
Cloth Napkins vs. High-Quality Paper:
Cloth Napkins: Investing in a set of simple linen or cotton-blend napkins in a neutral color like oatmeal or charcoal grey adds instant weight and sophistication. They are reusable and feel luxurious. Look for deals at places like HomeGoods or on Amazon.
Luxe Paper: If cleanup is a priority, opt for oversized, thick paper napkins that mimic the feel of linen. Brands like Caspari or Hester & Cook offer beautiful patterns that can act as a pop of color for your table.
The choice depends on your priority: reusability and texture, or convenience and pattern.
For an easy, high-impact runner, head to the hardware or craft store. A roll of brown kraft paper, cut to size, is the perfect canvas for personalization. Leave a few Sharpies on the table and invite guests to write down what they’re thankful for. It becomes a living document of the day’s gratitude.
The forgotten element: Lighting. Harsh overhead lighting can kill a cozy vibe instantly. If you have a dimmer, use it. If not, turn off the main light and rely on the warm, flickering glow of candles and task lighting from nearby lamps. This single change does more to create an intimate atmosphere than any centerpiece.
Create a place card that doubles as a small party favor. Tie a name tag with twine around a single beautiful pear, a small bundle of cinnamon sticks, or a miniature bottle of maple syrup. It’s a thoughtful gesture that shows individual care and gives guests a sweet memento to take home.
- Miniature pumpkins or gourds spray-painted in a soft metallic gold or copper.
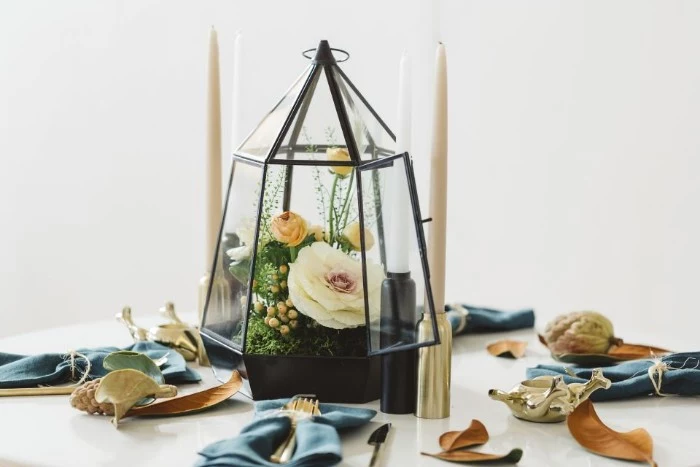
- A collection of vintage-style brass candlesticks of varying heights.
- Small, clear glass bud vases, each holding a single stem like a dahlia or a sprig of seeded eucalyptus.

My table is too small for a traditional centerpiece. What are my options?
Focus your decorative energy vertically or on the individual place settings. Hang a simple branch with dried orange slices or eucalyptus above the table. Or, forego a central arrangement entirely and make each place setting special with an exceptional napkin fold or a beautiful, personalized place card.
Don’t underestimate the power of thrifted finds. A single trip to a Goodwill or local thrift store can yield unique treasures: mismatched-but-coordinating small plates for appetizers, quirky salt and pepper shakers, or heavy, old-world silver-plated cutlery that adds a sense of history for just a few dollars.


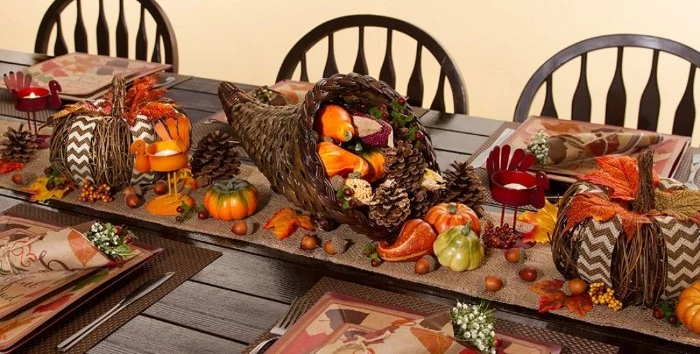
The cornucopia, or ‘horn of plenty,’ is a symbol of abundance and nourishment, tracing its roots back to Greek mythology long before it became a Thanksgiving staple.
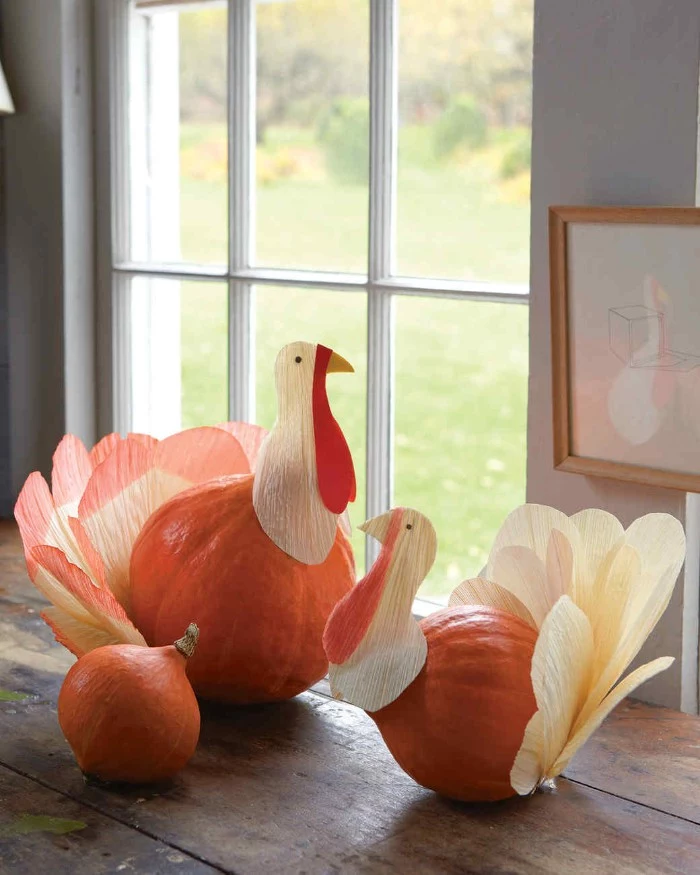
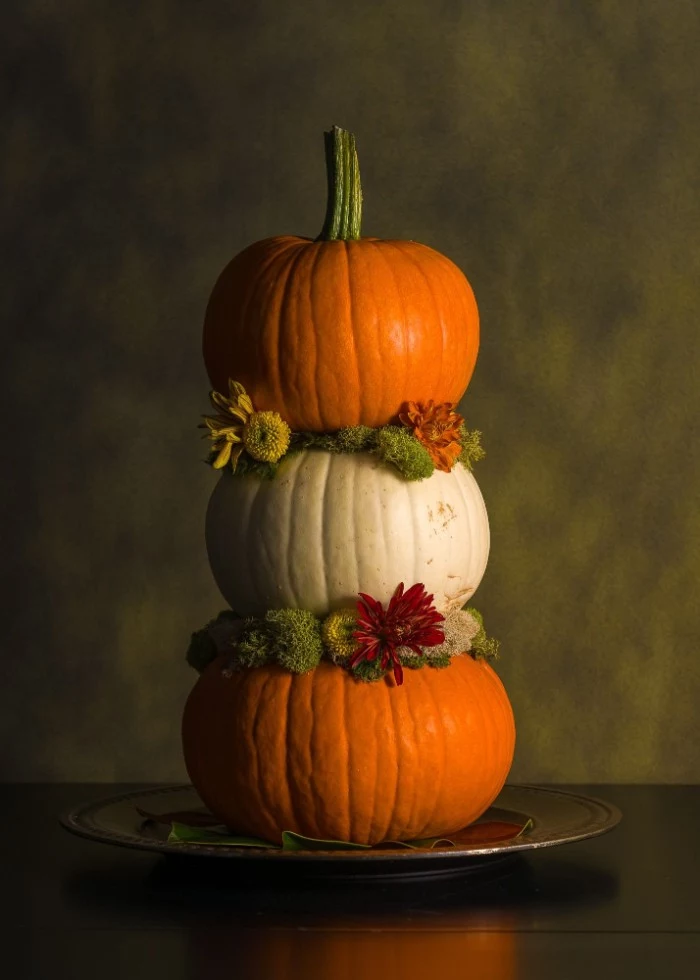
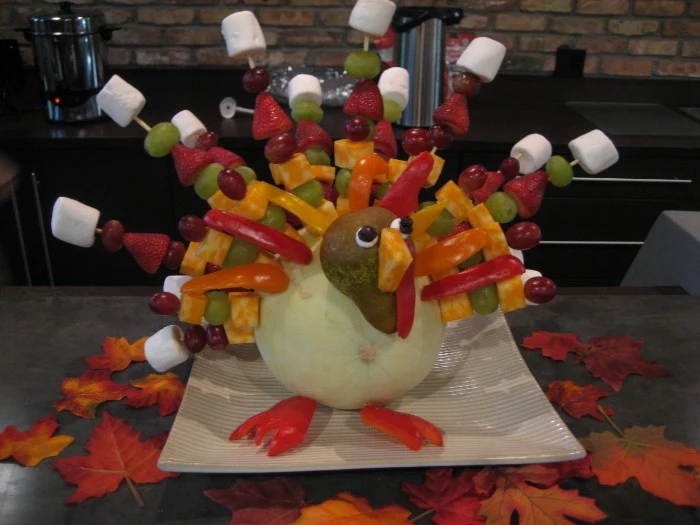
Instead of a traditional wicker cornucopia, you can create a modern version. Let a beautiful squash, like a Hubbard or Kabocha, be your ‘horn’ and have smaller gourds, nuts, and autumn leaves spill out from it across the table runner.
Give your plain glassware a simple upgrade. A small sprig of thyme tucked into the wine glass or a thin velvet ribbon tied around the stem is a quick, inexpensive detail that makes your standard glasses feel special for the occasion. It’s these tiny, thoughtful layers that build a memorable tablescape.
For a touch of moody elegance: Look to the Dutch Masters. The deep, rich color palettes and abundant, slightly chaotic feel of their still life paintings are perfect inspiration. Think dark linens, pewter or antique-finished serveware, and arrangements featuring dark grapes, figs, and pheasant feathers alongside deep red flowers.
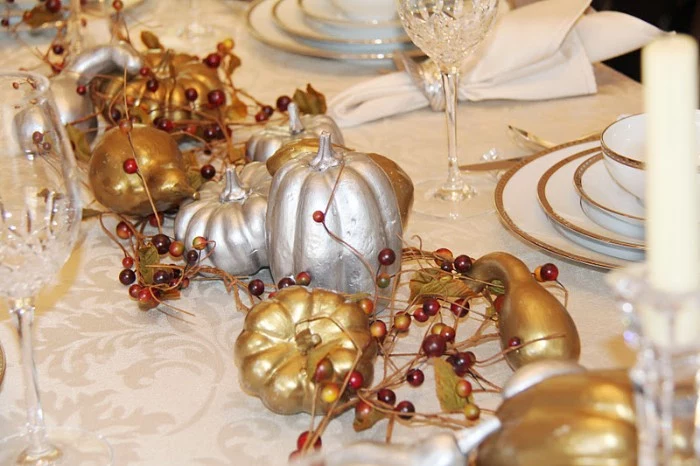
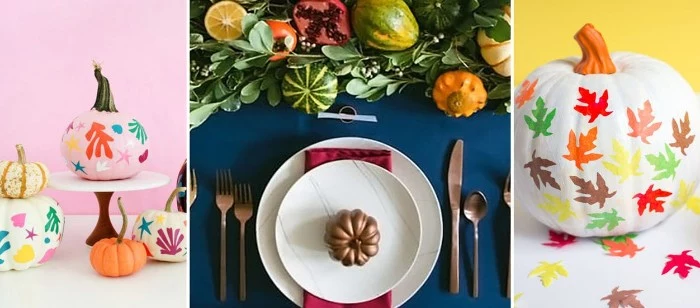
An easy DIY to unify your look: A can of spray paint is your best friend for a cohesive, budget-friendly design. Gather small pumpkins, gourds, or even some pears and give them a light coat of stone-textured spray paint (like Krylon’s) or a matte chalk finish paint in a single color like white or grey. This simple step turns cheap, disparate items into a chic, unified collection.
- They feel fun and less ‘precious’ than the main table.
- You can use unbreakable melamine plates and fun paper straws.
- A kraft paper tablecloth and a cup of crayons will keep them entertained.
The trick? Make the kids’ table an intentional, fun zone, not an afterthought. They’ll feel special and be happily occupied before and after the meal.
Are there any sustainable decoration ideas?
Absolutely. Instead of cut flowers, use small potted plants like cyclamen or ornamental kale as your centerpiece; they can be planted in the garden afterwards. Forage for fallen leaves and branches in your own yard. Choose cloth napkins you’ll use for years. The most sustainable approach is to choose beautiful, durable items you love and will reuse.

Flatware Placement, Simplified: The old rule is simple logic. Place utensils in the order of use, from the outside in. Salad fork goes to the far left of the dinner fork. Soup spoon to the far right of the dinner spoon. The only utensil that can go above the plate is the dessert spoon or fork.
Even the most basic white plates can look high-end.
The secret is what you put them on. A simple stoneware set, like the popular FÄRGKLAR series from IKEA, becomes a perfect canvas when placed on a textured charger. A charger—be it woven rattan, galvanized metal, or even a slice of wood—frames the plate and adds a crucial layer of dimension and color.
A Tip for Texture: A beautiful table engages more than just the eyes. Think about the tactile experience. The rough weave of a linen napkin, the smooth, cool feel of a ceramic plate, the satisfying weight of good cutlery, and the smooth rim of a glass all contribute to the overall feeling of quality and care.
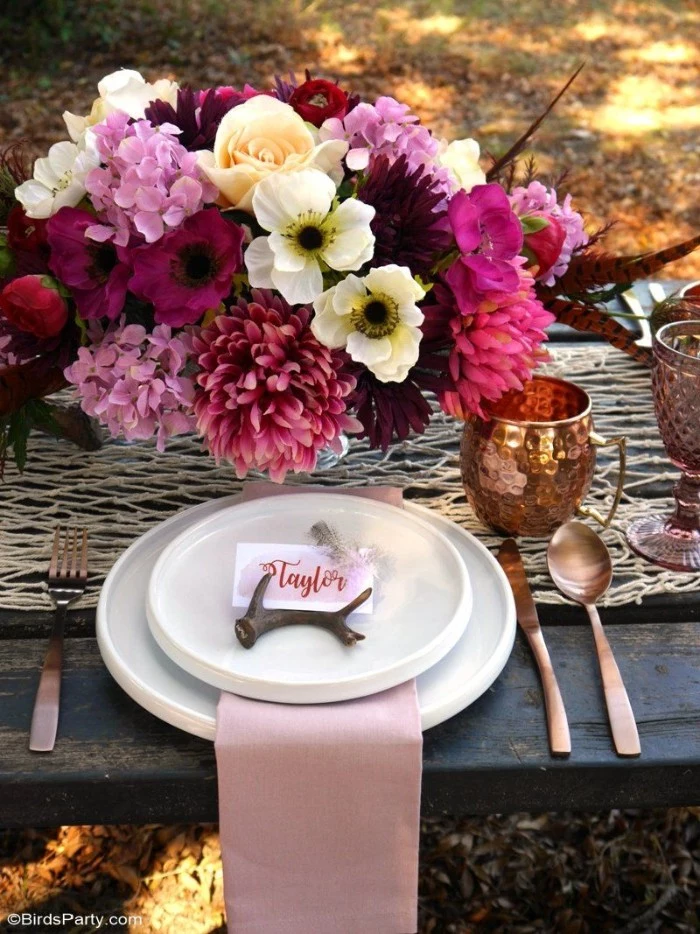
If you’re using place cards, consider adding a simple icebreaker question on the back for guests who may not know each other. Questions like

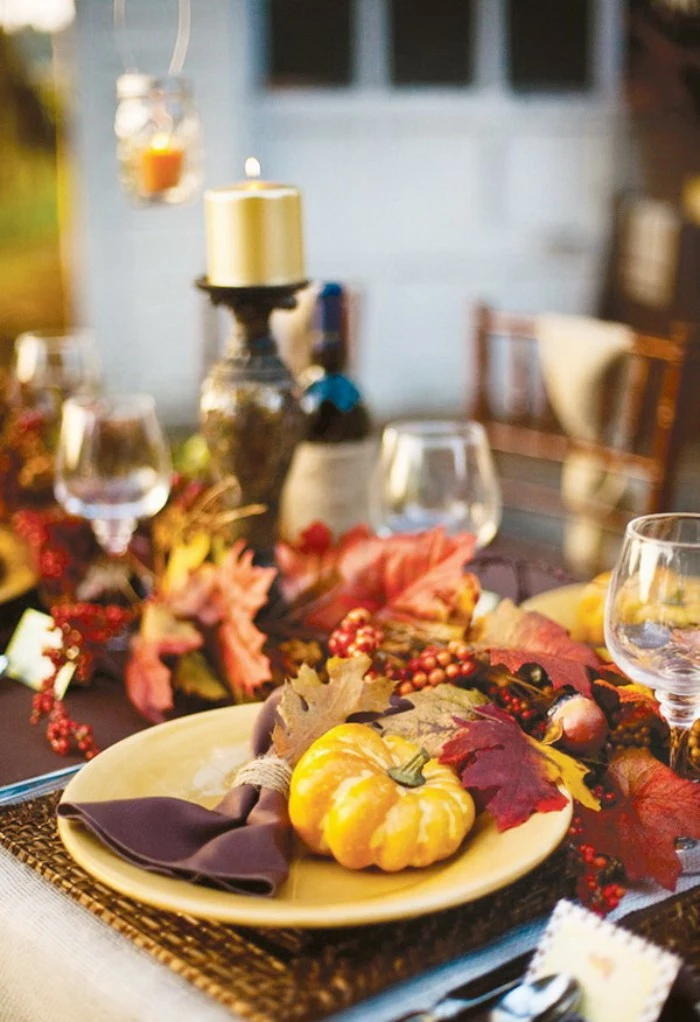
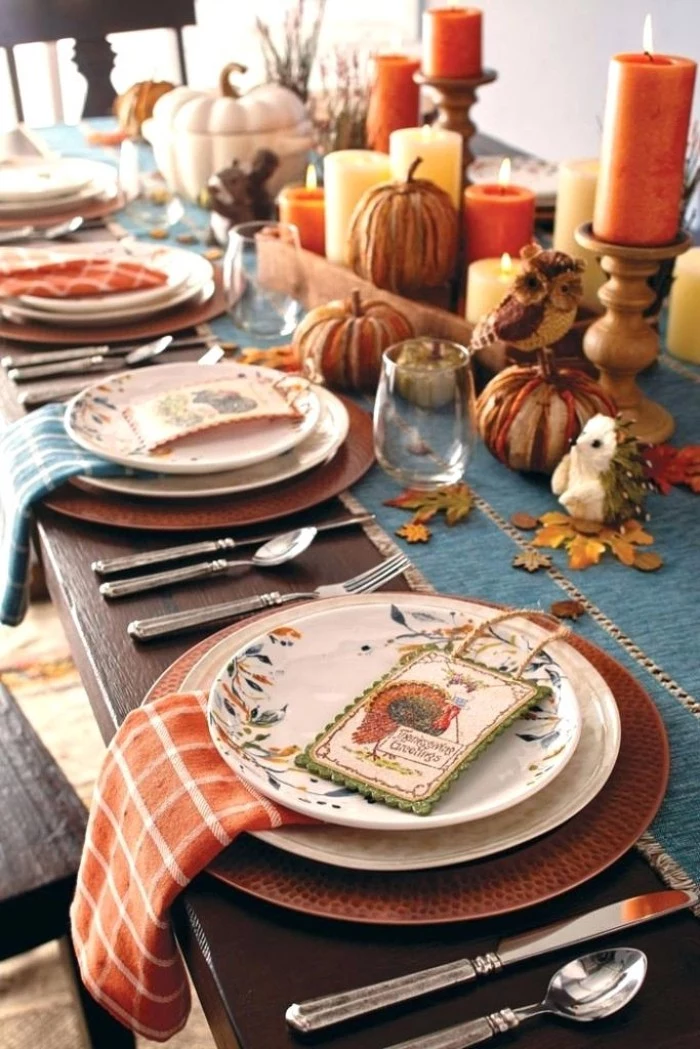
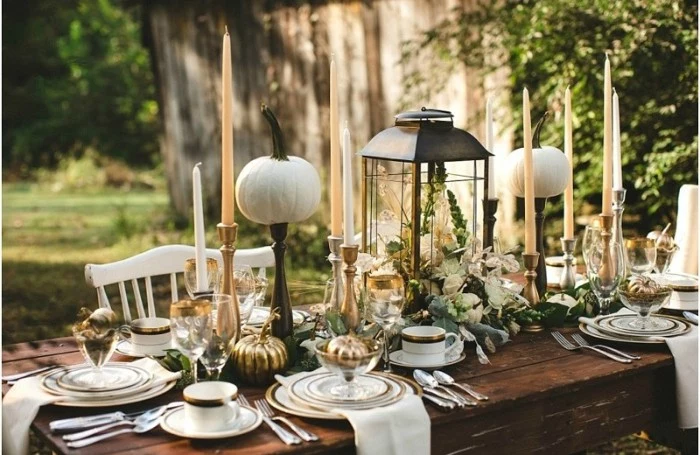
Taper Candles: Offer classic elegance and height, casting a broad, romantic light. Best used in sturdy, heavy-bottomed holders for safety.
Votive Candles: Provide a low, intimate glow. Grouping them in threes or fives creates a beautiful, shimmering effect down the center of a table.
For the most dynamic lighting, use both. The varying heights create a layered, magical ambiance.

When the meal is over, don’t rush to clear everything. Let the remnants of the feast—the wine-stained napkins, the crumbs on the runner, the flickering candle stubs—sit for a little while. This beautiful mess is the sign of a successful gathering, one centered on connection, not perfection.