You can always tell when Valentine’s Day is around the corner just by looking at people’s hands. Suddenly, the deep winter blues and sparkly holiday shades are gone, replaced by every shade of pink and red imaginable. It’s a whole season of romantic, creative nail art.
But here’s the secret the pros know: amazing nail art isn’t just about a steady hand. It’s about building a beautiful design on a foundation that’s actually healthy and strong. Honestly, a wobbly heart on a well-prepped nail will look better and last longer than a perfect one on a nail that’s destined to chip tomorrow.
So, this guide is going to break it all down. We’re going beyond pretty pictures to get into the why behind each step. Whether you’re a DIY nail enthusiast or just tired of your manicures chipping in two days, you’ll find the secrets to making your Valentine’s nail art look incredible and last for weeks.
Why Your Nail Prep Is Everything (Seriously)
Before you even think about cracking open a bottle of red polish, the fate of your manicure has already been decided. It all comes down to the prep work. This isn’t just about a quick wipe-down; it’s about creating the perfect surface for polish to stick to.
Think of your nail plate as a layered surface with natural oils. For polish to really bond, you need to gently remove those surface oils without causing damage. A common mistake I see people make is getting too aggressive with their nail file, thinking a rougher surface means better grip. In reality, going at your nail with a coarse file (like a 180-grit) just thins it out and makes it weaker. All you need is a light touch with a high-grit buffer (220-grit or higher) to gently take off the shine.
After buffing, the next step is to dehydrate the nail surface. For regular polish, a thorough wipe with isopropyl alcohol on a lint-free pad is usually all you need. But if you’re working with gel, a dedicated nail dehydrator or pH bonder is a must. It’s a quick step that temporarily removes moisture, creating an almost ‘sticky’ surface for your base coat to grab onto. This little step is the number one reason salon gel manicures last so long.
Getting Your Nails Ready: The Pro Method
Rushing your prep is a guaranteed way to get chips and lifting within a few days. So, let’s walk through it, the right way.
Cuticle Care That Actually Works
First, a quick anatomy lesson. The “cuticle” is the non-living, transparent skin that’s stuck to your nail plate. The “eponychium” is the line of living skin at the base of your nail that you should never cut. Cutting that living tissue is how infections happen, and it’s a major no-no.
Here’s how to handle it like a pro:
Get a Softener: Apply a cuticle remover or softener. You can find great ones from brands like Sally Hansen or Blue Cross at most drugstores or Sally Beauty for around $5-$8. Let it sit for about 30 seconds.
Gently Push Back: Use a metal pusher or a simple orangewood stick to carefully push the living skin back. You’ll see the true cuticle—that transparent layer—start to lift up off the nail.
Gently Scrape or Nip: This is key. Use your pusher to gently scrape away only that lifted, non-living tissue. If you use nippers, only snip off visible hangnails or stubborn bits of dead skin. This is precision work, not trimming!
I once had a client come to me after a bad experience elsewhere, and her nail beds were red and painful for weeks. It was a powerful reminder that gentle care is always better.
Shaping and Buffing
When you file your nails, always go in one direction, from the side toward the center. That classic back-and-forth sawing motion actually frays the nail edges and can lead to splits. For Valentine’s looks, softer shapes like almond, oval, or a rounded square look fantastic.
After shaping, grab a high-grit buffer (220-grit or higher) and lightly buff the entire nail surface to remove shine. Pay extra attention to the areas near your cuticle and the sidewalls—that’s where lifting almost always starts.
Regular Polish vs. Gel: Which One’s Right for You?
Okay, let’s talk about what you’re actually going to paint with. Your choice here affects everything from cost to how long your design will last.
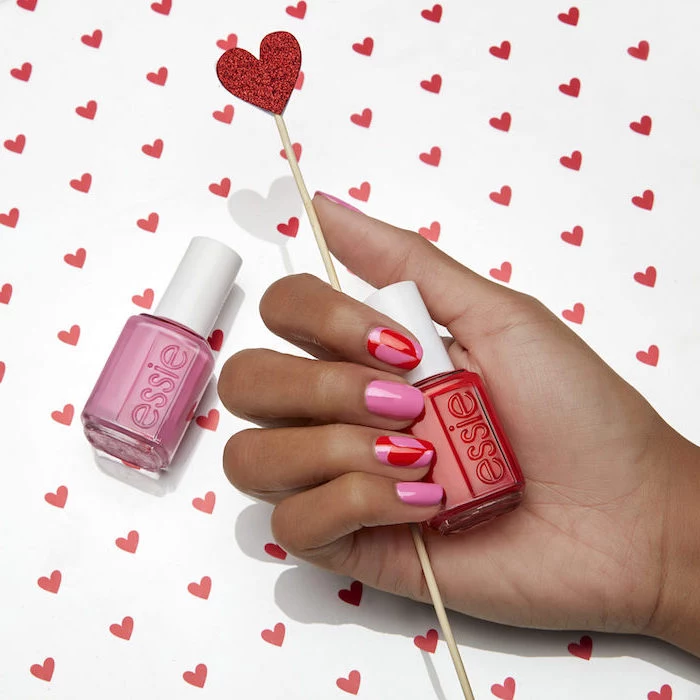
Regular Nail Polish: This is your go-to if you love changing your nails often. It’s affordable and easy to find everywhere. A good bottle from a brand like OPI or Essie runs about $9-$12. The downside? It takes a while to dry, and you’ll be lucky to get 3-7 days without a chip. For art, you need serious patience between layers.
Gel Polish: This is the salon standard for a reason. Gel is cured (hardened) under an LED lamp, meaning it’s rock-solid and smudge-proof in 30-60 seconds. A gel manicure can easily last 2-3 weeks. The initial investment is higher—a good starter kit from Amazon with a lamp and some colors can cost between $30 and $70—but it pays for itself quickly. The learning curve is a bit steeper, and removal requires a proper soak-off.
For most people, the choice comes down to time and money. If you have an hour or two to dedicate to a manicure that will last for weeks, gel is a fantastic option. If you want a quick, 15-minute color change, stick with regular polish.
Fun Valentine’s Art You Can Actually Do
Now for the fun part! Before you start, it’s helpful to have a few basic tools. You don’t need to spend a lot.
My Beginner’s V-Day Art Shopping List:
Dotting Tool Set: About $5 on Amazon or at Sally Beauty. Worth every penny.
Fine Liner Brush: A cheap one from a craft store works perfectly. Maybe $3-$5.
100% Pure Acetone: For cleanup and removal. Around $5 for a bottle at Walmart or a drug store.
Nail Art Vinyls (Optional): Heart-shaped stencils make life so much easier. A sheet is usually under $5 on Etsy or Amazon.
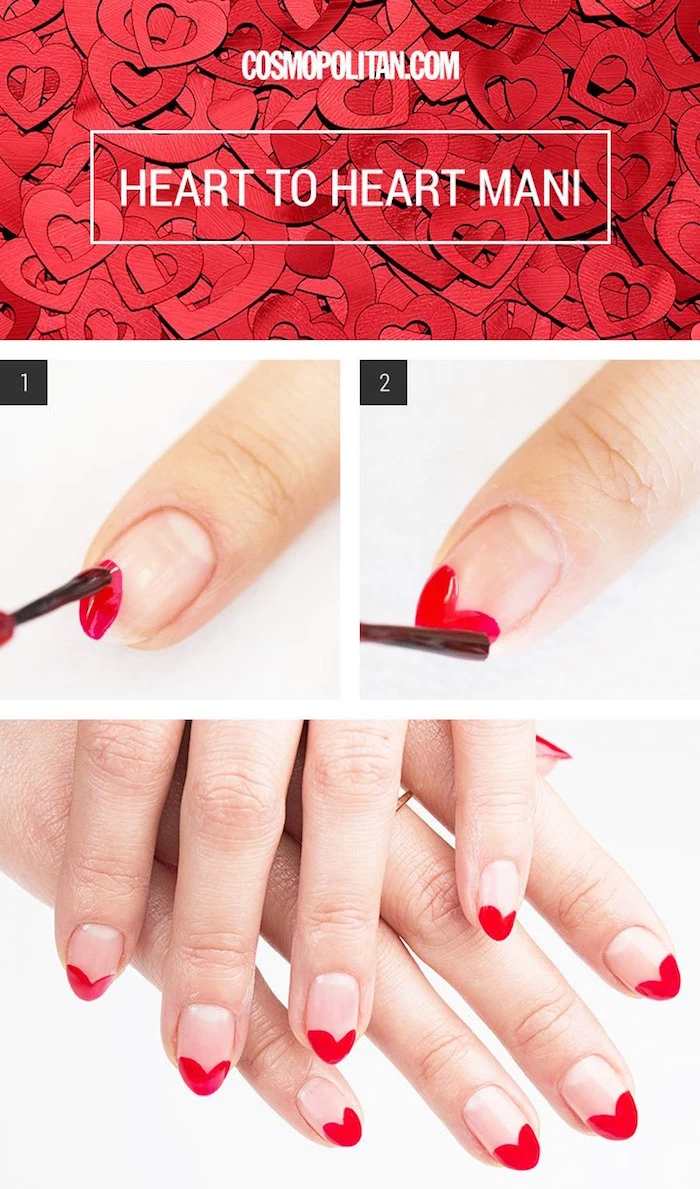
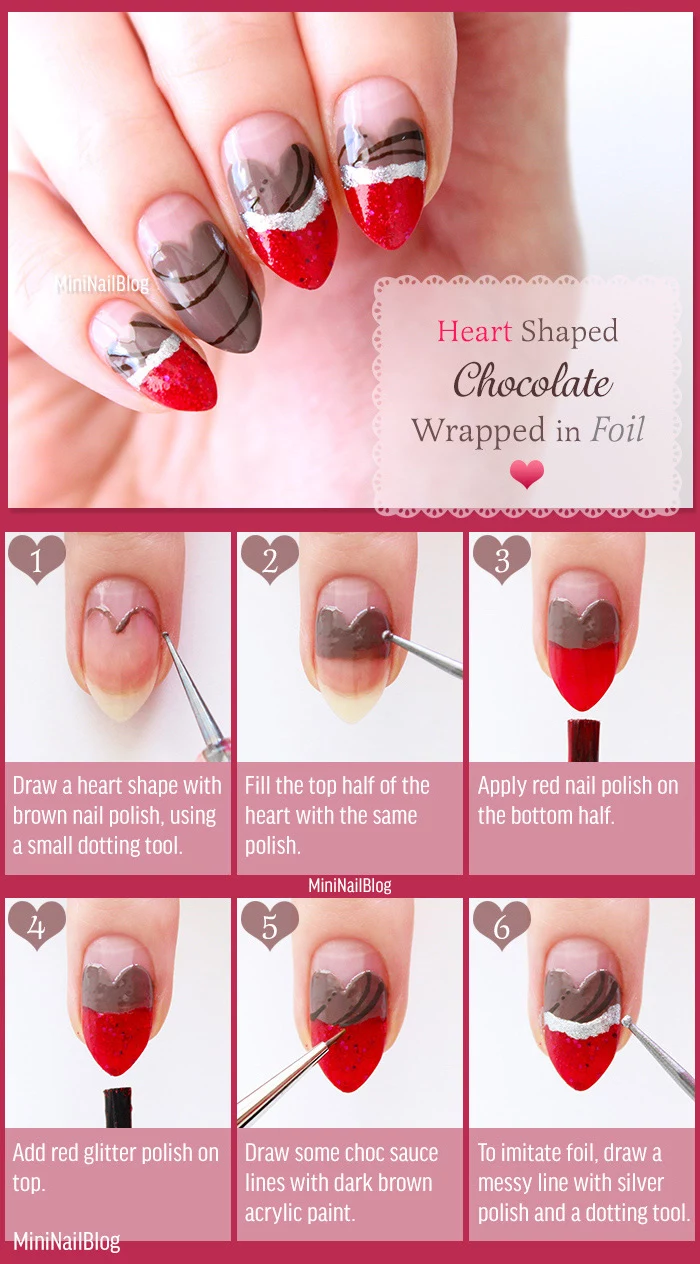
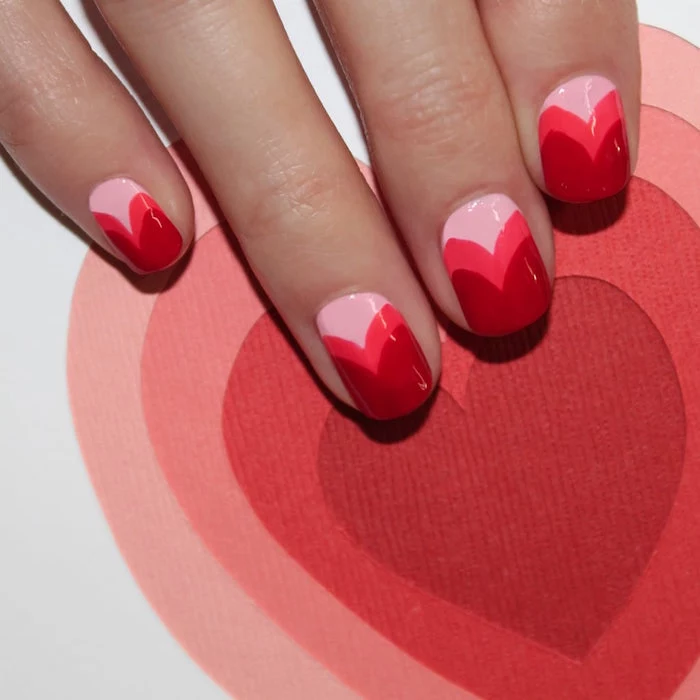
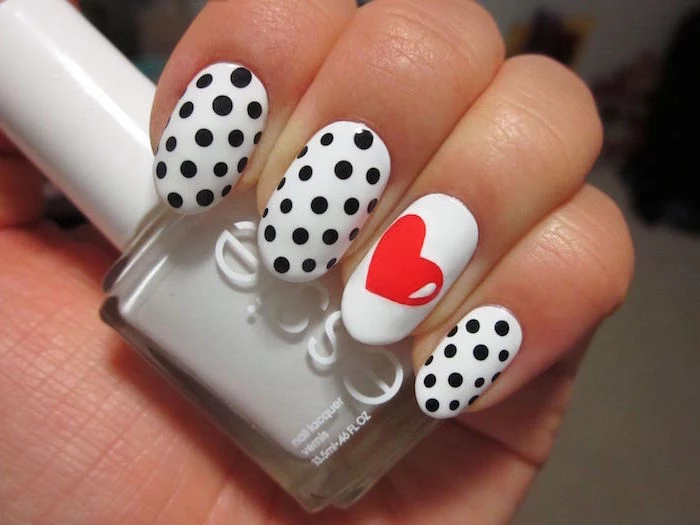
Technique 1: The Perfect Heart
A freehand heart looks tricky, but it’s not if you break it down.
You’ll Need: A dotting tool and your nail polish.
Dip your dotting tool into the polish and place two dots right next to each other on the nail.
Using a fine liner brush (or the tiny end of the dotting tool), drag the bottom of each dot down until they meet at a perfect point. Voilà! A heart.
Quick Tip: Don’t have a dotting tool? No problem! The tip of a bobby pin, the head of a straight pin, or even a toothpick works just as well.
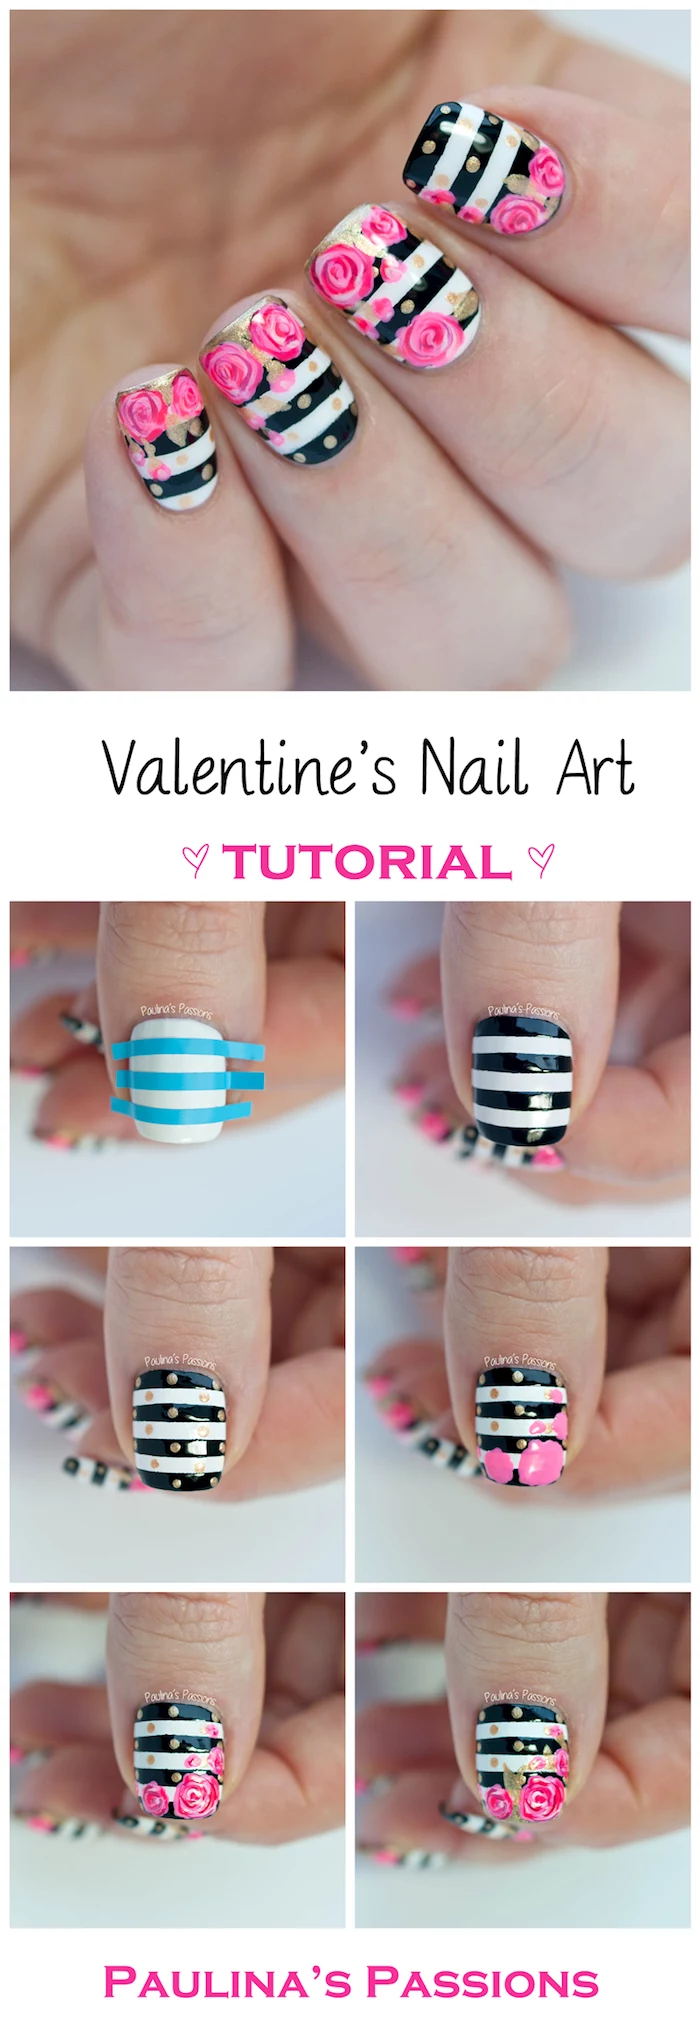
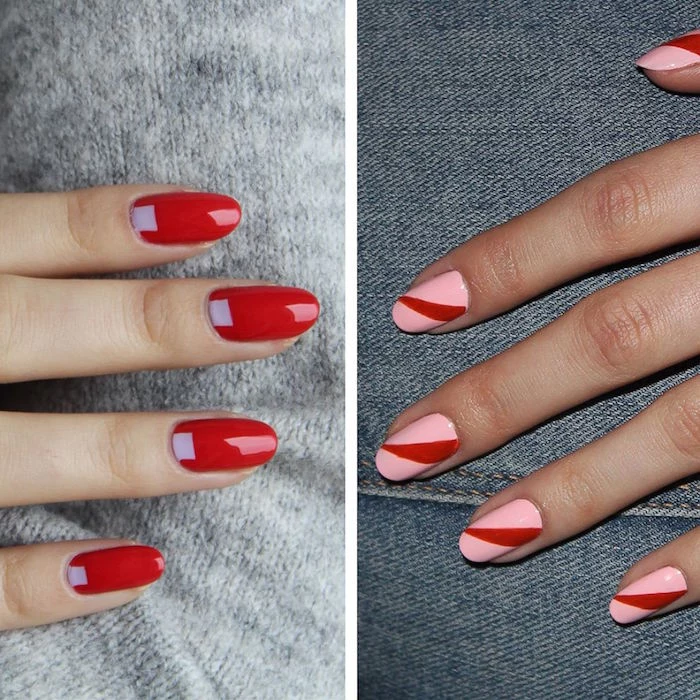
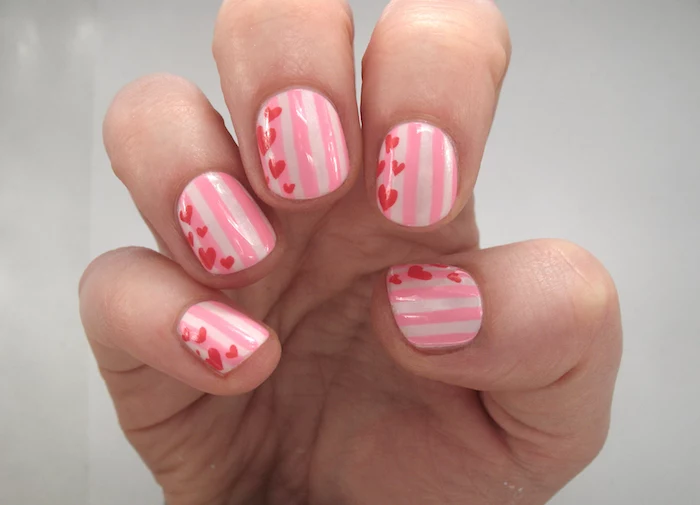
Technique 2: Super Crisp Lines (The French Tip Hack)
Getting a clean line for a French tip or color block seems impossible, but this is the secret.
You’ll Need: Your base and tip colors (gel works best for this), a small flat brush, and isopropyl alcohol.
Apply and cure your base color (let’s say it’s a sheer nude).
Wipe the sticky layer off with alcohol. This is critical—it stops the colors from bleeding.
Paint your tip color on. Don’t worry about making it perfect.
Now, dip your small, flat cleanup brush in alcohol, wipe off the excess, and use it to carve out a perfect, crisp smile line. The alcohol removes the uncured gel without touching your cured base.
Once you love the line, cure it and apply a top coat.
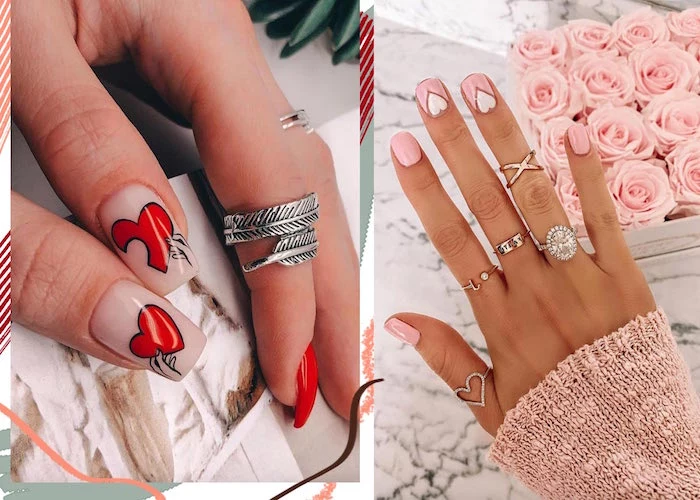
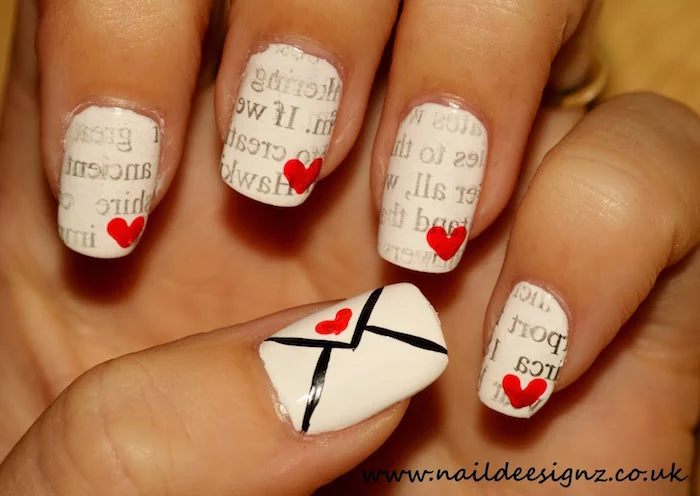
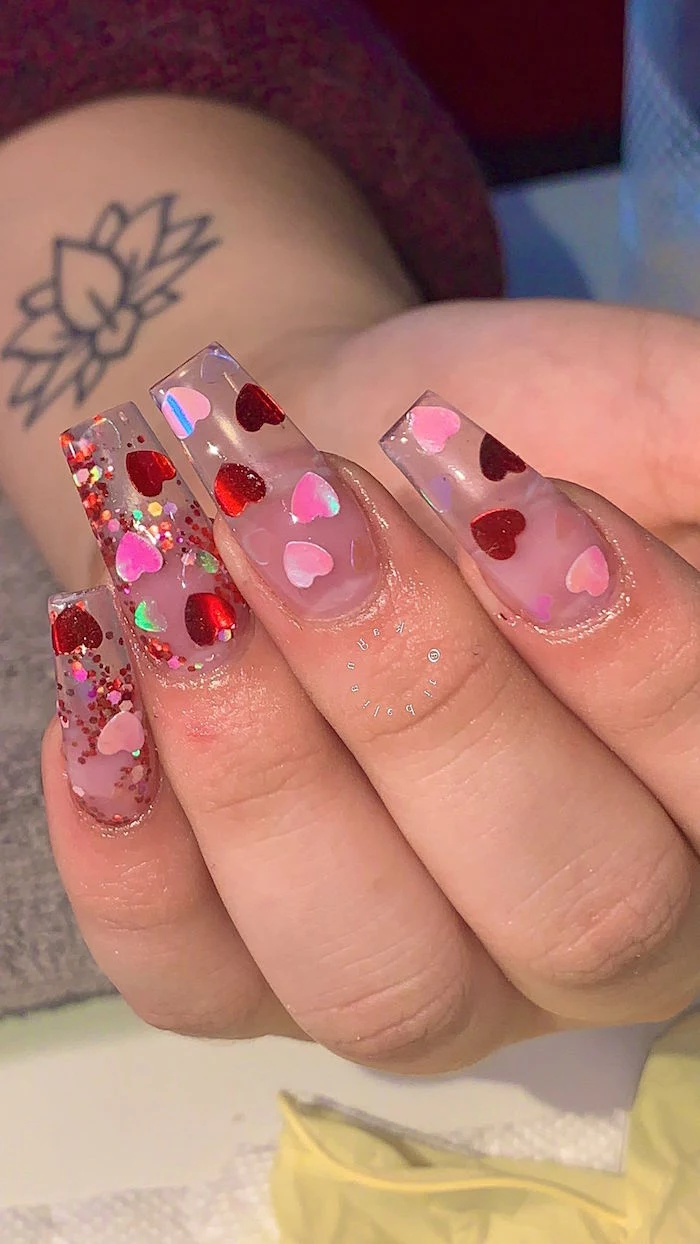
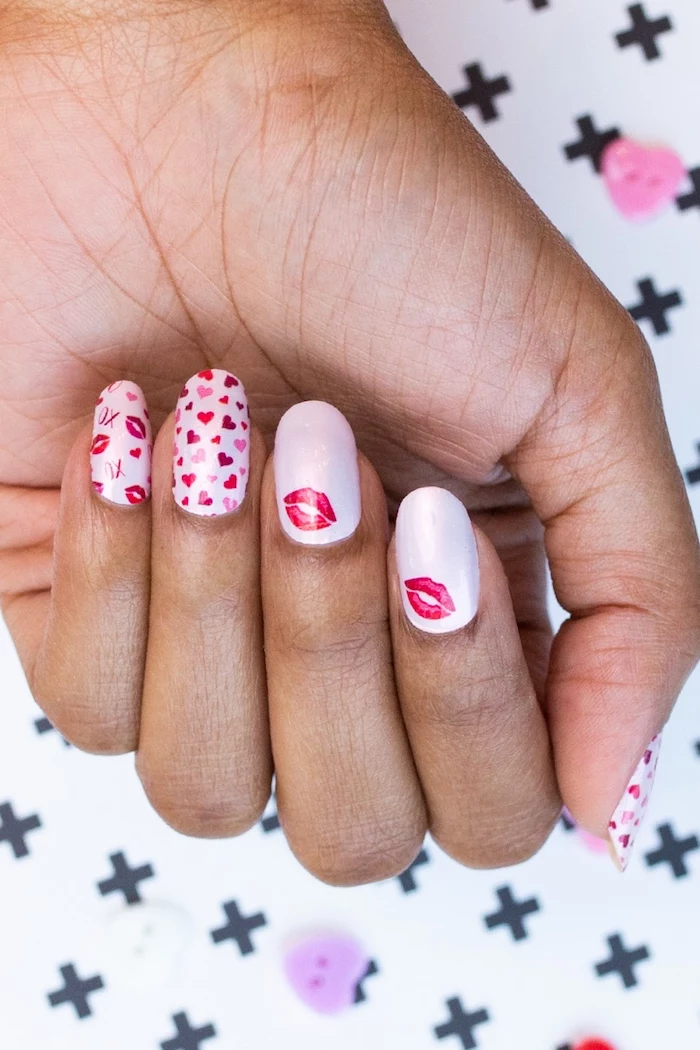
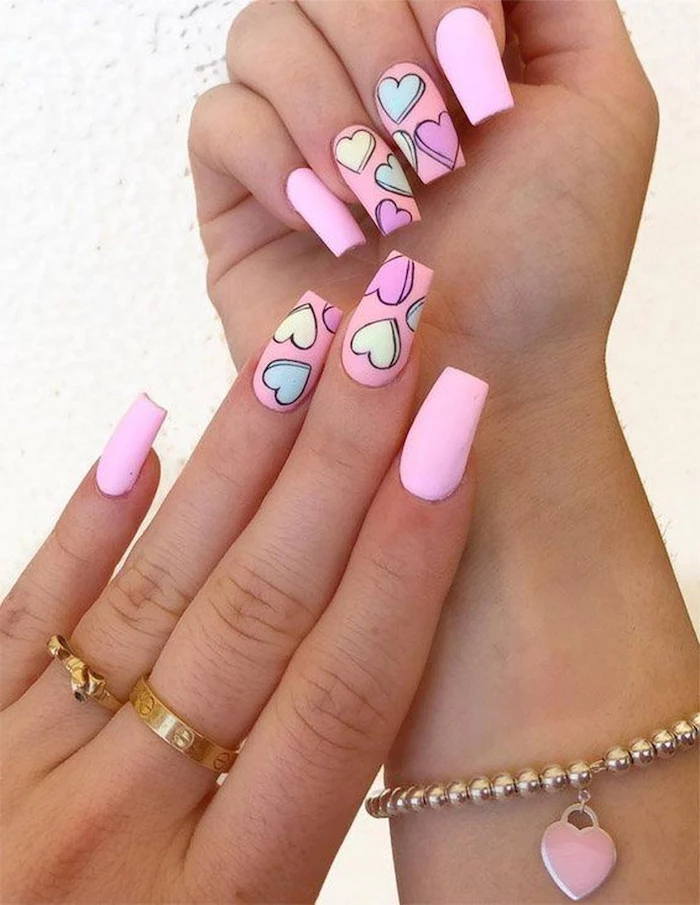
Technique 3: That Cool Negative Space Look
A little heart-shaped window showing your natural nail is super trendy and surprisingly easy.
You’ll Need: A heart-shaped nail vinyl and your polish.
After your base coat is fully dry or cured, press the heart vinyl down firmly on your nail. Make sure the edges are sealed.
Paint your color right over the nail and the vinyl.
Here’s the most important part: while the polish is still wet, use tweezers to grab a corner of the vinyl and peel it off. If you wait for it to dry, it’ll ruin the crisp edge. With gel, you would cure the color first, then peel off the vinyl.
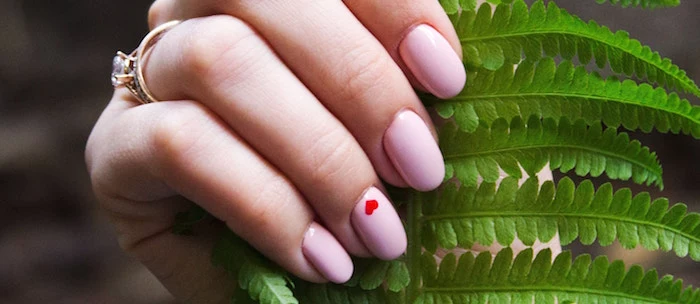
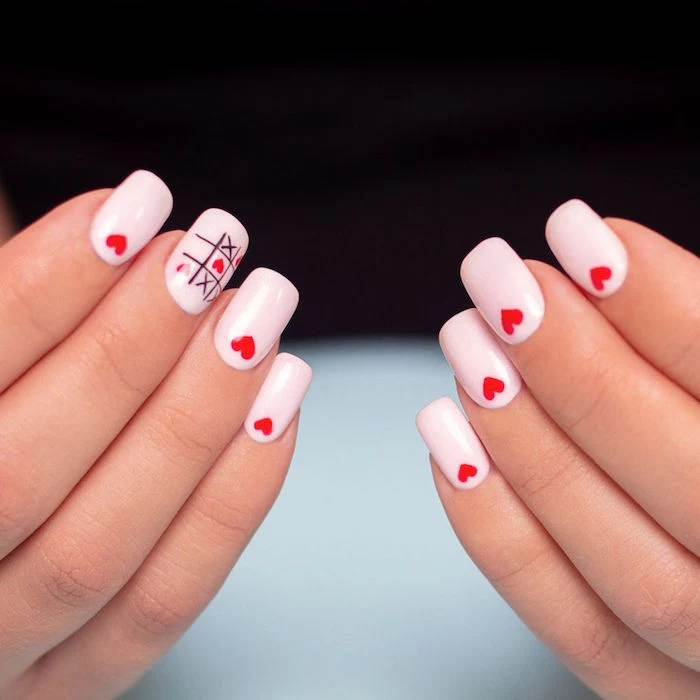
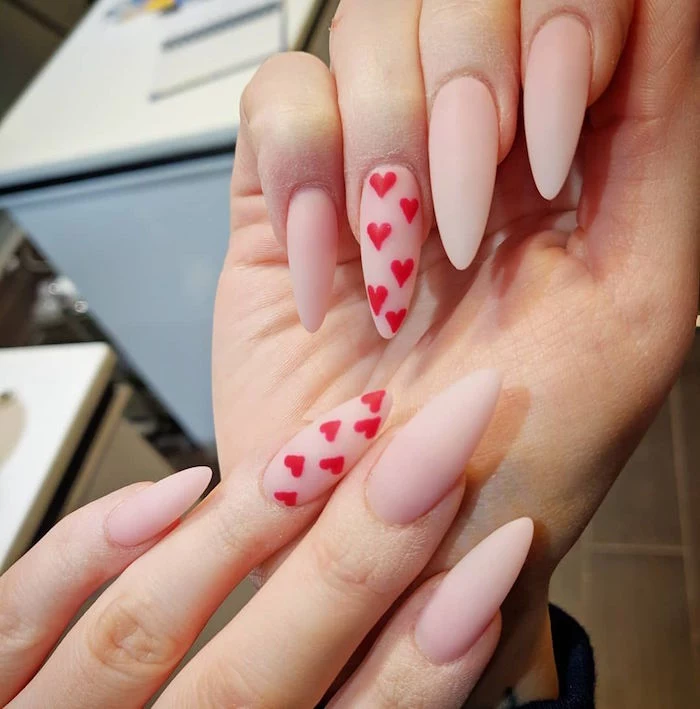
Quickest V-Day Win
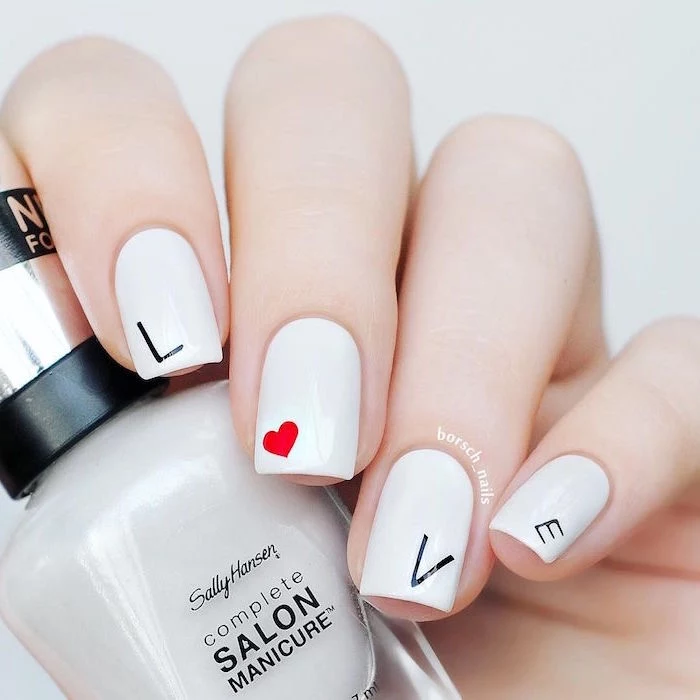
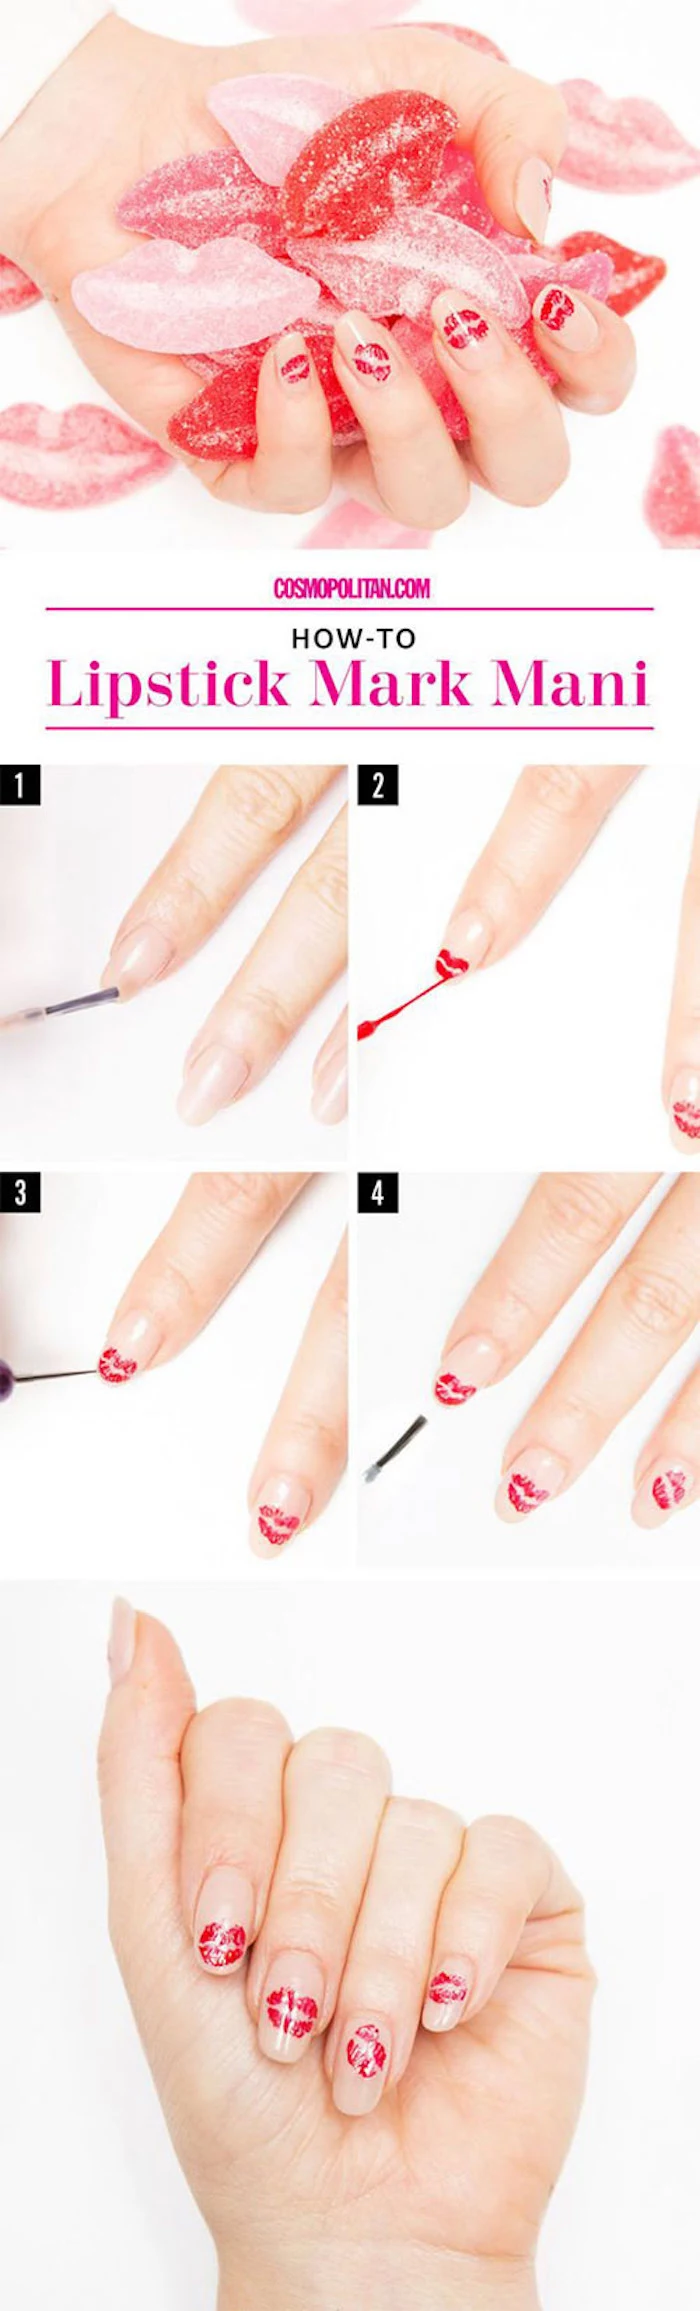
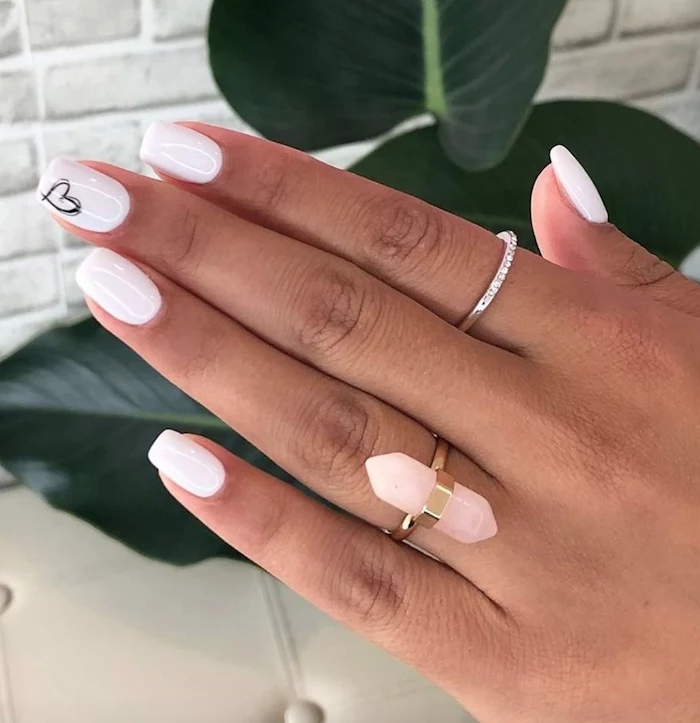
Feeling short on time? Just do a single, tiny heart on each ring finger over a clear base coat. It takes five minutes, looks incredibly chic, and feels intentional.
Making It Last & Taking It Off Safely
You did all that work, so let’s make it last. The number one thing you can do is “cap the free edge.” After each coat—base, color, and top coat—run your brush lightly along the very tip of your nail. This creates a seal that massively reduces chipping.
And now, for my most important piece of advice: DO NOT pick or peel off your gel polish. I can’t say this enough. When you peel off gel, you’re literally ripping off the top layers of your natural nail with it. That’s what causes nails to become thin, weak, and damaged.
Here’s how to remove gel safely:
Break the Seal: Gently file off the shiny top coat. This lets the acetone get to the color underneath.
Soak: Saturate a piece of a cotton ball in 100% pure acetone (regular remover won’t work as well), and place it on your nail.
Wrap: Wrap your fingertip in a small piece of aluminum foil to hold the cotton in place.
Wait: Set a timer for 10-15 minutes.
Gently Scrape: Unwrap one finger. The gel should look soft and be flaking off. Use an orangewood stick to gently push it off. If it’s not coming off easily, re-wrap it and wait another 5 minutes. Never, ever force it.
And there you have it. By focusing on a great foundation and using a few simple techniques, you can create Valentine’s nails that are not only beautiful but also healthy and durable. Have fun with it!
Inspirational Gallery
A dotting tool is your best friend for creating hearts. Place two dots side-by-side, then use a fine liner brush to drag them down into a V-shape.
No dotting tool? The rounded end of a bobby pin works wonders.
For ultra-sharp micro-hearts, a single bristle brush or a toothpick is perfect.
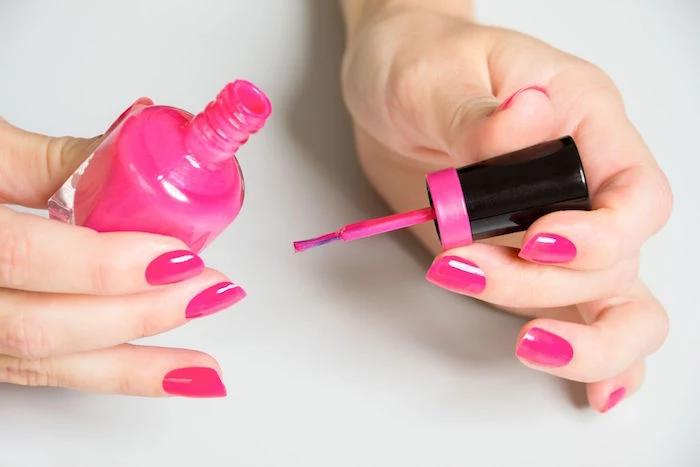
The secret to a perfect at-home manicure? Patience between coats. Applying a second layer before the first is at least 80% dry can cause dragging, bubbles, and a much longer overall drying time. Wait at least two to three minutes between each coat of color. Put on a podcast and enjoy the process!
Not all reds are created equal. In fact, blue-toned reds (like OPI’s
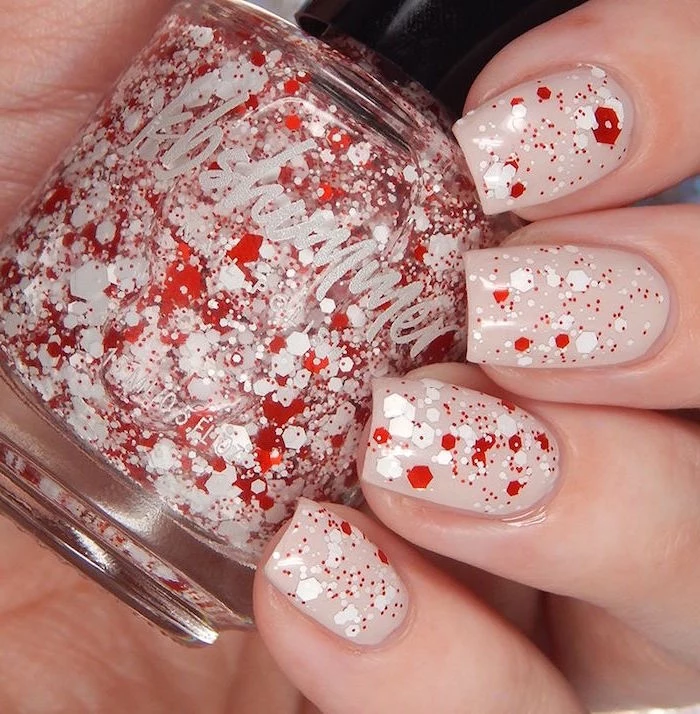
Want to take your V-Day design from simple to sublime? Try layering a sheer, shimmery polish over your base color. A single coat of a polish like Essie’s
Painting with your non-dominant hand can feel like a high-wire act. The key is stabilization.
Rest the wrist of your painting hand on a flat surface.
Instead of moving the brush, try rotating the nail of your other hand into the brush.
Anchor your pinky finger on the table or against your other hand for extra control.
How do I prevent my beautiful art from chipping at the tips?
The answer is a salon technique called ‘capping the free edge’. After your final color coat and before your top coat, take the brush and run it lightly along the very edge of your nail tip. This creates a seal that dramatically reduces tip wear and the likelihood of chipping.
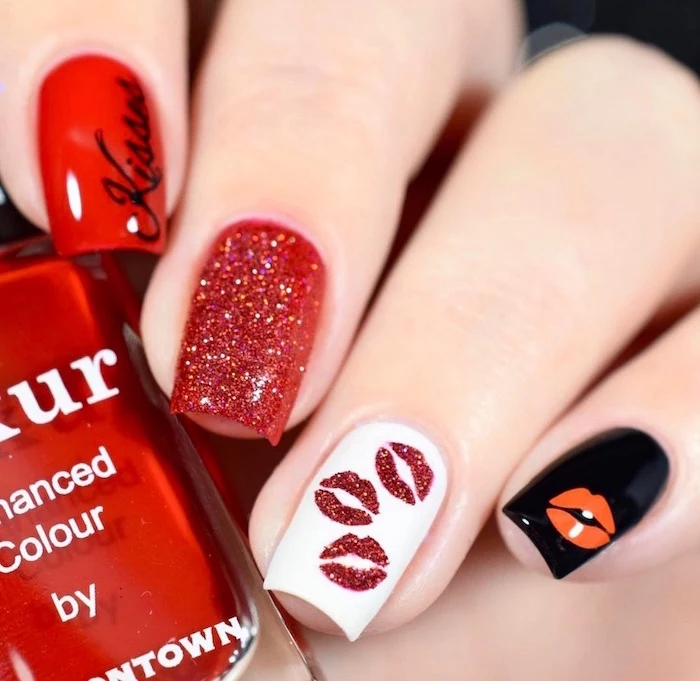
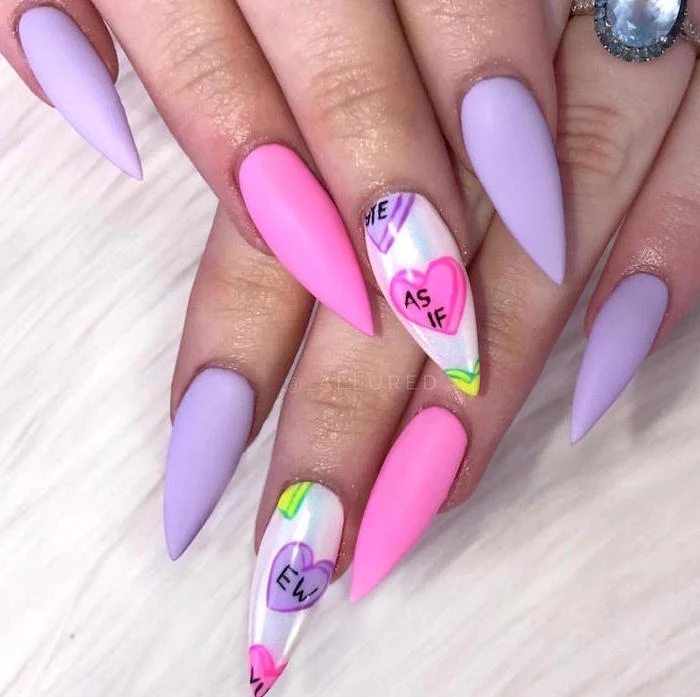
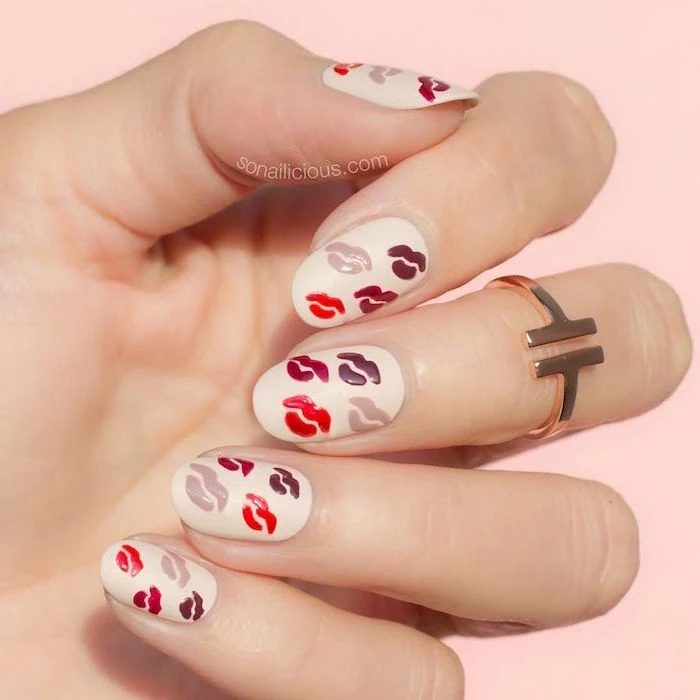
Matte Top Coat: Instantly gives any color a velvety, modern finish. It’s perfect for a ‘conversation heart’ look or to make deep reds and burgundies look incredibly chic and sophisticated.
Glossy Top Coat: The classic choice for a high-shine, ‘wet’ look. It makes colors pop, glitter sparkle, and gives your manicure that durable, candy-coated appearance.
For a trendy twist, try a glossy heart design over a matte base color.
A 2022 Mintel report found that over 40% of women who use nail products prefer to do their own manicures at home. You’re part of a huge, creative community!
This shift towards DIY nail art isn’t just about saving money. It’s a form of self-expression and a mindful, relaxing ritual. Mastering a new technique, like a perfect heart or a smooth ombre, is a small victory that can brighten your whole week.
Prevents painful hangnails.
Hydrates the skin around your nail, making your whole manicure look more professional.
Promotes healthier, stronger nail growth from the matrix.
The secret? Daily application of a good cuticle oil. Look for one with jojoba oil, like CND’s SolarOil, as its molecules are small enough to penetrate the nail plate.
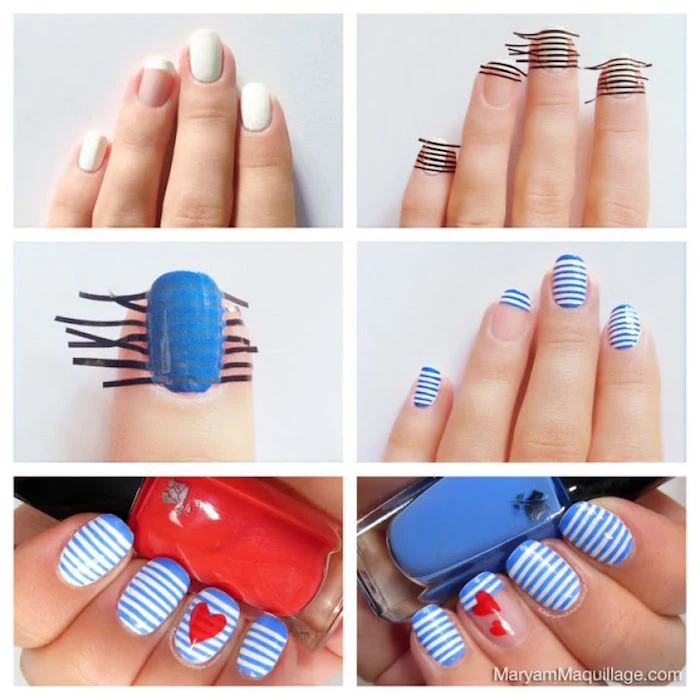
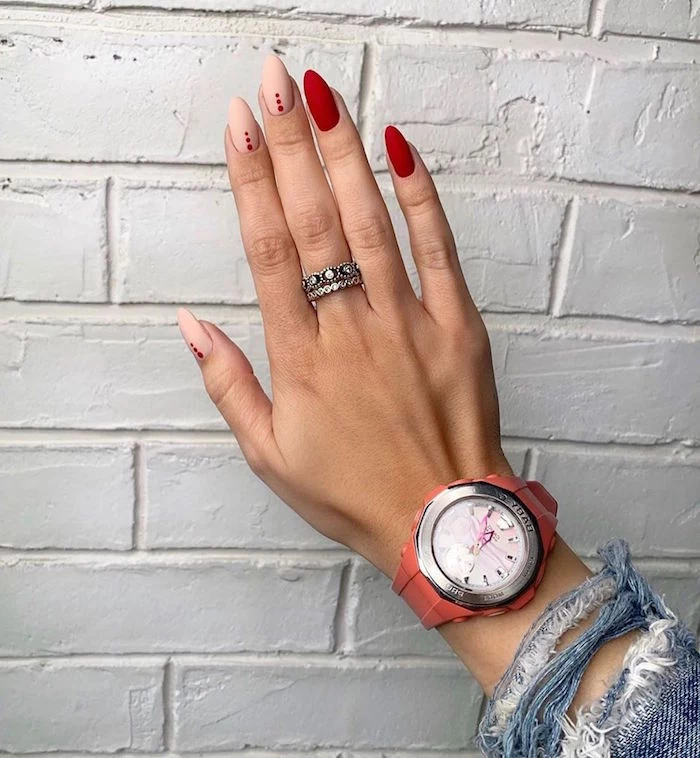
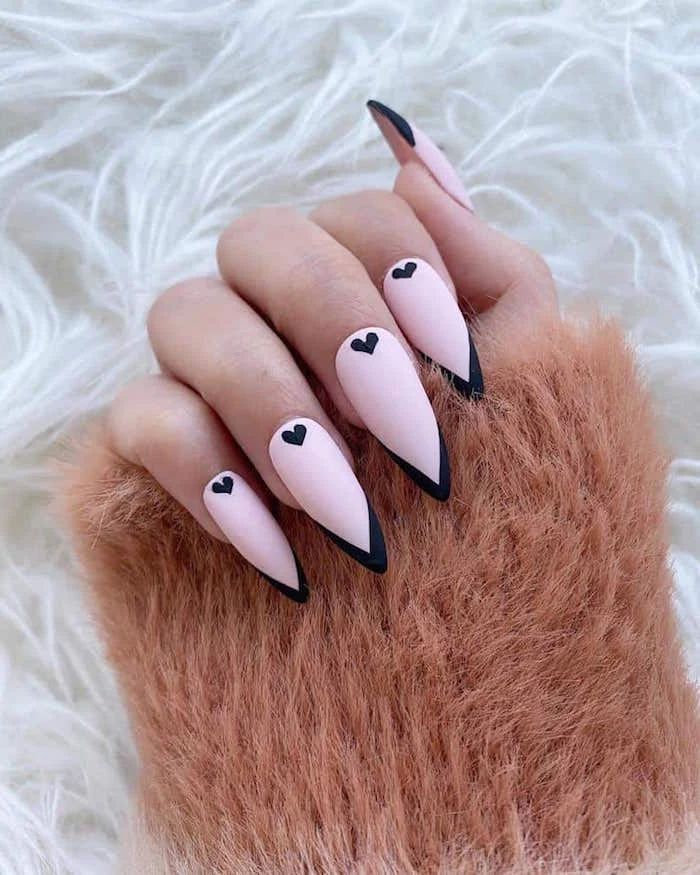
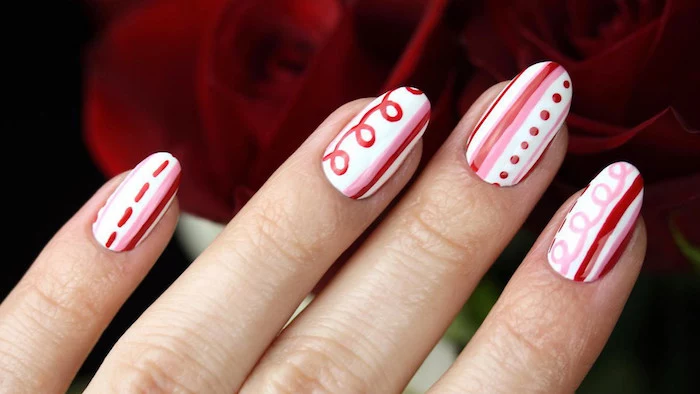
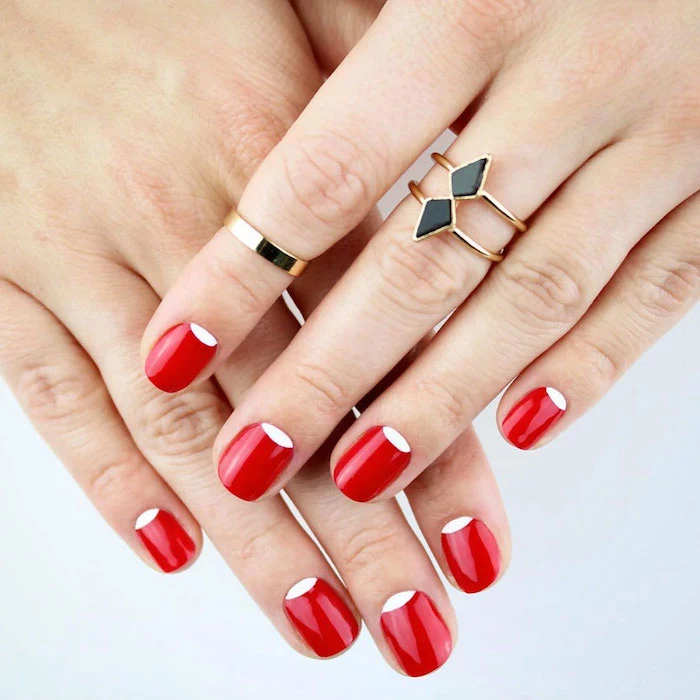
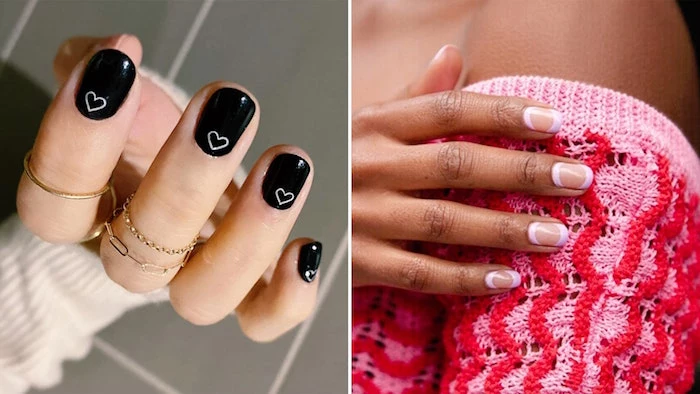
Trend Alert: The Micro-French. Forget the thick white stripes of the 2000s. The modern French manicure is all about a whisper-thin line of color right at the tip. For Valentine’s Day, try a classic nude base with a delicate red, hot pink, or even a metallic gold micro-tip. It’s minimalist, elegant, and perfectly on-trend.
That dreaded smudge doesn’t have to mean starting over. If the polish is still wet, take a clean brush dipped in a tiny amount of nail polish remover, and gently tap the edges of the smudge to smooth it out. Let it dry, then apply a thin layer of color over the spot, followed by your top coat.
Don’t skip the base coat, especially with reds! We all love a classic Valentine’s red, but those potent pigments can stain your natural nails yellow. A quality base coat, like Orly’s Bonder, acts as a protective barrier, preventing discoloration while also giving your polish something to grip onto for a longer-lasting mani.
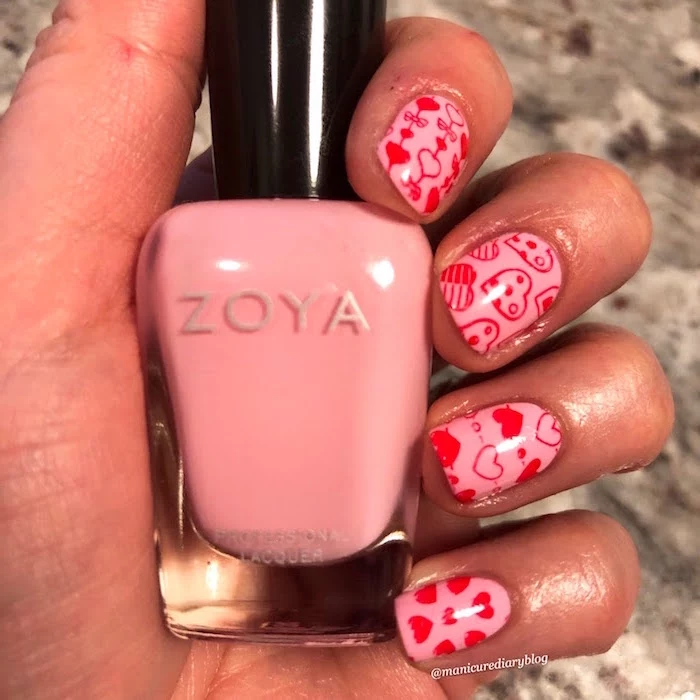
Ever wonder how people get those impossibly perfect, intricate designs? Often, the secret is nail stamping.
You’ll need a stamping plate (a metal plate etched with designs), a scraper, and a silicone stamper.
Brands like Maniology and Moyou London offer amazing starter kits with Valentine’s themes.
It’s a game-changer for creating flawless patterns, tiny text, and delicate lace effects in seconds.
What’s the best way to remove stubborn glitter polish without destroying my nails?
The foil method is your savior. Soak a piece of a cotton ball in acetone, place it on your nail, and wrap your fingertip tightly in a small square of aluminum foil. Wait 5-10 minutes. The glitter polish will slide right off with the cotton, no aggressive scrubbing required!
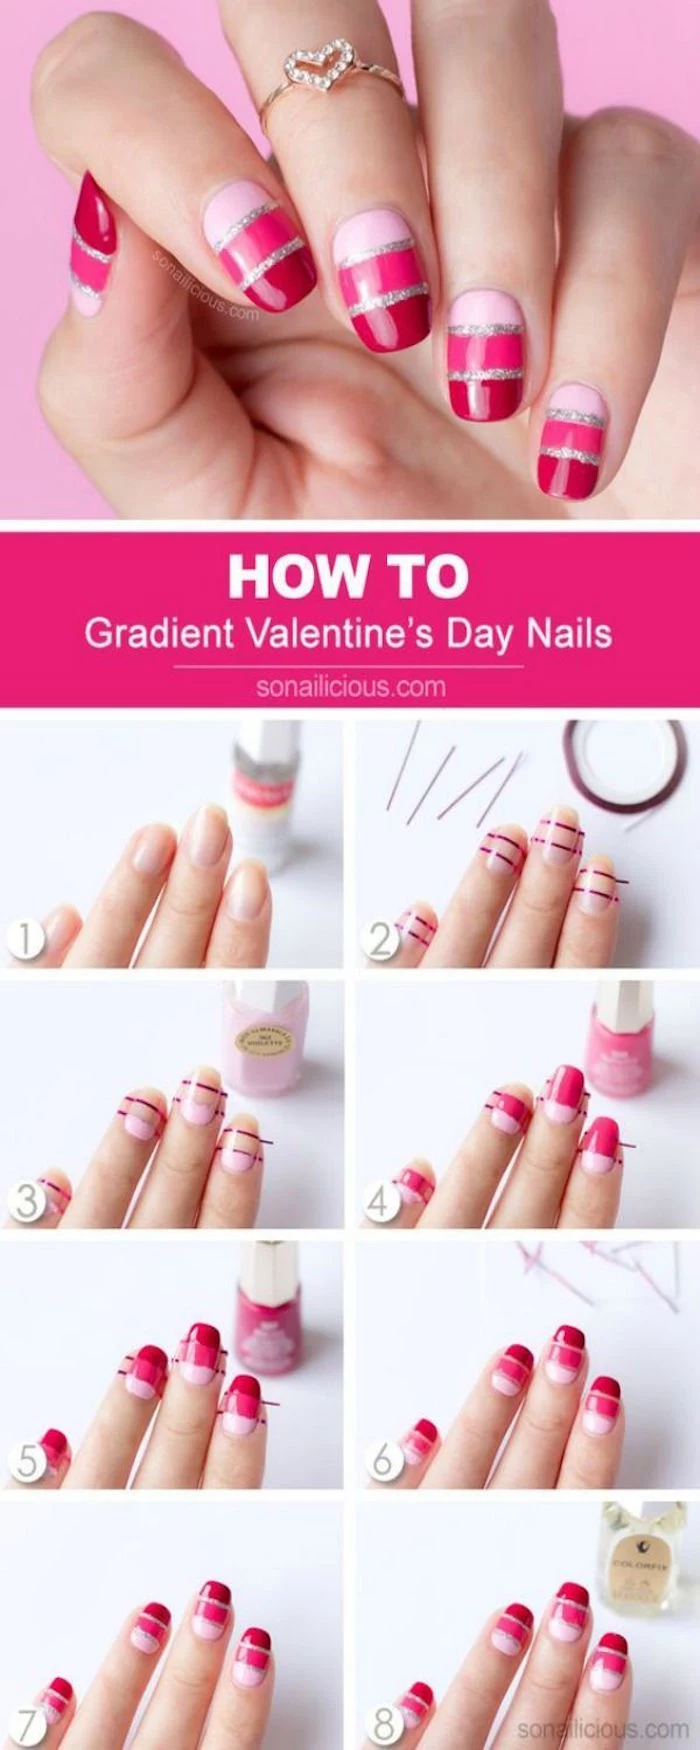
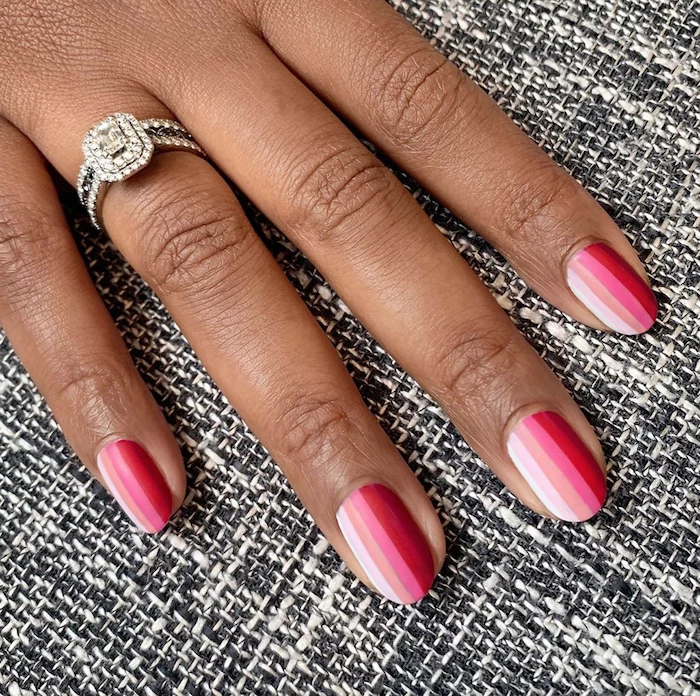
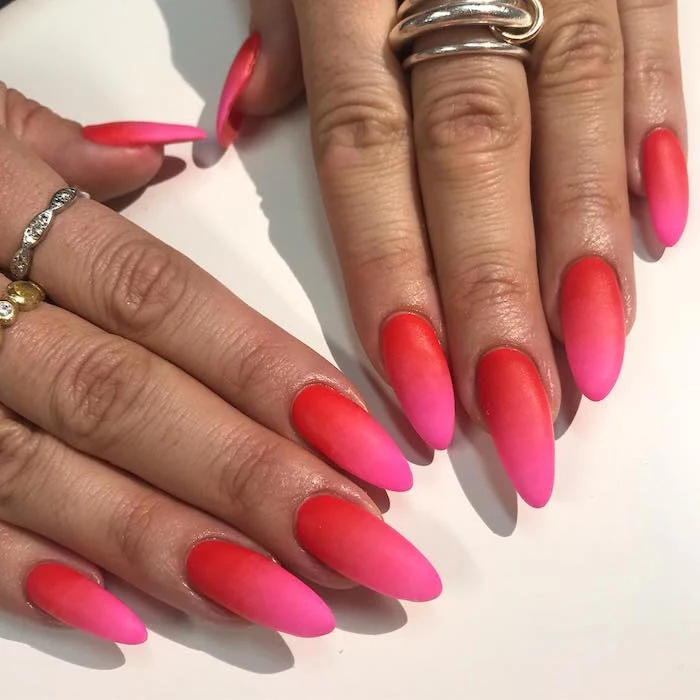
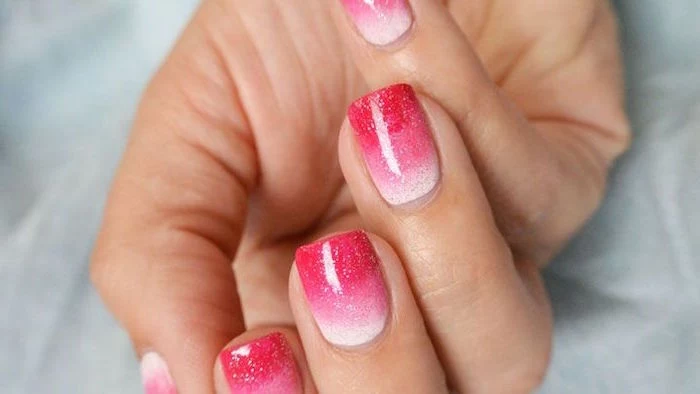
For a soft, romantic gradient: Use a disposable makeup sponge. Paint stripes of your chosen colors (e.g., white, light pink, and red) directly onto the sponge, slightly overlapping them. Then, dab the sponge directly onto your nail. It’s a little messy, so protect your skin with a liquid latex barrier or clean up with a brush and acetone afterward. The dreamy blend is worth it!
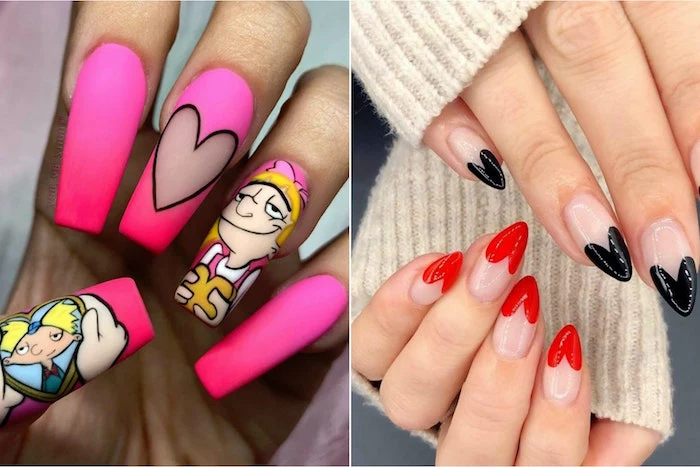
Feeling adventurous? Try a ‘negative space’ manicure. This design purposefully leaves parts of the bare nail exposed. A simple heart outline on a clean, buffed nail or a minimalist stripe of red can look incredibly modern and chic. It’s a statement that’s both bold and understated.
Your fingernails grow, on average, 3.47 millimeters per month.
What does this mean for your nail art? If you have a design near your cuticle, it will show a visible gap in about a week and a half. Plan your manicure for just a day or two before your Valentine’s event for the freshest look.
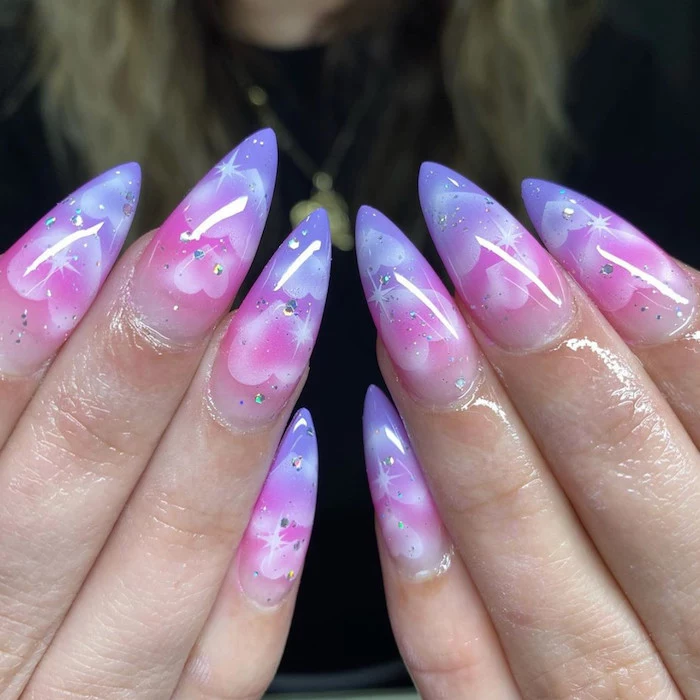
Think beyond pink and red! For an unexpected and sophisticated Valentine’s palette, try these combinations:
Lavender and Silver: A dreamy, cool-toned romance.
Deep Burgundy and Cream: Rich, warm, and timelessly elegant.
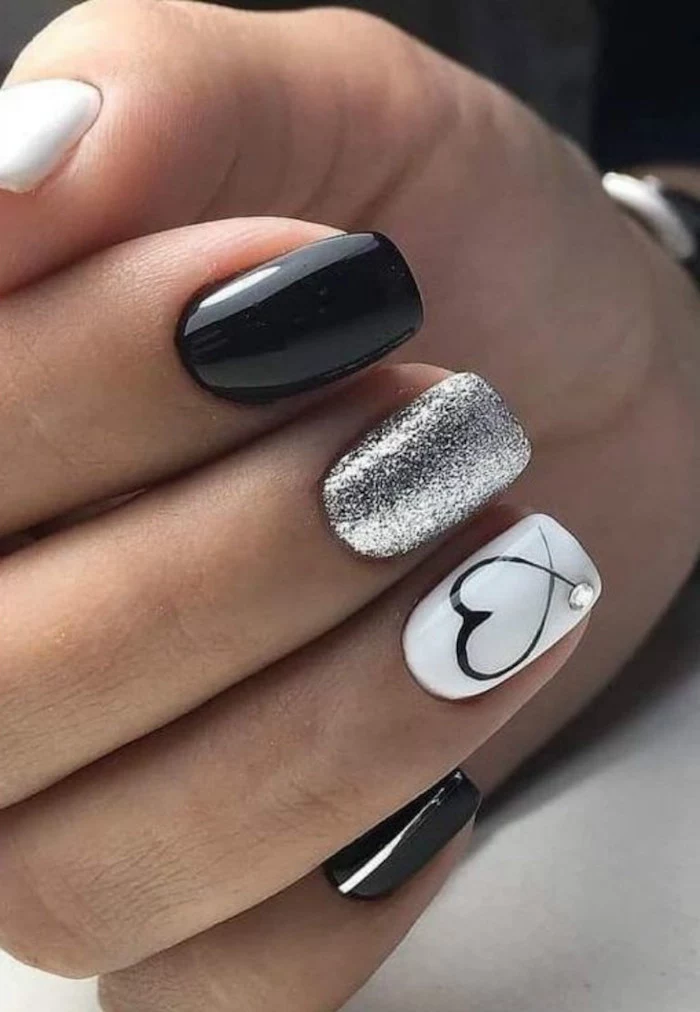
Black and Nude: For a dramatic, edgy, and high-fashion heart design.
A quick-dry top coat is a non-negotiable for DIY nail art. It doesn’t just add shine; it chemically bonds with the layers of polish underneath it, hardening them much faster than they would on their own. Products like Seche Vite or Essie’s Gel-Setter Top Coat can make your nails feel dry to the touch in minutes, protecting your art from smudges.
A smoother, more even application of polish.
A manicure that lasts days longer without chipping.
Less friction and stress on the nail plate.
The trick? Applying your color in thin, even coats. Two thin coats are always better than one thick, gloopy one.
In a rush? Press-ons are your chic secret weapon. Modern press-on nails from brands like Olive & June or Glamnetic are a world away from the drugstore tabs of the past. They come in trendy shapes and pre-made Valentine’s designs, offering a flawless, damage-free manicure in under 10 minutes.
The first recorded use of red-tinted nails dates back to 3000 B.C. in China, where royals used a mixture of beeswax, egg whites, and flower petals to color their nails, with red and black indicating the highest rank.
I see polishes labeled ‘5-Free’ or ’10-Free’. What does that mean?
This refers to the number of potentially harmful chemicals that have been eliminated from the polish formula. The original ‘Big 3’ to avoid were Formaldehyde, Toluene, and DBP. ‘5-Free’ polishes also eliminate Formaldehyde Resin and Camphor. Opting for these formulas is a great choice for your overall nail health, especially if you do frequent manicures.
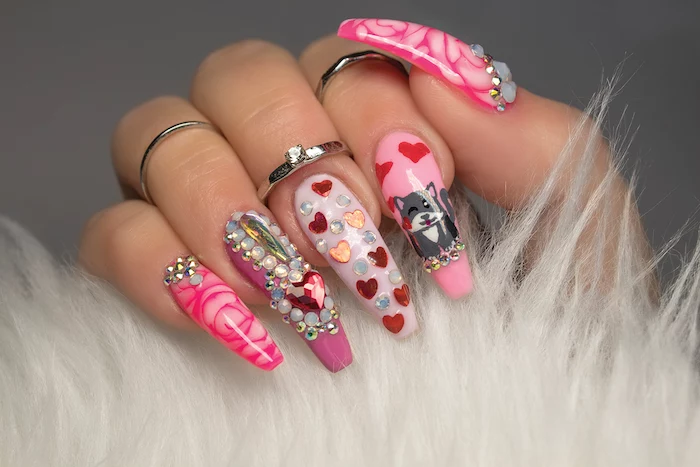
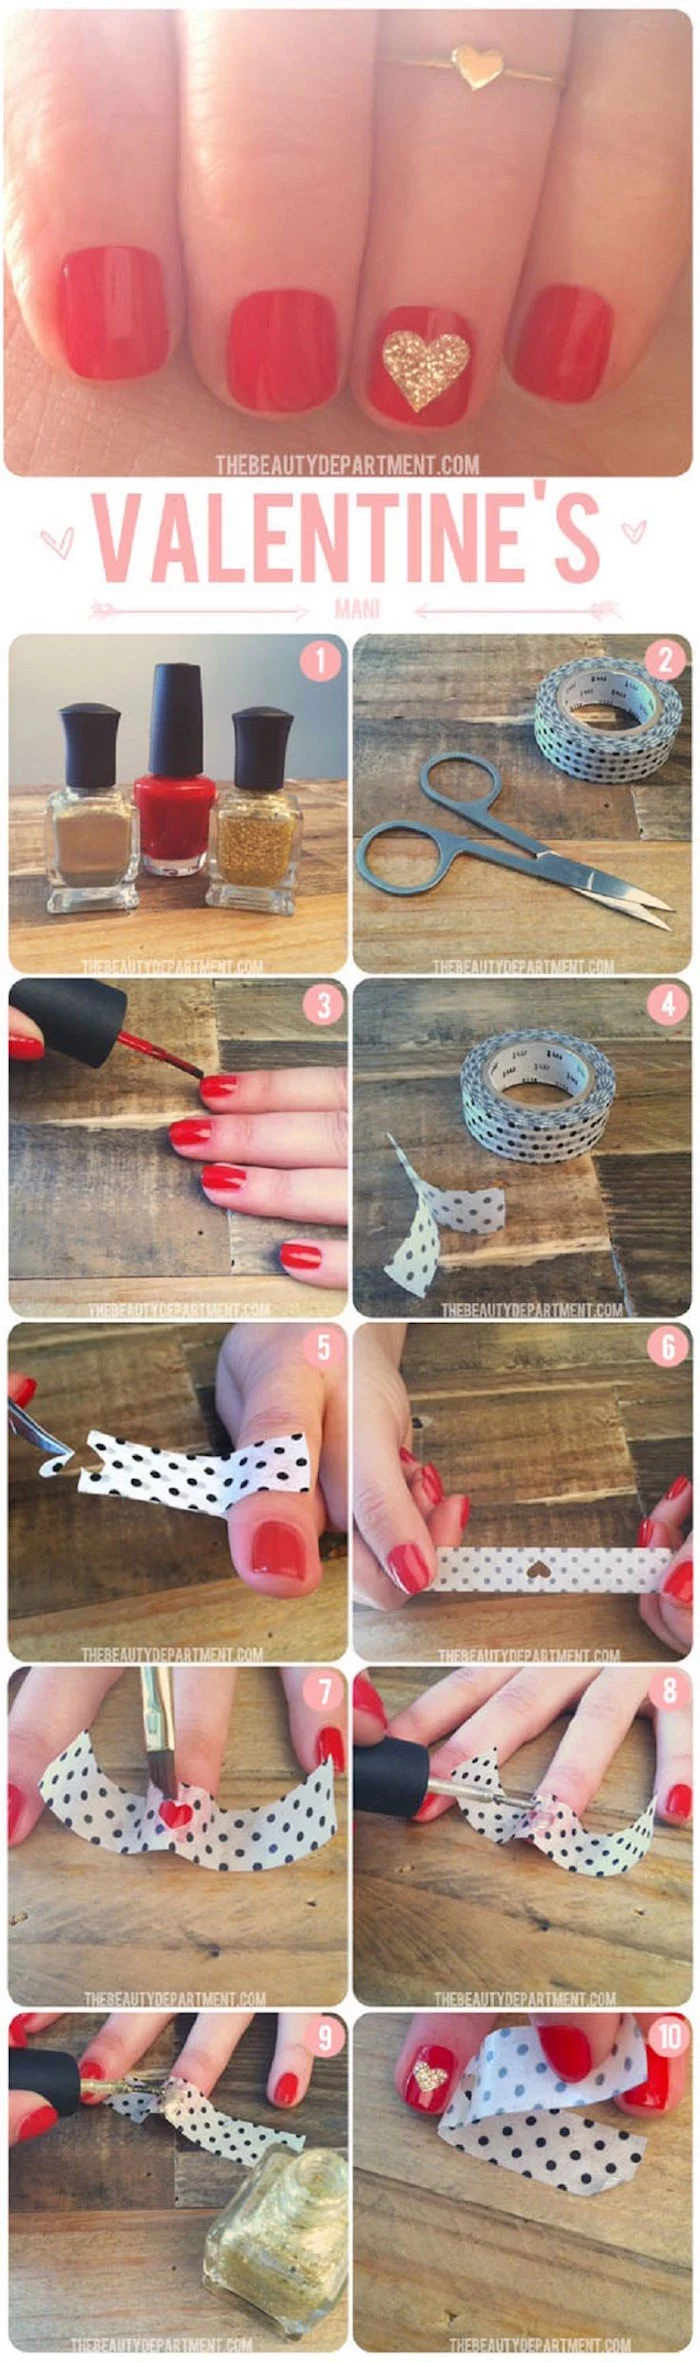
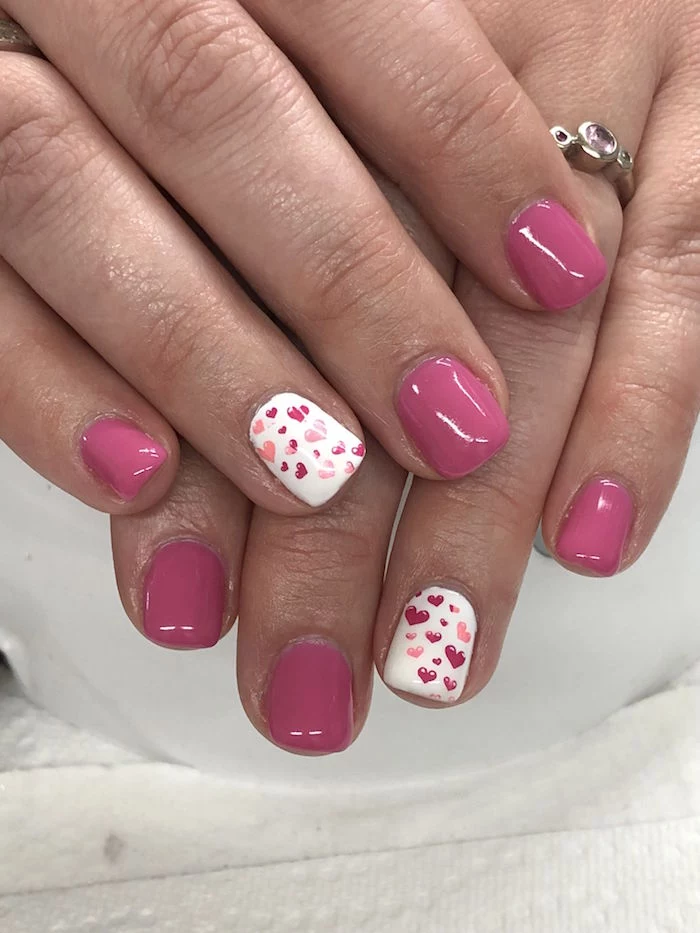
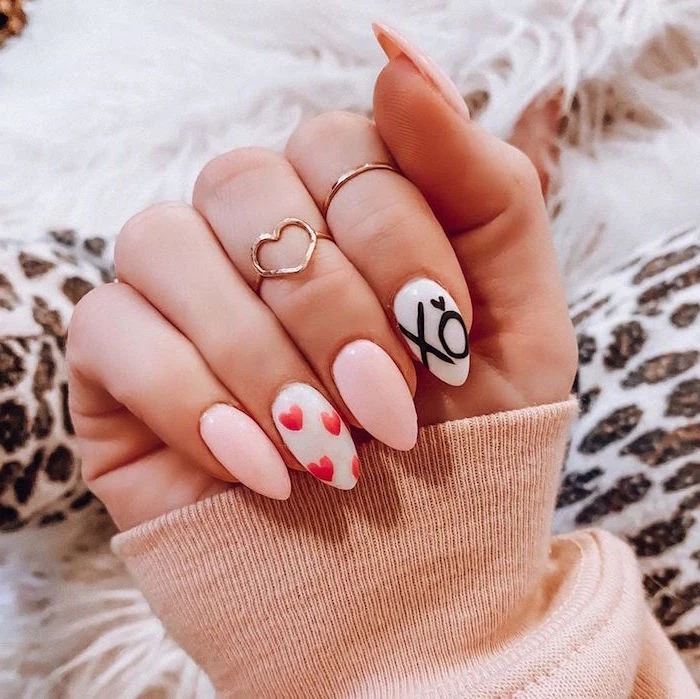
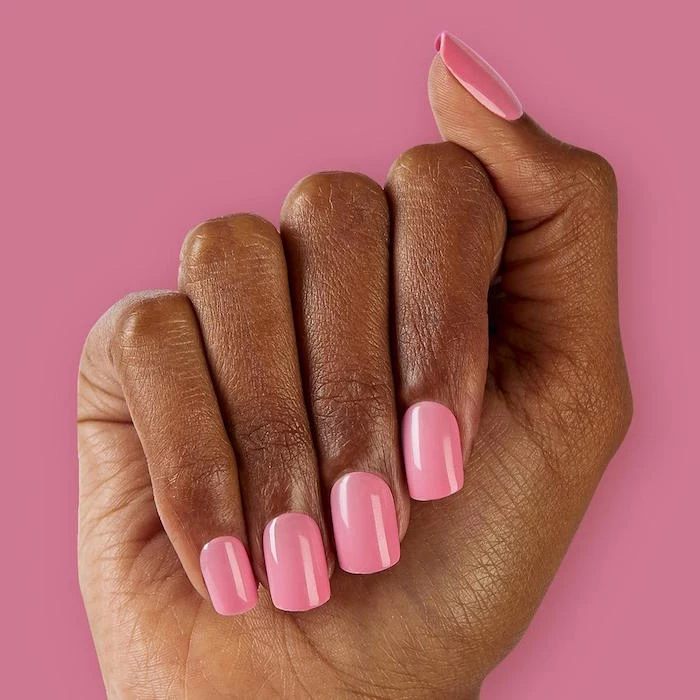
Don’t have time for a full set of intricate art? The accent nail is your best friend. Paint all of your nails a gorgeous shade of pink or red, and reserve just one—typically the ring finger—for your special design. A single, perfectly drawn heart or a touch of glitter on one nail provides that festive pop without the time commitment.
John combines 12 years of experience in event planning, interior styling, and lifestyle curation. With a degree in Visual Arts from California Institute of the Arts and certifications in event design, he has styled luxury weddings, corporate events, and celebrity celebrations. John believes in creating memorable experiences through innovative design and attention to detail.
To provide the best experiences, we use technologies like cookies to store and/or access device information. Consenting to these technologies will allow us to process data such as browsing behavior or unique IDs on this site. Not consenting or withdrawing consent, may adversely affect certain features and functions.
Functional
Always active
The technical storage or access is strictly necessary for the legitimate purpose of enabling the use of a specific service explicitly requested by the subscriber or user, or for the sole purpose of carrying out the transmission of a communication over an electronic communications network.
Preferences
The technical storage or access is necessary for the legitimate purpose of storing preferences that are not requested by the subscriber or user.
Statistics
The technical storage or access that is used exclusively for statistical purposes.The technical storage or access that is used exclusively for anonymous statistical purposes. Without a subpoena, voluntary compliance on the part of your Internet Service Provider, or additional records from a third party, information stored or retrieved for this purpose alone cannot usually be used to identify you.
Marketing
The technical storage or access is required to create user profiles to send advertising, or to track the user on a website or across several websites for similar marketing purposes.