Gifts That Tell a Story: Your Guide to Crafting a Wooden Recipe Box & Soy Candles
I’ve spent more years than I can count in my workshop, a place that always smells like a mix of fresh sawdust and warm beeswax. It’s my sanctuary. In all that time, building things and teaching others, one question comes up more than any other: “What’s a truly meaningful gift I can make?” People want to give something special, something that doesn’t just come off a big-box store shelf.
My answer is always the same: make something with your hands.
A handmade gift just hits different, doesn’t it? It holds the time, focus, and care you poured into it. It tells a story. And honestly, it doesn’t have to be perfect. Those little quirks and imperfections are what prove it was made by a human, not a machine. Today, I want to walk you through two of my favorite projects—a beautiful hardwood recipe box and some hand-poured soy candles. One is about creating something lasting and solid; the other is about creating warmth and atmosphere. Both are amazing ways to make a gift that someone will actually treasure.
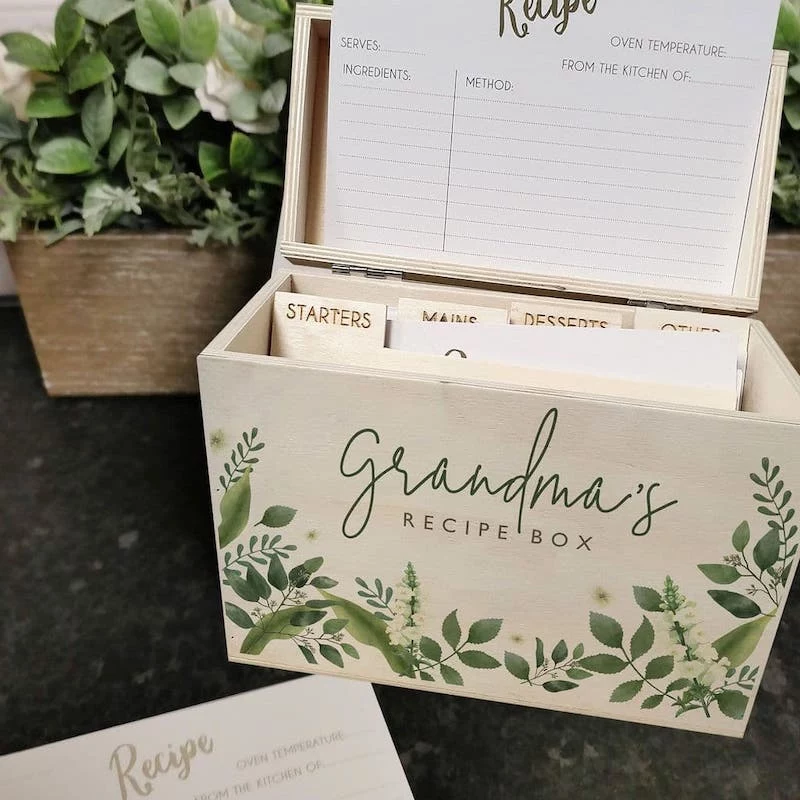
Part 1: The Forever Recipe Box
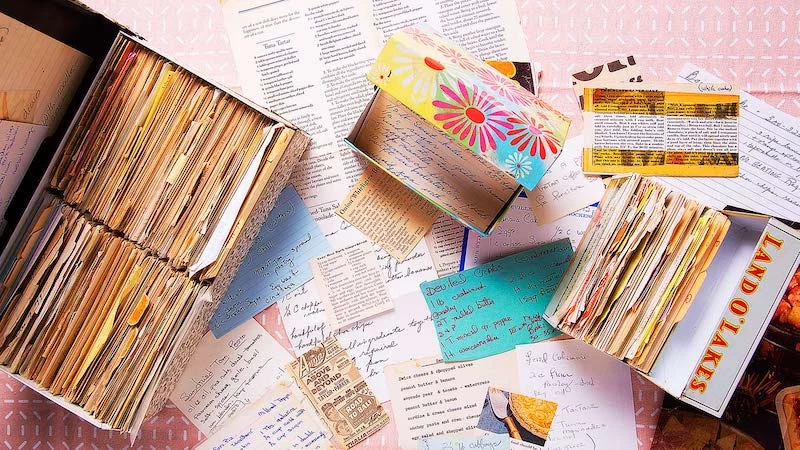
Let’s be real, a recipe box is more than just a place to store cards. It’s a family archive in the making. I once worked on a simple pine box for a client. It was pretty banged up, the lid was split, but inside were her grandmother’s handwritten recipe cards, complete with stains from vanilla and butter. That box held decades of family dinners. We ended up building a new one from American cherry, a wood that gets richer and darker with age. We carefully moved the old recipes over and left blank cards for her own kids. That project was about continuing a legacy.
So, you want to build one? Great. For a beginner, plan on this being a solid weekend project. As for budget, you can get all the high-quality hardwood you need for a standard-sized box for around $30 to $50, depending on your choice of wood.

Choosing Your Wood: The Heart of the Project
The first decision you make is the most important: the wood. This choice defines the entire look, feel, and future of the box. Wood isn’t static; it’s a living material that breathes, expanding and contracting with humidity. The pros call this “wood movement,” and learning to respect it is the secret to furniture that lasts for generations.
For a recipe box that will get handled a lot in a kitchen, you want a stable hardwood. I’d steer clear of softwoods like pine, as they dent way too easily. Here are a few of my go-to choices:
- American Black Walnut: This is a classic for a reason. It has a gorgeous, deep chocolate color and is an absolute pleasure to work with. A walnut box just feels important. You can expect to pay a bit more for it, maybe around $12-$18 per board foot.
- Hard Maple: If you’re going for a cleaner, more modern vibe, maple is your friend. It’s incredibly hard, durable, and has a light, creamy color that looks fantastic with more complex joinery. It’s usually a bit more affordable, around $8-$12 per board foot.
- Cherry: My personal favorite for gifts. When you first cut it, cherry is a pale, pinkish wood. But with time and light exposure, it deepens into a stunning reddish-brown. It’s like a gift that keeps on giving. Cherry often falls in the middle, around $10-$15 per board foot.
Quick Tip: To make life easier, ask for boards that are “S4S,” which means surfaced on four sides. This gives you a flat, square starting point. For a box designed to hold 4×6 inch recipe cards, a single 1×6 board (which is actually 3/4-inch thick and 5.5 inches wide) is the perfect starting point.
How It’s Made: The Magic of Joinery
How you connect the corners of the box is everything. It dictates both the strength and the beauty of the piece. Just gluing the ends together (a butt joint) is a recipe for disaster; end grain soaks up glue like a straw but doesn’t create a strong bond. We need a mechanical connection.
For a Great-Looking, Strong Start: Miter Joints with Splines
Cutting each corner at a 45-degree angle gives you a miter joint, which creates that beautiful, continuous grain pattern that wraps around the box. But on its own, it’s still a weak joint. The solution? Add a spline. This is just a thin strip of wood glued into a slot cut across the miter. This simple addition creates a super-strong connection and, if you use a contrasting wood (like a maple spline in a walnut box), it becomes a fantastic design detail.

Heads up! Don’t have a fancy table saw? No problem. You can absolutely do this with a simple plastic miter box and a handsaw, which you can get for under $20 at any hardware store. Instead of splines, you can reinforce the inside corners with small wooden blocks (glue blocks). It’s a classic technique that works perfectly.
For the Ambitious: Hand-Cut Dovetails
Dovetails are the undisputed champion of woodworking joints. They are a beautiful series of interlocking pins and tails that form a bond so strong, it will hold together even without glue. Learning to cut them by hand is a rite of passage. It teaches you patience and precision like nothing else. My first set was a gappy mess that took me a whole weekend, but the feeling of them finally sliding together was pure magic.
Putting It All Together: The Lid, Bottom, and Finish
Before any glue touches wood, you MUST do a “dry fit.” Assemble the entire box using only clamps. This is your chance to check every joint for gaps and make sure everything is square. Trust me, it’s way easier to fix a problem now than when you have sticky, fast-drying glue everywhere.
Okay, so what about the bottom and the lid? For the bottom, the professional way is to use a thin piece of 1/4-inch plywood that “floats” in a groove cut into the inside faces of the box walls. This allows the solid wood sides to expand and contract without breaking the box apart. You can cut this shallow groove (called a dado) with a few passes on a table saw or with a router.
For the lid, a simple lift-off design is both elegant and practical. You can construct a flat panel and add a small, thin lip around the inside edge that fits snugly into the box opening. This keeps it from sliding around.
When it’s time to glue, I recommend Titebond II. It’s strong, gives you enough working time, and is water-resistant—perfect for a kitchen item. For the finish, you want something non-toxic and beautiful. My favorite is a simple blend of mineral oil and beeswax. You can find pre-made “board butter” for about $10-$15, or make your own. Just warm it up and rub it in. It makes the wood’s natural color pop and gives it a soft, satin feel that’s just wonderful to touch.

Part 2: Hand-Poured Soy Candles
Making a candle seems easy, right? Melt wax, add scent, pour. But there’s a surprising amount of science that goes into making a good one. A bad candle tunnels down the middle, spits out soot, and barely smells. A great candle burns cleanly, melts evenly from edge to edge, and fills a room with just the right amount of fragrance.
The Science of a Perfect Burn
The magic of a candle lies in the partnership between the wax and the wick. The wick isn’t just a string; it’s a fuel delivery system. Through capillary action, it draws melted wax up into the flame. The heat vaporizes the wax, and it’s this vapor that actually burns. It’s a tiny, self-regulating engine.
I work almost exclusively with soy wax. It’s a natural product from soybeans, it burns much cleaner than traditional petroleum-based paraffin wax, and it’s easier to work with. By the way, if you see some whitish texture on your finished soy candle (called “frosting”), don’t panic! It’s a totally harmless, cosmetic quirk and a sign that you’re using 100% natural soy wax.
The Chandler’s Method: A Recipe for Success
Consistency is everything in candle making. To get great results every time, you need to be precise. That means measuring everything by weight, not volume, using a simple digital kitchen scale.
Your Beginner’s Shopping List
To get started, you’ll need a few key things. You can find everything online from reputable suppliers like CandleScience or The Flaming Candle. Expect your initial investment for a starter kit to be around $50 to $75.
- Soy Wax: Start with a container blend. Golden Brands 464 is an industry-standard, fantastic for beginners. A 5lb bag will cost around $20.
- Wicks: This is the trickiest part. The wick size has to match your container’s diameter. For a typical 3-inch diameter jar, an ECO-10 or CD-18 wick is a good starting point. Test, test, test!
- Fragrance Oil: You MUST use oils specifically designed for candles. Essential oils can be unsafe to burn. A 2oz bottle of quality fragrance oil will run you $5-$10.
- Gear: You’ll need a digital scale, a pouring pot, a thermometer, and some containers (8oz glass jars are perfect).
The Process, Step-by-Step
- Prep Your Jars: Secure your wick to the exact bottom center of your clean jar using a wick sticker or a dab of hot glue. Use a clothespin or wick centering tool to hold the wick perfectly straight at the top.
- Melt the Wax: Using a double boiler (or a pouring pot set inside a pot of simmering water), gently melt your wax. Never heat wax directly on a stove burner! Heat it to 185°F (85°C). This specific temperature opens up the wax molecules so they can bond properly with the fragrance oil.
- Mix in the Fragrance: Once you hit 185°F, take the pot off the heat. Now, add your fragrance oil. A good rule of thumb is an 8% fragrance load. So, for a standard 8oz jar, here’s a foolproof recipe: use 200g of wax and 16g of fragrance oil. Stir gently but thoroughly for two full minutes. It feels long, but this is critical for a strong-smelling candle.
- Cool and Pour: Let the wax cool down to about 135°F (57°C) before you pour. Pouring too hot can cause cracks and sinkholes. Pour slowly and steadily into your prepped jar.
- Let it Cure: This is the step everyone wants to skip, but don’t! A soy candle needs to cure for at least one week—but two is even better—before you light it. This waiting period allows the wax and oil to fully bond, which dramatically improves the scent when it’s burning.
A Final Word on Safety
Whether you’re using a saw or working with hot wax, please be careful. A sharp tool is a safe tool, and a well-fitting N95 mask is essential when sanding wood. For candles, fire safety is non-negotiable. Never leave a burning candle unattended, and always trim the wick to ¼ inch before every single burn to prevent a large, sooty flame. And if you’re giving these as a gift, do yourself (and them) a favor and stick a warning label on the bottom of the jar.
Whether you choose to work with wood or wax, you’re choosing to give something that truly has a piece of you in it. Take your time, enjoy the process, and don’t get discouraged by a mistake—it’s just part of learning. The final result, whether it’s a sturdy box for treasured recipes or a candle that fills a home with warmth, will be a gift that truly matters.
Inspirational Gallery
The finishing touch: The wood for your recipe box is chosen, but how will you protect it? The finish doesn’t just protect; it deepens the color and enhances the grain. For a food-safe, natural look that feels incredible to the touch, consider a pure tung oil or a specialized butcher block conditioner like Howard’s. It requires a bit more patience, with multiple coats and drying time, but the resulting satin-smooth, rich finish is an heirloom-quality detail that store-bought items rarely achieve.
- Start with a personal anecdote related to the recipe.

A single soy candle can burn up to 50% longer than a paraffin candle of the same size.
This remarkable efficiency is why so many artisans choose soy wax. Beyond longevity, it’s a cleaner burn, producing significantly less soot than traditional paraffin. This means no dark rings on your jars or walls, just pure, beautiful fragrance. When you gift a hand-poured soy candle, you’re not just giving a scent; you’re giving a cleaner, longer-lasting, and more sustainable moment of peace.

How do I create a truly unique scent for my candles?
Think like a perfumer by layering notes. A balanced custom scent has a top, middle, and base. Start with a familiar base note (like vanilla or sandalwood), add a complementary middle note (like cinnamon or rose), and finish with a bright top note that you smell first (like lemon or mint). Try blending fragrance oils from a supplier like CandleScience, starting with small batches. A great combination to try: a base of cedarwood, a middle of rosemary, and a top of grapefruit for a scent that’s both grounding and invigorating.

The wood choice is everything. For a classic, warm recipe box that darkens beautifully over time, American Cherry is a top-tier choice. For something with dramatic, contrasting grain, consider Black Walnut. If you prefer a lighter, more modern Scandinavian feel, Hard Maple offers a creamy, clean canvas. Each tells a different story before you even make the first cut.


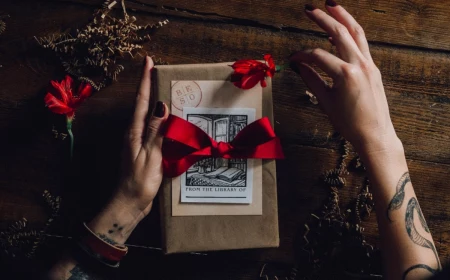
A beautiful handmade gift deserves packaging that honors the effort inside. Forget mass-produced gift wrap. Instead, try the Japanese art of Furoshiki, wrapping the recipe box in a beautiful piece of fabric—perhaps a vintage tea towel or a patterned linen square. For candles, nestle them in a small wooden crate with natural filler like crinkle paper or dried moss, and tie it all together with a simple twine ribbon and a sprig of dried eucalyptus.
Common Pitfall: The ‘Wrong’ Wick. Choosing a wick that’s too small for your candle container will cause ‘tunneling,’ where only the wax in the center melts, wasting most of the candle. A wick that’s too large will create excess soot and a dangerously high flame. Always check the supplier’s guide—most, like The Flaming Candle Company, offer detailed charts matching wick series (like CD or ECO) to container diameters for a perfect, even burn.

Looking for a quicker, but still heartfelt, alternative to building a box from scratch?
- Find a simple, unfinished pine or basswood box from a craft store like Michaels or Hobby Lobby.
- Personalize it with wood-burning (pyrography) to add a name, a meaningful quote, or a floral design.
- Alternatively, use milk paint for a rustic, colorful finish that still lets the wood grain show through.

Walnut Oil Finish: A natural, food-safe polymerizing oil that brings out a rich, deep luster in dark woods like walnut. It’s easy to apply with a soft cloth.
Shellac & Wax Polish: For a more traditional, high-gloss finish. Apply thin coats of shellac, sand lightly, then buff with a quality paste wax like Briwax for a durable, glassy shine.
The choice depends on the desired aesthetic: natural and matte, or polished and classic.
Don’t forget a maker’s mark. It’s the artist’s signature and a beautiful final detail. You can have a custom stamp made with your initials or a simple logo. Gently press it into the bottom of the recipe box before the final finishing coat, or create a small custom label for the bottom of your candle jar. It’s a subtle touch that says, “I made this, with care, for you.”
The scent of sawdust, the warmth of melted wax, the focus required to make a straight cut—these are the invisible ingredients in your gift. They infuse the object with a story and a soul that can never be replicated by a machine. It’s not just a box or a candle; it’s a tangible piece of your time and affection.