My Pro Secrets for Outdoor Holiday Lights That Actually Last
I’ve spent more holiday seasons on a ladder than I can count, setting up everything from simple, elegant front porches to massive commercial displays that had to shine bright for six straight weeks. And trust me, in the beginning, I made every mistake in the book. I’ve tripped breakers in the freezing cold, chased runaway inflatable snowmen down the street in a windstorm, and spent what felt like days untangling miles of lights.
In this article
- First Things First: Plan Your Display Before You Plug Anything In
- Let’s Talk Power: The Most Important Part of Your Setup
- How to Install Decorations Like a Pro
- Adapting Your Display to Your Climate
- DIY Projects: Building Decorations That Actually Last
- When to Put Down the Tools and Call a Pro
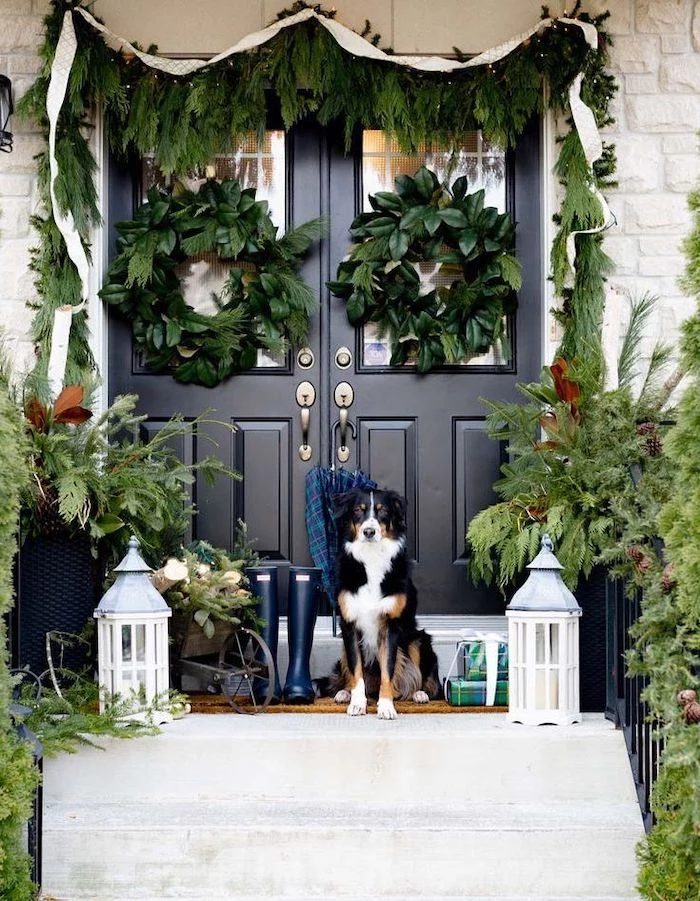
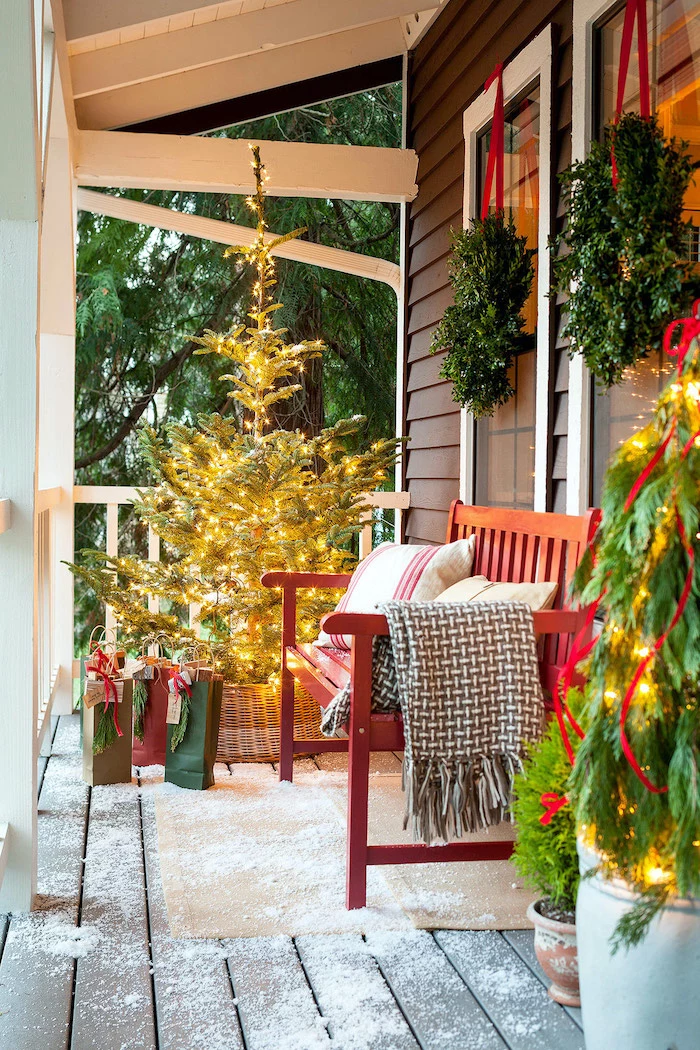
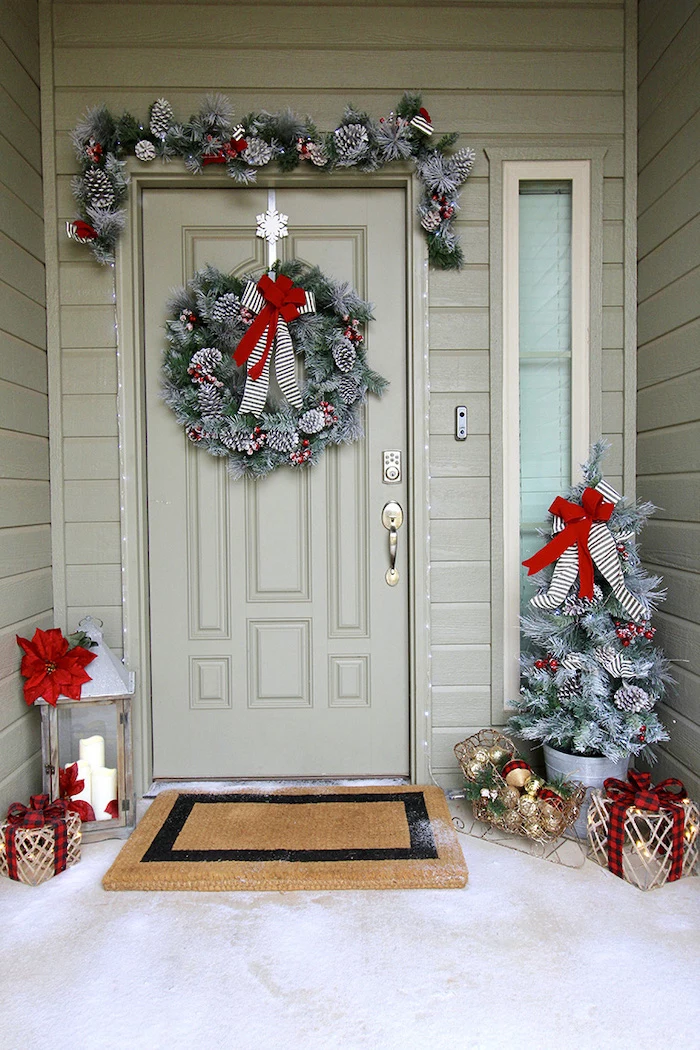
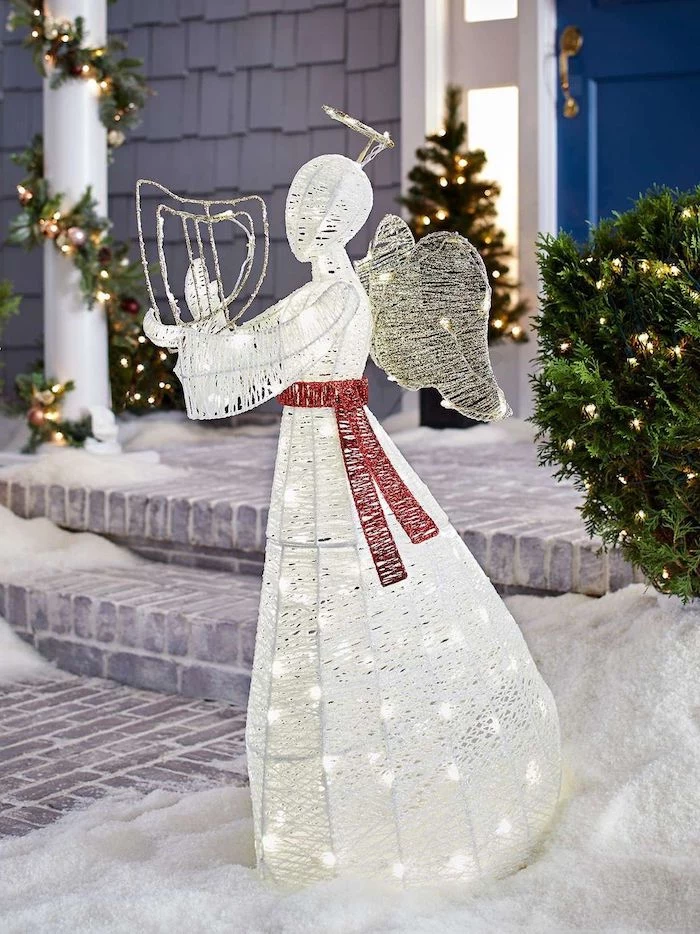
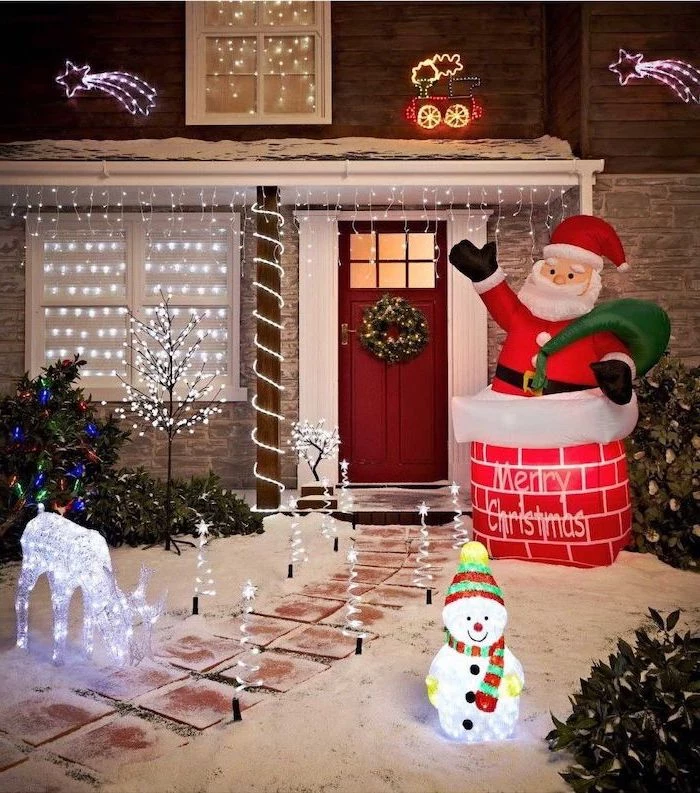
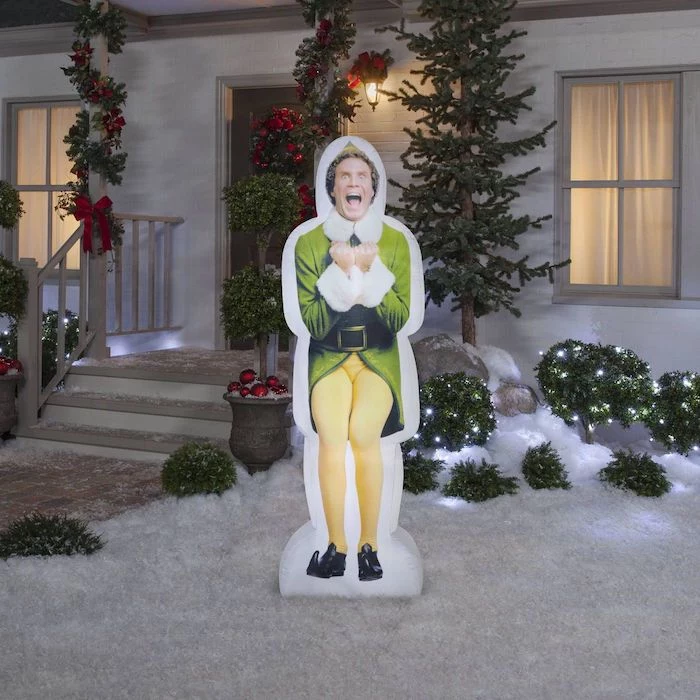
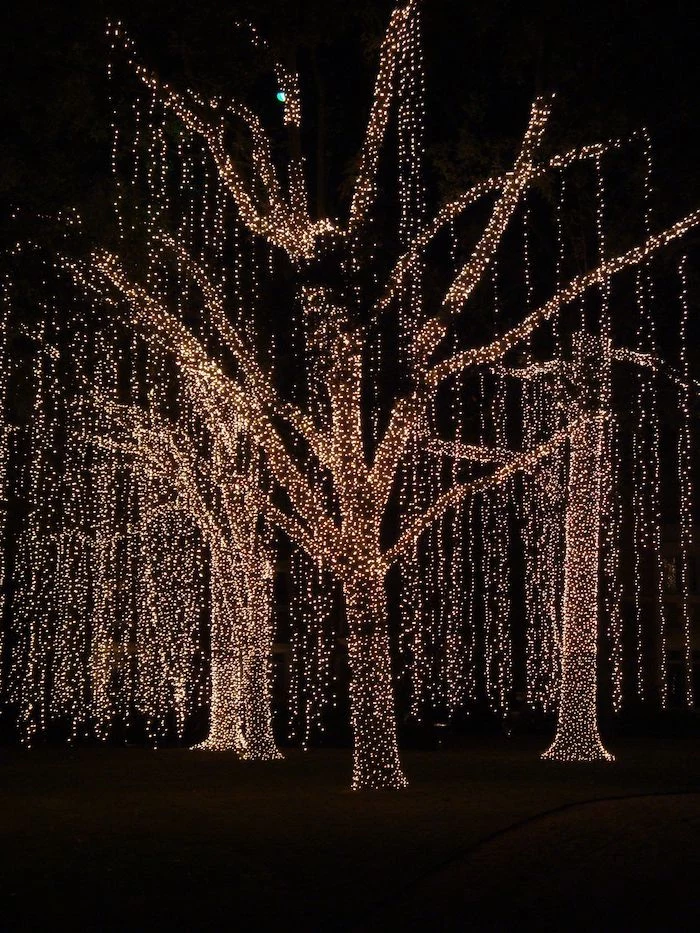
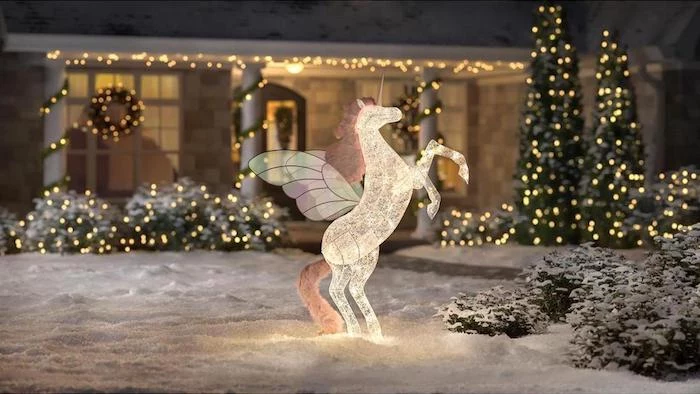
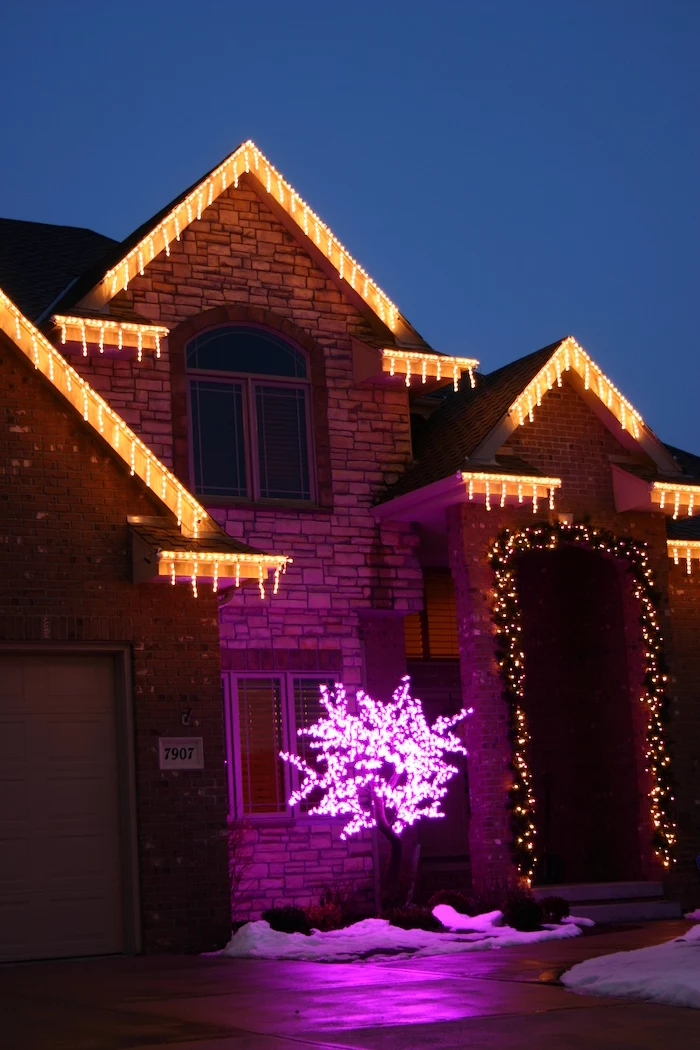
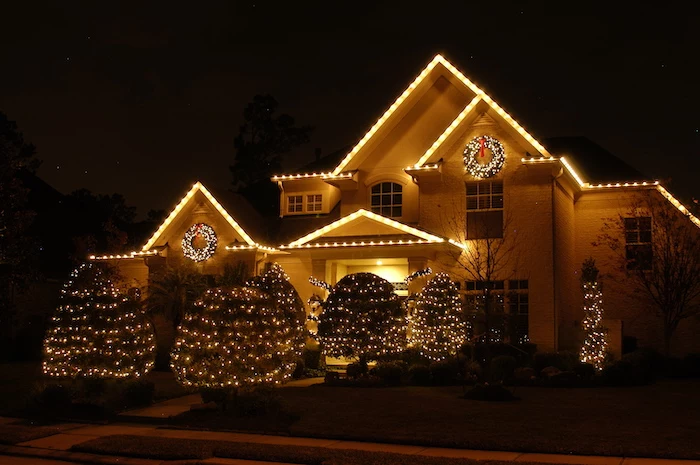
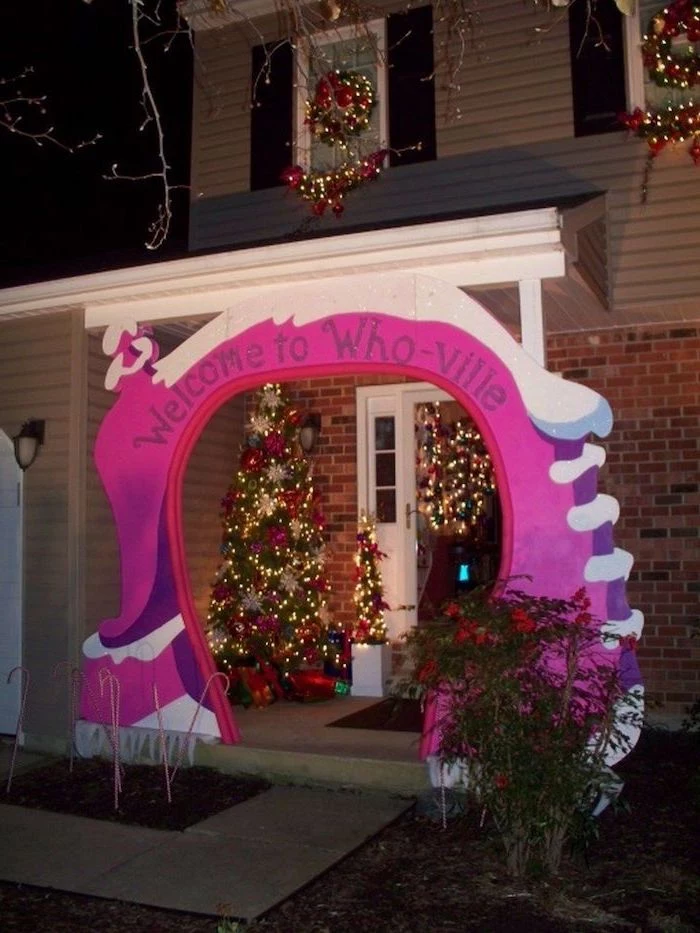
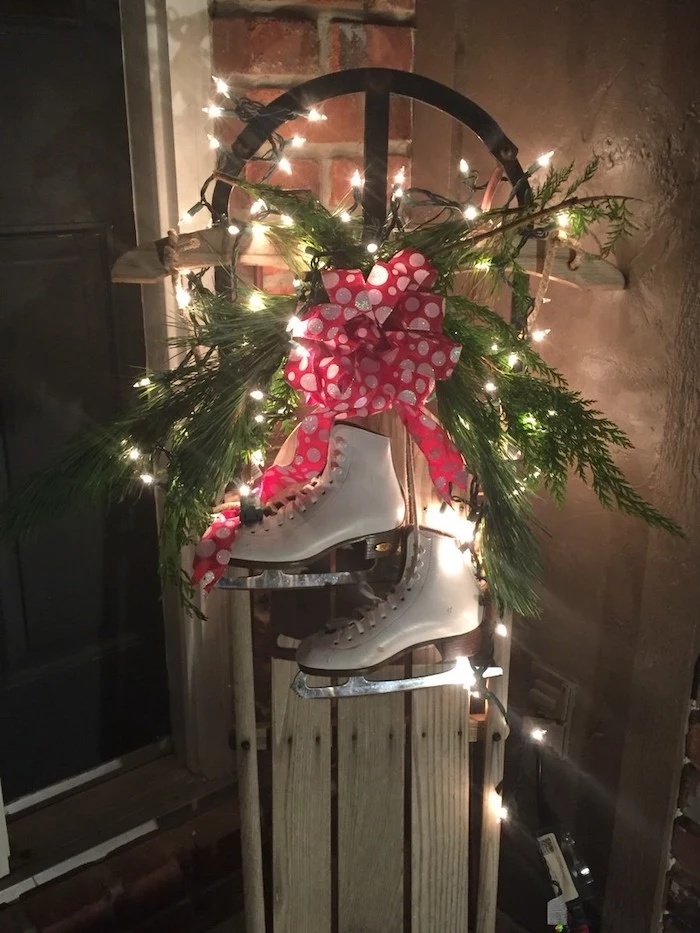
- Inspiration Gallery
Those tough lessons taught me something important: a truly beautiful outdoor holiday display isn’t about having the most lights on the block. It’s about smart planning, safety, and good old-fashioned craftsmanship. It’s about creating a little bit of magic that makes you smile every time you pull into your driveway.
So, this isn’t going to be a list of fleeting trends. This is my playbook of core techniques that the pros use. We’ll cover how to map out your design, get the electrical basics right so everyone stays safe, and install everything so it survives whatever winter throws at it. Let’s focus on doing the job right, so you can actually enjoy it.
First Things First: Plan Your Display Before You Plug Anything In
The number one rookie mistake is buying a bunch of lights and just starting to hang them. An amazing display starts with a plan, not with unboxing decorations. Seriously, taking an hour to plan can save you an entire weekend of pure frustration.
Sketch Out Your Vision
You don’t need to be an artist. Just print out a photo of your house from the street—it makes a perfect canvas. Or, a simple sketch of your house and yard works great, too.
Now, grab a pen and think about three key things:
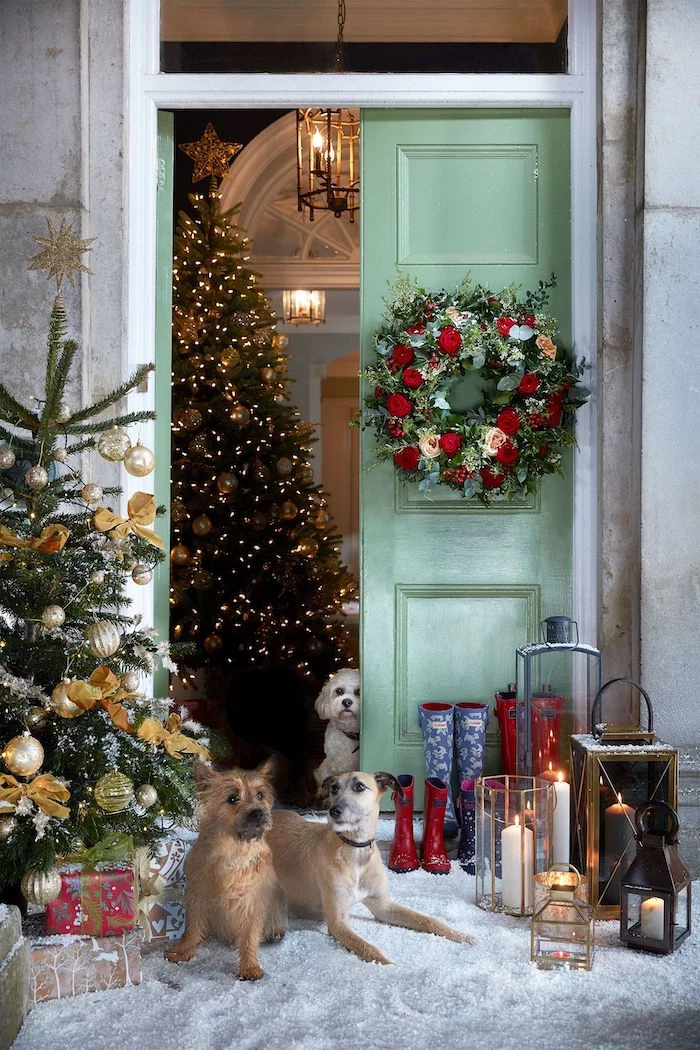
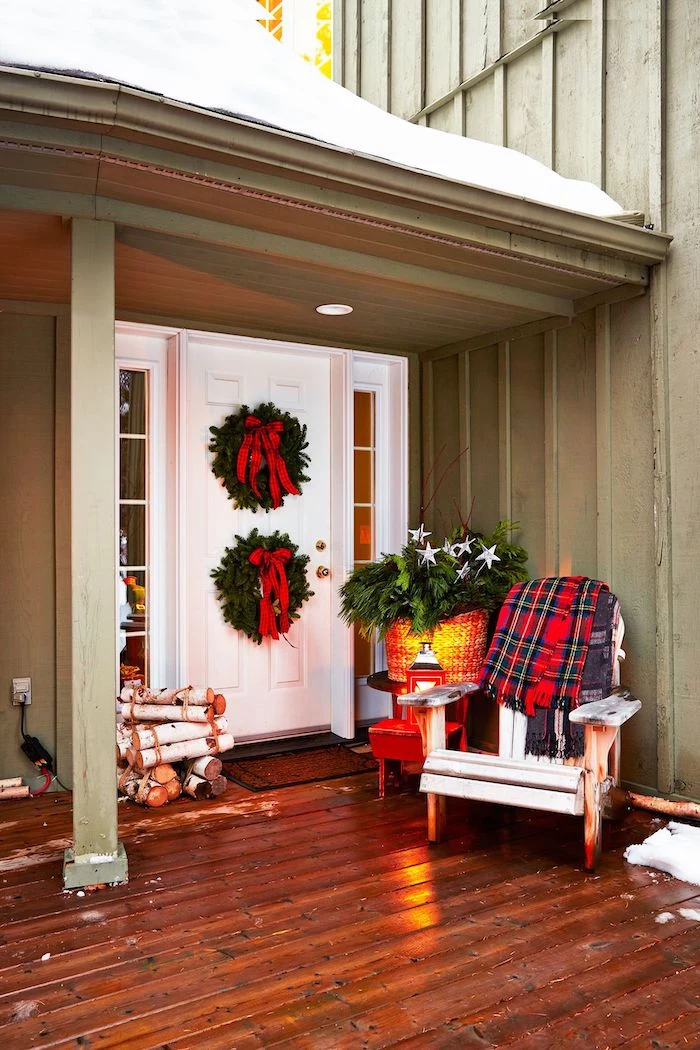
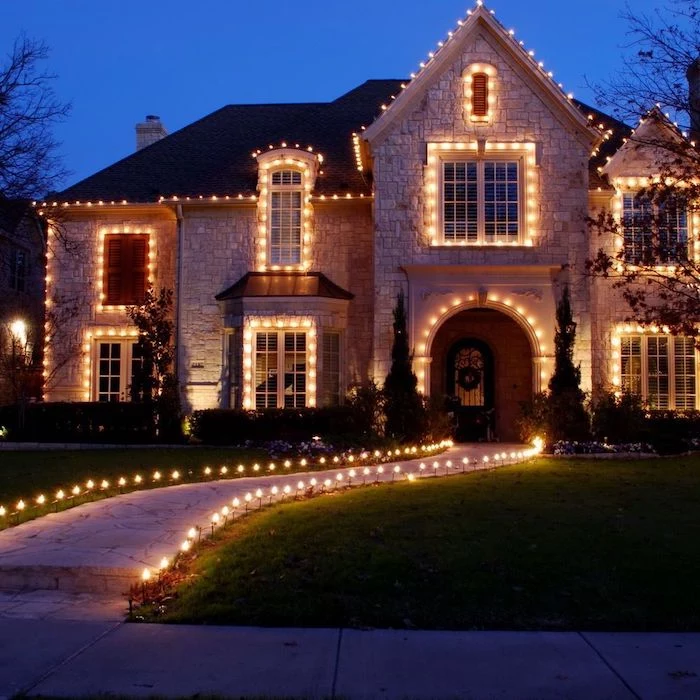
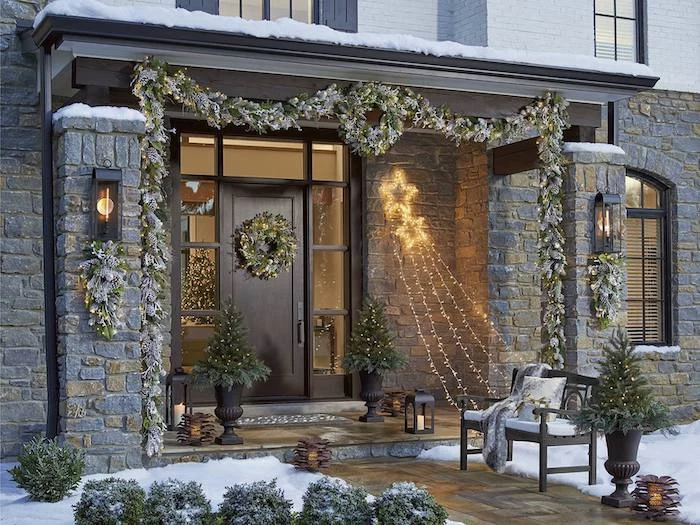
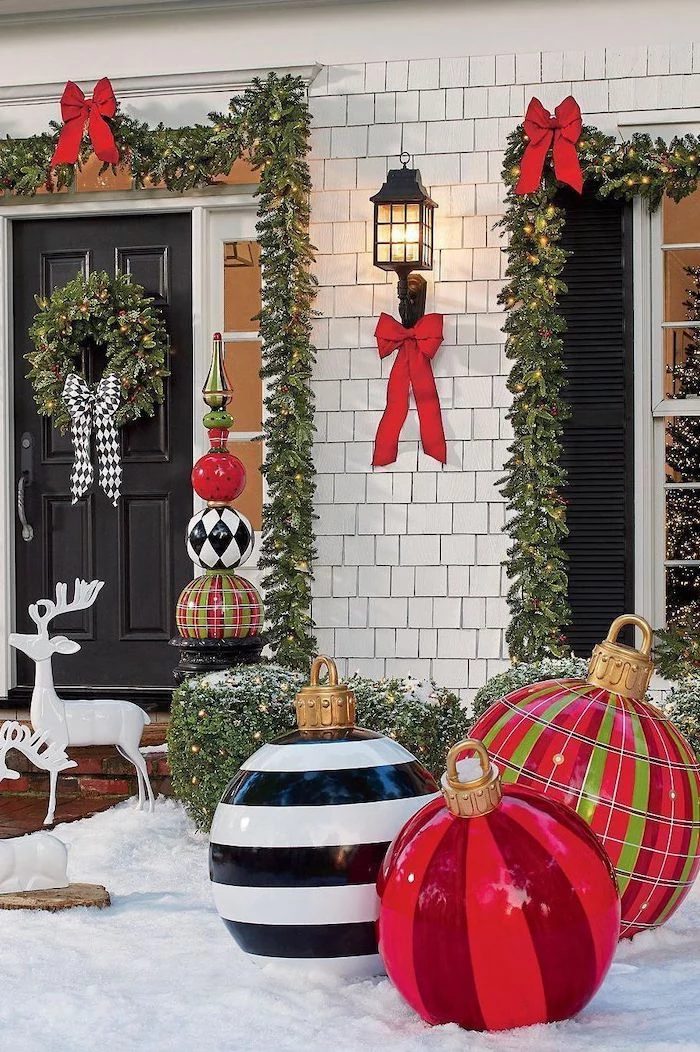
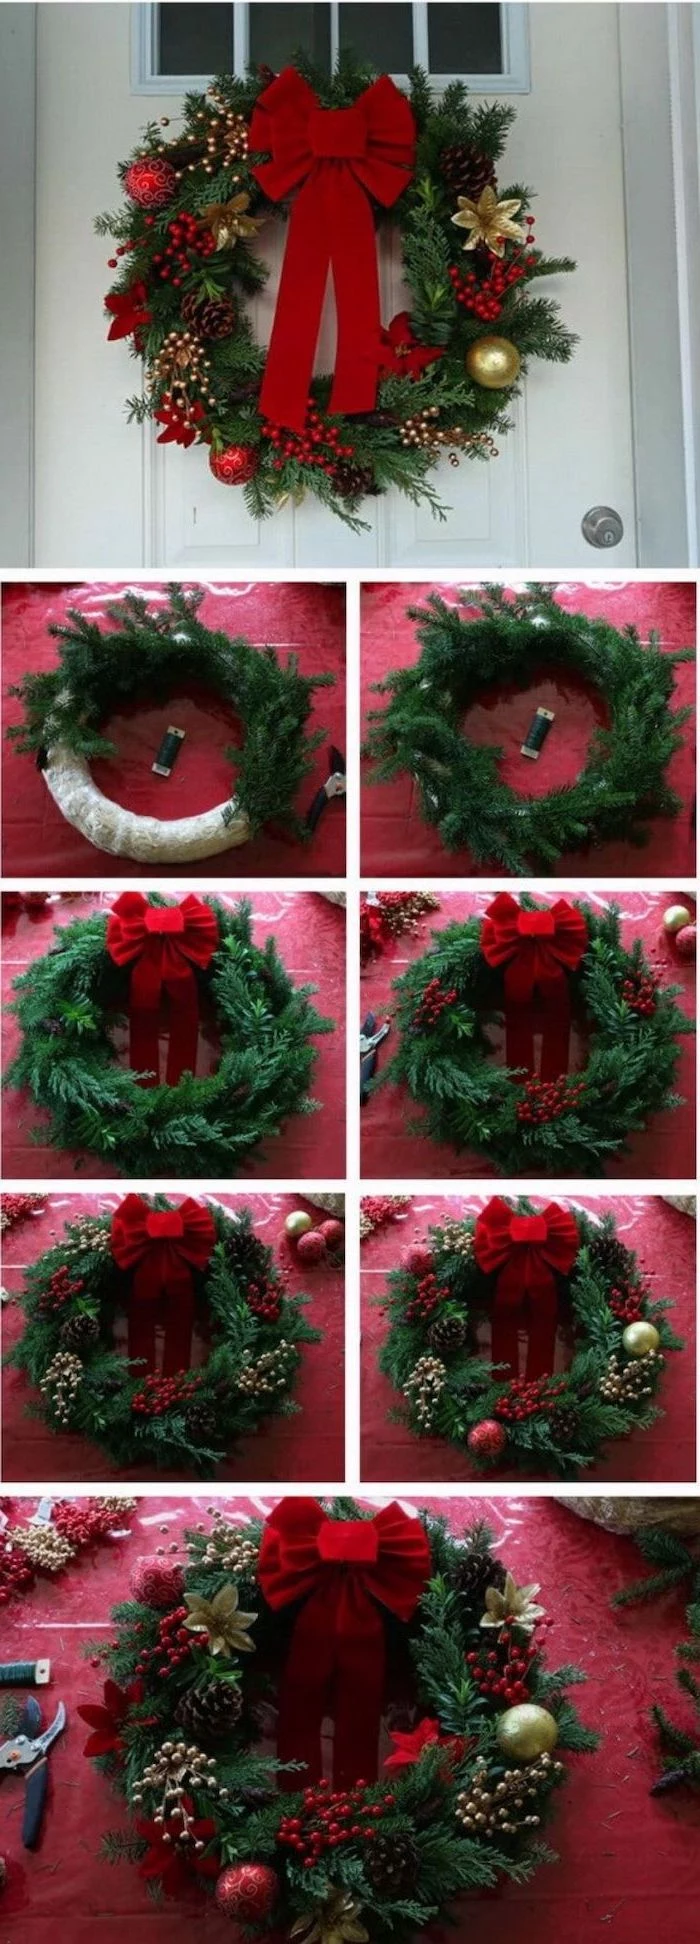
- Find Your Focal Point: What’s the first thing you want people to notice? Usually, it’s the front door, a big picture window, or a beautiful tree in the yard. Circle that on your photo. This is where your best, brightest, or most detailed decorations should go. A classic, well-lit wreath on the door is a powerful focal point for a reason.
- Check Your Sightlines: Think about where people will see your display from—the street, the sidewalk, and even from inside your house. It’s a bummer to create a masterpiece that looks amazing from the curb but feels like an airport runway landing strip from your living room sofa.
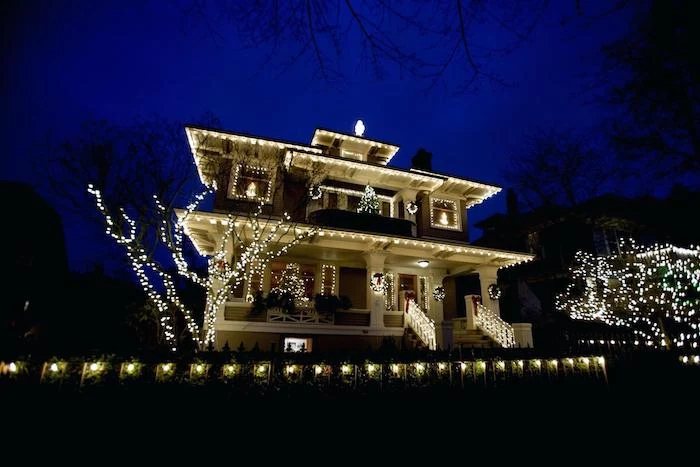
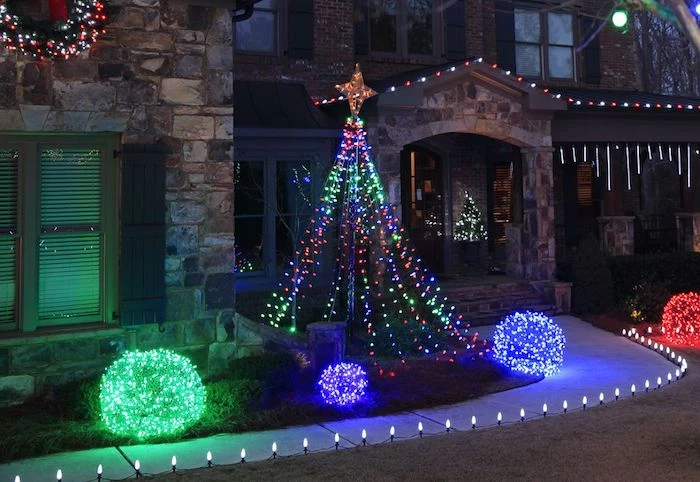
- Layer for Depth: This is what separates the okay displays from the WOW displays. Think in layers. The first layer is the house itself (roofline, windows, pillars). The second layer could be wrapping shrubs and trees in the front beds. The third layer is for yard elements, like lighted gift boxes or wireframe deer. This layering creates a rich, full scene instead of a flat one.
On your sketch, use different colors to mark where everything goes. And here’s a crucial tip: Mark where your outdoor power outlets are! This simple map instantly reveals where you’ll need extension cords and helps you figure out if you have enough lights before you’re halfway across the roof.
Let’s Talk Power: The Most Important Part of Your Setup
Okay, let’s get serious for a minute. Getting the electricity right isn’t just about making the lights turn on; it’s about preventing fires and electrical shock. I’ve seen melted plugs and dangerously overloaded circuits from folks who meant well. We’re going to make sure that doesn’t happen to you.
The Simple Math of Safe Power
Your home’s circuits aren’t infinite. A standard household circuit is usually 15 amps. To be safe, the rule of thumb is to only use 80% of that for something that runs for hours, like holiday lights. So, for a 15-amp circuit, your safe working limit is 12 amps.
So how do you figure this out? Every string of lights has a little tag near the plug that lists its power draw in amps or watts. You just add them up for everything plugged into one circuit.
But here’s why that’s easier than it sounds. Let’s do a real-world example. A single string of 100 old-school incandescent C7 bulbs could draw almost 5 amps. You could only safely plug two of those into one circuit! But a modern string of 100 LED C7 bulbs? It might only draw 0.04 amps. On that same 12-amp limit, you could theoretically connect hundreds of strings. It’s a total game-changer.
LED vs. Incandescent: There’s a Clear Winner
For years, all we had were incandescent bulbs. They have that warm, nostalgic glow, but they’re energy hogs and they get HOT. I remember feeling the heat radiating off a heavily decorated tree, and that warmth is a legitimate fire risk, especially near dry needles or old wood.
- Incandescent Bulbs: These are the classic, hot-to-the-touch glass bulbs. They are cheaper upfront (maybe $15 for a string) but burn a ton of power, burn out quickly, and break easily. The heat they produce is a real hazard.
- LED Bulbs: Modern LEDs are the only way to go for any sizable display. They cost more initially (expect to pay $25-$40 for a quality string), but they use up to 90% less energy, which you’ll notice on your power bill. They produce virtually no heat, making them incredibly safe around foliage, and they’re made of durable plastic that rarely breaks. They pay for themselves in a season or two.
Cords, Plugs, and Must-Have Protection
Your power setup is the heart of the whole display. Treat it with respect.
- GFCI Outlets are Non-Negotiable: Any outlet you use outside MUST be a GFCI (Ground Fault Circuit Interrupter). It’s the kind with the little ‘Test’ and ‘Reset’ buttons. If it detects any short circuit—like from moisture—it instantly cuts the power, which can literally save a life. If your outdoor outlets don’t have these buttons, call an electrician to install one before you do anything else. It’s not optional.
- Buy the Right Extension Cords: Never use your indoor tan or white extension cords outside. They aren’t built to handle moisture or UV rays from the sun. Head to a store like Home Depot or Lowe’s and look for cords specifically labeled ‘For Outdoor Use’. The wire thickness (gauge) is also key. For most displays, a 14-gauge or a heavy-duty 12-gauge cord is your best bet. A cheap, thin 16-gauge cord can overheat if you run too much power through it over a long distance. A good 50-foot, 14-gauge cord might run you $30-$40, but it’s a critical safety investment.
- Look for the UL Mark: Check every single thing you buy—lights, cords, timers—for a certification mark from a testing lab, like UL, ETL, or CSA. The UL-588 rating is the standard for seasonal products. This little symbol means it’s been tested for fire and safety hazards. I personally refuse to install anything that isn’t certified. It’s just not worth the risk.
How to Install Decorations Like a Pro
The way you hang your lights is what separates a clean, sharp look from a messy, amateur one. It’s also about protecting your home from damage.
Securing Lights Without Damage
Rule number one: Never, EVER use a staple gun or nails to attach lights to your house. It’s so easy to accidentally pierce the wire’s insulation, creating a short circuit and a serious fire hazard.
Instead, use dedicated plastic clips. They cost a few bucks for a pack of 50 and they’re worth every penny. You can find different types for every surface:
- Shingle Tabs: These slide perfectly under the edge of asphalt shingles without causing any damage.
- Gutter Hooks: These clip right onto the front lip of your gutters. Super easy.
- All-in-One Clips: These are the most versatile and can often be flipped to work on either shingles or gutters. They’re my go-to.
When you’re wrapping trees and shrubs, work with the plant. Start at the base, wrap the trunk, and then move out to the main branches. It takes more time than just throwing a net over the top, but the result is a thousand times better, giving the plant a beautiful, natural structure.
Quick Tips to Avoid a Headache
- Test Everything on the Ground: Before you climb a single rung of a ladder, plug in every string of lights on the ground to make sure it works. Finding a dead string when you’re already on the roof is the worst.
- Don’t Stretch the Strings: Pulling light strings too tight puts stress on the wires and connections. Give them just a little bit of slack to allow for temperature changes and prevent damage.
- Zip Ties Are Your Best Friend: For bundling wires or securing lights to railings, a pack of green or black zip ties is invaluable for a clean, tidy look.
Adapting Your Display to Your Climate
Where you live has a huge impact on your setup. A display that works fine in sunny California could be a complete failure in a Minnesota winter.
- For Snowy & Icy Climates: Water and electricity are mortal enemies. You have to keep all your plug connections off the ground. I use small stakes to elevate the connection point and then wrap it tightly with electrical tape or a purpose-built waterproof connector cover. Also, remember that heavy, wet snow can weigh a lot, so make sure your clips are secure.
- For Windy & Coastal Areas: I’ve seen way too many giant inflatables tumbling down the street in a storm. They are basically big sails. Use every single tie-down point they come with, and for big ones, I recommend upgrading the flimsy included stakes to heavy-duty rebar or screw-in ground anchors from the hardware store. If you live near the coast, the salt air is corrosive. A small dab of dielectric grease (you can find it for about $8 in any auto parts store) inside your plug connections will work wonders to prevent corrosion.
- For Hot & Sunny Climates: In places like Florida or Arizona, the sun is your biggest enemy. UV rays will destroy plastic over time, making cords brittle and colors fade. Just know that your decorations may have a shorter lifespan. Storing them in a dark, cool space like a garage (not a blazing hot attic) will make a huge difference.
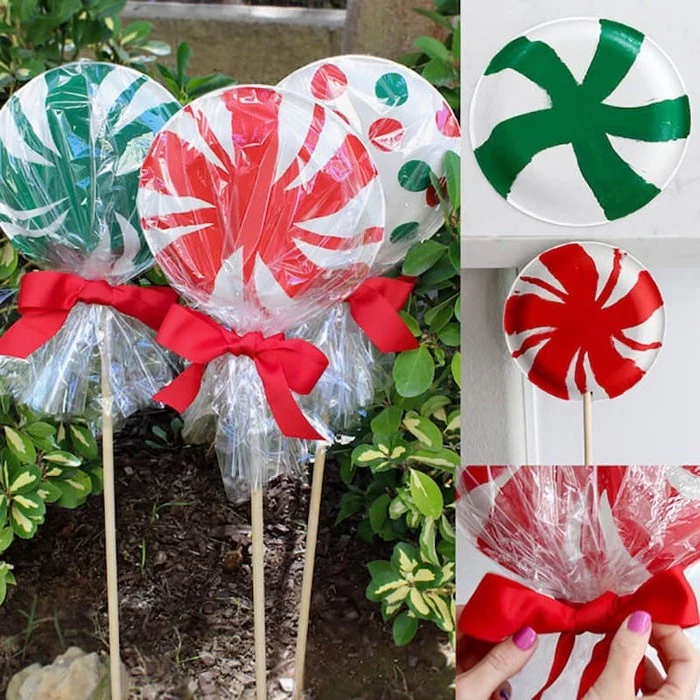
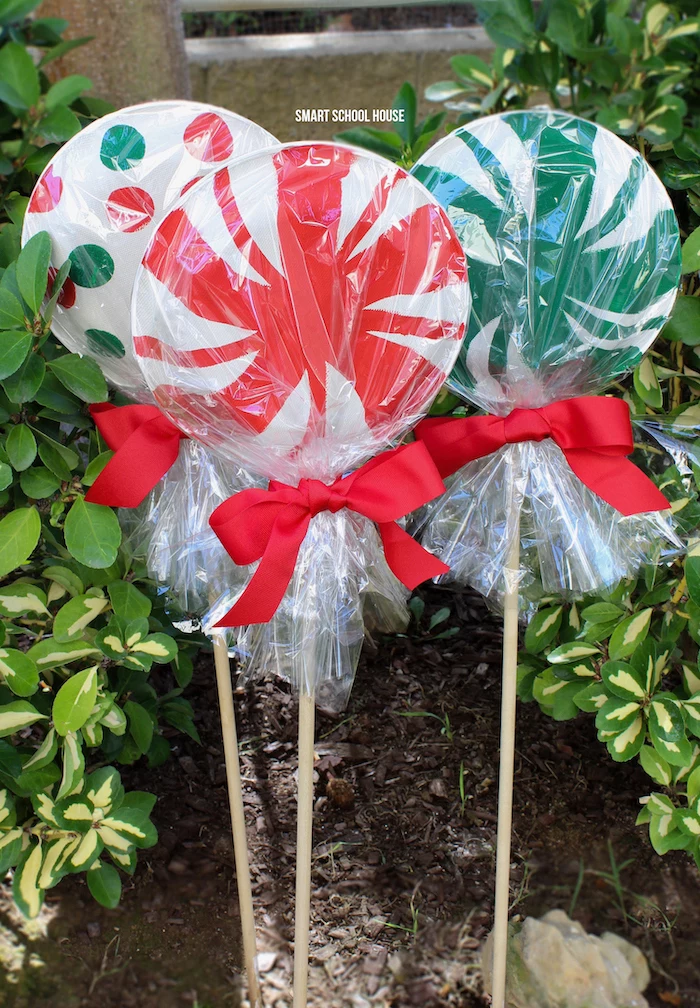
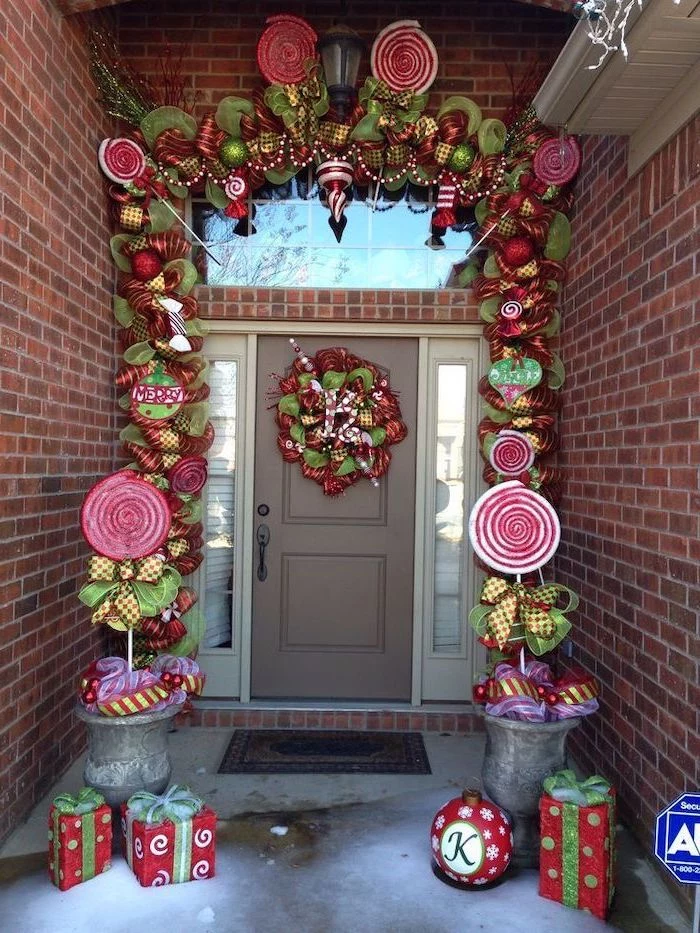
DIY Projects: Building Decorations That Actually Last
A lot of store-bought decorations are pretty flimsy. With a bit of elbow grease, you can make your own high-quality pieces that will look great for years.
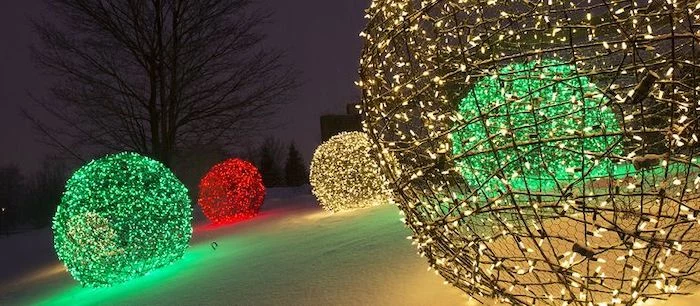
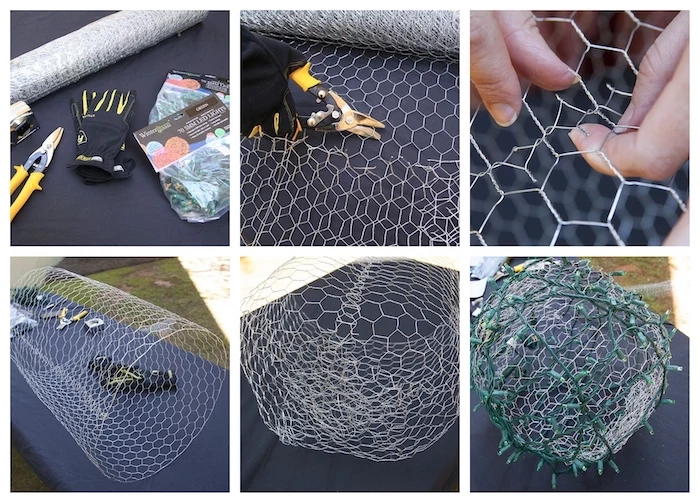
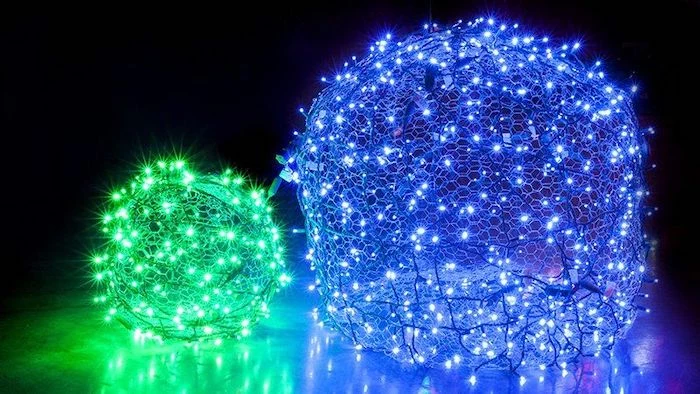
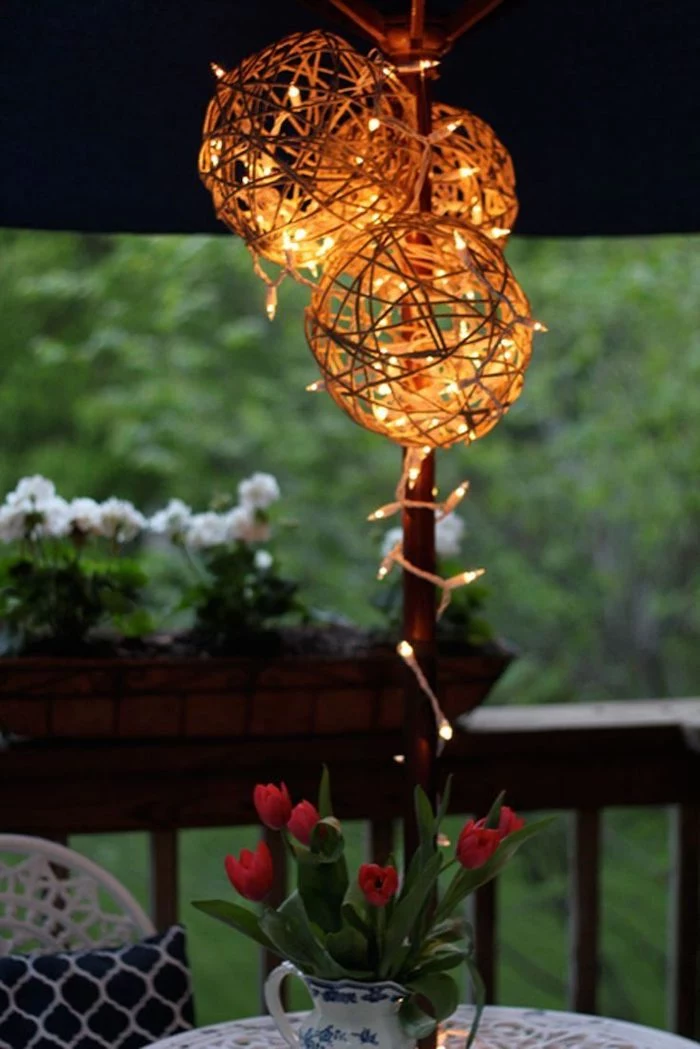
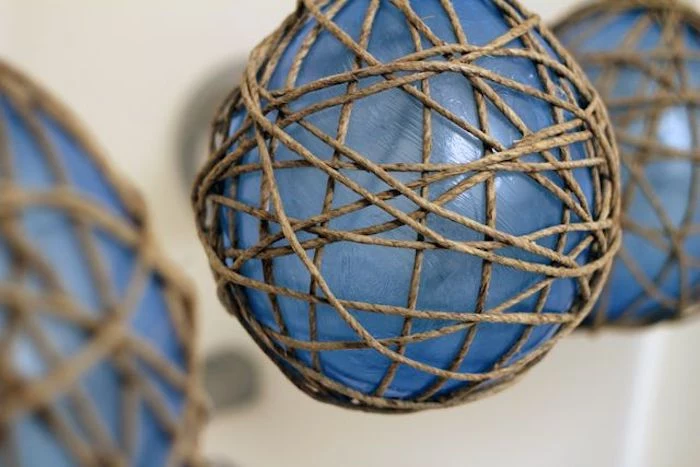
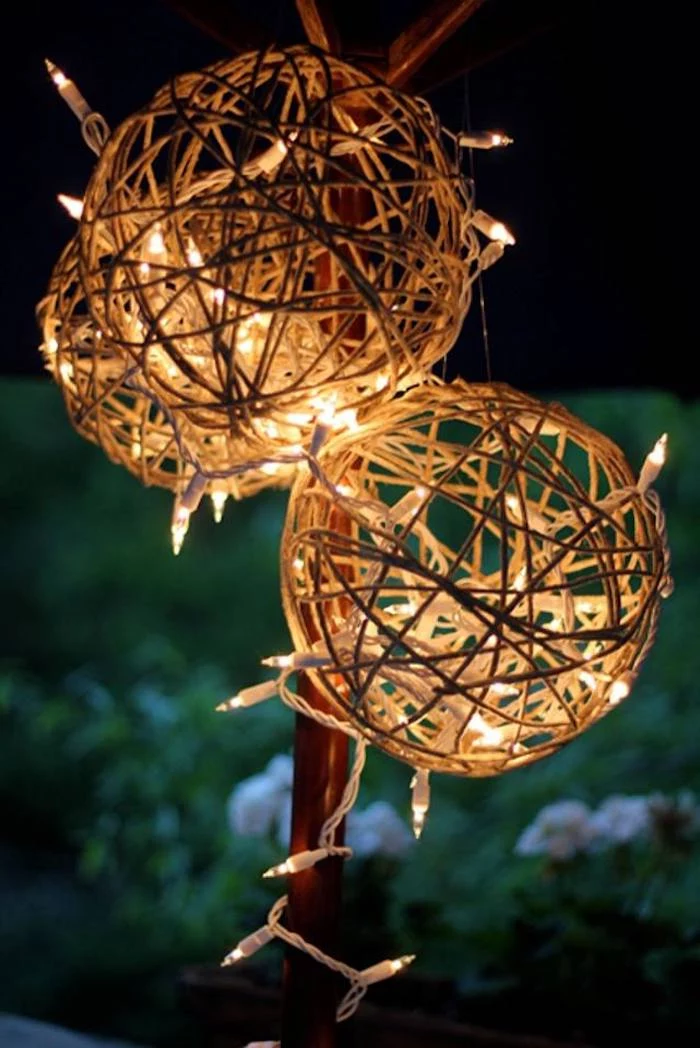
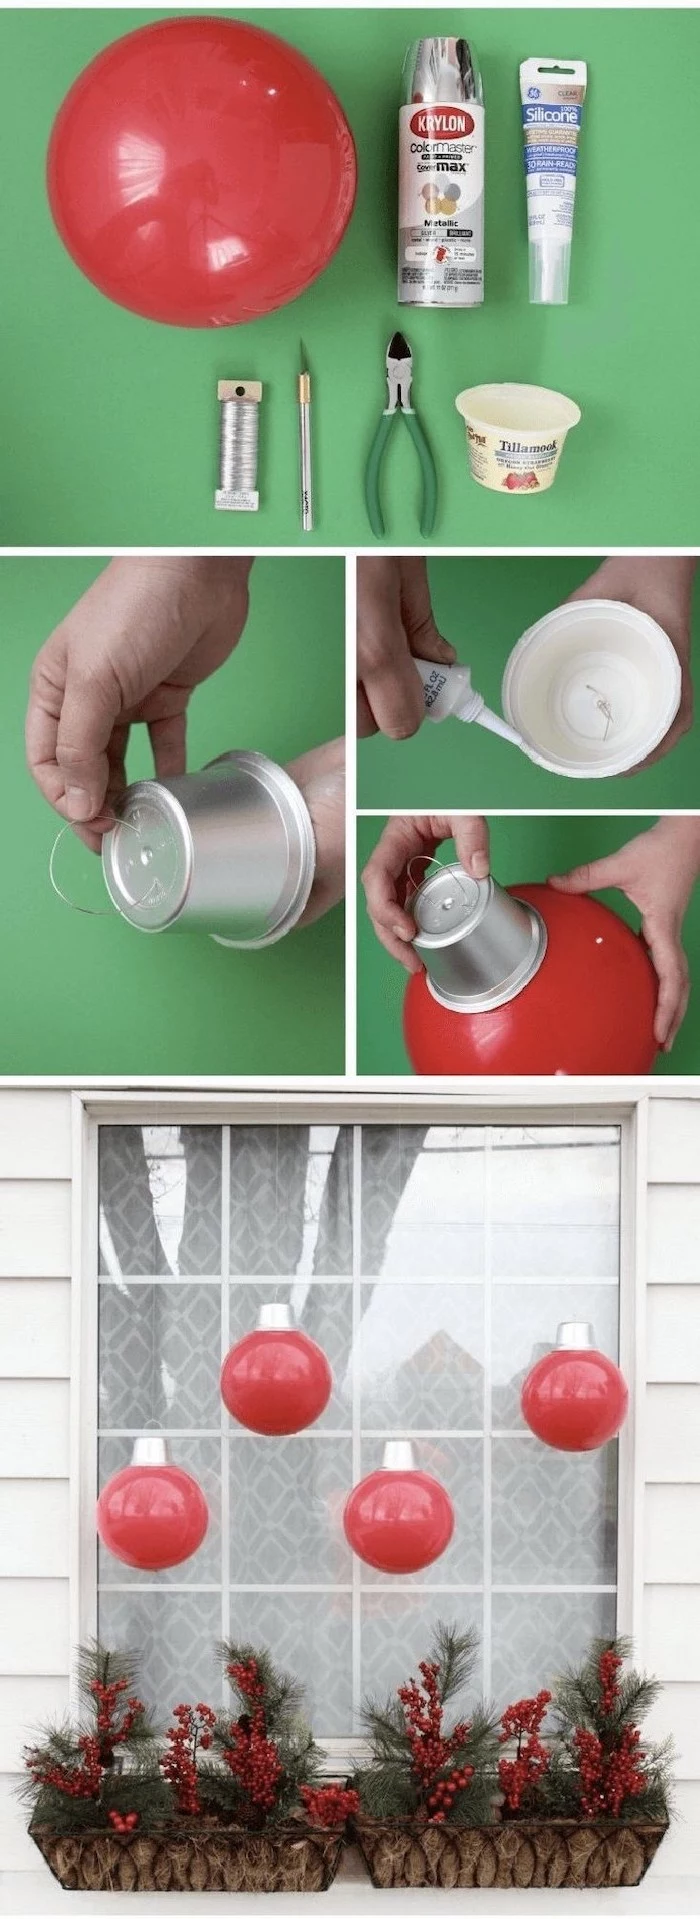
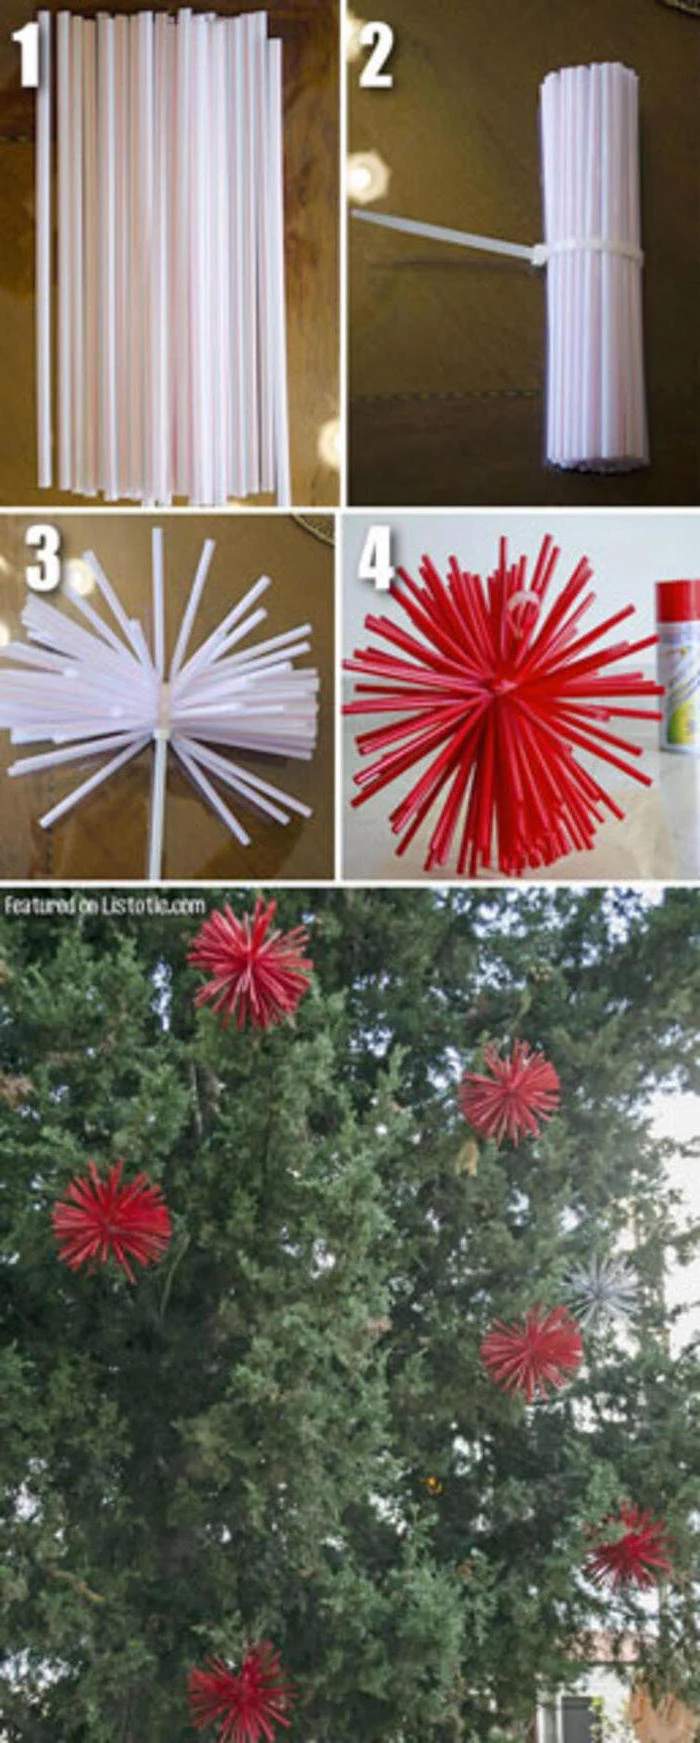
Project 1: The Pro-Style Wireframe Light Ball
Those glowing orbs hanging from trees are awesome, but the chicken-wire versions can be a pain. Using stiffer hardware cloth is the pro trick.
- Estimated Time: About 90 minutes
- Estimated Cost: $25 – $35 per ball
- You’ll Need: 1/2-inch or 1-inch galvanized hardware cloth (stiffer than chicken wire), heavy-duty wire cutters, thick leather work gloves (non-negotiable!), zip ties, and a string of 50 or 70 LED mini lights.
- The Method: Cut a rectangle of the hardware cloth where the length is about double the width (like 2 feet by 4 feet). Roll it into a cylinder and fasten the seam with zip ties. Now, the patient part: slowly start pressing the open ends inward, shaping it into a sphere with your hands. It won’t be perfect, and that’s okay. Once you have a ball shape, wrap your LED lights around it, tucking the wire into the mesh to hold it securely. They look amazing clustered together on the lawn or hanging from a big tree branch.
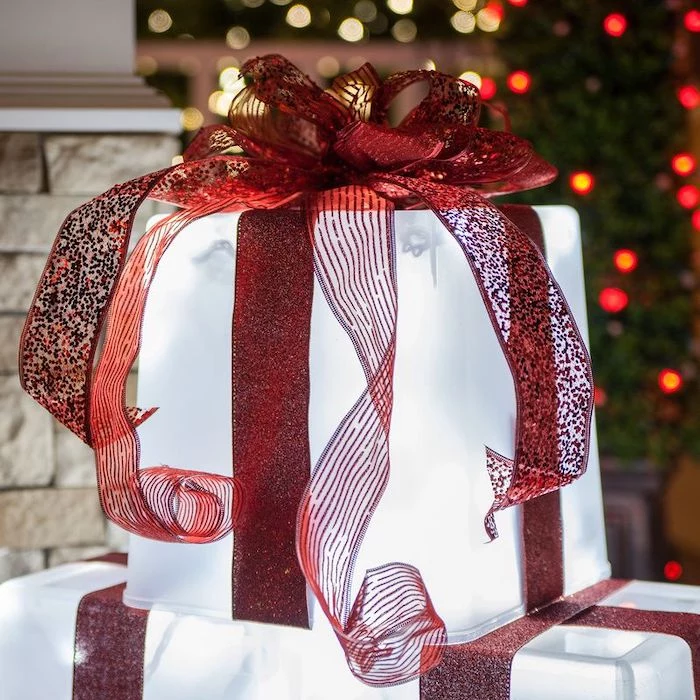
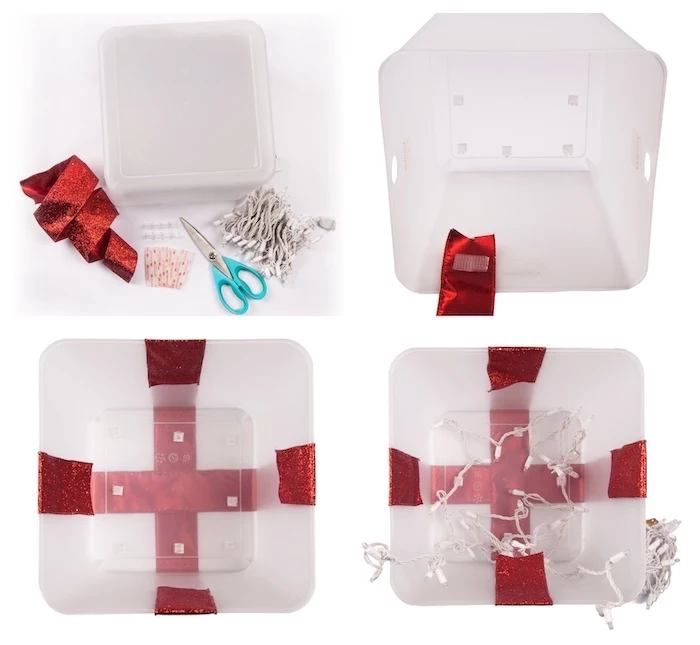
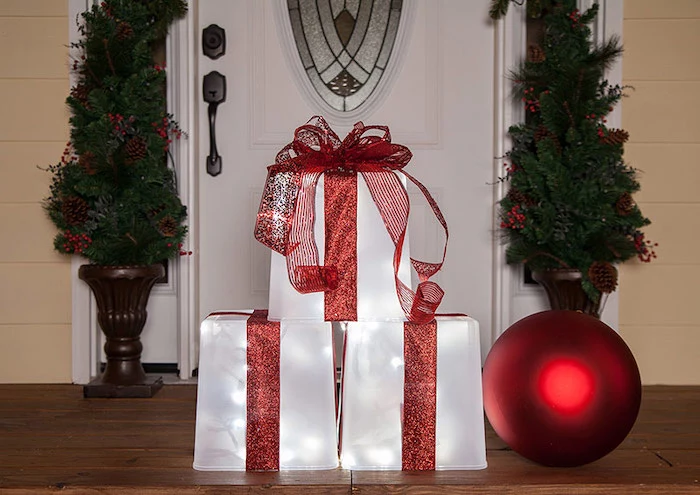
Project 2: The Weatherproof Illuminated Gift Box
You can make a lighted gift box from a plastic tote, but this method creates a rigid, durable frame that won’t collapse or fade.
- Estimated Time: 2-3 hours
- Estimated Cost: $40 – $50 for a large box
- You’ll Need: 1/2-inch PVC pipe and four 3-way corner fittings, PVC cutter, corrugated plastic sheets (like Coroplast), outdoor-rated fabric ribbon, UV-resistant zip ties, and a string of LED lights.
- The Method: Build a cube frame out of the PVC pipe and fittings. Cut the Coroplast sheets to fit each side, and attach them to the frame with zip ties, leaving one side open. Place the lights inside, drill a small hole for the plug to exit, and then attach the final panel. Wrap it with a big, beautiful outdoor ribbon. This thing is built like a tank and will last for many seasons.
Project 3: The Safer Twine Lantern
Wrapping a balloon with glue-soaked twine is a classic craft, but it can be a fire hazard if you use the wrong lights. This is for covered areas ONLY, like a front porch.
- CRITICAL SAFETY WARNING: I can’t say this loudly enough. Never, ever use regular plug-in (120V) lights in a homemade twine lantern. The heat is a massive fire risk, and any moisture creates an electrocution hazard. You MUST use low-voltage, battery-operated LED “fairy lights” for this project.
- The Method: Inflate a balloon, soak cotton twine in a mix of two parts white glue to one part water, and wrap it all around the balloon. Let it hang and dry for a full 24 hours until it’s rock solid. Pop the balloon, and spray the twine sphere with a few coats of clear, waterproof sealer. Carefully tuck the battery-powered fairy lights inside. It creates a beautiful, delicate glow, but please, keep it on a dry, covered porch away from rain and snow.
When to Put Down the Tools and Call a Pro
For some people, this becomes a serious hobby involving light-sequencing software and custom-welded props. That’s awesome, but it requires deep electrical and fabrication knowledge.
For the rest of us, it’s smart to know our limits. There is absolutely no shame in calling a licensed electrician; in fact, it’s the responsible choice. Call a pro if:
- You don’t have GFCI-protected outdoor outlets.
- Your breaker keeps tripping and you can’t figure out why.
- Your plan requires adding a new outlet or a dedicated circuit from your breaker panel.
- The electrical load calculations just feel too complicated or overwhelming.
A service call might cost between $150 and $250, but it’s the best money you’ll ever spend for your peace of mind and your family’s safety.
A Final Thought…
You know, after all these years, the best part of the job isn’t flipping the switch on some massive display. It’s seeing the look on a kid’s face, or having a neighbor stop to tell you how much they enjoy the lights on their evening walk. A well-crafted display brings a bit of warmth and joy to the darkest, coldest time of the year. So take your time, plan it out, and build something you’re proud of. Do it safely, do it well, and have fun with it.
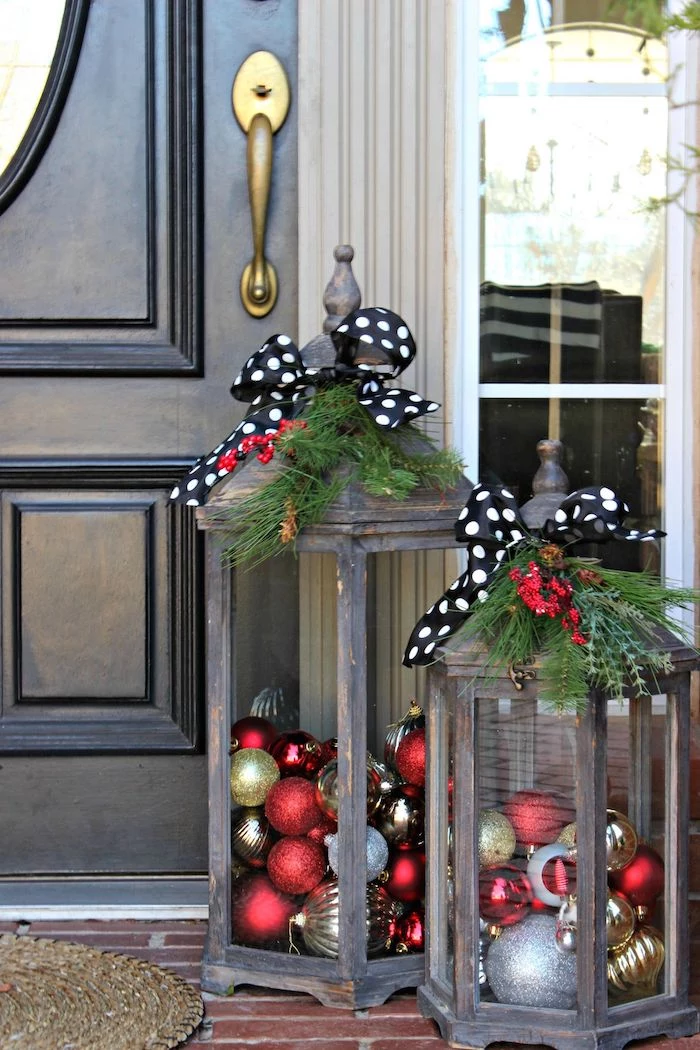
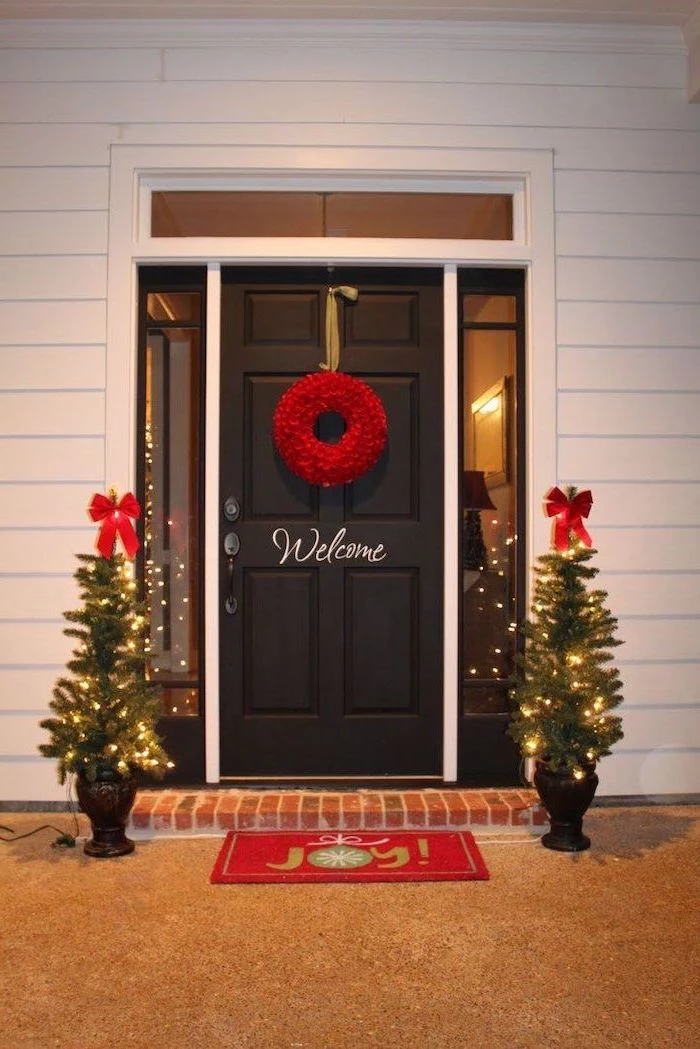
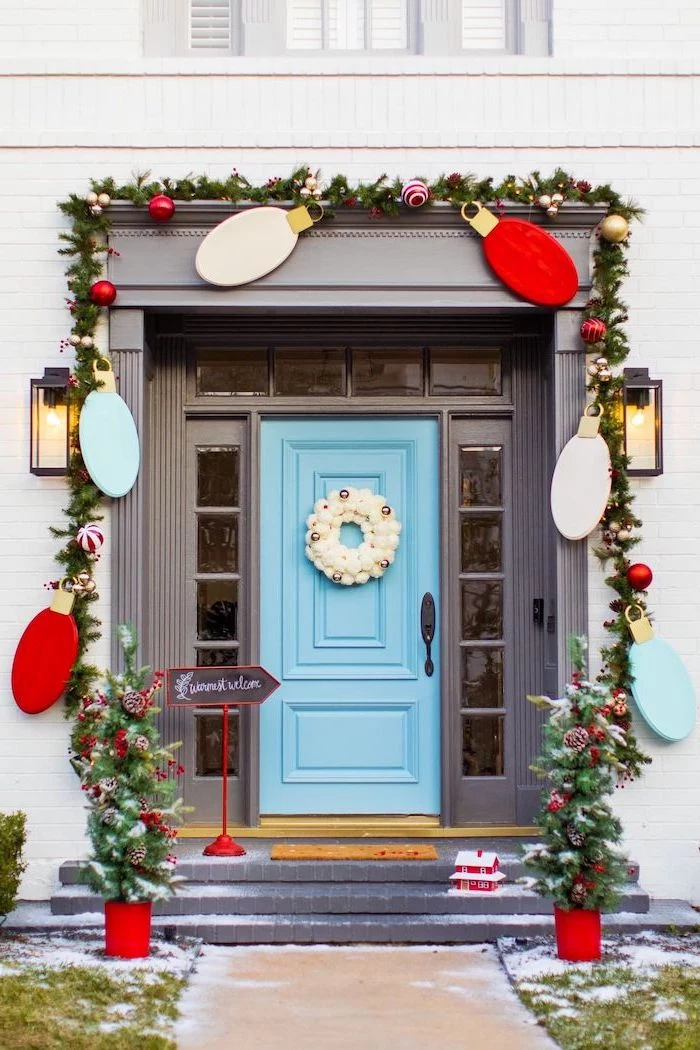
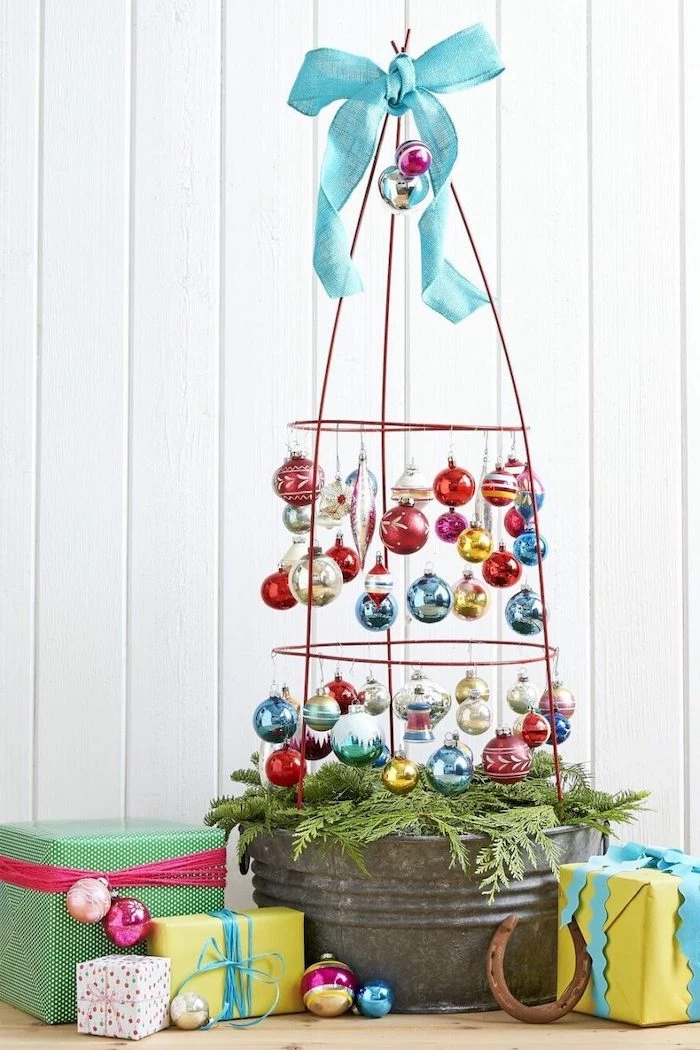
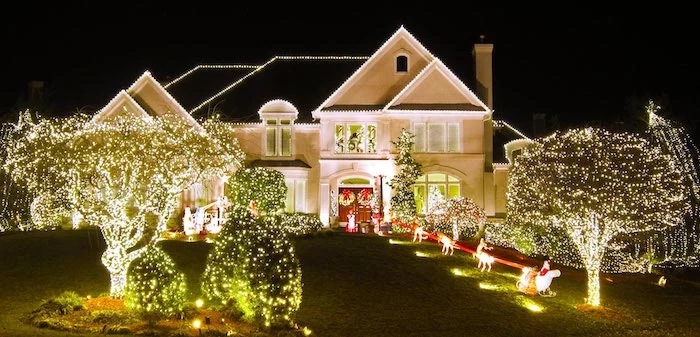
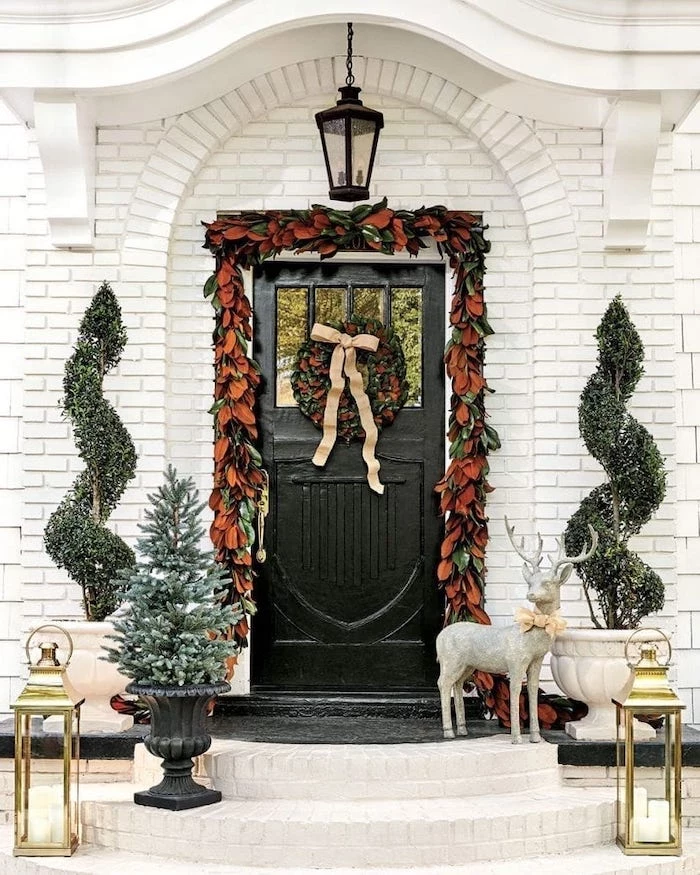
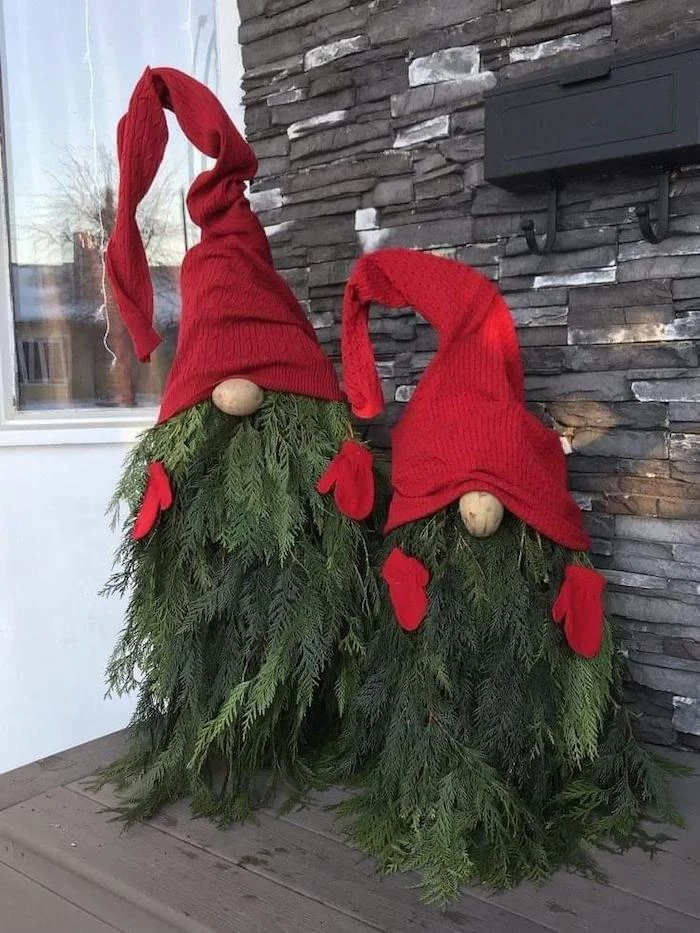
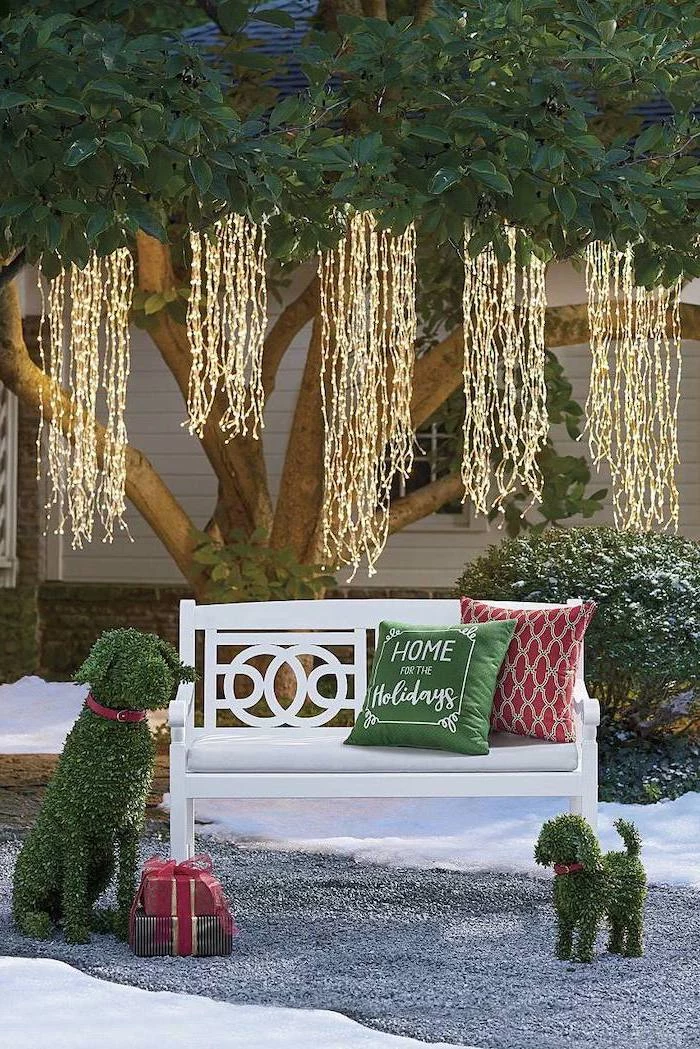
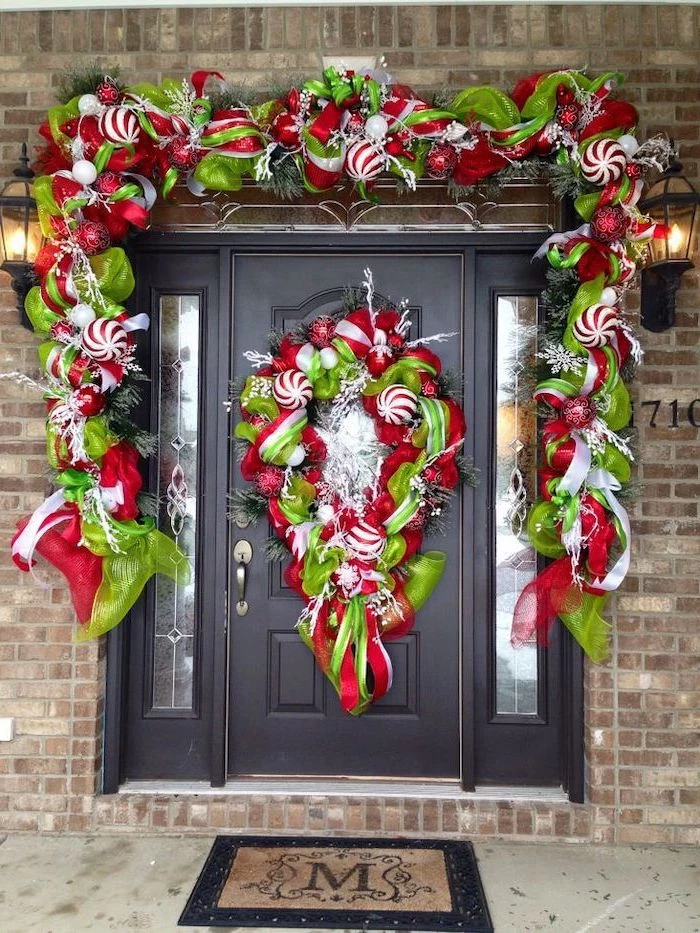
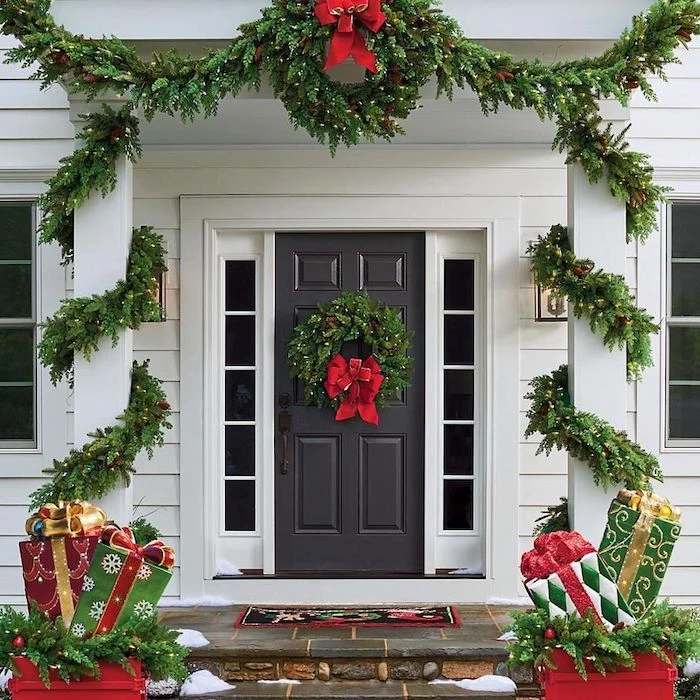
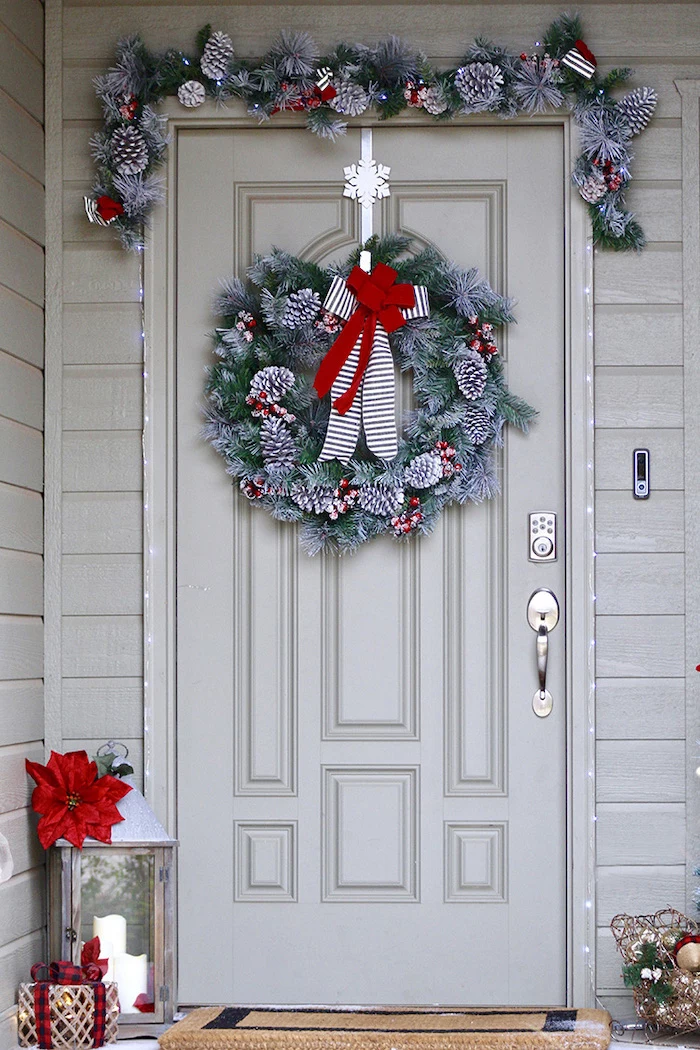
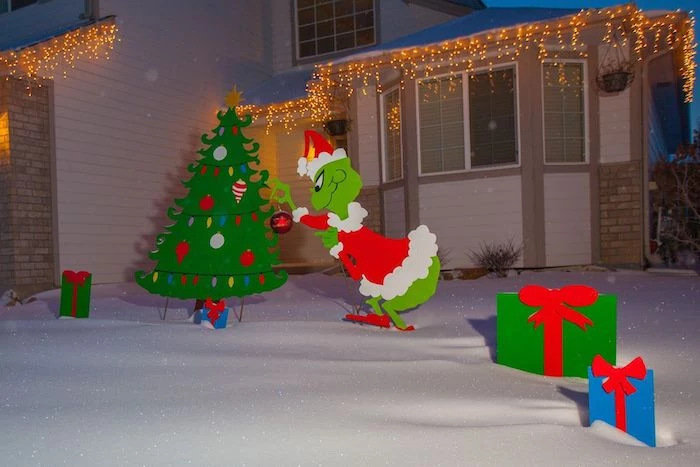
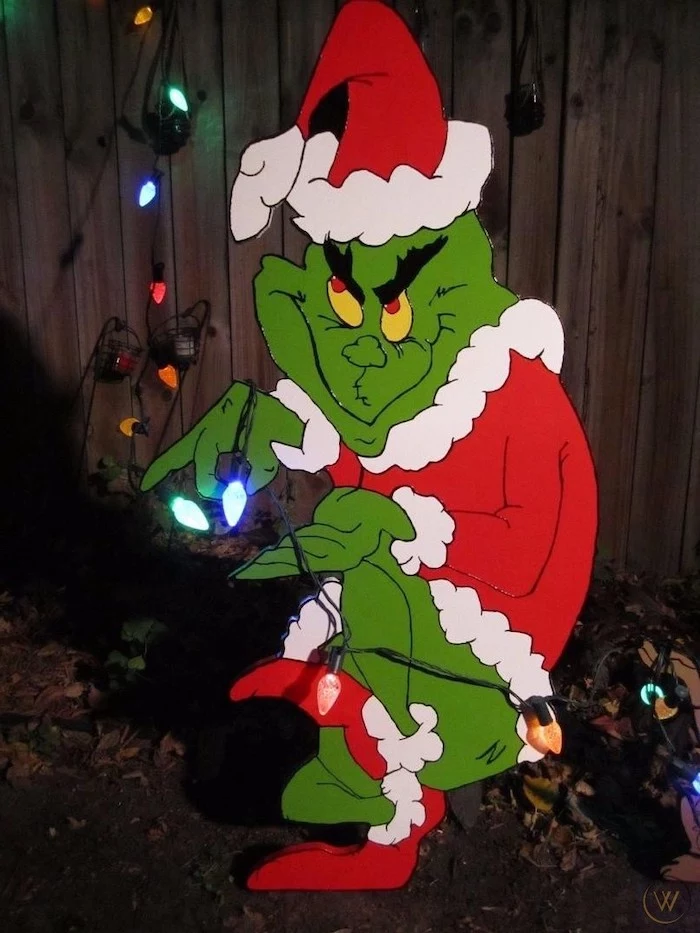
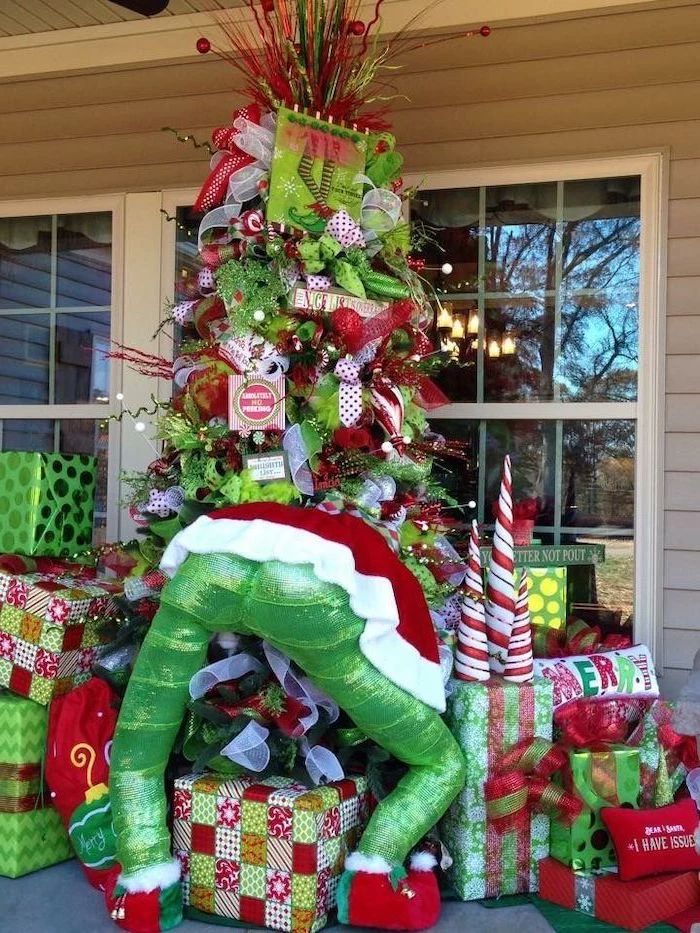
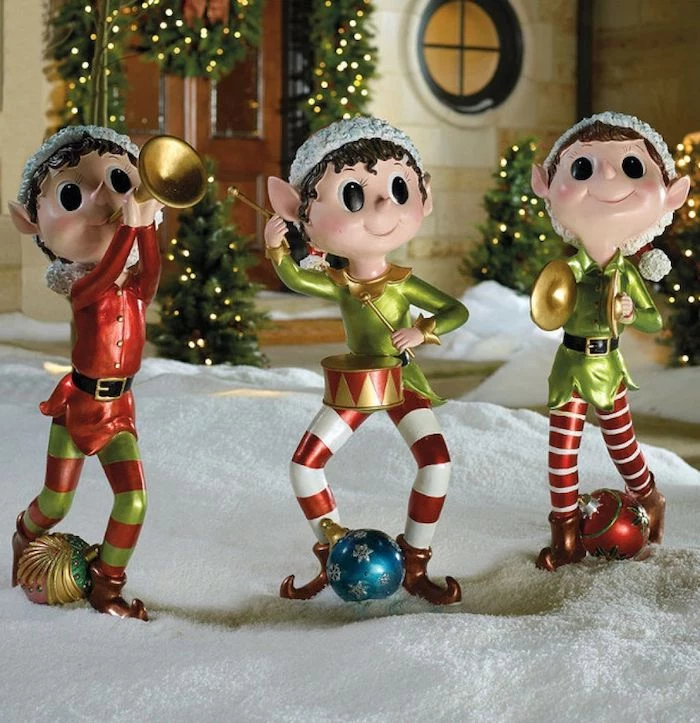
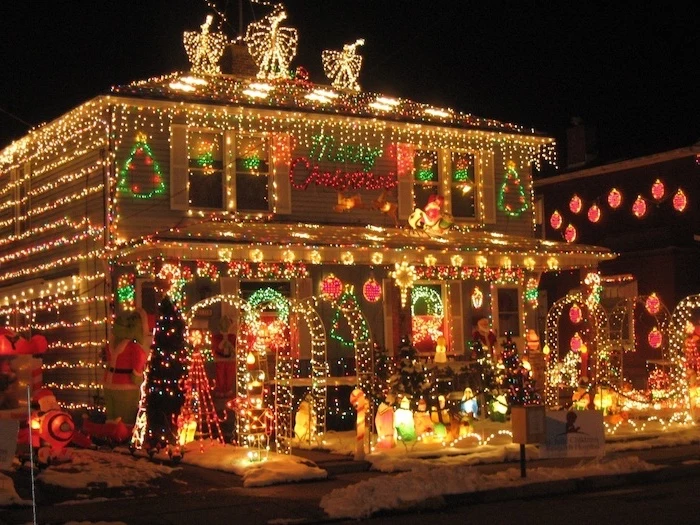
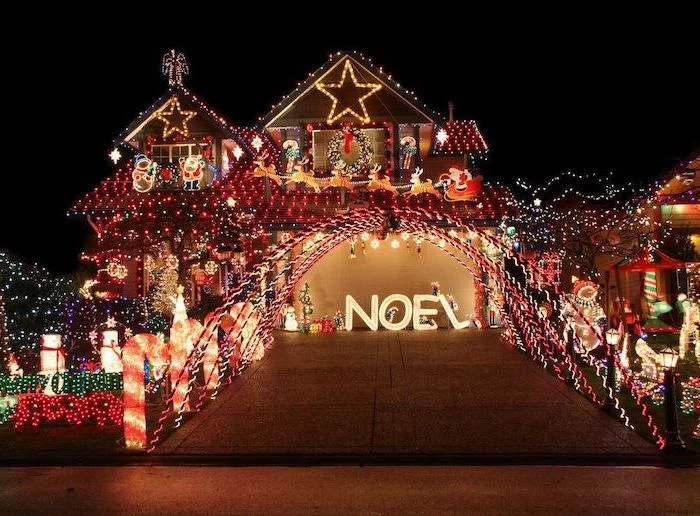
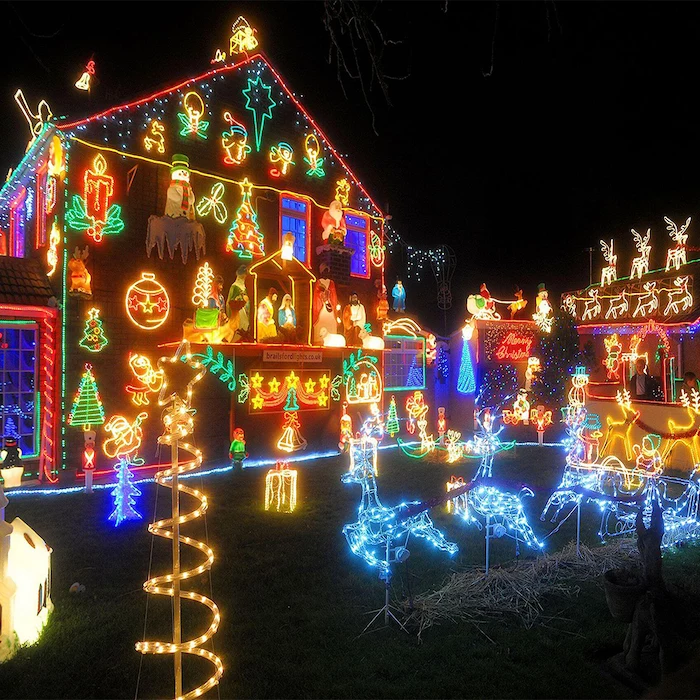
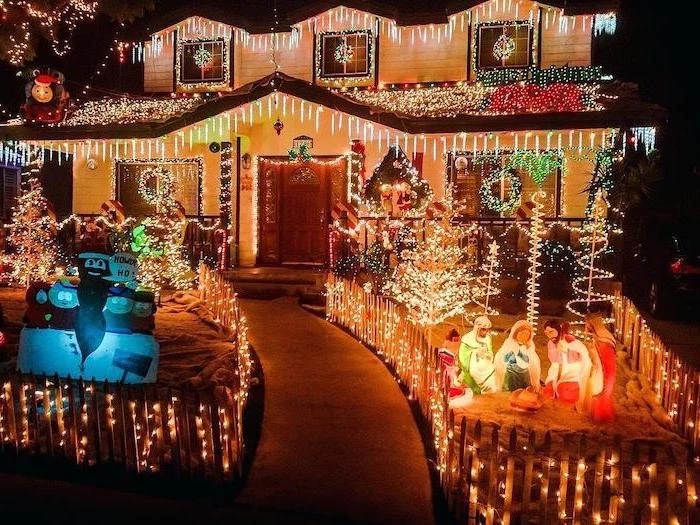
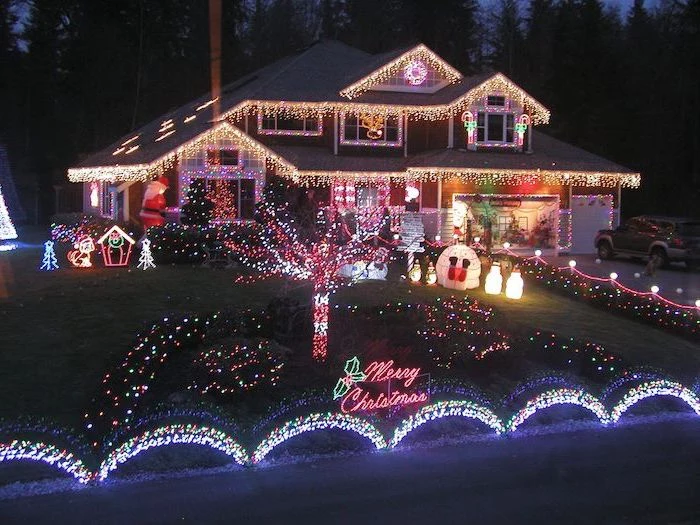
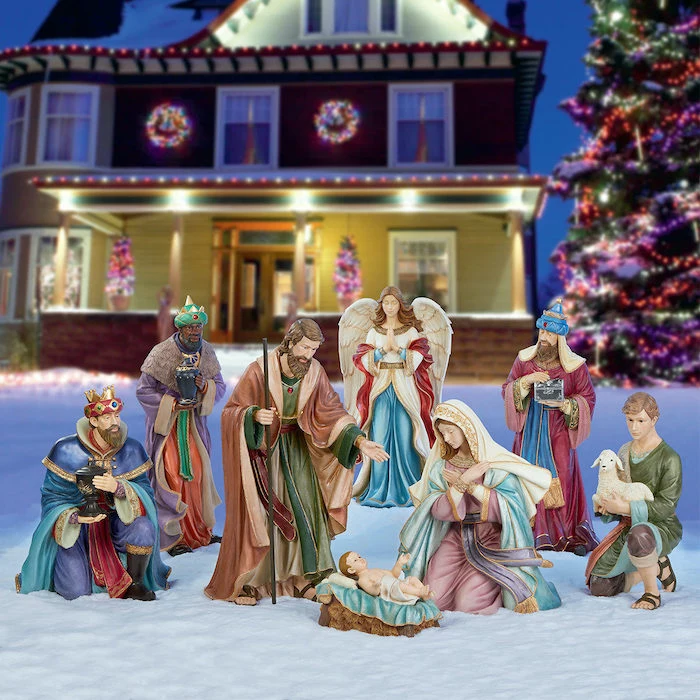
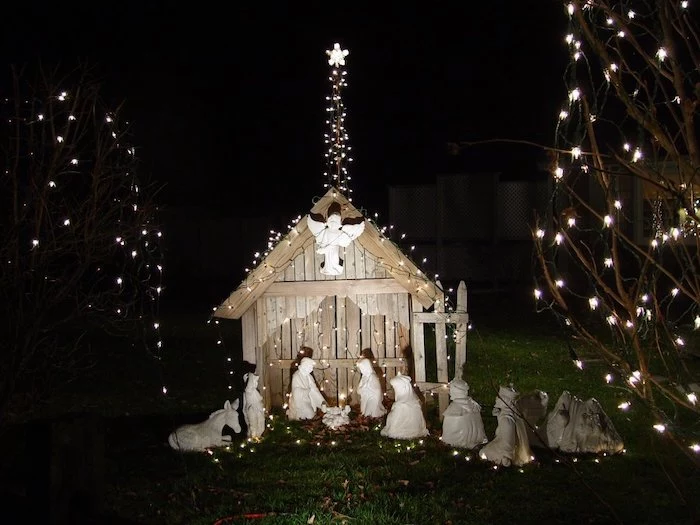
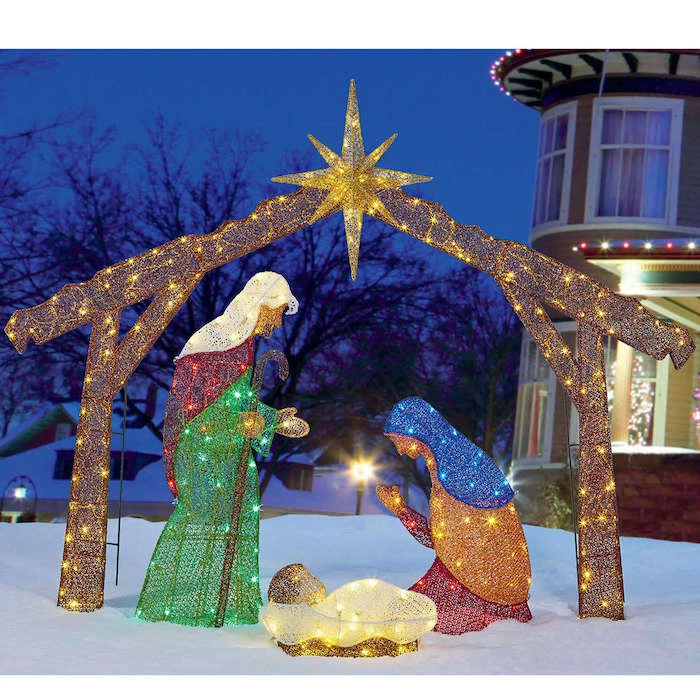
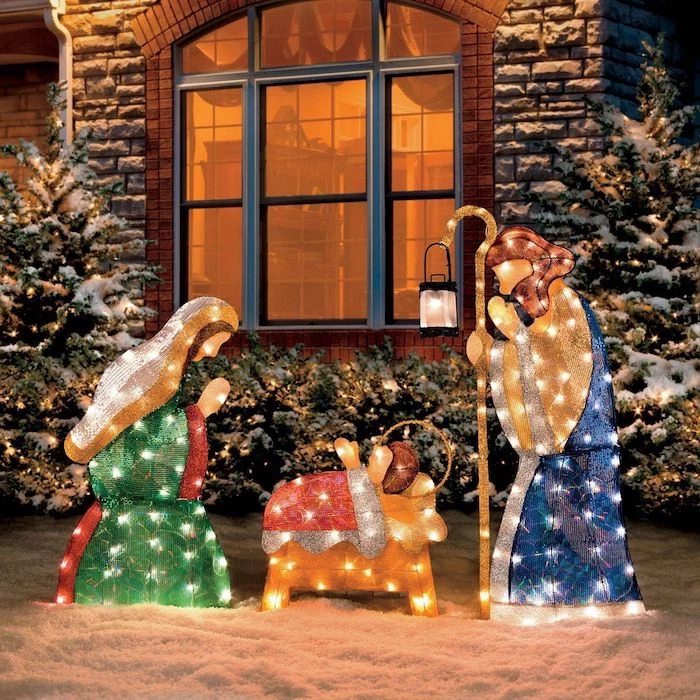
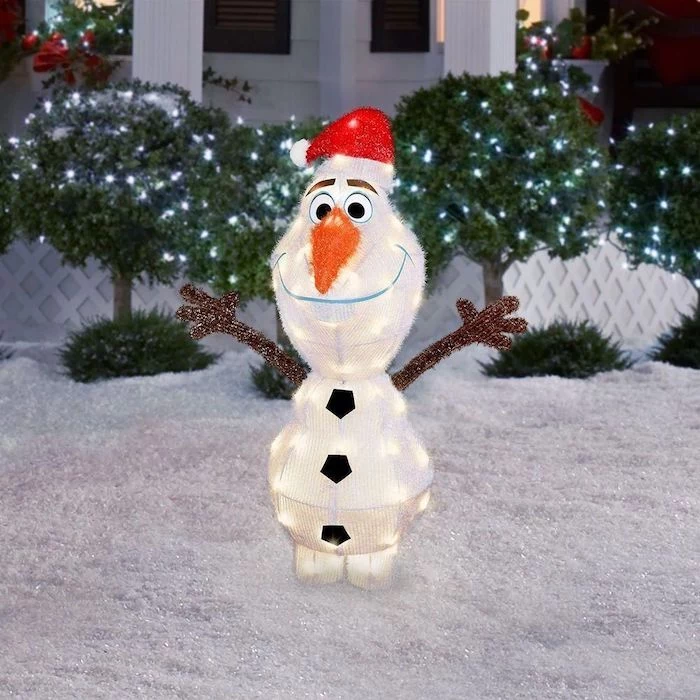
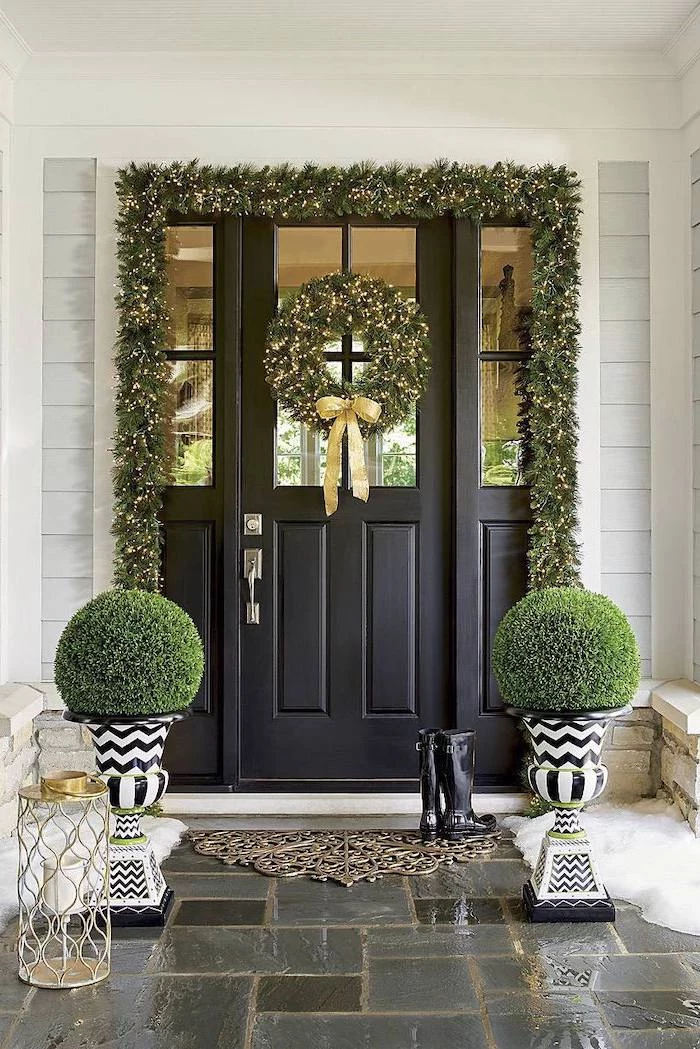
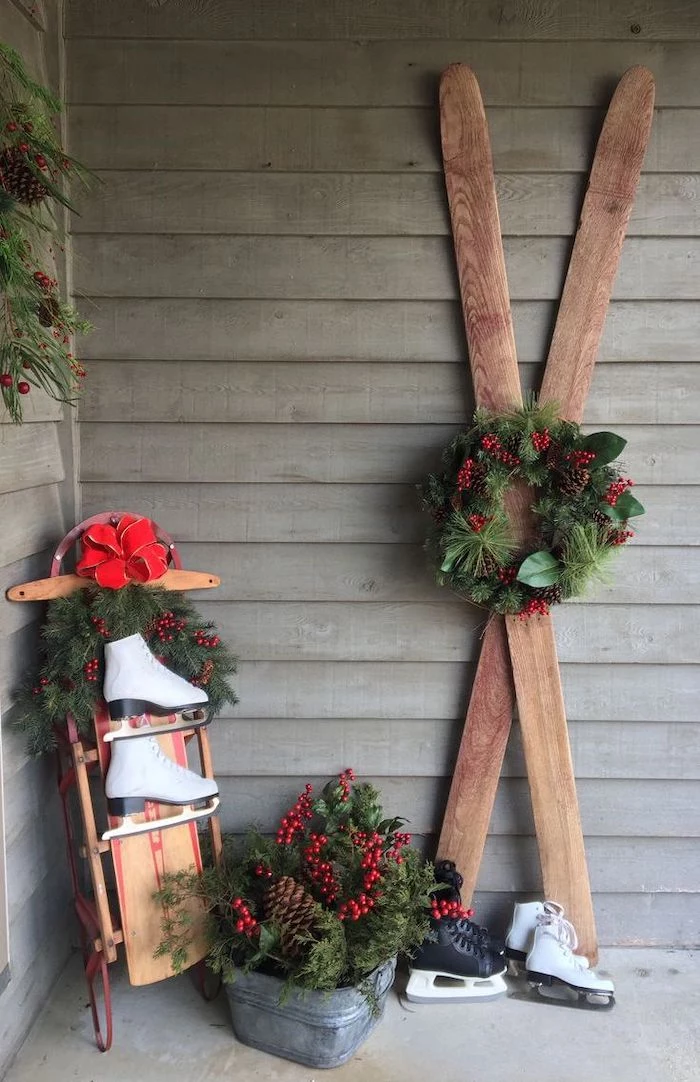
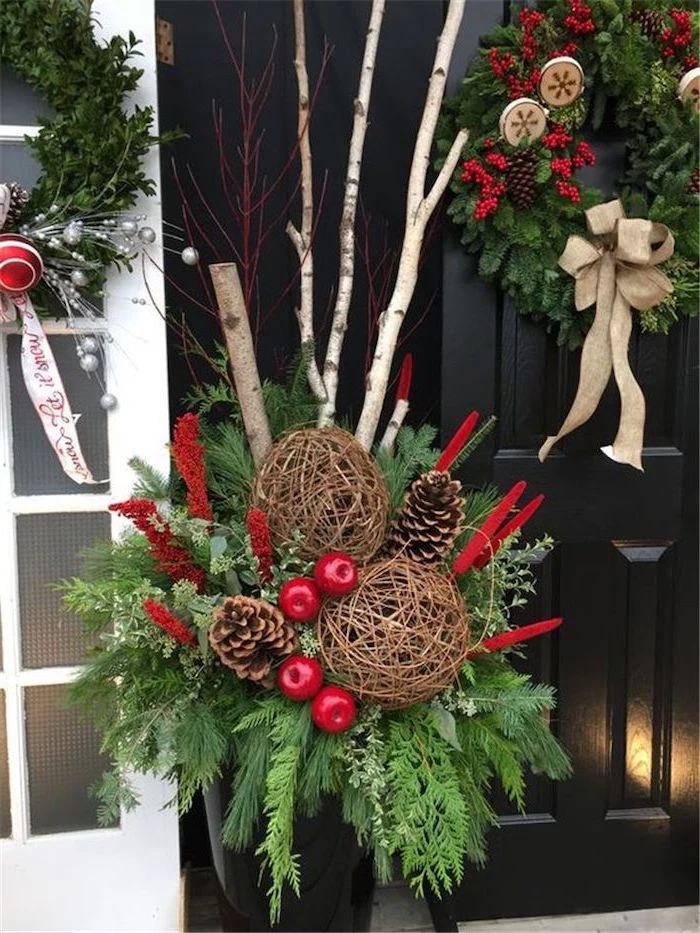
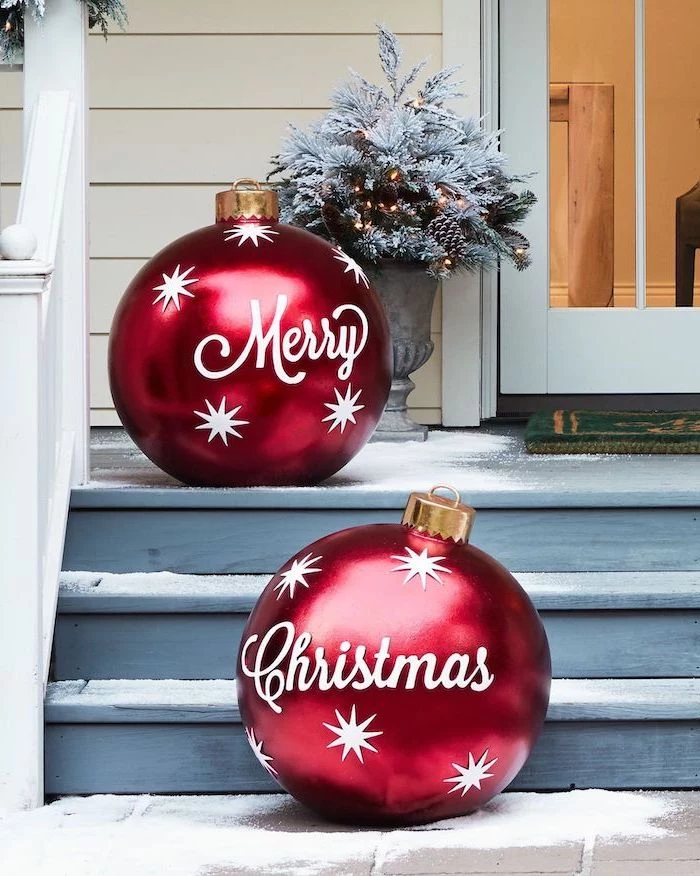
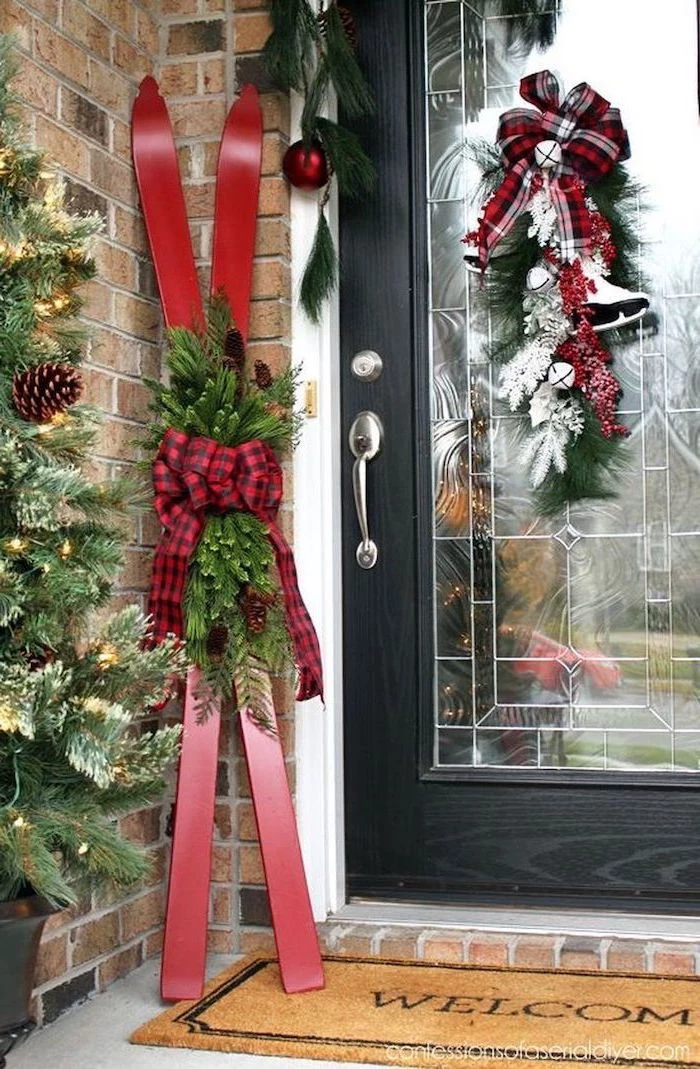
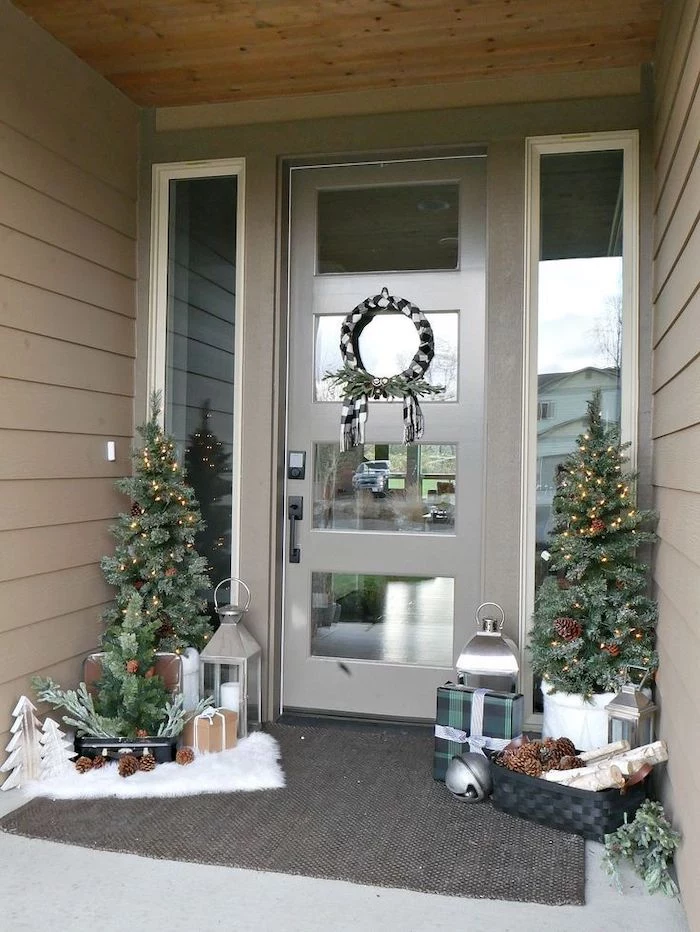
Inspiration Gallery
When choosing LED lights, look for the CRI, or Color Rendering Index. A CRI above 80 ensures that the colors of your home, wreaths, and other decorations will look rich and true under the lights, not washed out or tinged with an unnatural blue or yellow hue. It’s a small detail that makes a huge difference in the overall quality of your display.
- Wind a stubborn string of lights around a cardboard rectangle (cut from a delivery box) to prevent tangles.
- Label each string with masking tape indicating its location (e.g., “Front Porch Railing”).
- Store all lights, clips, and timers in a single, clearly marked plastic tote to make next year’s setup a breeze.
The secret to a pro-level installation is using the right clips. Instead of staples or nails which can puncture the wire’s insulation and create a fire hazard, invest in a set of specialized light clips. Brands like Command and Simple Living Innovations offer damage-free options for siding, while others make specific clips for gutters, shingles, and even brickwork.
Switching from traditional incandescent C9 bulbs to their LED counterparts can reduce your holiday lighting energy consumption by up to 90%.
That giant inflatable snowman can become a neighborhood menace in a winter gust. To keep it grounded, go beyond the flimsy stakes it came with:
- Use heavy-duty tent or landscape stakes hammered deep into the ground.
- For extra security, tie guide lines from the inflatable’s upper loops to screw eyes installed on your eaves or fence posts.
- Place sandbags over the base, concealed by a bit of faux snow or greenery.
What’s the difference between Warm White and Cool White LEDs?
Warm White (around 2700K-3000K) emits a soft, yellowish glow that mimics traditional incandescent bulbs, creating a cozy and nostalgic feel. Cool White (4000K-5000K) gives off a bright, crisp, modern light that’s closer to daylight, making colors pop and creating a vibrant, energetic look. Neither is better—it’s all about the mood you want to create.
For brick surfaces: Use specialized brick clips that grip the top and bottom of the brick without drilling. They provide a surprisingly sturdy anchor for light strings.
For vinyl siding: Look for siding clips that slide into the seam between panels. They are virtually invisible and require no tools or adhesives, popping out easily after the season.
Choosing the right clip prevents damage and saves immense frustration.

In 1882, Edward Johnson, an associate of Thomas Edison, was the first to electrically light a Christmas tree in his home, showcasing 80 hand-blown red, white, and blue light bulbs.
This single, innovative act paved the way for the dazzling neighborhood displays we know today. It reminds us that every grand tradition starts with a single bright idea.
- A perfectly uniform, professional-looking wrap.
- No awkward dark spots or overly bright patches.
- Lights stay secure even in wind and snow.
The secret? Start at the bottom of the tree trunk and wrap upwards, keeping the spacing between each loop consistent—about three to four inches is a good rule of thumb. When you reach a branch, wrap out along it and then back to the trunk before continuing up.
Don’t underestimate the power of an outdoor smart plug. Models from Kasa, Wyze, or Meross allow you to set precise on/off schedules right from your phone. You can even create custom rules, like having the lights automatically turn on at sunset and off at midnight, saving energy and ensuring your home is always shining bright when you want it to be.
A single dead bulb can kill an entire section of modern string lights. Before you toss the string, invest in a light tester tool like the LightKeeper Pro. It can often diagnose the problem by sending a pulse through the circuit to fix the faulty shunt in the bulb, bringing the whole section back to life instantly. It’s the one gadget every serious decorator should own.
Is it safe to leave lights on in the rain or snow?
Yes, provided you’ve used products specifically rated for outdoor use. Look for the “UL Listed” mark on the tag, which means it has been tested for safety in wet conditions. Ensure all connections between extension cords and light strings are snug, wrapped with electrical tape, and elevated off the ground to prevent them from sitting in puddles.
The simple string light remains the most popular type of holiday decoration, outselling inflatables, projectors, and lawn figures combined.
To add dramatic dimension, think beyond just outlining your house. Use a few well-placed outdoor spotlights (stake lights work perfectly) to uplight key features. Aim one at a large wreath on a garage, another to highlight the texture of a stone chimney, and one on your largest front-yard tree. This technique creates layers of light and shadow, giving your entire display a rich, architectural quality.
Incandescent Bulbs: Offer a classic, warm, and nostalgic glow. They are cheaper to purchase initially but have a shorter lifespan and use significantly more electricity.
LED Bulbs: Cost more upfront but last up to 25 times longer and are far more energy-efficient and durable. They come in a vast array of colors and styles, including vintage-look C9s.
For longevity and lower electricity bills, LED is the clear winner for any new purchases.
- You’ll use fewer lights overall, saving money.
- Installation is faster and more focused.
- The final look is intentional and high-impact.
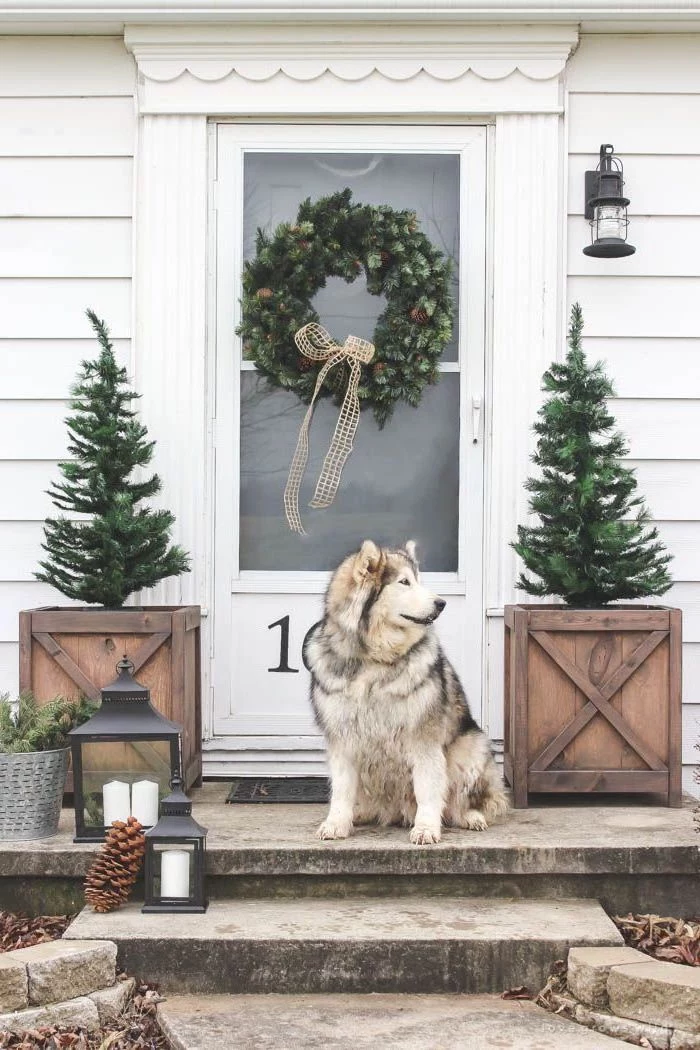
The trick is to concentrate your budget and effort on one key zone, like the front entryway. A dense, beautifully lit garland around the door, flanked by two lush potted trees with mini-lights, creates a more powerful and welcoming statement than sparse lights strung thinly across the entire house.
Important note on safety: Always check your extension cords. For outdoor use, you need a cord rated for the elements—look for a
The latest trend in holiday lighting involves pixel-mappable RGB string lights, like those from Twinkly or Govee. These smart lights allow you to control each individual bulb’s color and brightness from an app on your phone. You can create flowing color gradients, sparkling effects, and even synchronize the lights to music for a truly dynamic and modern display that will stop traffic.

Don’t just hang lights on your house—illuminate the path to your door. Lining a walkway with simple stake lights, either solar-powered or wired, creates a warm and inviting runway for guests. It’s a simple touch that connects the street-level view to your front door, making the entire design feel more cohesive and welcoming.
Look for the UL (Underwriter Laboratories) certification on any electrical holiday decoration. A red UL mark indicates it’s suitable for both indoor and outdoor use, while a green UL mark is for indoor use only.
This isn’t just a suggestion; it’s the most critical safety check you can perform. Using indoor-only products outside exposes them to moisture and temperature swings they aren’t built to handle, creating a serious risk of shock or fire.
For an elegant, timeless look inspired by Scandinavian winters, consider simplicity. A single, battery-operated candle light in each front-facing window offers a gentle, uniform glow. This minimalist approach exudes a quiet, cozy charm that stands out beautifully amidst more elaborate displays.
Gutter Hooks: These S-shaped clips slide easily onto the edge of a gutter, providing a quick way to hang lights. Best for standard K-style gutters and lightweight C7 or mini-light strings.
Shingle Tabs: These flat tabs slide up under the edge of a shingle. They are more versatile for homes without gutters and can hold heavier C9 bulbs securely along the roofline.
For a clean roofline, shingle tabs are often the superior, more stable choice.
- All lights turn on and off automatically, so you never have to think about it.
- It saves electricity by ensuring lights aren’t left on all night or during the day.
- It provides security by making your home look occupied, even when you’re away for the holidays.
The secret is an inexpensive outdoor timer. Whether it’s a simple mechanical dial or a digital photosensor model that turns on at dusk, a timer is the single best accessory for managing your display. Plug your main extension cord into the timer, and the timer into the GFCI outlet.
Creating a consistent, evenly-spaced line of lights along a roof or railing is the hallmark of a careful installation. A simple trick is to use your hand as a measuring guide. After placing the first clip, spread your fingers and place the next clip at the tip of your pinky or thumb. Repeat the process, using the same hand-span each time for a perfectly uniform look.
Can I mix different types of lights, like nets, icicles, and strings?
Absolutely! Layering is a fantastic way to add texture and interest. Use net lights for quick, even coverage on bushes, icicle lights along the eaves for a dripping effect, and classic C9 string lights to outline the architectural lines of the house. The key to a cohesive look is to stick with the same color temperature (e.g., all warm white) across the different light styles.


