My Pro Guide to Decorating a Flocked Christmas Tree (Without Losing Your Mind)
I’ve been decorating Christmas trees for a long, long time—more than twenty years, if you’re counting. I’ve wrangled everything from tiny tabletop spruces to massive firs that scrape the ceiling. But let me tell you, nothing changes the game quite like a flocked tree.
In this article
The first time a client asked for one, I figured, how hard can it be? It’s just a tree with some white stuff on it, right? Oh, I was so wrong. That built-in layer of “snow” changes everything: how the branches behave, how light hits them, and what kind of ornaments you can even use. That first attempt, I swear I spent more time vacuuming white dust than decorating. And yes, I made the classic mistake of hanging a heavy glass heirloom on a delicate, flocked tip, only to watch it sag and eventually slide off. A near disaster!
This guide is everything I wish I’d known back then. It’s not just about pretty colors; it’s about understanding the unique canvas you’re working with to create something stunning, stable, and totally magical.
First, Let’s Talk Money & Material
Before you even think about hanging an ornament, you’ve gotta know what you’re getting into. The “flock” itself is usually a mix of paper pulp or cellulose fibers, an adhesive to make it stick, and a fire retardant for safety. When you buy a pre-flocked tree from a good source, it should have a safety certification, which means the whole package—tree, lights, and flock—has been tested to be fire-resistant. This is a big deal.
But here’s the real talk: what’s the difference between a $250 flocked tree from a big-box store and a $900 one from a specialty online retailer? It’s all in the quality of the flock and the branches underneath.
- Budget-Friendly Trees ($200-$400): These are a great entry point, but be prepared for more shedding, especially the first year. The flocking might be a lighter coat, and the branches might not be as robust.
- Mid-Range Trees ($400-$700): You’ll notice a big difference here. The flocking is usually denser and applied better, meaning less mess. The branches are often stronger and have a more realistic shape.
- Premium Trees ($800+): These are the showstoppers. They often feature incredible realism, very little shedding, and strong, well-engineered branches designed to hold their shape and weight. The flocking application is top-tier, giving you that deep, snowy look without the constant cleanup.
Honestly, you get what you pay for when it comes to shedding and durability. But no matter your budget, the prep work is what makes it look like a million bucks.
Pre-Decoration Prep: The Non-Negotiable Steps
The single biggest mistake people make is underestimating the setup. So, put on some holiday music, grab a festive drink, and settle in. For a standard 7.5-foot tree, you should honestly block out a solid 3-4 hours from unboxing to the final touch. Don’t rush it!
1. Tame the Snowstorm Before It Starts
Even the best flocked trees will shed. It’s just a fact. Before you even open the box, lay down an old sheet or a canvas drop cloth. This will be your best friend. For a heavily flocked tree, I’d even suggest wearing a simple dust mask and some gloves—the fine particles can be a bit irritating.
Quick Tip: When you’re all done, the best way to clean up the fallout on hardwood floors is with a vacuum using a soft brush attachment. If you have one, a shop vac is even better at sucking up the dust without blowing it everywhere.
2. Fluffing, But Gently
Shaping a flocked tree requires a bit of finesse. You can’t just yank the branches into place. Start at the bottom, near the trunk, and work your way up and out. Gently separate each individual tip. The flocking makes the branches stiffer, so if you feel resistance, don’t force it. You’re aiming for a full, natural shape without cracking the coating. Think of it as waking the tree up, not wrestling it into submission. This alone can take a full hour, but it’s the foundation for a professional look.
3. Lighting for That Magical Glow
If your tree isn’t pre-lit, this is your next job. The white surface completely changes how light works, so you have to be strategic.
First, and this is non-negotiable for me, use white-wire lights. Green wire will stick out like a sore thumb and ruin the whole snowy illusion. It’s a small detail that makes a massive difference. I now almost exclusively use LEDs because they run cool and won’t risk yellowing the flocking over time like old-school hot incandescent bulbs can.
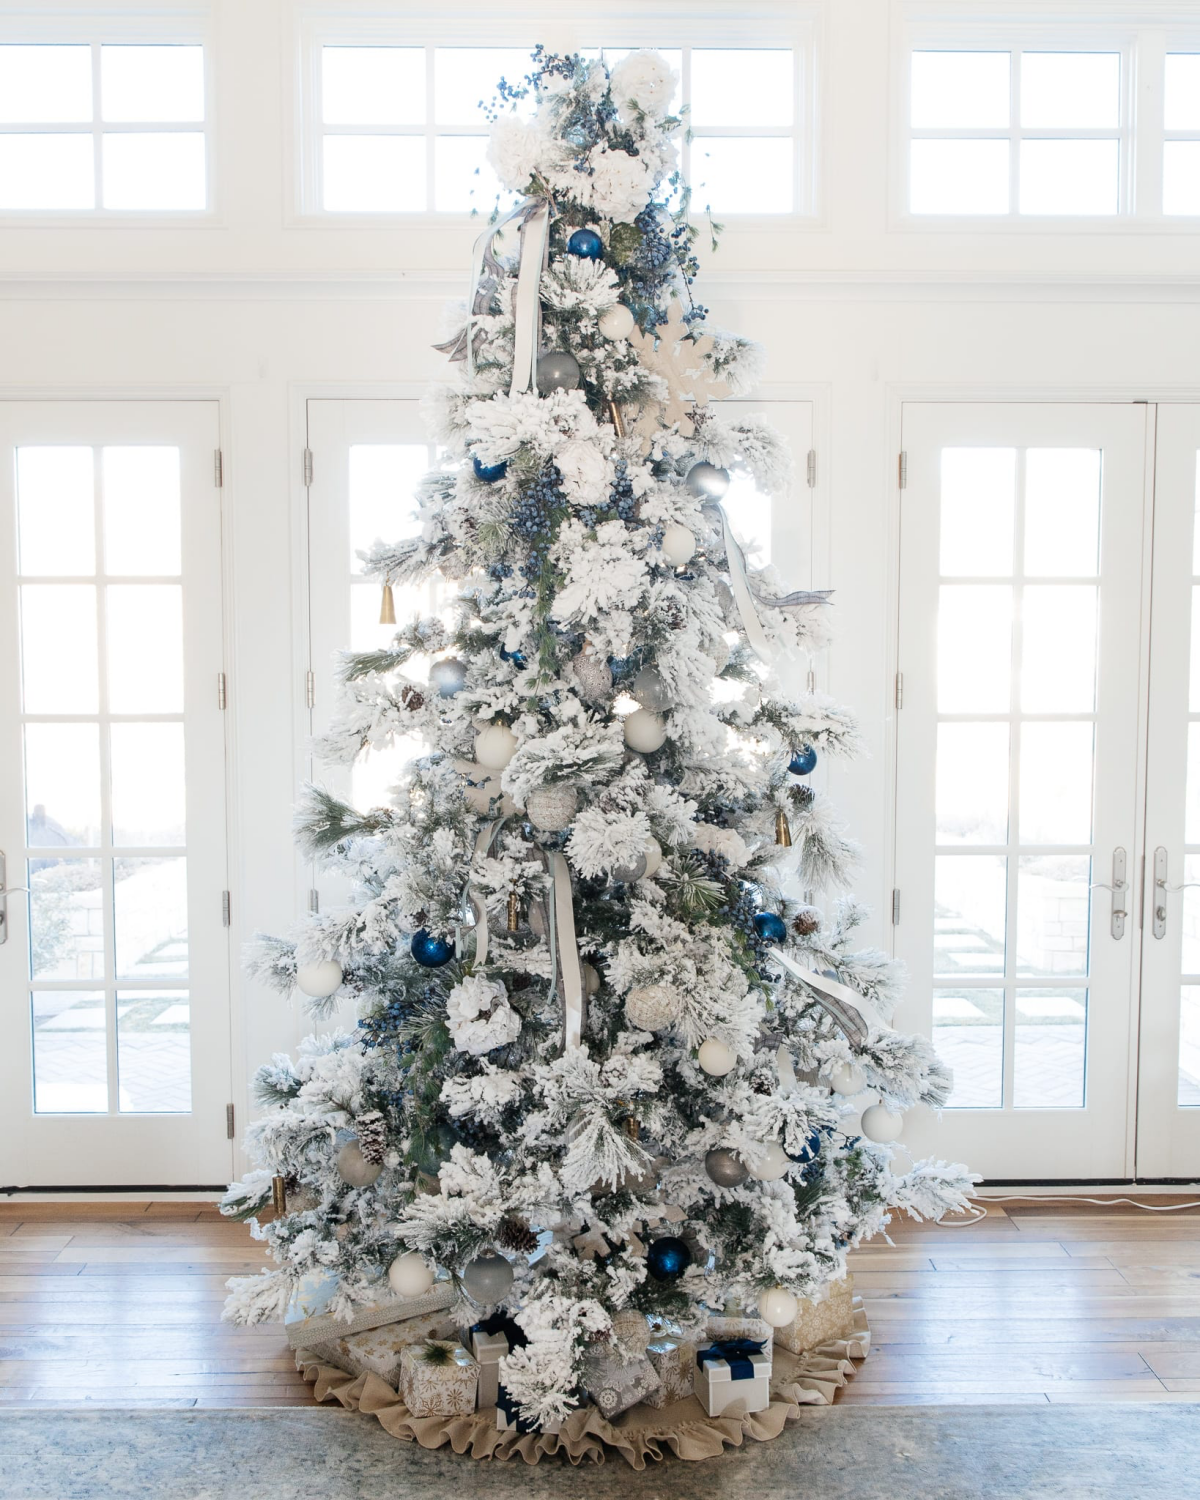
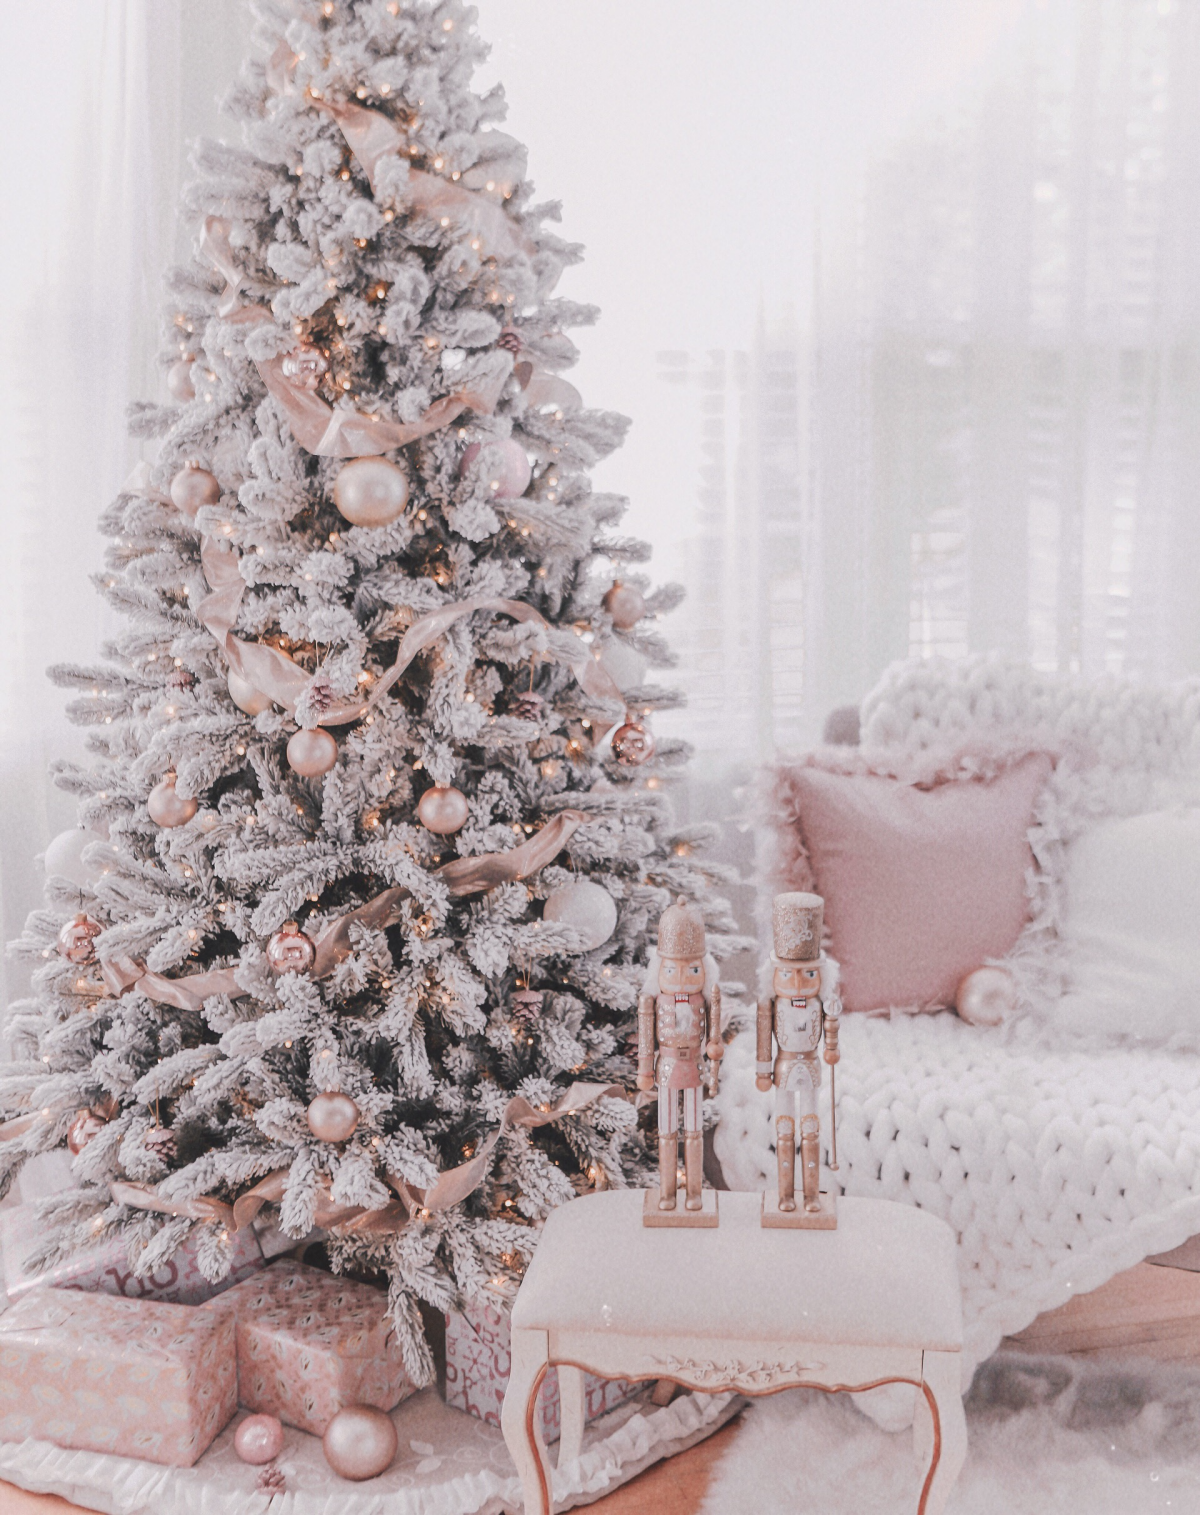
So, should you go with warm or cool lights? It completely changes the vibe. Warm white lights will give your tree a soft, cozy, nostalgic glow—think snow at sunrise. It’s perfect for rustic, traditional, or gold-toned themes. On the other hand, cool white lights create a crisp, icy, magical sparkle, like snow under the moonlight. This is what you want for a “winter wonderland” or a modern silver-and-blue look. There’s no wrong answer, but the choice directs your entire theme.
And please, don’t just wrap the lights around the outside! To get that designer glow, you have to light from the inside out. Start near the trunk, run the light string out to the tip of a branch, and then run it back toward the trunk before moving to the next one. This makes the tree glow from within. It takes more lights—plan on at least 100 lights per vertical foot (so 700-800 for a 7.5-foot tree)—but the result is breathtaking.
The Layering Method for a Flawless Finish
Alright, the tree is fluffed and glowing. Now for the fun part. I use a four-layer method to make sure the design is balanced, deep, and cohesive.
Layer 1: Ribbon or Garland
Ribbon is your blueprint. It sets the flow and color story. Go for wide, wired ribbon (2.5 to 4 inches is ideal) from a craft store like JOANN or Michaels. You can shape it. For a 7.5-foot tree, you’ll want at least two 10-yard rolls, maybe three if you like a really full look.
My go-to technique is the Vertical Cascade. Cut strips of ribbon about as long as your tree. Tuck one end deep into the branches at the top, and let it flow down, tucking it gently into the tree every 12 inches or so to create a soft billow. It’s super elegant.
Layer 2: Filler Ornaments
These are your workhorses—usually simple ball ornaments in your main colors. The pro secret? Don’t hang them on the tips! Tuck at least 70% of them deep inside the tree, close to the trunk. This adds color and depth, making the tree look incredibly full. For a 7.5-foot tree, I’d start with 3 or 4 boxes of 12 standard-sized ornaments.
Layer 3: The Statement Pieces
These are your show-offs—the big, detailed, or sentimental ornaments. But remember my cautionary tale! Flocked branches are heavy and stiff. Never hang a heavy ornament on a weak tip. Find a sturdy branch closer to the trunk. And for goodness sake, toss the flimsy strings they come with. Use strong metal S-hooks and pinch them closed around the branch so they can’t slip off.
Layer 4: Picks & Sprays
This is the final touch that screams “professional.” Picks are decorative stems—think glittery twigs, berry clusters, or frosted eucalyptus—that you don’t hang, but rather slide into the branches. Use them to fill any gaps, add texture, and reinforce your theme. They make the tree look lush and complete.
Feeling Overwhelmed? Try This One Quick Trick.
If all of this sounds like too much, just try this. Go to your tree right now. Find 3-5 of your favorite ornaments that are hanging off the very tips of the branches. Now, move them deeper inside, nestled between branches closer to the center pole. Step back. See how much fuller and more intentional the tree looks? That’s the secret in action!
A Beginner’s Shopping List for an “Icy Wonderland” Tree
Let’s make this real. Say you want that classic icy, silver-and-blue look on a 7.5-foot tree. Here’s a realistic shopping list to get you started:
First, the tree itself, which we know can range from $400 to $900 for a quality one. Then, you’ll need about 8 strands of white-wire cool LED lights, which will run you about $80. For ribbon, grab two 10-yard spools of silver wired ribbon for around $30. For your filler, pick up three boxes of shatterproof ball ornaments in shades of blue, silver, and white—that’s about $60. Finally, budget another $50-$70 for a dozen or so pretty statement ornaments and some glittery silver picks. All in, you’re looking at a project, but one that will last for years.
Long-Term Care and Troubleshooting
A little care goes a long way in keeping your tree looking pristine.
- Yellowing Flock: This is usually caused by two things: direct sunlight or heat. Store your tree in a cool, dark place (a basement is way better than a hot attic). And as I said, use cool-running LED lights.
- Patching Bare Spots: If a chunk of flocking gets scraped off, don’t panic. You can buy flocking powder or spray snow at most craft stores. A little spray adhesive and a sprinkle of powder will fix a small spot right up. Just do it in a well-ventilated area!
- The Best Way to Store It: Ditch the original cardboard box. It won’t protect your investment. A dedicated tree storage bag is worth every penny. It keeps the tree safe from dust, moisture, and getting crushed. Store it in a cool, dark place, and it’ll look just as beautiful next year.
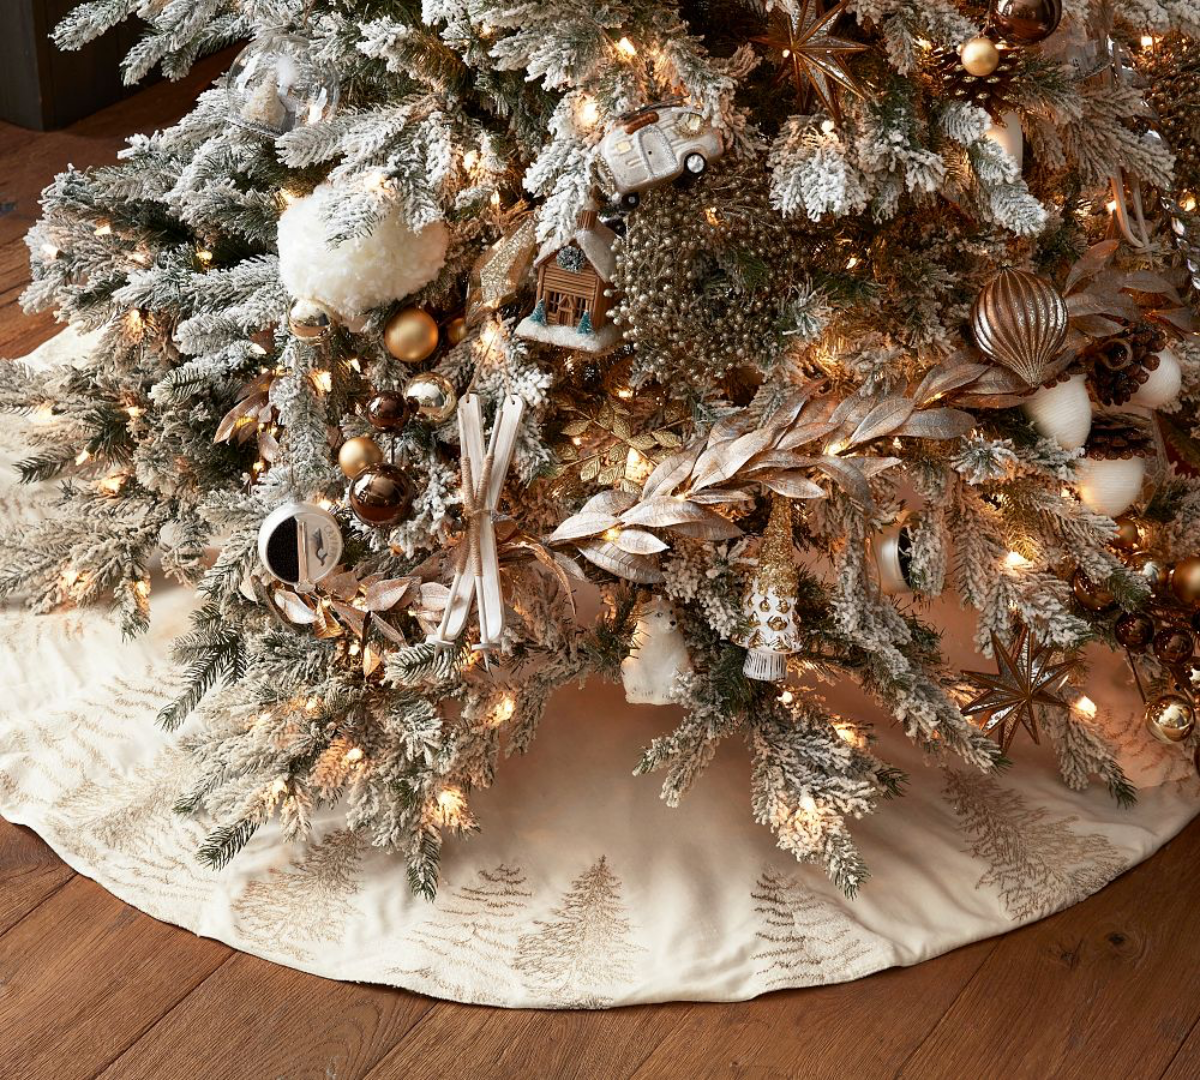
Galerie d’inspiration

The Ornament Hook Dilemma: A detail that’s easy to miss until it’s too late. Those standard green metal hooks that blend into a natural fir tree? They stick out like a sore thumb against snowy white branches. For a truly professional finish, switch to silver, white, or clear plastic hooks. Better yet, tie your ornaments with thin, silky white ribbon for an elegant and fully integrated look.
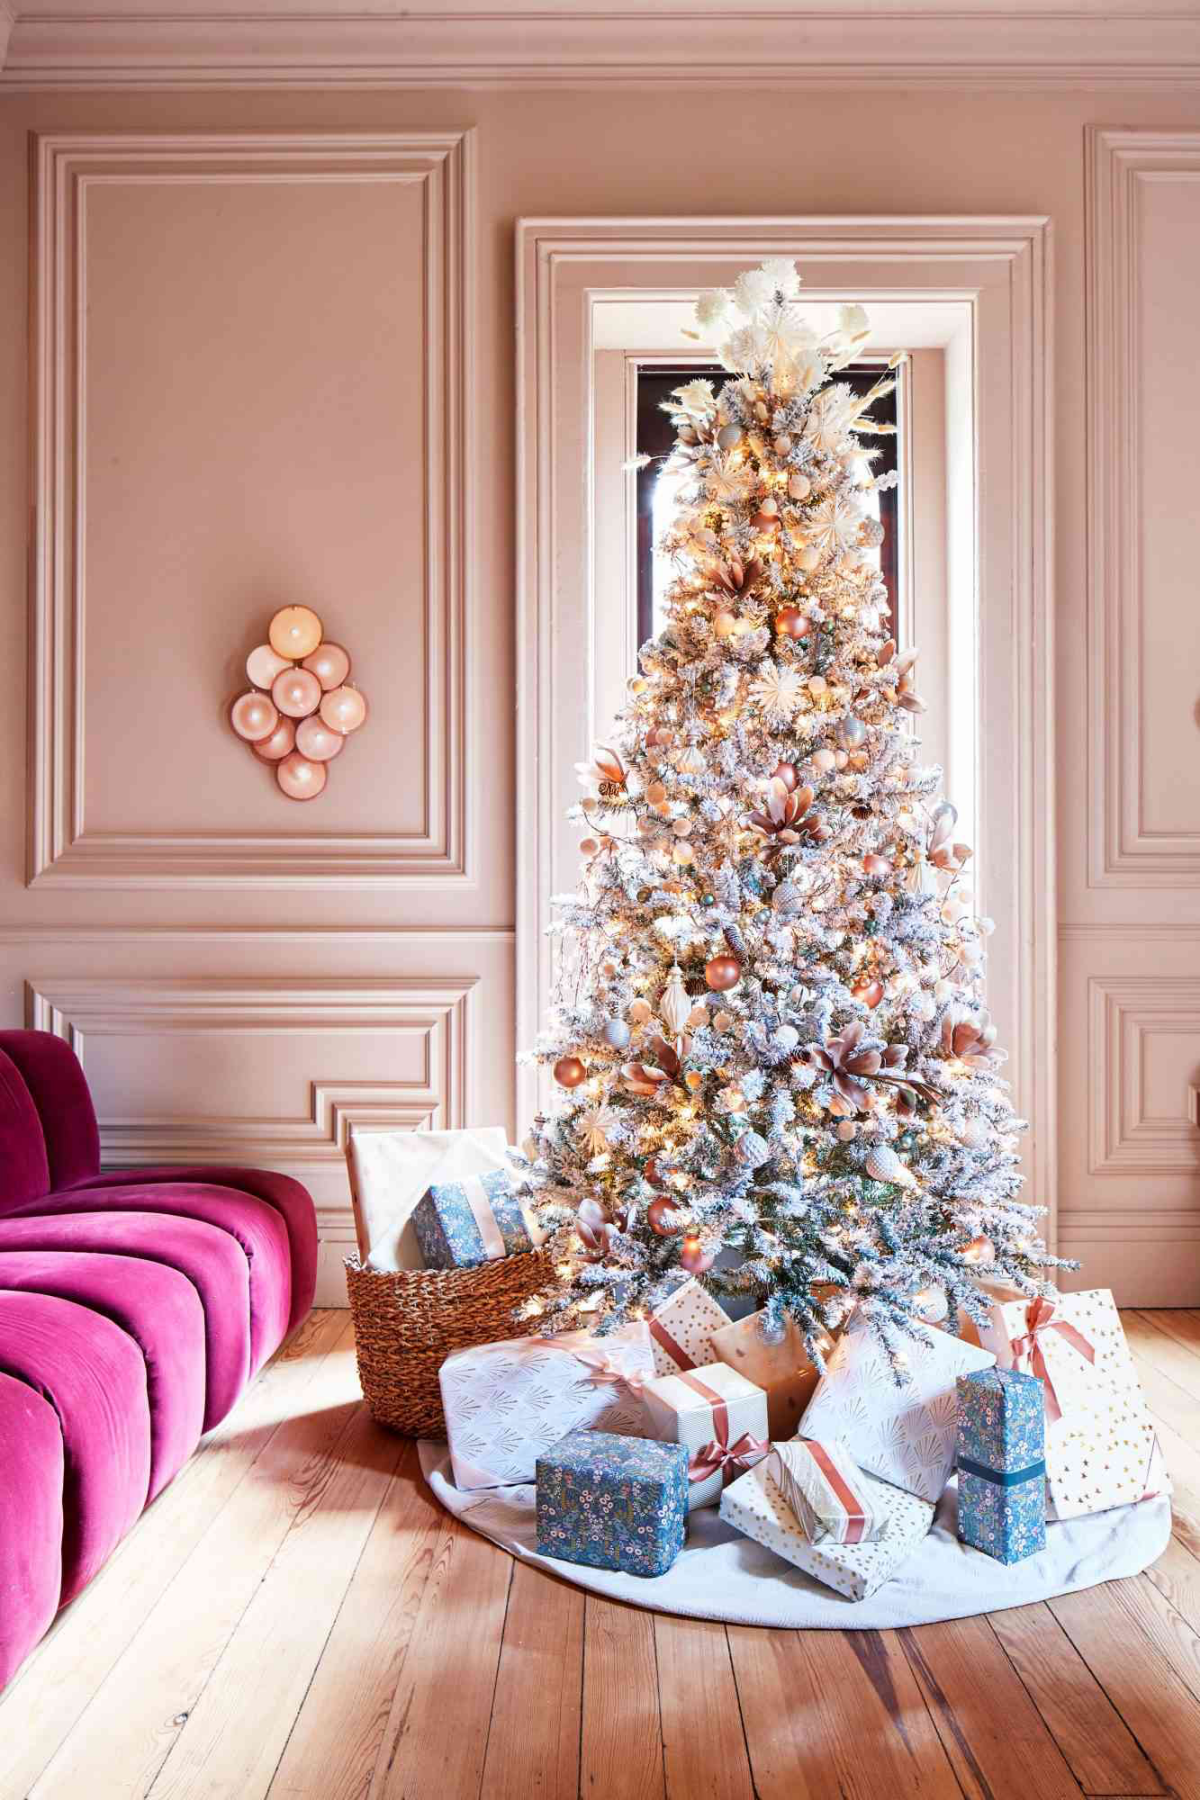
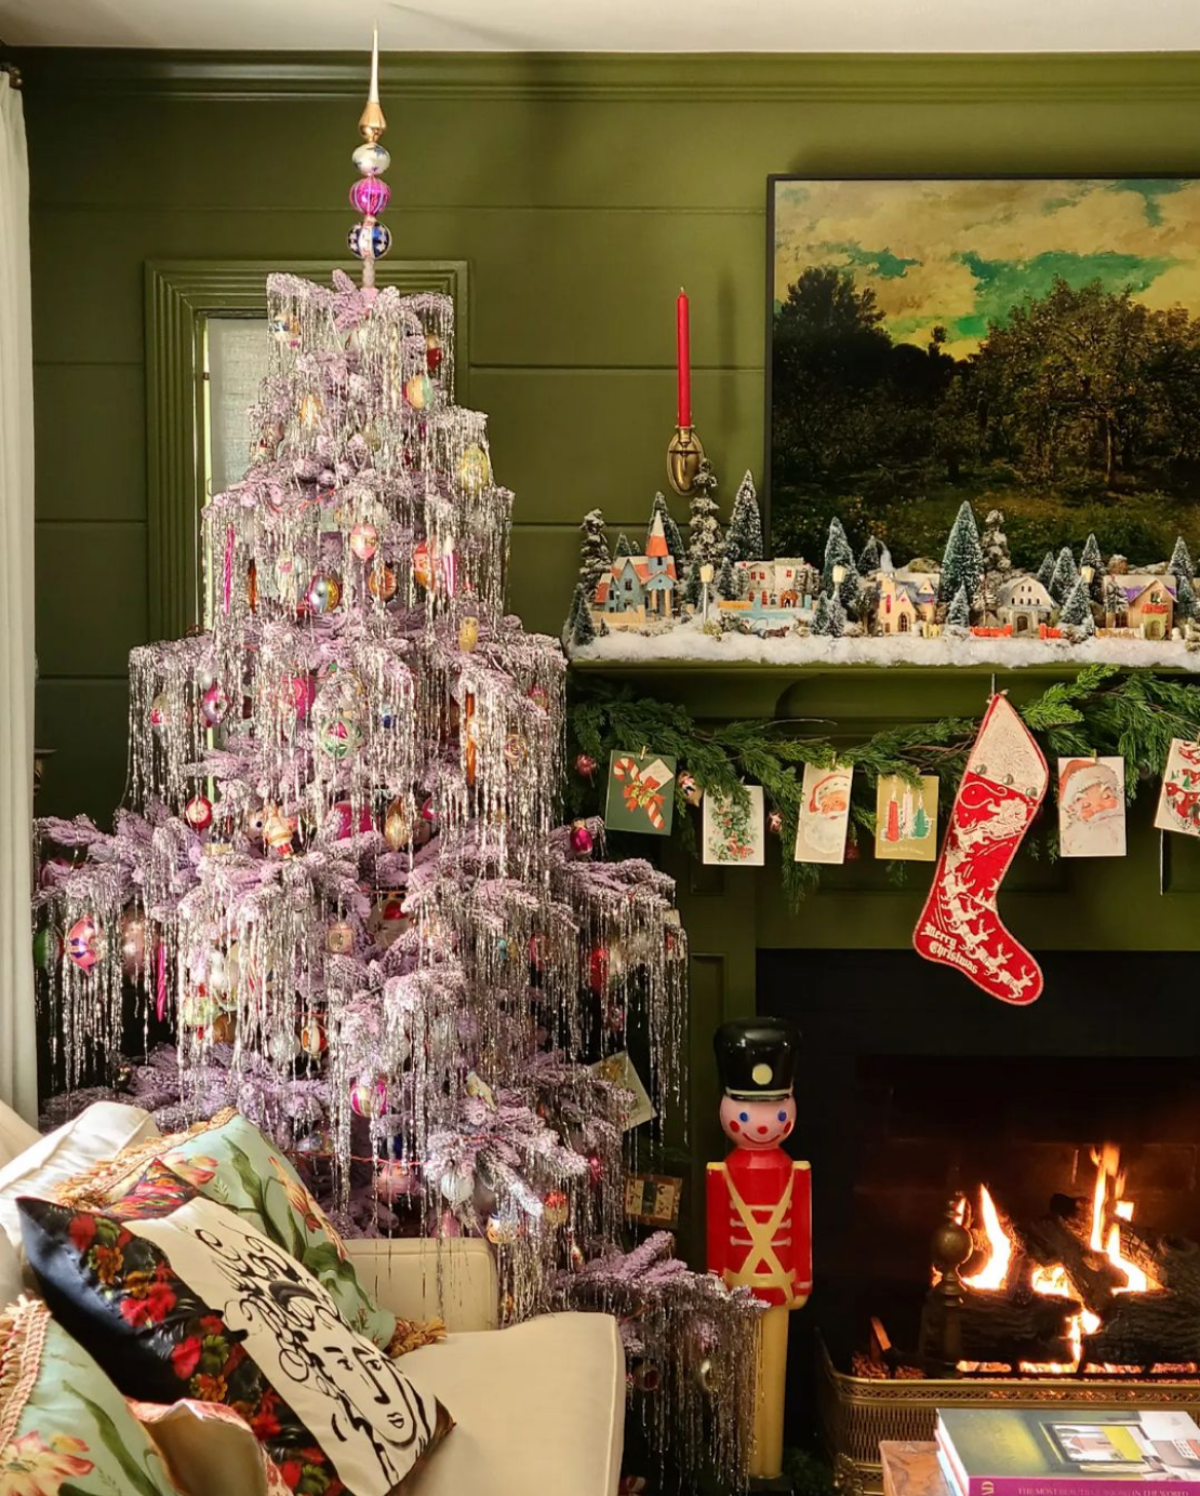
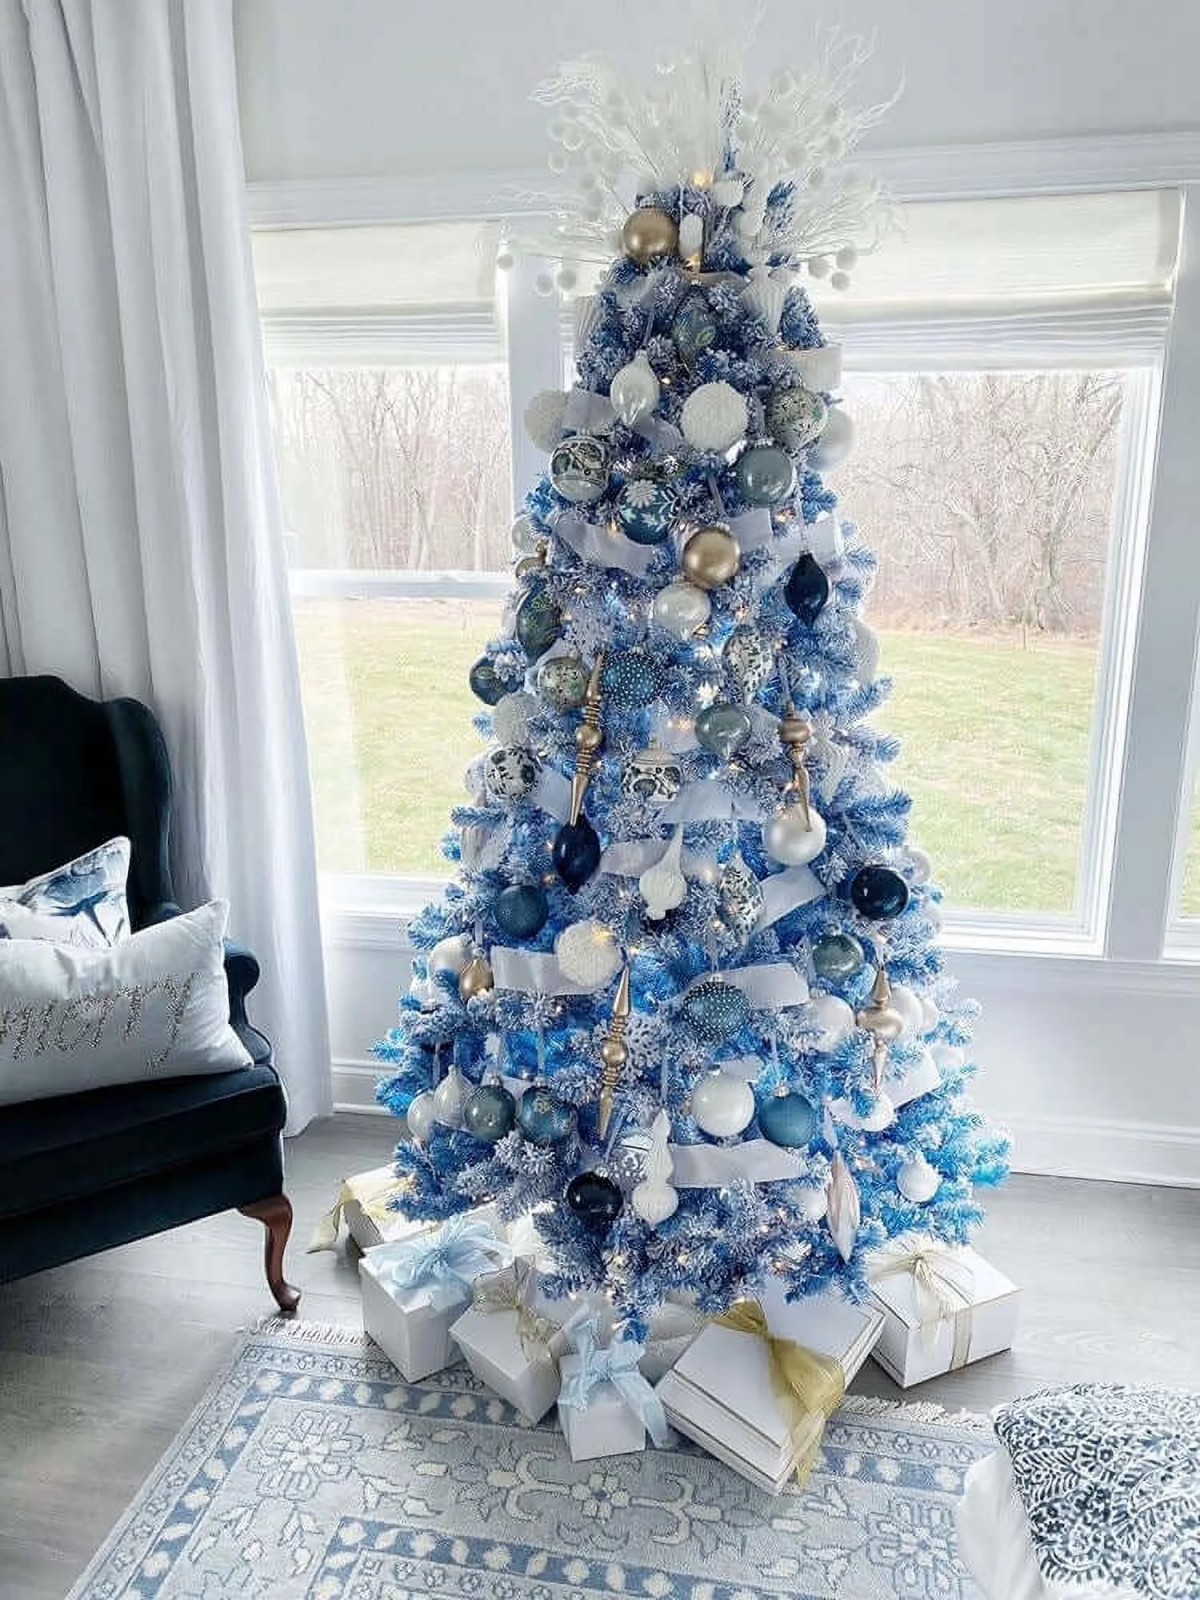
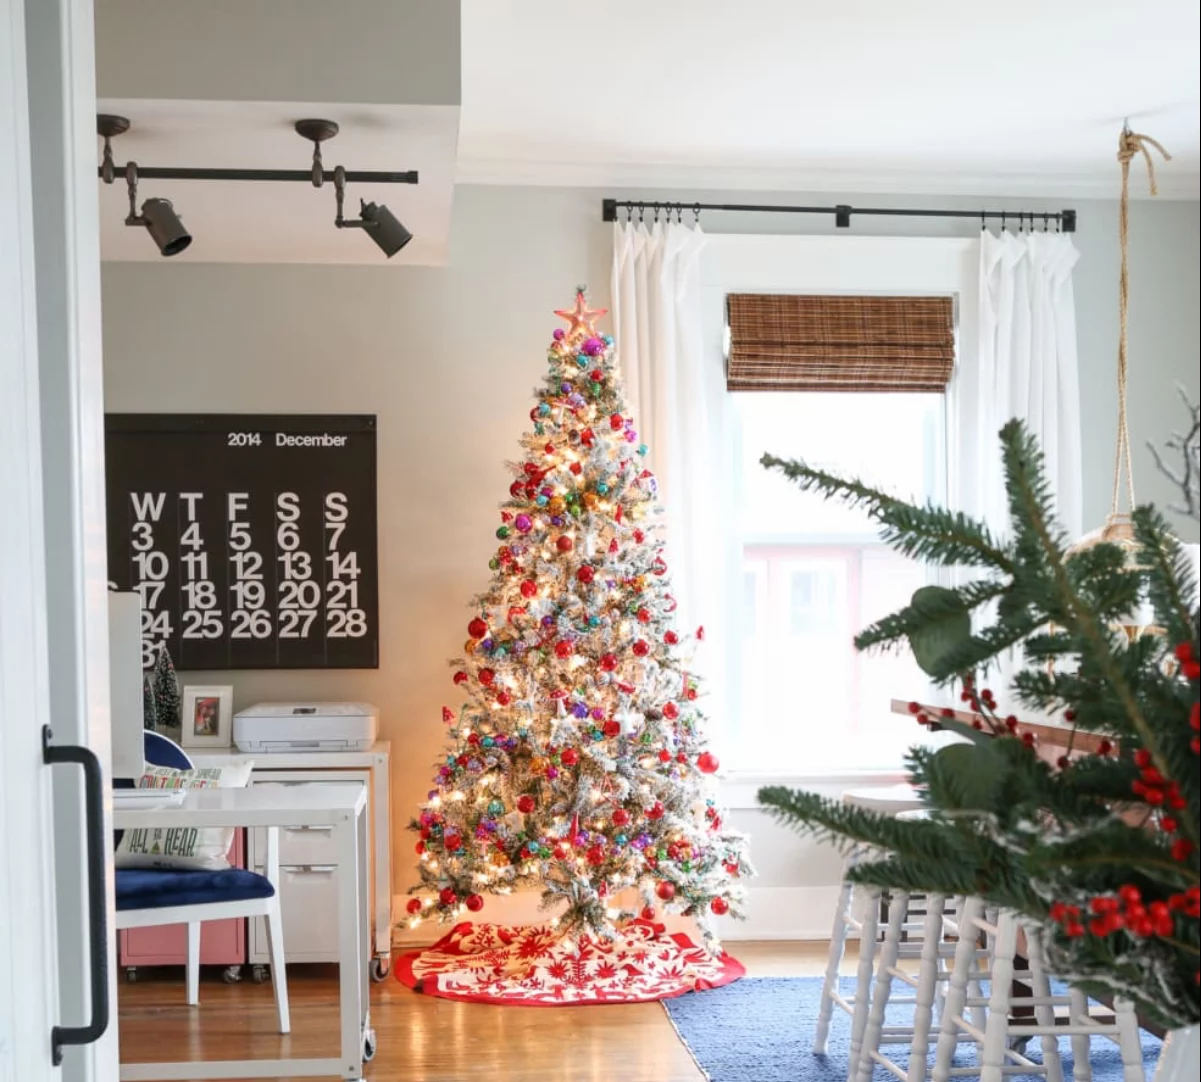
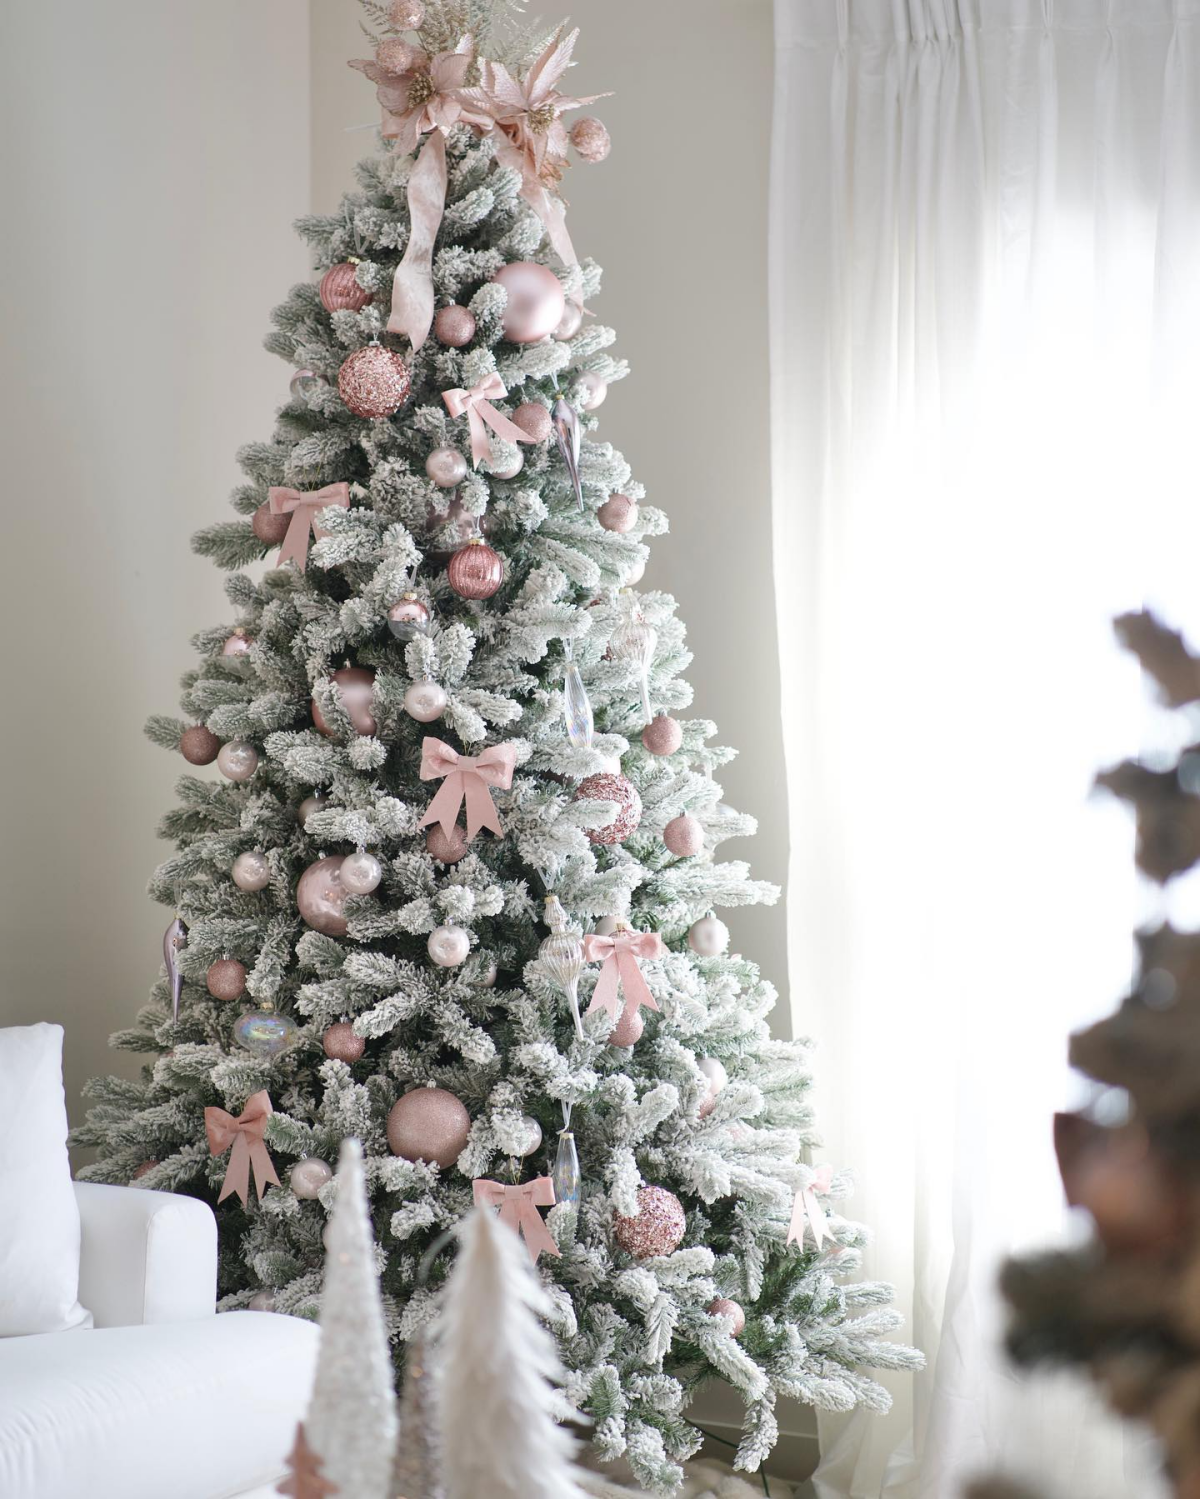
The white surface of a flocked tree acts like a primer on a painter’s canvas, making every color you add appear more vibrant and saturated.
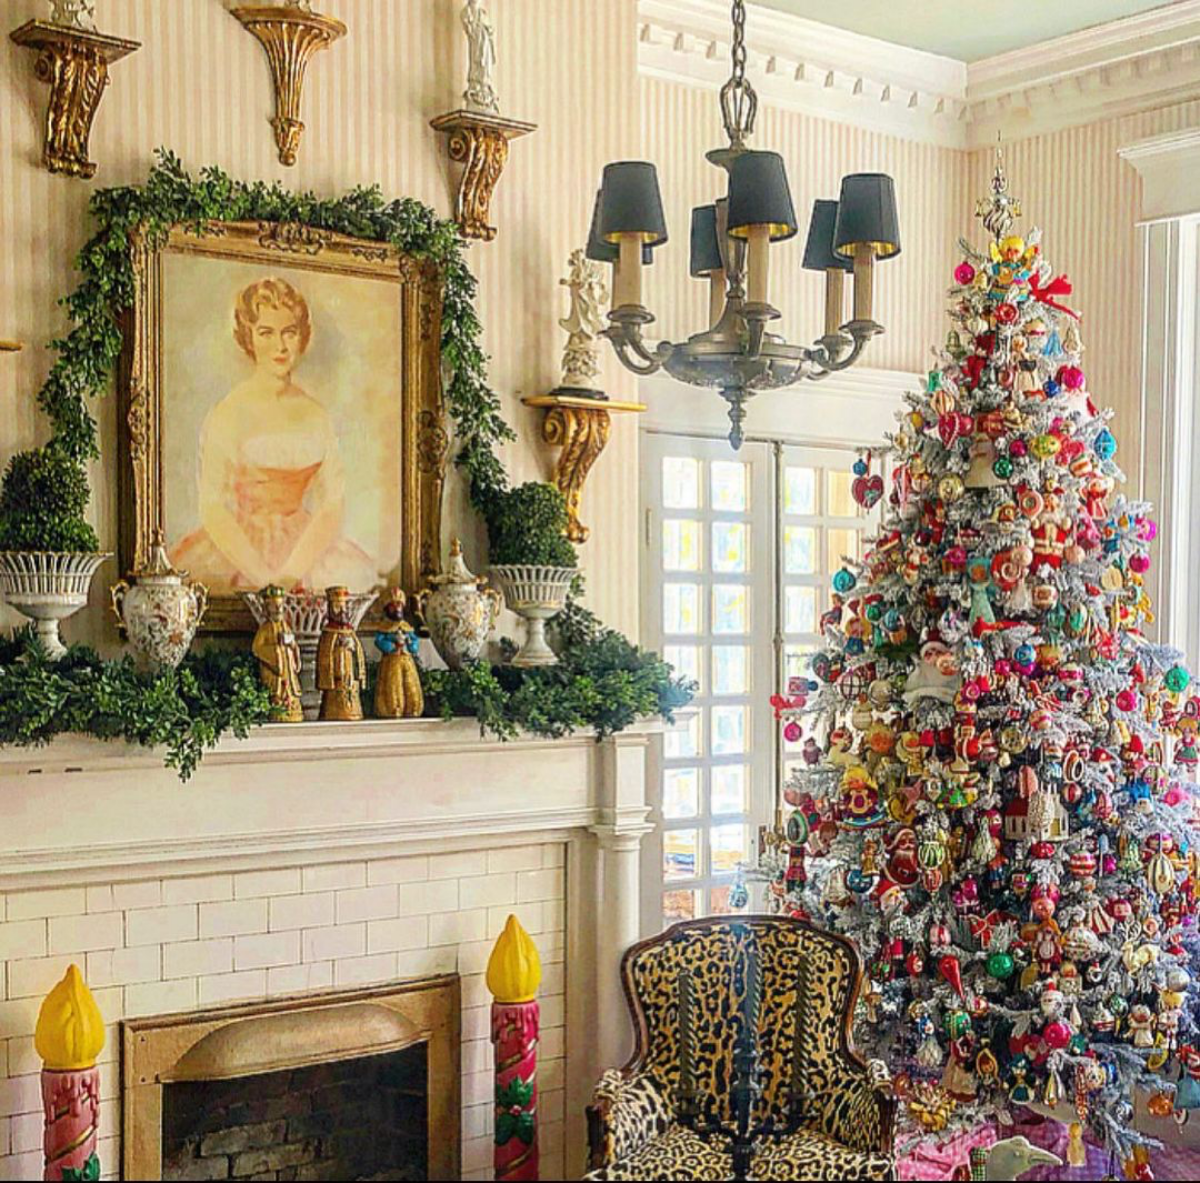
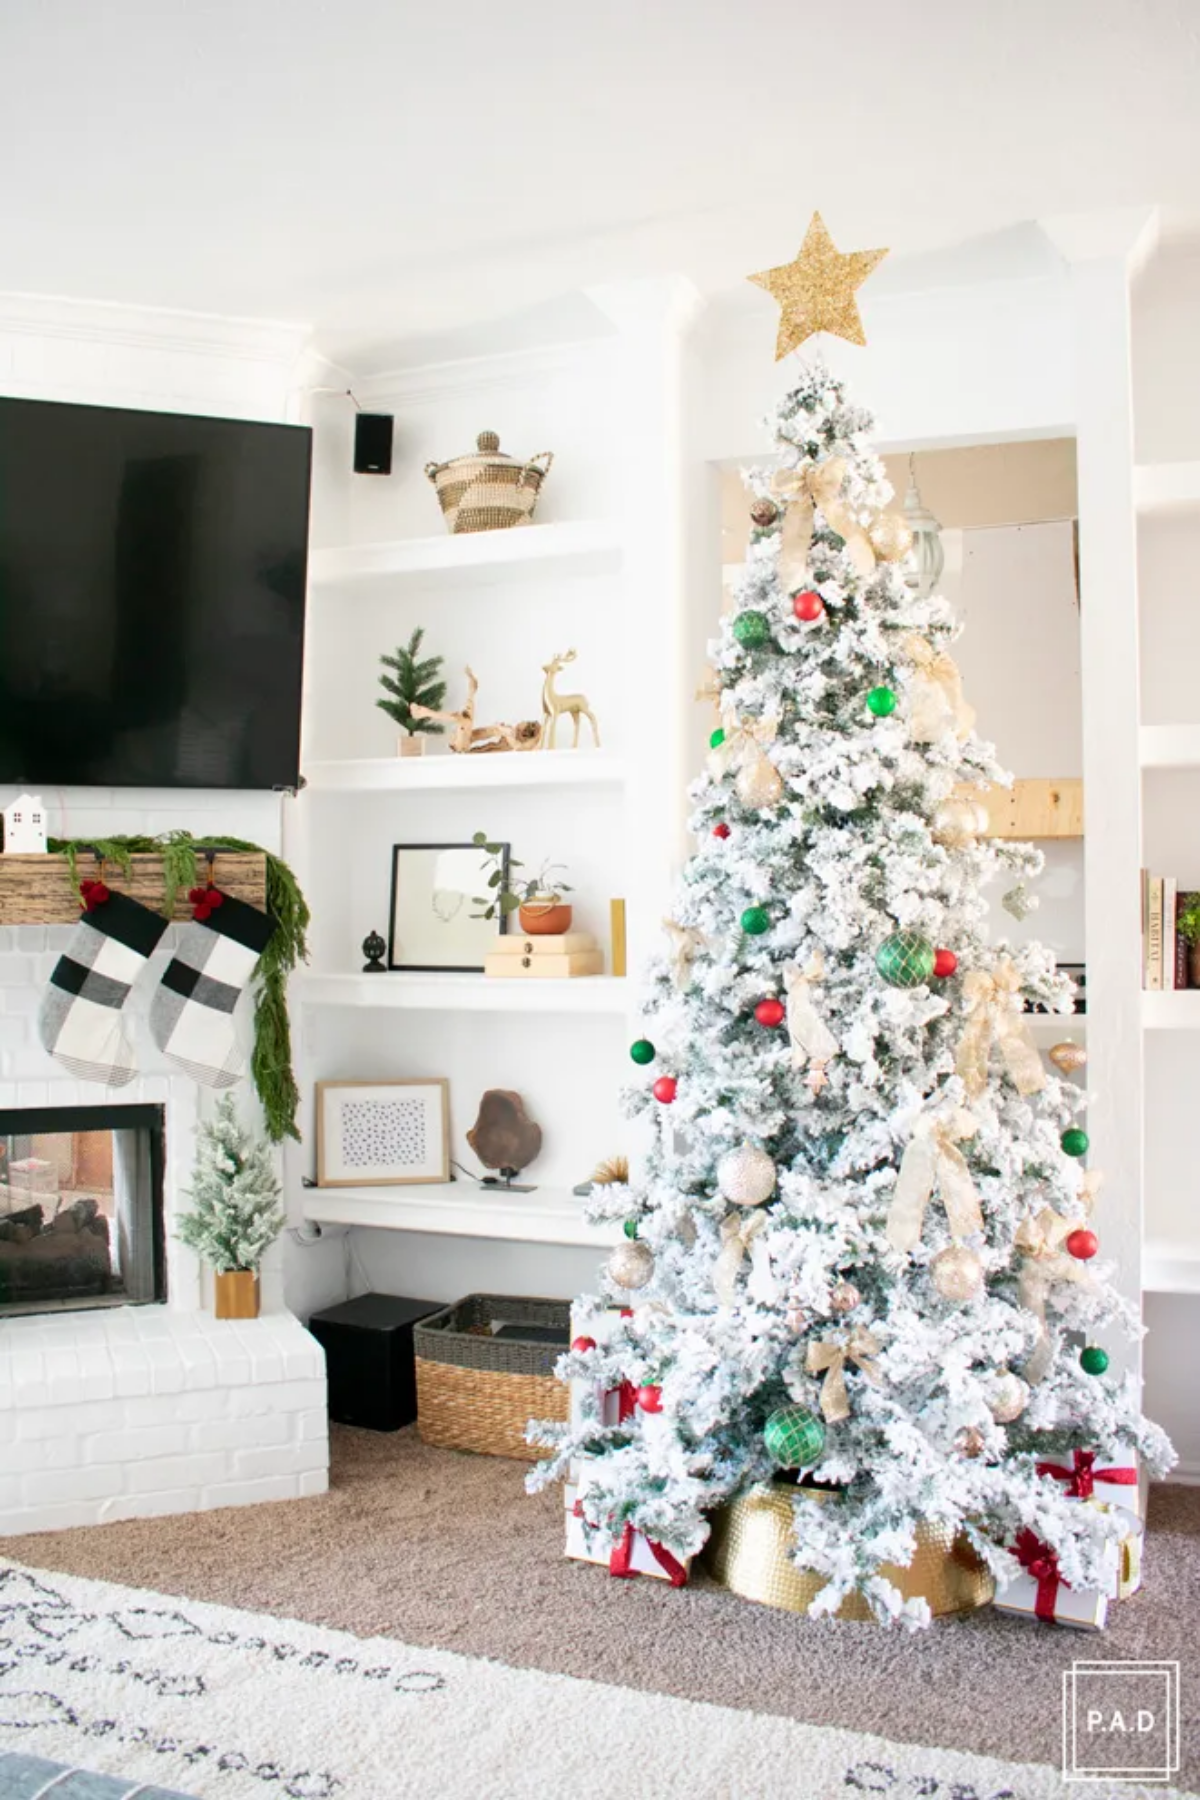
This is why jewel tones like emerald, sapphire, and ruby look so incredibly rich on a flocked background. The snow-white flocking eliminates the dark green undertones of a natural tree, allowing colors to pop with undiluted intensity. It’s a designer’s secret for achieving a high-impact, luxurious look.
Do I need more or fewer lights for a flocked tree?
Surprisingly, you can often get away with fewer. The white, powdery surface is highly reflective and amplifies the glow of each bulb, creating a brilliant effect. The key is choosing the right color temperature. Opt for warm white lights (around 2700K) to give the “snow” a cozy, fireside glow. Cool white can look too sterile or icy unless you’re specifically aiming for a modern, arctic theme. Many high-end pre-lit trees from brands like Balsam Hill use this warmer tone by default.
- Protects delicate flocked branches from being crushed.
- Prevents yellowing from exposure to light and dust.
- Drastically reduces shedding during next year’s setup.
The secret? Proper end-of-season storage. Instead of forcing your tree back into its original cardboard box, wrap it carefully in stretch plastic wrap (like industrial pallet wrap) section by section before placing it in a dedicated Christmas tree storage bag. Store it in a cool, dark place like a basement or closet, never a hot attic.
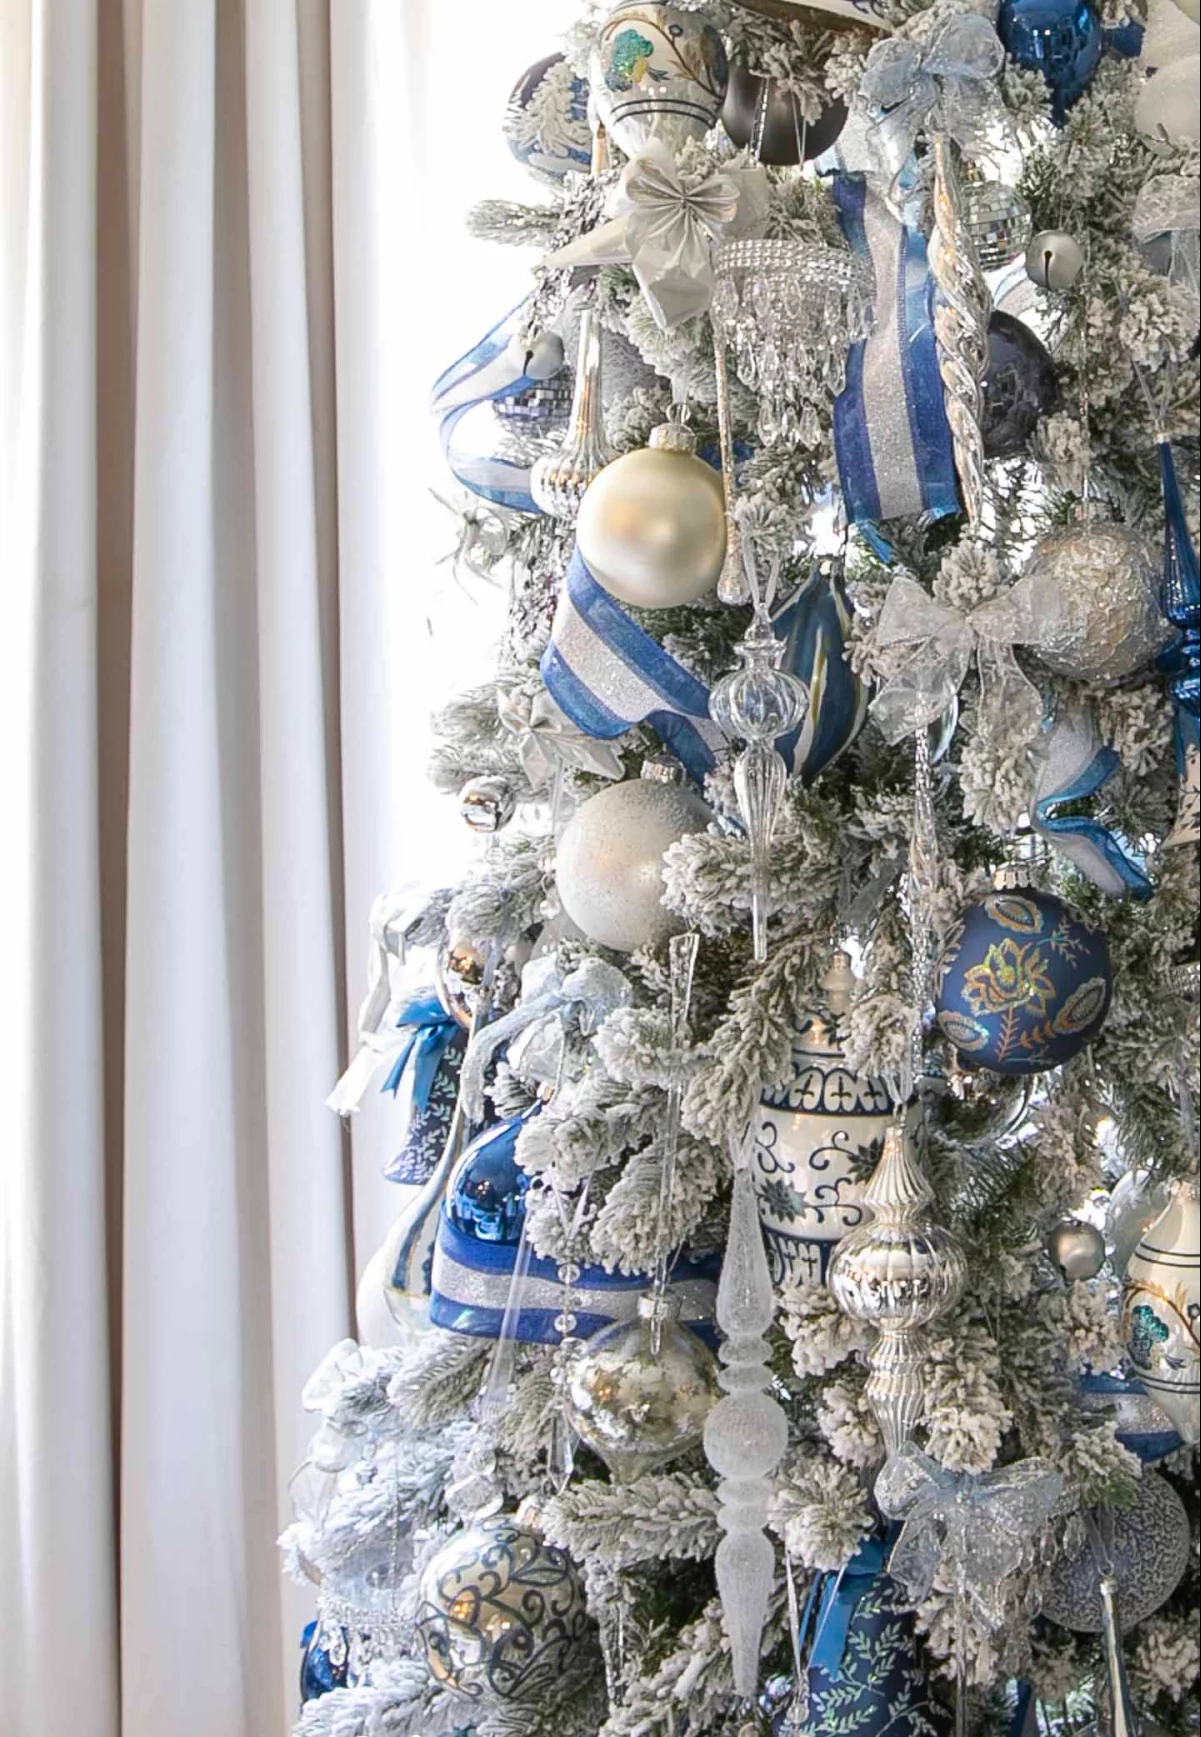
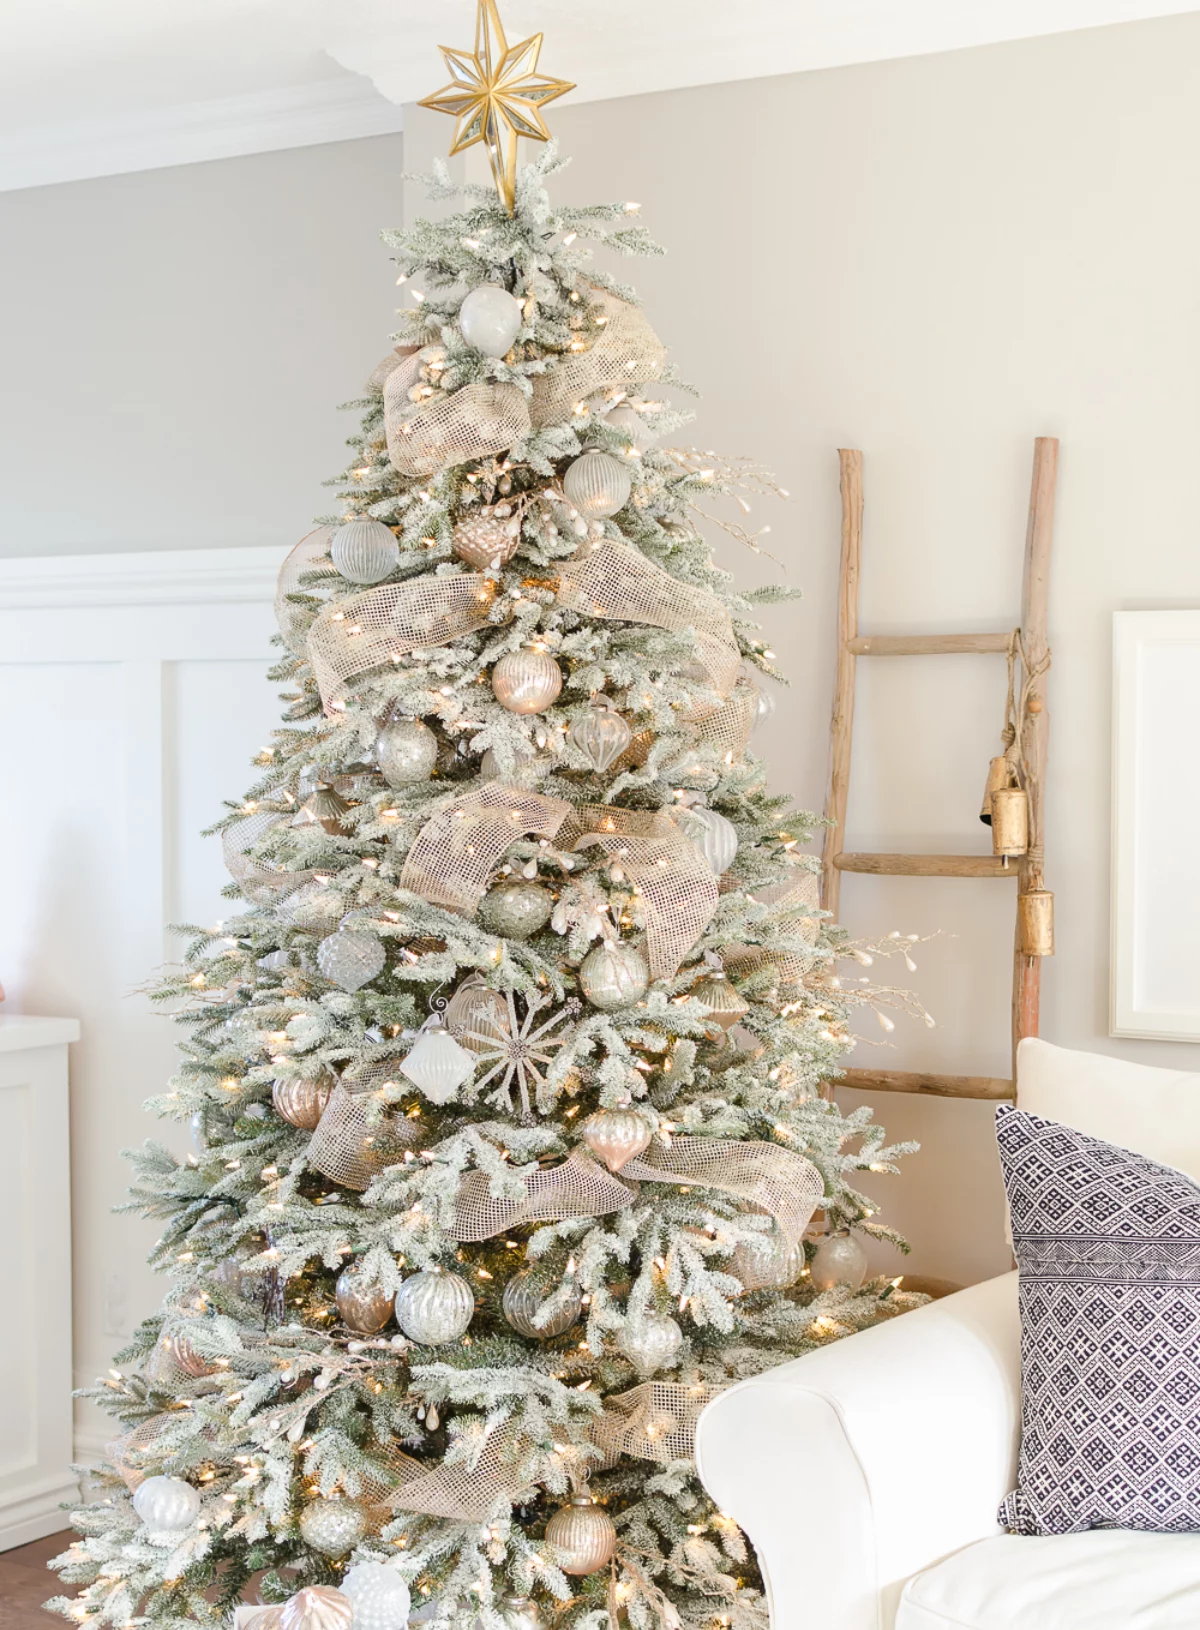
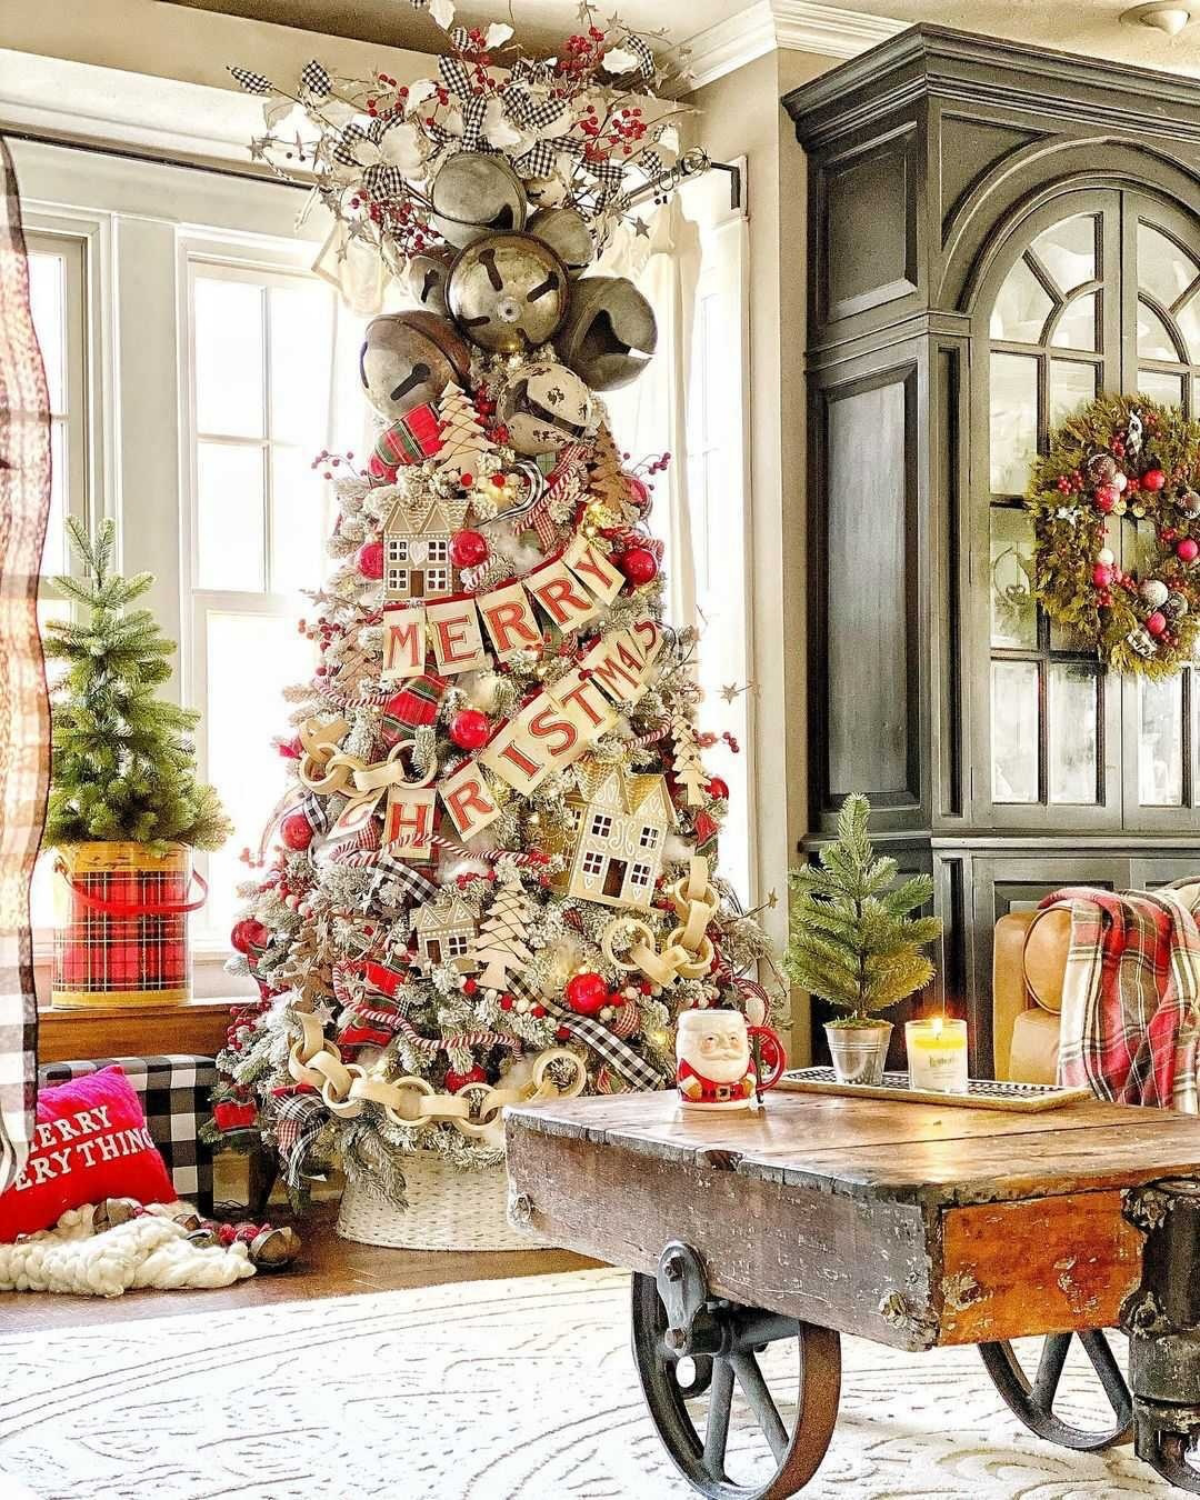
Don’t underestimate the power of texture. While color is important, a flocked tree truly comes alive when you play with different materials. Contrast the soft, powdery flocking with the raw texture of burlap ribbons, the glossy smoothness of ceramic ornaments, the rustic feel of unfinished wood beads, and the delicate transparency of glass icicles. This textural layering adds depth and sophistication, making the tree visually interesting even from up close.
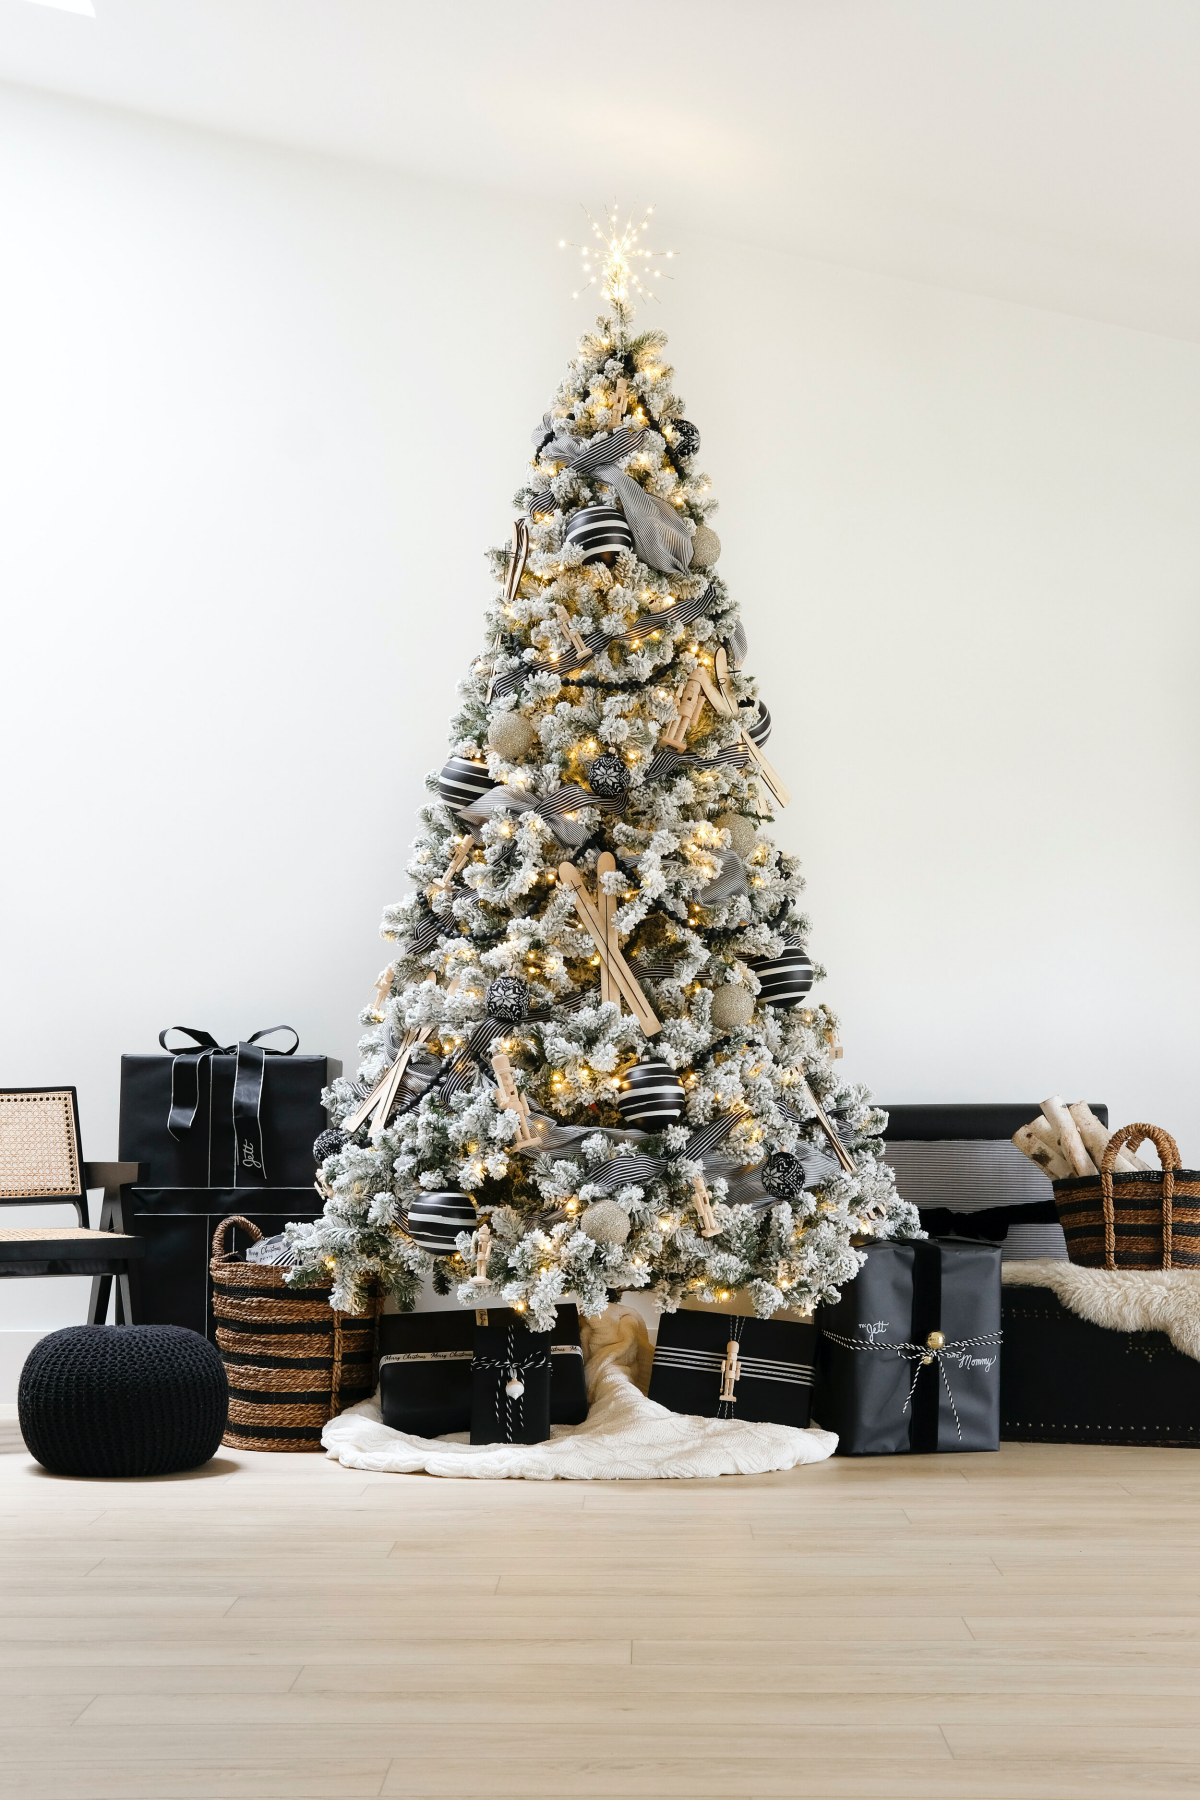
Matte Ornaments: They provide a soft, velvety finish that absorbs light, creating a deep, rich color that contrasts beautifully with the bright white flocking. It’s a sophisticated, understated choice.
Shiny Ornaments: These reflect the lights on your tree, creating a dazzling, sparkling effect that feels festive and magical. They add energy and movement to the decor.
For the best of both worlds, use a mix! A 70/30 split, with a majority of one finish and an accent of the other, creates a dynamic and professionally styled look.
A 2013 study confirmed that smells are powerful triggers for vivid emotional memories. The lack of a pine scent from an artificial flocked tree can make the experience feel incomplete.
To restore the full magic of Christmas, reintroduce the scent. Tuck a few pine-scented ornament sticks, like ScentSicles, deep into the branches near the trunk. They are nearly invisible but will fill the room with an authentic forest aroma, completing the sensory illusion.
Elevating a budget-friendly flocked tree is all about smart embellishments. Since these trees can sometimes be sparser, the goal is to add fullness and luxury.
- Use wide, wired ribbon: A 4-inch wired ribbon, perhaps a velvet one from a supplier like d.stevens, can be woven deep into the tree. Create large, billowy loops to fill gaps and add a sense of opulence.
- Cluster your ornaments: Instead of hanging small ornaments individually, wire three or four together to create a single, more substantial cluster. This technique makes inexpensive baubles look much more high-end.
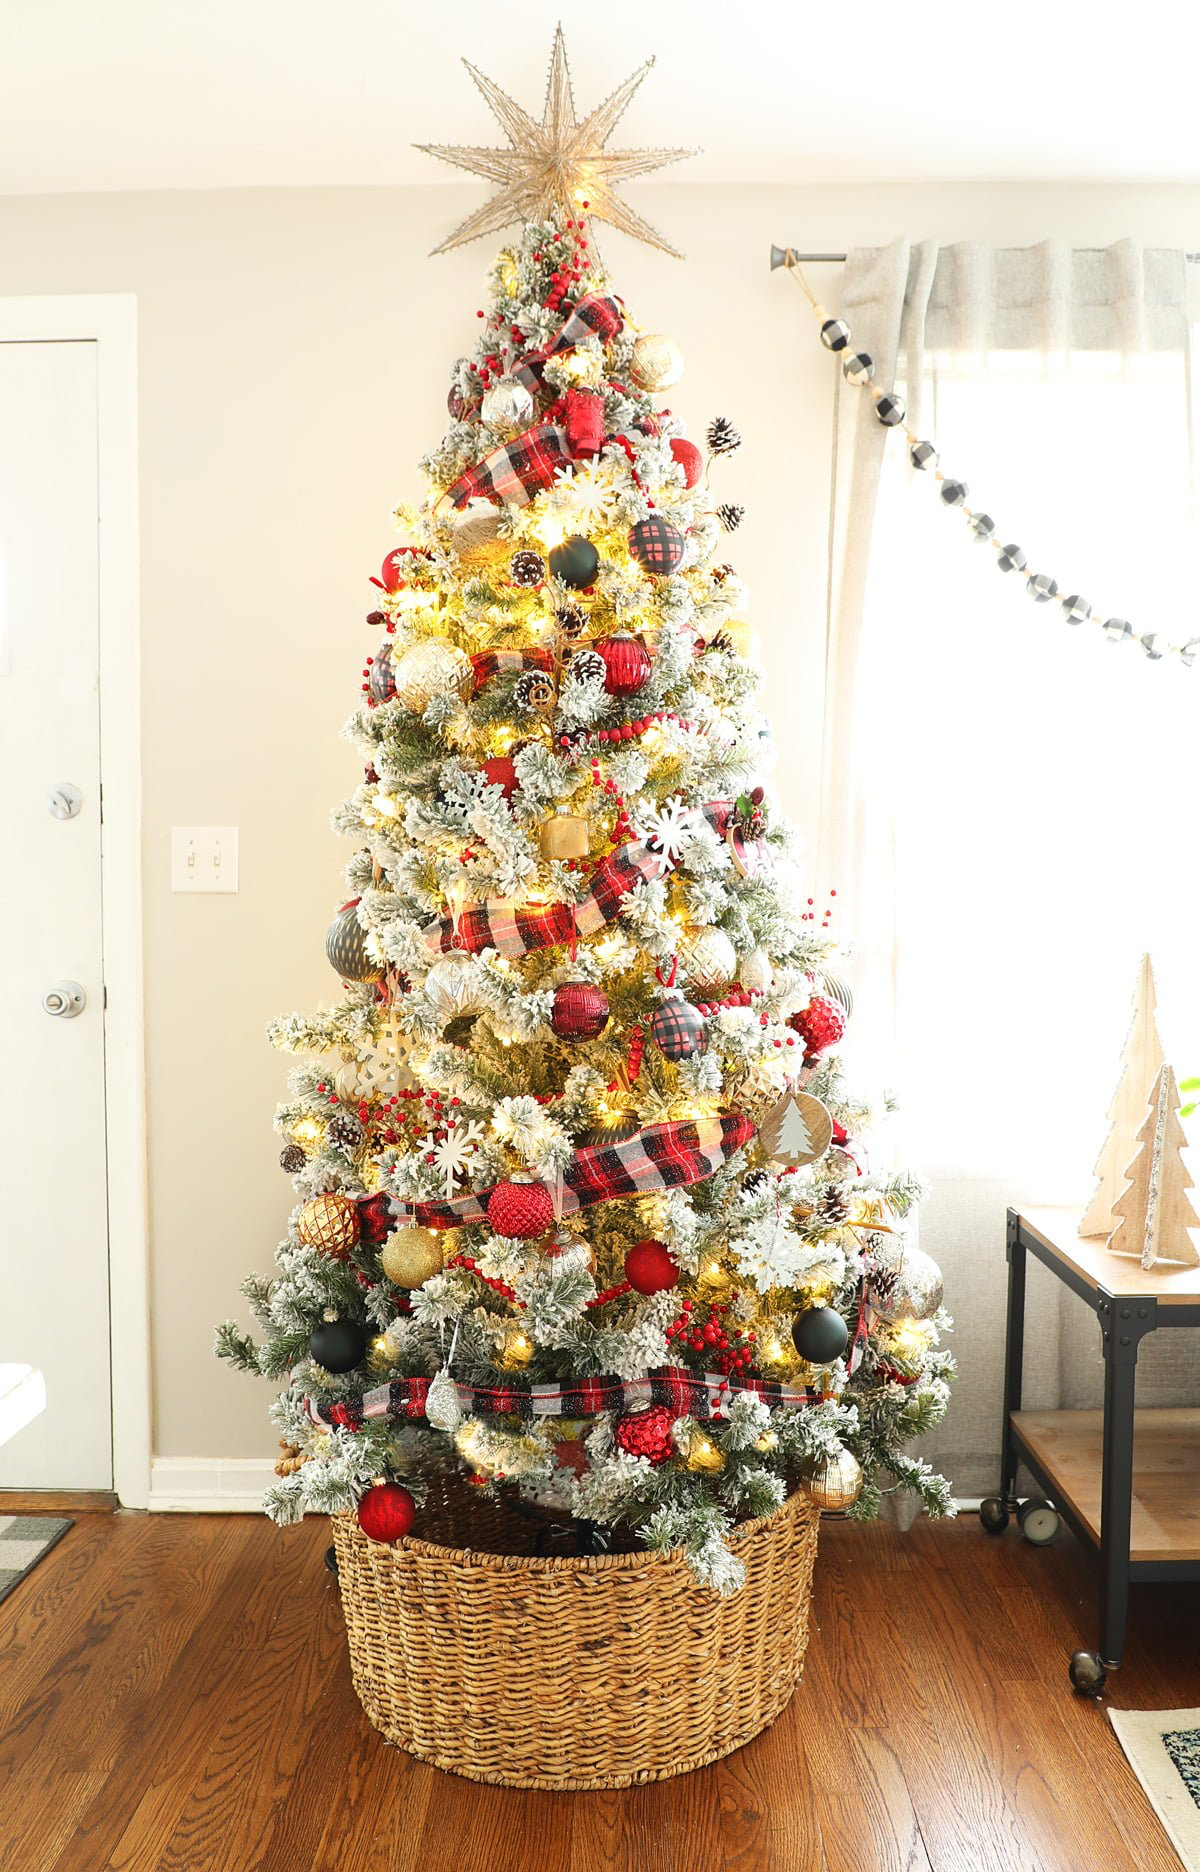
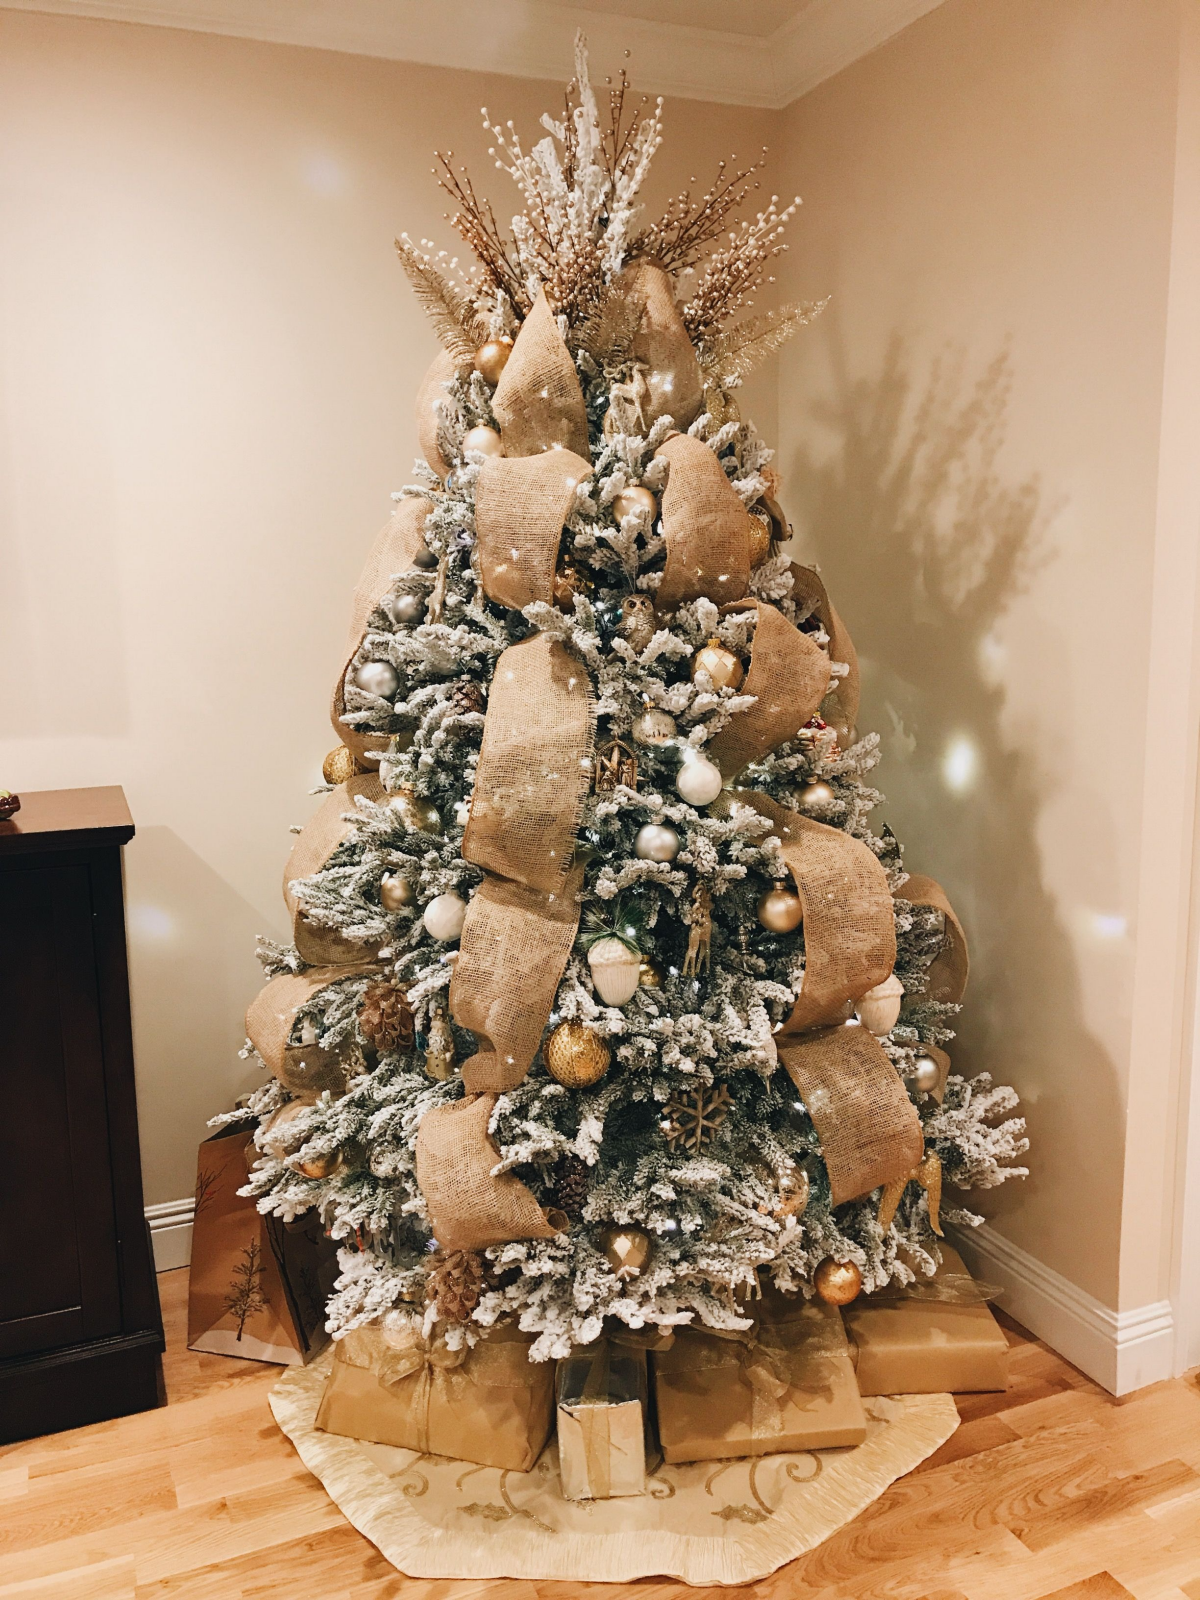
One of the most captivating current trends is contrasting the cool white of flocking with warm, natural elements. Move beyond traditional ornaments and incorporate things like dried orange slices, bundles of cinnamon sticks tied with twine, and long pheasant feathers. This “Winter Woodland” aesthetic, championed by brands like Crate & Barrel, creates a beautiful tension between the artificial snow and organic textures for a cozy, upscale cabin feel.
For an extra touch of icy magic, add a subtle layer of shimmer.
After your lights are on, lightly mist a few outer branches with a spray adhesive like 3M Super 77. Before it dries, dust them with a fine, iridescent glitter or faux crystal flakes. When the tree lights hit these custom-sparkled spots, you get a delicate, shimmering effect that looks like freshly frozen snow catching the morning sun.


