Holiday Appetizers Without the Last-Minute Panic: Pro Secrets for Home Cooks
We’ve all been there. The doorbell rings, your first guests are here, and you’re still frantically chopping something while a pot boils over on the stove. Honestly, it’s the worst. Over years of working in catering and bustling event kitchens, I’ve learned one massive truth: appetizers set the vibe for the whole night. They’re the first impression, but they absolutely shouldn’t be the host’s biggest source of stress.
In this article
So, let’s ditch the complicated recipes. This is all about learning a few core techniques the pros use to serve incredible food while actually, you know, enjoying the party. It’s about working smart, not hard.
The Real Secret Weapon: Your Game Plan
In the pro world, everything revolves around a concept called “mise en place,” which is just a fancy way of saying “get your act together before you start cooking.” For a party, this is your golden ticket to a stress-free night. It just means breaking down the work into tiny, manageable chunks over a few days.
Here’s what that actually looks like:
- 2-3 Days Before the Party: This is for the sturdy stuff. You can whip up the base for a cheese ball and wrap it tight in the fridge. Go ahead and cook and crumble your bacon. You can also chop up nuts or grate hard cheeses like Parmesan and stash them in airtight containers. Dips and sauces, like a pesto or a chili glaze, often taste even better after a day or two anyway.
- The Day Before: Time to assemble. This is perfect for rolling that cheese ball in its nutty coating or wrapping bacon around water chestnuts. Just line them up on a sheet pan, cover them, and pop them in the fridge. If you’re making anything with a dough filling, you can usually get that ready, too.
- Morning of the Party: Now it’s just the final touches. Chop your delicate fresh herbs like parsley or chives. You can also pull out all your serving platters and utensils. Seriously, just knowing which bowl is for which dip saves you from a frantic cabinet search later.
When your first guest arrives, you’re just warming things up and plating. You’re a host, not a line cook.
A Quick Note on Gear: You don’t need a commercial kitchen, but a few key items make a huge difference. A sharp knife is a must for safety (dull knives are way more dangerous!). A food processor is a lifesaver for making silky-smooth dips. And an instant-read thermometer, which you can get for like $15 online, is the only way to know for sure if your food is cooked properly and safe to eat.
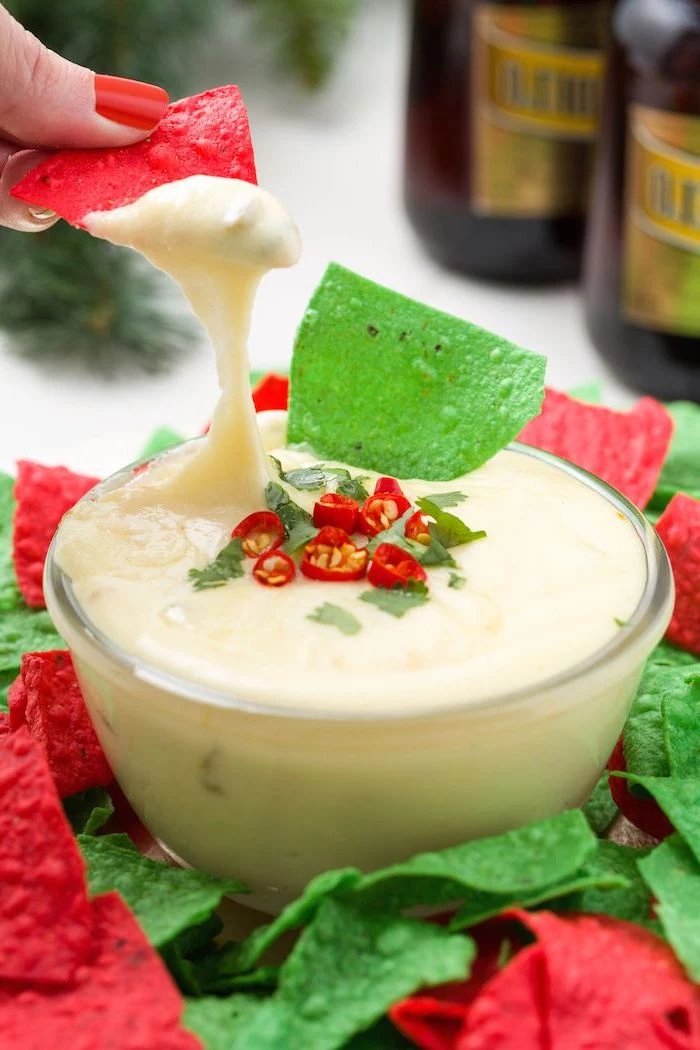
Let’s Talk About Cheese: The Ultimate Party Starter
Cheese is a holiday MVP. It’s comforting, it’s versatile, and it just feels festive. But there’s a big difference between a boring cheese plate and an appetizer people talk about for weeks. It all comes down to technique.
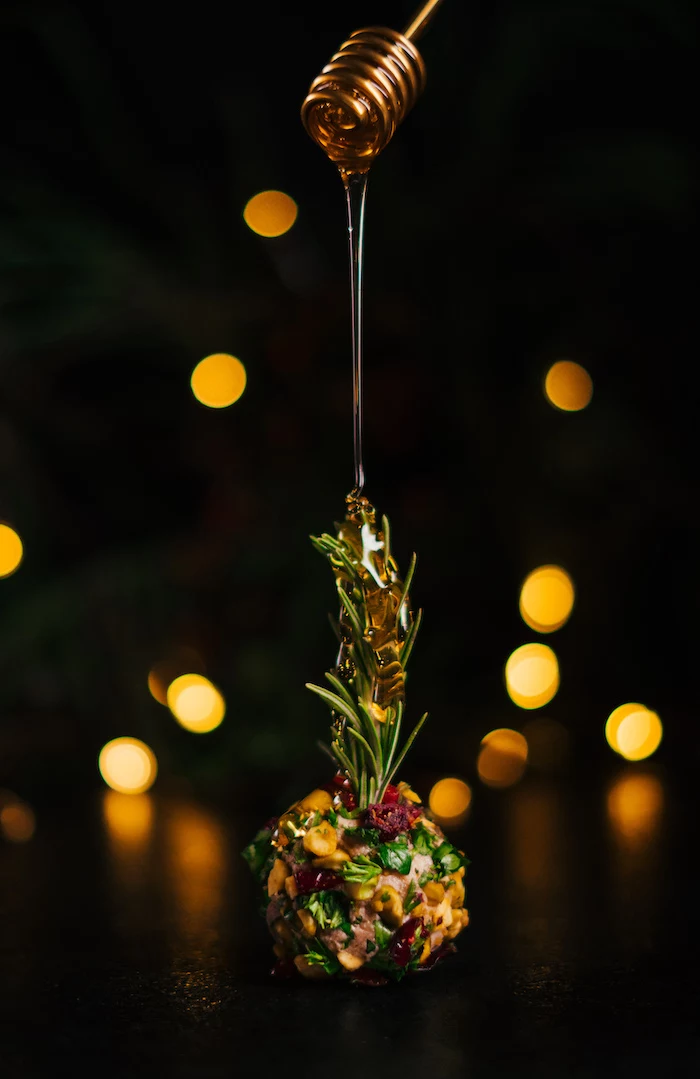
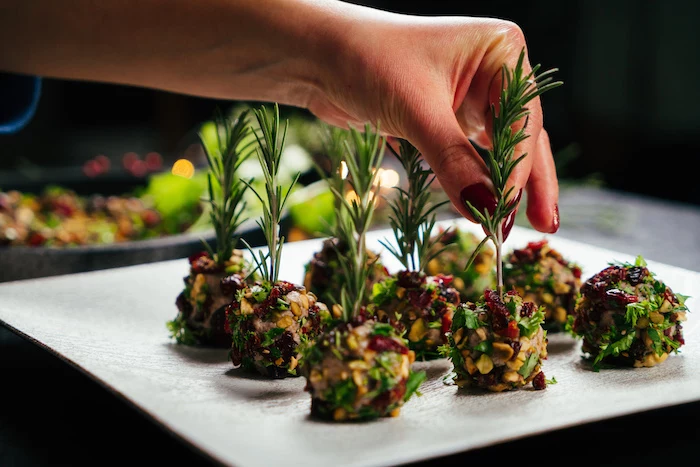
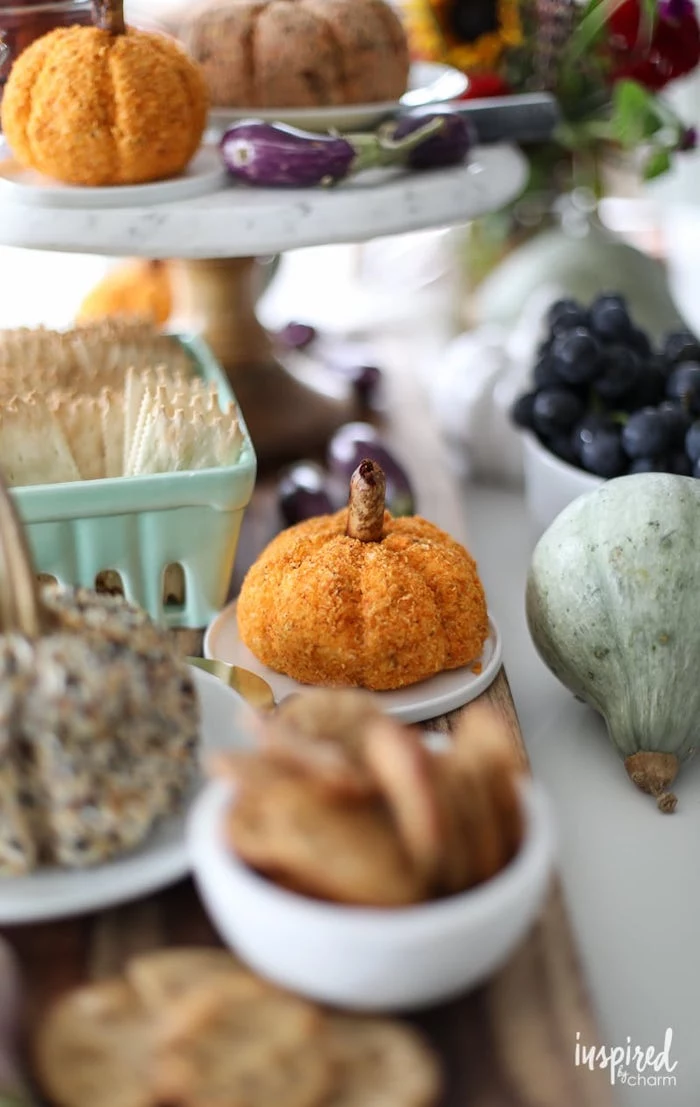
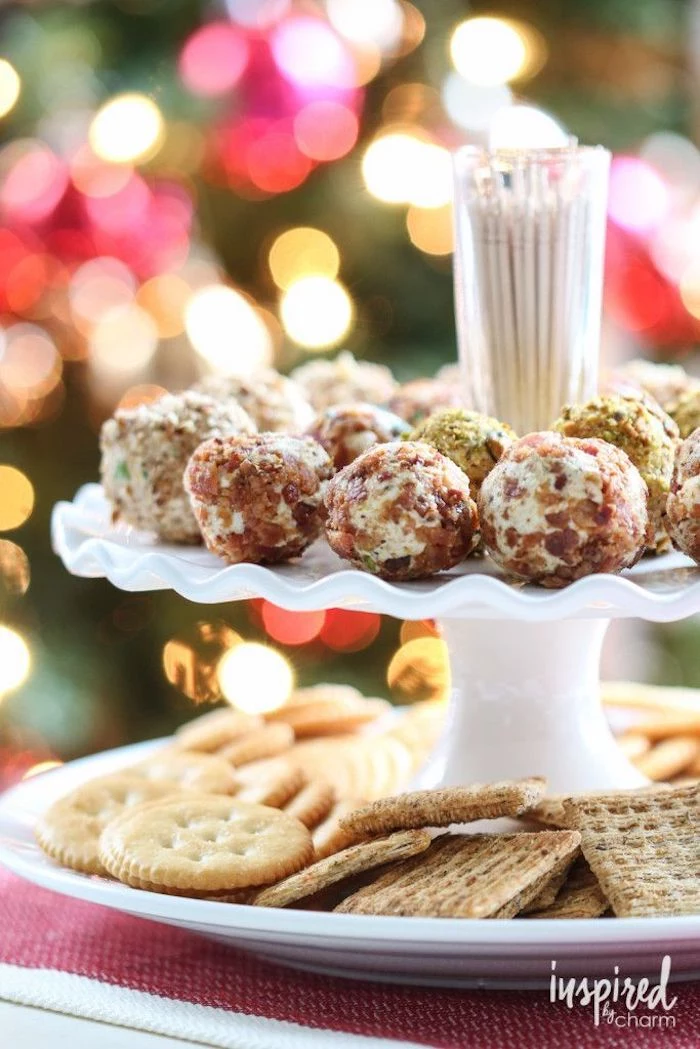
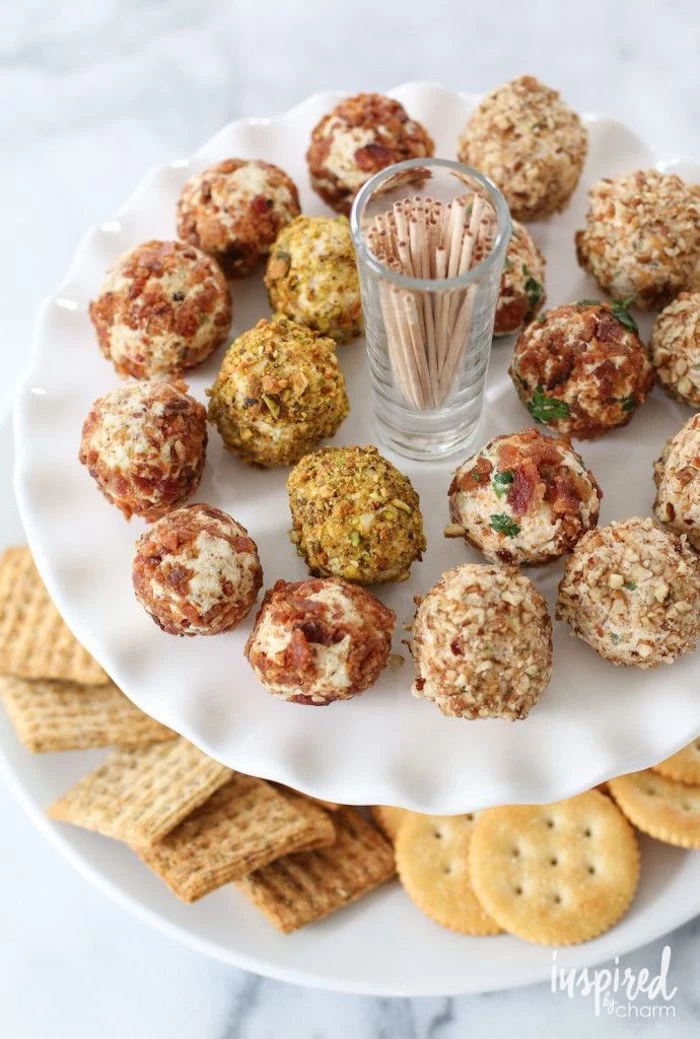
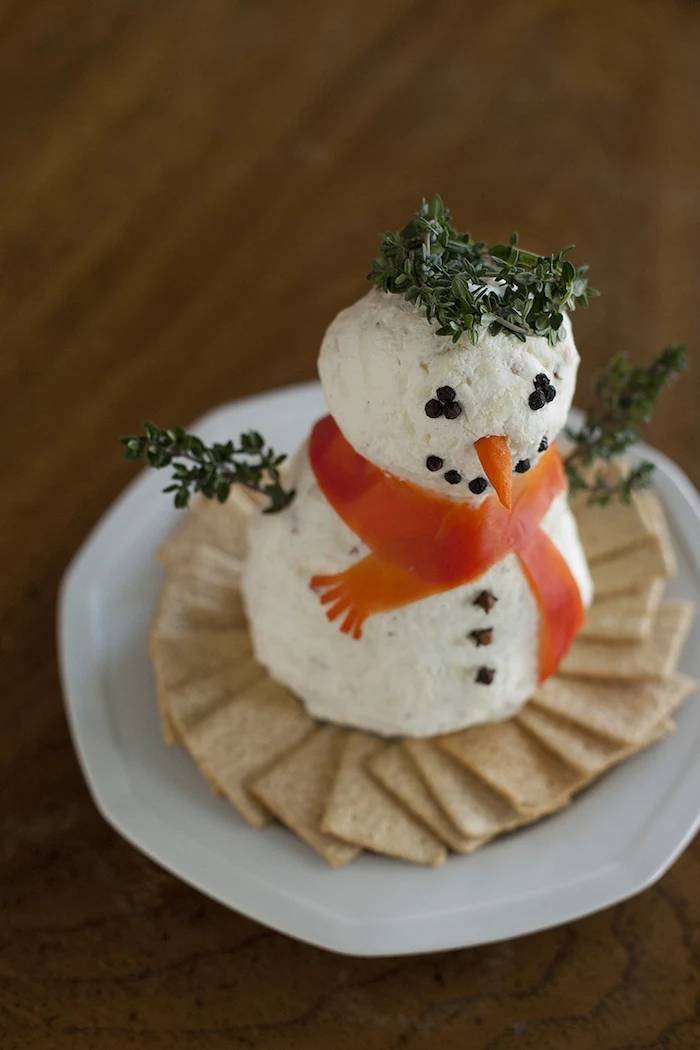
The Perfect Cheese Ball (or Truffles!)
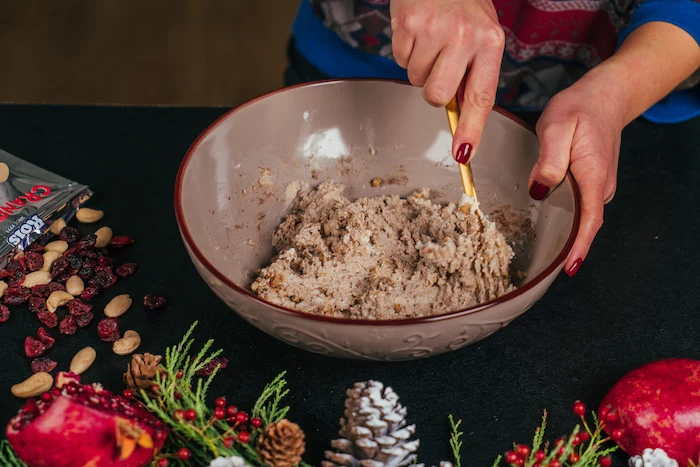
A great cheese ball is all about a smooth, creamy texture. The base is almost always cream cheese, but here’s the most important tip: let the cream cheese soften to room temperature first. I learned this the hard way trying to make a huge batch for an event once, and I spent what felt like an eternity trying to beat lumps out of cold cream cheese. Just let it sit on the counter for an hour. Trust me.
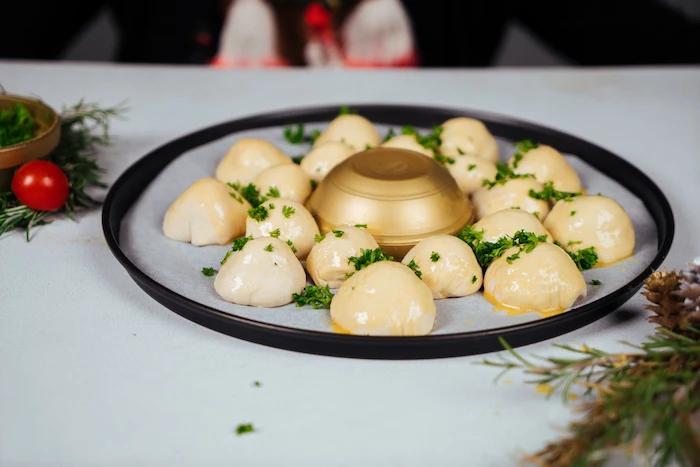
Let’s make some classic cheese truffles. They’re basically mini, single-serving cheese balls.
- 8 ounces full-fat cream cheese, softened
- 1 cup sharp cheddar cheese, finely shredded (Budget tip: Buying a block of cheddar for about $3 and shredding it yourself is way cheaper and melts better than the pre-shredded kind.)
- 2 scallions, thinly sliced
- 6 slices of bacon, cooked crispy and crumbled
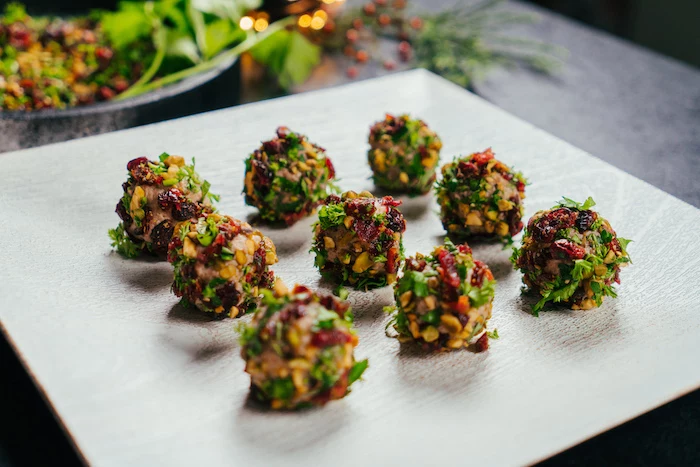
- For Coating: A mix of 1/2 cup chopped pecans and 1/2 cup chopped fresh parsley.
Using a hand mixer or just a spatula, combine the softened cream cheese, cheddar, scallions, and bacon. Once it’s all mixed, cover the bowl and chill it for at least an hour. This step is non-negotiable! Chilling firms up the mixture so you can handle it. Skip this, and you’ll have a sticky, melty mess on your hands.
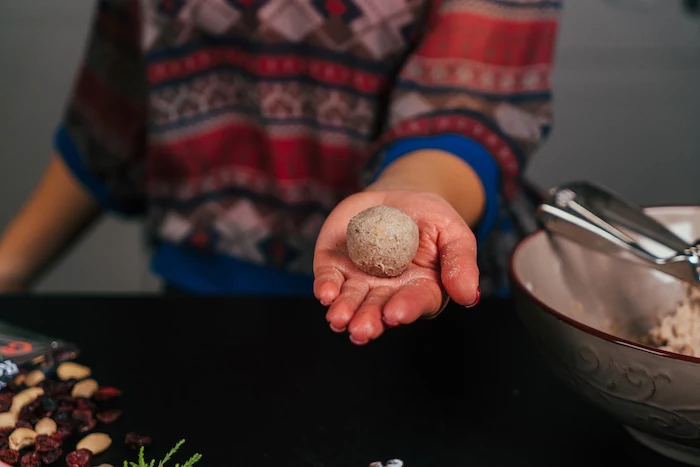
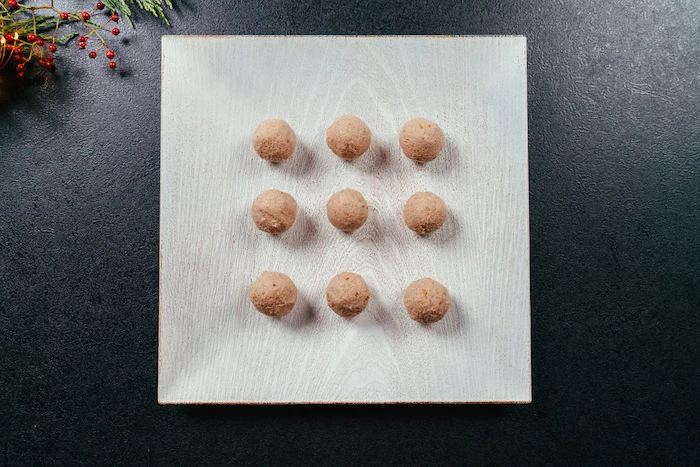
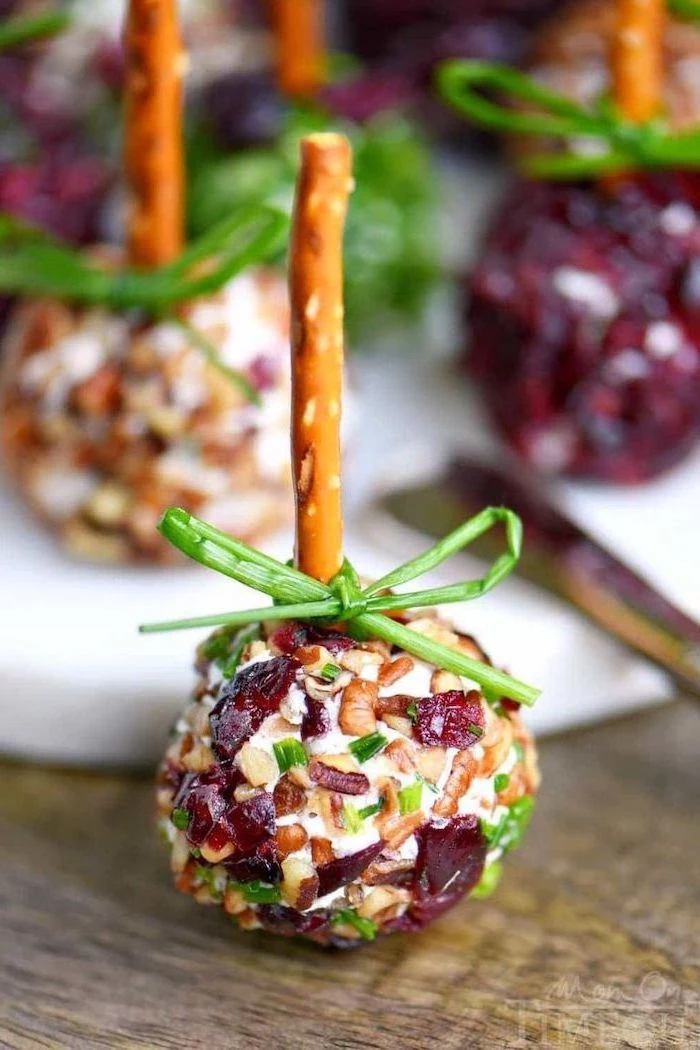
Once it’s chilled, use a small cookie scoop (about a tablespoon) to portion out the balls for a uniform look. Roll them quickly in your palms, then into the pecan-parsley mixture. These can be made up to three days ahead. How easy is that?
Heads up! If your mixture feels too soft, you might have used a low-fat cream cheese. The full-fat version has the structure you need. A quick fix is to mix in a tablespoon of plain breadcrumbs to help bind it together.
More coating ideas? Oh yeah. For folks with nut allergies or just for variety, try rolling them in Everything Bagel seasoning, finely chopped chives, or panko breadcrumbs that you’ve toasted in a dry pan until golden.
This recipe makes about 24-30 truffles, perfect for a party of 10-15 people.
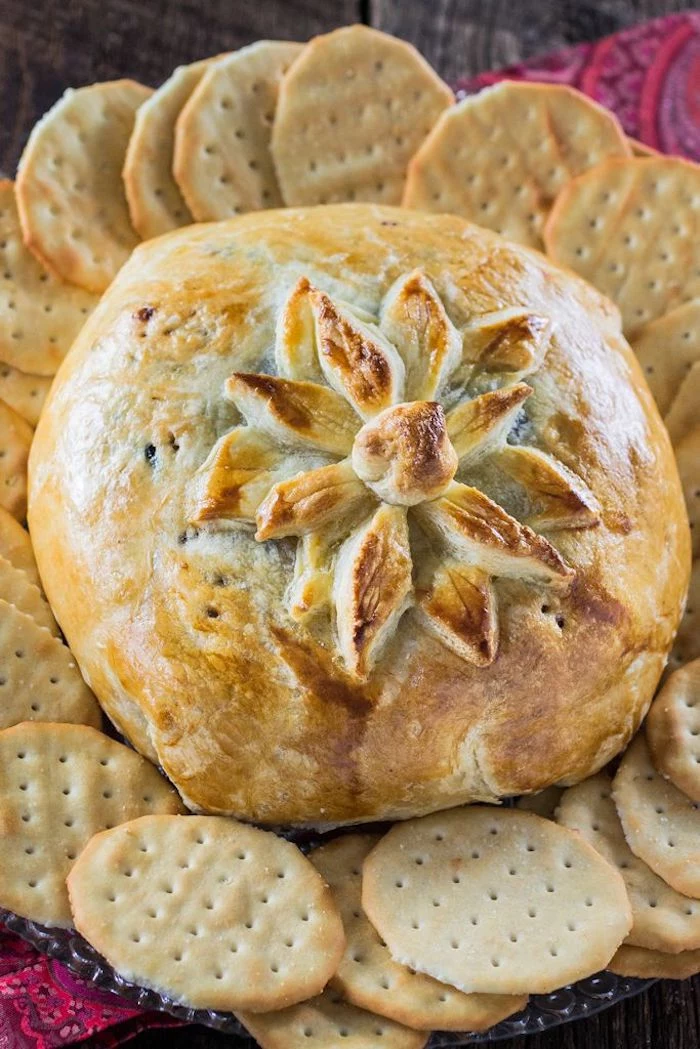
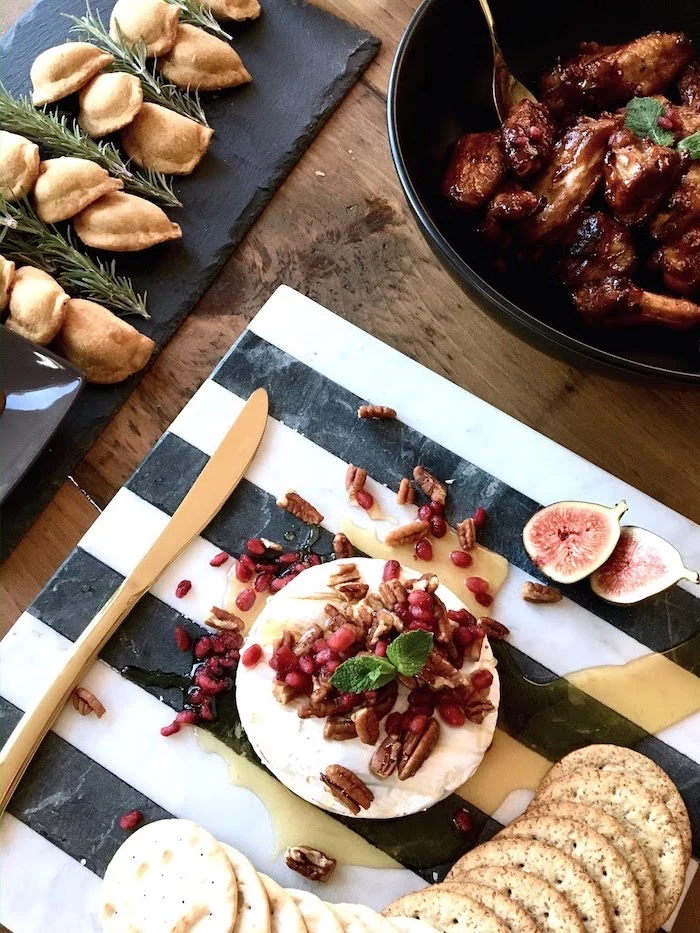
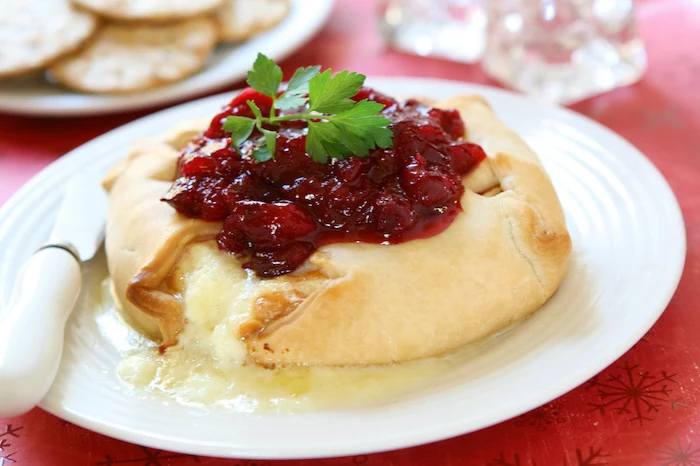
Baked Brie: Getting That Perfect Ooze
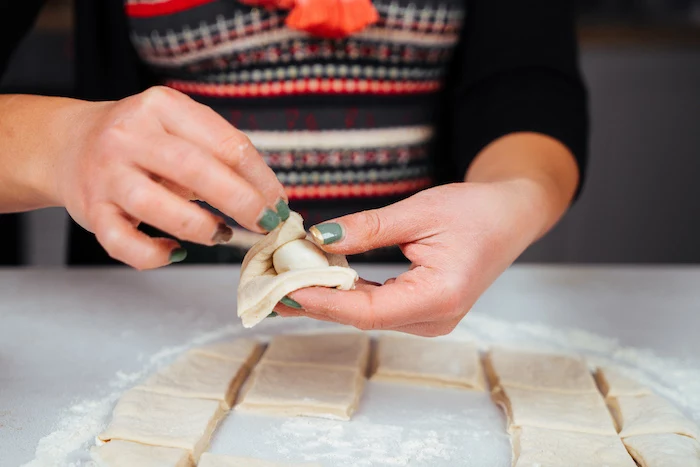
Baked Brie is pure drama and deliciousness. The goal is to get that gooey, molten center without it leaking everywhere. The hero here is store-bought puff pastry. It’s a pro-level shortcut I use all the time.
- 1 sheet of puff pastry, thawed (around $5-$8 in the freezer aisle)
- 1 (8-ounce) wheel of Brie (costs between $6 and $10)
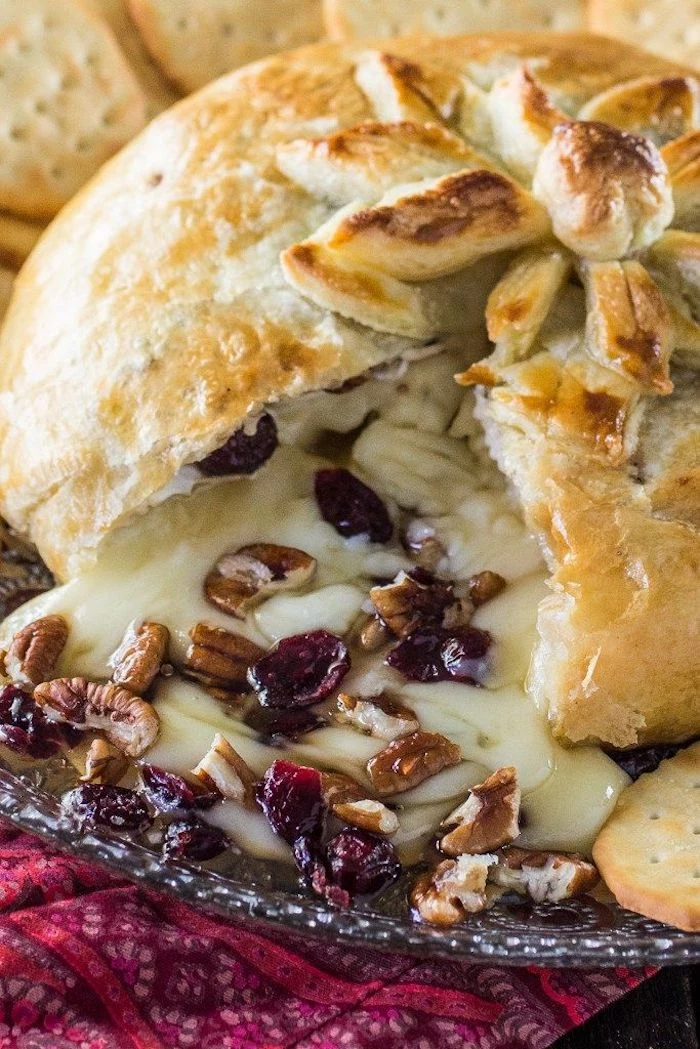
- 1/4 cup honey or maple syrup
- 1/3 cup chopped pecans or walnuts
- 1/4 cup dried cranberries
- 1 egg, beaten with a splash of water (this is your egg wash)
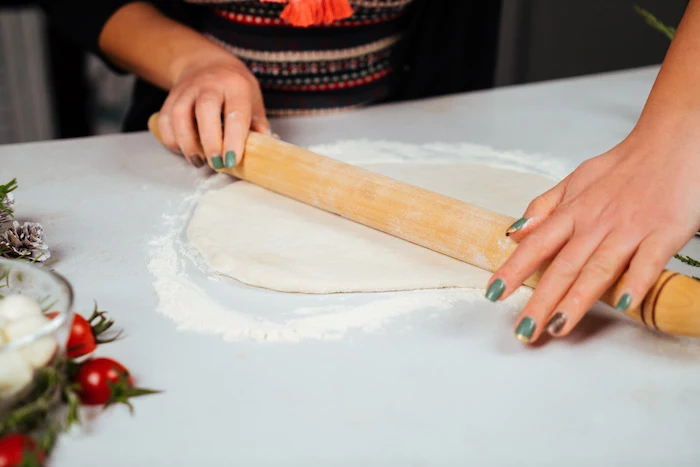
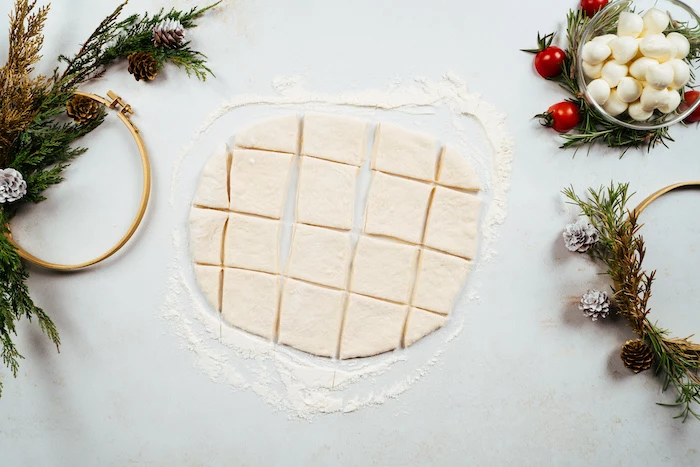
First, get your oven roaring hot at 400°F (200°C). This helps the pastry puff up instantly. On a lightly floured surface, lay out your pastry. Here’s a pro tip: spoon the honey, nuts, and cranberries onto the pastry first, right where the Brie will sit. This creates a little nest and helps prevent a soggy bottom. Then, place your Brie wheel on top.
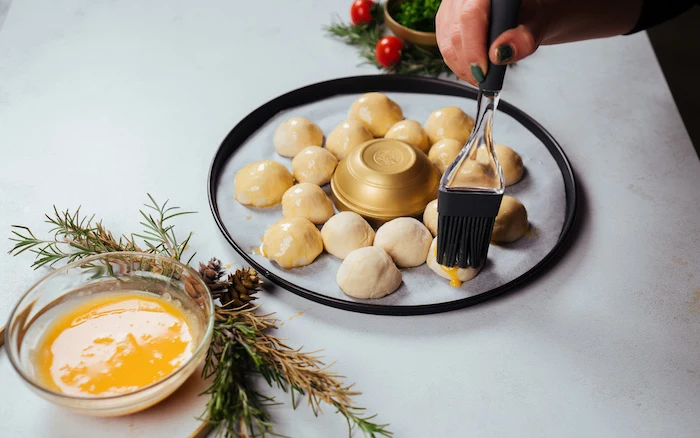
Now for the most common pitfall: leaky cheese! You have to fold the pastry over the Brie and create a tight seal. Pinch the seams together firmly. Any little gap is a potential cheese volcano. Trim off any extra dough and place the whole package seam-side down on a parchment-lined baking sheet. Brush it all over with that egg wash for a gorgeous, glossy, golden-brown finish.
Bake for 20-25 minutes. When it comes out, you MUST let it rest for at least 10 minutes before cutting into it. The cheese inside is like lava. I once saw a guest get a nasty burn at a party, and ever since, I’m a stickler for this rule. The rest also helps the cheese set up a bit, so it oozes beautifully instead of flooding the plate.
Serves about 8-10 people as part of an appetizer spread.
The Magic of Bacon-Wrapped Everything
Wrapping things in bacon is a guaranteed crowd-pleaser. The challenge? Getting the bacon perfectly crisp without incinerating whatever is inside.
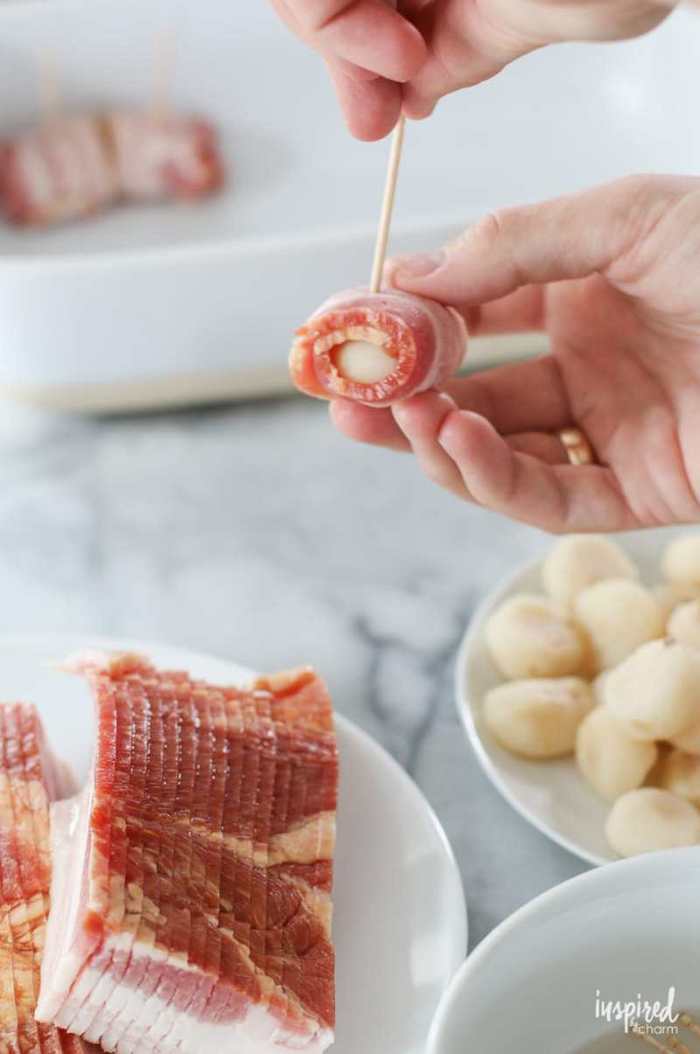
Classic Bacon-Wrapped Water Chestnuts
This app is a masterclass in texture: crispy, salty bacon meets the crunchy, mild water chestnut. The trick is to use thick-cut bacon. Regular bacon just cooks too fast and gets flimsy. Cut each thick slice in half.
Here’s the game-changing technique: Par-bake the bacon. Lay the half-slices on a wire rack over a baking sheet and bake them at 400°F (200°C) for about 8-10 minutes. You want the fat to start rendering, but the bacon should still be completely floppy and easy to wrap. This step ensures a less greasy and much crispier final product.
- 1 pound thick-cut bacon, cut into half-strips and par-baked
- 2 (8-ounce) cans whole water chestnuts, drained well
- 1 cup light brown sugar
- 1/2 cup sweet chili sauce (the syrupy Thai kind, not the red American cocktail sauce)
- Toothpicks for securing
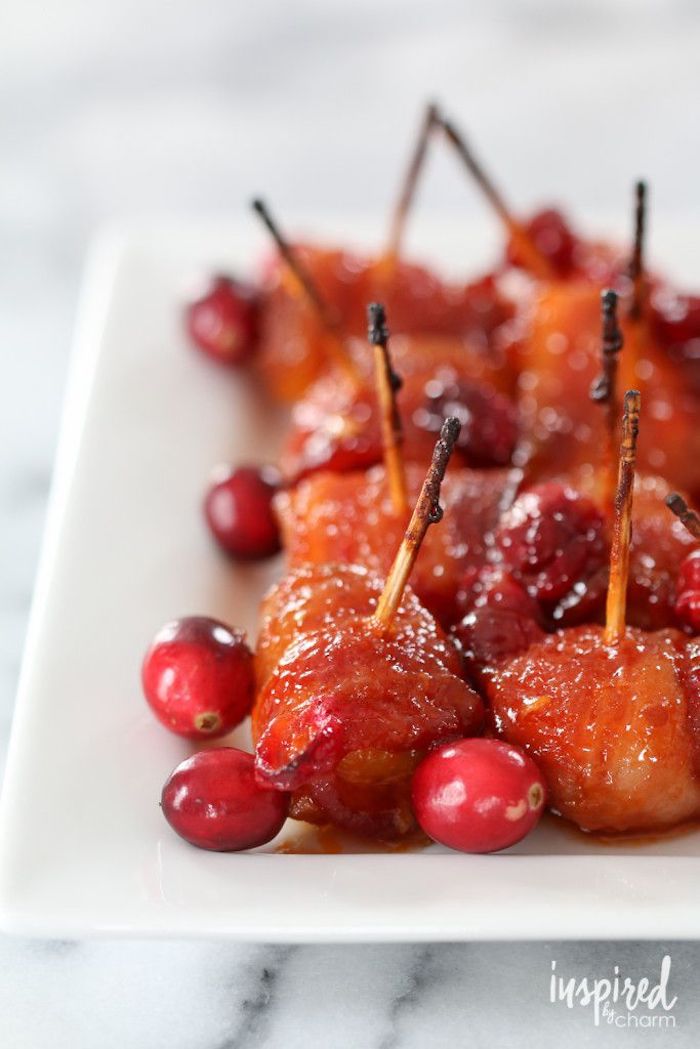
Once the bacon is cool enough to handle, wrap each water chestnut and secure it with a toothpick. Mix the brown sugar and chili sauce for your glaze, spoon it over the wraps, and bake at 375°F (190°C) for another 20-25 minutes, until the glaze is bubbly and caramelized. For extra crispiness, you can hit it with the broiler for the last minute or two—but don’t walk away, as that sugar can burn in a heartbeat!
Friendly reminder: Bacon is raw meat. Use a separate cutting board and wash your hands thoroughly after handling it. Don’t let it touch anything else!
Makes about 30-35 pieces, great for a larger crowd.
Being a Thoughtful Host: Easy Vegan & GF Options
Being a good host means thinking of everyone. Having a killer vegan or gluten-free option isn’t hard, and it shows you care. The key is to build amazing flavor from ingredients that are already naturally free of animal products or gluten.
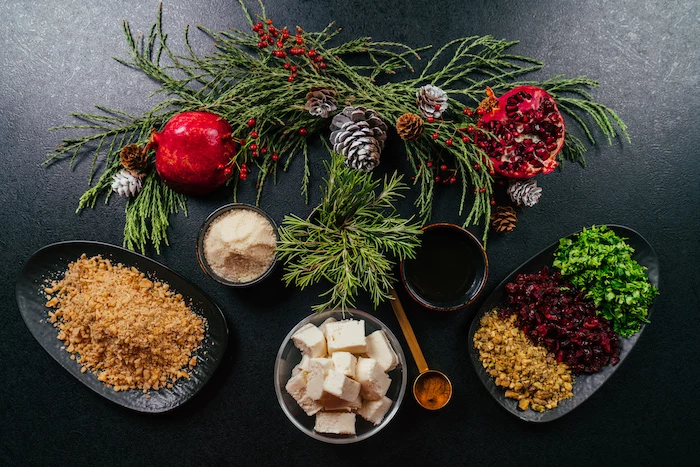
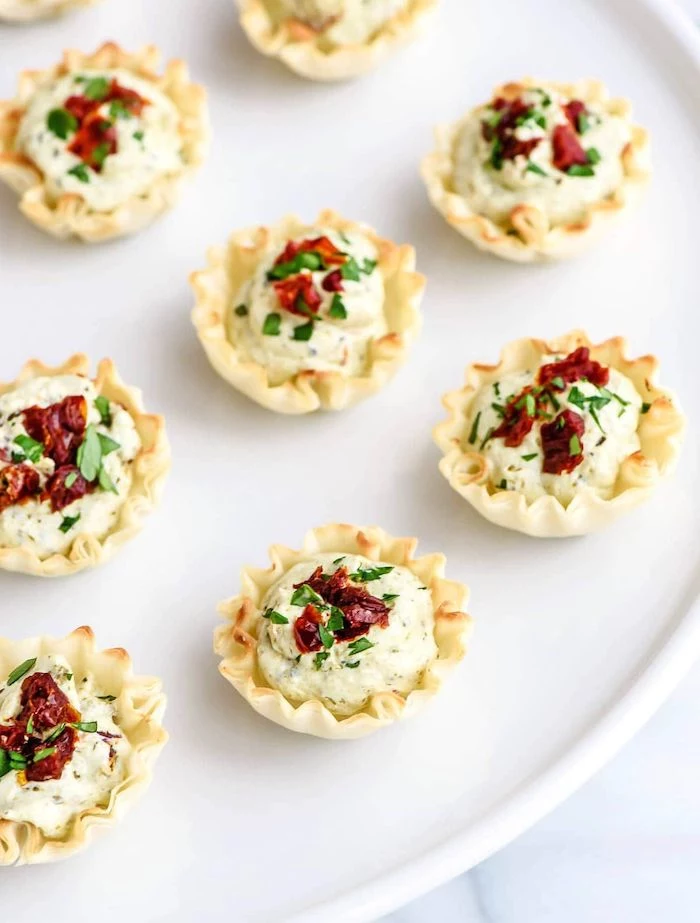
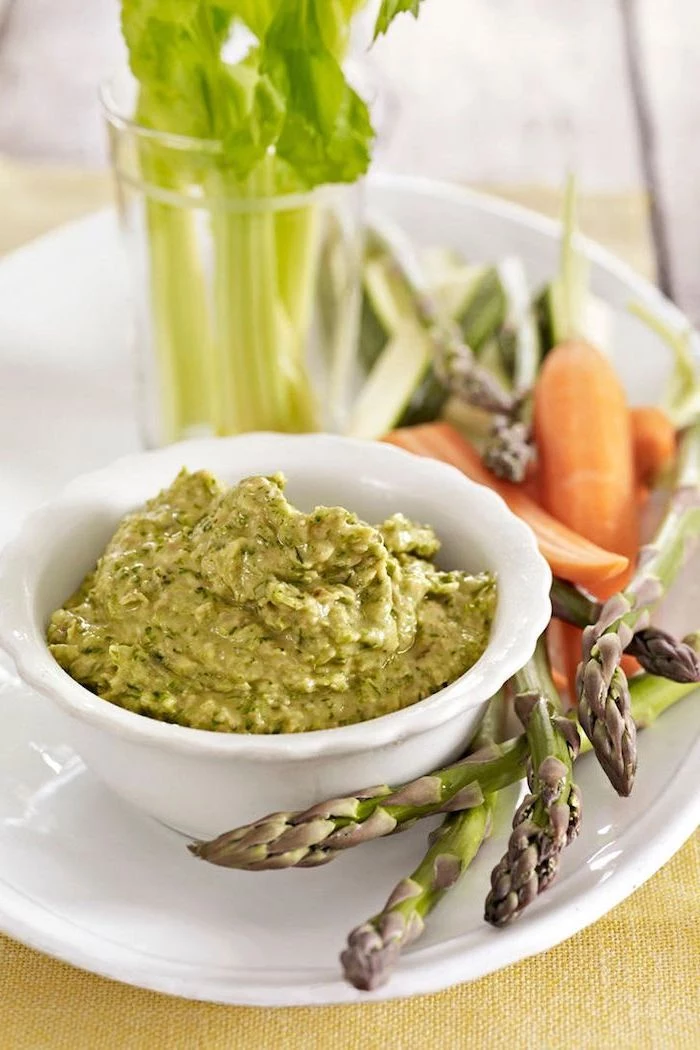
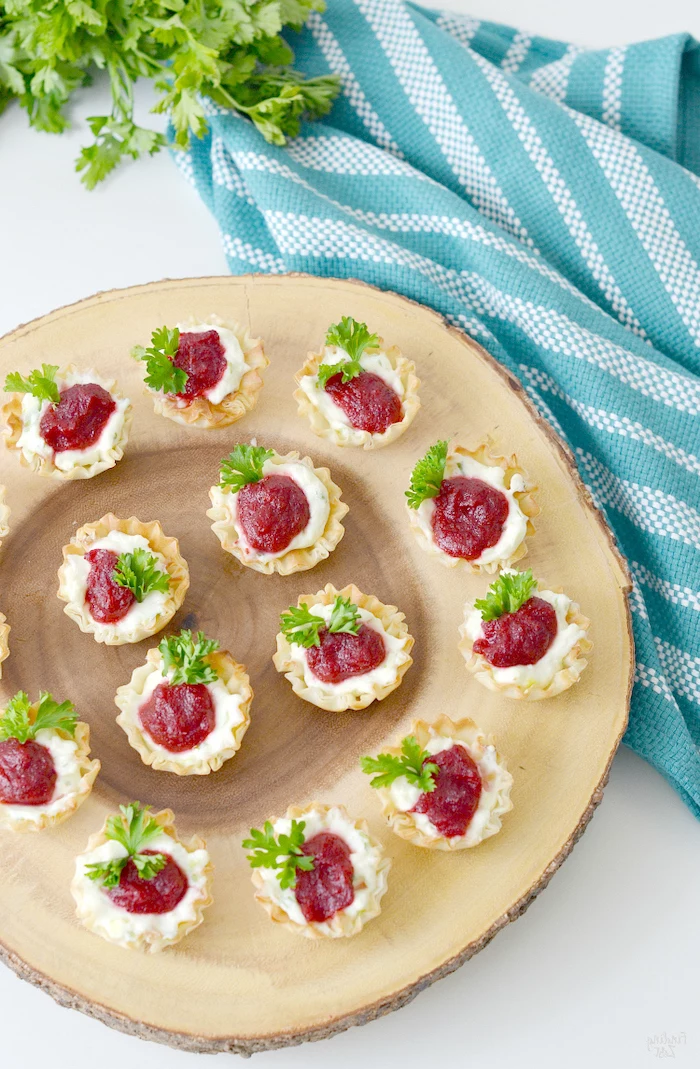
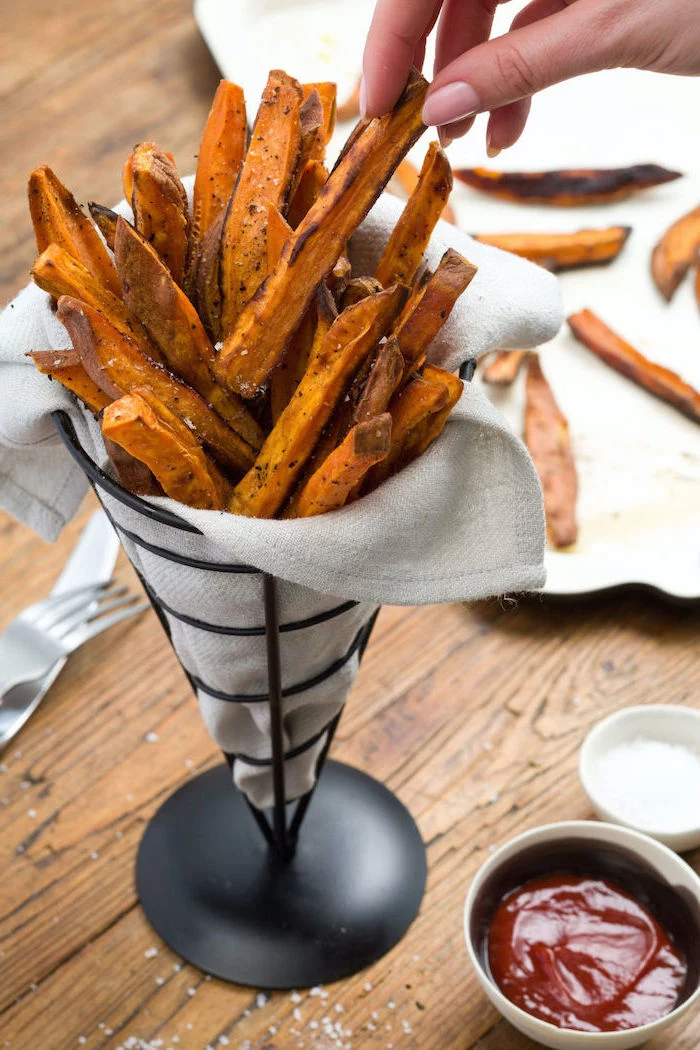
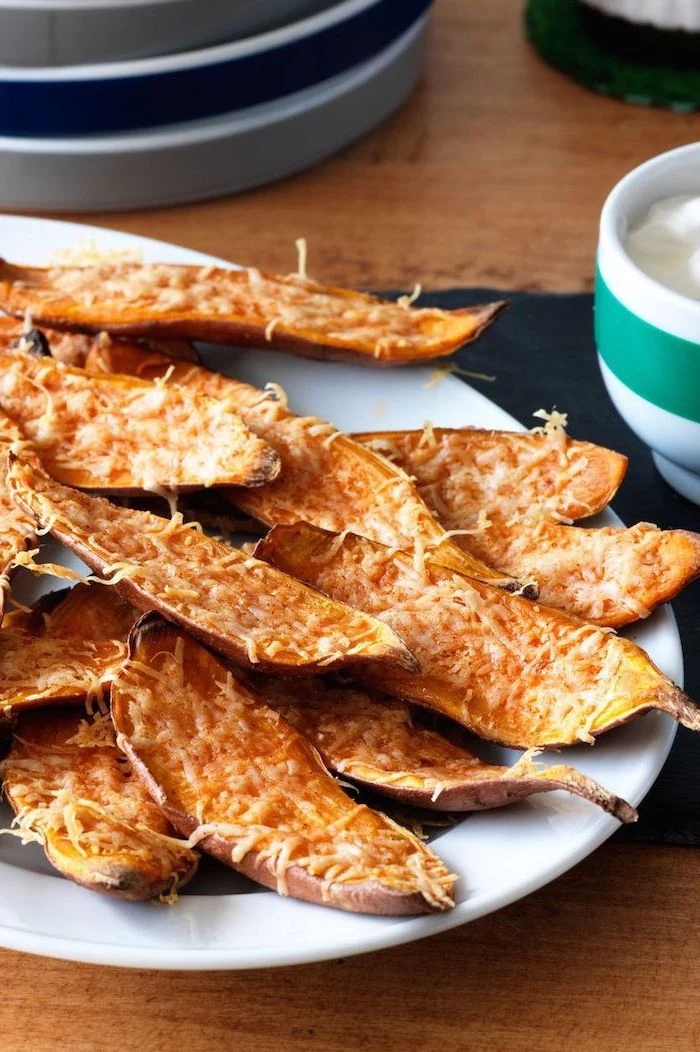
Vegan Sweet Potato Mousse Bites
This recipe is all about layering flavors: the earthy sweetness of the potato, the tang of cranberry, and the rich crunch of nuts.
- 2 medium sweet potatoes, baked until super soft
- 1/2 cup vegan cream cheese (the cashew or almond-based ones work great)
- A pinch of cinnamon, nutmeg, salt, and pepper
- Toppings: Whole-berry cranberry sauce and chopped, toasted pecans
- For serving: Sturdy gluten-free crackers (like a seeded flatbread) or cucumber slices
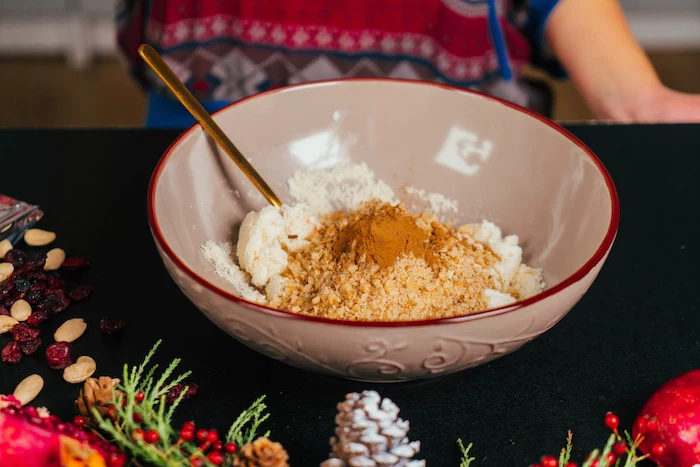
Scoop the baked sweet potato flesh into a food processor. Add the vegan cream cheese and spices, and blend until it’s totally smooth. The vegan cream cheese adds a wonderful tangy balance to the sweetness. Taste it and see if it needs a little more salt—salt makes all the other flavors pop.

You can make this mousse a day ahead. To serve, you can either spoon it onto crackers or, for a fancier look, use a piping bag with a star tip to make little rosettes. Top each one with a tiny dollop of cranberry sauce and a sprinkle of toasted pecans. Don’t skip the toasted nuts; their flavor is essential!
Good to know: It’s a really nice touch to label your dishes, especially for guests with dietary needs. A simple little card that says “Vegan Sweet Potato Bites (contains nuts)” is incredibly helpful.
Last-Minute Lifesavers and Food Safety
Okay, final piece of advice. Let’s talk safety. The temperature “danger zone” for food is between 40°F and 140°F (that’s 4°C to 60°C). It’s where bacteria have a party. So, hot food needs to stay hot, and cold food needs to stay cold.
Don’t have a professional chafing dish? No problem. Your small slow cooker set to “Warm” is the perfect way to keep a hot dip perfectly bubbly all night. For cold stuff like a cheese ball or dip, just place its serving dish inside a larger bowl filled with ice. Simple hacks, big difference.
Entertaining is supposed to be fun—for you, too. With a little planning and these tried-and-true techniques, you can serve amazing food and still have plenty of time to kick back and enjoy your own party.
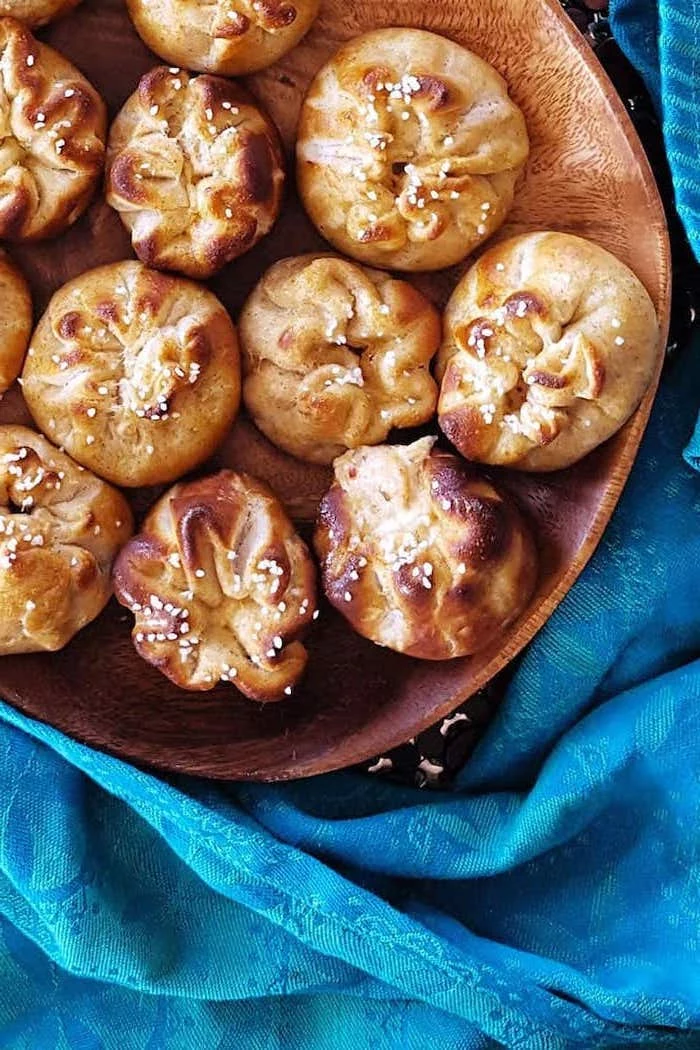
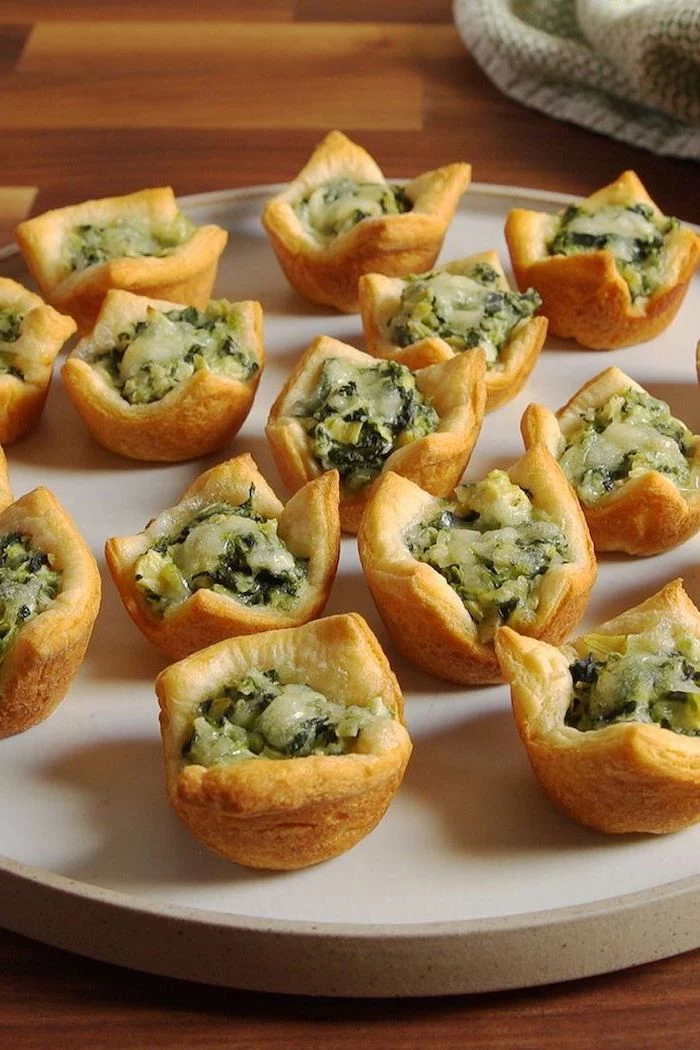
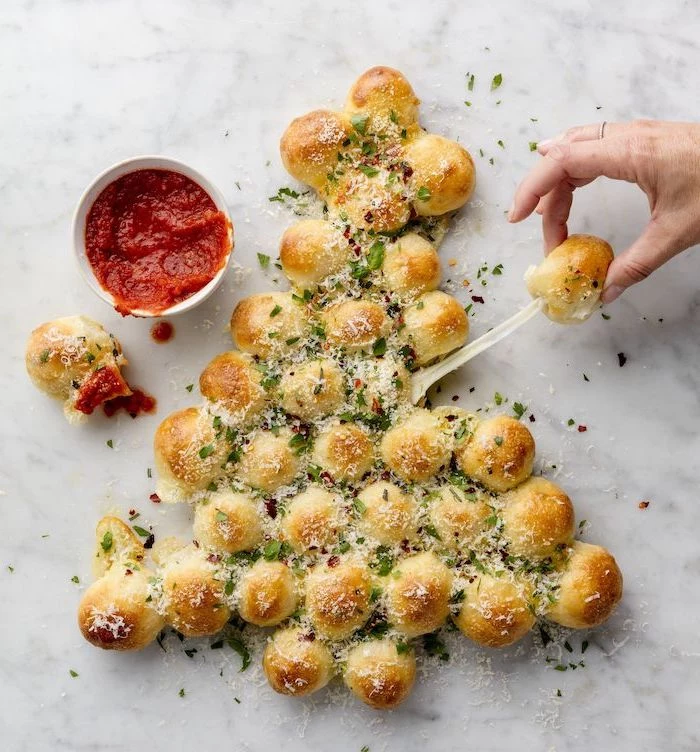
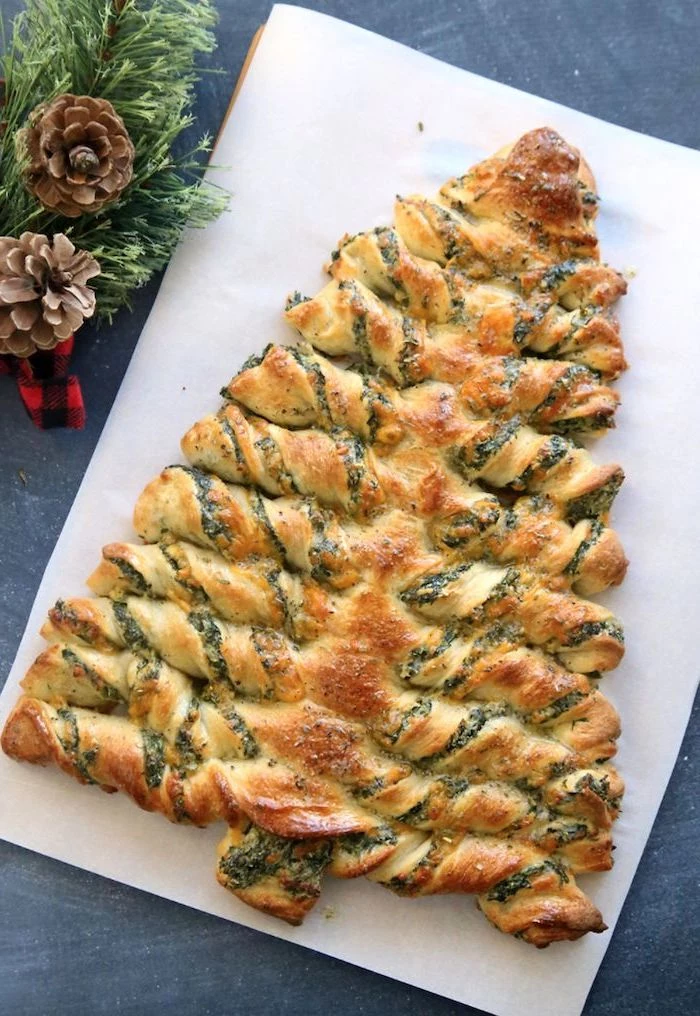
Inspiration Gallery
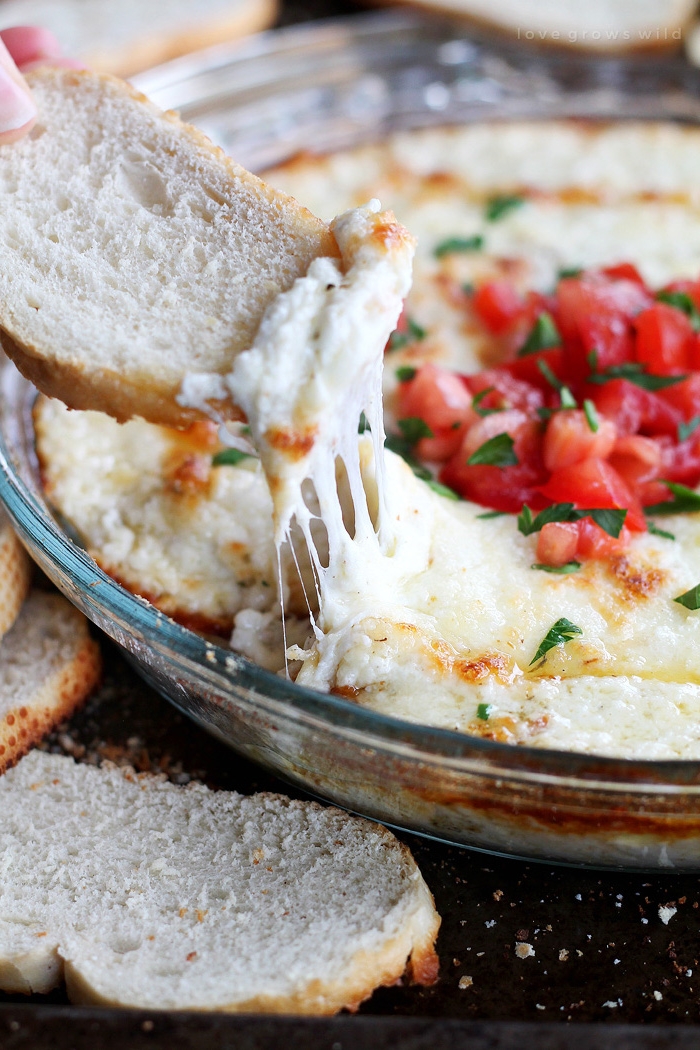
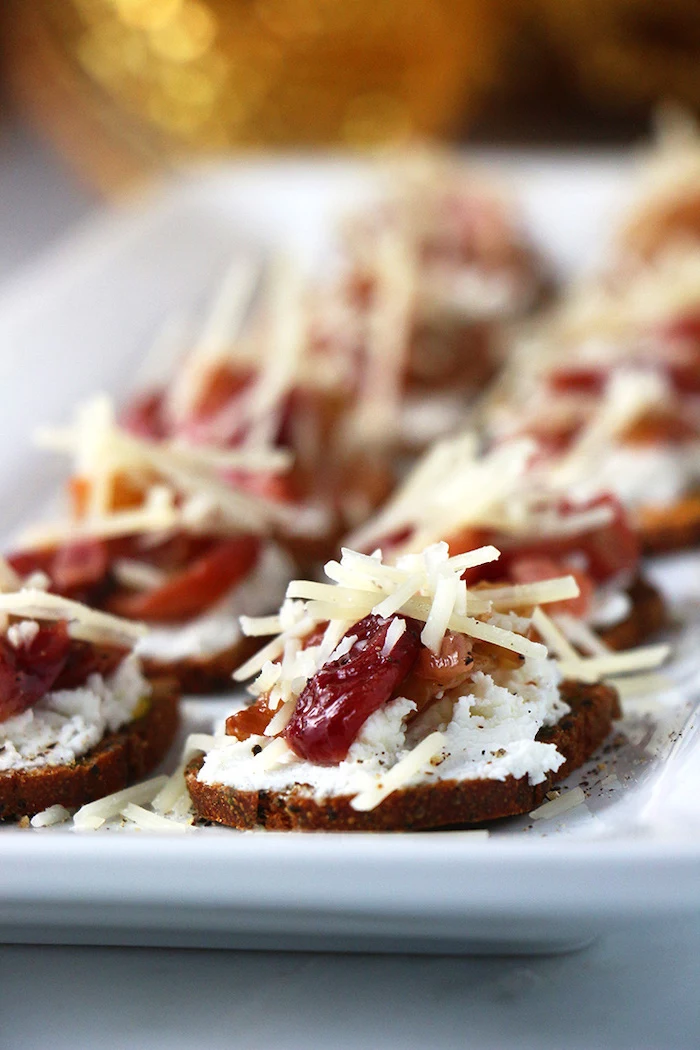
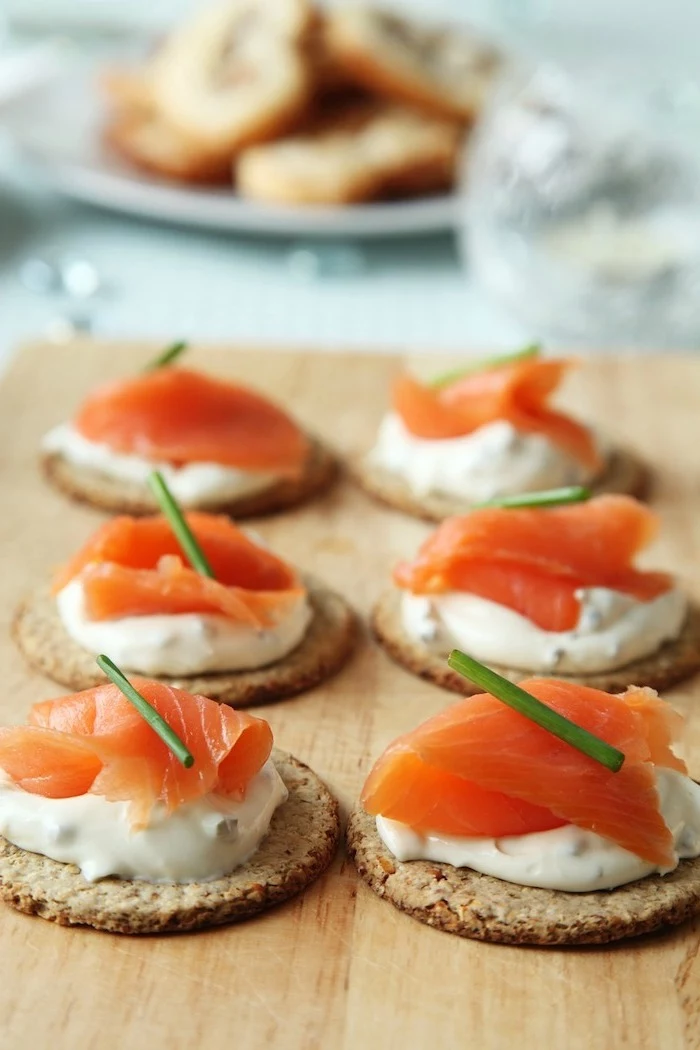
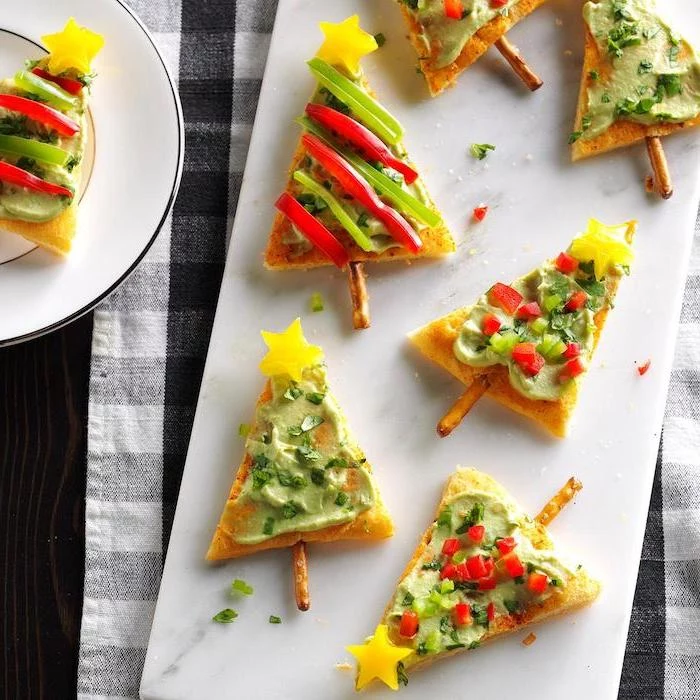
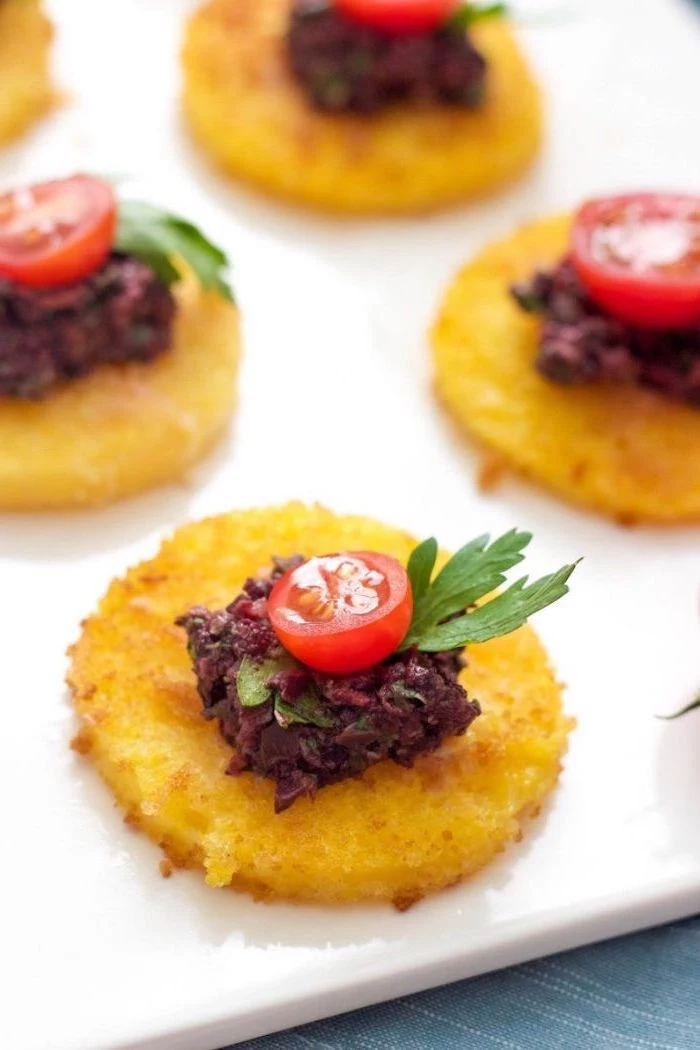
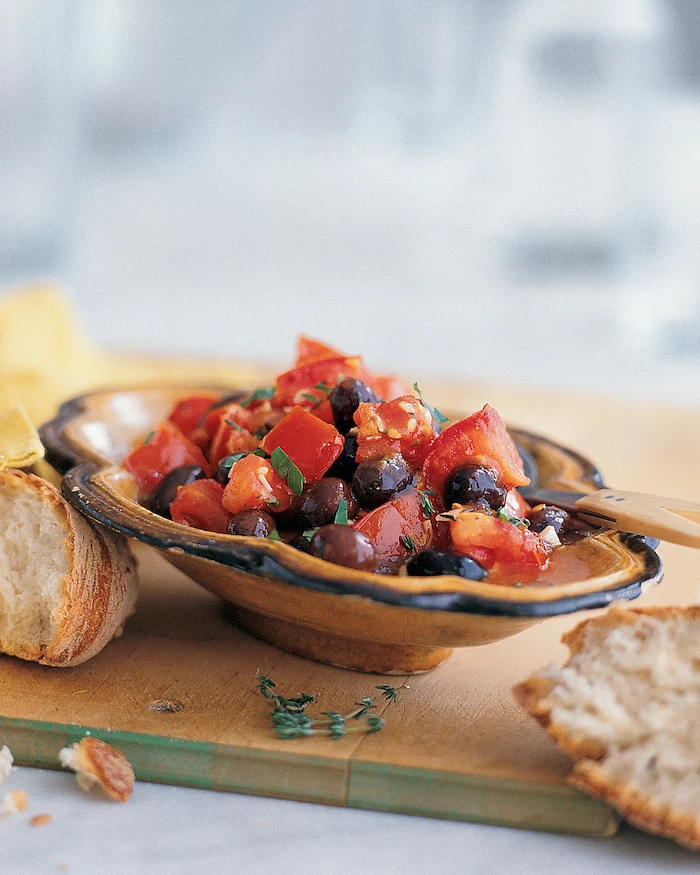
How do you keep bread-based appetizers like crostini from getting soggy?
The trick is to create a barrier. Toast your bread slices as usual, but before adding any moist toppings, brush them lightly with olive oil or spread a thin layer of a high-fat condiment like cream cheese, goat cheese, or even butter. This fat layer acts as a waterproof seal, keeping the bread crisp for much longer, even when topped with juicy tomatoes or tapenade.
- Impress guests with minimal effort.
- Keep your kitchen workflow smooth.
- Ensure every bite is perfectly warmed.
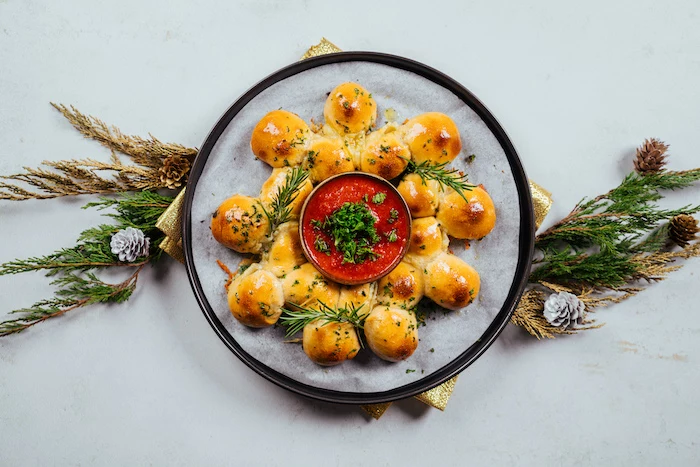
The secret? Batch baking. Instead of trying to cook multiple appetizer types at once, assemble everything on separate sheet pans (like bacon-wrapped dates on one, mini quiches on another). As guests arrive, pop one tray into the oven. When it’s nearly done, the next one goes in. It creates a seamless flow of fresh, hot food without overwhelming your oven or your sanity.
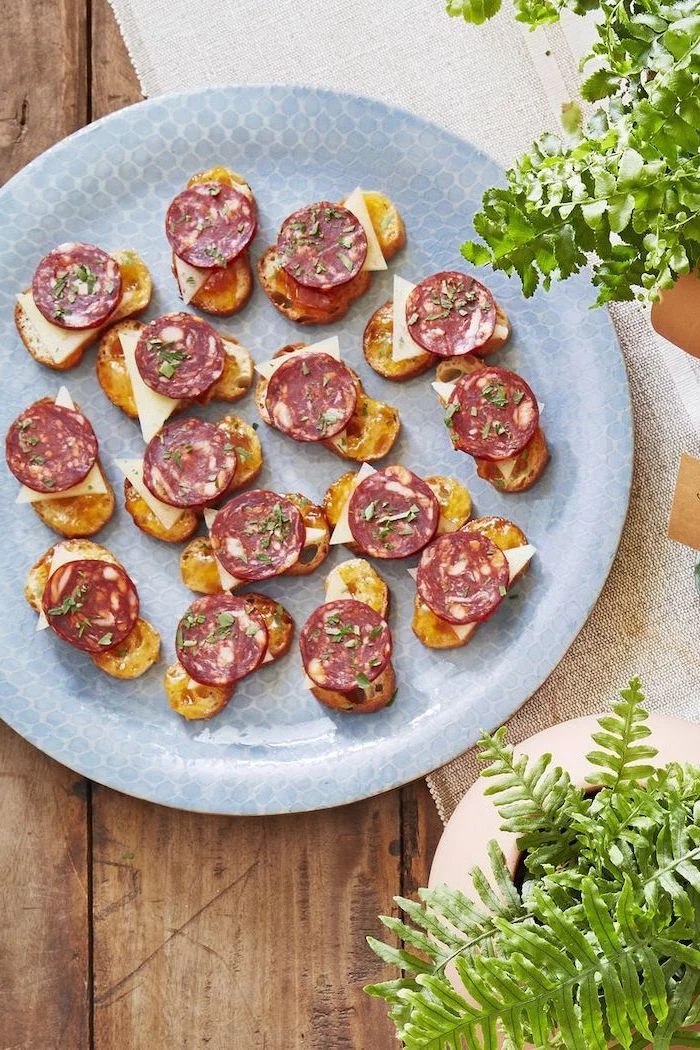
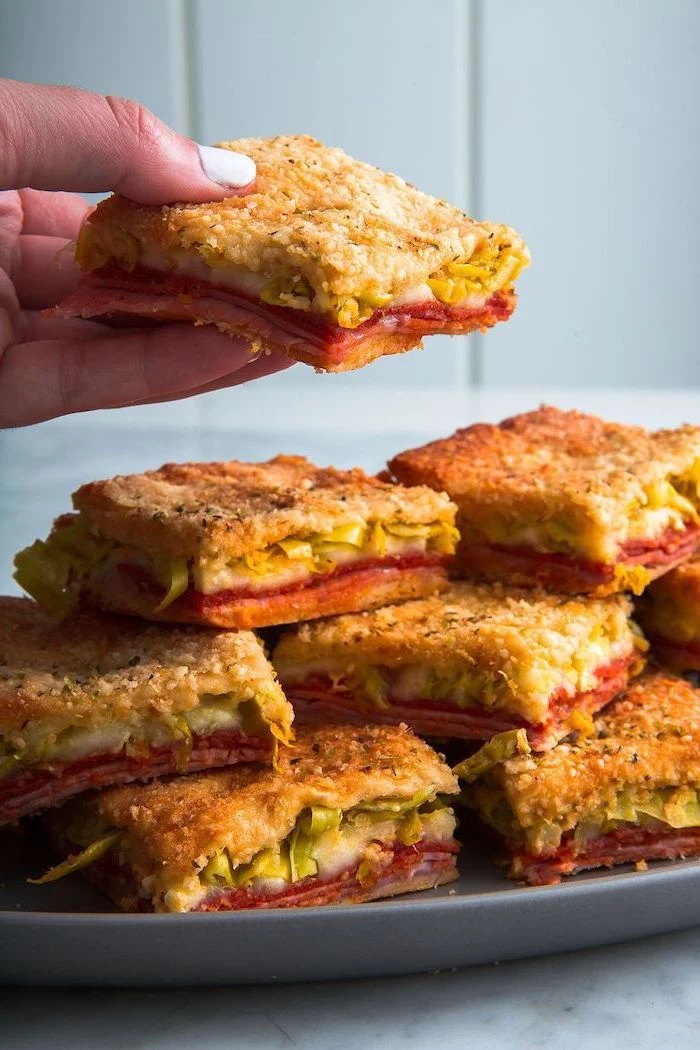
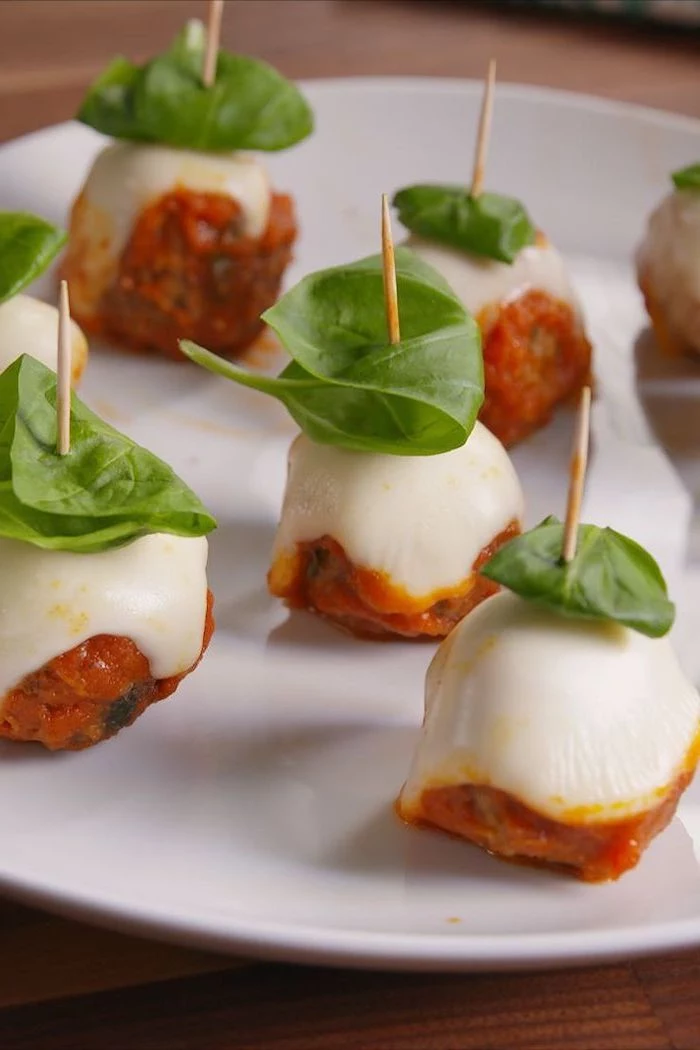
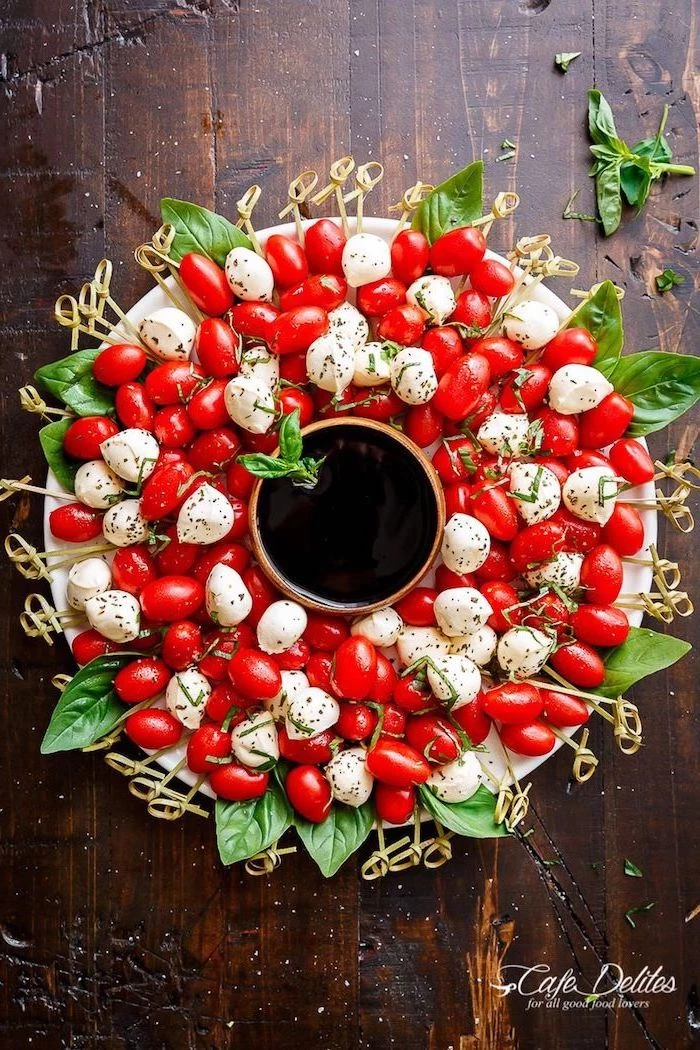
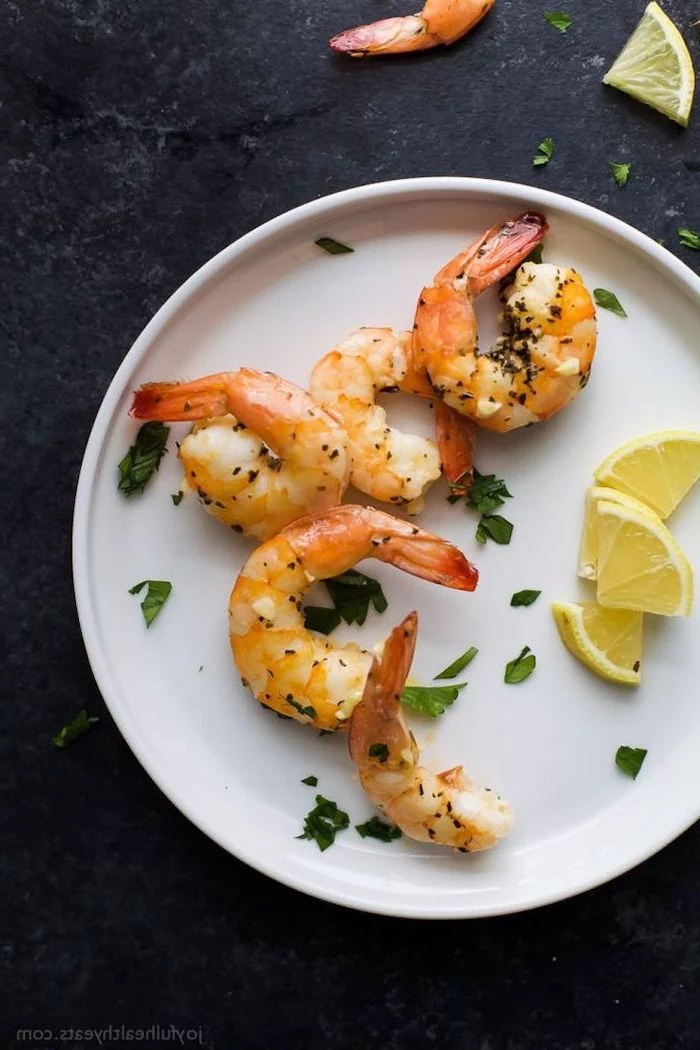
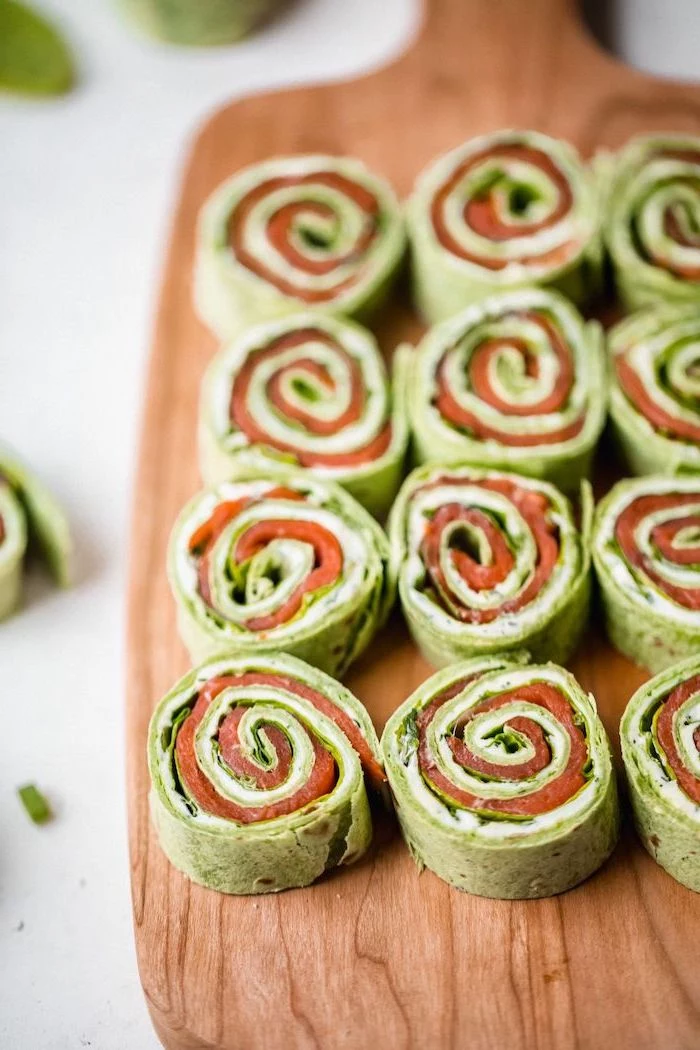
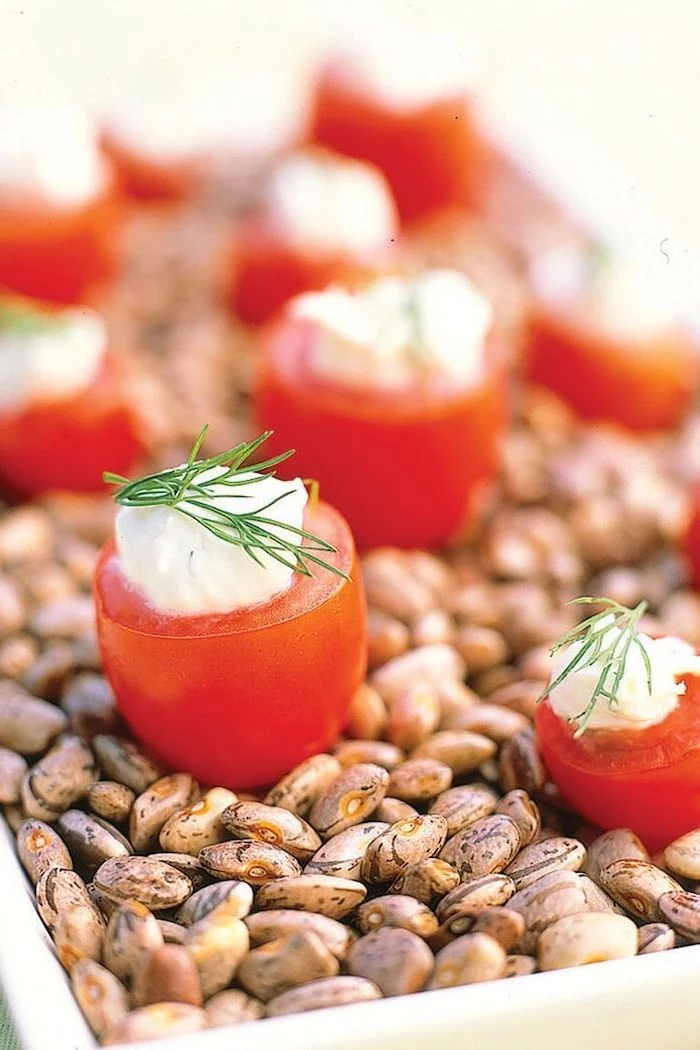
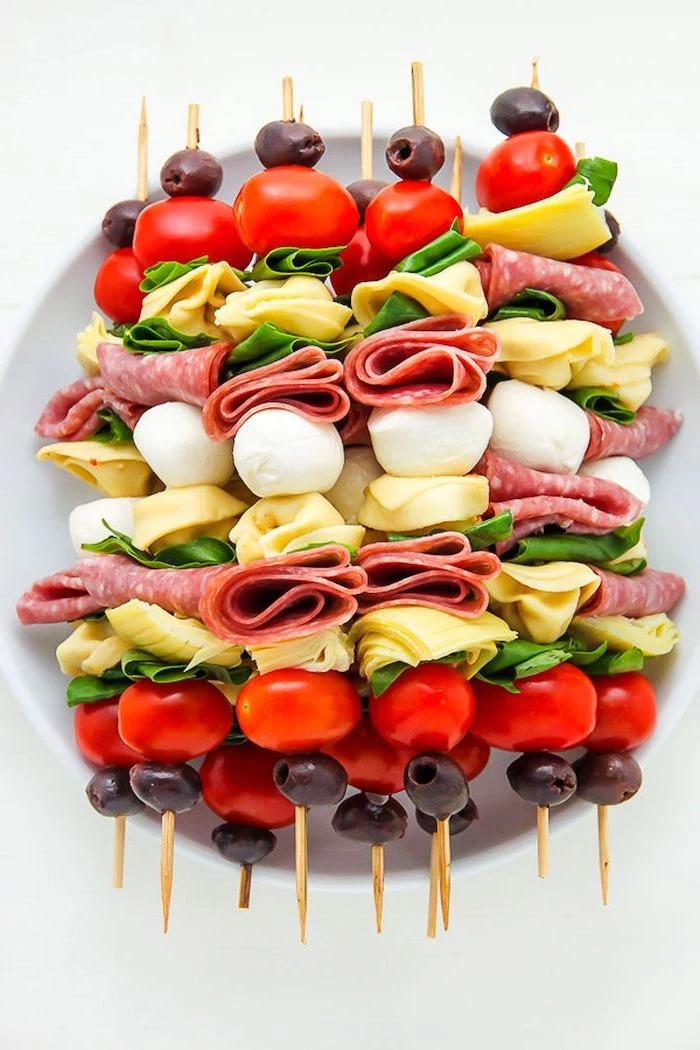
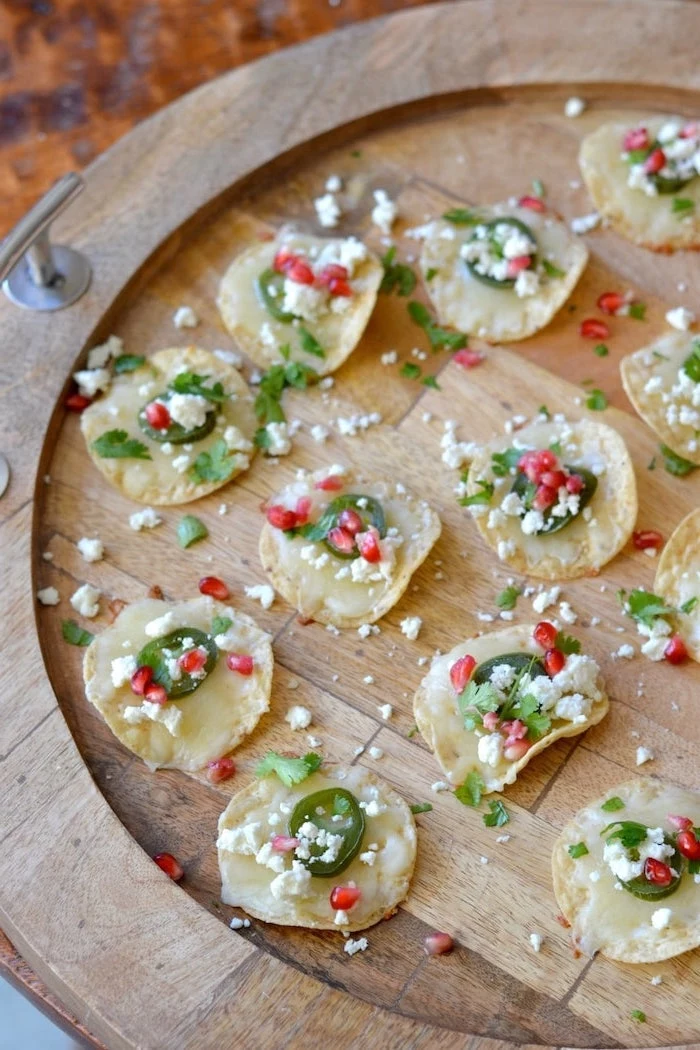
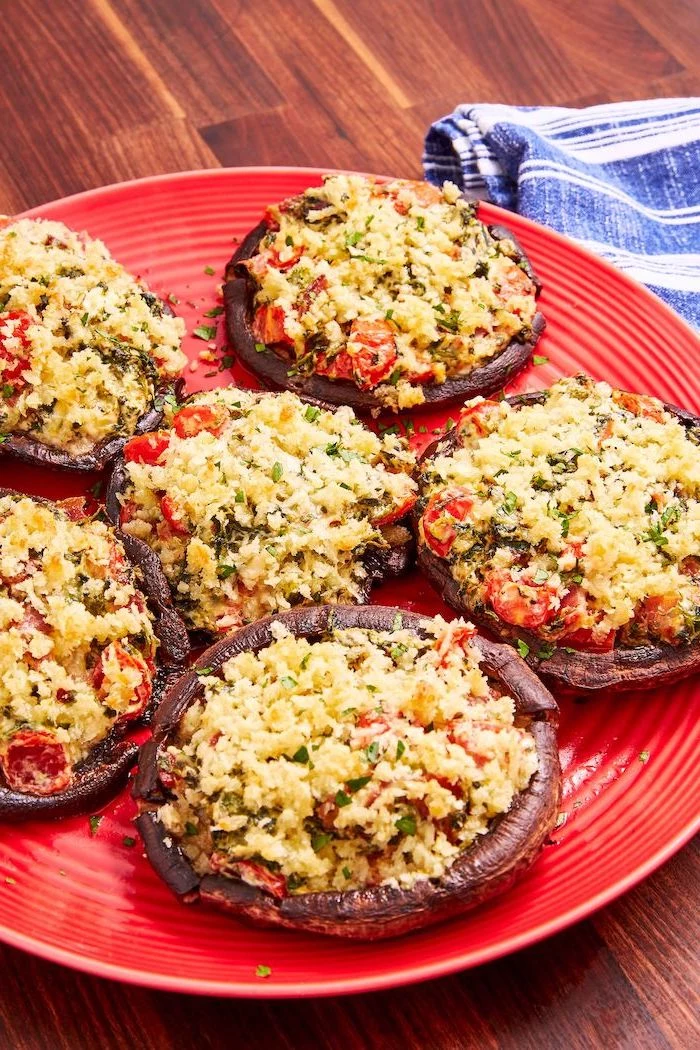
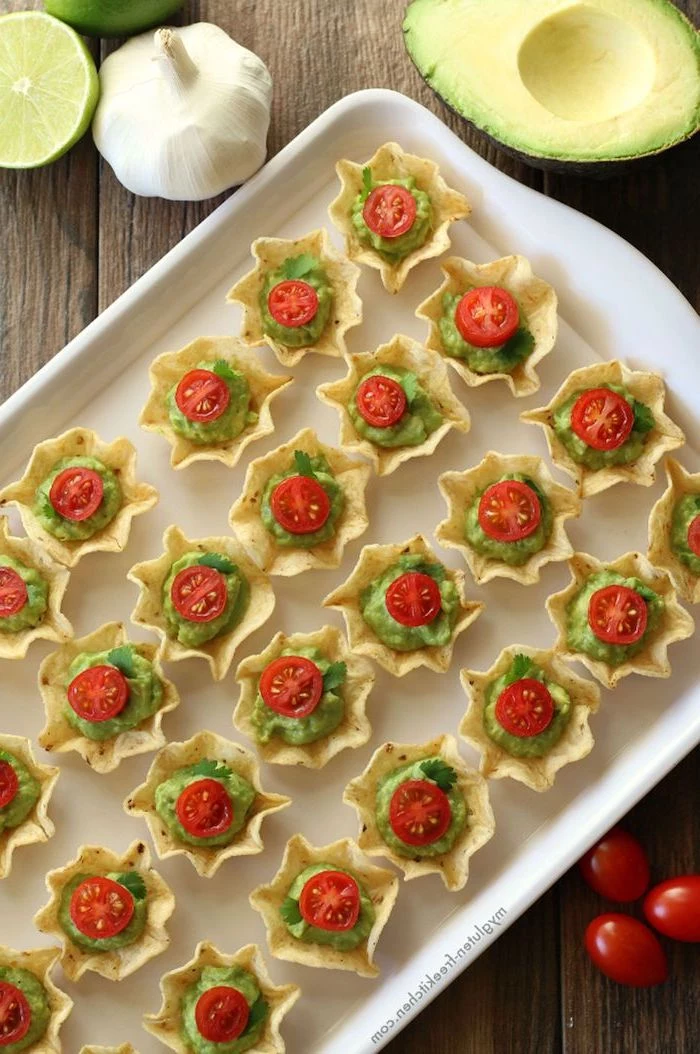
The One-Bite Wonder: For a stand-up cocktail party, aim for appetizers that can be eaten in a single, clean bite. This eliminates the need for plates and forks, freeing up your guests’ hands to hold their drinks and mingle. Think caprese skewers, stuffed mushrooms, or shrimp toasts. It’s an elegant solution that simplifies both eating and cleanup.
A study by Cornell University’s Food and Brand Lab found that the first food a person eats can influence their perception and enjoyment of the entire meal that follows.
This is why appetizers are so crucial. They aren’t just filler; they are the opening act that sets the stage. A thoughtful, delicious first bite tells your guests they’re in for a special experience, making them feel welcomed and cared for from the moment they arrive.

Elevate your serving game by playing with temperature and texture. Place a hot, creamy spinach-artichoke dip next to a bowl of ice-cold, crisp radishes and cucumbers for dipping. The contrast is surprising and delightful. Similarly, a warm, gooey baked brie topped with crunchy, candied pecans offers a multi-sensory experience in every scoop.
Puff Pastry: Flaky, buttery, and rich. Ideal for vol-au-vents, cheese straws, or wrapping sausages. Brands like Dufour are all-butter and deliver incredible flavor.
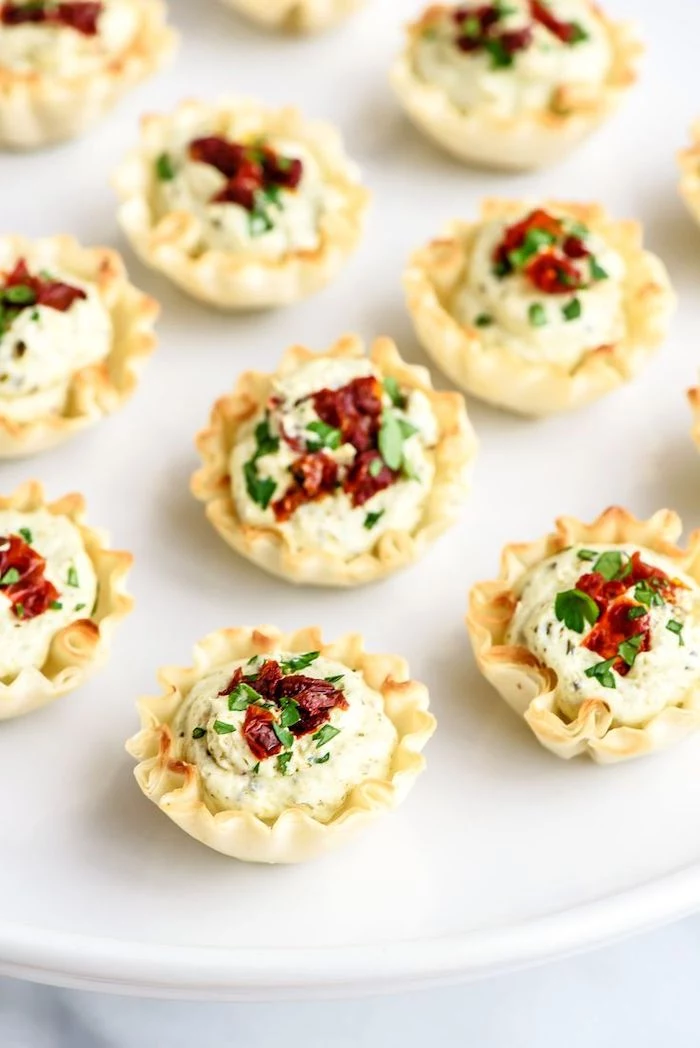
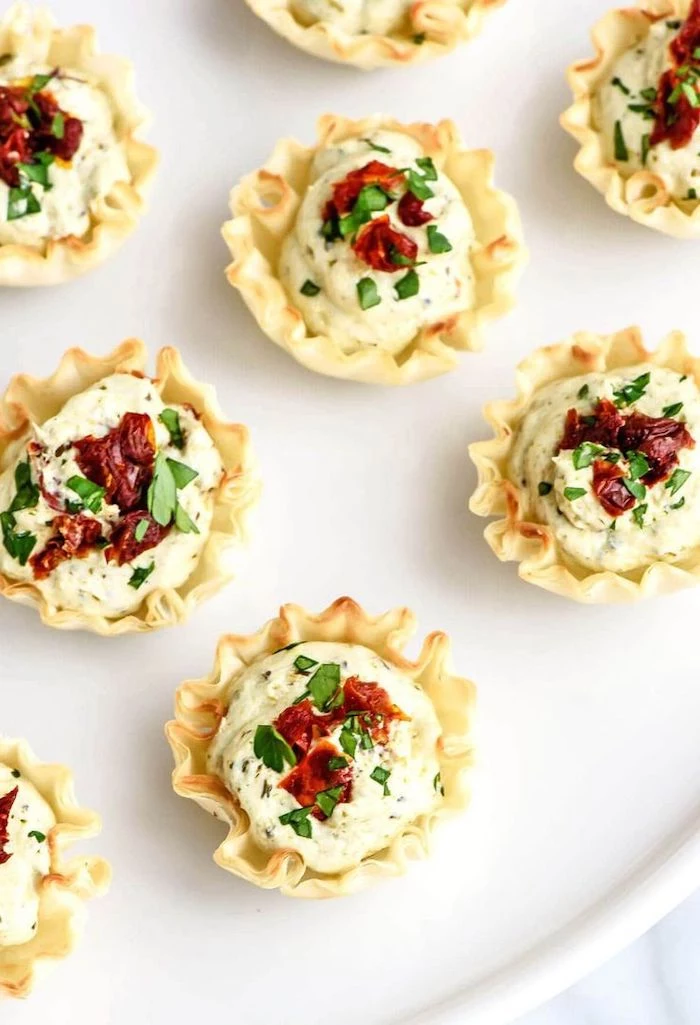
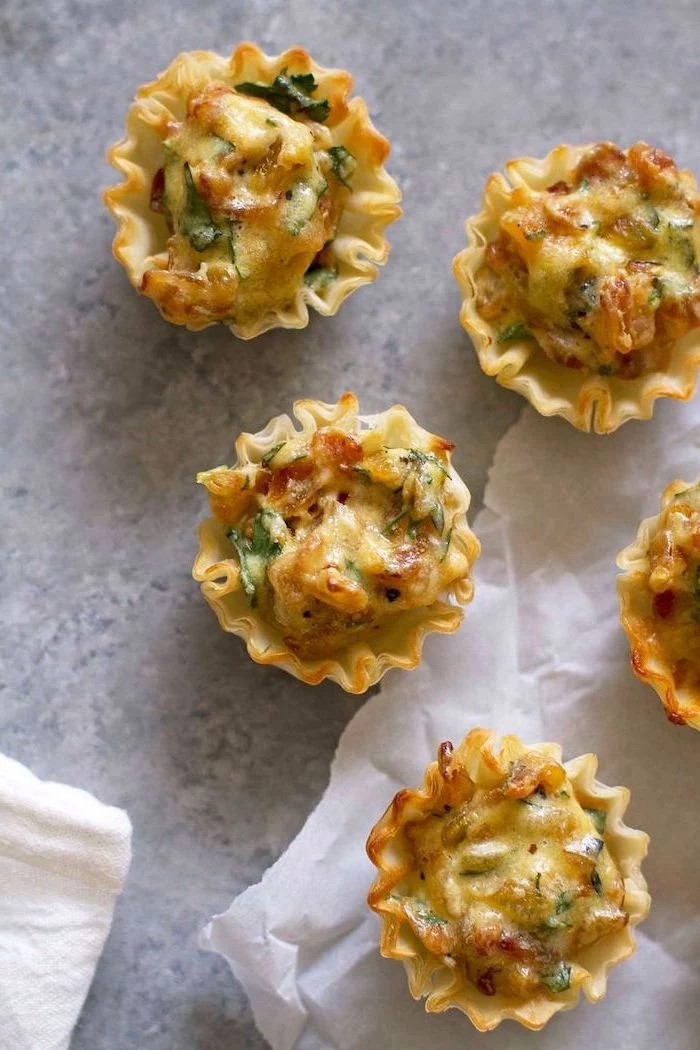
Phyllo Dough: Paper-thin, creating an shatteringly crisp texture when layered and baked. Perfect for savory triangles like spanakopita or delicate tartlet shells.
For impressive height and a decadent feel, choose puff pastry. For a lighter, crunchier result, phyllo is your answer.

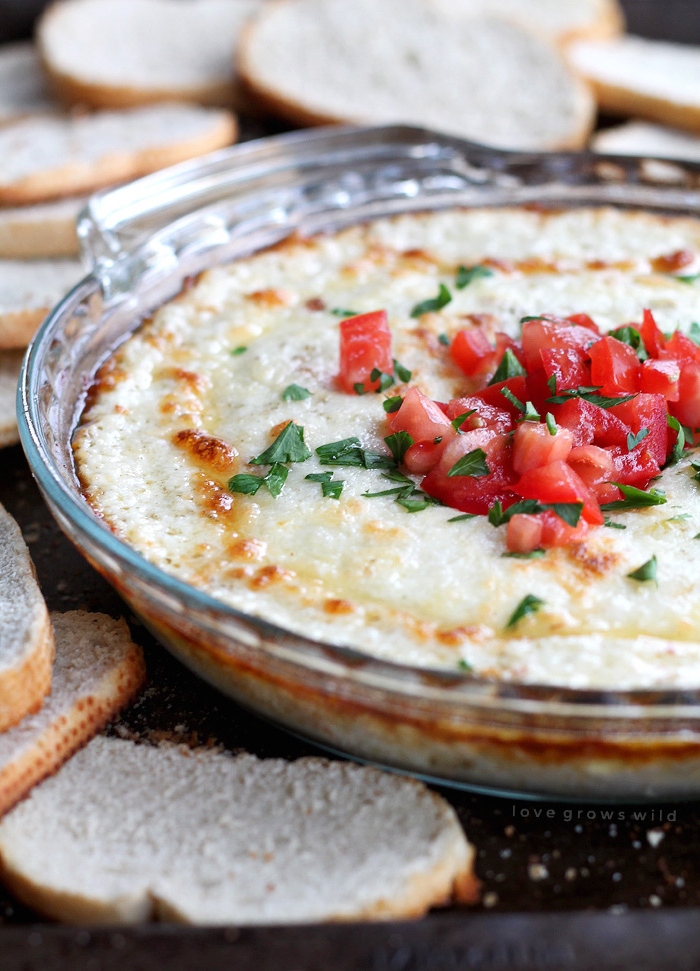
Don’t underestimate the power of a simple, high-quality finishing salt. A tiny sprinkle just before serving can transform an appetizer from good to great. The key is texture: Use large, flaky salts like Maldon or Jacobsen Salt Co. Their delicate crunch adds a final layer of texture and a clean, briny pop of flavor that enhances everything from deviled eggs to roasted vegetable skewers.


Think beyond the standard sour cream or yogurt. A versatile dip base can be your greatest ally. Start with a block of softened cream cheese (like classic Philadelphia) or creamy goat cheese and consider it a blank canvas.
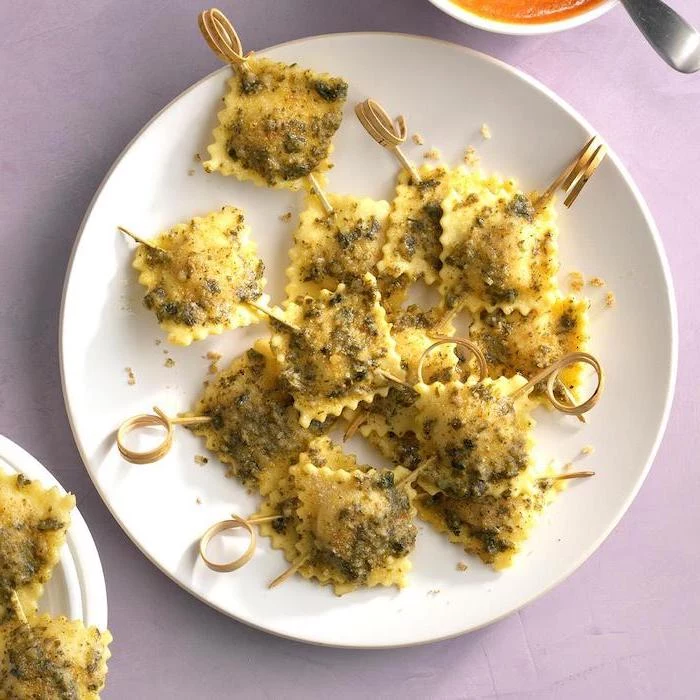
- Blend with jarred pesto and a squeeze of lemon.
- Mix with sundried tomato paste and fresh basil.
- Whip with honey, chopped walnuts, and a pinch of cinnamon for a sweet and savory option.

- Finely chopped fresh chives or parsley
- A swirl of high-quality balsamic glaze
- A sprinkle of smoked paprika or zesty lemon zest
These three simple garnishes can elevate almost any savory appetizer. Keep them on hand to add a pop of color, a touch of acidity, or a smoky note right before serving. It’s the fastest way to make even a simple dip look professionally styled.
The term ‘canapé’ is French for ‘sofa.’ The culinary term originated from the idea that the topping is ‘sitting’ on the bread or cracker base, much like a person on a couch.
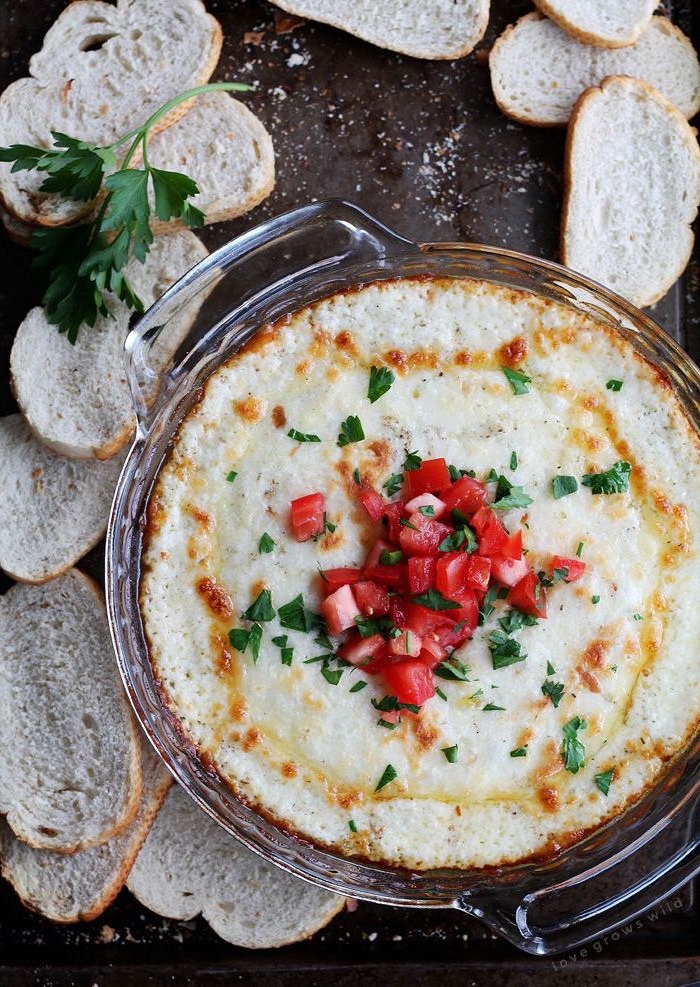
How do you keep hot dips perfectly warm throughout the party without a bulky slow cooker?
A cast-iron skillet is your best friend. Heat your dip in a small (6-8 inch) cast-iron skillet in the oven. When you take it out, the skillet will retain its heat for a remarkably long time, keeping the dip bubbly and warm on the serving table for at least 30-45 minutes. Just be sure to place it on a sturdy trivet and warn guests that the handle is hot!
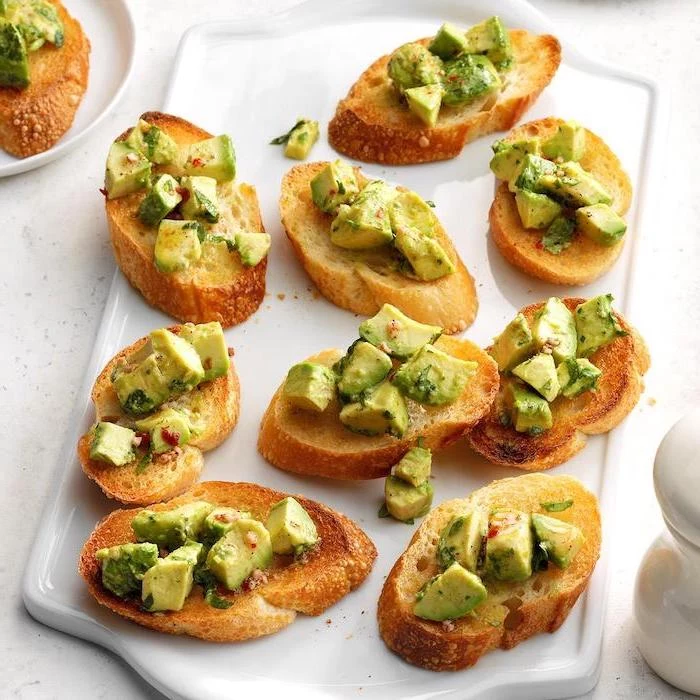
For an appetizer that feels luxurious but is secretly budget-friendly, try whipped ricotta. Simply take a container of whole-milk ricotta, whip it with an electric mixer until light and airy, and season with salt, pepper, and a drizzle of good olive oil. Serve in a beautiful bowl with a sprinkle of red pepper flakes, alongside toasted baguette slices. It feels utterly gourmet.
Your freezer is your secret prep-kitchen. Many appetizers can be fully assembled and frozen, ready to be baked from frozen when guests are on their way.
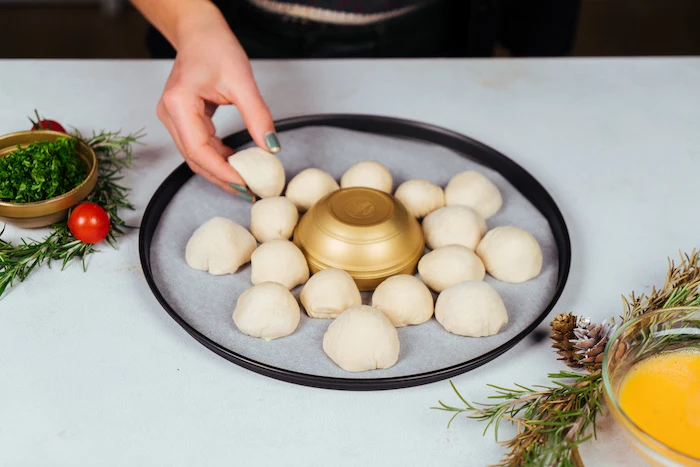
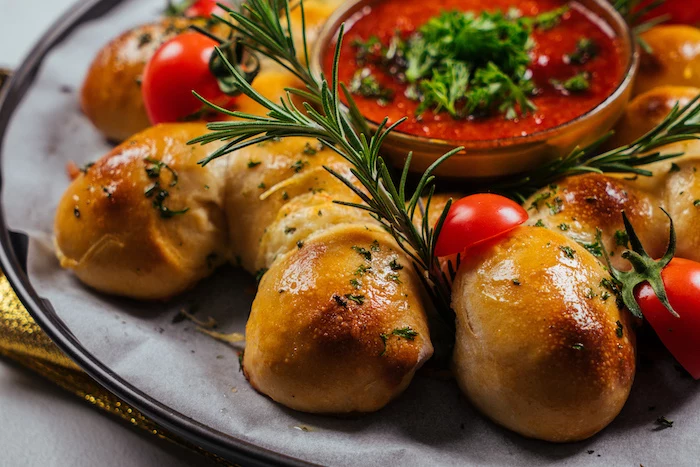
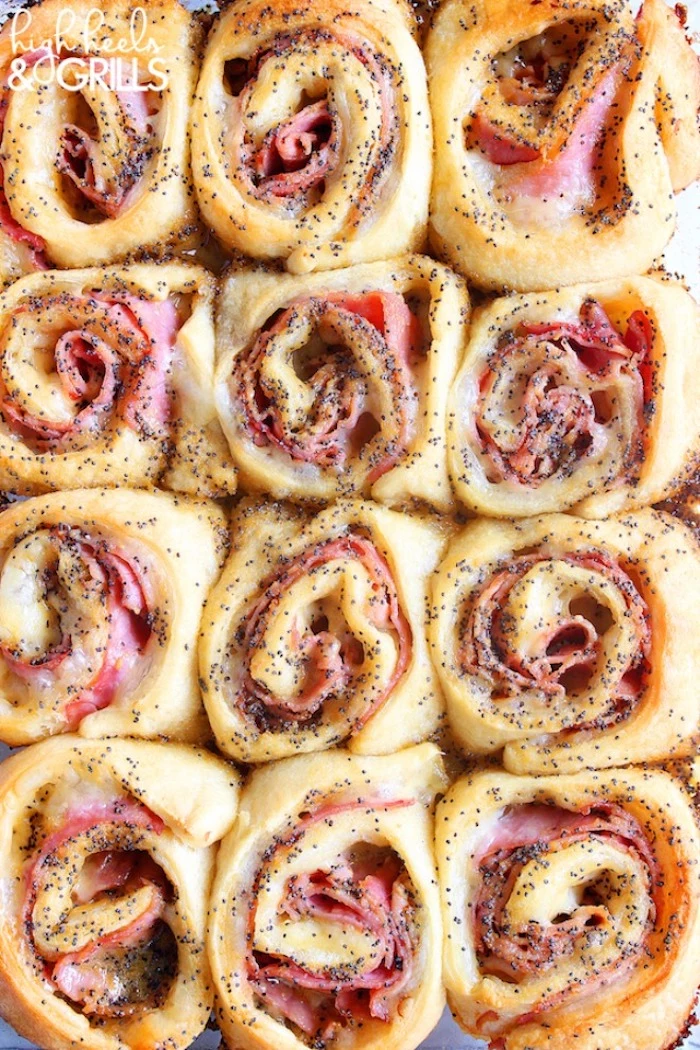
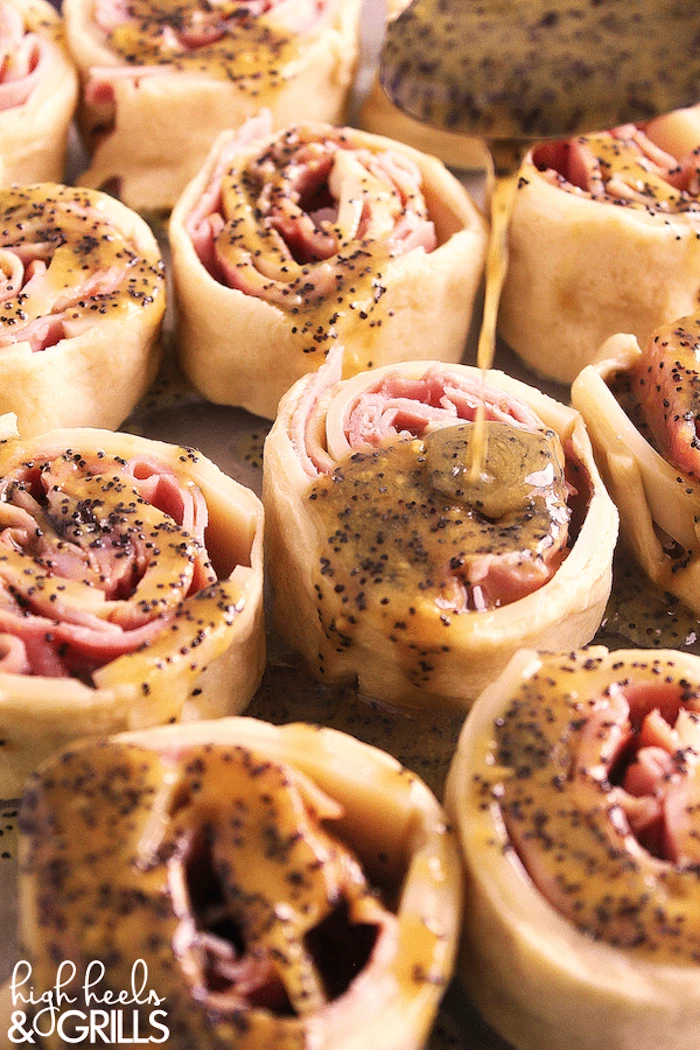
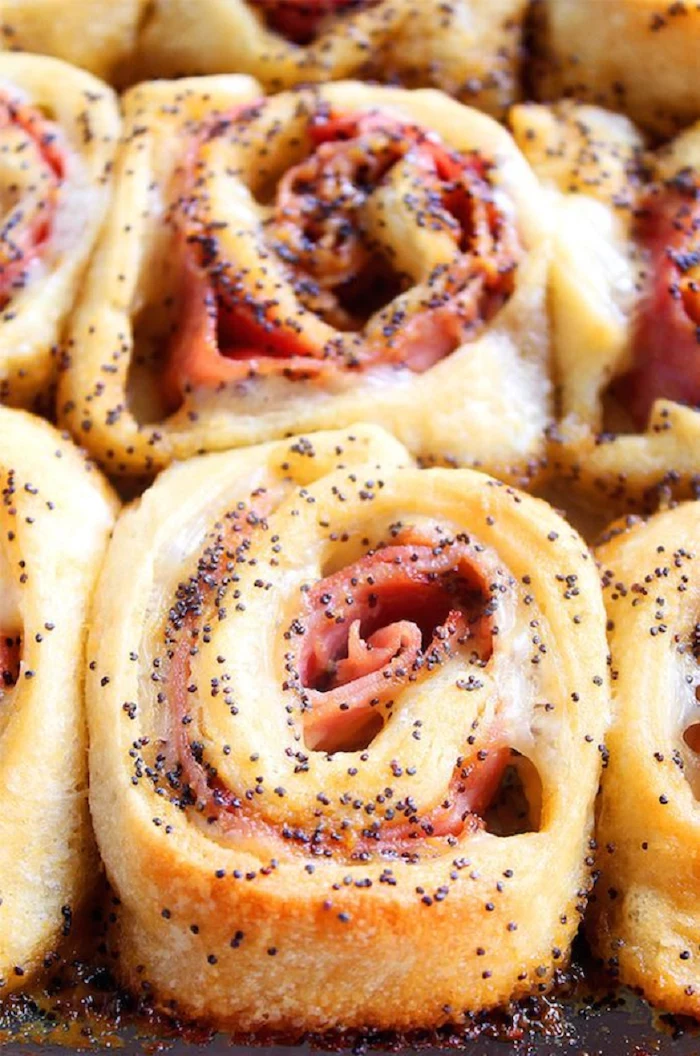
- Sausage Rolls: Assemble with puff pastry, slice into individual portions, and freeze on a baking sheet before transferring to a bag. No need to thaw before baking.
- Stuffed Mushrooms: Prepare and stuff the mushrooms, then freeze solid. Bake directly from frozen, adding a few extra minutes to the cooking time.
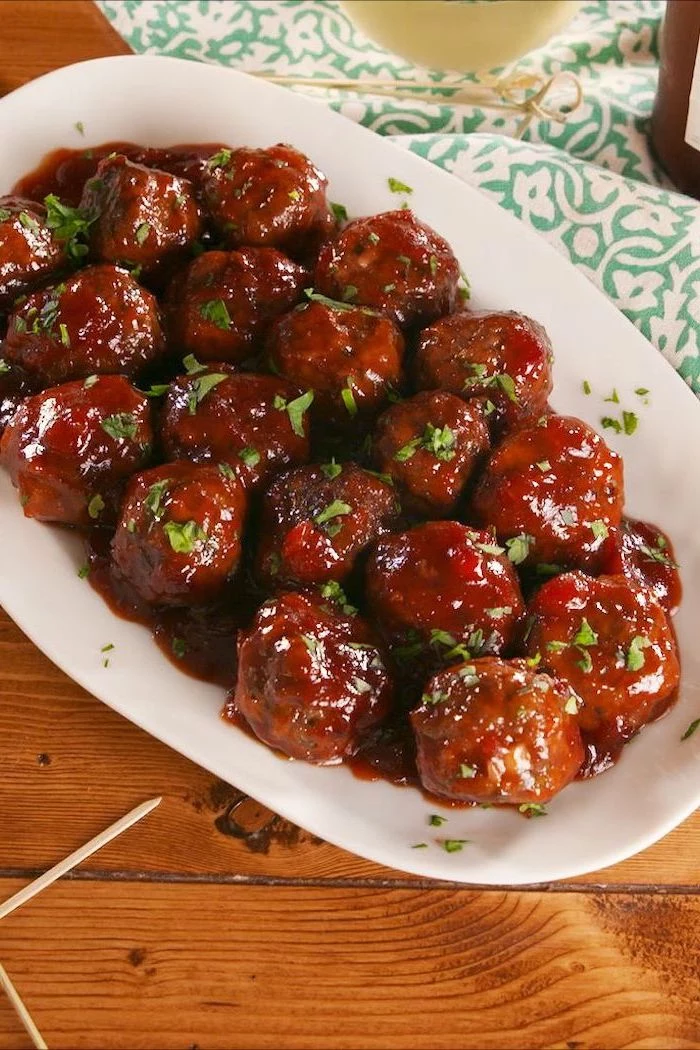
- Mini Meatballs: Cook, cool, and freeze. Reheat gently in your favorite sauce on the stovetop.
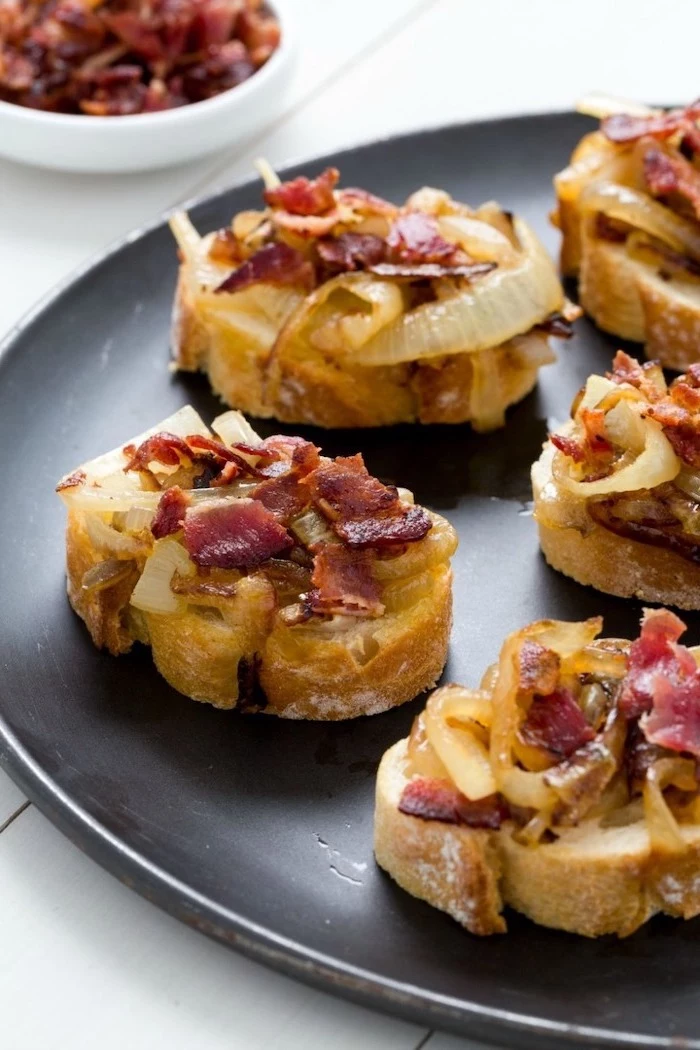
The secret to non-greasy bacon-wrapped anything? Par-cook the bacon. Before wrapping your dates, shrimp, or water chestnuts, lay the bacon strips on a wire rack set over a baking sheet. Bake at 400°F (200°C) for about 8-10 minutes. The bacon will still be pliable, but much of the fat will have rendered out. Blot it dry, wrap your items, and finish cooking. The result is perfectly crisp bacon without the grease slick.
Create a stunning ‘scent-scape’ by simmering a pot of mulling spices on the stove an hour before guests arrive. A simple mix of cinnamon sticks, whole cloves, star anise, and orange peel in a small saucepan of water will fill your home with an irresistibly festive and welcoming aroma. It’s a sensory detail that sets a cozy, celebratory mood before a single appetizer is served.

According to the Natural Resources Defense Council, food waste increases by an estimated 25% during the holiday season.
Plan your appetizers with versatility in mind. The pesto for your crostini can be thinned out for a pasta salad the next day. The leftover cheese from your board can be grated into a morning omelet. Thinking about an ingredient’s ‘next life’ not only reduces waste but also simplifies your post-party cooking.


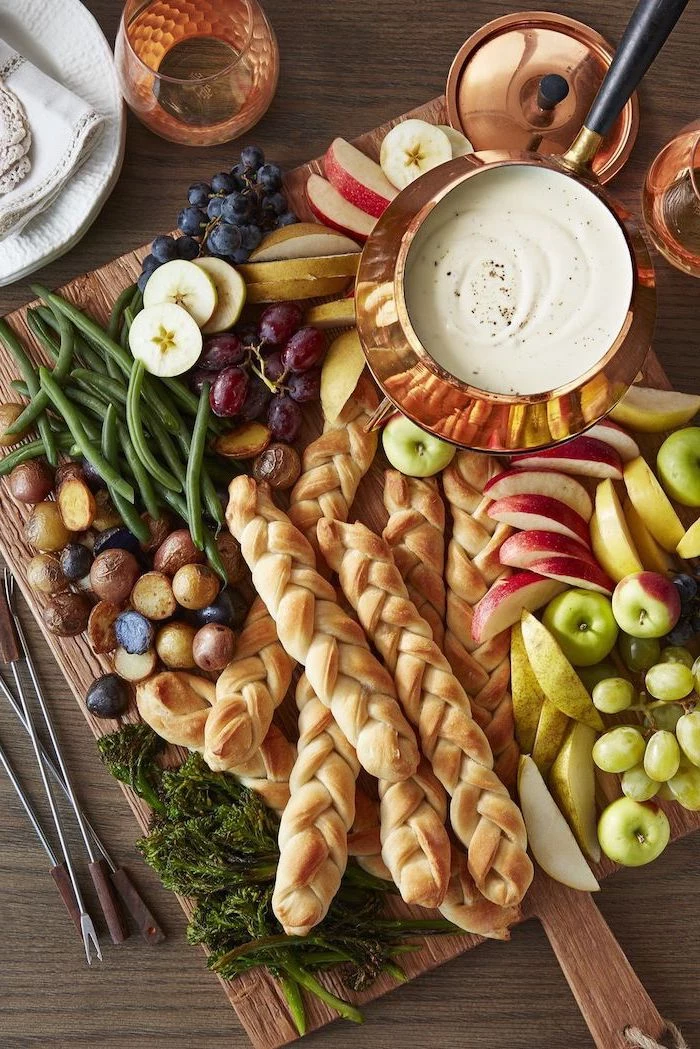
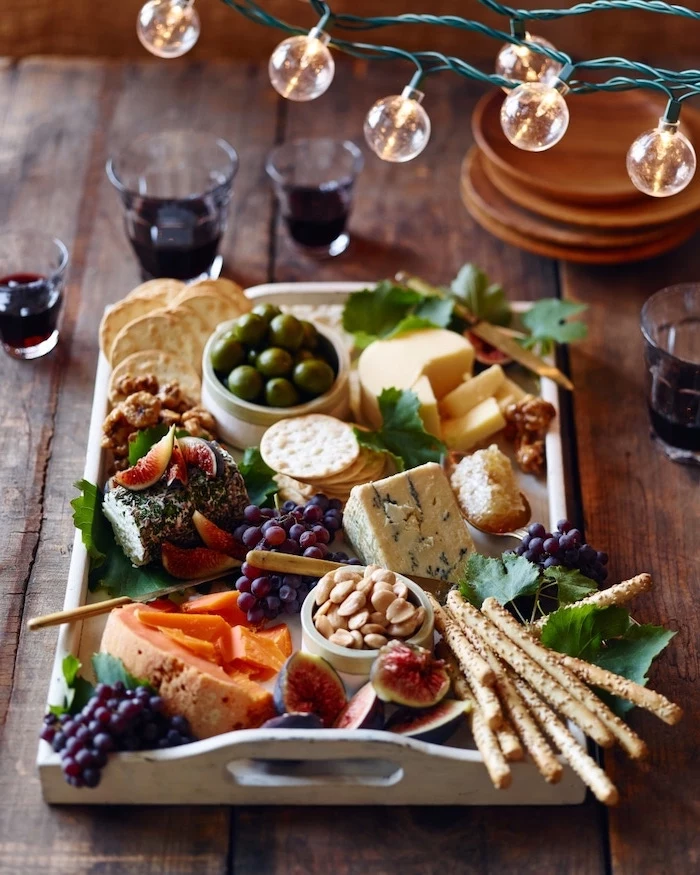
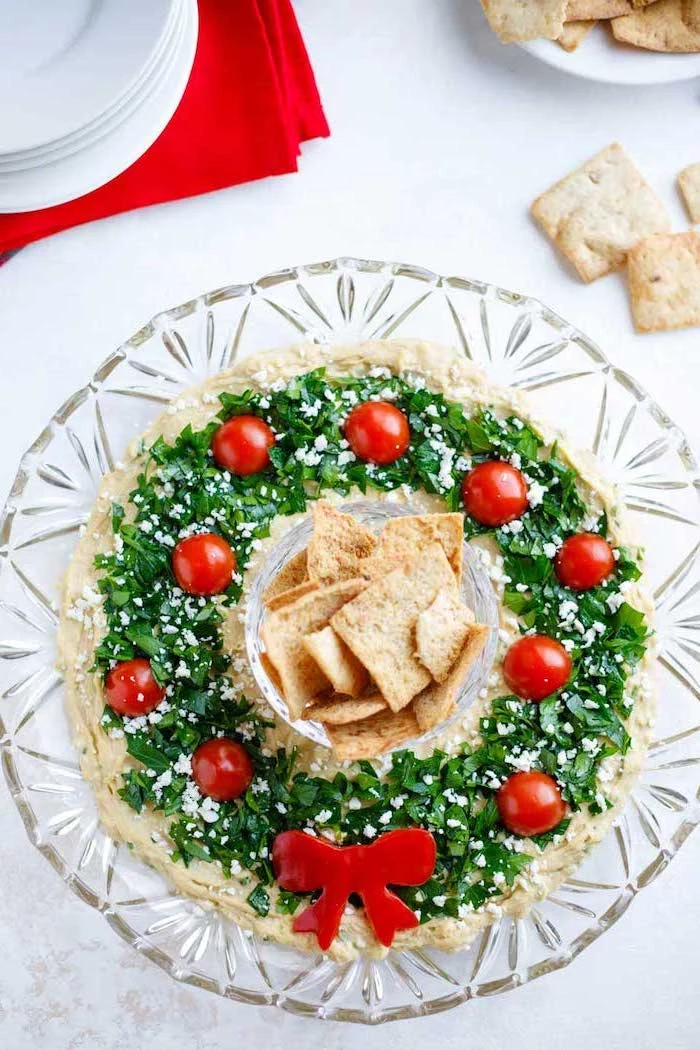
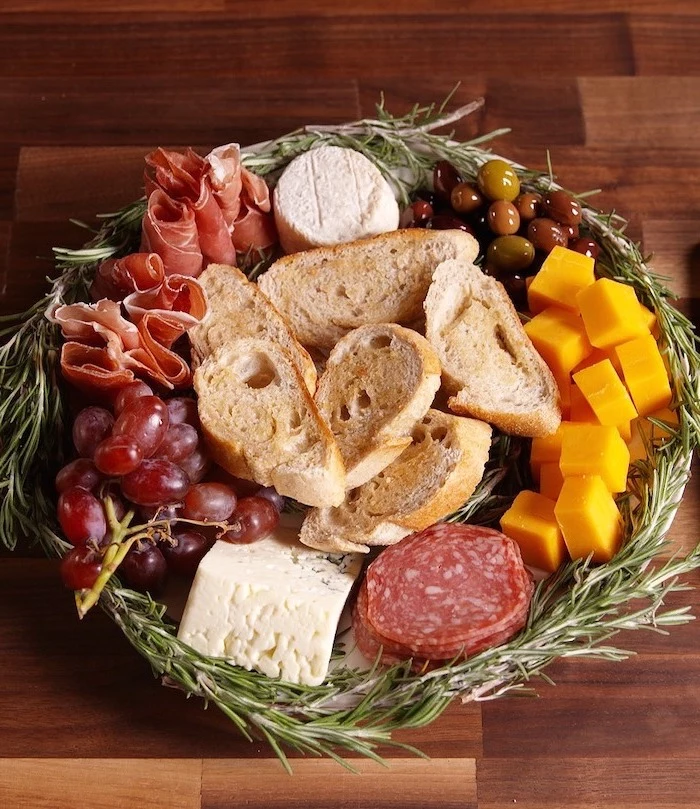
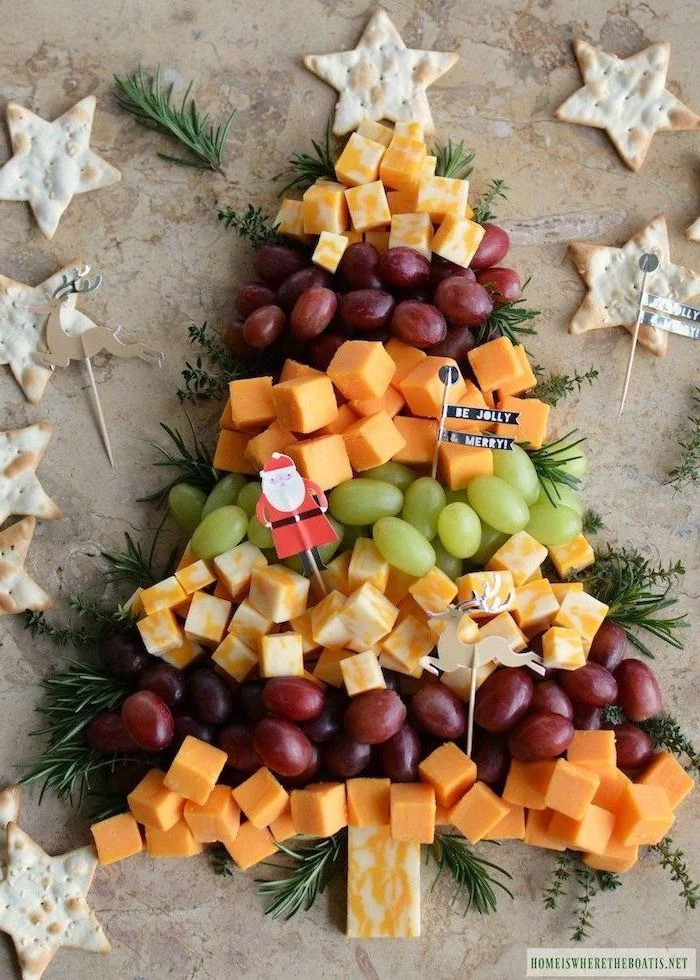
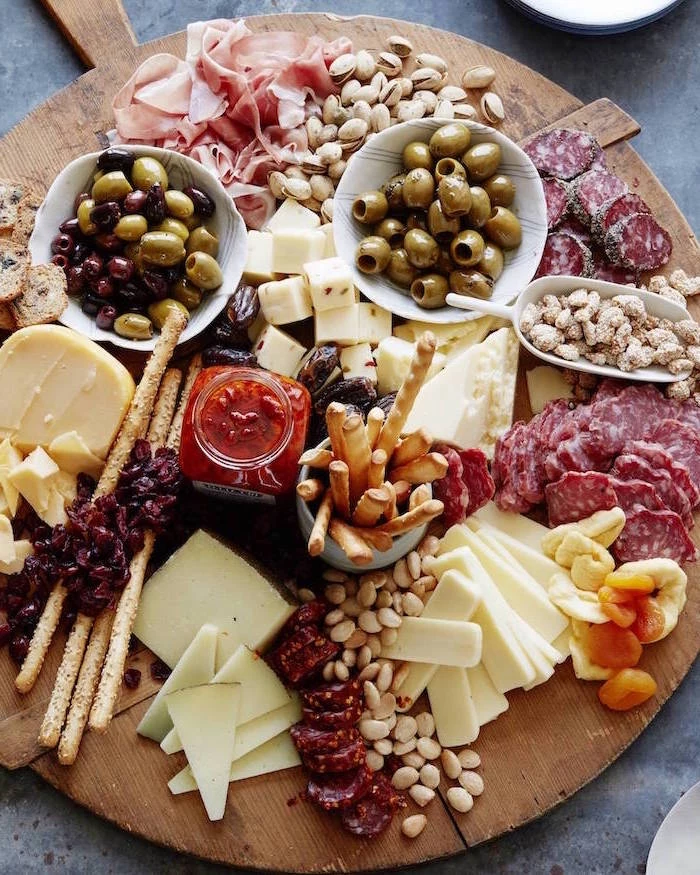
A beautiful grazing board is all about creating pathways for the eye and hand. Instead of scattering items randomly, create ‘rivers’ of crackers and bread that flow between ‘pools’ of dips and ‘mounds’ of cheese and charcuterie. Use small bowls like those from brands like Heath Ceramics or even simple Ramekins to contain wet items like olives and jams, adding height and preventing flavors from mingling.
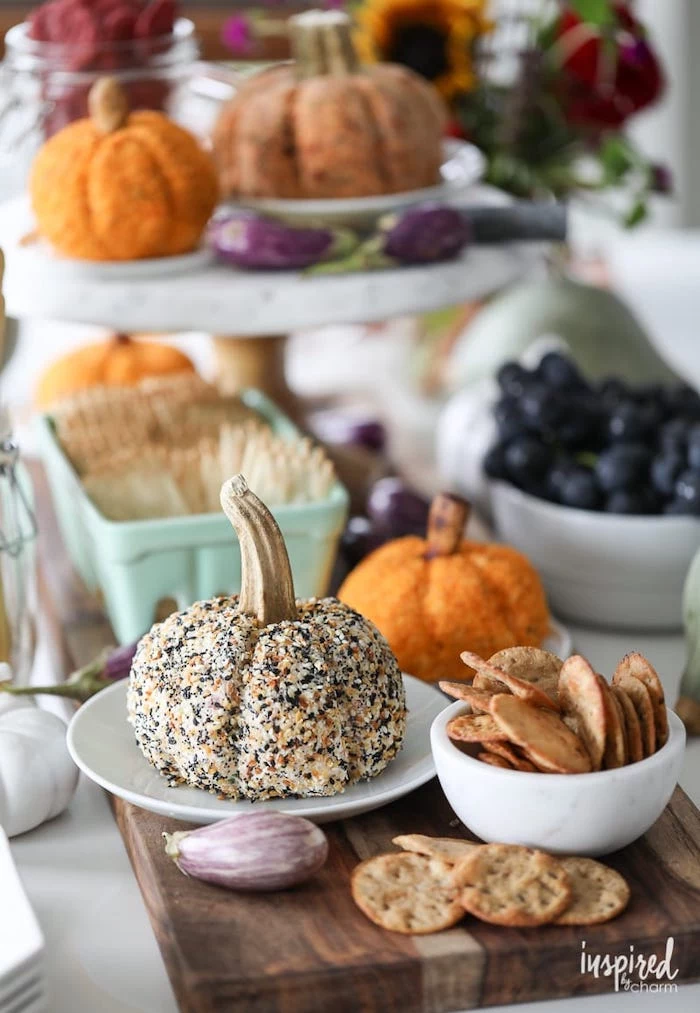
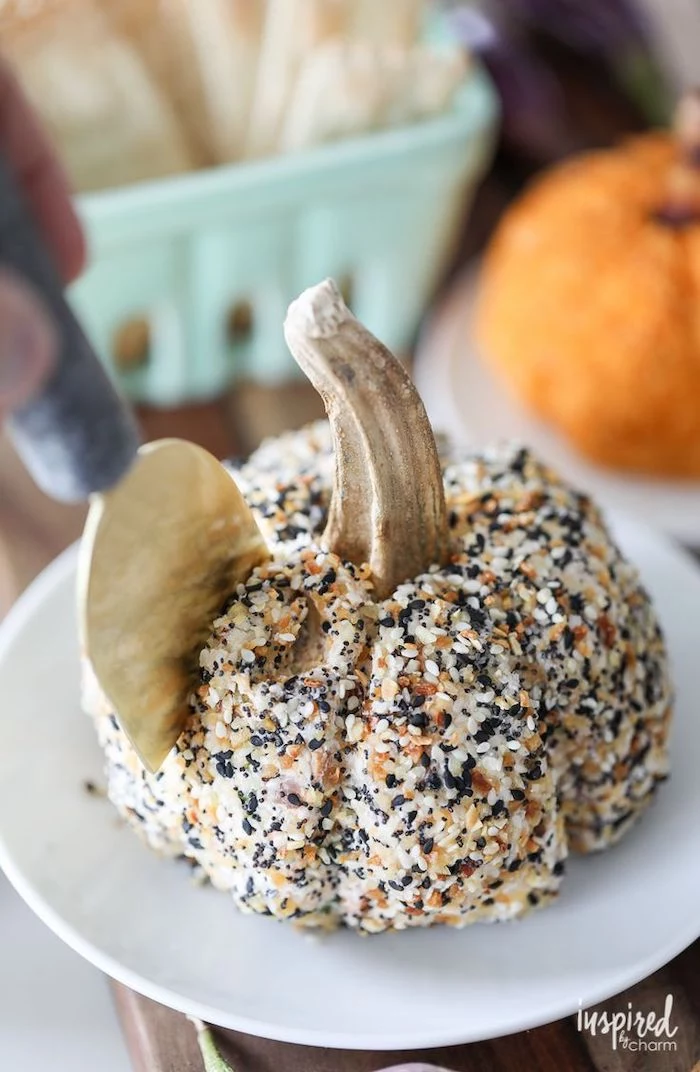
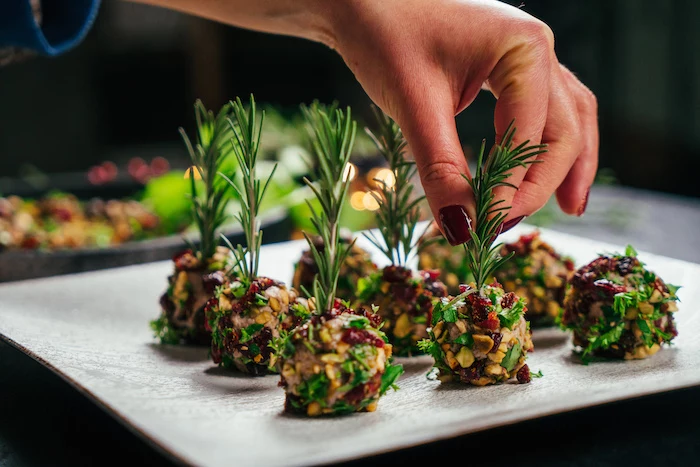
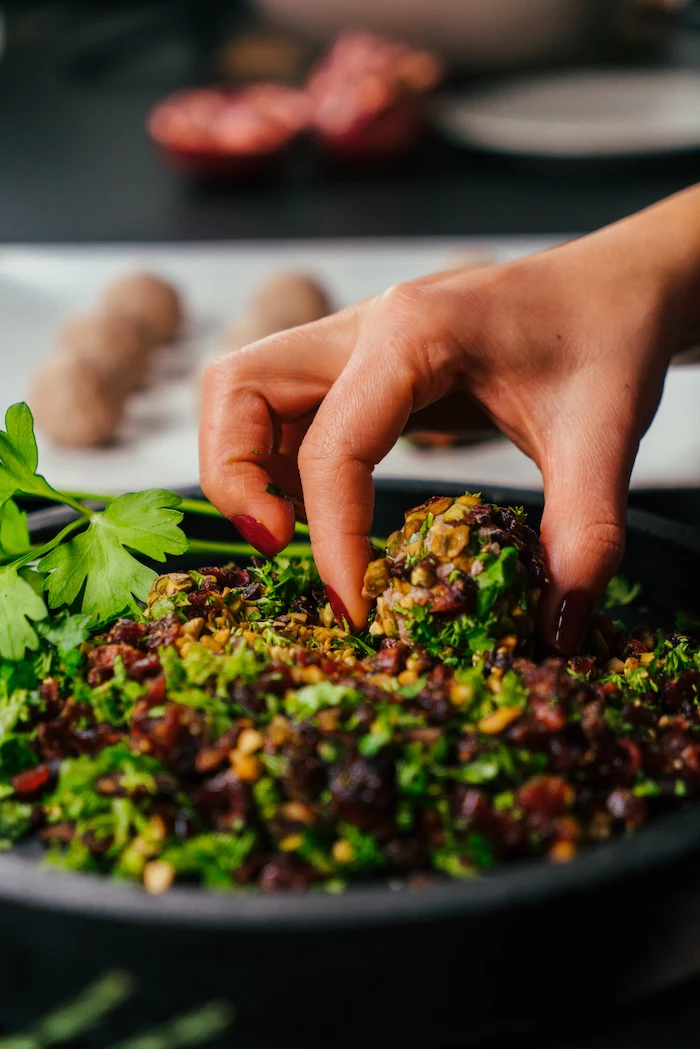
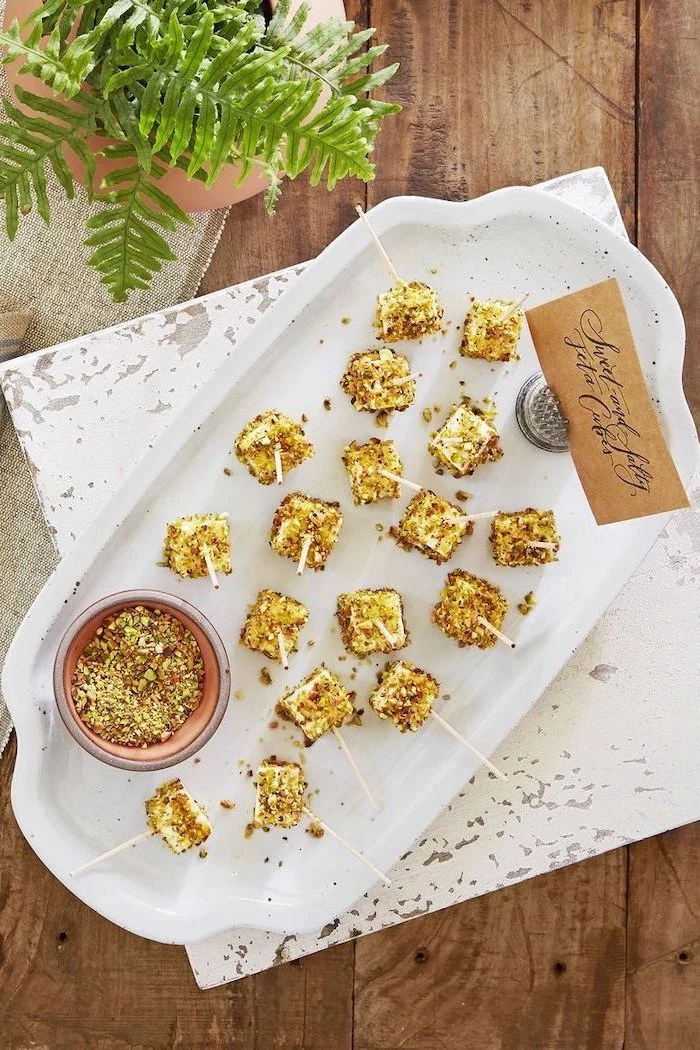
Tired of the same old cheese ball?
Give it a modern twist. Instead of a single large ball, form the cheese mixture into several mini-balls (truffle-sized) and roll them in different coatings. Try finely chopped pistachios, toasted sesame seeds with black pepper, or a mix of dried cranberries and parsley. It looks more elegant and allows guests to sample multiple flavors.
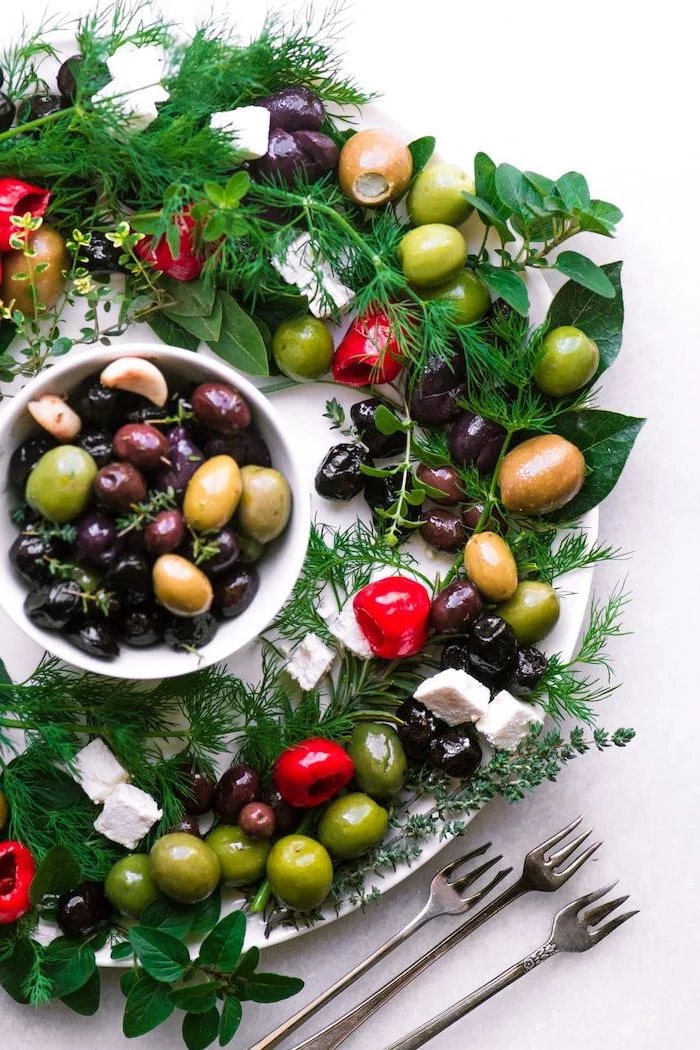
Don’t just open a jar of olives. Give them a 10-minute upgrade that will stun your guests. Gently warm a cup of mixed olives (like Castelvetrano and Kalamata) in a small pan with a generous glug of extra virgin olive oil. Add a few wide strips of orange or lemon peel and a sprinkle of red pepper flakes. Serve warm. The infused oil and bright citrus notes completely transform this simple staple.
- It adds a subtle, deep layer of flavor.
- It makes store-bought items taste homemade.
- It looks incredibly professional when drizzled.
The trick? Infused oil. Gently warm olive oil with a few garlic cloves and a sprig of rosemary for 15 minutes. Let it cool, then discard the solids. This fragrant oil can be brushed on bread, drizzled over dips like hummus, or used to toss roasted nuts. It’s a two-minute prep for a five-star flavor boost.
The ‘butter board,’ a viral trend, is a brilliant and easy holiday appetizer. Spread softened, high-quality butter (like Kerrygold or a cultured butter) across a wooden board or platter. Use the back of a spoon to create artistic swoops and swirls. Top with flaky salt, lemon zest, edible flowers, hot honey, or chopped nuts. Serve with warm, crusty bread. It’s visually stunning and incredibly simple.
Important consideration: Thoughtful drink pairings aren’t just for wine. For guests who aren’t drinking alcohol, offer a sophisticated alternative. A sparkling cranberry-lime spritzer or a pitcher of iced tea infused with fresh mint and ginger complements a wide range of savory appetizers and makes everyone feel included in the celebration.

When planning, it’s wise to have at least one appetizer that caters to multiple dietary needs simultaneously. A great example is a platter of colorful endive spears filled with an herbed white bean dip. It’s naturally gluten-free, dairy-free, and vegan, yet feels elegant and satisfying for everyone. No special labels needed, just delicious food.

Certain tools truly earn their keep during party prep. A good-quality mandoline slicer (like a Benriner) makes uniformly thin potato chips or cucumber slices in seconds. A small offset spatula is invaluable for perfectly spreading dips or frosting canapés. And don’t forget a ‘spider’ strainer for safely fishing out fried items or blanched vegetables from hot oil or water. They make the work faster, safer, and more professional.


