I built my first gingerbread house more than twenty years ago, and let me tell you, it was a spectacular disaster. The walls buckled, the roof slid right off, and the whole thing just… slumped into a spicy, sticky puddle. I thought I’d followed the magazine recipe to the letter. But that failure taught me the single most important lesson in this game: you’re not just baking a cookie. You’re engineering a structure.
That soft, chewy gingerbread you dunk in your tea? That’s not what we’re using here. That’s a recipe for collapse. Over years of running a small bakery and teaching holiday classes, I’ve figured out the secrets to a gingerbread house that lasts. It’s more about chemistry and technique than just festive spirit.
This guide is everything I’ve learned, distilled down. We’re going way beyond a simple recipe to cover structural dough, construction-grade icing, and the assembly methods the pros use. My goal is to give you the confidence to build something beautiful that stands proud all season long.
Heads up: This is a multi-day project! But honestly, most of that is just waiting for things to chill and dry, I promise. As for cost, if you’re starting from scratch, expect to spend between $25 and $40 for all the ingredients. The biggest expenses are usually butter and spices, so check your pantry first!
Step 1: The Blueprint – Don’t Skip the Plan!
Every successful building project begins with a plan, and a gingerbread house is no different. Just jumping into baking without a solid template is probably the most common rookie mistake. A good template ensures all your pieces will actually fit together.
Making a Template That Works
First off, forget using regular printer paper. It gets flimsy, soaks up moisture from the dough, and is a general pain to work with. I always use something sturdier, like thin cardstock or an old manila folder. It’s rigid enough to guide your knife and won’t wilt on you.
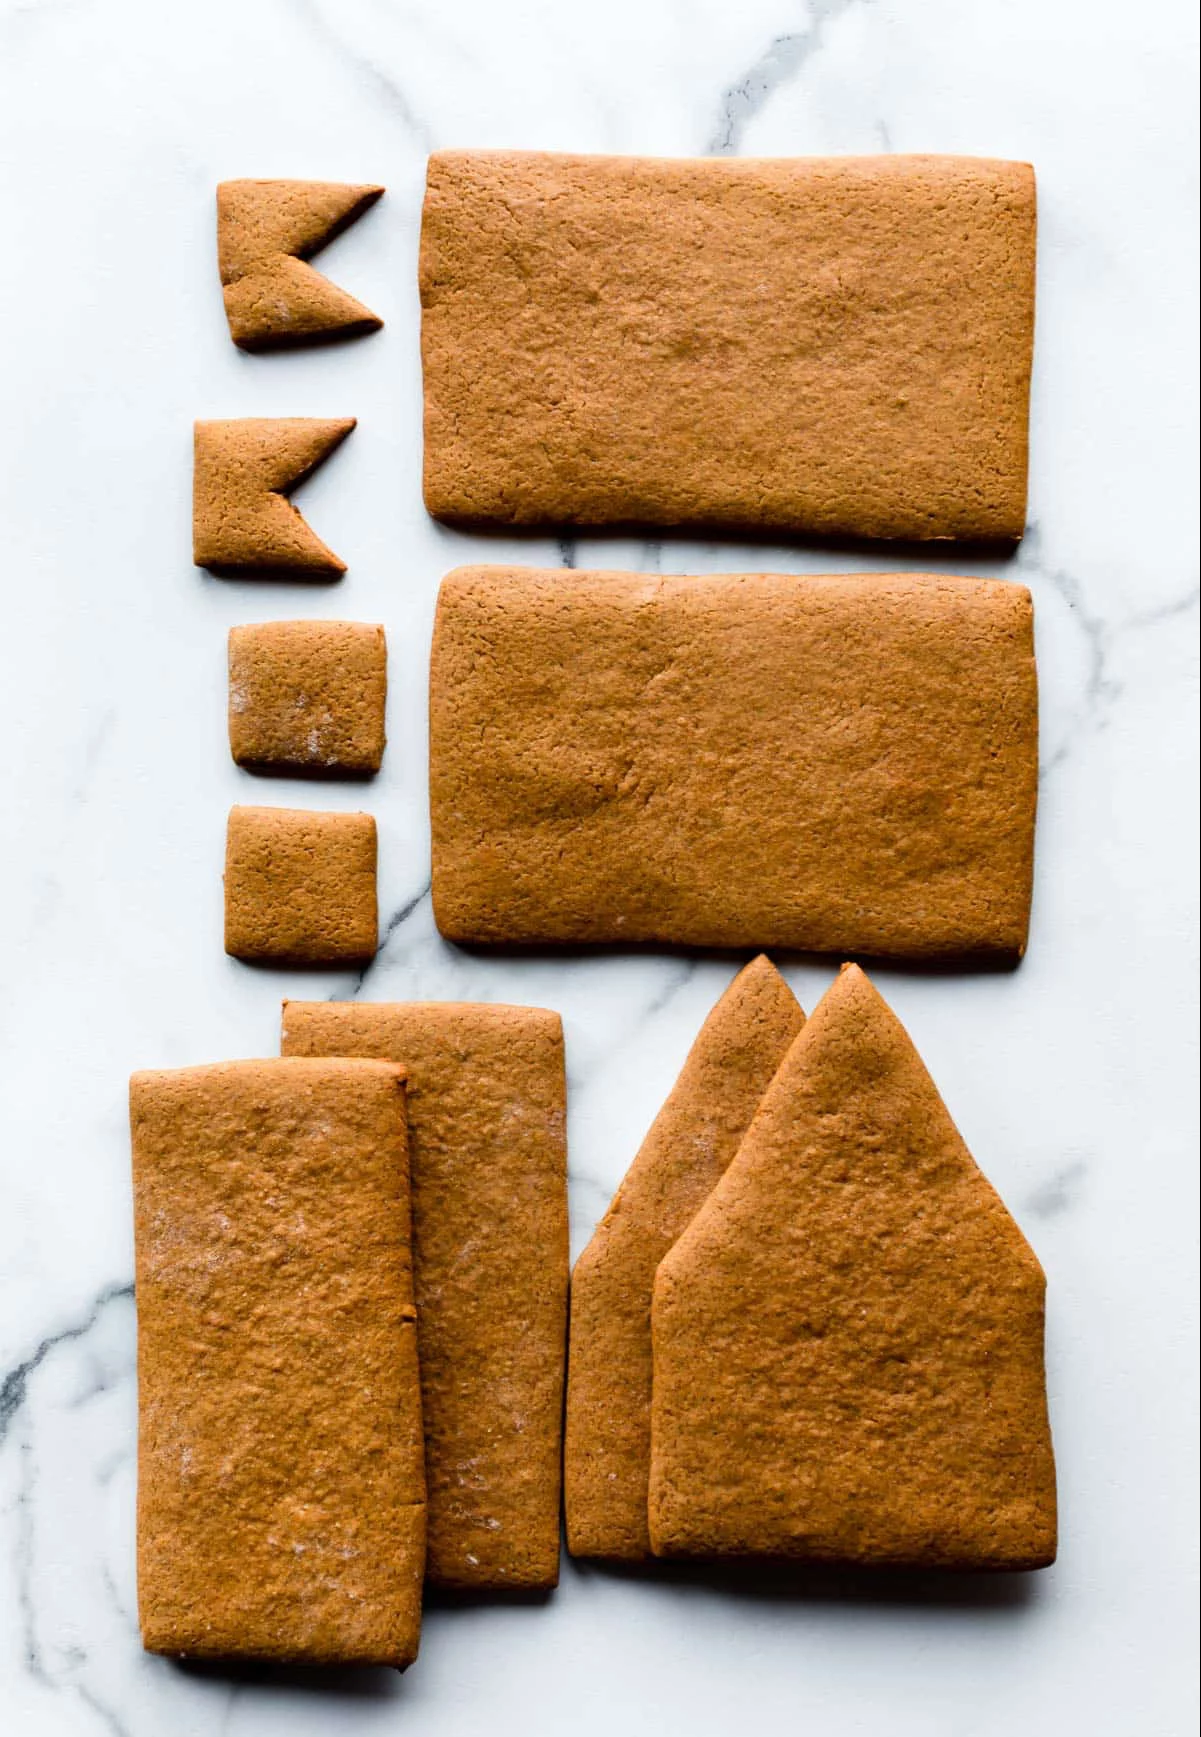
For a basic, no-fuss house, you’ll need six pieces:
Two identical side walls
Two identical end walls (the ones with the pointy gables)
Two identical roof panels
The measurements are where people get tripped up. Here’s a simple, reliable set of dimensions for a classic starter house:
Side Walls: 5 inches long by 3 inches high.
End Walls: 3 inches wide at the base, 3 inches high to where the roof starts, with a 45-degree peak on top.
Roof Panels: 5.25 inches long by 3.5 inches wide.
Why the different numbers? The roof panel needs to be a little longer than the side wall for a nice overhang, and the width of the roof panel needs to cover the angled slope of the end wall. I always sketch it out on paper first, double-checking the math before I cut the cardstock. A little ruler and a protractor are your best friends here.
Oh yeah, and before you move on, think about the details. Want windows? A chimney? Now’s the time to plan for them. Cut the windows directly out of your wall templates. A chimney is usually four small, separate pieces you build later. Planning this now is way easier than trying to carve into fragile, baked gingerbread.
Step 2: The Foundation – The All-Important Structural Dough
Okay, this is where the science kicks in. Structural gingerbread is basically a building material. It needs to be hard, flat, and resistant to humidity. That means we need a very specific kind of dough.
Why This Dough is Different
It all comes down to three things: leavening, fat, and moisture.
We use very little (or even zero) baking soda or powder. Why? Leaveners create air bubbles that make dough puff up and spread. That’s great for soft cookies, but a total nightmare for flat, straight walls. We want clean, sharp edges, not puffy distortions.
Next is fat. Butter adds flavor and tenderness, but for our purposes, we only use enough to bind the dough. Too much fat causes spreading and makes the final product brittle. Some old-school European recipes even call for shortening for a rock-hard finish.
Finally, moisture. The secret to a durable panel is low moisture. We achieve this with our ingredients and, more importantly, a long, slow bake time. Molasses gives it that classic color and flavor, but it’s also a humectant, meaning it attracts moisture from the air. We counteract that by essentially drying the dough out in the oven until it’s a hard, stable slab.
A Structural Gingerbread Recipe You Can Trust
This is my go-to recipe. It makes strong, flat pieces that smell absolutely amazing. I really recommend using a kitchen scale for this; it’s so much more accurate than measuring cups.
Ingredients:
6 cups (720g) all-purpose flour
1 teaspoon (6g) salt
1 teaspoon (4g) baking soda
4 teaspoons (8g) ground ginger
4 teaspoons (8g) ground cinnamon
1 teaspoon (2g) ground cloves
1 cup (227g) unsalted butter, softened
1 cup (200g) packed dark brown sugar
1 large egg
1 cup (340g) unsulfured molasses
The Pro Mixing Method
How you mix the dough actually matters. You’re trying to control gluten development, because over-mixing creates a tough dough that can shrink or warp in the oven.
1. Dry First: In a big bowl, whisk together the flour, salt, baking soda, and all the spices. This is a simple step people skip, but it prevents getting a random mouthful of pure cinnamon later.
2. Cream Butter & Sugar: In a separate bowl with a stand mixer (or hand mixer), beat the softened butter and brown sugar for about 2-3 minutes on medium. You want it creamy, but not light and fluffy like you would for a cake. We’re not trying to whip in a bunch of air.
3. Add Wet Ingredients: Beat in the egg until it’s just mixed. Then, pour in the molasses and mix on low until it’s smooth. Scrape down the sides of the bowl to get everything incorporated.
4. Combine: On the mixer’s lowest speed, add the dry ingredients in about three batches. Mix only until the last streaks of flour disappear. Seriously, don’t overmix. The dough will be soft and sticky.
5. Divide and Chill: Plop the dough onto your counter, divide it in half, and shape each half into a flat disk about an inch thick. (Pro tip: a disk is way easier to roll out later than a ball). Wrap each disk tightly in plastic wrap.
And now, the most important step: CHILL THE DOUGH. It needs at least 3 hours in the fridge, but overnight is even better. This solidifies the fat, which is the key to preventing spread in the oven. Don’t skip this!
Rolling, Cutting, and Baking to Perfection
1. Roll it Out: I like to roll my dough directly on a sheet of parchment paper. It means I can slide the whole thing onto a baking sheet without stretching my carefully cut shapes. Roll it to a consistent 1/4-inch thickness. You can buy rolling pin guides, or just use two 1/4-inch square wooden dowels from a hardware store as rails on either side of your dough.
2. Cut Your Shapes: Place your cardstock templates on the dough and use a sharp paring knife or a pizza cutter to trace them. A pizza cutter is fantastic for the long, straight lines. Peel away the excess dough around your shapes. You can ball that up, re-chill it, and re-roll it.
3. The Pre-Bake Chill: This is a pro trick. Slide the parchment paper with your cut pieces onto a baking sheet and pop the whole thing in the freezer for 15 minutes. This final chill really helps the edges stay perfectly sharp.
4. Bake: Bake in a preheated 350°F (175°C) oven. Timing depends on size—small pieces might take 10-12 minutes, large walls maybe 15-20. You want firm edges and a top that feels solid. It’s better to overbake slightly than to underbake. A soft piece will bend and break.
5. The Post-Bake Trim: The second you take them out of the oven, lay your templates back on the hot gingerbread. Use a sharp knife to trim any little bits that spread. The hot cookie is still pliable enough to get a perfect edge. Let them cool for a few minutes on the sheet before moving to a wire rack. They must be 100% cool before you even think about assembly.
Quick tip: Got leftover dough after cutting your main pieces? Re-roll it and cut out some gingerbread people, trees, or stars. They make a great little scene to place around your finished house!
Step 3: The Mortar – Icing That Holds Like Cement
Royal icing is the glue that holds this whole operation together. Made correctly, it dries rock-hard. The consistency is everything.
By the way, traditional recipes use raw egg whites, but I strongly advise against that for a decoration that will be sitting out. For years, I’ve exclusively used meringue powder. It’s made from dried egg whites, is completely food-safe, and gives you a strong, reliable icing every single time. You can find it in the baking aisle at most grocery stores or at craft stores like Michaels.
Construction-Grade Royal Icing Recipe
This recipe makes a super-stiff icing that’s perfect for building.
Ingredients:
4 cups (480g) powdered sugar, sifted
3 tablespoons (25g) meringue powder
1/2 teaspoon cream of tartar (optional, but adds stability)
1/2 cup (120ml) lukewarm water
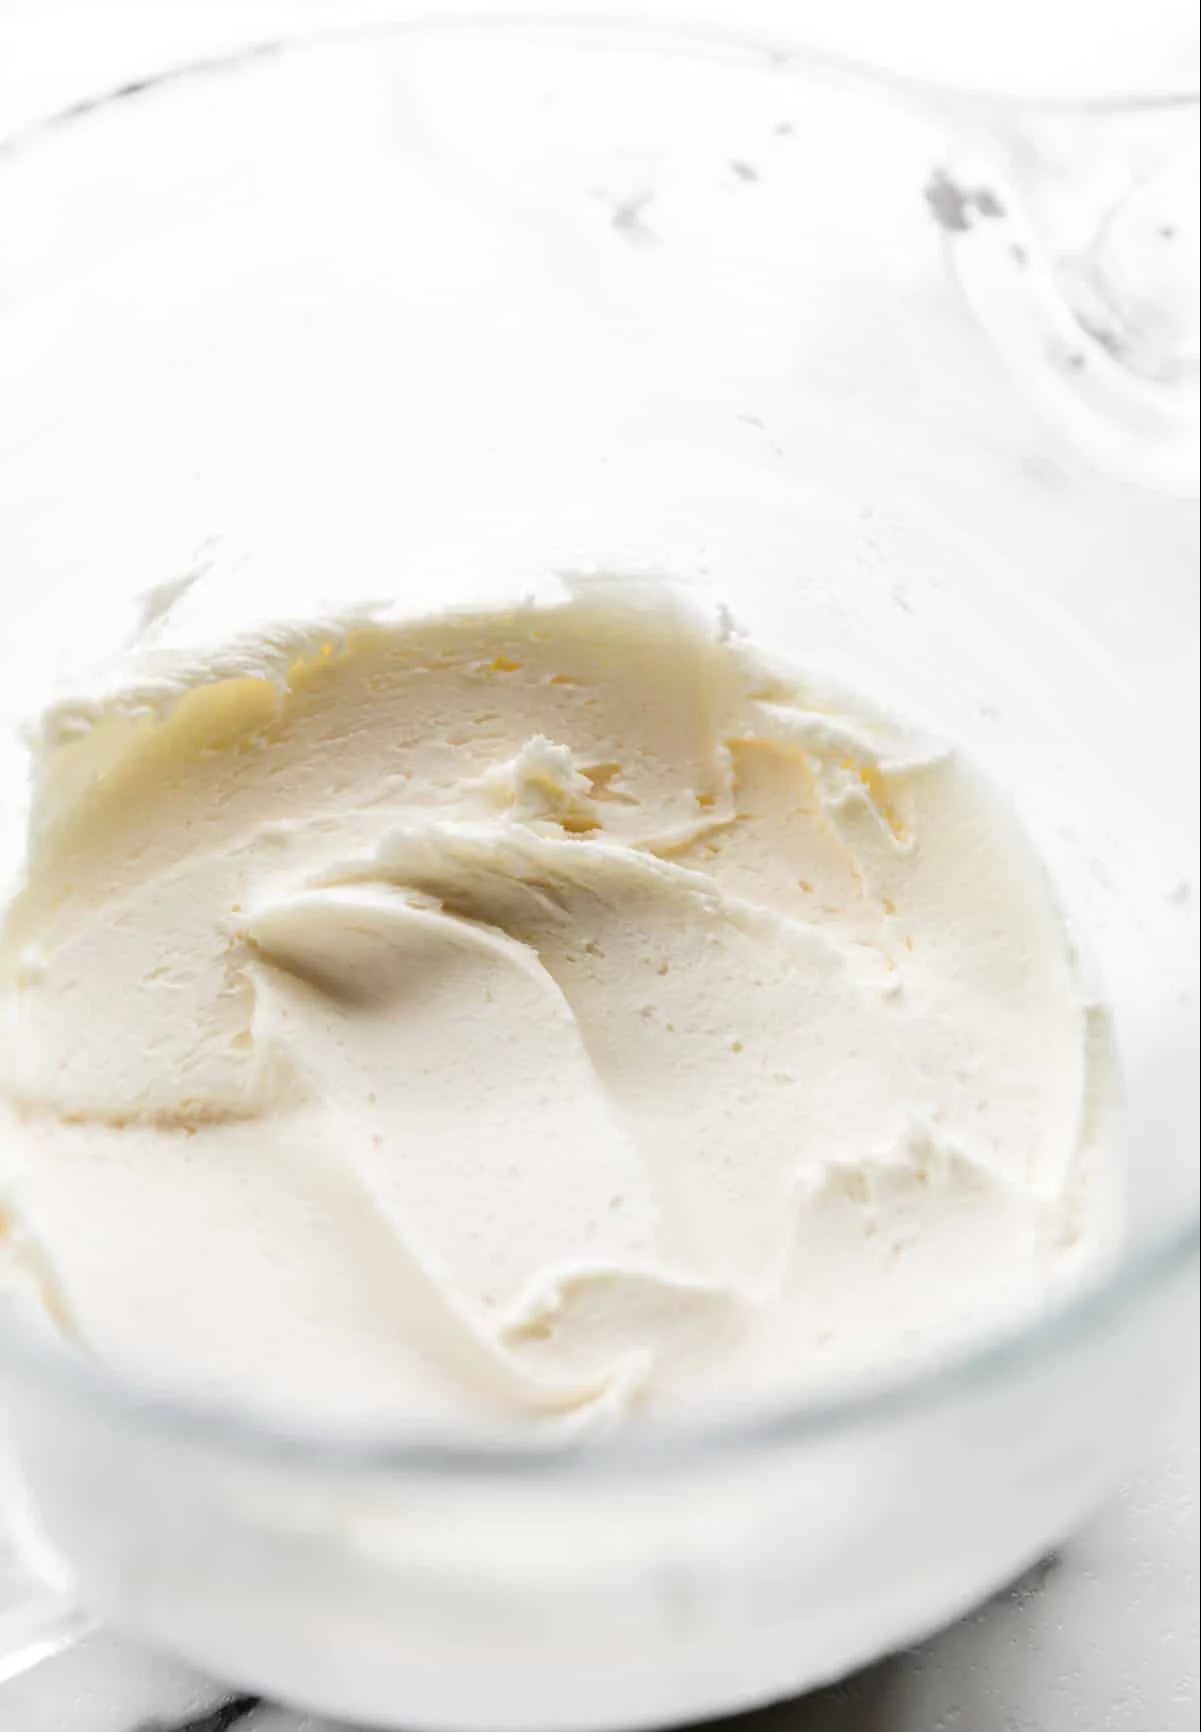
1. In a stand mixer bowl, whisk the sifted powdered sugar, meringue powder, and cream of tartar.
2. Pour in the water and mix on low until combined, then crank it to medium-high and beat for 5-7 minutes. The icing will transform from soupy to glossy and very, very stiff.
The ideal construction icing has the texture of thick spackle. When you pull the beater out, the peak should stand straight up without drooping at all. If it’s too thick, add water a tiny bit at a time (like, 1/2 teaspoon). Too thin? Add more sifted powdered sugar. A runny icing is the
1 cause of house collapse.
Heads up! Royal icing dries out incredibly fast. Always keep the bowl covered with a damp cloth or plastic wrap pressed right onto the surface of the icing. I just load what I need into a piping bag and keep the rest sealed.
Okay, That’s Cement. What About for Decorating?
Great question! You can’t pipe delicate icicles with spackle. To get a good decorating consistency, scoop about a cup of your stiff icing into a separate small bowl. Then, using a spray bottle or a teaspoon, add water just a little bit at a time and stir.
For piping lines, dots, and details: You’re looking for a consistency like toothpaste. It should hold its shape but be smooth enough to pipe easily.
For “flooding” or filling in an area with a smooth layer of color: You want a consistency like honey or shampoo. When you drizzle a ribbon of it back into the bowl, the lines should disappear back into the surface in about 10-15 seconds. This is where you’d add gel food coloring, too.
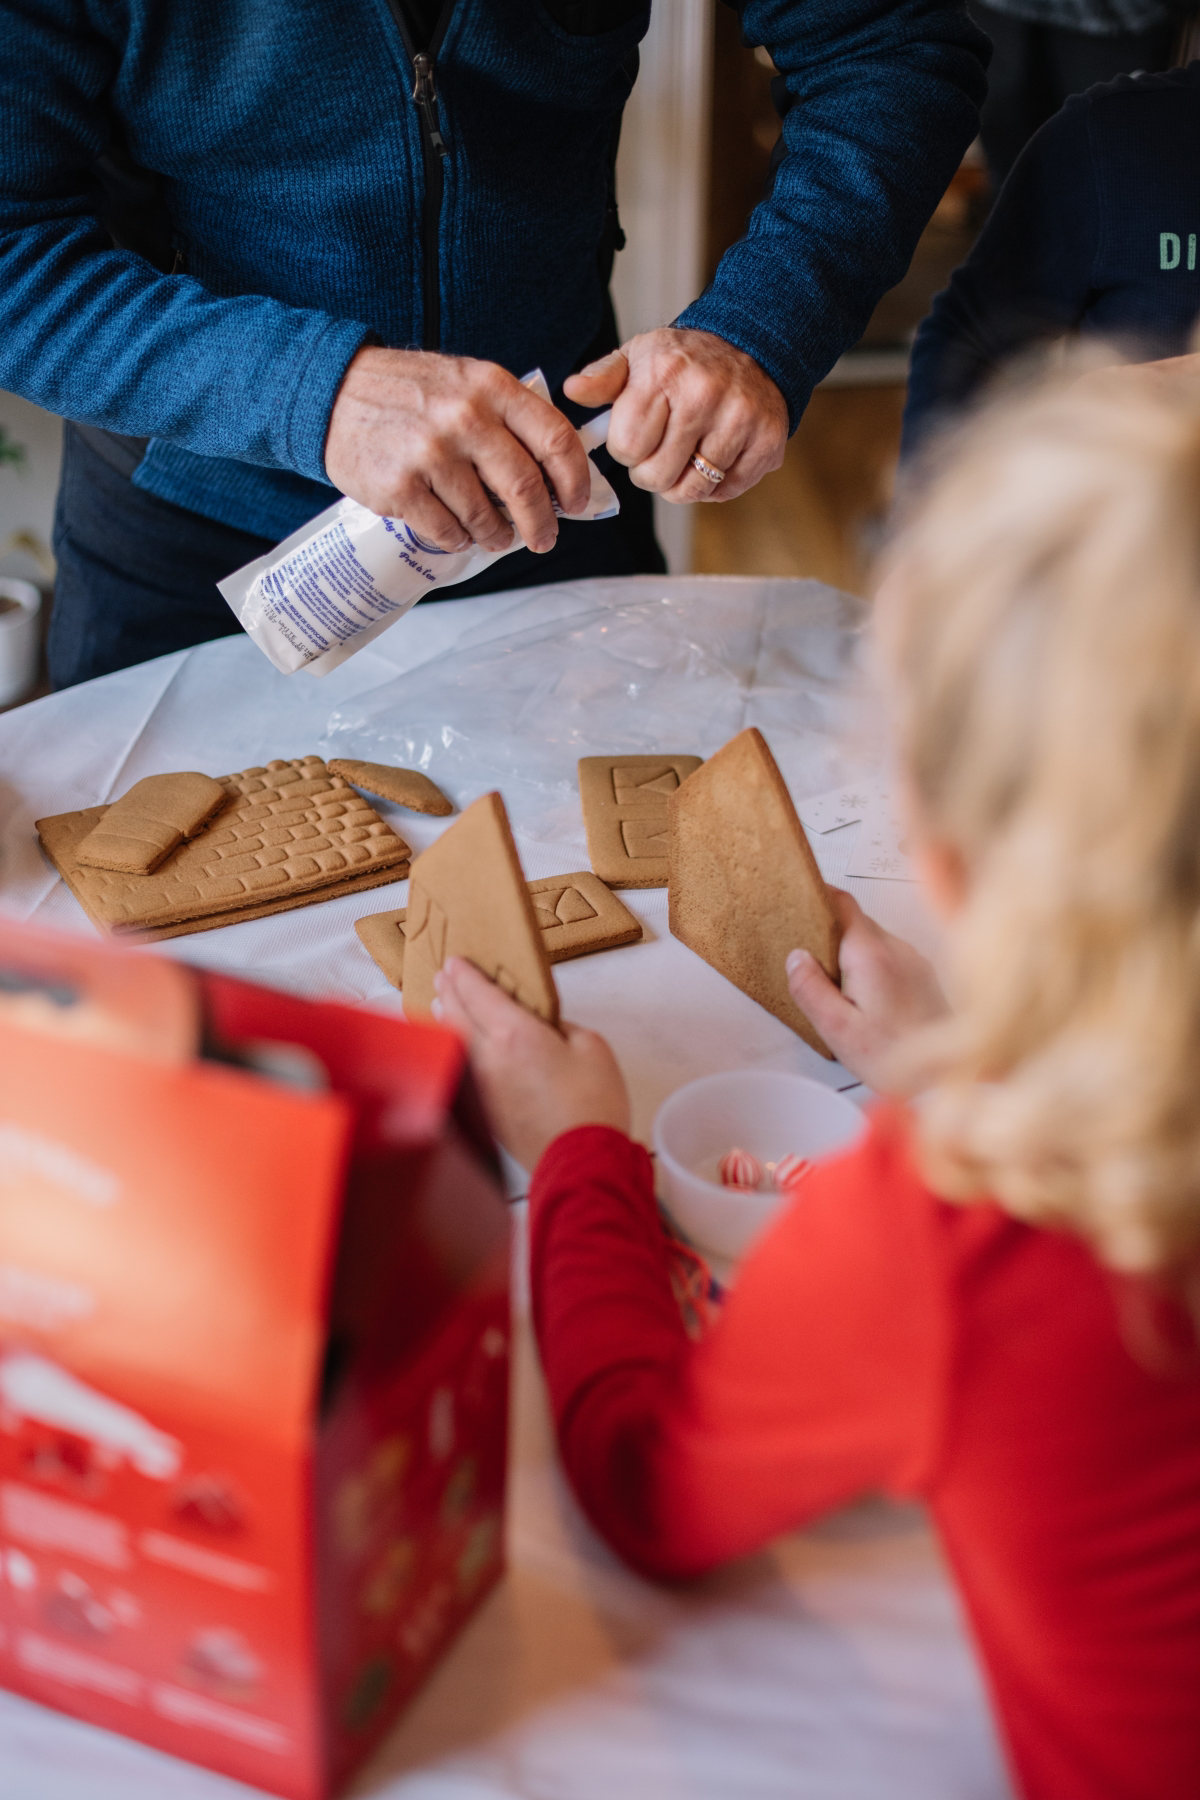
Step 4: The Assembly – Time to Build!
Patience is your most important tool now. Put on some music, take a deep breath, and work methodically. You’ll need your cooled gingerbread pieces, your stiff icing in a piping bag with a medium round tip (a Wilton
10 is perfect), and some props like small food cans or spice jars to hold the walls up.
1. Lay the Foundation: Pipe a thick line of icing on your base (a foil-covered piece of cardboard or a cake drum works great) where you want your first wall. Pipe another line along the vertical edge of a second wall that will connect to it.
2. Raise the Walls: Press the two walls together on the base to form a corner. Use your cans and jars on the inside and outside to hold them at a perfect 90-degree angle. Then, run another thick bead of icing along the interior seam. This hidden joint adds a ton of strength.
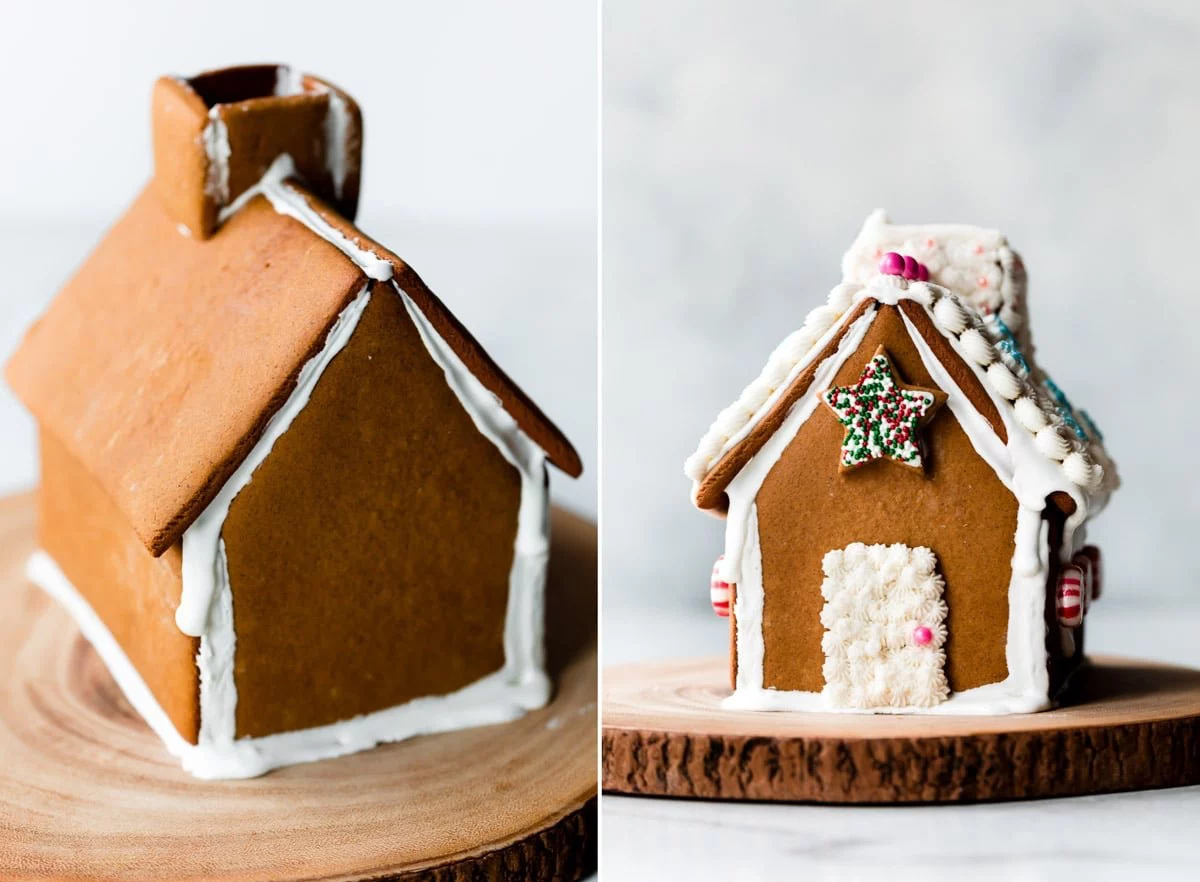
3. Dry the Base: Continue until all four walls are up. Now… stop. Walk away for at least an hour, preferably two. You need the walls to be a solid, unmoving box before you add the heavy roof.
4. Attach the Roof: Pipe a very generous line of icing along the top edges of the gables and side walls. Carefully place one roof panel. Then the other. It might want to slide, so you might need to hold it with your hands for 5-10 minutes until the icing grabs. It’s a bit tedious, but it’s necessary.
5. Seal the Deal: Pipe a thick, decorative line of icing along the peak where the two roof panels meet. This looks nice and seals the final joint.
Now for the final test of patience: let the whole house dry for at least 8 hours, or better yet, overnight. Don’t touch it! A fully cured house will be rock solid and ready for decorating.
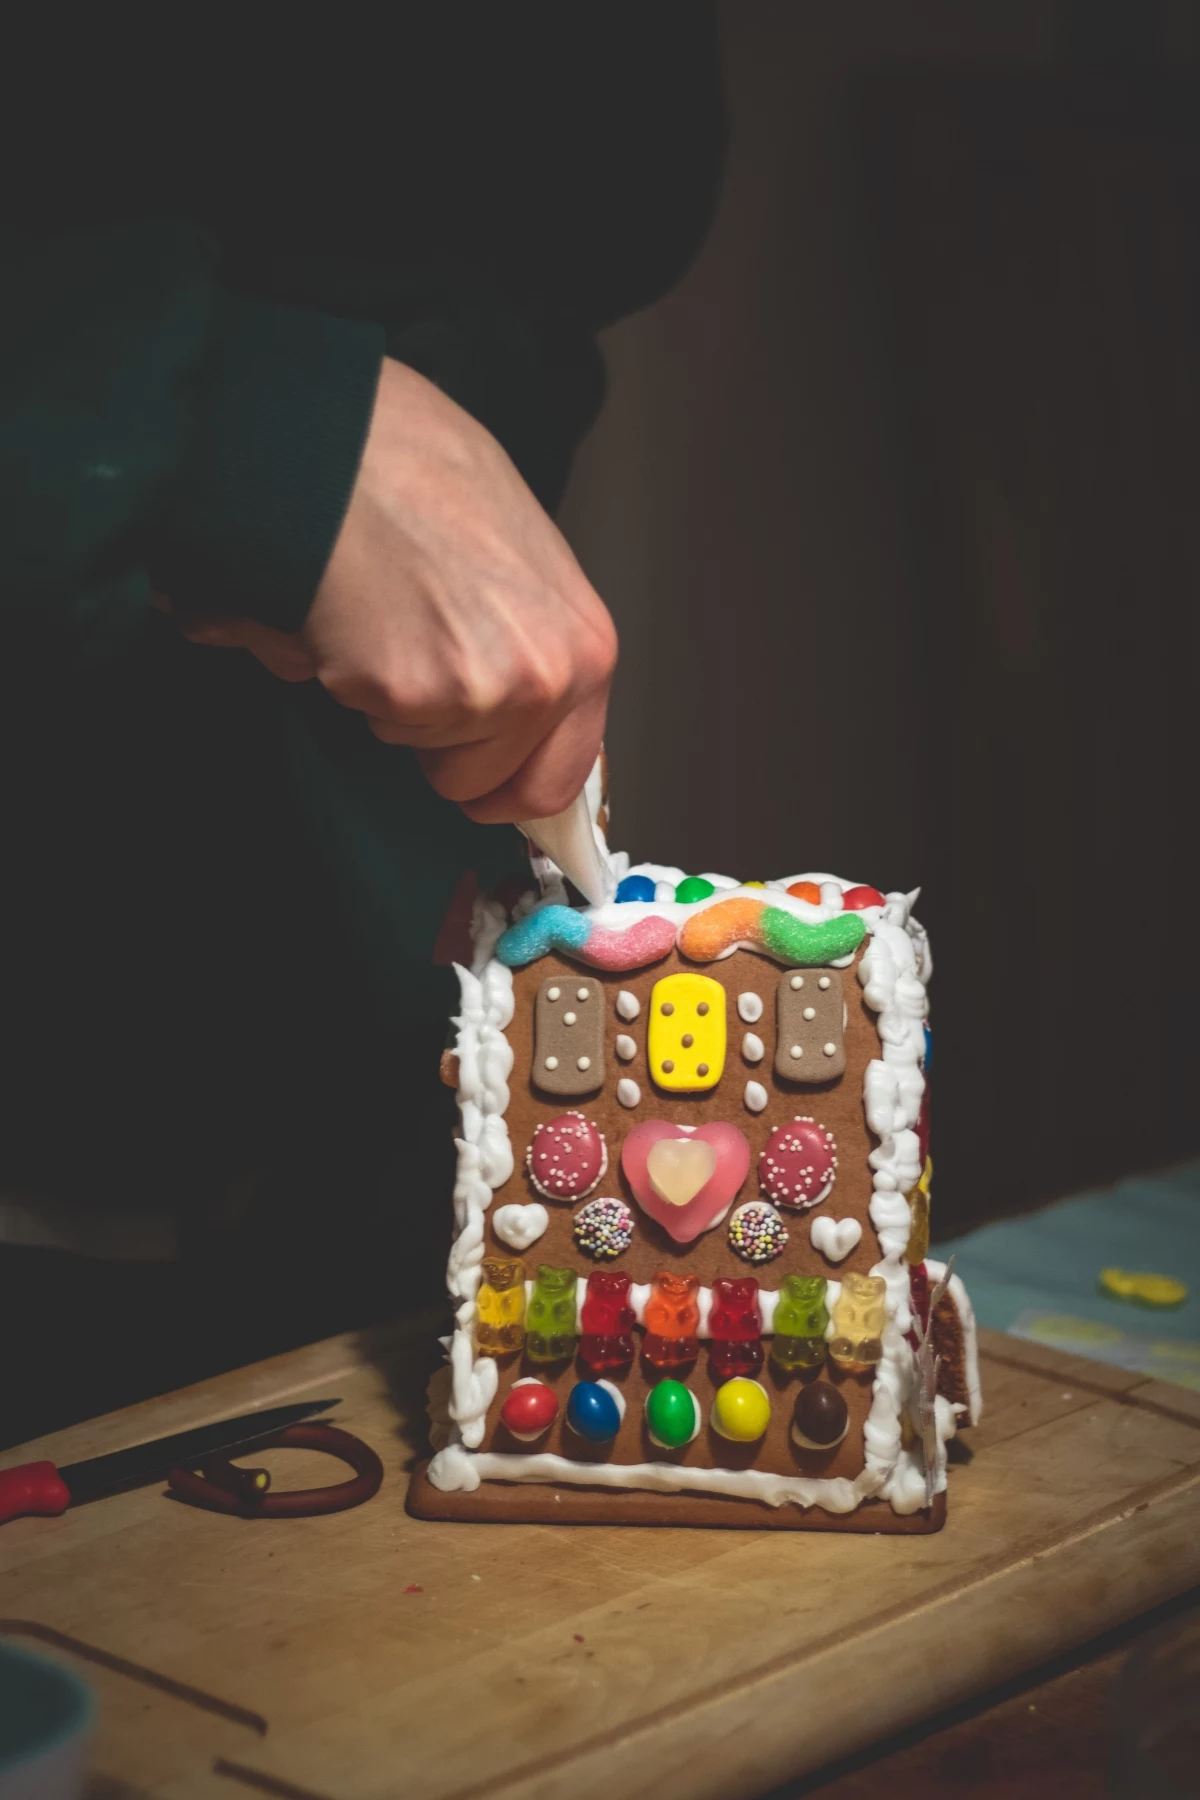
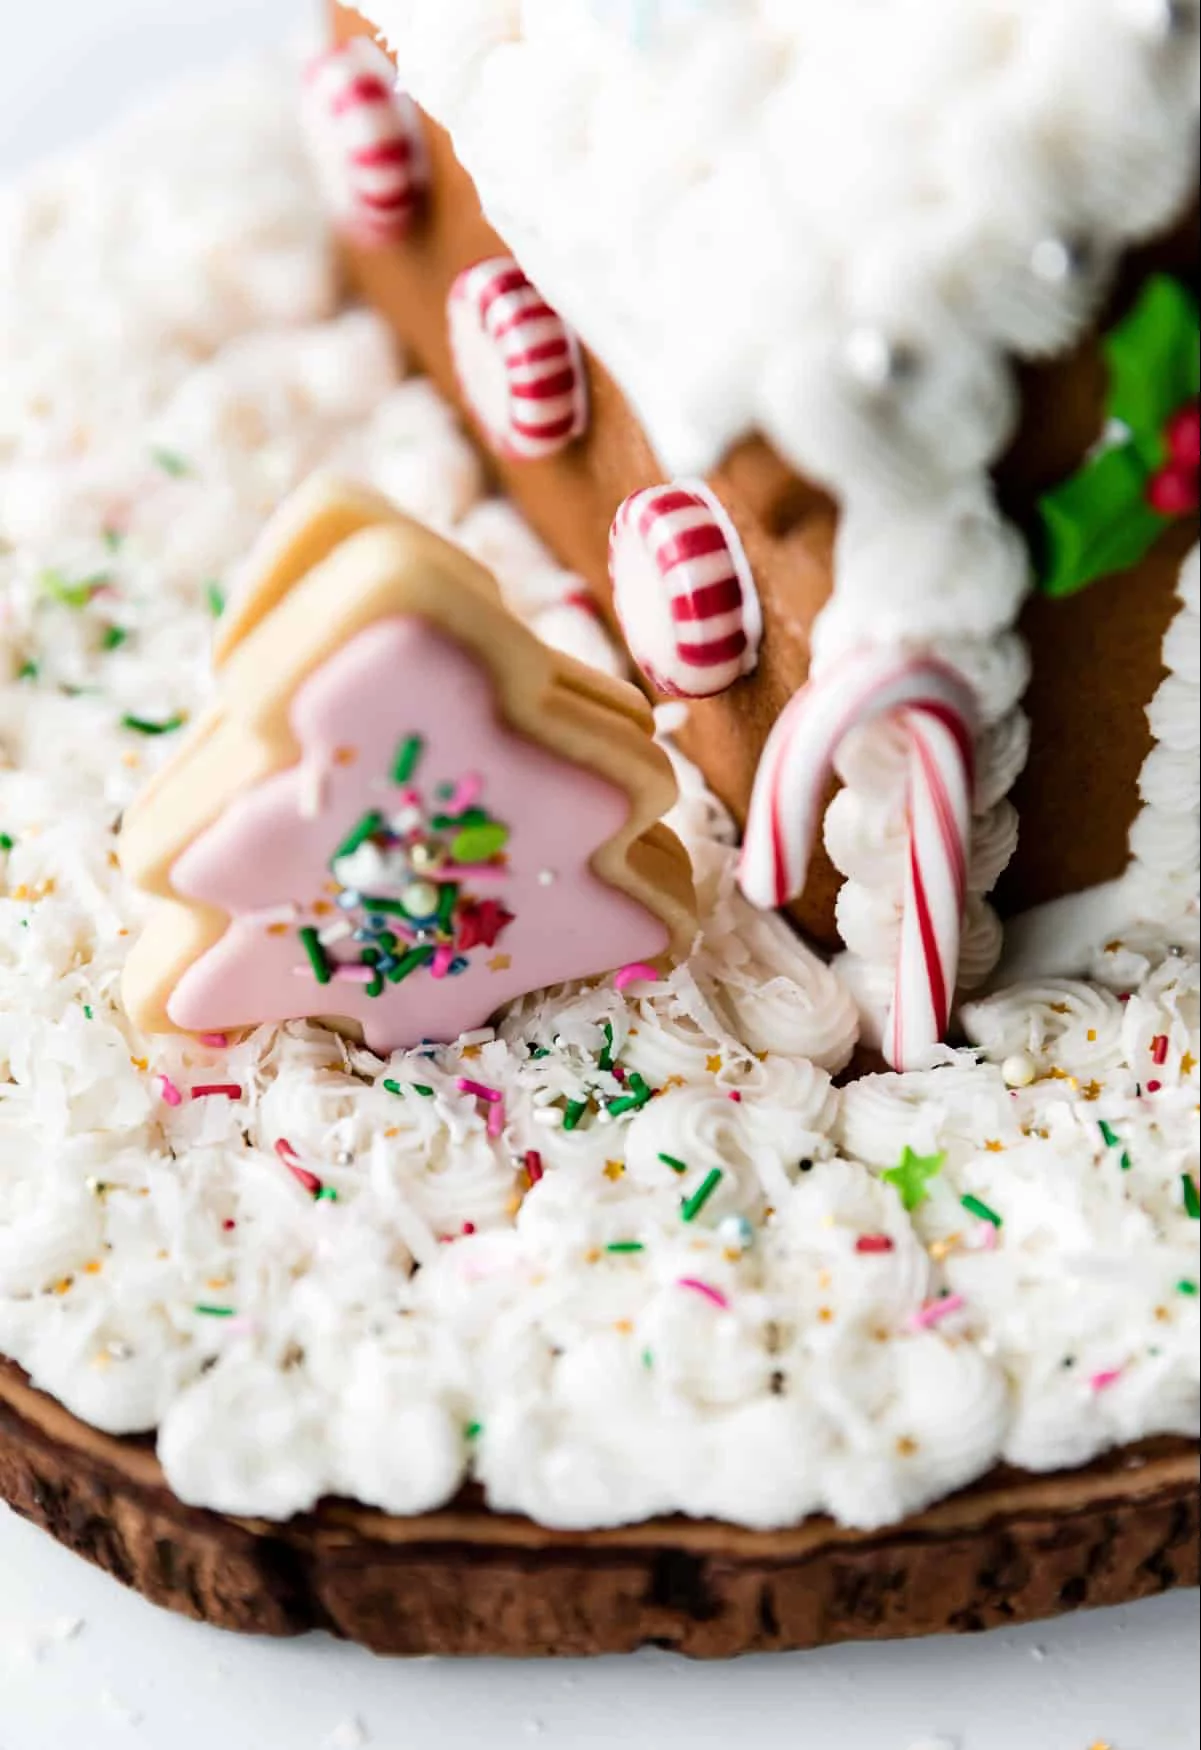
Step 5: The Fun Part – Time to Decorate!
This is your reward for all that careful construction. You can thin your icing for details as we discussed above. But what about the candy?
Here’s my go-to candy shopping list for a killer house:
For Roof Shingles: Necco Wafers, Cinnamon Toast Crunch, Golden Grahams, or even Shredded Wheat cereal (the big biscuits) look amazing.
For a Log Pile or Fencing: Pretzel sticks or Pirouette cookies.
For Walkways and Stone Walls: M&Ms, chocolate rocks, or mixed nuts.
For Bushes and Landscaping: Gumdrops, green and red Mike and Ikes, or Dots.
For Windows and Doors: Mini candy canes for a frame, or stick pretzels for window panes.
Advanced Tricks & Troubleshooting
Once you’ve got the basics down, you can try some really cool stuff.
A popular technique is making “stained glass” windows. Before you bake, just fill the window cut-outs with a single layer of crushed hard candies (like Jolly Ranchers). As it bakes, the candy melts into a beautiful translucent pane. To crush the candy, just toss it in a ziplock bag, cover it with a towel, and give it a few gentle whacks with a rolling pin until it’s the size of small gravel. Don’t turn it into dust!
If you want to put a light inside, never, ever use a real candle. It’s a major fire hazard. Use only battery-powered LED lights, like fairy lights or a flameless tea light. Just cut a small hole in the back wall panel before you bake it.
What If Things Go Wrong?
My pieces spread and got rounded! Your dough was too warm. Next time, make sure you do the full chilling time (especially the freezer part!) and double-check your recipe isn’t too high in fat or leavening.
My walls are warped! Your baking sheet might be warped, or you moved the pieces when they were still too warm and flexible. Let them cool a bit longer on the pan.
My house fell down! It’s almost always one of two things: your icing was too runny, or you didn’t let the walls dry long enough before putting on the roof. Be patient!
Ultimately, building a gingerbread house from scratch is a slow, rewarding process. It teaches patience and a little bit of engineering. So don’t worry if your first try isn’t perfect. Mine sure wasn’t. But with a solid plan and a good recipe, you have everything you need to create something truly special. Enjoy the process!
Inspirational Gallery
Option A: Royal Icing. The classic choice for a reason. Made with egg whites (or meringue powder like Wilton’s) and powdered sugar, it dries rock-hard, acting as a powerful, edible cement. It’s perfect for structural assembly and sharp, fine details that won’t budge.
Option B: Glacé Icing. A simple mix of powdered sugar and milk or water. While easy to whip up for cookie decorating, it never fully hardens and remains susceptible to humidity. It’s a recipe for structural collapse.
For construction, royal icing is non-negotiable.
Did you know? The tradition of making decorated gingerbread houses began in Germany in the early 1800s, largely inspired by the popular Grimm’s fairy tale
Help! One of my gingerbread pieces cracked right after baking. Is it ruined?
Not at all! This is a common issue and easily fixed. Think of your royal icing as ‘structural putty.’ Simply lay the broken pieces flat on parchment paper, pipe a thick line of stiff-consistency icing along the crack, and gently press the pieces together. Use a small spatula to smooth the excess. Let it dry completely for at least 4-6 hours before attempting to build with it. The ‘scar’ will be on the inside and no one will ever know.
Create a rustic ‘log cabin’ effect on your walls.
Add a convincing ‘thatched roof’ texture.
Make your chimney look like it’s made of weathered stone.
The secret? Everyday kitchen tools. Before baking, gently press the tines of a fork into the dough for a wood grain look. Drag a clean, stiff-bristled brush across roof panels. Lightly press a scrunched-up ball of aluminum foil onto chimney pieces. These simple textures catch the light beautifully.
The windows are the soul of a gingerbread house, turning it from a cookie structure into a tiny, glowing home. For a magical touch, go beyond just piping a square outline.
Stained Glass Effect: Place your wall pieces on a silicone-lined baking sheet. Fill the window cut-outs with a single layer of crushed hard candies (Jolly Ranchers work brilliantly for their vibrant colors). They will melt into a translucent, glass-like pane as the gingerbread bakes.
Crystal Clear Panes: For a more advanced, perfectly clear window, use isomalt nibs. Melt them according to package directions and carefully pour the hot liquid into the baked and cooled window spaces.
Over 70% of gingerbread house structural failures are due to using the wrong icing consistency.
It’s true. Most people use a single batch of royal icing for everything, but pros know the secret is in the separation. You need a
Looking for that perfect, intense red or a deep forest green? Don’t reach for standard liquid food coloring. It will thin your royal icing, compromising its structural integrity. The professional’s choice is a concentrated gel paste, like those from AmeriColor or Chefmaster. You only need a tiny amount on a toothpick to achieve rich, vibrant color without altering the all-important icing consistency.
Shingles made from Golden Grahams cereal.
A cobblestone path created with chocolate-covered raisins or Cocoa Puffs.
A rustic split-rail fence built from pretzel sticks.
Chiclets or Tic Tacs for perfect, tiny bricks or tiles.
Move beyond the traditional candy-covered cottage and explore a minimalist aesthetic. The Scandinavian-inspired gingerbread house relies on the beauty of simplicity. Use only pure white royal icing on the unadorned, warm-brown gingerbread. Focus on precise, graphic piping—delicate scallops along the eaves, simple dots, and clean vertical lines. The beauty comes from the contrast and the perfection of your piping work, creating a structure that is both elegant and festive.
Maria Konou combines her fine arts degree from Parsons School of Design with 15 years of hands-on crafting experience. She has taught workshops across the country and authored two bestselling DIY books. Maria believes in the transformative power of creating with your own hands and loves helping others discover their creative potential.
To provide the best experiences, we use technologies like cookies to store and/or access device information. Consenting to these technologies will allow us to process data such as browsing behavior or unique IDs on this site. Not consenting or withdrawing consent, may adversely affect certain features and functions.
Functional
Always active
The technical storage or access is strictly necessary for the legitimate purpose of enabling the use of a specific service explicitly requested by the subscriber or user, or for the sole purpose of carrying out the transmission of a communication over an electronic communications network.
Preferences
The technical storage or access is necessary for the legitimate purpose of storing preferences that are not requested by the subscriber or user.
Statistics
The technical storage or access that is used exclusively for statistical purposes.The technical storage or access that is used exclusively for anonymous statistical purposes. Without a subpoena, voluntary compliance on the part of your Internet Service Provider, or additional records from a third party, information stored or retrieved for this purpose alone cannot usually be used to identify you.
Marketing
The technical storage or access is required to create user profiles to send advertising, or to track the user on a website or across several websites for similar marketing purposes.