Your Step-by-Step Guide to a Stunning Christmas Mantel
Decorating Your Mantel Like a Pro (Without the Stress)
Let’s be honest, standing in front of a bare mantel with a box of decorations can feel… a little overwhelming. For years, I’ve helped people transform that exact spot, from grand hotel lobbies to cozy family living rooms, and I’ve learned one crucial thing: a gorgeous Christmas mantel isn’t about having the most expensive stuff. It’s about knowing how to layer.
In this article
So many people fall into the same two traps. They either pile on so much that it looks cluttered, or they use tiny things that just get lost on the big shelf. And even worse, they sometimes forget that a fireplace is a real, heat-producing appliance. But we’re going to skip all that.
This is the step-by-step method that works every single time, no matter if your style is rustic farmhouse or sleek and modern. We’ll build it layer by layer, so it feels manageable and turns out looking polished and personal. Oh, and good to know: plan for about two hours for this whole process, not counting shopping. Don’t rush it! Pour yourself a festive drink and actually enjoy making your home feel magical.
First Things First: Safety, Heat, and Weight
Before you even think about placing that first sprig of holly, we have to talk about the fireplace itself. Ignoring the heat it puts out is the biggest mistake you can make, and honestly, it’s a scary one. Safety always comes first.
Understanding Fireplace Heat
Fireplaces throw heat in two ways: radiant heat that beams out and convective heat that rises up. Both can be a serious fire hazard. Standard fire safety codes are very clear about keeping flammable things away from the firebox opening—usually, that means leaving at least six inches of empty space around the top and sides.
But here’s the kicker that most people miss: that clearance needs to increase depending on how deep your mantel is. For every 1/8 inch your mantel shelf sticks out, you need to add another full inch of clearance above it. So, for instance, if your mantel shelf is 8 inches deep, you’d need an extra 8 inches of clearance on top of the standard 6 inches. That’s a total of 14 inches of space where nothing flammable should be! That’s a huge deal.
I once saw a beautiful, dry eucalyptus garland where the leaves closest to the firebox were scorched brown. They were lucky it didn’t ignite. This is why fresh greenery, like pine or cedar, is a bit safer at first because it holds moisture. But as it dries out over the holidays, the risk goes way up. You can buy fire-retardant sprays online or at hardware stores, but distance is always your best friend.
Is Your Mantel Strong Enough?
Another heads-up: your mantel shelf might not be as sturdy as it looks. Some are purely decorative. Before you start loading it up, give it a firm press. Does it wiggle or sag? If you’re not sure, it’s always better to assume it’s weaker than you think and use lighter decorations.
A lush, fresh garland can easily weigh 20-30 pounds. Add some of those heavy cast-iron stocking holders, and you could be creeping up on 50 pounds or more. The trick is to spread that weight out instead of clustering it all in the middle. It’s better for balance, both physically and visually.
The Layering Method for a Flawless Mantel
Okay, with the safety talk out of the way, let’s get to the fun part. This simple process makes decorating feel less chaotic and way more creative.
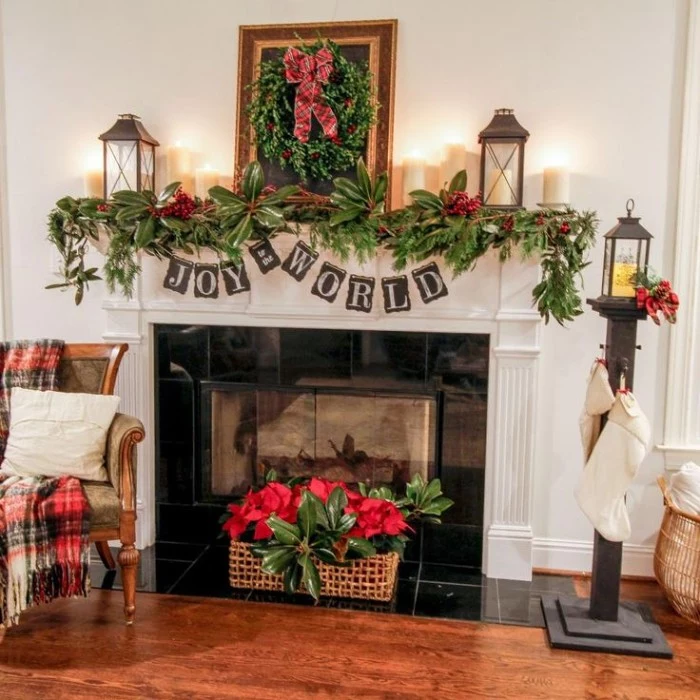
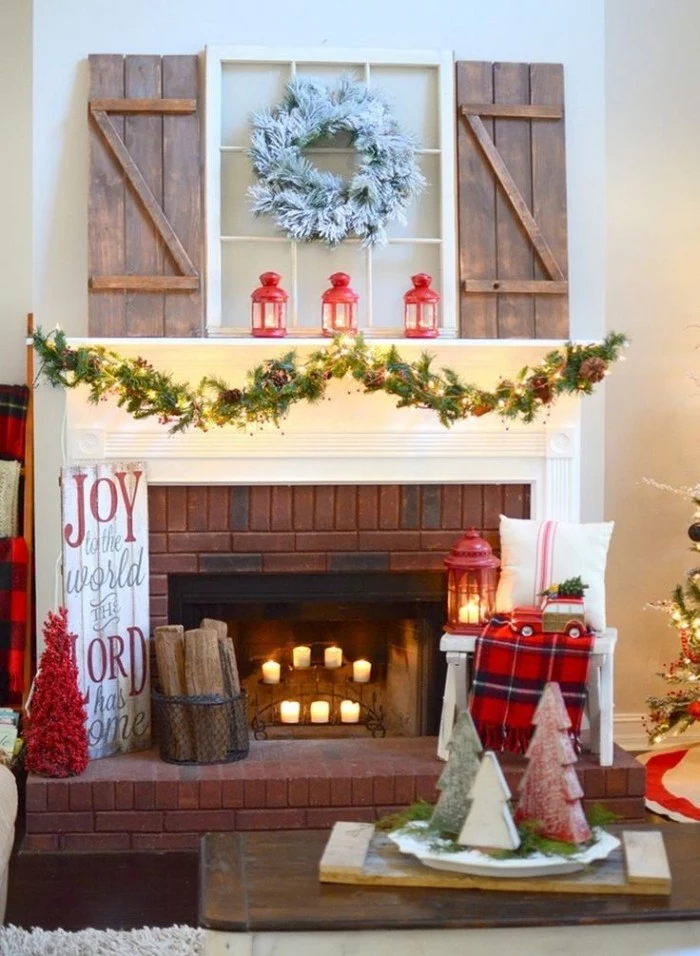
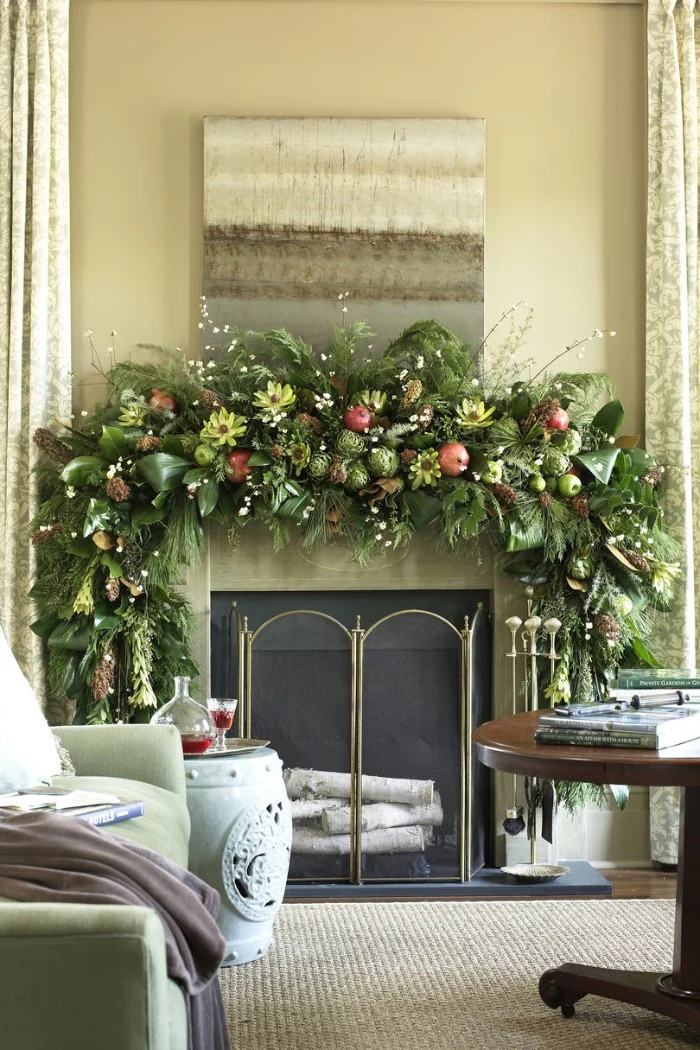
Step 1: The Foundation (Your Garland)
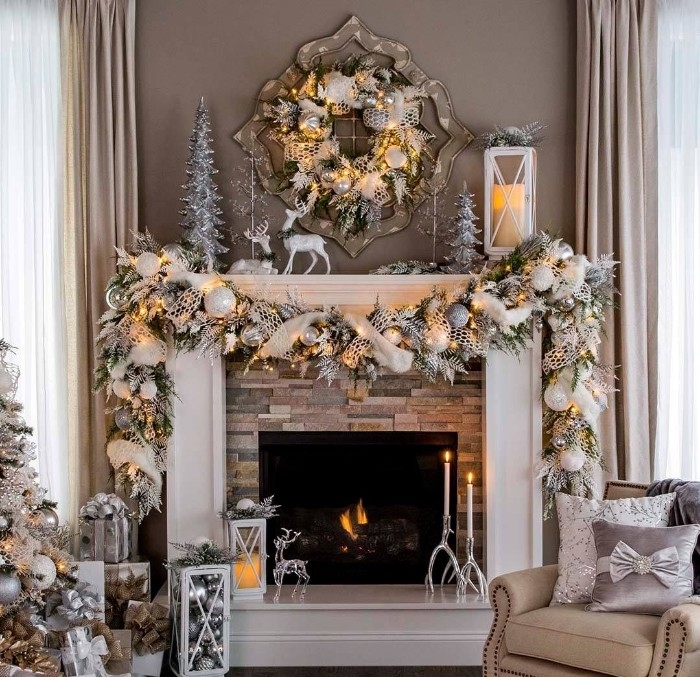
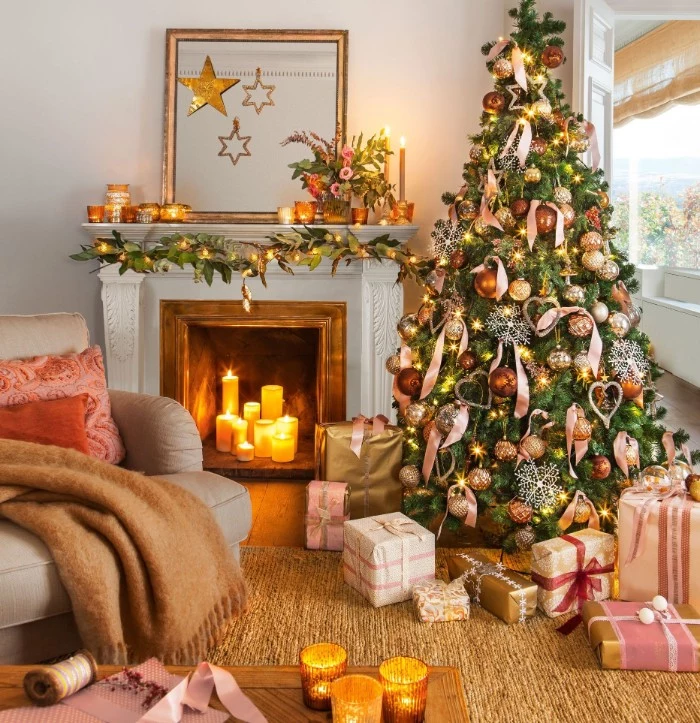
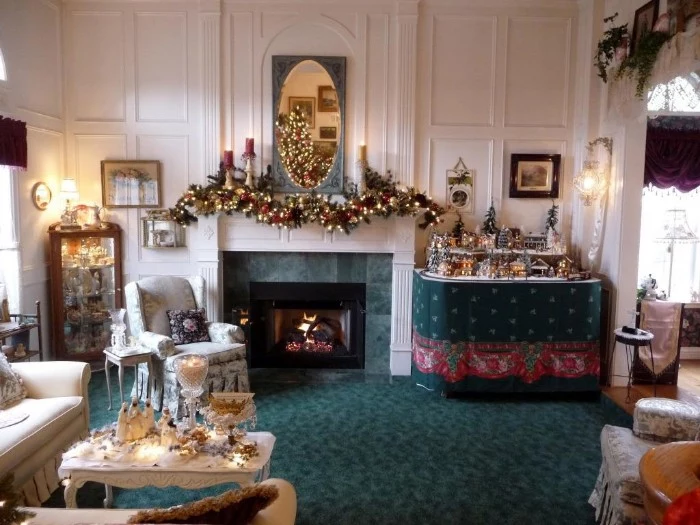
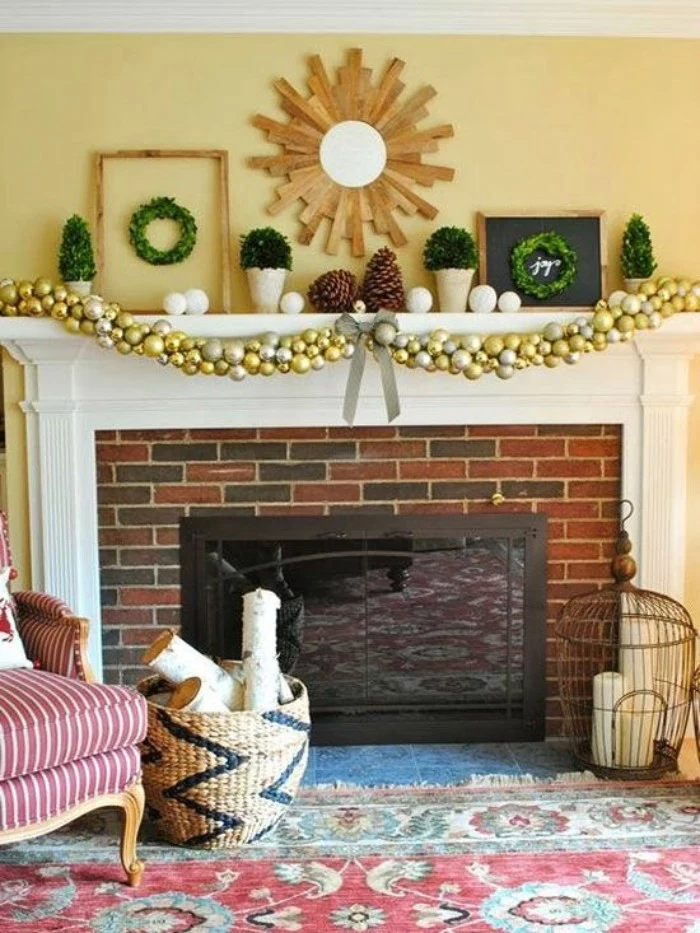
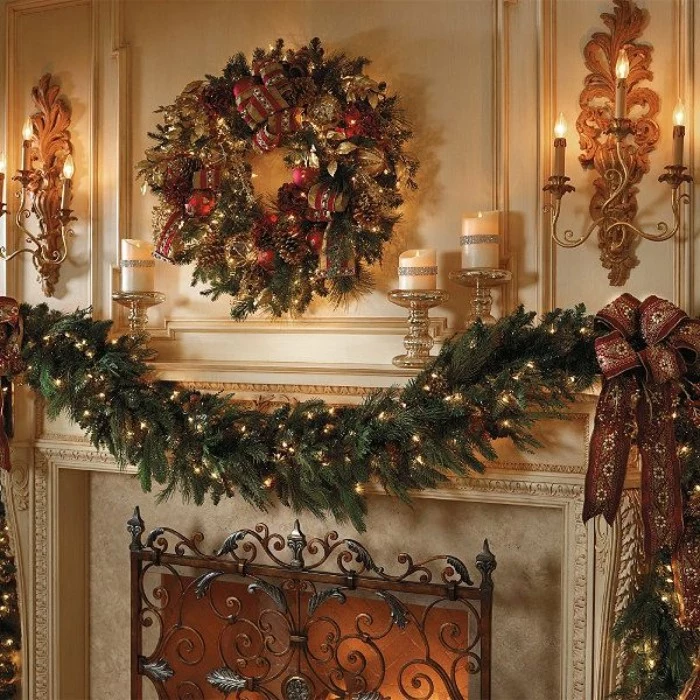
The garland is the backbone of the whole design. I highly recommend investing in a good artificial one. A quality garland from a place like Balsam Hill can be a bit pricey, maybe $150 to $250, but it will look amazing and last for a decade. For a more budget-friendly option, you can find surprisingly great ones at Target or Michael’s for around $50 to $80. Look for one with a high tip count and strong, bendable wires.
Now, this next part is NON-NEGOTIABLE. You have to “fluff” the garland. Straight out of the box, it looks like a sad, flat snake. Spend a good 15-20 minutes separating every little branch, bending them up, down, and sideways to create volume. I promise you, this single step makes a cheap garland look expensive and an expensive garland look breathtaking.
To hang it, I always trust 3M Command Hooks—just make sure you get the ones rated for at least 5 pounds for a heavy garland. Place three or more on top of the mantel where they won’t be seen. For a really heavy or droopy design, weighted garland holders are a fantastic, damage-free option.
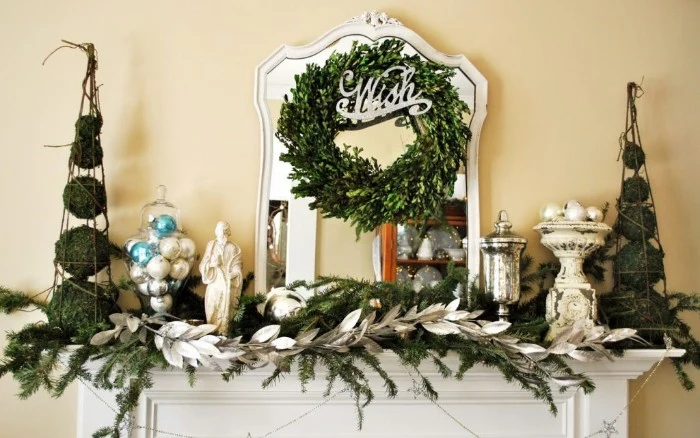
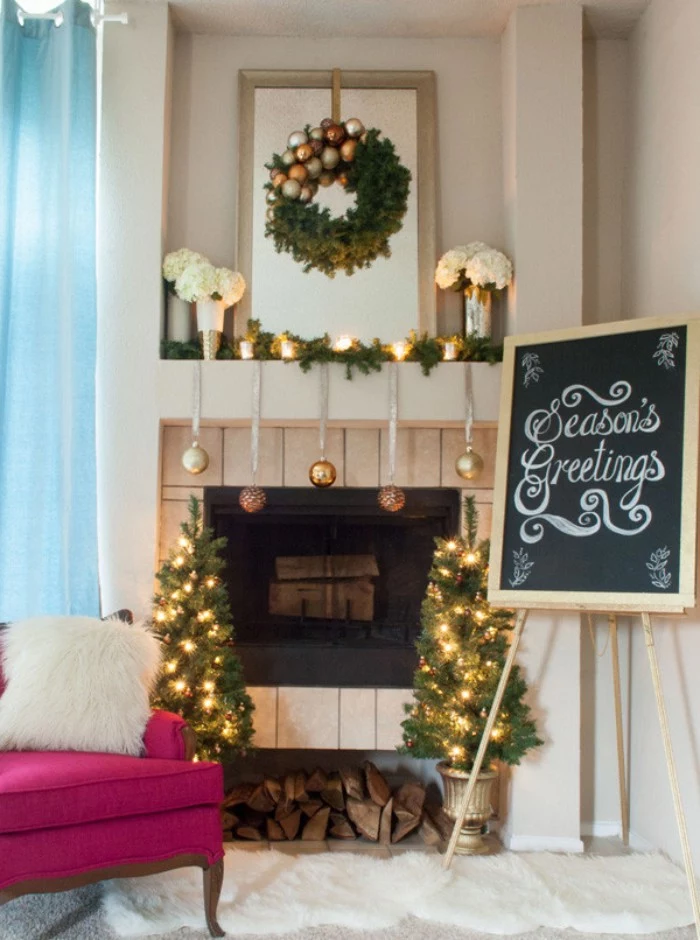
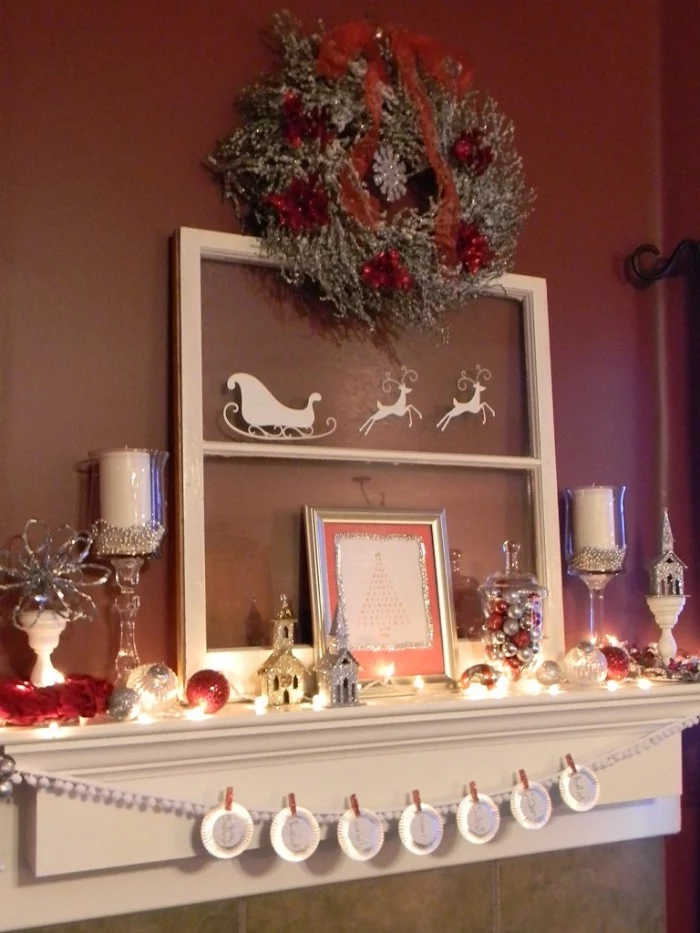
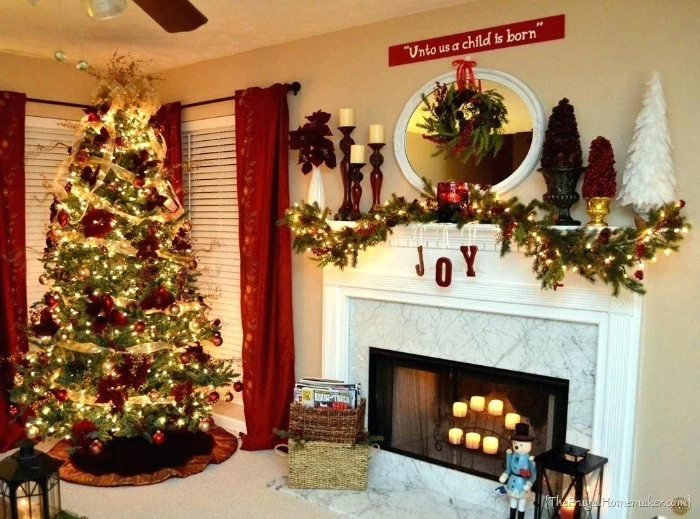
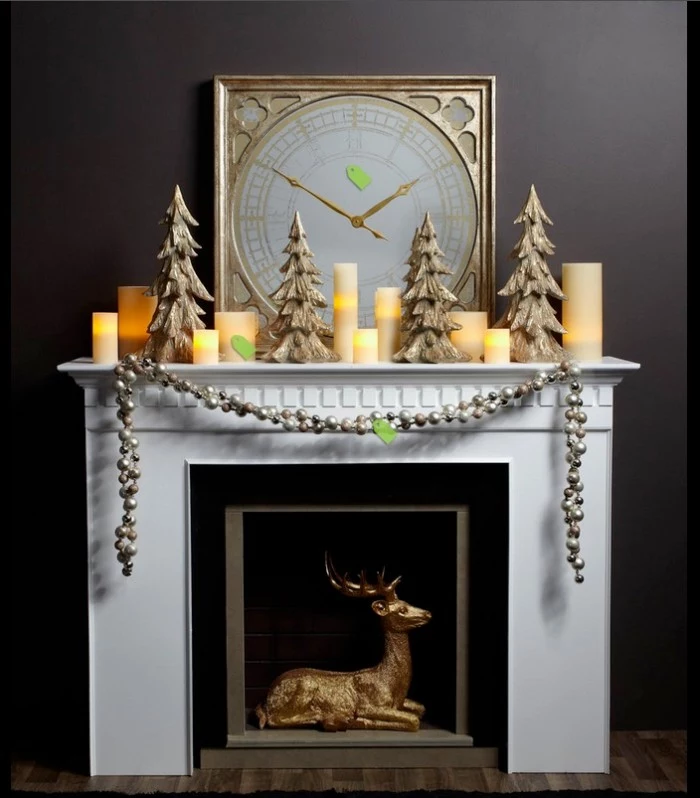
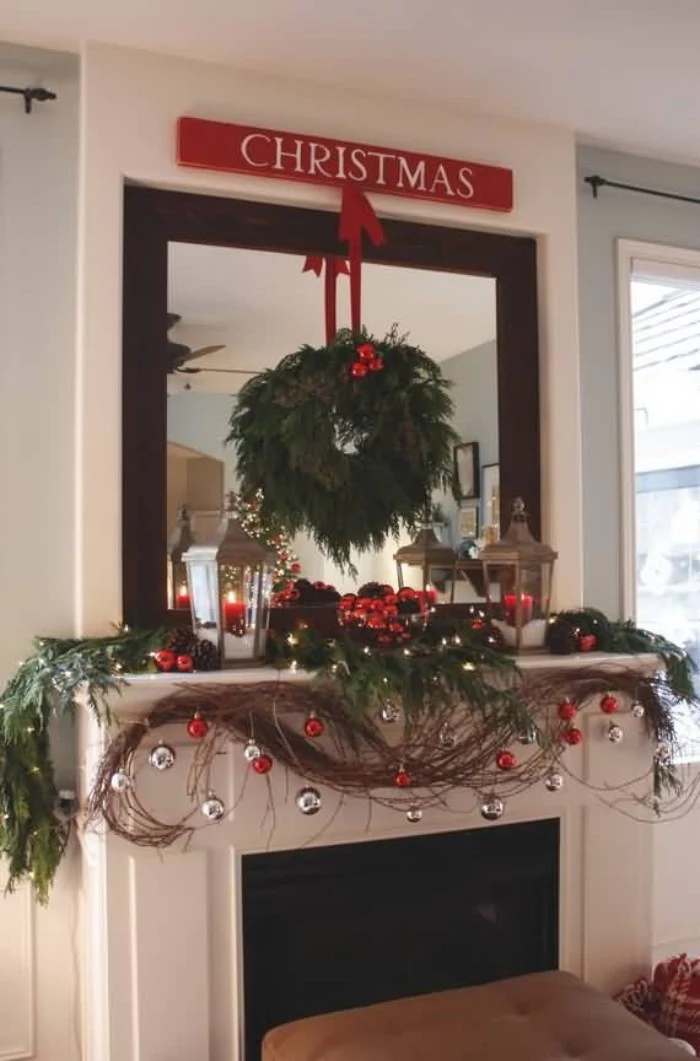
Step 2: The Anchor (Your Focal Point)
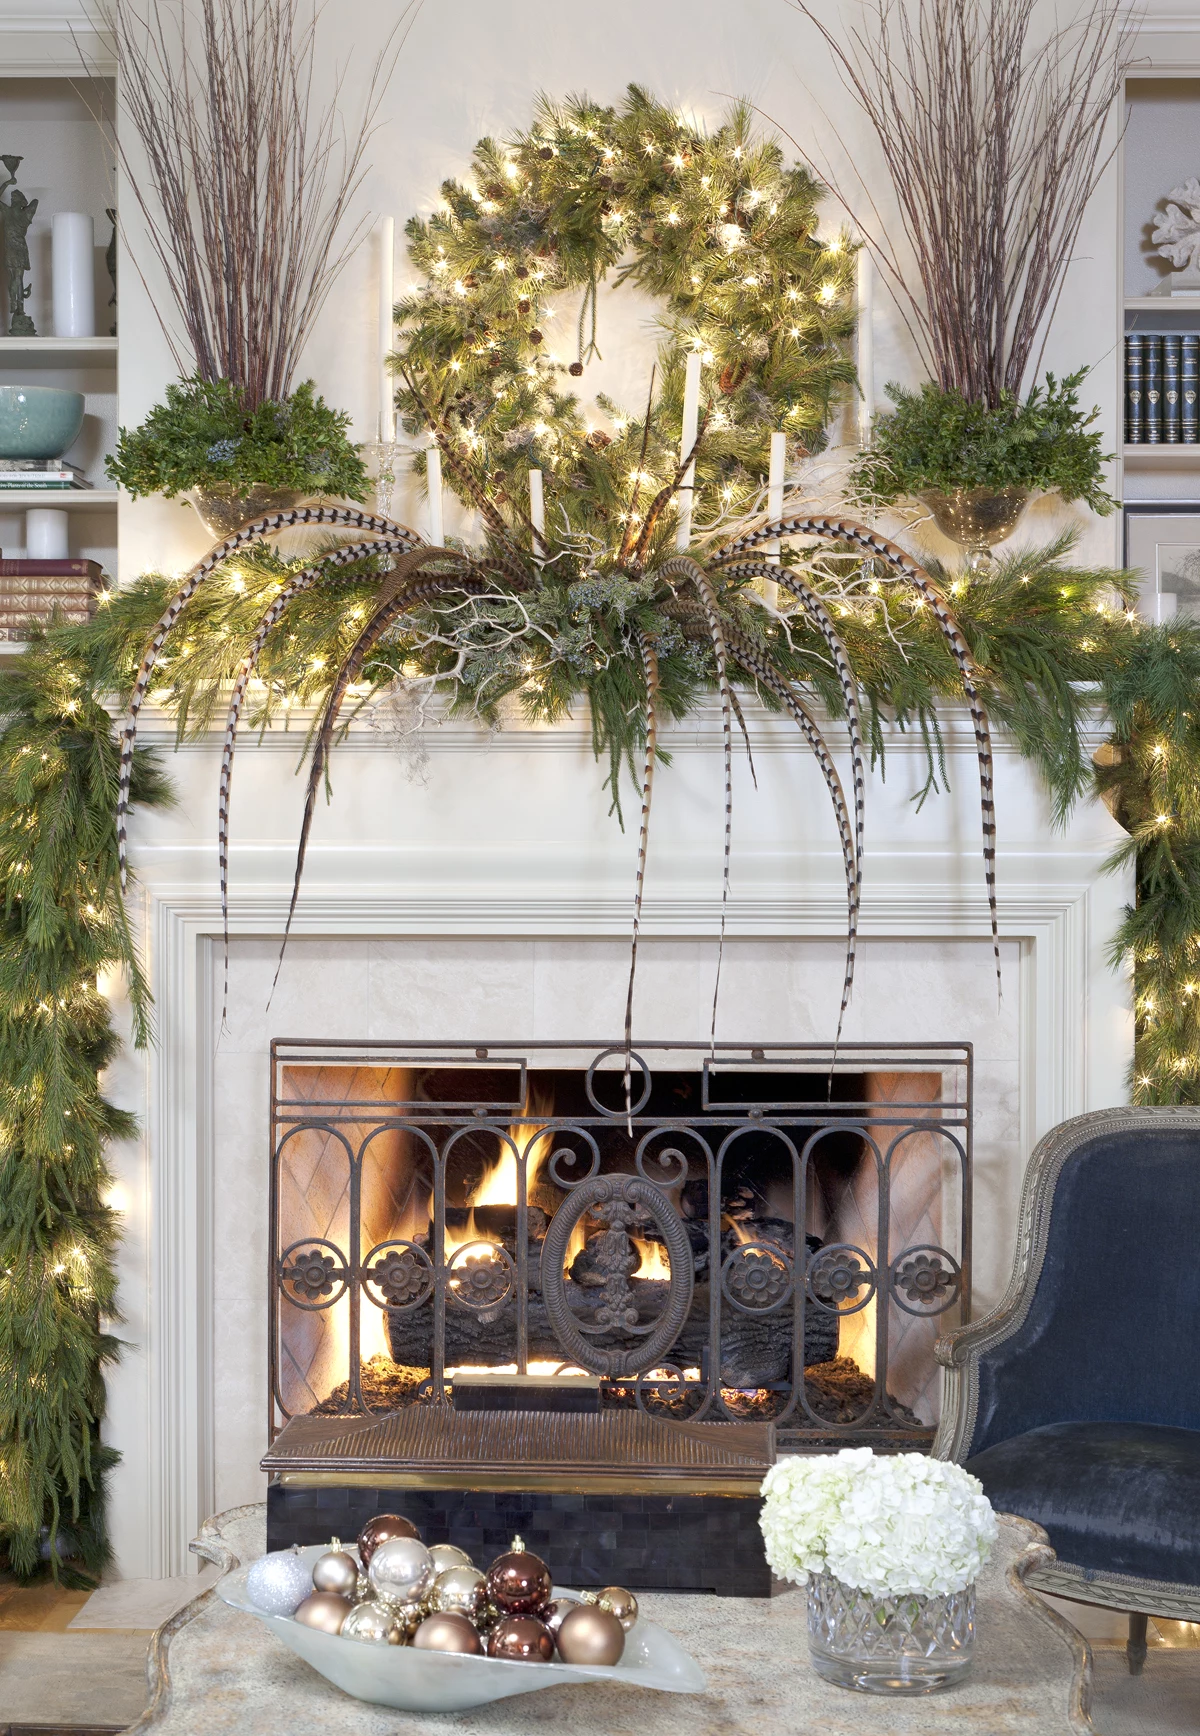
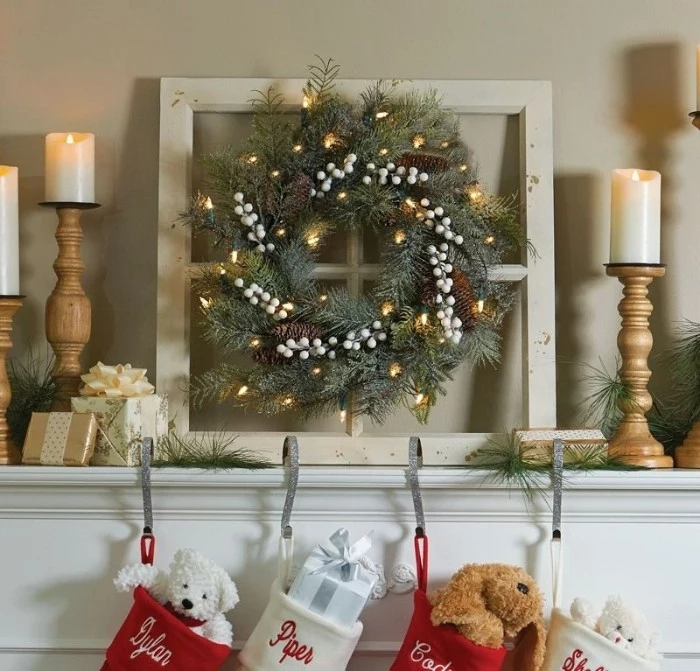
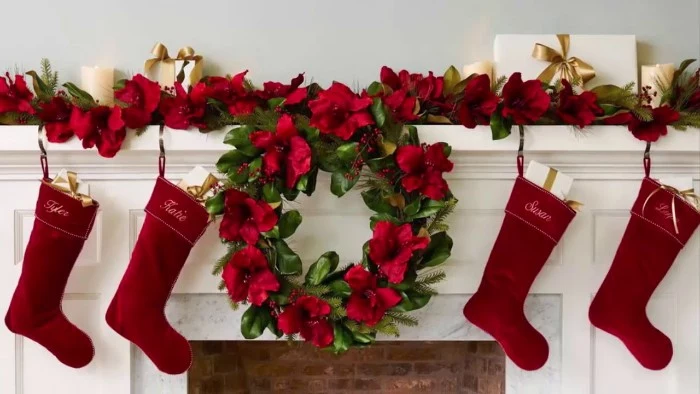
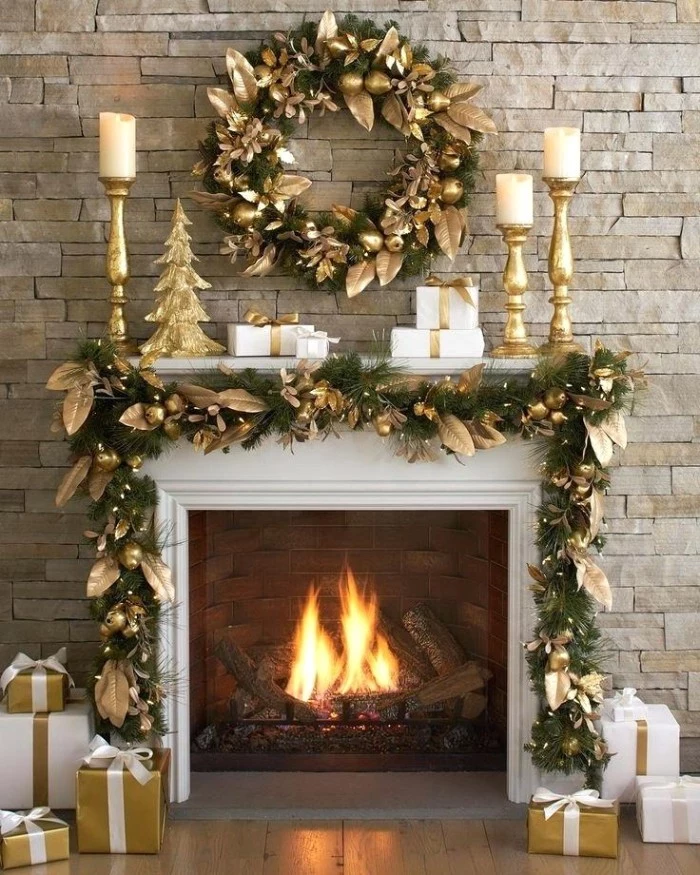
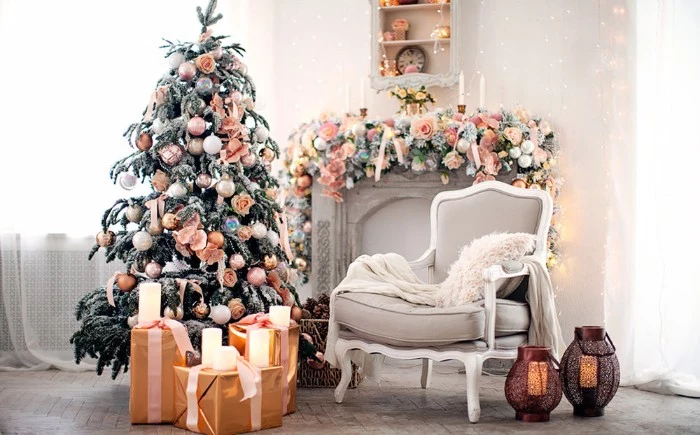
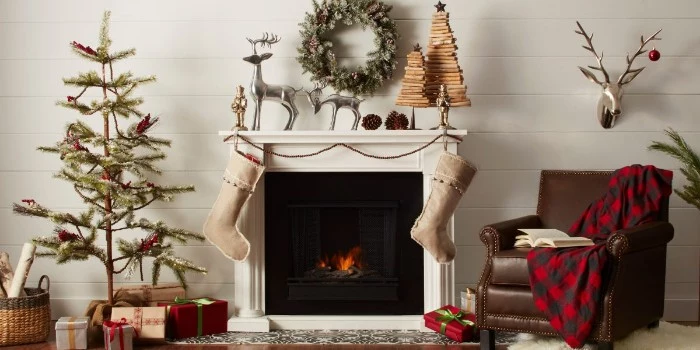
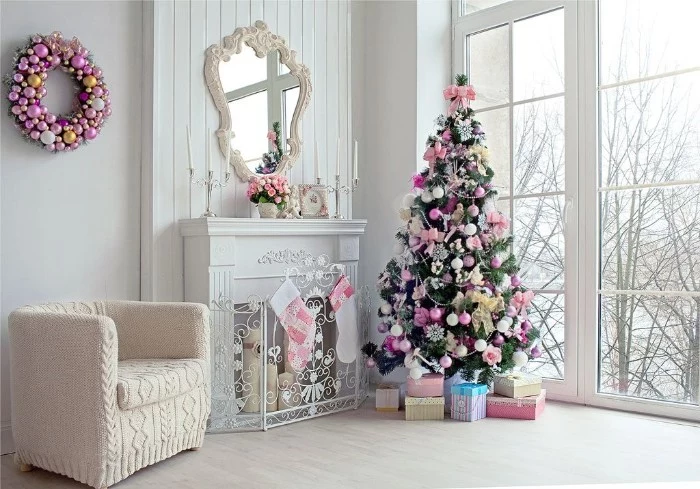
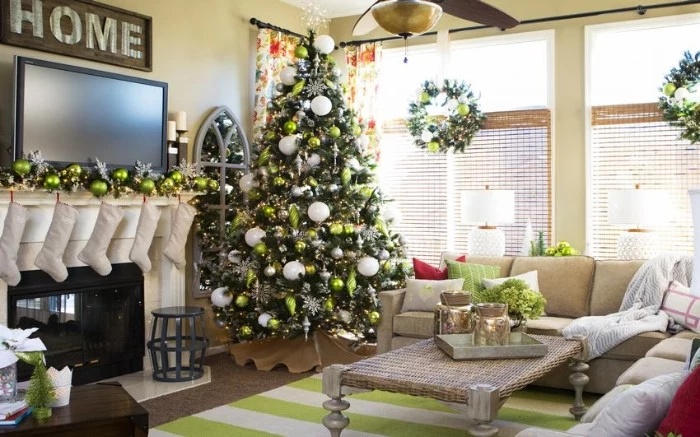
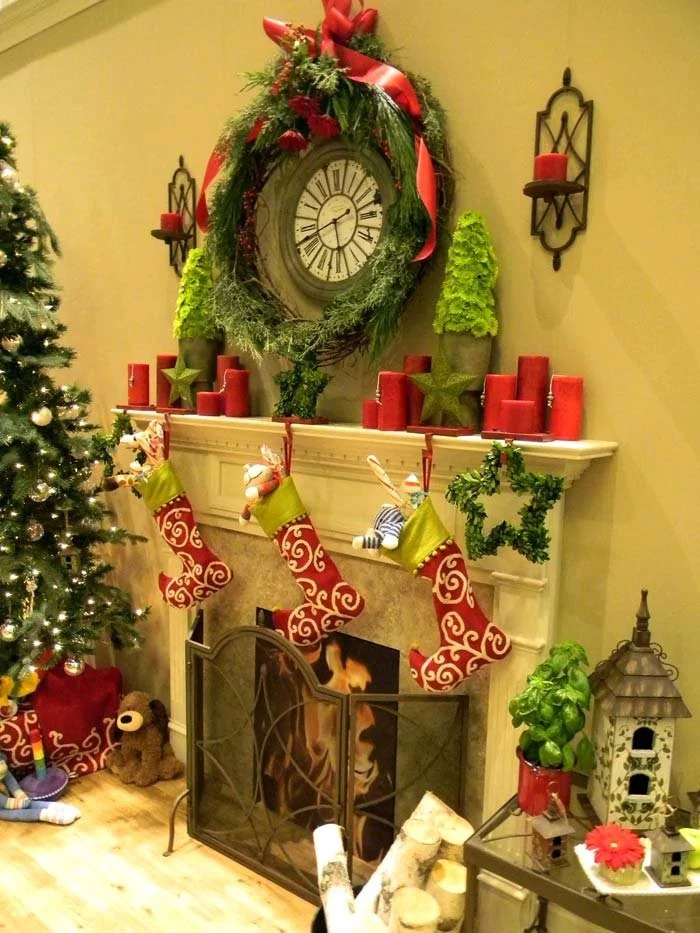
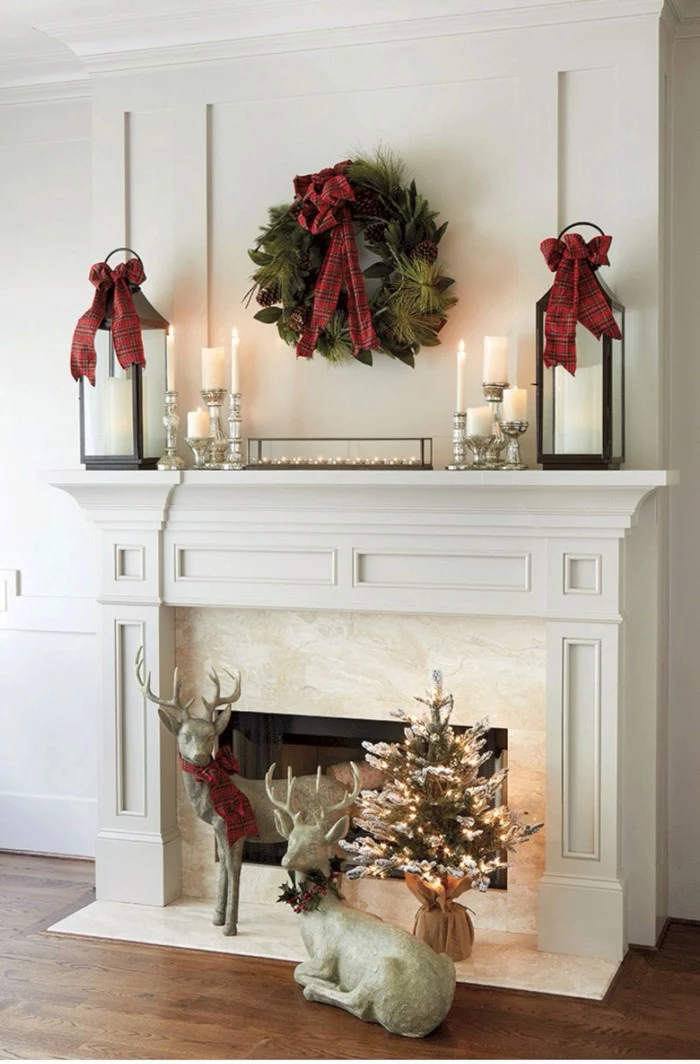
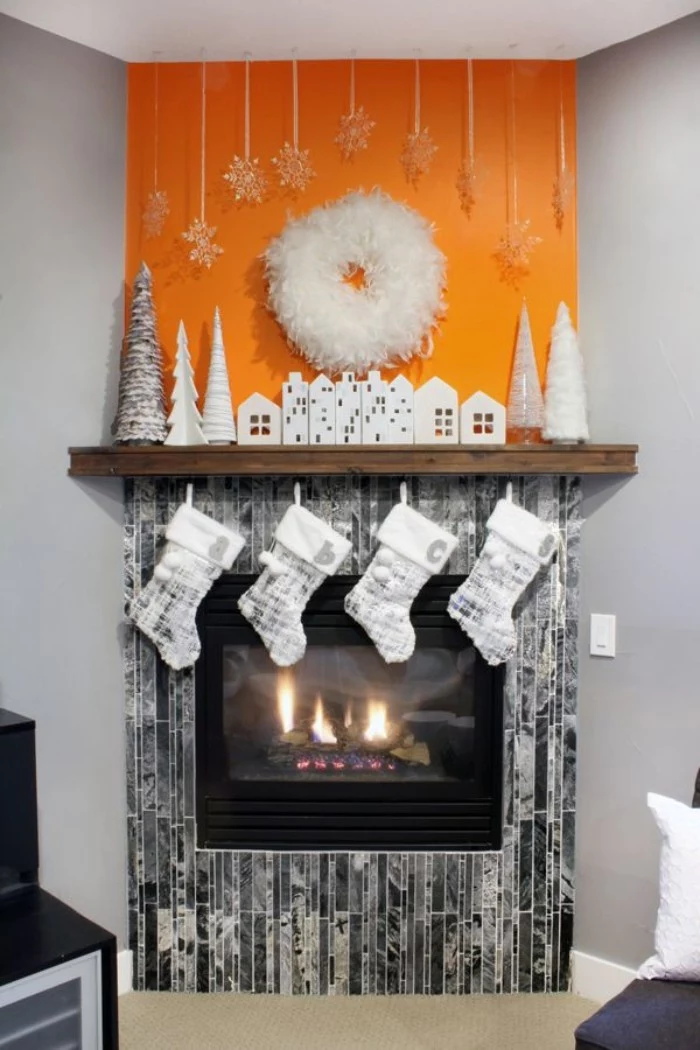
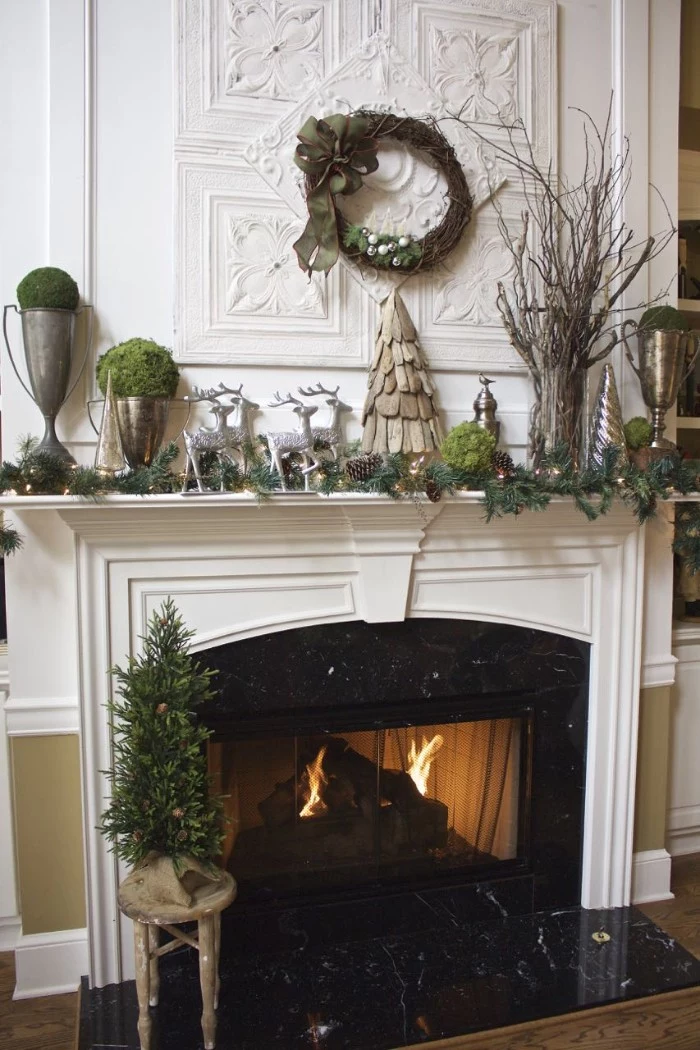
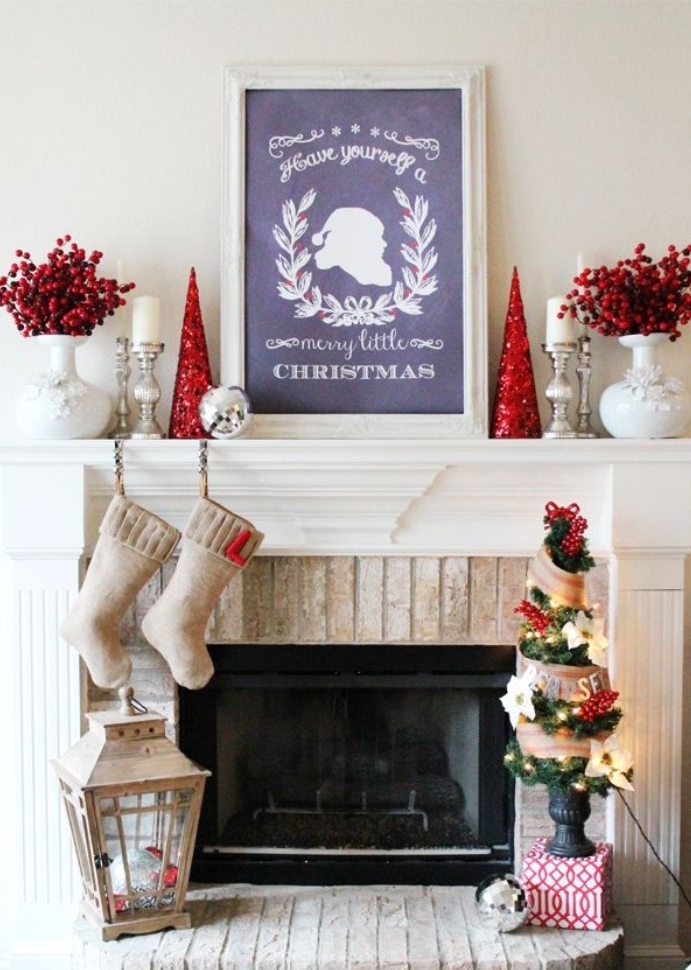
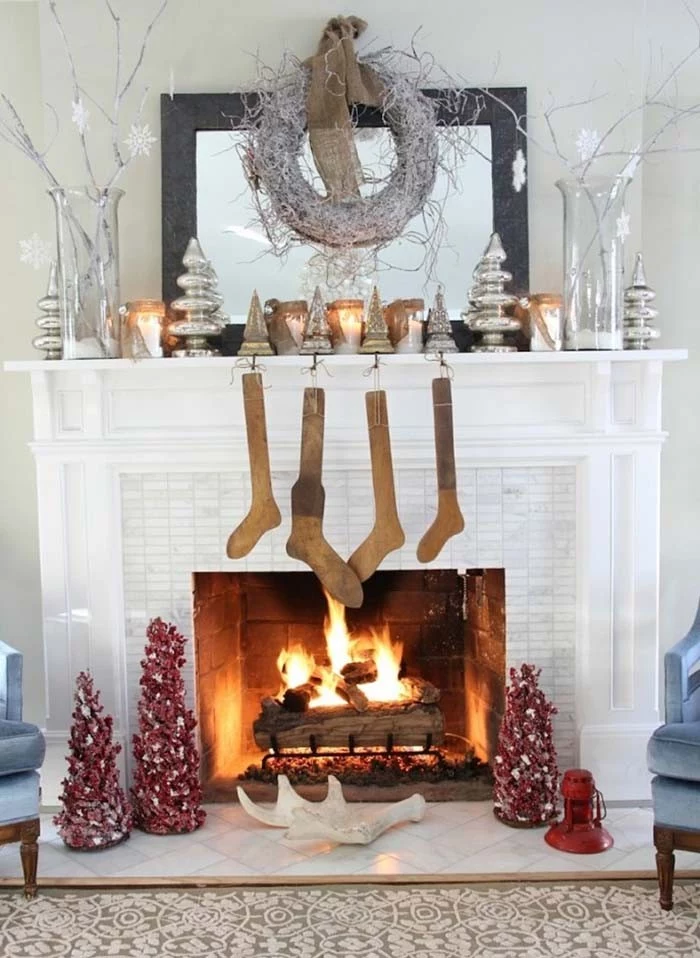
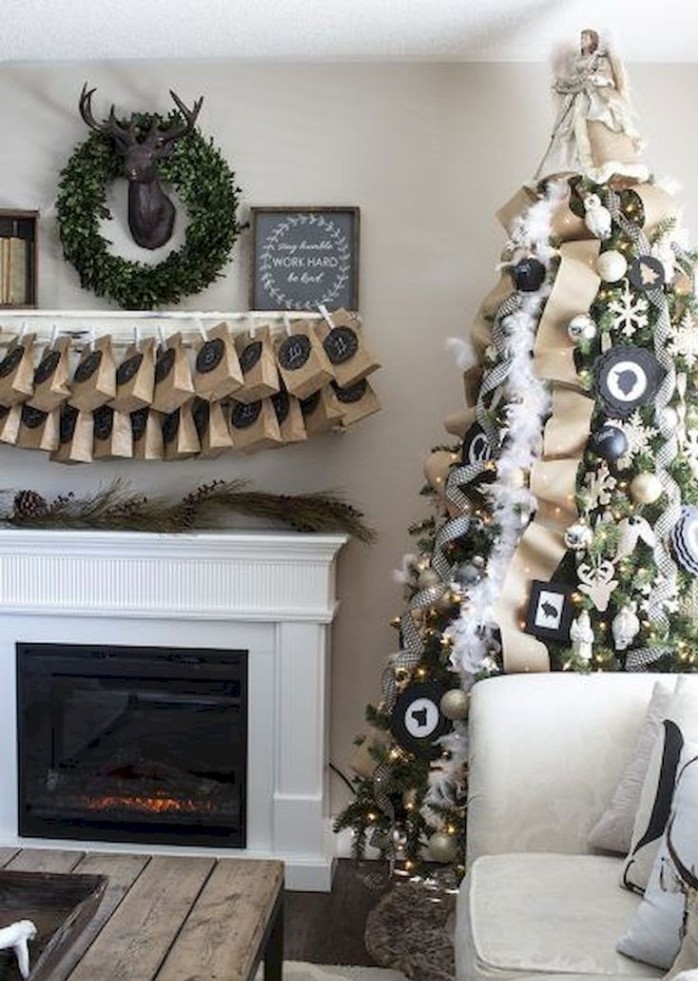
Every great design needs a focal point. This is the big item that your eyes go to first—usually a mirror, a large piece of art, or a substantial wreath hanging on the wall above the mantel. The key here is scale. A common mistake is using something too small, which just looks awkward. A good rule of thumb is to choose an anchor piece that’s about two-thirds the width of your mantel shelf.
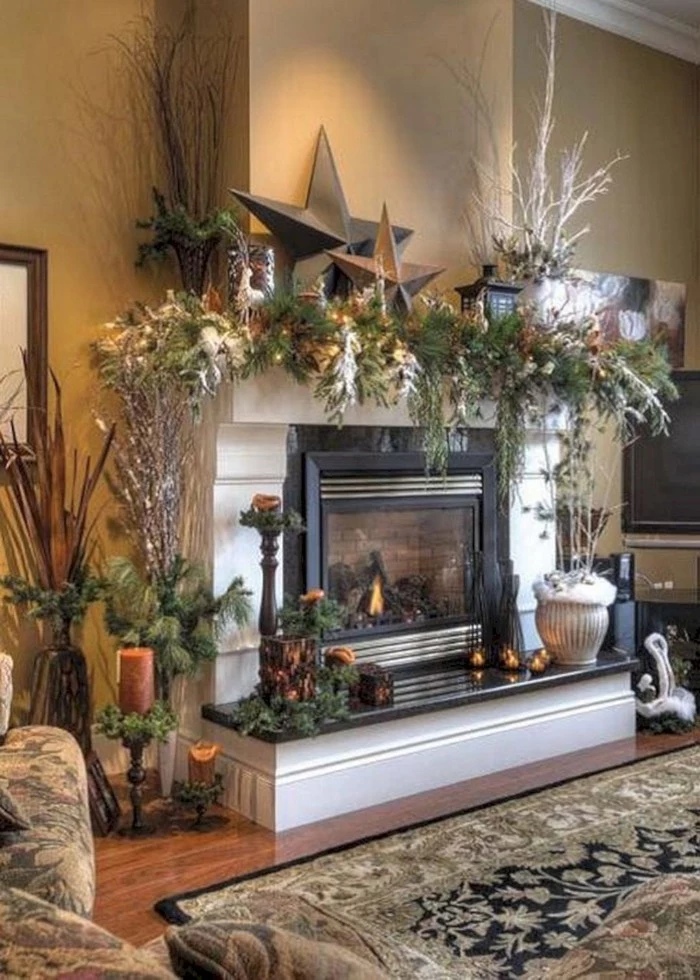
Step 3: The Height (Adding Dimension)
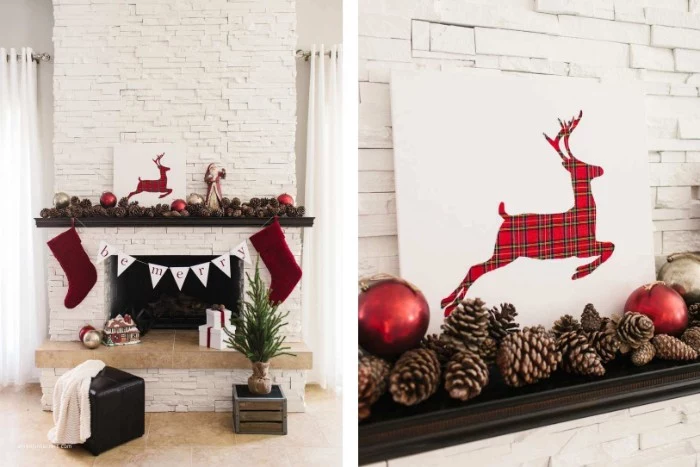
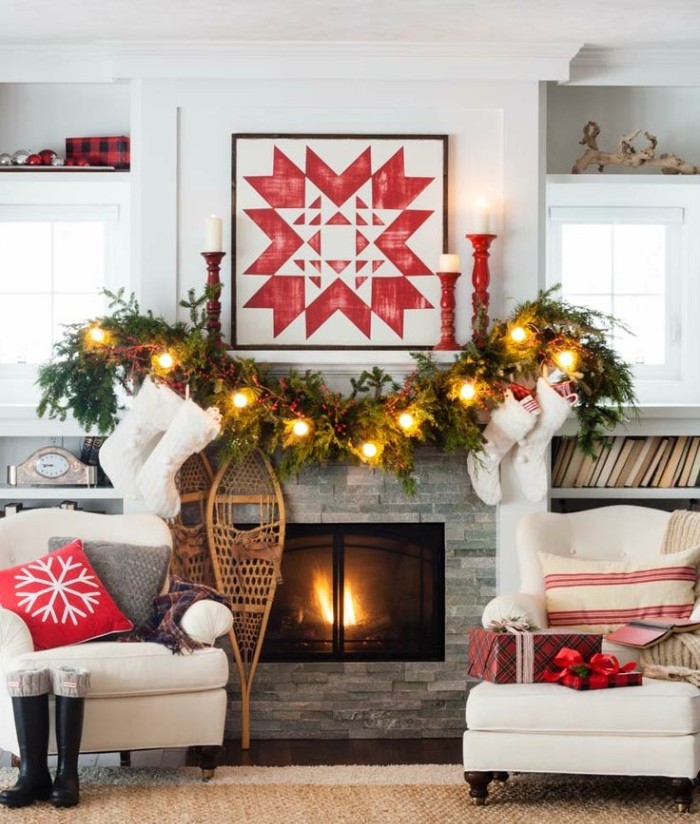
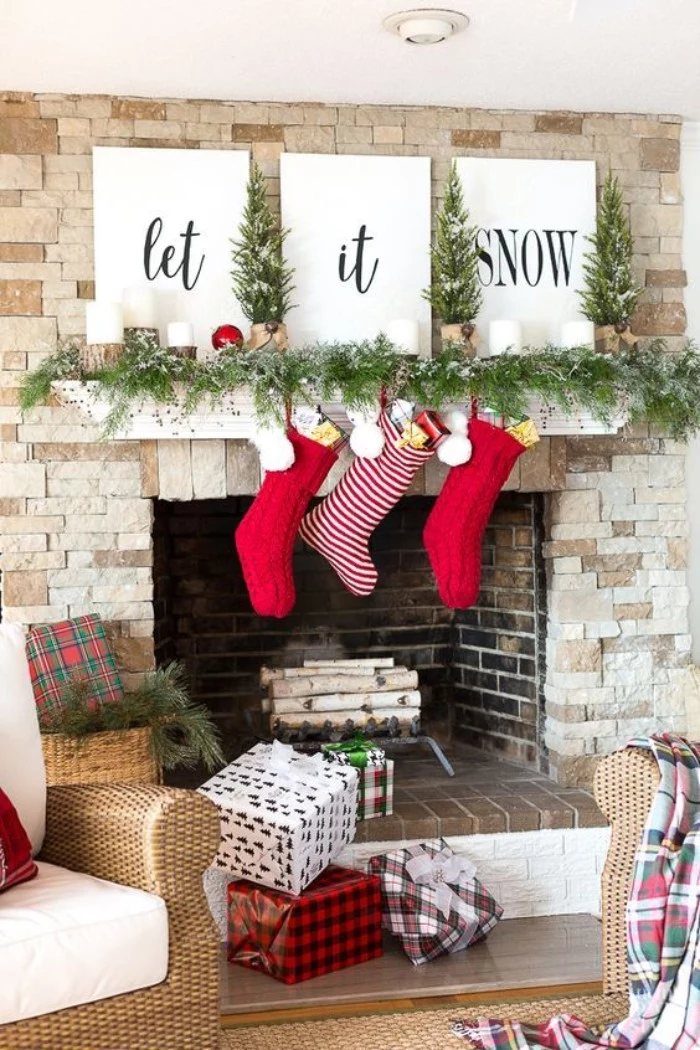
With the garland and anchor in place, it’s time to break up that long horizontal line. This is where you add things like candlesticks, mini Christmas trees, or vases with tall, bare branches. I almost always use odd numbers, like a group of three candlesticks in varying heights on one side. It feels more natural and dynamic than a perfectly symmetrical pair.
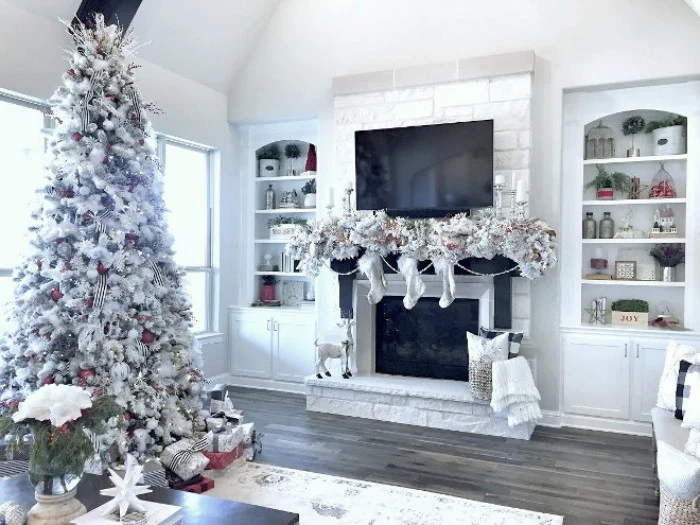
Step 4: The Glow (Bring on the Lights!)
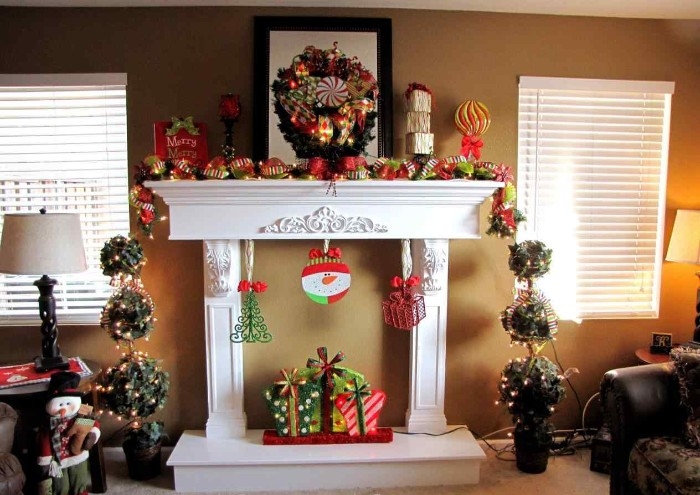
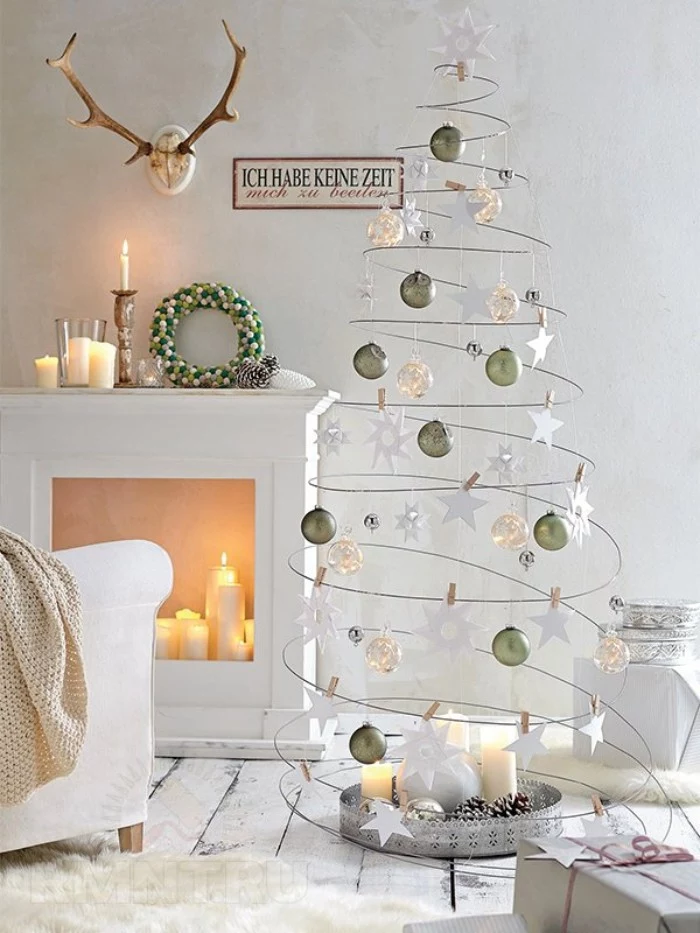
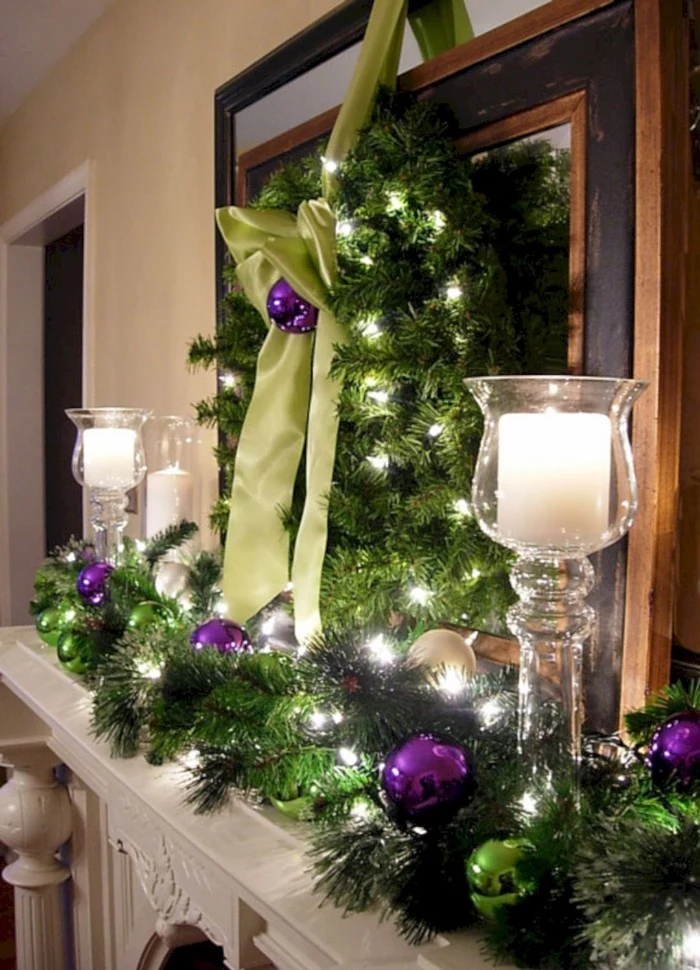
Lights are what bring the magic. For safety, please only use LED string lights. They produce almost zero heat, making them safe to snuggle into your greenery. When you’re buying them, pay attention to the color. Warm white gives that classic, cozy golden glow, while cool white is icier and more modern. I love using battery-operated lights with a built-in timer; you can tuck the battery pack into the garland, and they’ll turn on and off by themselves every night. It’s brilliant.
Pro tip: Don’t just lay the light string on top. Weave it deep into the garland, wrapping it around the main stem. This makes it look like the greenery is glowing from within.
Step 5: The Details (Personality and Texture)
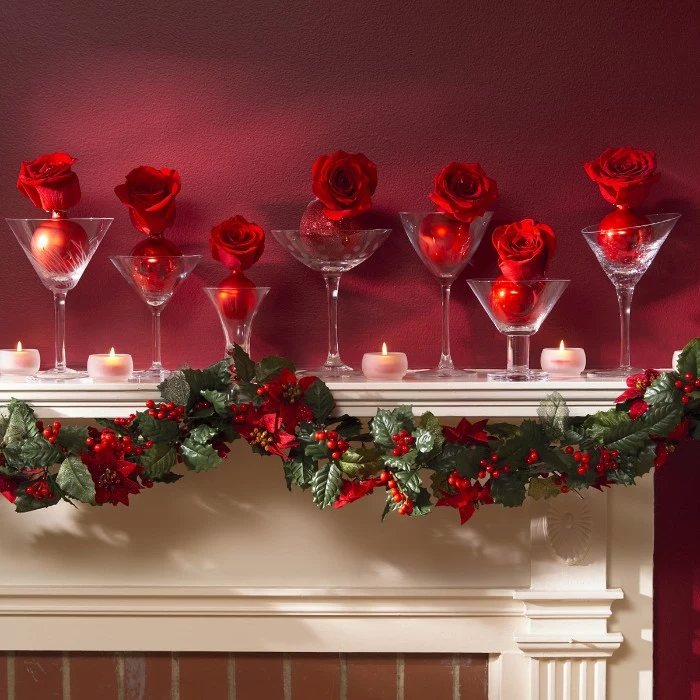
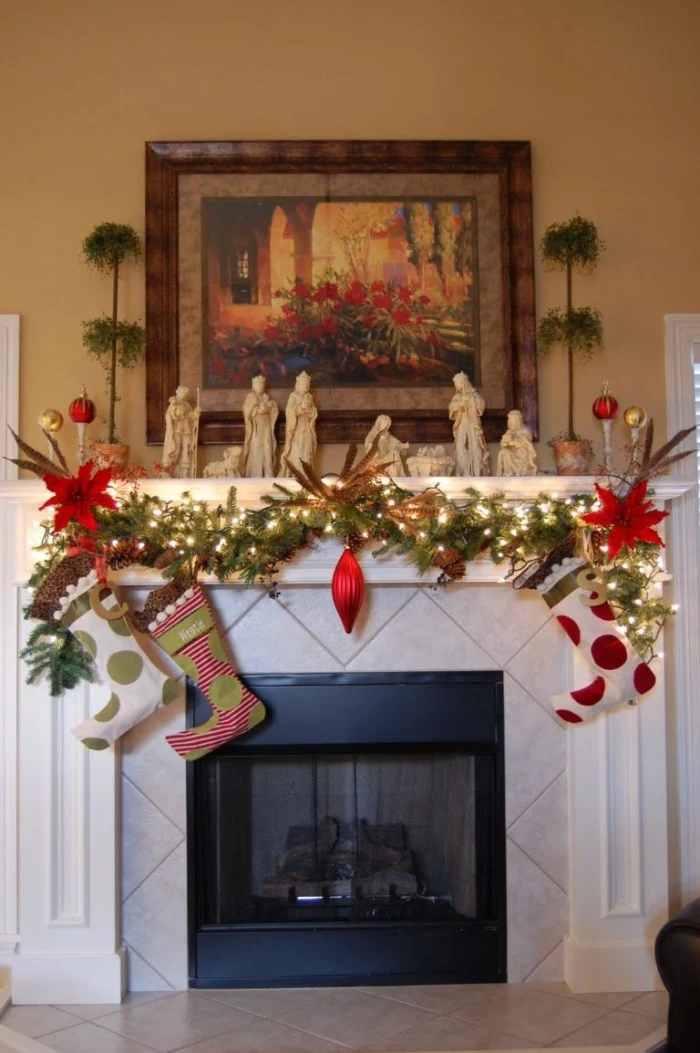
Now you get to play! This is where you add fillers like ornaments, pinecones, and ribbon. To keep the look cohesive, stick to a simple color palette of two or three main colors. Use floral wire (you can get a paddle of it for a few bucks at any craft store) to attach ornaments securely to the garland branches, not the flimsy hooks they come with. Try to mix up your textures: shiny glass balls next to matte ones, rough pinecones, and soft velvet ribbon.
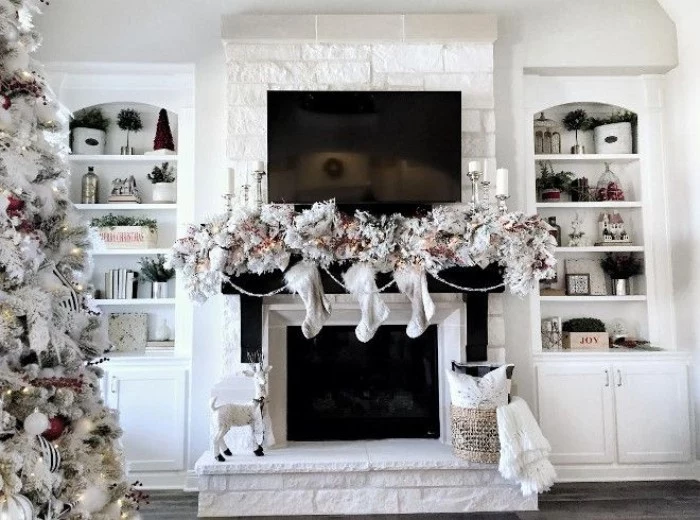
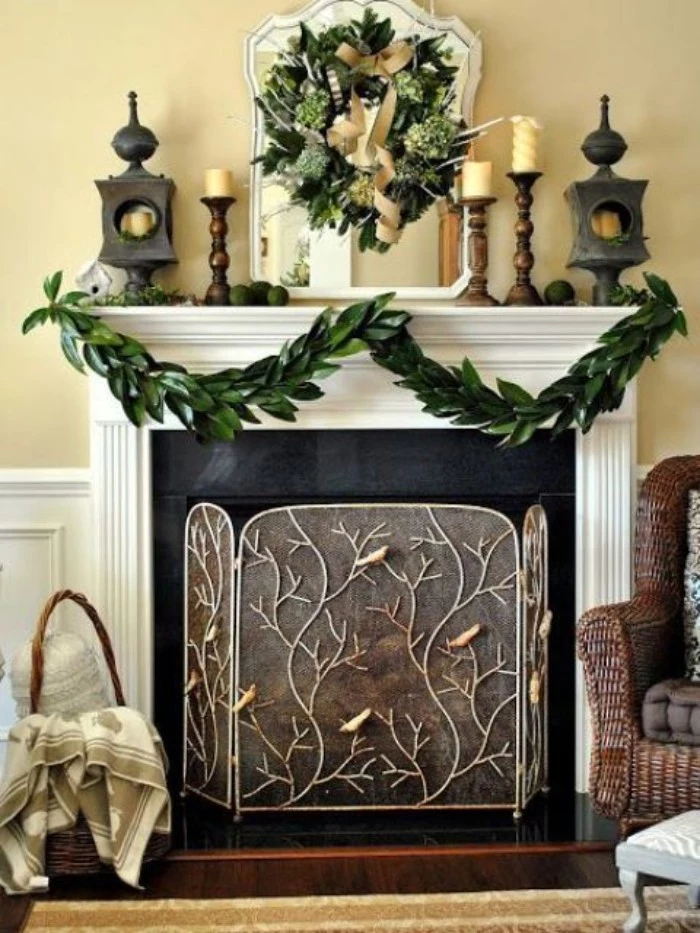
Step 6: The Grounding (Don’t Forget the Hearth!)
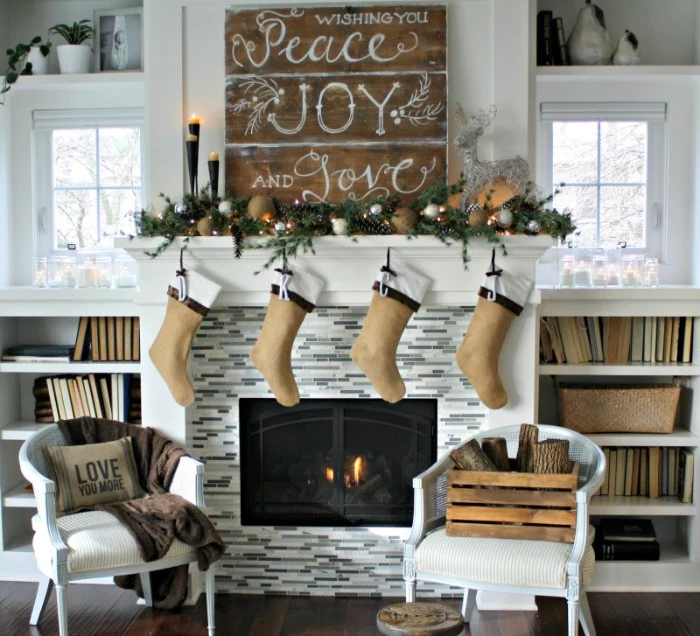
A finished design doesn’t stop at the shelf. An empty hearth can make your beautiful mantel look like it’s floating in mid-air. Ground the whole look by placing something on the floor. A nice log holder with birch logs, a cluster of lanterns with LED candles inside, or even a few artfully stacked presents can tie the whole fireplace together.
Practical Tips for Every Kind of Home
What If I Don’t Have a Mantel?
No fireplace? No problem. You can create the same festive focal point on a console table, a floating wall shelf, or even a low bookcase. Just apply the exact same layering principles: hang an anchor on the wall above, lay a garland on the surface, and add your vertical elements and details. For a very narrow shelf, sometimes called a mantel cap, a full garland can be too bulky. Instead, try layering two or three smaller evergreen sprays for a similar, but more proportional, effect.
Decorating on a Dime
You really don’t need to spend a fortune. If you can only splurge on one thing, make it that full, well-fluffed garland. For fillers, you can get creative and cheap! Foraged pinecones and branches from the yard are free and beautiful. You can also make your own stunning decorations by drying orange slices. It’s super easy: slice oranges about 1/4-inch thick, pat them dry with a paper towel, and bake them on a wire rack in a 200°F oven for about 3 hours, flipping them halfway through. They look like stained glass and smell incredible.
Damage-Free Decorating for Renters
If you’re renting, putting nails in the wall is a big no-no. This is where those high-quality 3M Command Hooks are your best friend. For stockings, skip the lightweight hangers that a kid or pet could easily pull down. Instead, invest in heavy, weighted stocking holders that sit firmly on the mantel. They usually run between $15 and $30 each but are much safer.
Your 6-Step Mantel Checklist
Feeling ready? When you’re in the middle of it, just come back to this quick list to stay on track.
- The Foundation: Fluff and secure your main garland.
- The Anchor: Hang your large focal point on the wall above.
- The Height: Add vertical elements like candlesticks or mini trees.
- The Glow: Weave in your (LED!) string lights.
- The Details: Fill in with ornaments, pinecones, and ribbon.
- The Grounding: Place something on the hearth to complete the look.
A Final Word on Safety
I know we already covered this, but it’s the most important part. A beautiful home is a safe home.
Always maintain proper fire clearances. Only use LED lights near greenery. Never, ever leave real candles unattended on a mantel. And finally, don’t overload your shelf. Your peace of mind is way more important than any decoration. Happy decorating!
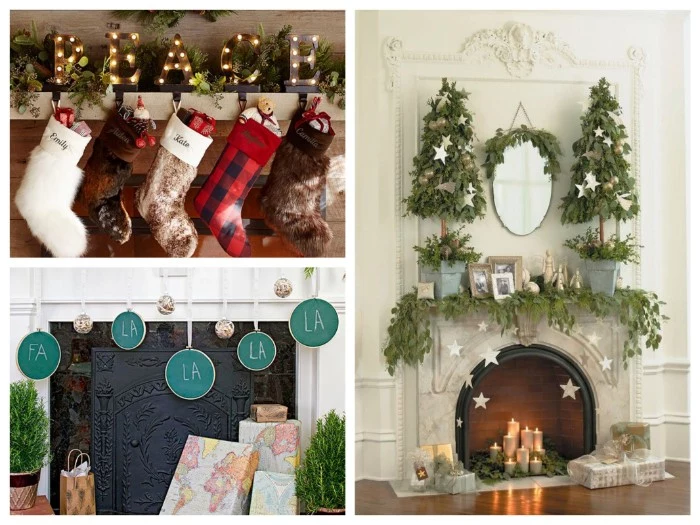
Inspiration Gallery
Don’t just decorate the eyes; engage the nose. The scent of Christmas is powerful. A few drops of pine or cinnamon essential oil on your pinecones, or a strategically placed scented candle like Diptyque’s ‘Feu de Bois’ or Yankee Candle’s ‘Balsam & Cedar’, can make your display feel truly immersive and magical.
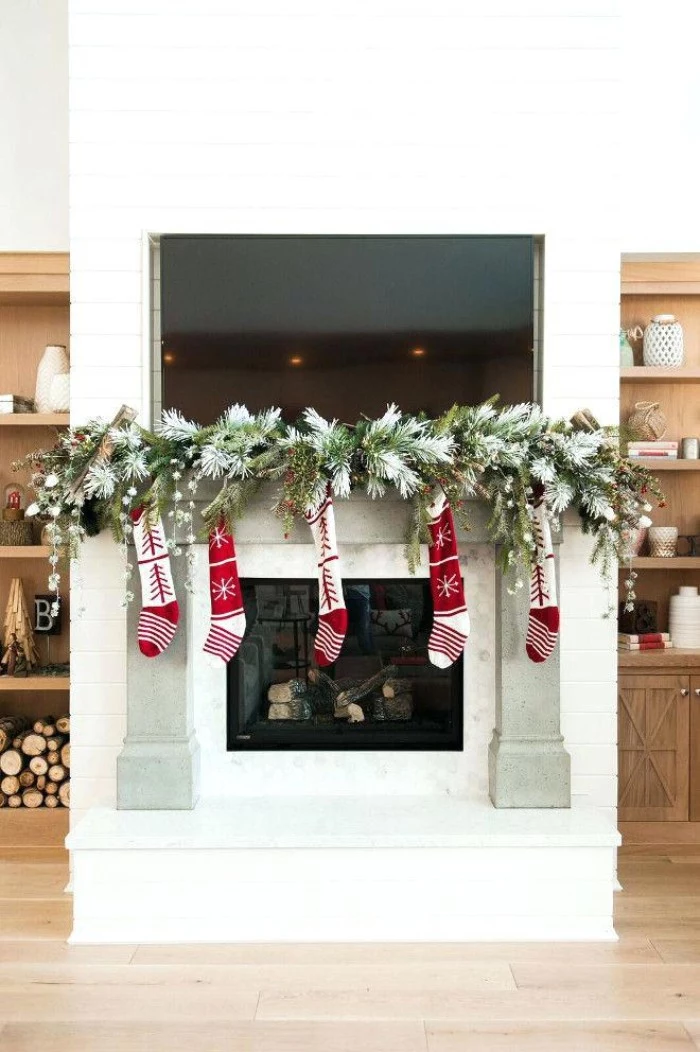
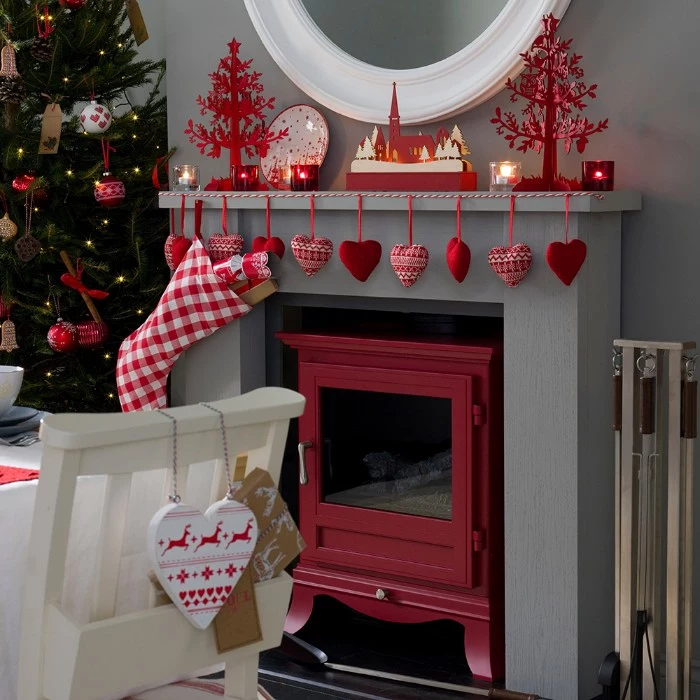
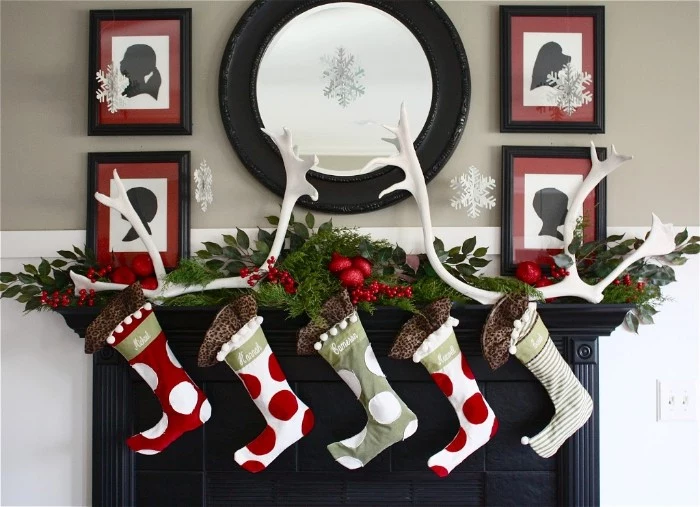
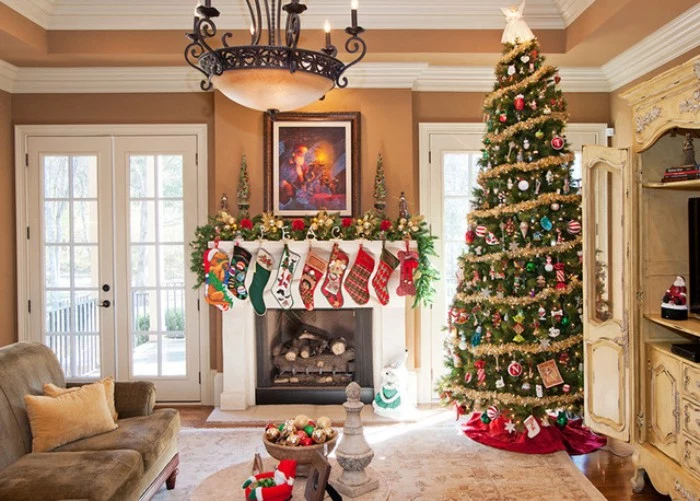
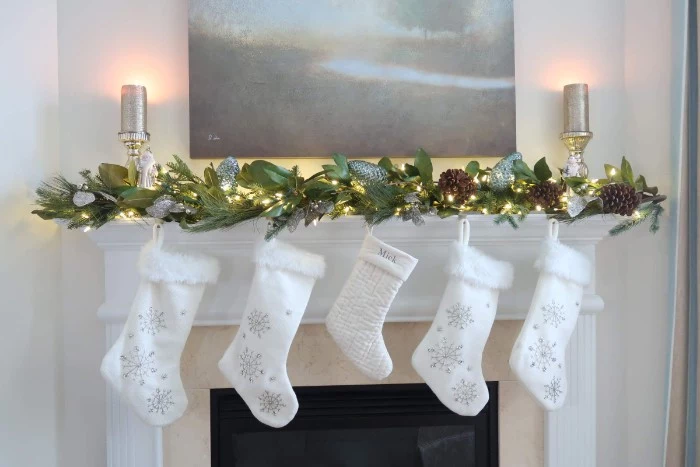
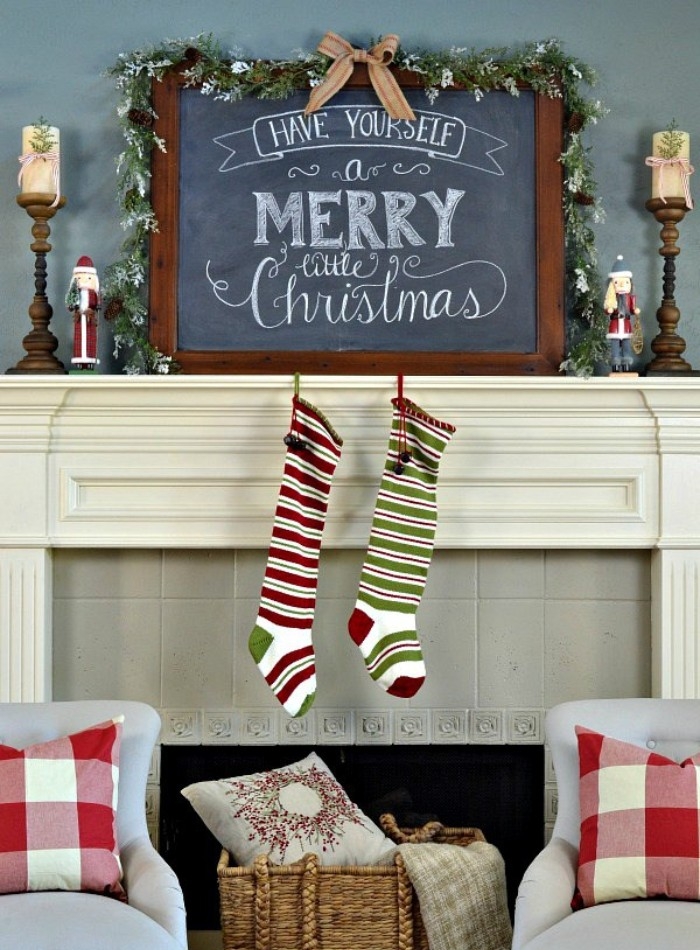
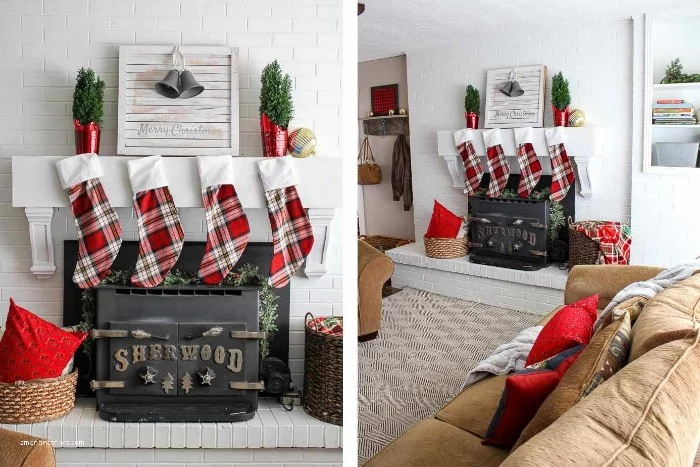
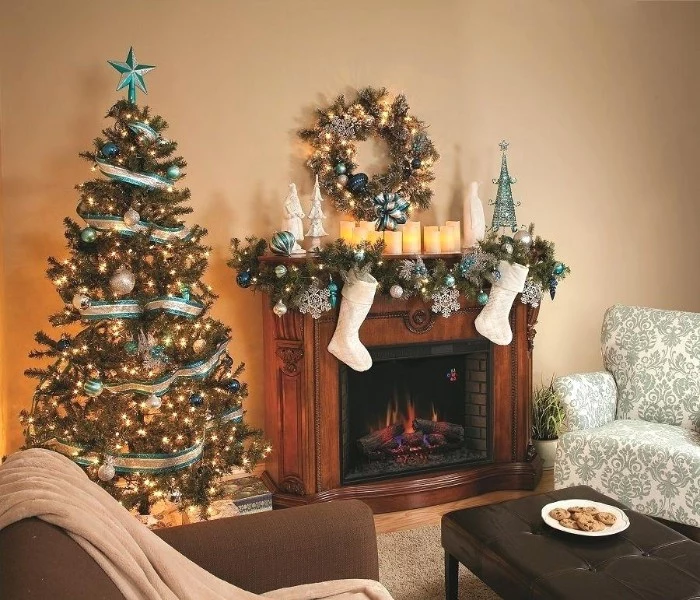
- For heavy, filled stockings, use sturdy, weighted mantel hooks from brands like Pottery Barn that use gravity to stay put.
- For lighter or purely decorative stockings, clear Command™ hooks placed on top of or just under the mantel’s edge offer a strong, damage-free alternative. Check the weight limit on the package!
Think in odd numbers: When grouping objects like candles or small decorative trees, arranging them in clusters of three or five is more visually appealing and dynamic than placing them in even-numbered pairs. This simple design trick creates a sense of natural, effortless balance.

The tradition of hanging stockings is believed to originate from a story of Saint Nicholas, who secretly tossed gold coins down a chimney that landed in stockings left by the fire to dry.
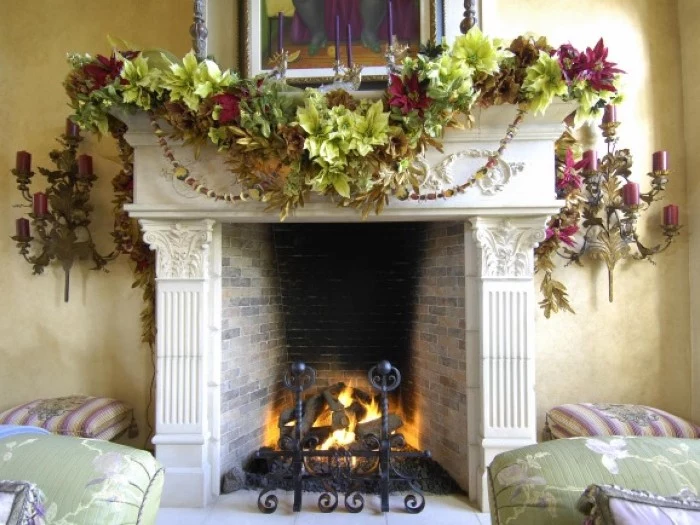
To achieve that lush, professional look, mix real and faux greenery. Here’s how:
- Start with a high-quality, realistic faux garland (like those from Balsam Hill or Afloral) as a durable, non-shedding base.
- Weave in sprigs of fresh, fragrant cedar, seeded eucalyptus, or magnolia leaves for authentic texture and scent.
- This hybrid approach gives you the best of both worlds: longevity and a multi-sensory experience.

My mantel is very narrow. What can I do?
Focus on using the vertical space above the mantel instead of cluttering the shallow shelf. Hang a dramatic wreath or an oversized mirror on the wall. For the mantel itself, opt for a slender, delicate garland like eucalyptus or even a simple string of wooden beads. Use tall, thin candlestick holders to draw the eye upward and create an illusion of depth.
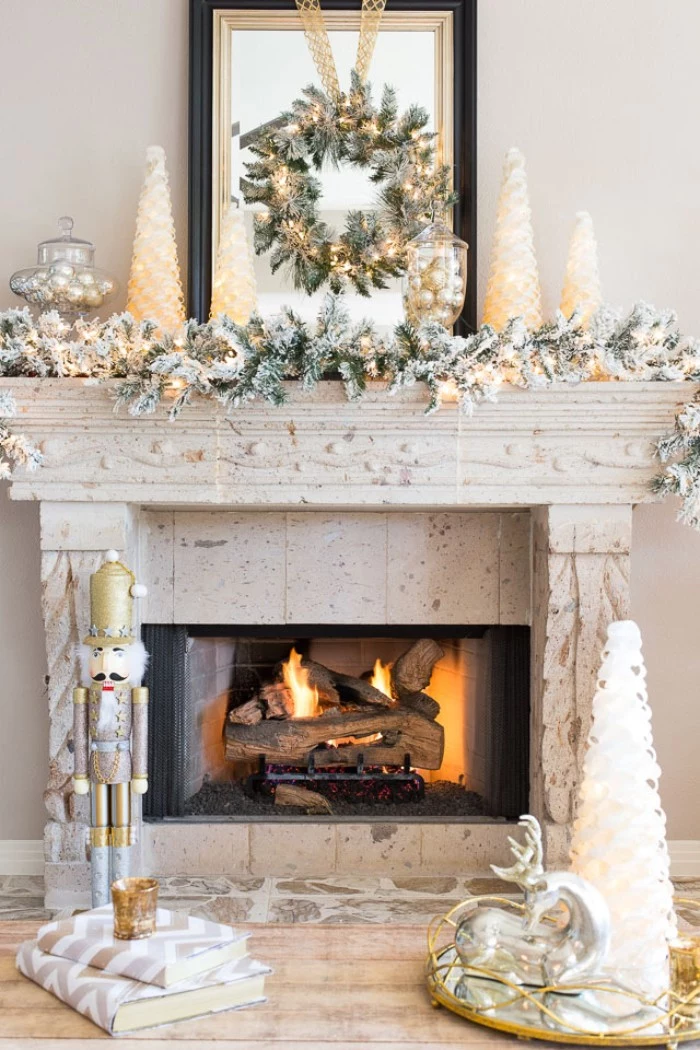
Symmetrical Design: Features mirrored elements on both sides of the center point (e.g., matching topiaries and stocking groups). This creates a formal, classic, and serene look.
Asymmetrical Design: Uses different objects of similar visual weight to create balance (e.g., a tall vase on one side, balanced by a lower, wider grouping of objects on the other). This feels more modern and dynamic.
Your choice depends on whether you crave calm order or energetic style.
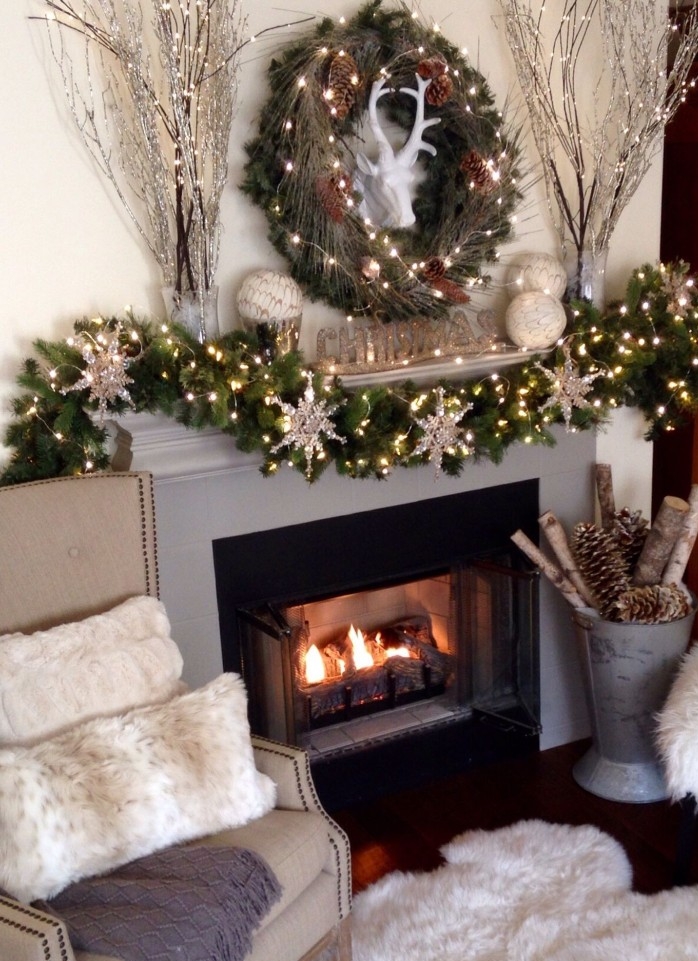
A string of 100 traditional incandescent mini-lights uses about 40 watts. A comparable string of LED lights uses only 5 watts.
This huge energy difference means you can layer multiple strands of LED lights guilt-free. Plus, they stay cool to the touch, making them a much safer choice to nestle directly into flammable greenery and against your wall, significantly reducing fire risk.
- It adds a warm, inviting glow without adding bulk.
- It highlights the unique textures of your ornaments and greenery.
- It makes any metallic elements sparkle magnificently.
The secret? Weaving two or three strands of battery-operated micro fairy lights deep within your main garland. Their thin, flexible wires are nearly invisible, creating a magical effect that seems to come from within.
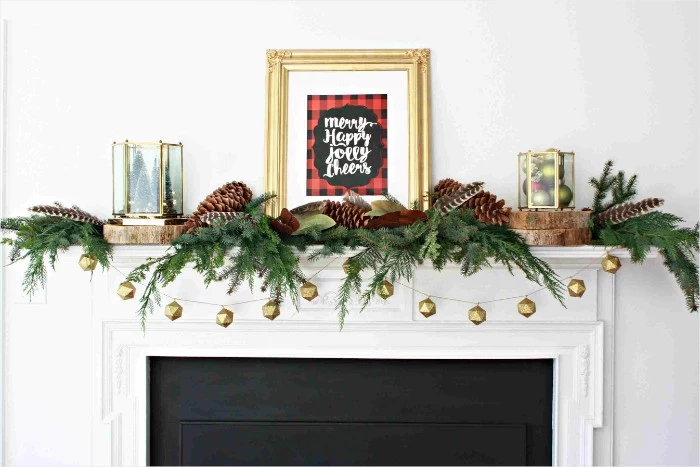
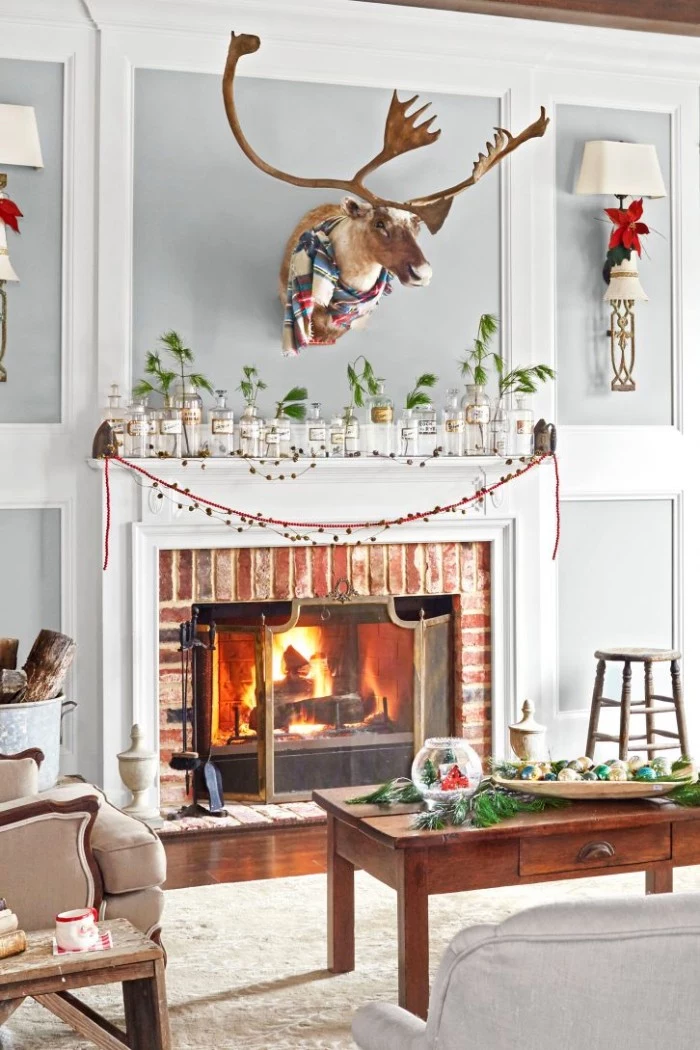
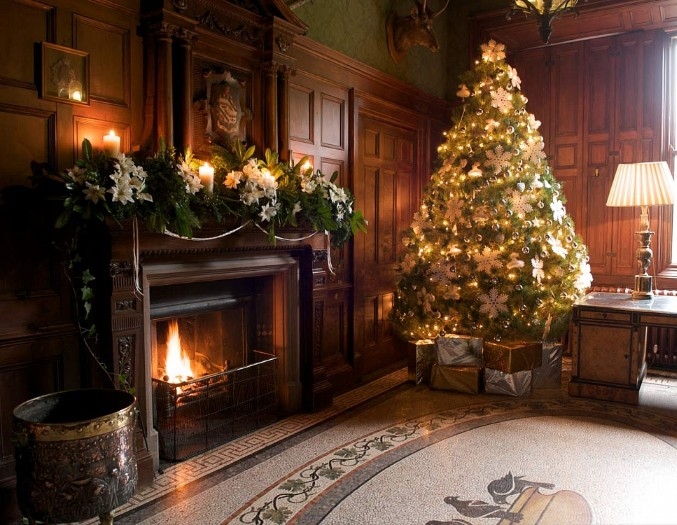
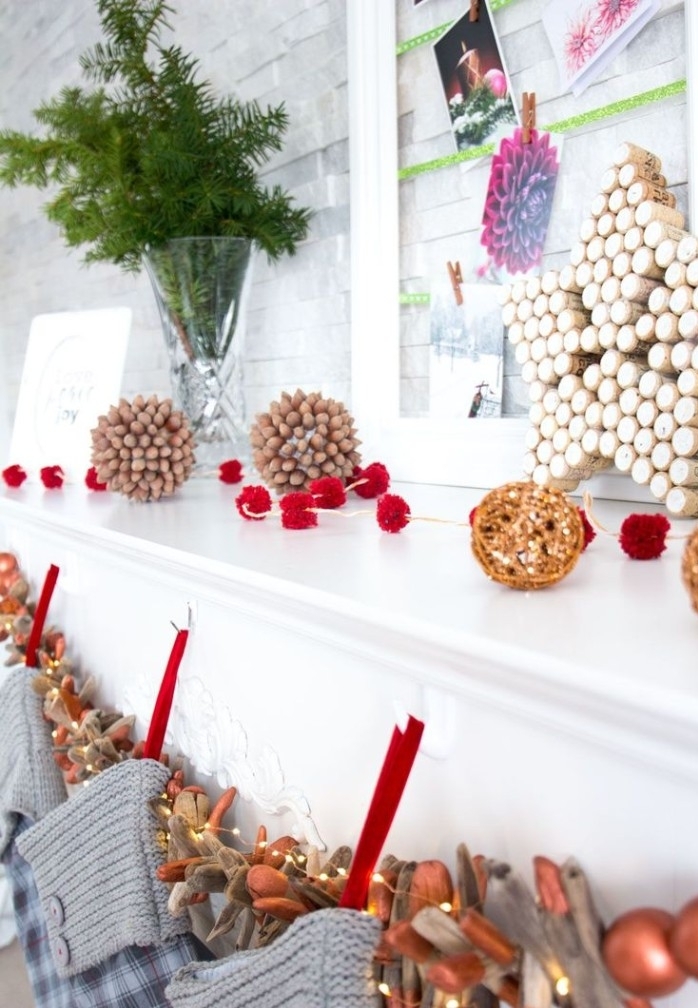
For a touch of rustic charm, a woodland-inspired theme is timeless. Think beyond just pinecones. Incorporate elements like birch bark, shed antlers (real or faux), sprigs of red berries, and small woodland creature figurines. The result is a cozy, cabin-chic vibe that feels both festive and connected to nature.
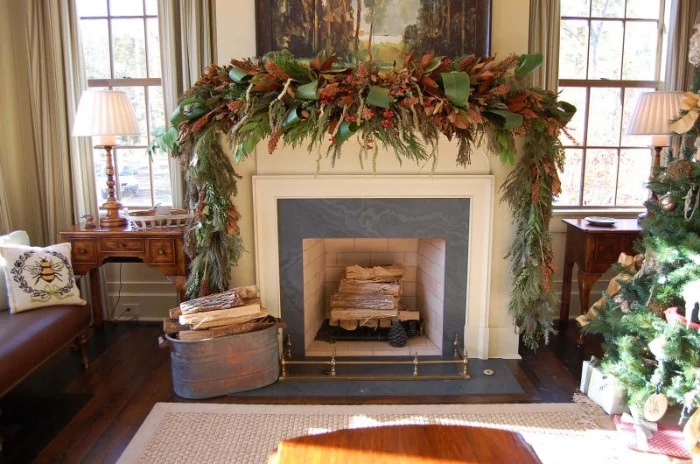
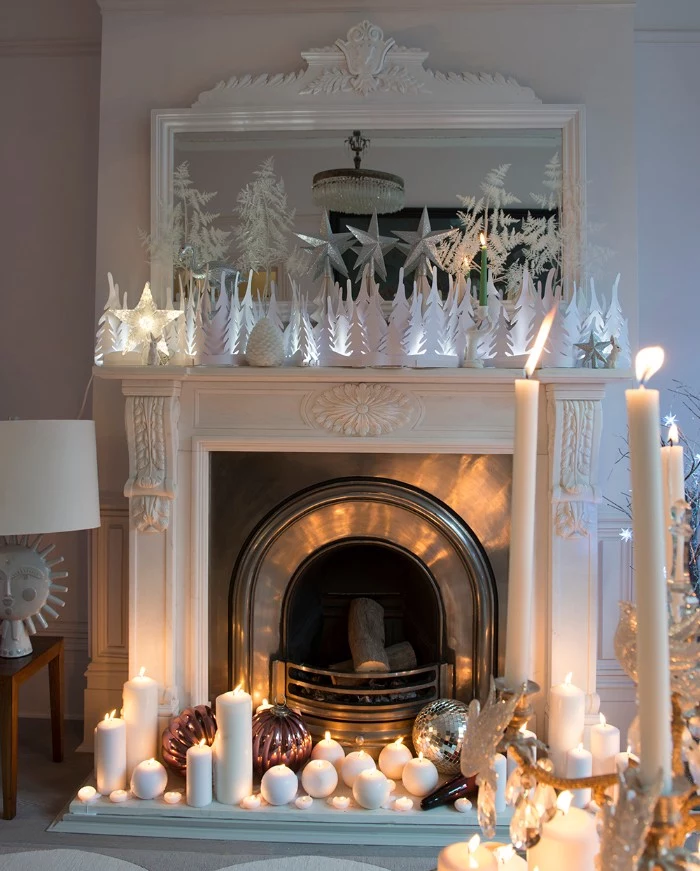
Don’t forget the hearth! The area below your mantel is valuable decorating real estate. It’s the perfect spot to ground your design. A beautiful stack of white birch logs, a wicker basket filled with cozy blankets, or a cluster of oversized lanterns with LED candles will make your entire fireplace composition feel complete and intentional.

Are real candles safe to use on a mantel?
Caution is key. If you use real candles, they must be in heavy, stable holders that won’t tip over. Place them far from any flammable greenery and never leave them burning unattended. For worry-free ambiance, consider high-quality flickering LED candles from brands like Luminara; they provide a remarkably realistic glow without any of the risk.
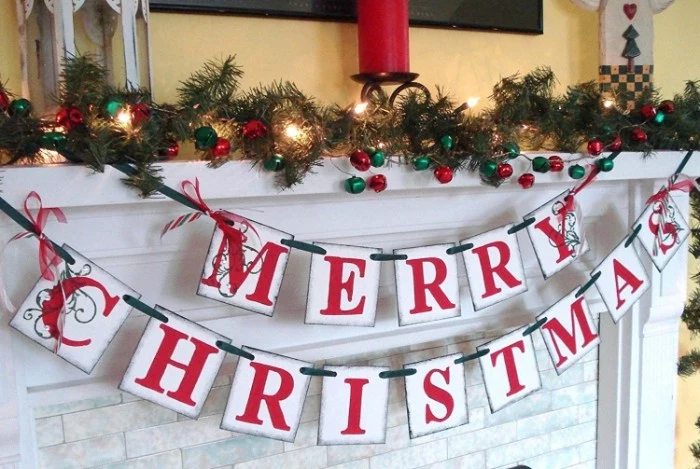
Instead of a traditional garland, try a ‘garland of objects’. String together items that fit your theme, such as vintage brass bells, felted wool balls in festive colors, or even gingerbread cookies. It’s a unique and personal twist that can become a family-favorite tradition.
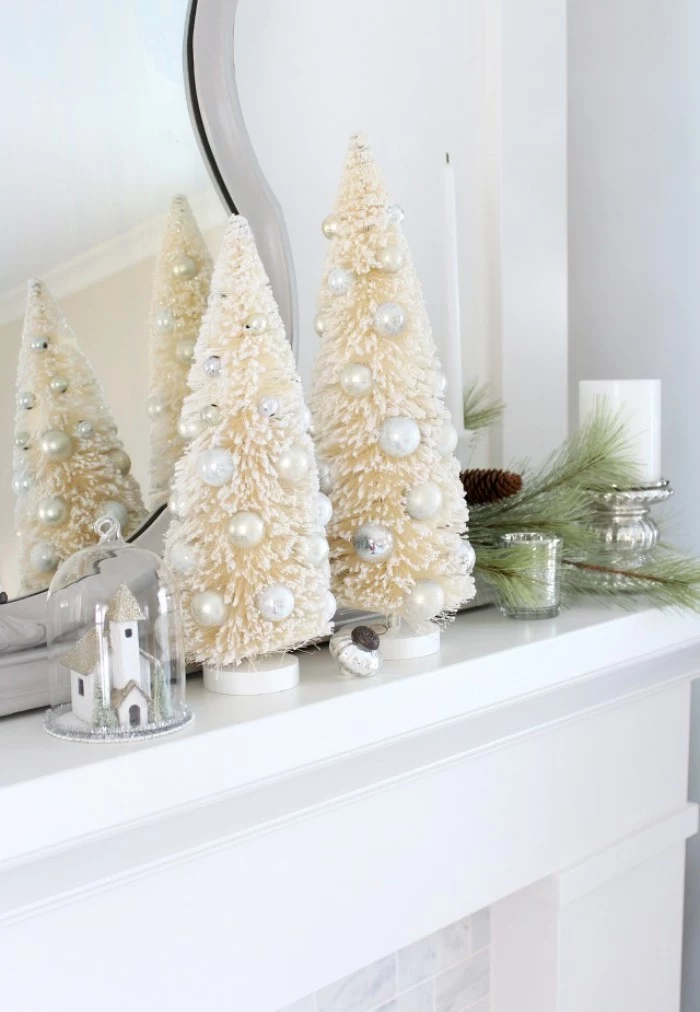
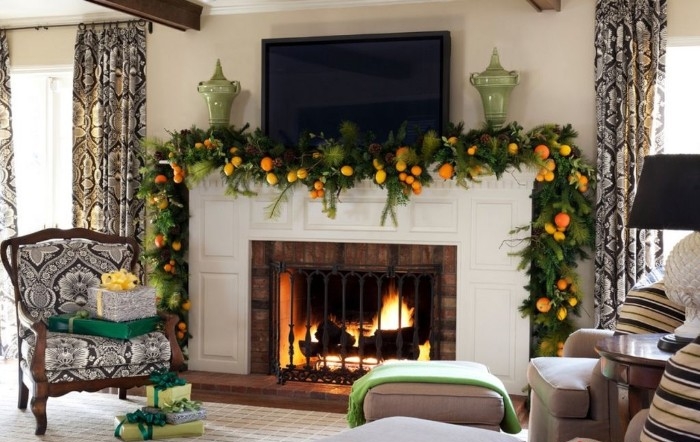
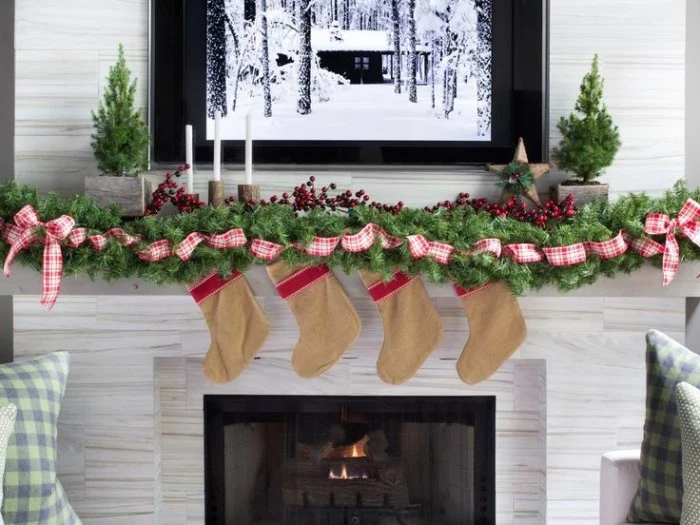
- Icy & Cool: Mix silver, ice blue, and crisp white for a serene ‘Winter Wonderland’ feel. Mercury glass and glitter are perfect here.
- Warm & Earthy: Combine deep forest green, copper, and cream. This palette is sophisticated and cozy.
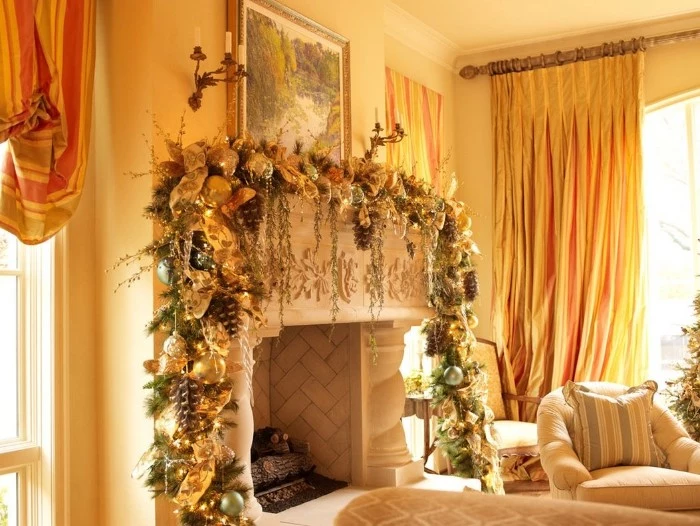
- Rich & Moody: Try deep jewel tones like emerald, plum, and navy with brushed gold accents for a luxurious, dramatic effect.
The finishing touch: Incorporate ribbon. A beautiful velvet or satin ribbon woven loosely through the garland adds a layer of softness and color. Let the ends trail down elegantly on one or both sides of the mantel for a final, polished flourish.
Fresh Greenery: Offers unparalleled natural fragrance and authentic texture. However, it requires frequent misting to avoid drying out, can be messy, and will only last for a few weeks.
Preserved Greenery: Real eucalyptus, boxwood, or cedar that has been professionally preserved. It maintains its look for months or even years without water, but lacks the fresh scent and can be more expensive upfront.
For longevity with a real-touch feel, preserved is an excellent investment.

- It adds instant sophistication and glamour.
- It beautifully reflects the warm glow of string lights and candles.
- It works with nearly any color scheme, from classic red to modern blush.
The secret? A touch of metal. You don’t need much. A pair of brass reindeer, a few mercury glass votives, or a silver-beaded garland is all it takes to elevate your entire display.
According to a 2022 survey, 34% of people who decorate for Christmas begin before Thanksgiving. Planning your mantel design early gives you time to gather the perfect pieces without the holiday rush.
If your fireplace has a textured stone or brick facade where hooks won’t stick, get creative with your anchoring. Use small, clear fishing line to tie your garland to discreet weights (like decorative rocks or even small bags of sand) hidden behind objects on the mantel.
For a minimalist yet festive look, less is more. Forgo the garland entirely and place a single, striking asymmetrical branch of pine or juniper across the mantel. Pair it with three simple, unadorned white ceramic houses or a single tall, elegant brass candlestick.
Think beyond the bauble: To create a truly layered and interesting mantelscape, focus on a variety of textures. Combine the rough texture of pinecones, the smooth sheen of glass ornaments, the softness of velvet ribbon, and the waxy leaves of fresh magnolia for a display that is as pleasing to the touch as it is to the eye.

Create a cohesive look by linking your mantel to your Christmas tree. It’s simple:
- Choose two or three ornament styles or colors from your tree and repeat them in a bowl or scattered amongst the greenery on your mantel.
- Use the same style of ribbon on both your tree topper and woven through your mantel garland.
How do I care for my fresh garland to make it last?
Fresh greenery is thirsty! Before hanging, give your garland a full soak in a bathtub of water for a few hours. Once it’s up, mist it with water every 1-2 days. Keep it away from direct heat sources, including sunny windows and heating vents, to prevent it from drying out prematurely. This little bit of care can keep it looking fresh through New Year’s.

A budget-friendly secret: Foraged finds. A walk in your backyard or a local park can yield beautiful, free decor. Look for interesting branches, shapely pinecones, and hardy greenery. Just be sure to give them a good shake and cleaning outdoors before bringing them into your home.


