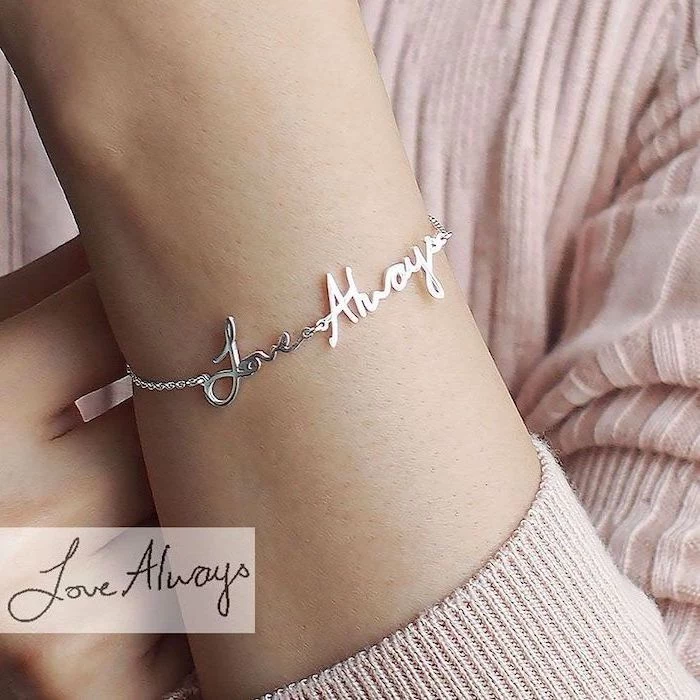
From My Workshop: DIY Gifts for Mom That She’ll Actually Use and Love
My workshop has a permanent smell of sawdust and warm beeswax. It’s a scent I’ve grown to love over two decades of working with my hands, turning chunks of wood, clay, and wax into things people can actually hold and use. And out of all the things I’ve ever made, the gifts for my mom are the ones that get the most care.
In this article
I’ve learned that a gift’s real value isn’t on the price tag. It’s in the time and thought you pour into it. A handmade gift tells a story—the story of you, thinking of her, while you sanded that edge or mixed that color.
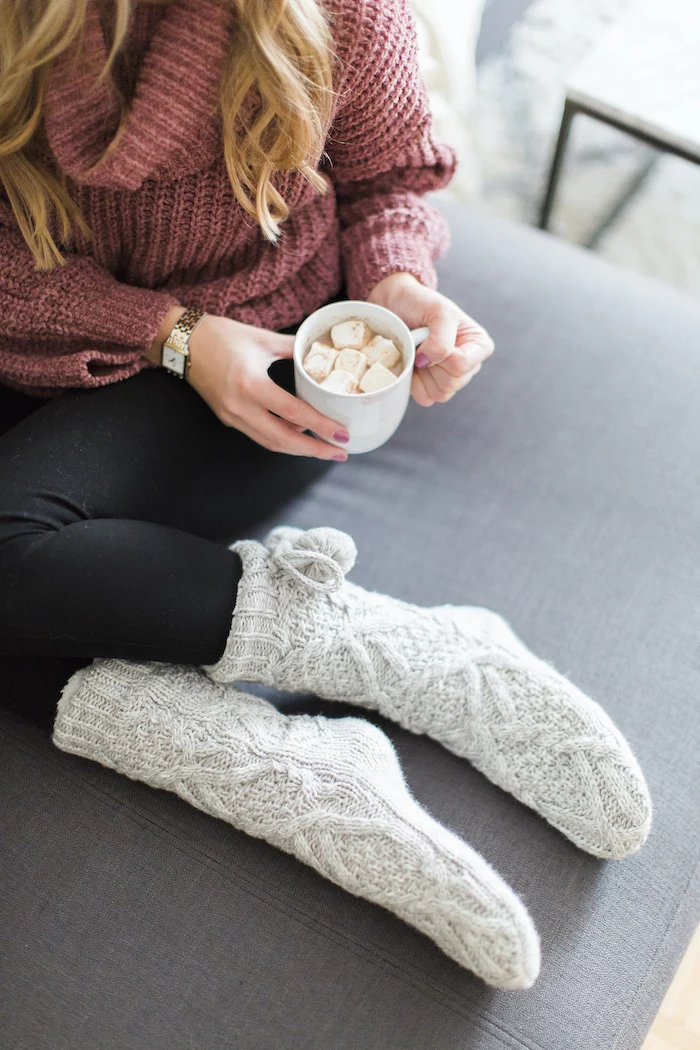
Let’s be honest, the holidays can feel like a mad dash to the checkout button. We click, we wrap, we move on. But there’s another way. It involves slowing down, getting your hands a little dirty, and putting a piece of yourself into the present. And no, we’re not aiming for factory-perfect. In fact, some of my favorite projects have little quirks. I once made my mom a set of ceramic mugs where the glaze ran a bit. She told me she loved them because she could see my hand in the work. That’s the magic we’re going for.
This isn’t just another list of 50 fleeting ideas. Instead, we’re going to dive deep into a couple of classic, heartfelt projects that I’ve personally made and taught to others. I’ll give you the pro techniques, the simple science behind the craft, and the hard-won lessons from my own mistakes. We’ll cover what can go wrong and, more importantly, how to fix it. This is all about giving you the confidence to create something that will be cherished long after the wrapping paper is gone.
First, Let’s Get Your Head in the Game
Before you even think about touching a tool, getting into the right mindset is key. Making something by hand is basically an act of mindfulness. You have to shut out the noise and just focus. The goal isn’t just the finished object; it’s the process. Every time your mom sips her coffee from that coaster, she’ll feel the echo of the quiet time you dedicated to her.
But you’ve got to be realistic. Don’t try a massive, complicated project two days before Christmas. That’s a recipe for stress and a half-finished gift. It’s so much better to make a simple, beautiful item than an ambitious one that’s poorly executed. Trust me, the joy on her face when she opens something you poured your heart into is worth every single second.
And my most important piece of advice? Let go of perfection. Handmade means made by a human, not a machine. Little variations aren’t flaws; they’re character. They’re the unique signature of your love and effort. It took me years to truly learn that lesson, both in my workshop and in life.
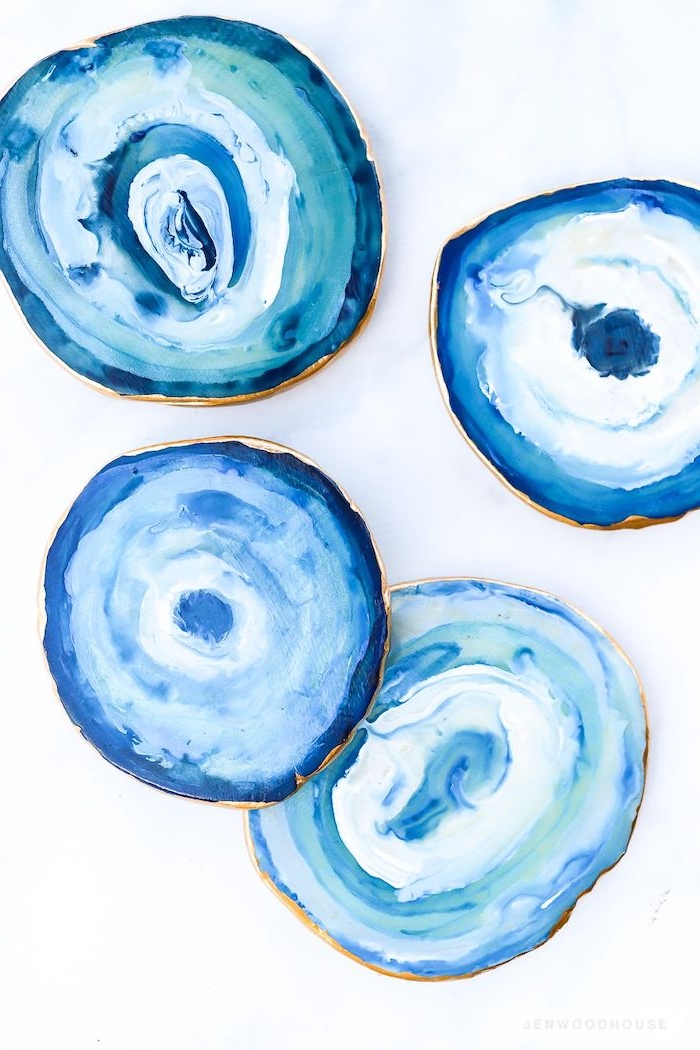
Project 1: Faux Agate Coasters from Polymer Clay
Sure, you can buy agate coasters, but making your own means you can pick the exact colors to match her living room. This project is a fantastic introduction to polymer clay because it’s so forgiving and versatile. Once you get the hang of it, you can use these same skills to make jewelry, little trinket dishes, you name it.
The Lowdown on Materials and Science
Polymer clay is a type of PVC plastic that stays soft until you bake it at a fairly low temperature. The secret to making it strong and not brittle is all about proper conditioning and baking.
- Choosing Your Clay: For something that needs to be durable like a coaster, don’t just grab the cheapest clay. I’d go for brands like Sculpey Premo or Fimo Professional. They’re much stronger after baking than the softer clays (like Sculpey III), which can sometimes snap. The pros often use Kato Polyclay because it’s super firm, but to be frank, it can be a real workout to condition by hand.
- Why Conditioning is a MUST: Straight out of the package, the clay is stiff. Conditioning is just a fancy word for warming it up and kneading it. This makes it pliable, strong, and way less likely to crack in the oven. The #1 reason beginner projects fail is under-conditioned clay. Plan to knead it by hand or run it through a dedicated pasta machine (seriously, don’t use it for food after this!) for a good 5-10 minutes.
- Baking (Curing) is a Science: Baking is what turns the soft clay into hard plastic. It needs to hit a specific temperature and stay there for a while. Here’s the catch: your home oven’s temperature dial is probably lying to you. They can be off by 25 degrees or more! So, a cheap oven thermometer is your best friend here. It’s not optional if you want good results. Baking too low gives you a weak coaster; baking too high can burn the clay and release nasty fumes.
Your Shopping and Game Plan
Let’s make a set of four cool coasters. Here’s what you’ll need and a rough idea of the cost.
Heads up on timing: Plan for about 2-3 hours of active work. With all the baking and drying time, the whole project will take about 6-8 hours, but most of that is just hands-off waiting time.
The Shopping List:
- Polymer Clay: You’ll want 3-4 different 2 oz blocks. A good combo is white, a dark color like navy or black, a mid-tone like teal, and a metallic like gold or silver. (Cost: about $3-$4 per block, so ~$12-$16 total). You can find these at Michaels, Jo-Ann, or online.
- Acrylic Roller or Pasta Machine: A simple roller is fine. If you get a pasta machine, it’s for clay ONLY from now on.
- Work Surface: A simple ceramic tile or a sheet of glass works great. You can even bake right on the tile.
- Oven Thermometer: The most important $7 you’ll spend on this project.
- Sandpaper: Get a variety pack of wet/dry sandpaper with grits like 400, 600, and 1000. (Cost: ~$5-$8).
- Sealant: A small can of water-based polyurethane (Varathane is a great brand) or, for a super glossy finish, a two-part epoxy resin kit. (Cost: ~$10-$20).
- Gold Leaf Pen or Paint: This adds that professional touch to the edges. (Cost: ~$6).
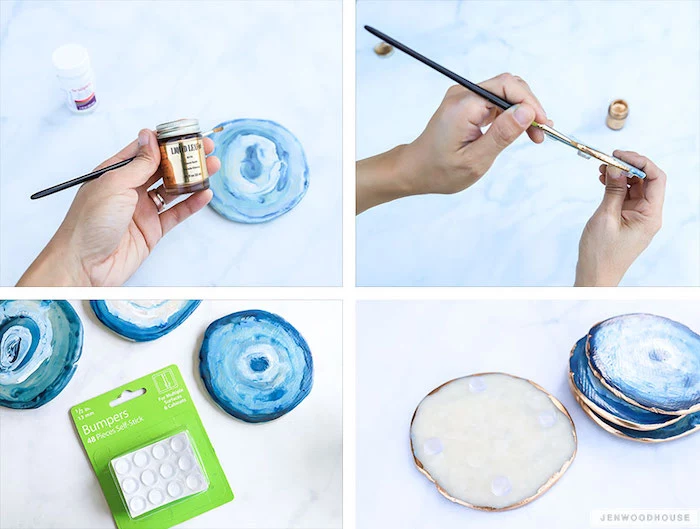
- Cork Backing or Rubber Feet: To protect furniture. You can get a pack for a few bucks.
Total Starter Cost: Expect to spend around $40-$60 for all the supplies. But the good news is you’ll have plenty of sealant, sandpaper, and tools left over for future projects!
The Step-by-Step Guide
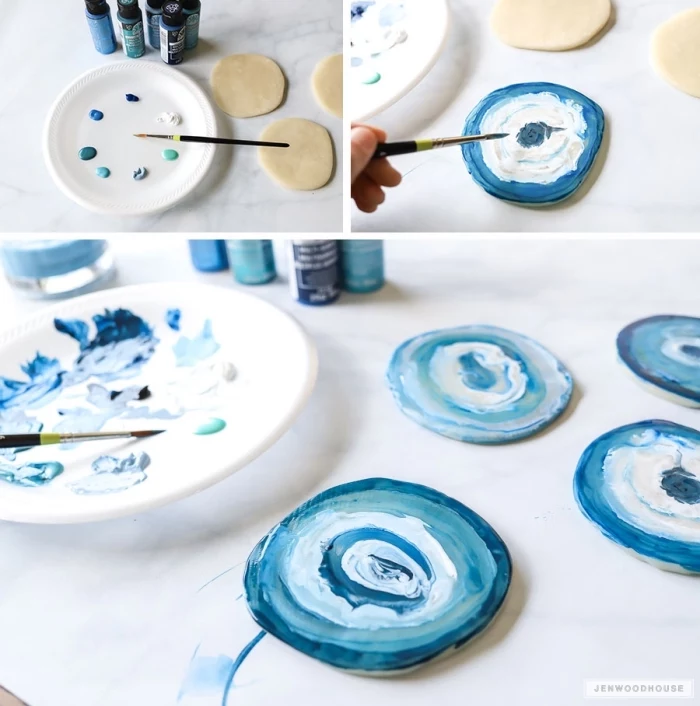
- Condition & Blend: First, condition each color of clay separately until it’s soft. Roll each one into a snake. Now, twist the snakes together. Fold that twisted log in half and twist it again. Do this a few times, but don’t overdo it! You want veins of color, not a single muddy blob.
- Shape the Blank: Roll the twisted log into a ball. Now for the magic trick: slice it. Slicing reveals the gorgeous, stone-like patterns inside. I usually slice off 1/4-inch thick pieces.
- Form the Coaster: Take a slice and gently flatten it into a rough circle about 4-5 inches wide. Use your acrylic roller to smooth it to a final thickness of about 1/4 inch. Try to keep the thickness even so it bakes evenly.
- Bake with Precision: Preheat your oven with the thermometer inside to the temperature on the clay package (usually around 275°F / 130°C). Once the temp is stable, pop your coasters in. For a 1/4-inch piece, bake for at least 30 minutes. Pro tip: I often bake mine for 45-60 minutes. A longer bake time at the correct temperature makes the piece way more durable.
- Finishing is Everything: After they’ve cooled, it’s time to sand. This is the step that separates a homemade craft from a handmade gift. Wet sanding (under a trickle of water) with 400-grit paper will remove any fingerprints or bumps. Then move up through the higher grits until the surface feels silky smooth.
- Seal and Protect: To make them waterproof, you need a sealant. A few thin coats of water-based polyurethane give you a lovely satin finish. For that glassy, store-bought look, you’ll need to use a two-part epoxy resin. Just follow the instructions on the box carefully and use a little heat gun to pop any air bubbles.
- The Final Flourish: Use that gold leaf pen to carefully paint the edges. It just makes them look so finished. Once that’s dry, stick on the cork backing or little rubber feet with a strong glue like E6000.
Common Problems & Quick Fixes
- My coaster broke! Ah, the classic. This almost always means it was under-baked. Your oven was likely cooler than you thought. Get that thermometer and try baking the next batch a little longer.
- It burned and smells awful! Been there. I once scorched a whole batch of ornaments and had to air out the house for an hour. This means your oven was too hot. Again, the thermometer is your friend. If it happens, open the windows and let the oven cool completely before you take anything out.
- In a rush? Try a quick win: Use these exact same steps to make one beautiful fridge magnet or a couple of unique keychain charms. It’s a great way to test the waters in about an hour!
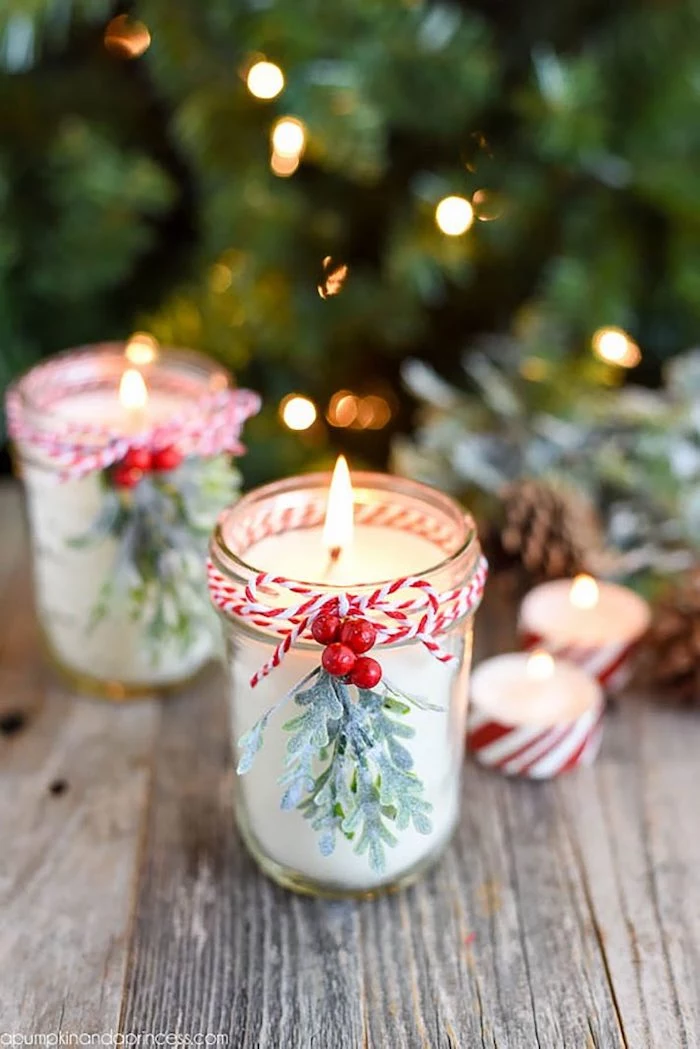
Project 2: Hand-Poured Soy Candles
A candle seems simple, right? But making a good candle—one that burns cleanly and smells amazing—is all about precision. I learned the hard way that it’s a mix of art and science, especially when it comes to wicks and temperatures.

The Science of a Perfect Burn
Think of a candle as a tiny fuel-delivery system. The flame melts a pool of wax, the wick soaks it up, and the flame burns the wax vapor. The goal is a clean, even burn.
- Why Soy Wax? I pretty much only use natural soy wax for candles in jars. It burns slower and cleaner than paraffin wax (which comes from petroleum) and has a lower melting point, making it safer for home projects. The downside? Soy wax can be a little fussy. It’s known for “frosting” (white crystal patterns) or pulling away from the glass, but don’t worry, we can manage that.
- The Wick is Everything: The most common mistake is using the wrong size wick. A wick that’s too small will “tunnel,” leaving a ton of wax stuck to the sides of the jar. A wick that’s too big will create a huge, sooty flame. You need to match your wick size to the diameter of your container. Most candle supply websites have handy charts to help you choose.
- Temperature Control is Key: This is non-negotiable for a great candle. You have to melt the wax, add the fragrance, and pour at specific temperatures for the best results.
The Nitty-Gritty Details
Pro Tip on Ratios: A great starting point for scent is 1 oz of fragrance oil per 1 lb (16 oz) of soy wax. This is about a 6% fragrance load, which gives you a wonderful scent that isn’t overpowering.
The Magic Numbers for Temperature:
- Melt your wax gently in a double boiler until it’s fully liquid.
- Let the wax cool to about 185°F (85°C). NOW you can add your fragrance oil. Stir gently but thoroughly for two full minutes to make sure it binds with the wax.
- Let the wax cool down even more, to about 135°F (57°C), before you pour it into your container. Pouring too hot is the main cause of cracks and frosting.
Pour slowly, secure your wick in the center (a clothespin laid across the jar top works perfectly), and then… walk away. Let it cure for at least 24 hours before you trim the wick to 1/4 inch and light it. For the best scent throw, let it cure for a week or two if you can stand the wait!
Inspiration Gallery
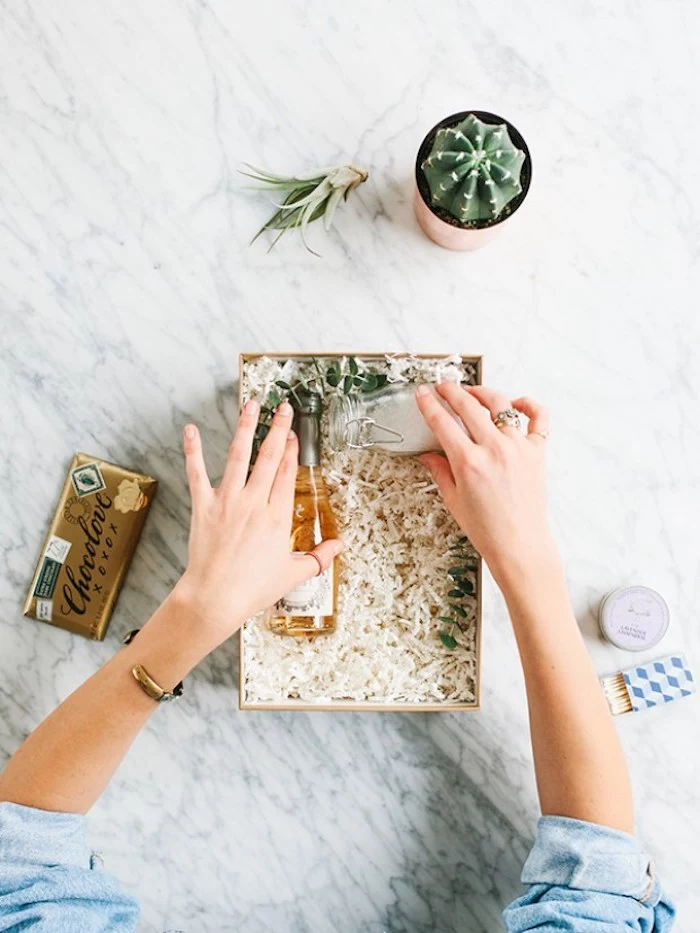
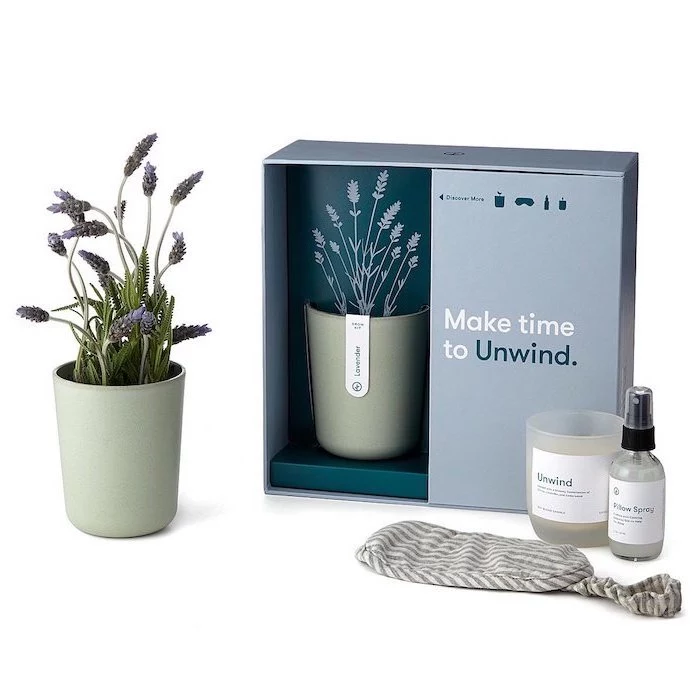
When wrapping your handmade gift, think beyond traditional paper. A simple knot of natural jute twine around a plain kraft box speaks volumes. For an extra touch, tuck in a sprig of dried lavender or a small branch of rosemary—it engages another sense and hints at the natural, personal care you put into the gift inside.
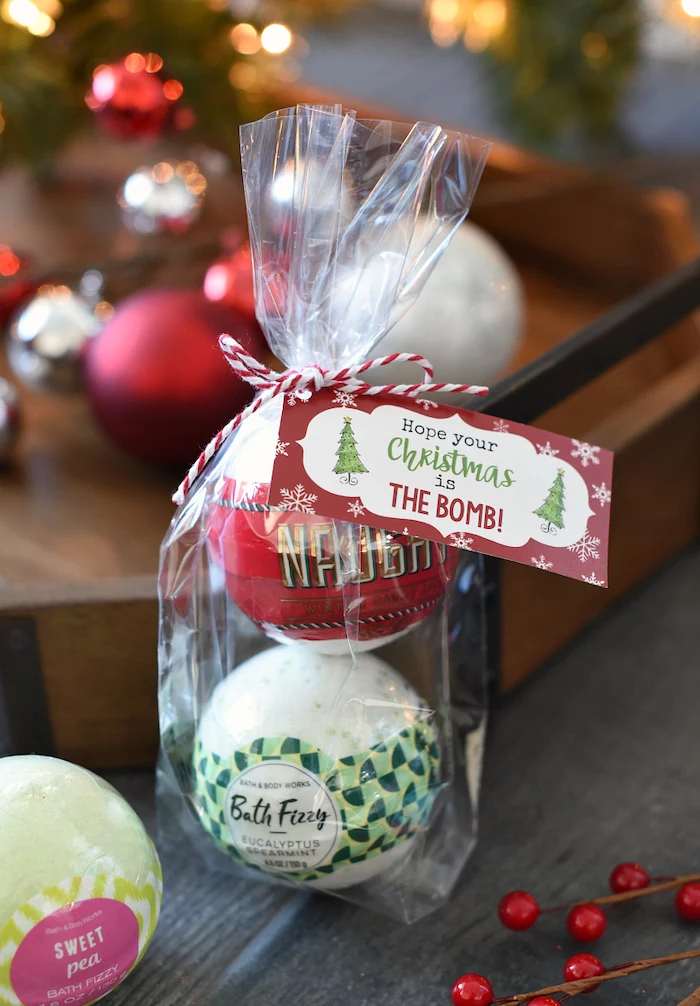
The secret to a truly luxurious bath bomb or salt soak? The right scent combination.
- For Ultimate Relaxation: Blend Lavender, Roman Chamomile, and a touch of Ylang Ylang.
- For an Energizing Boost: Combine Sweet Orange, Grapefruit, and a hint of Peppermint.
- For a Cozy, Warm Feeling: Mix Frankincense, Cinnamon Leaf, and a drop of Clove.
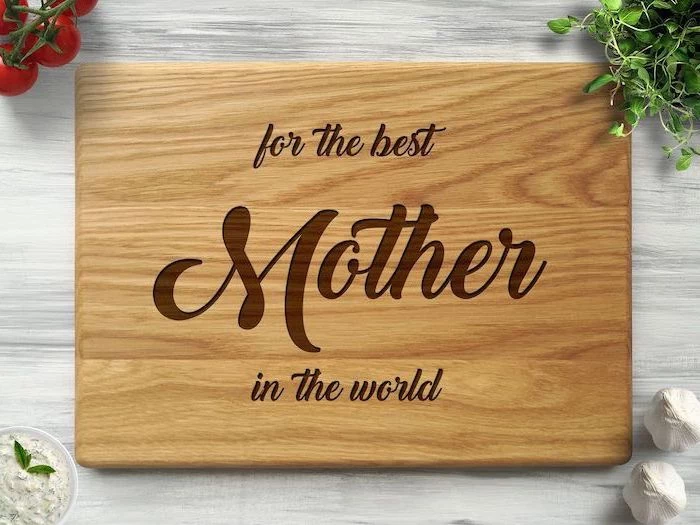
A Critical Detail for Kitchen Gifts: If you’re making a wooden cutting board, spoon, or bowl, the finish must be 100% food-safe. Don’t take chances. Look for products specifically designed for this, like Howard Butcher Block Conditioner or pure, food-grade mineral oil. It ensures the gift is not only beautiful but truly usable and safe for her kitchen.
“The desire to create is one of the deepest yearnings of the human soul.”
Tapping into that desire to make a gift for someone you love is a powerful act. It’s not about achieving perfection, but about the process of creation itself—a story your mom will feel every time she uses what you’ve made.
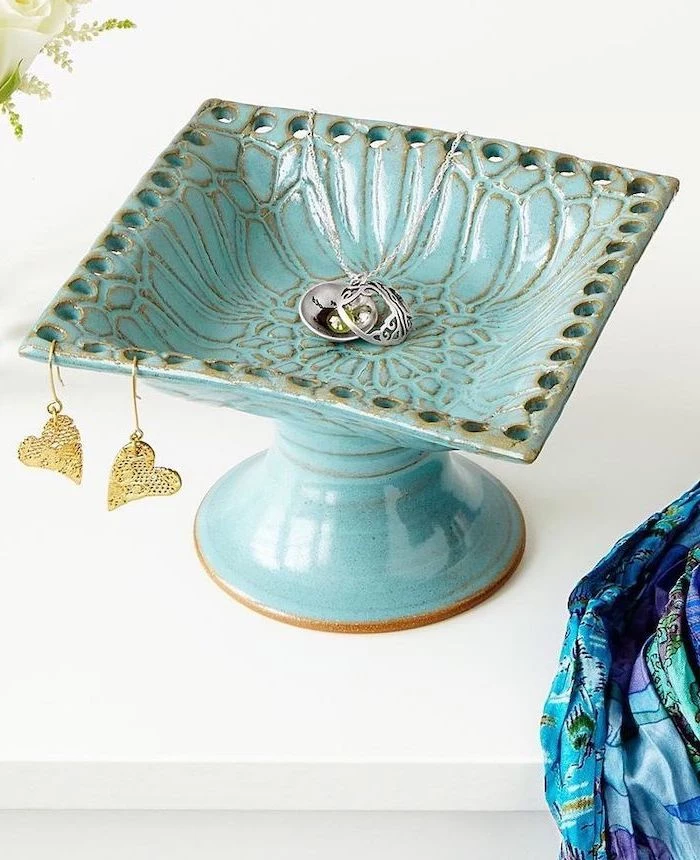
Want to make a jewelry dish but don’t have a kiln?
Air-dry clay is your best friend. Brands like DAS or Crayola Air-Dry Clay are beginner-friendly and incredibly versatile. Simply sculpt your dish, let it dry for 24-48 hours, and then you can paint it with acrylics. Finish with a clear sealant, like Mod Podge Dishwasher Safe Gloss, to protect your design and give it a professional-looking sheen.
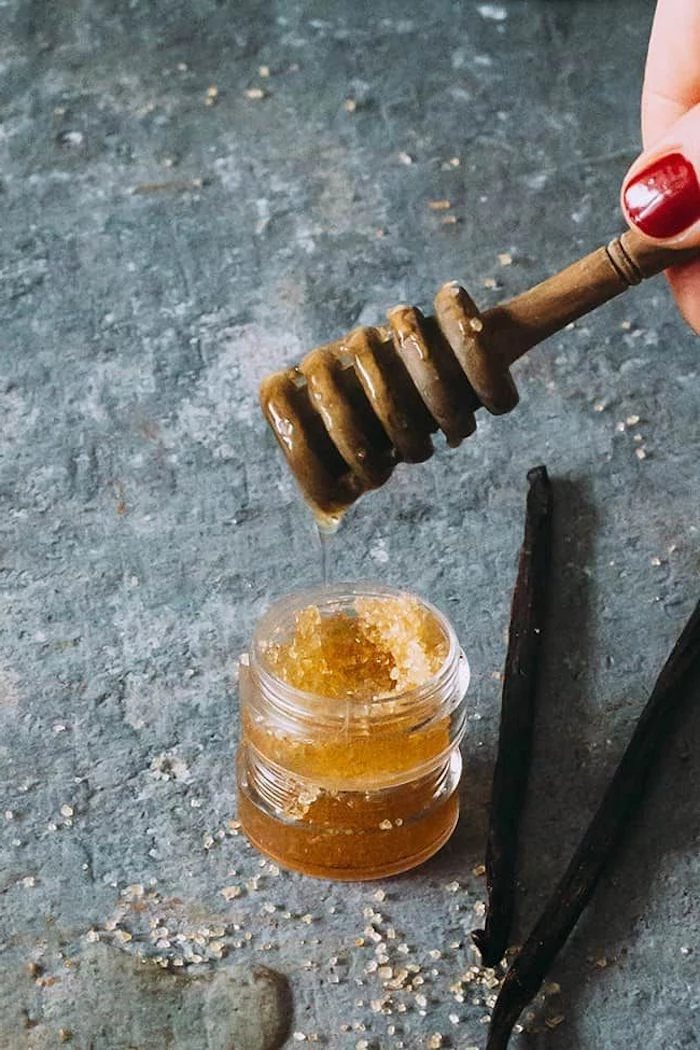
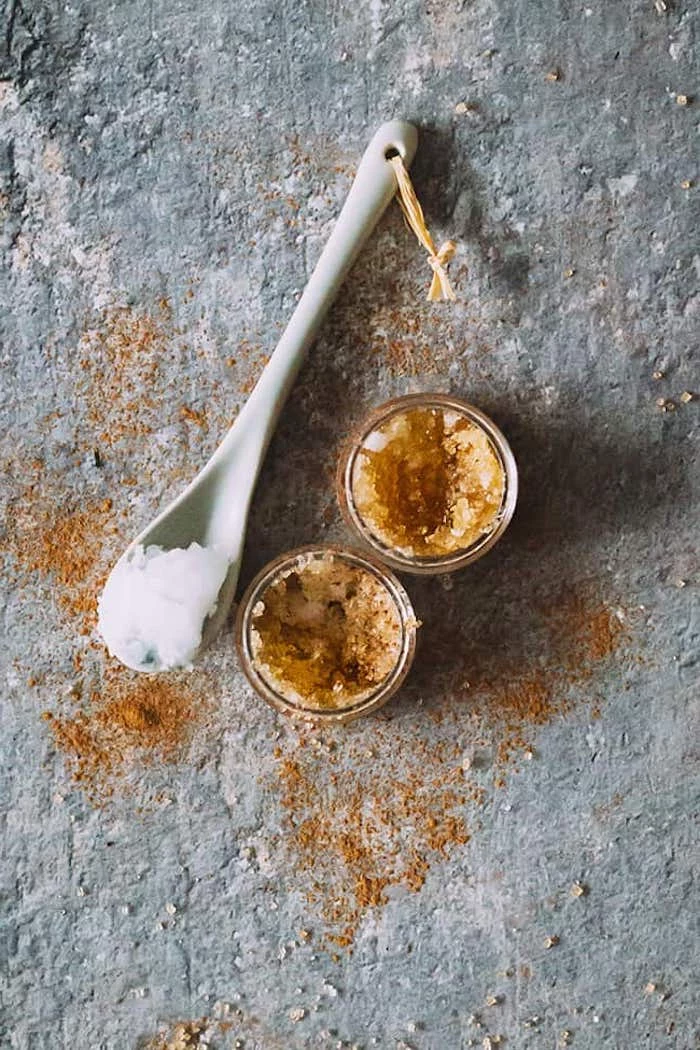
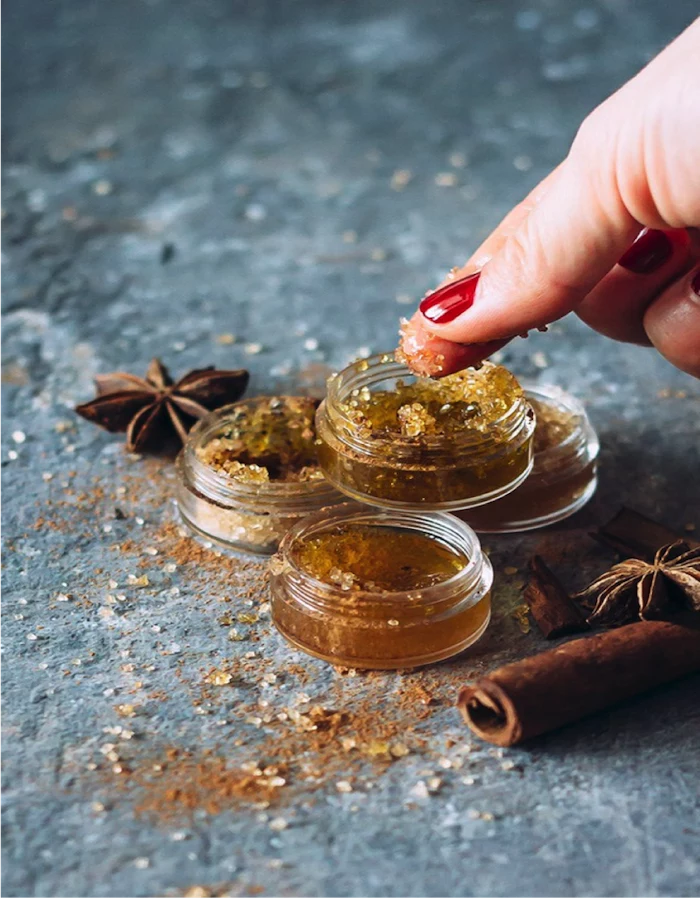
Give the gift of a spa moment with a simple, homemade sugar scrub. It’s incredibly easy.
- Mix 1 cup of brown sugar with 1/2 cup of melted coconut or almond oil.
- Add a teaspoon of vanilla extract or a few drops of her favorite essential oil.
- Spoon it into a small glass jar with a tight-fitting lid. Add a waterproof label and a small wooden spoon for scooping.
A 2016 study in the Journal of Marketing confirmed that recipients perceive handmade gifts as containing significantly more “love” than their store-bought equivalents.
It’s scientific! That feeling isn’t just in your head. When your mom unwraps your gift, she’s subconsciously registering the time, effort, and thought you dedicated exclusively to her, making the object feel far more valuable.

Polymer Clay: Best for durability. Brands like Sculpey Premo or Fimo are perfect for making keychains, earrings, or trinket dishes that need to withstand handling. It requires baking in a home oven to cure.
Air-Dry Clay: Best for ease of use. No oven needed. It’s ideal for more decorative, sculptural pieces that won’t be handled constantly, like a ring cone. It’s lighter but less durable than polymer.
For a first-timer making a decorative item, air-dry clay is a forgiving place to start.
- A perfectly smooth, professional finish.
- A deep, rich color from the wood grain.
- A surface that feels like silk to the touch.
The secret? Progressive sanding. Don’t just use one type of sandpaper. Start with a coarse grit (like 100) to shape and remove marks, move to a medium grit (150) to smooth, and end with a fine grit (220 or higher) to polish. The difference is astounding.

Instead of just writing

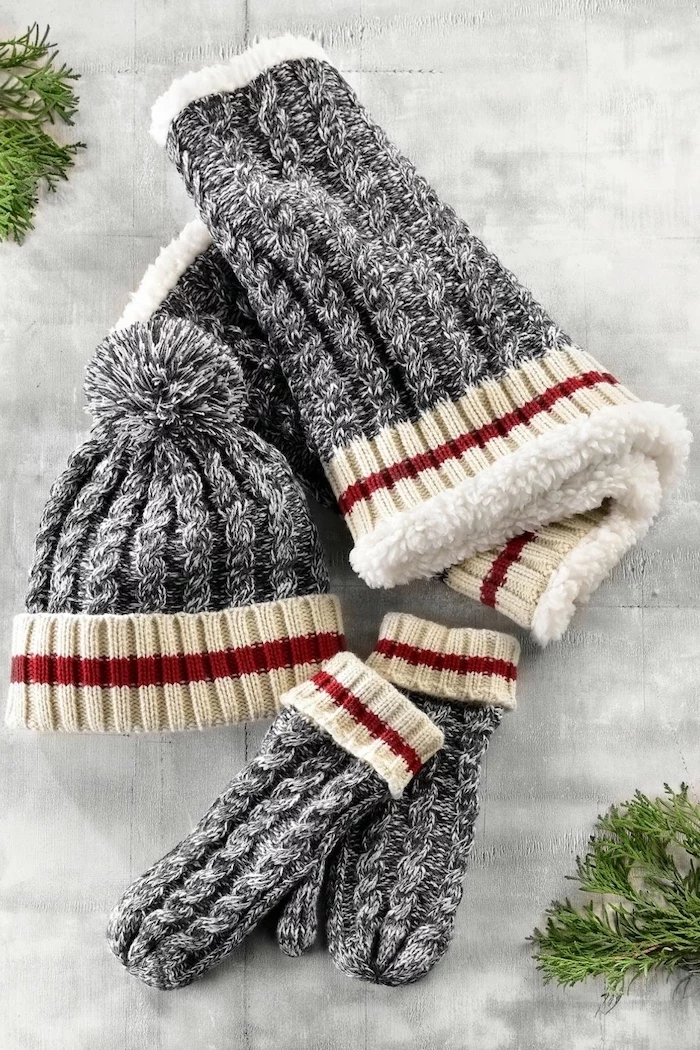
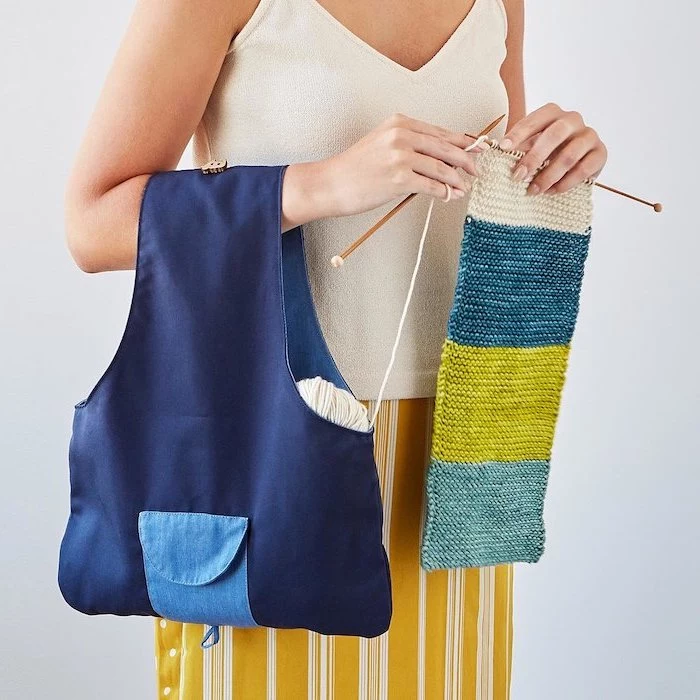
I can’t knit, but I want to make a cozy blanket. Is it possible?
Absolutely! Look into arm knitting. Using just your arms as needles and super chunky chenille or merino wool yarn (brands like Bernat Blanket Big or Loopy Mango have great options), you can create a stunningly soft and luxurious throw blanket in a single afternoon. There are countless video tutorials online to guide you.
“Handmade is the new luxury.” – Li Edelkoort, Trend Forecaster
Don’t forget the care card. A small, handwritten note explaining how to look after the gift is a thoughtful final touch. Whether it’s “Hand-wash only, lay flat to dry” for a knitted scarf or “Re-oil with mineral oil once a month” for a cutting board, it shows you want her to enjoy your gift for years to come.
For a gift that’s both beautiful and practical, try making natural fabric dyes. You can create a stunning palette from kitchen scraps.
- Dusty Pink: Simmer avocado skins and pits.
- Golden Yellow: Boil yellow onion skins.
- Soft Grey-Blue: Use black beans soaked in water.
Use these to dye a set of cotton tea towels or a simple silk scarf for a one-of-a-kind gift.


Take a plain ceramic mug and make it personal. With a fine-tipped oil-based paint marker, like Sharpie Oil-Based or DecoColor, you can draw a custom design. Write a cherished quote, draw her favorite flower, or create a pattern that matches her kitchen. Let it air dry completely, then bake in the oven following the marker’s instructions to make the design permanent and washable.

Capture a scent memory. Did your mom always have a pot of herbs on the windowsill? Create a custom herb-infused olive oil with rosemary and thyme. Did she love her rose garden? Make rosewater-scented soap. Connecting a scent to a specific, happy memory is one of the most powerful ways to make a gift resonate emotionally.
- It creates beautiful, crackled textures.
- It smells incredible during the process.
- It gives a warm, golden hue to paper and fabric.
The secret? Beeswax. Melt cosmetic-grade beeswax pellets in a double boiler or a dedicated slow cooker. Dip thick watercolor paper or cotton fabric into the wax to create unique journal covers, gift tags, or reusable (and beautiful) food wraps.
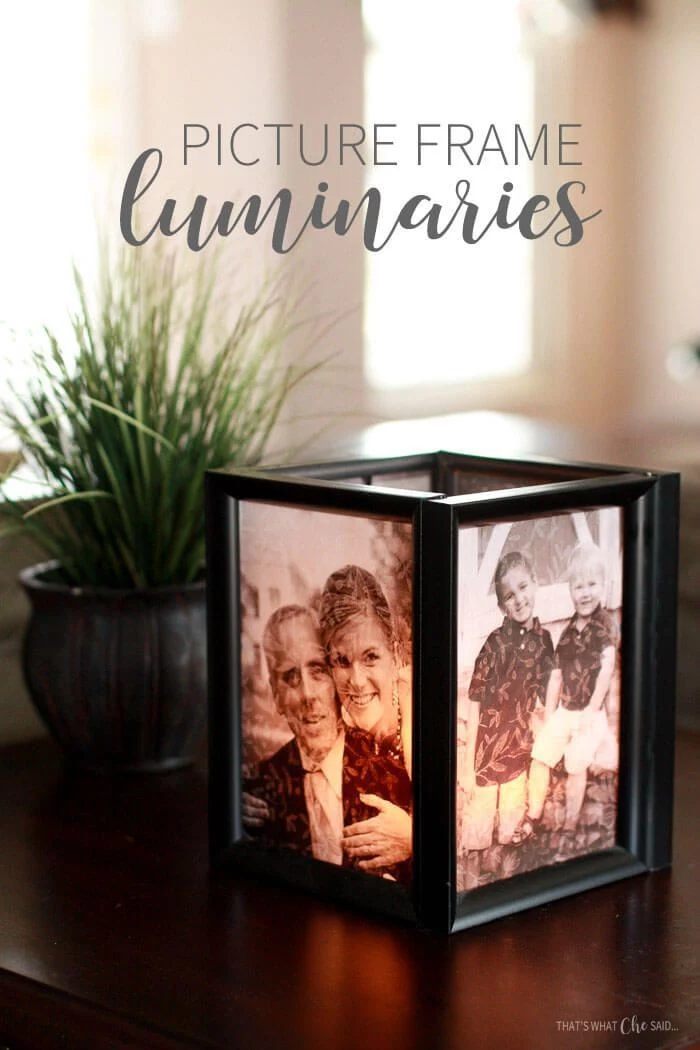
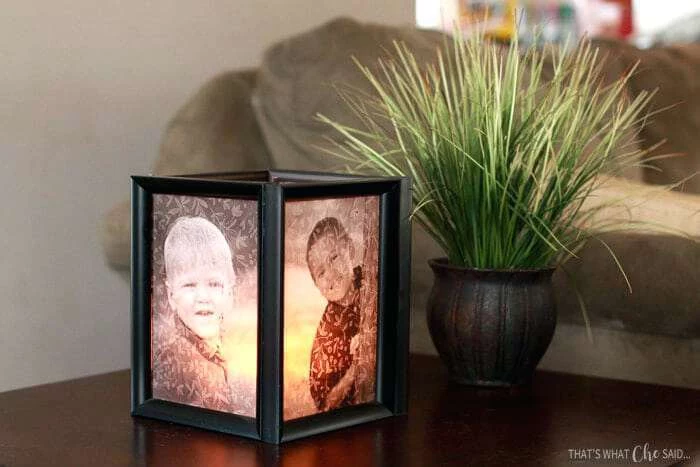
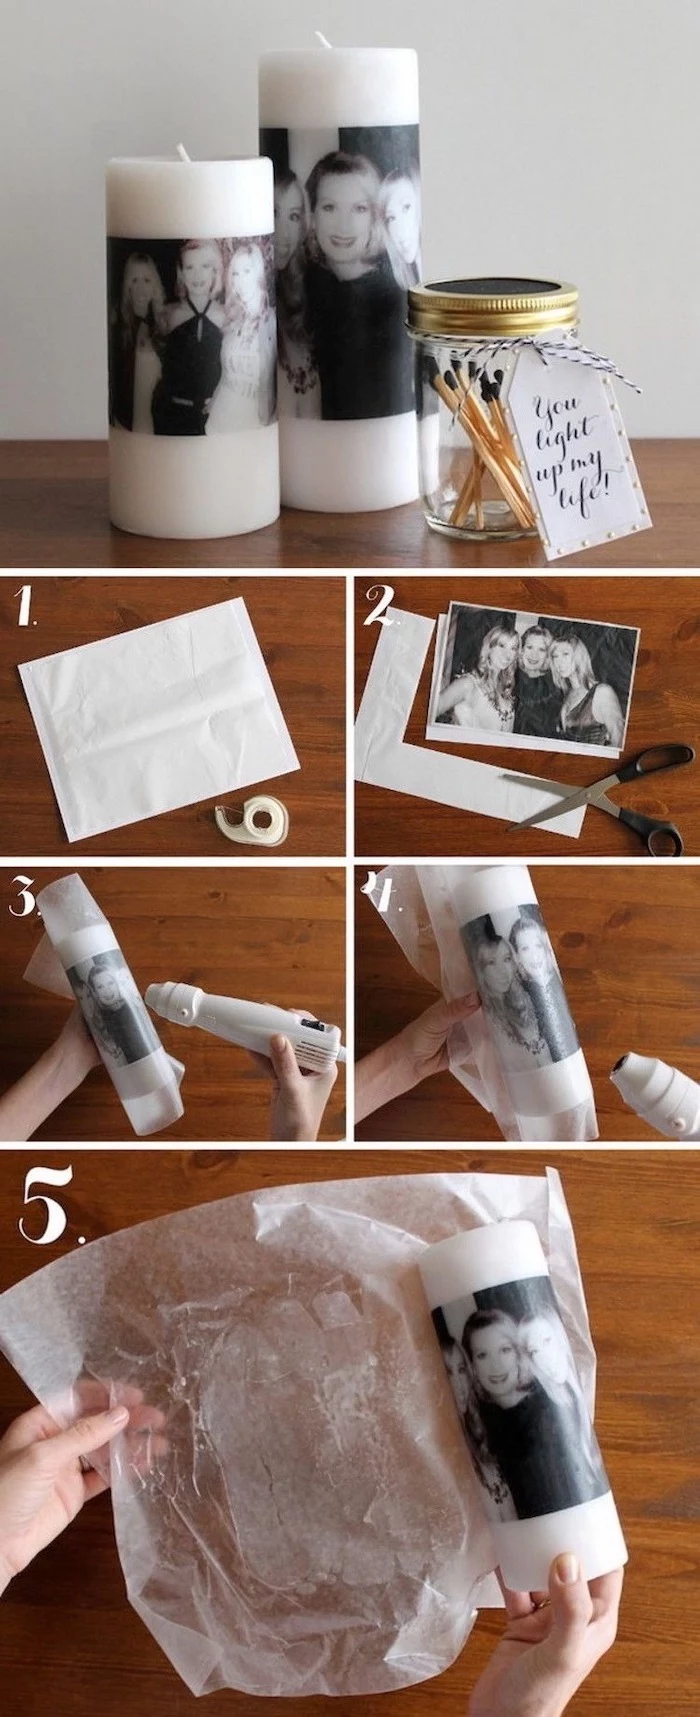
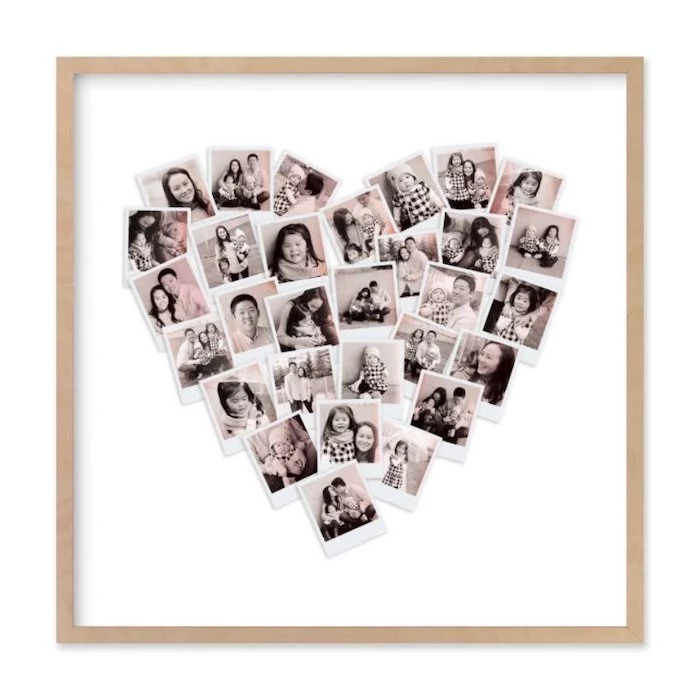
I want to make something with a photo, but home prints look cheap. What’s the trick?
The quality of the print makes all the difference. For projects like photo coasters or custom-framed pictures, order a professional print on matte or lustre paper. Services like Mpix or Artifact Uprising offer archival quality that won’t fade and has a rich, velvety finish that elevates the entire project.

The word “amateur” comes from the Latin word “amare,” which means “to love.”
Remember this when you’re working. You are making this gift as an act of love, not as a professional trying to achieve factory perfection. That love is the most important ingredient and it will shine through in the final piece, quirks and all.
DIY Room Spray: A simple, elegant gift she can use every day. In a small glass spray bottle, combine 1/2 cup of distilled water, 2 tablespoons of witch hazel or vodka (this helps the oil and water mix), and 15-20 drops of her favorite essential oil. A lavender and eucalyptus blend is perfect for a calming bedroom spray.
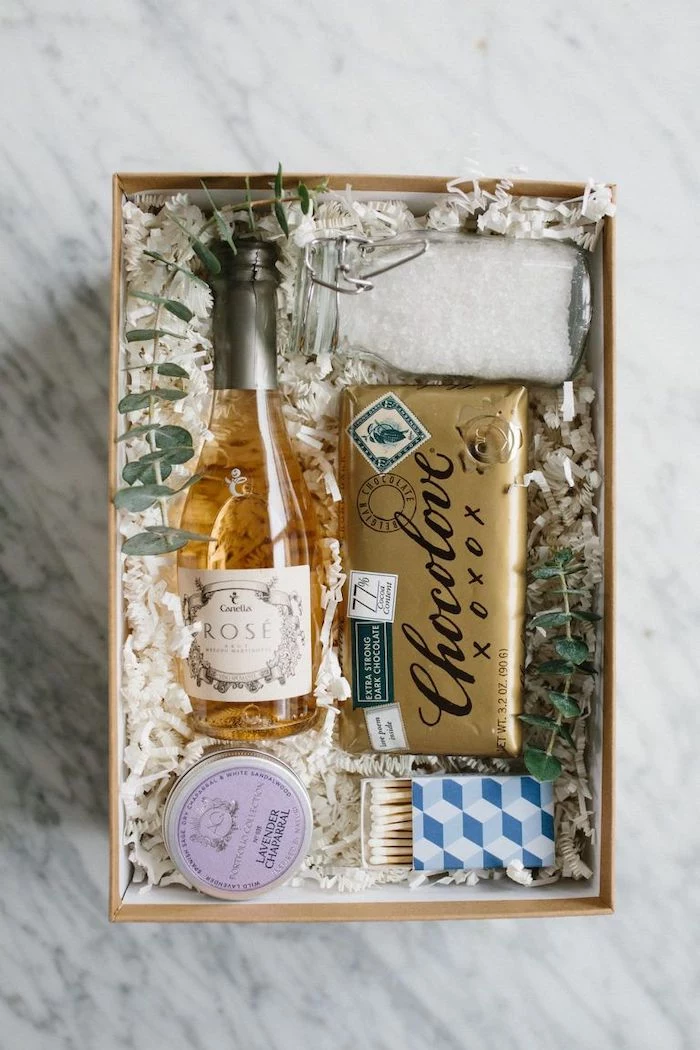
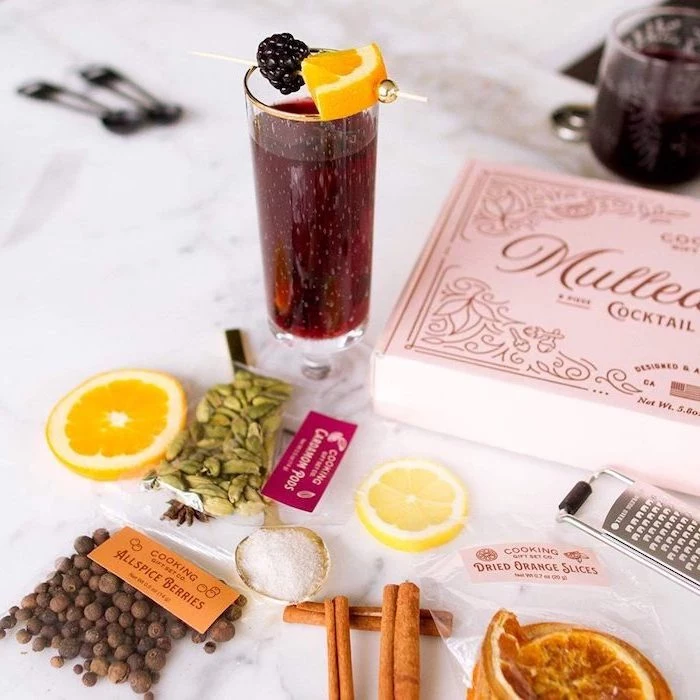
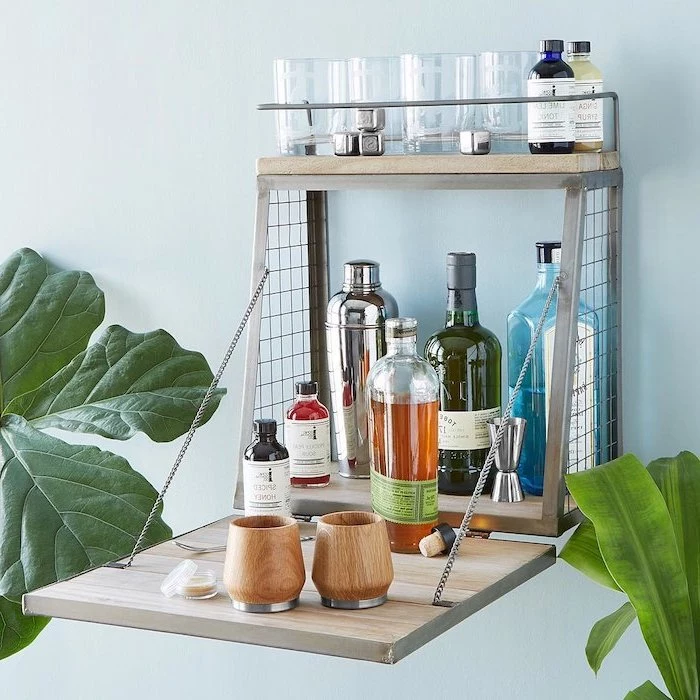
Give the gift of a perfect cocktail hour. Find a nice wooden box and assemble a kit.
- A small bottle of artisanal tonic or ginger beer.
- A jar of homemade spiced simple syrup (cinnamon, star anise, clove).
- A bag of dehydrated orange or grapefruit slices for garnish.
- A handwritten recipe card for her new signature drink.
A note on leather: You don’t need complex tools to make a beautiful leather gift. A simple personalized keychain or luggage tag is a great start. Purchase a vegetable-tanned leather scrap, a set of metal letter stamps, and a mallet. A bit of water on the leather before stamping will give you a clear, crisp impression.

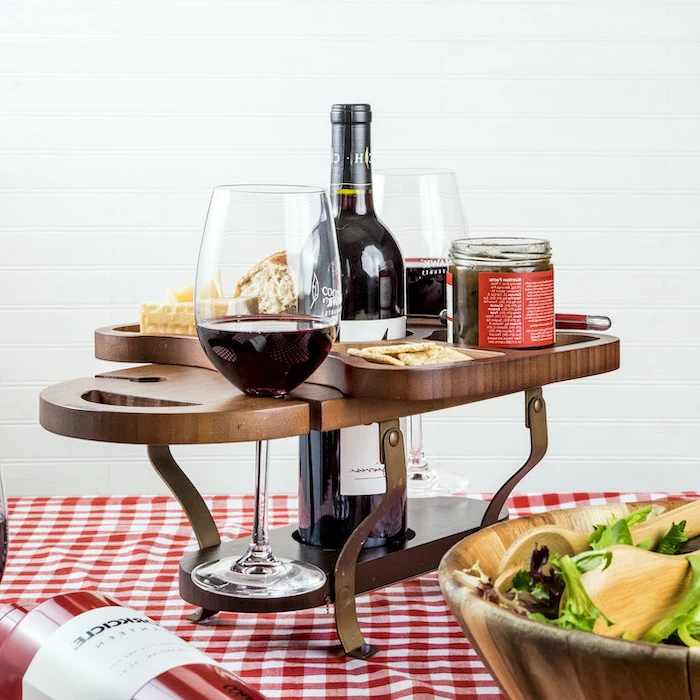
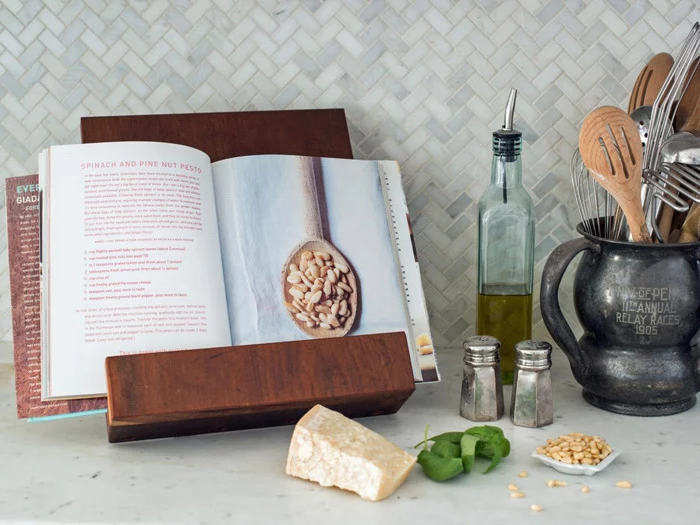
My mom has everything. What’s a useful DIY gift she won’t already have?
Make a stylish tablet or cookbook stand. All it takes is a small, beautifully grained piece of wood (like acacia or olive wood). Cut a groove down the middle at a slight angle using a table saw or router. Sand it to a buttery-smooth finish and oil it. It’s minimalist, incredibly useful, and something few people think to buy for themselves.
Clay versus Wood: For a small jewelry dish, a hand-formed piece from Sculpey polymer clay offers endless color and shape possibilities. Wooden Alternative: For a more natural, minimalist aesthetic, find a small, shallow wooden bowl (acacia wood is beautiful) and line the inside with a piece of soft felt or a scrap of suede. No sculpting required, just assembly.
Think about the unwrapping experience. Instead of tape, seal your wrapped gift with a custom wax seal. You can get a stamp made with her initial. It’s a classic, elegant touch that makes the gift feel important and timeless before it’s even opened.


