Your Classroom Door Doesn’t Have to Be a Hot Mess: A Real Teacher’s Guide
Let me tell you about my first classroom door. A complete disaster. It was my second year teaching, and I was armed with shiny, thin wrapping paper and a roll of the cheapest tape I could find. I spent a whole evening on what I thought was a masterpiece. By the next morning? Half of it was peeling. By lunchtime, a kid ripped a giant hole in it just by opening the door. It was a failure, but it taught me something crucial: a great classroom door isn’t just about being cute. It’s about smart planning, the right materials, and creating something that can actually survive the beautiful chaos of a school hallway.
In this article
After years of decorating doors for every age group—from kindergarteners with sticky fingers to high schoolers pretending they’re too cool to care—I’ve figured out what works, what falls apart, and what gets you a friendly but firm email from the fire marshal. This is the guide I wish I’d had back then. It’s about building a safe, durable, and meaningful display with your students that brings a little joy to your corner of the school.
Before You Even Think About Decorating
I know, you want to jump to the fun part. But trust me, skipping these prep steps is the #1 reason doors fail before winter break even starts. Ten minutes of planning now will save you hours of frustration later.
1. The Most Important Step: Check the Rules
Seriously, do this first. Before you buy a single thing, go talk to your school administration or, even better, the head custodian. They know everything. Every school district has rules about door decorations, and they’re almost always based on fire code. When the fire marshal shows up, they don’t play around.
Most schools use some version of the “20% rule,” meaning no more than 20% of your door’s surface can be covered with flammable stuff like paper. Some are stricter, some are more relaxed. You need to know your school’s exact policy. I once saw a teacher have to tear down a gorgeous floor-to-ceiling display because it violated code. It was heartbreaking.
Also, ask about approved materials. Many districts now require flame-retardant paper. It’s a bit more expensive (a 4-foot by 50-foot roll might be $25-$35 instead of $20), but it’s non-negotiable if required. You can find it at school supply stores or online.
2. No Tape Allowed? No Problem.
What if your principal has a strict “no tape on the doors” policy? Don’t despair. You have options:
- Strong Magnets: If your door is metal, this is your best friend. Use a few strong magnets (neodymium magnets work great) to hold up the corners of your background paper. You can also use magnetic hooks for hanging bigger items.
- Over-the-Door Hangers: A simple wreath hanger can be a great anchor point. You can hang a poster board or a flat piece of cardboard from it as your base.
- Tension Rods: This is a clever one. You can fit a small tension rod (like for a cafe curtain) inside the door frame. Then you can hang your paper or fabric background from it like a curtain. It never even touches the door itself.
3. Get to Know Your Canvas (The Door)
Not all doors are the same, and the type you have dictates what will work best.
- Painted Metal Doors: These are pretty common and usually easy to work with. They’re smooth and hold tape or magnets well. The only catch is that many layers of old paint can sometimes block a magnet’s pull.
- Wood Doors: Often found in older schools. Be gentle here! Strong adhesives can easily peel off the varnish or paint. This is where blue painter’s tape is a must.
- Doors with Windows: That little window is both a blessing and a curse. Fire codes almost always require windows and peepholes to be completely clear. Don’t cover them. Instead, make the window part of your design—maybe it’s the moon in a night sky or the window of a gingerbread house.
- Door Hardware: Pay close attention to the handle, lock, and any push bars. A quick tip: always cut a generous space around the handle, at least a two-inch border. And here’s a pro-move: reinforce the back of that cutout with a square of clear packing tape before you hang the paper. It will prevent rips from day one.
Choosing Materials That Actually Last
The stuff you use will make or break your door. Here’s what I’ve learned from years of trial and error.
For Your Background:
Put down the cheap gift wrap. It’s thin, it tears, and the shine creates a terrible glare in the hallway. Go for one of these instead:
- Butcher or Kraft Paper: My top recommendation. It’s durable, matte, and comes in huge rolls perfect for covering a door. A good roll can run you $20-$25 on Amazon or at a craft store, but it’ll last for years.
- Vinyl Tablecloths: This is a fantastic hack. They’re waterproof, tear-resistant, and you can wipe them clean. You can often find solid colors at the dollar store for a couple of bucks. They’re also reusable if you store them carefully.
- Flame-Retardant Paper: Again, if your school requires it, this is your only option. It feels a bit thicker and does the job just fine.
For Sticking Stuff Up:
Using the wrong adhesive is a recipe for falling decorations or a damaged door. Here’s my ranking:
- The Best All-Arounder: Blue Painter’s Tape. This is my go-to. It has enough grip to hold paper but is gentle enough that it rarely damages surfaces. My method is to apply it to the back perimeter of the paper first, then press the whole sheet onto the door.
- For Heavier Things: Command Strips. If you’re hanging a cardboard mailbox or 3D elements, Command Strips are worth their weight in gold. They’re not cheap—a pack can cost around $8—but they hold a lot of weight and are designed to come off clean. Just follow the instructions!
- For Metal Doors: Strong Magnets. A total game-changer for metal doors. Use them to pin up the background or attach individual items. Makes everything super easy to adjust or remove.
- Use With Caution: Double-Sided Tape. Some types are incredibly aggressive and will peel paint. If you must, get the removable kind and test it in a hidden spot first.
- Just Don’t Do It: Packing Tape & Duct Tape. They will hold, yes. But they will absolutely leave a sticky mess or pull the finish right off the door. And please, never use hot glue directly on the door itself.
Involving Your Students Without Creating Chaos
A classroom door should be a team project. It gives kids a sense of ownership. But you can’t just hand a bunch of second graders some scissors and hope for the best. The key is managed chaos.
I like to set up stations. Each station has one specific task and clear instructions. It’s like a little assembly line.
- The Cutting Station: For older students only, with very clear safety rules. They can cut out big background shapes. For younger kids, I pre-cut everything myself.
- The Detailing Station: This is perfect for everyone. Kids can color pre-printed ornaments, draw faces on gingerbread people, or write their names on things. I provide a mix of crayons, markers, and colored pencils.
- The Assembly Station: This is where smaller pieces come together—gluing cotton balls onto Santa hats or adding ribbons to paper presents. Pro-tip: use glue sticks instead of liquid glue whenever possible. It cuts the mess by about 90%.
Oh yeah, and always have a quick safety chat first. Simple rules: scissors are for paper, we walk carefully, and only the teacher uses the step stool. Done.

Quick Wins for Busy Teachers
Don’t have time for a full-blown masterpiece? I get it. Here are some ideas you can pull off in under 30 minutes:
- The Giant Gift Bag: Find a huge, festive gift bag. Slice one of the side seams open, and you’ve got an instant, decorated door cover. Tape it up, and you’re done in 5 minutes flat.
- Frame the Door: Forget covering the whole thing. Just frame the doorway. The pool noodle candy canes from the Gingerbread House project below are perfect for this and take about 15 minutes to make.
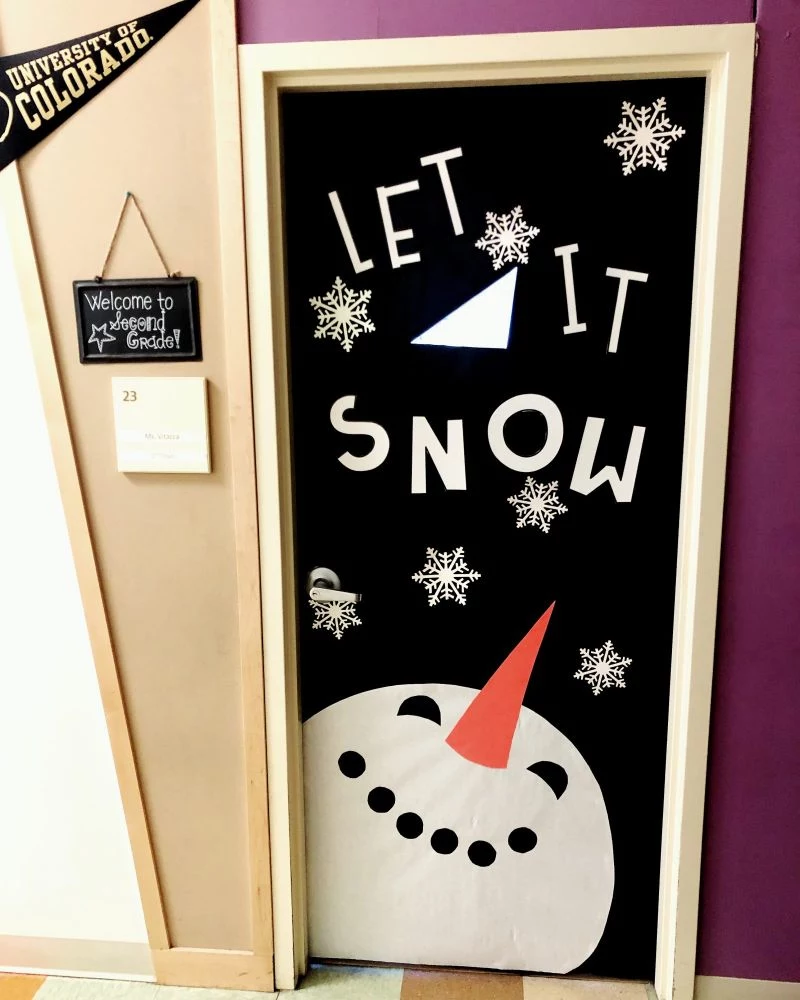
- Just Add Snowflakes: Cover the door in blue paper. Print out a giant snowman (or just the head). Have every student cut out a unique paper snowflake to stick all around him. Simple, personal, and fast.
Project Blueprints: Four Designs That Actually Work
Here are four classic designs, broken down with all the practical details.
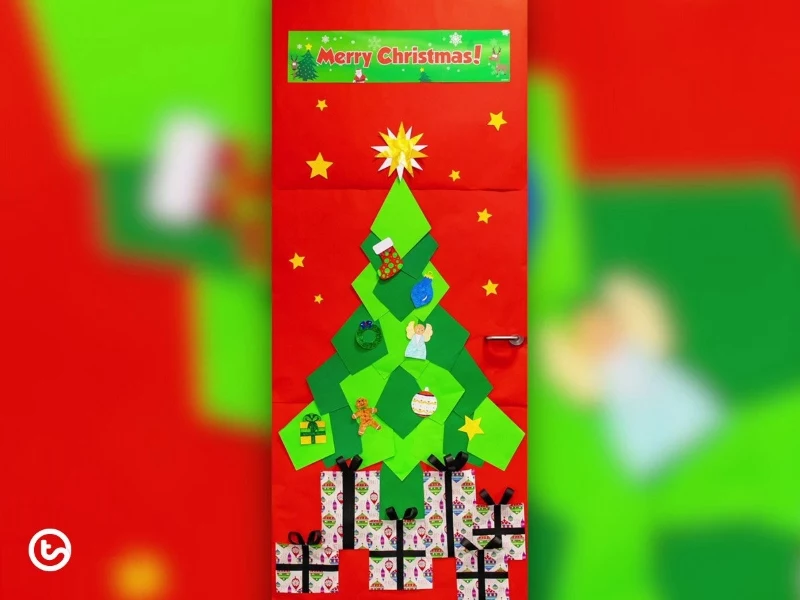
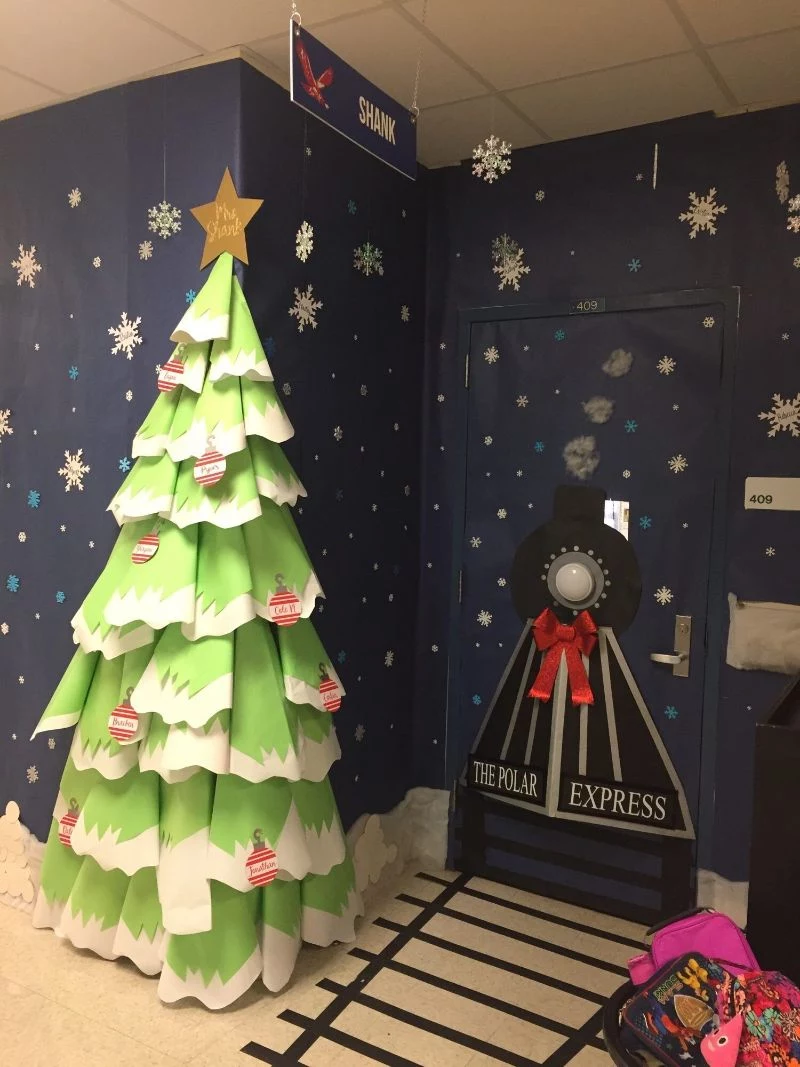
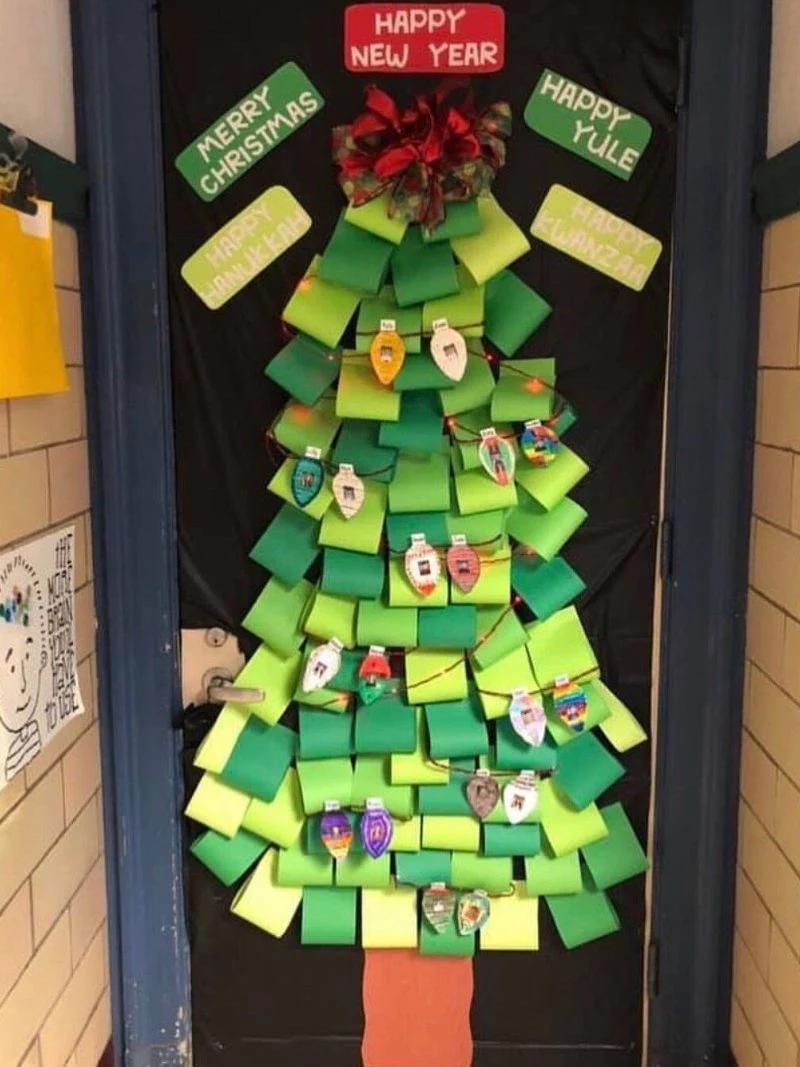
Project 1: The Community Christmas Tree
A classic for a reason! It’s simple, looks great, and showcases every single student’s work.
The Bottom Line (Budget & Shopping): You can do this for under $20. You’ll need a roll of brown or red butcher paper (~$20, but you’ll use a fraction of it), and various colors of construction paper (usually in your school’s supply closet for free!).
Time Commitment: Let’s be real. Prep (just you): 45 mins to cut the background and the green “shingles.” Class Activity: One 45-minute art session for kids to make ornaments. Final Assembly (you on a stool): 20 minutes.
The How-To: Cover the door in your background paper. Cut a bunch of 6×6 inch green squares, fold them in half, and cut a half-teardrop shape to make symmetrical pine boughs. Starting from the bottom of the door, layer these green boughs in overlapping rows to build your tree. Then, let each student create and add their own paper ornament. Top it with a big paper star!
Troubleshooting Tip: If the tree looks a little flat, gently curl the tips of the green paper boughs around a pencil before you tape them up. It gives them a fantastic 3D texture.
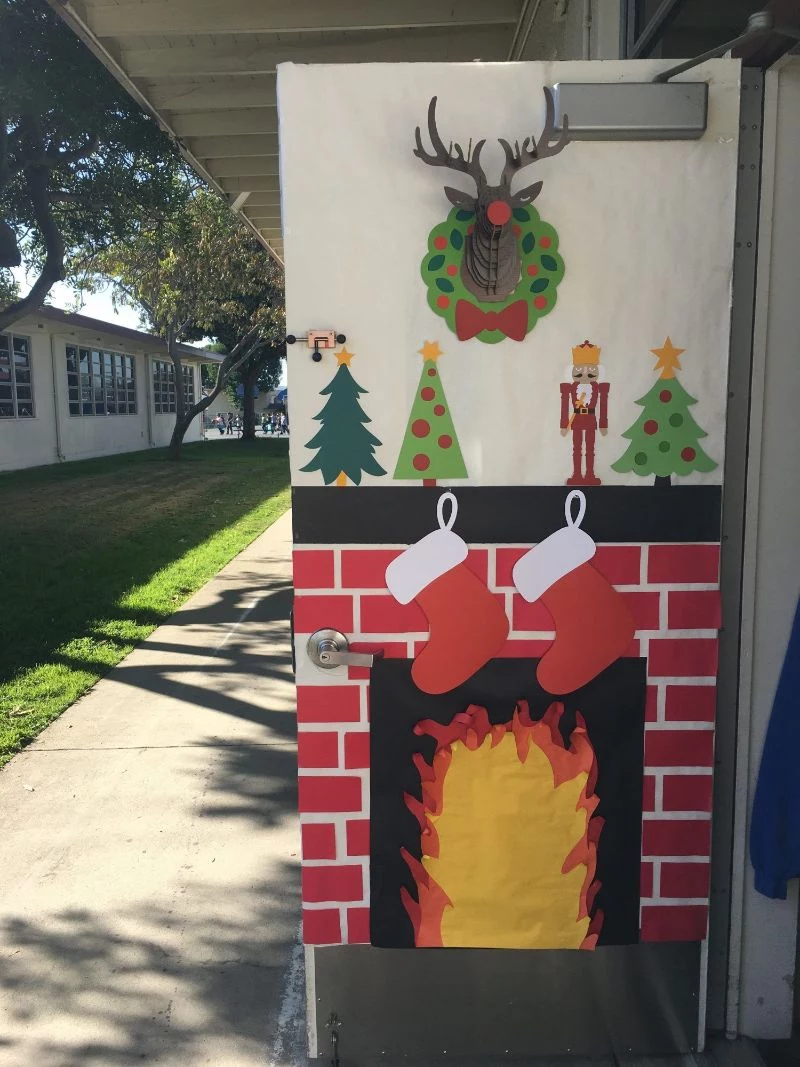
Project 2: The Cozy Fireplace
This one looks so impressive, but it’s really just a bunch of simple shapes.
A HUGE SAFETY WARNING: This is critical. NEVER, EVER use real string lights or any electrical device on a paper-covered door. It is a massive fire hazard and an instant code violation. All fire and light effects must be made from paper, cellophane, or other craft materials.
The Bottom Line (Budget & Shopping): About $15-$20, assuming you have paint. You need butcher paper, a long cardboard box for the mantel (free!), and some cellophane or tissue paper for the flames (~$5 at a party store).
Time Commitment: This one’s a bit more involved. Prep (you): 1.5-2 hours, mostly for making the bricks. Class Activity: 45 minutes for kids to design their stockings. Final Assembly (you): 45 minutes.
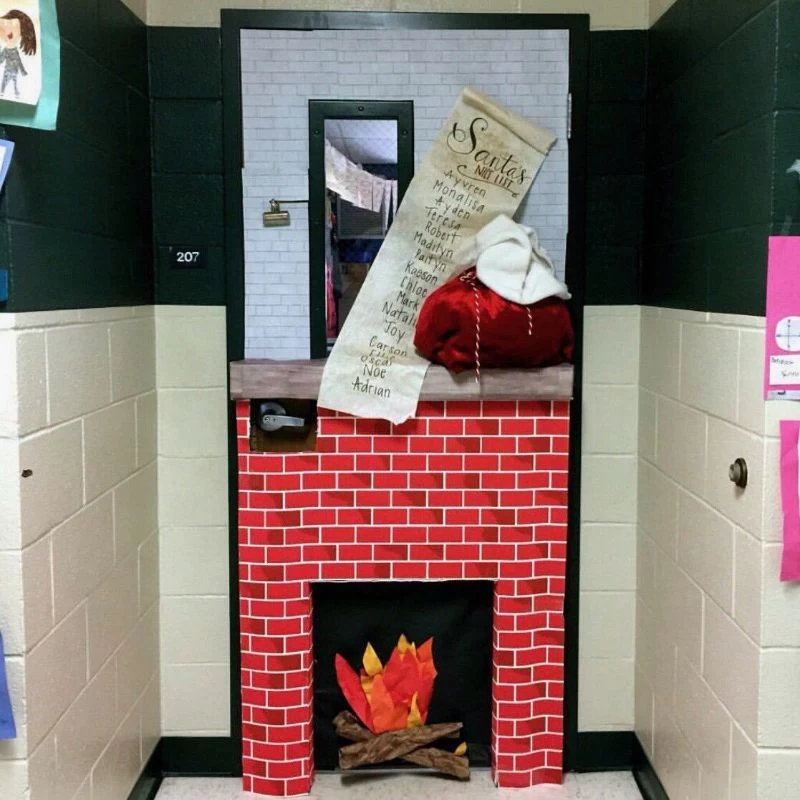
The How-To: The secret is the bricks. Cut red paper into rectangles. Pour a little black or brown paint on a plate, dip a dry sponge in it, dab off the excess, and lightly stamp the bricks for a rustic texture. Let them dry. Attach a black paper background to the top half of the door, then build your fireplace with the bricks. For the fire, tape crumpled yellow, orange, and red tissue paper in the opening. Cover a long cardboard box with paper to make a 3D mantel and hang student-made stockings from it.
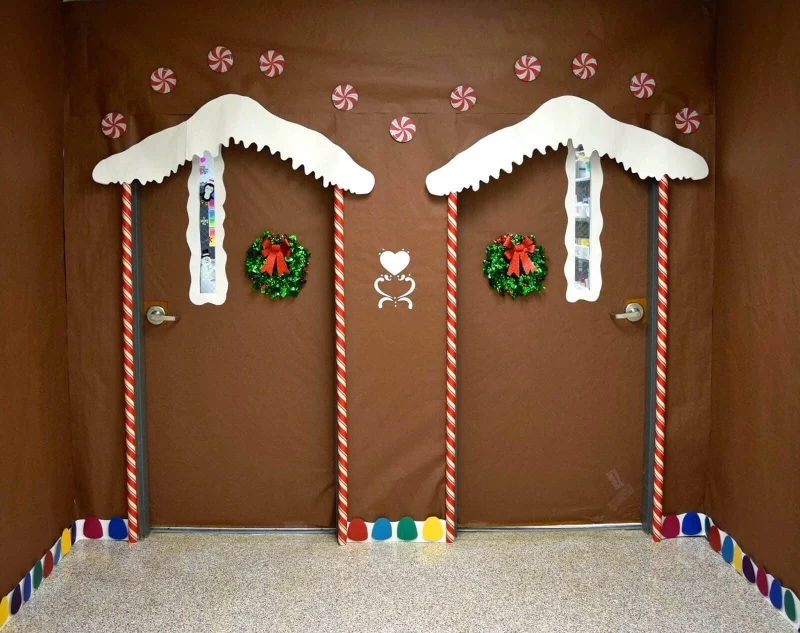
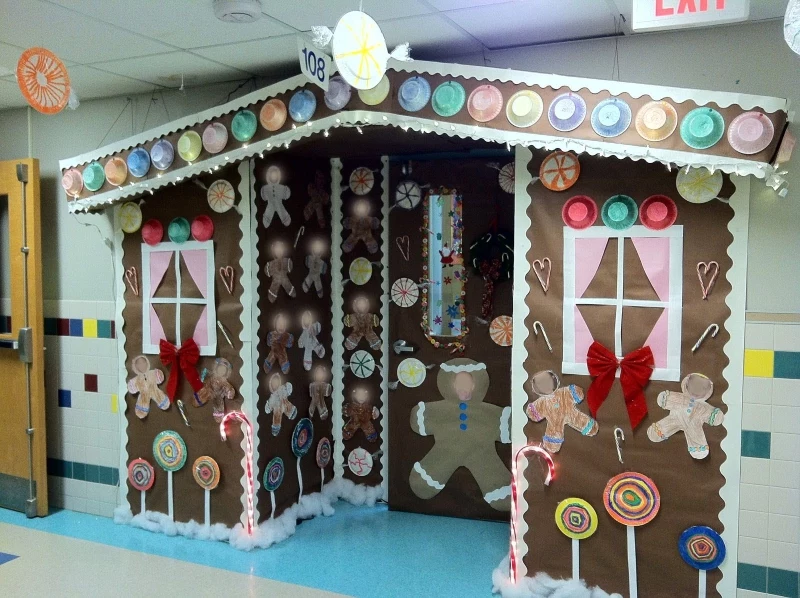
Project 3: The Gingerbread House Entrance
A huge favorite with the younger grades. It turns your whole doorway into a magical entrance.
The Bottom Line (Budget & Shopping): The biggest cost is the pool noodles, but there’s a trick. Get them at the dollar store for $1-$2 each during the summer and stash them. The rest is just paper and craft supplies. Total cost: under $15.
Time Commitment: Prep (you): 30 minutes to make the candy canes and cut the “snow.” Class Activity: One 45-minute session for kids to make candies from paper plates and bottle caps. Final Assembly: 30 minutes.
The How-To: Cover the door and frame in brown Kraft paper. The giant candy canes are the star: just take two pool noodles and wrap them in a spiral with white electrical tape. Boom. Instant candy canes. Secure them to the sides of the door frame with Command hooks. Cut a wavy, drippy “snow” roof from white paper or cotton batting for the top. Then, let the kids go wild decorating paper plates and bottle caps to look like gumdrops and peppermints to stick all over the house.
Durability Tip: If your hallway gets a lot of traffic, consider laminating the student-made candies before attaching them. They’ll survive way more bumps and scrapes.
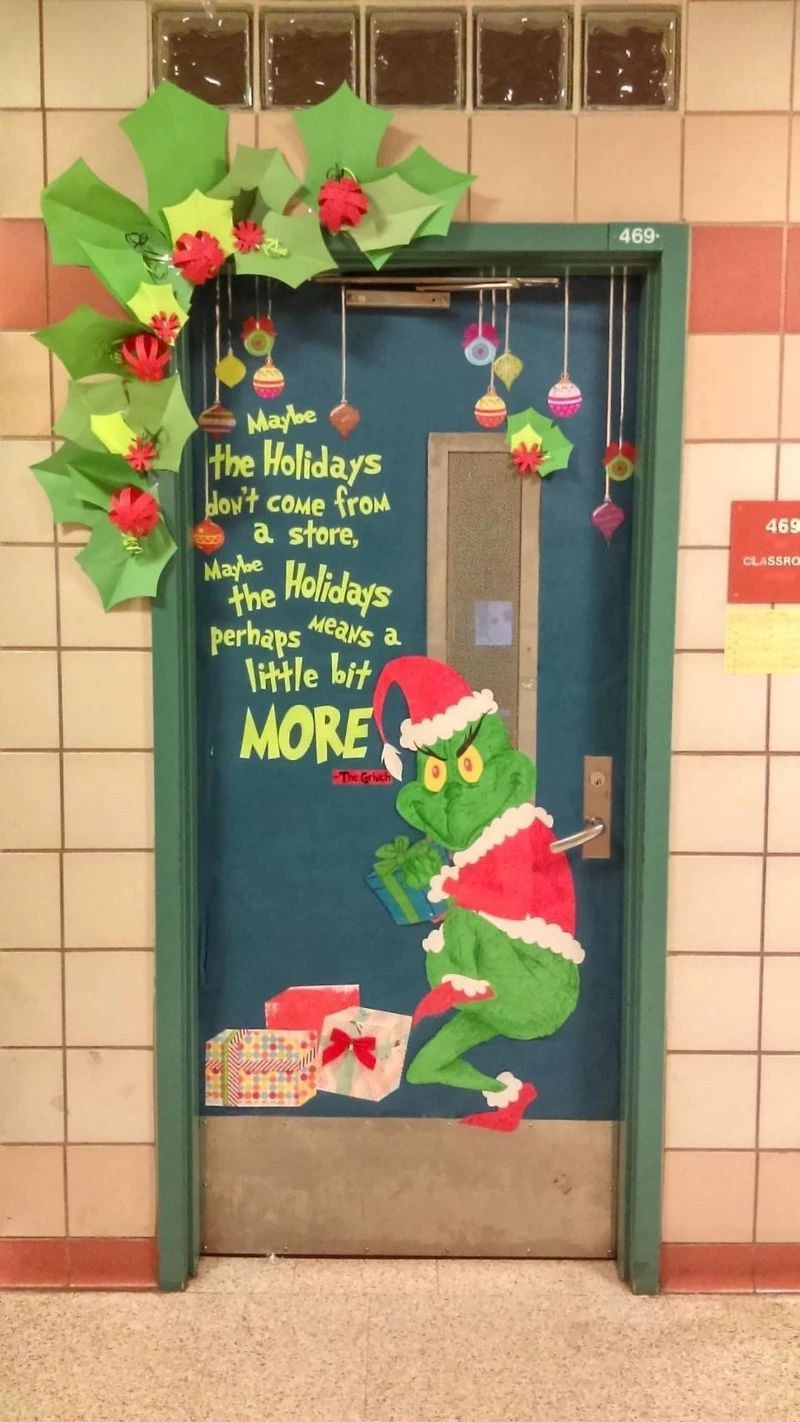
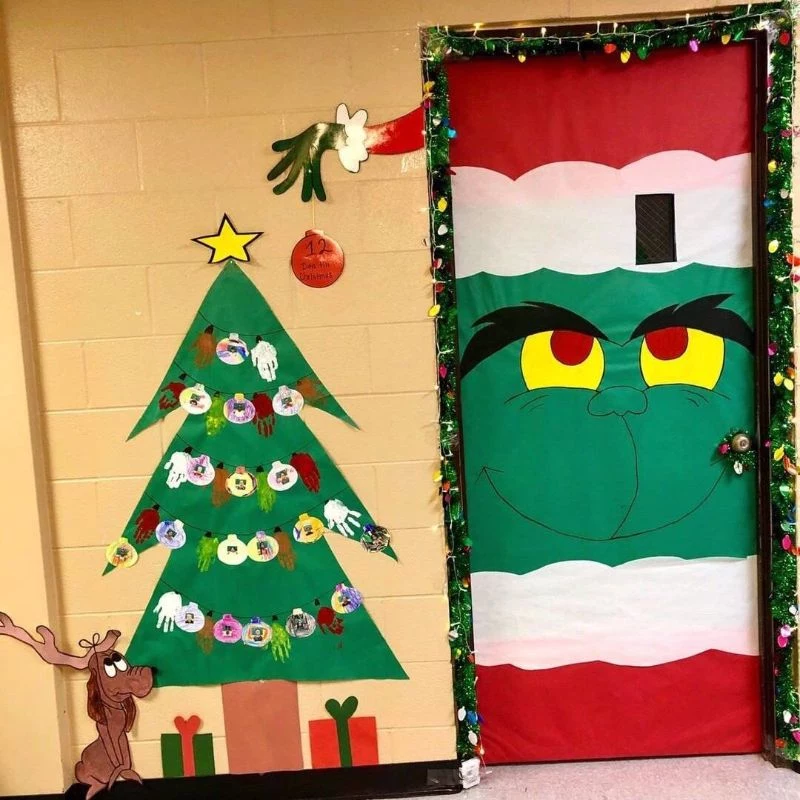
Project 4: The Grinch’s Lair (A Literary Tie-In)
Connecting your door to a book is always a win-win.
The Bottom Line (Budget & Shopping): Super cheap! Probably under $10 for a couple of sheets of butcher paper if you don’t already have them.
Time Commitment: Prep (you): 1 hour, mostly for drawing and cutting the Grinch. Class Activity: 30-45 minutes for kids to make whimsical presents. Final Assembly: 15 minutes.
The How-To: The easiest way to draw a big character is to use a projector. Find a simple image of the Grinch peeking, project it onto green paper, and trace it with a pencil. Then go over it with a thick black marker. Cut it out. Cover your door in red paper (like Santa’s suit), then attach the Grinch’s green hand and face so it looks like he’s peeking around the edge of the door. Have students create wacky-looking paper presents for him to “steal.” Finish it with a great quote from the book!
The Takedown: Finishing Like a Pro
Your amazing door can’t stay up forever. How you take it down matters—for the door’s finish and for any pieces you want to save.
The Right Way to Remove It:
- Use a Little Heat: For stubborn tape, a hairdryer on its lowest setting is magic. Wave it over the tape for about 15 seconds to soften the adhesive, and it should peel right off.
- Go Slow: Don’t just rip the paper off. Peel it back slowly at a 45-degree angle.
- Clean Up: If any sticky stuff is left behind, a tiny bit of goo-remover on a cloth usually does the trick. But test it on a hidden spot first!
Store for Next Year:
You don’t have to reinvent the wheel every year. I save durable pieces all the time. The pool noodle candy canes, the fireplace mantel, laminated candies—they can all be reused.
Roll big sheets of paper around a cardboard tube instead of folding them to avoid creases. Store smaller pieces flat in a big Ziploc bag or portfolio. Label a box “Holiday Door Decorations.” Future you will be so grateful.
In the end, creating a holiday door is so much more than a decoration. It’s a lesson in teamwork and planning, and it becomes a beacon of warmth in the school. When you and your students stand back and look at what you made together, the effort is always, always worth it.
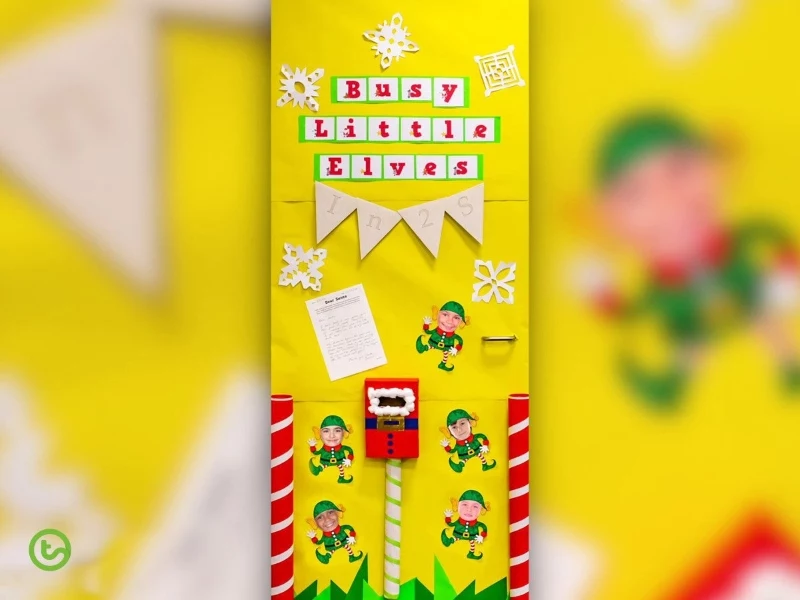
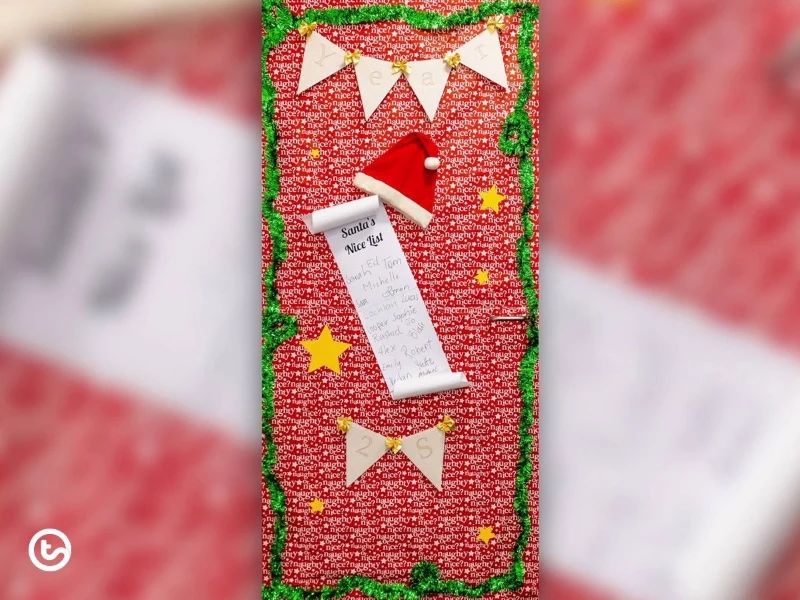
Inspirational Gallery
Did you know that many door designs can violate school fire codes? The National Fire Protection Association (NFPA 101) generally states that combustible decorations should not exceed 20% of the wall and ceiling area, a rule often applied to doors as well.
This is why many veteran teachers opt for a base layer of flame-retardant paper, like the rolls from Fadeless or Pacon. While slightly pricier, it provides a safe, compliant canvas. You can then add smaller, student-made paper elements on top, ensuring you stay well within the safety limits and avoid any last-minute teardowns ordered by the fire marshal.
How do you get those amazing 3D effects that make a door come to life?
The secret is layering and texture. Instead of taping everything flat, create dimension. For a snowman, bunch up white paper into loose balls before stapling them to create a puffy, rounded body. For a gingerbread house, use corrugated cardboard for the walls and puffy paint for the “icing” to give it a tactile feel. Small, empty tissue boxes wrapped in gift paper can become realistic-looking presents at the base of your door, literally popping out into the hallway.
Heavy-Duty Adhesion: For heavier elements like cardboard signs or laminated pieces, forget standard tape. Teacher-favorite Mavalus Removable Tape offers incredible hold without damaging surfaces. Alternatively, 3M Command Poster Strips are perfect for items you want to remove cleanly after the holidays, leaving no residue on the door.
Lightweight Paper & Cutouts: For delicate paper snowflakes or student artwork, a good old-fashioned glue stick (like Elmer’s) applied to a vinyl tablecloth background works wonders. The vinyl is durable and wipeable, and the glue peels off easily at the end of the season, preserving both the door and the decorations for next year.
- Create a sense of community.
- Reduce your workload.
- Make the design more personal.
The secret? Turn your door into an interactive advent calendar. Each student can be responsible for creating what’s behind one of the 24 flaps. It could be a drawing, a kind message, or a holiday joke. A different student gets the honor of opening a new flap each day, making the door a daily source of shared excitement.


