The Pro’s Guide to Making a Holiday Wreath That Actually Lasts
There’s something about the smell of fresh pine and cedar that just kicks off the holiday season, isn’t there? For years, I’ve made countless wreaths, from tiny ones for apartment doors to huge statement pieces for commercial buildings. And honestly, there’s a special kind of pride that comes from hanging something you made with your own hands.
In this article
- Let’s Talk Foundations: What Your Wreath is Built On
- The Secret to Greens That Don’t Drop Their Needles
- The Florist’s Method: Building a Wreath That Lasts
- Adding Decorations the Right Way
- Common Wreath Woes & Easy Fixes
- Not Ready to Start from Scratch? No Problem.
- A Few Workshop Rules I Live By
- Inspiration Gallery
A well-made wreath is more than just a decoration; it’s the first welcome your guests receive. It should be sturdy, gorgeous, and last straight through the new year. So many people either buy a new wreath every year or get frustrated when a DIY kit looks skimpy or falls apart in the first winter storm. My goal here is different. I want to pull back the curtain on the professional techniques we use in the floral industry—the stuff that ensures your wreath stays fresh and full from day one.
We’re going to cover everything, from picking the right foundation to the proper way to wire a pinecone so it doesn’t fall off. This is how you build a wreath you can be proud of.
Let’s Talk Foundations: What Your Wreath is Built On
A wreath’s lifespan starts with its base. Seriously, choosing the wrong one is like building a house on a weak foundation. I’ve seen so many homemade wreaths sag and collapse because the base just couldn’t handle the weight, especially after a bit of rain or snow. Let’s break down the main options you’ll find at the craft store.
Double-Wire Frames are the professional standard for a reason. These simple metal rings, which usually run you about $3 to $5, are incredibly strong for their weight. Their open design is perfect for tightly wiring bundles of greens, which is the secret to a lush, durable wreath. A 12-inch frame will give you a finished wreath around 20-22 inches across—perfect for most front doors. This is the base we’ll be focusing on.
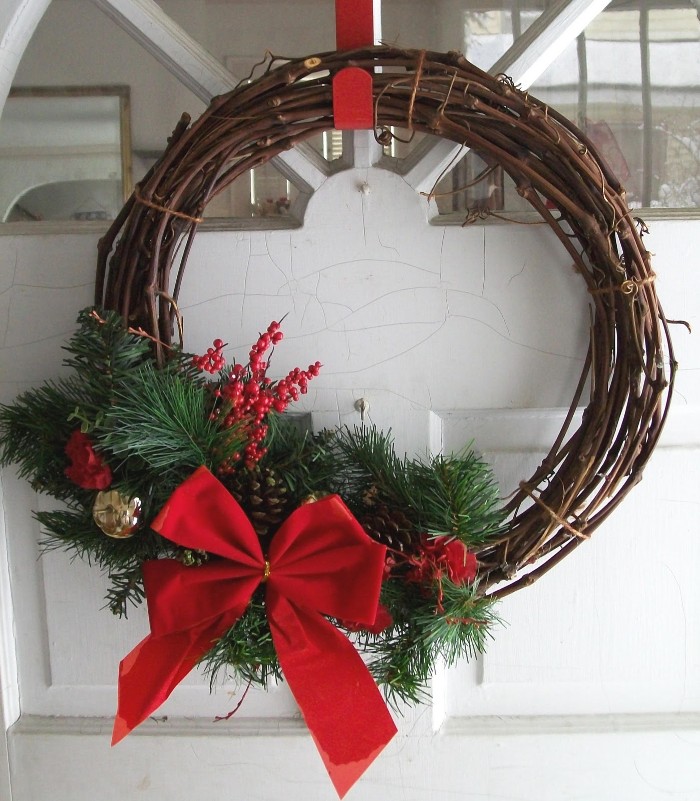
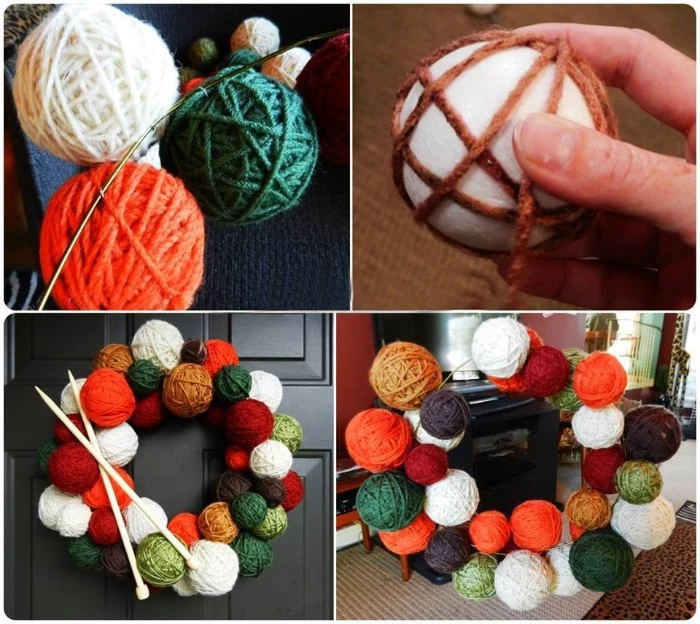
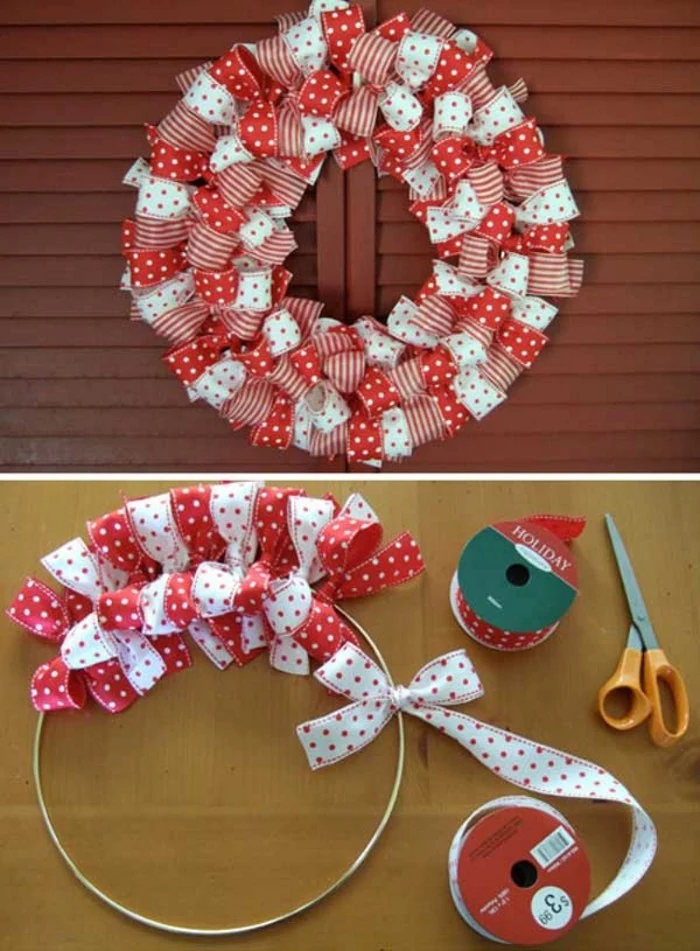
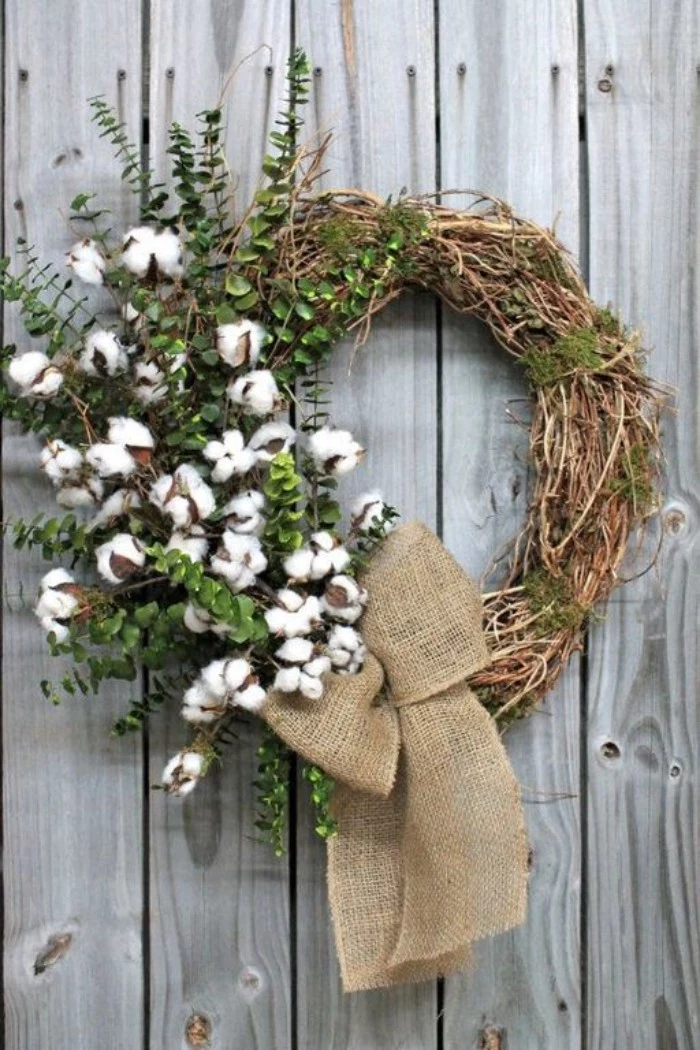
Grapevine Bases are fantastic for a more rustic or modern, asymmetrical look. Because the twisted vines are beautiful on their own, you don’t have to cover the whole thing. Attaching greens is a little different; it’s more about tucking stems in and using dabs of hot glue. They’re great, but best for lighter designs and are a bit more at home indoors or on a covered porch.
Oh, and what about those other bases you see? To be frank, I’d skip them for this project. Straw bases are heavy, absorb water like a sponge, and are better suited for wreaths made of dried flowers attached with pins. And those green foam bases? They’re meant to be soaked in water for fresh-cut flowers, not evergreens. They get messy, heavy, and can crumble easily.
The Secret to Greens That Don’t Drop Their Needles
Ever wonder why some wreaths look sad and crunchy after a week? It’s all about moisture loss. Once a branch is cut, it slowly dries out. Our job is to slow that process way down.
The type of evergreen you choose makes a huge difference. Firs, like Balsam or Fraser Fir, are champions of needle retention. They stay soft and full for weeks. Pine is another solid choice. And Cedar? It’s a favorite for its wonderful smell and how beautifully it drapes. The one I’m cautious with is Spruce. While pretty, it’s notorious for dropping its sharp needles as soon as it gets thirsty. I tend to use it only for small accents.
Quick tip: Want to really make your wreath last? Use an anti-desiccant spray (sometimes called anti-transpirant). A bottle costs about $10-$15 and will last you for years. You just spritz it on the finished wreath. It creates a waxy coating on the needles that seals in moisture. It’s a game-changer, especially if your door gets a lot of sun or wind.
The Florist’s Method: Building a Wreath That Lasts
This is the core technique that creates a full, durable, and professional-looking wreath. It’s all about making small, handmade bundles of greens and wiring them onto the frame. Once you nail this, you can make a wreath of any size.
Your Shopping List & Tools
Here’s what you’ll need to get started. No need to spend a fortune!
- A double-wire frame: A 12-inch or 14-inch frame is perfect for a front door ($3-$5 at craft stores).
- Paddle Wire: Look for 22-gauge green floral wire. The paddle makes it easy to work with. One paddle is about $4-$6 and is enough for a few wreaths.
- Wire Cutters: Don’t even think about using scissors; you’ll ruin them. A dedicated pair of wire cutters is a must.
- Gloves: Simple garden gloves are perfect. Pine sap is no joke—it’s sticky and can irritate your skin.
- Fresh Greens: For a lush 12-inch wreath, you’ll want about 5-7 pounds of mixed greens. You can often buy a bundle for $15-$25 at a tree lot or florist. A huge money-saver? Ask the tree lot for their leftover trimmings at the end of the day—they often give them away for free!

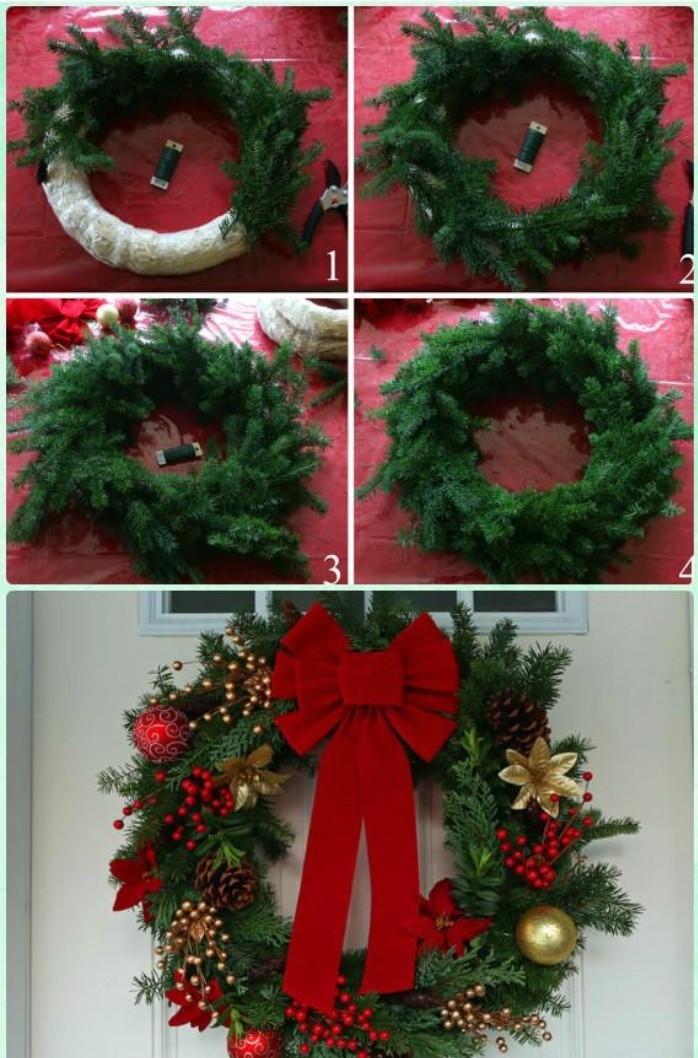
Step-by-Step: Let’s Build It!
If this is your first time, set aside about two hours so you can enjoy the process without feeling rushed. Once you get the hang of it, you’ll be able to whip one out in under an hour!
1. Prep Your Greens: First, cut your big branches into smaller, usable pieces, about 6 to 8 inches long. This is a crucial step! If your pieces are too long, the wreath will look shaggy and be hard to shape. Sort them into piles as you go.
2. Make Your Bundles: Now, grab two or three of those pieces and arrange them into a little fan. This is your “bunch.” Making all your bunches ahead of time makes the assembly process go so much faster. For a 12-inch frame, you’ll probably need around 20-25 bunches.
3. Anchor Your Wire: Take your paddle wire and, without cutting it, wrap the end around one of the frame’s metal crossbars a few times. Pull it tight. The goal is to work with one continuous piece of wire.
4. Attach the First Bunch: Lay your first bunch on the frame. Hold it firmly and bring the wire from the paddle over the stems, pulling it tight. Wrap it around the bunch and the frame three times. This triple-wrap is a non-negotiable rule—it keeps everything secure.
5. Layer and Repeat: Place your second bunch on top of the first, overlapping it by about half to hide the stems and wire. Wrap it tightly three times, just like the first. Keep going, always laying the bunches in the same direction and checking for consistent fullness. You’ll quickly get into a rhythm.
6. The Final Tuck: When you get all the way back to the start, you need a clean finish. Gently lift the needles of your very first bunch and tuck the stems of your last bunch underneath. Pull the wire as tight as you can for your final three wraps. Cut the wire, leaving a 4-inch tail, and wrap it securely around the back of the frame.

Adding Decorations the Right Way
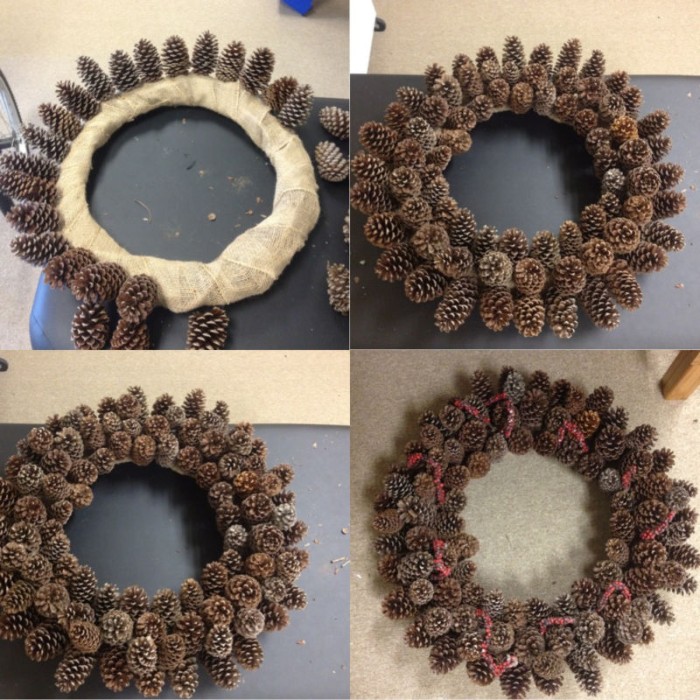
Hot glue is tempting, but trust me, it often fails in the cold and damp. For anything with a bit of weight, wire is your best friend. To attach a pinecone, just wrap a piece of floral wire around its base, hiding it in the lowest row of scales. Twist the wire, then use the ends to attach the cone securely to the wreath frame itself, not just the greenery. It won’t budge, even when the door slams.
By the way, learning to tie a great bow is a huge money-saver. Instead of buying a pricey pre-made one, grab a spool of ribbon. For a big, fluffy bow, you’ll need about 3 yards of 2.5-inch wide, wired ribbon. The wire in the ribbon is the key to getting those perfect, full loops.
Common Wreath Woes & Easy Fixes
What happens if it doesn’t look quite right? Don’t panic! It happens to everyone.
- “Help! My wreath looks lopsided!” This usually just means your bunches weren’t a consistent size. No worries. You can easily fix it by tucking a few extra green stems into the sparse areas to fill them out. Use a dab of hot glue to secure them if you need to.
- “I can see gaps and wires between my layers.” You probably didn’t overlap your bunches enough. Remember, the goal is for each new bunch to hide the stems of the last one. You can also try pulling the wire a bit tighter as you work to really compact the greens.
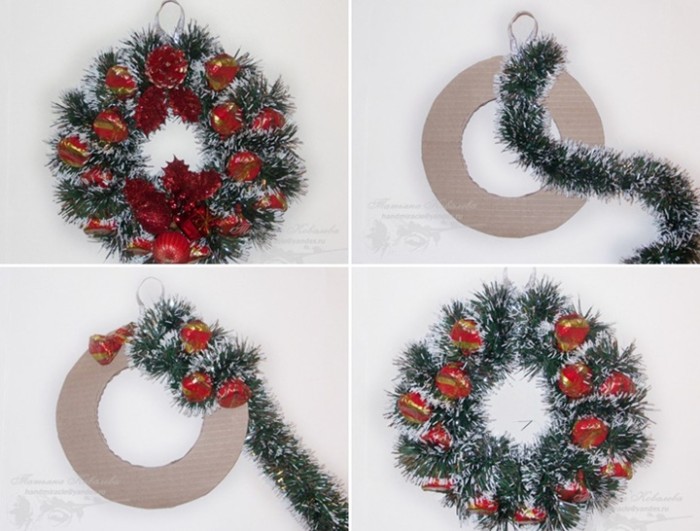
Not Ready to Start from Scratch? No Problem.
Maybe a full-blown wire-frame project feels like a bit much. You can still get a gorgeous, custom look.
A great starting point is to simply enhance a store-bought wreath. Buy a plain, undecorated wreath that looks fresh and full. Then, spend 30 minutes making it your own by tucking in a few stems of a contrasting green (like seeded eucalyptus), adding some wired pinecones, and finishing it with a beautiful handmade bow. You can easily turn a basic $20 wreath into something that looks like it came from a $75 boutique.

Another option is to build on a grapevine base. They’re more forgiving since the base is meant to be seen. You can arrange small bunches of greens in a crescent shape on one side, securing them with hot glue, for a really elegant and modern design.
A Few Workshop Rules I Live By
A beautiful wreath is never worth an injury or a fire. These are my non-negotiables.
Heads up! Many traditional holiday plants are toxic. Mistletoe, Holly berries, and Yew are all poisonous if eaten by pets or small children. If you have curious critters or little ones, it’s best to stick with non-toxic fir, pine, and cedar, and use faux berries.
And my most important rule: NEVER use real candles on a wreath. It’s just not worth the fire risk. If you want lights, only use ones that are rated for outdoor use, and always check the cords for damage. When you’re done, do a quick check on the back of the wreath and snip off any sharp wire ends that could scratch your door.

Making a wreath is such a rewarding process. It connects you to the season in a hands-on way. Start simple, learn the basics, and don’t be afraid to make it your own. I promise, each one you make will be better than the last.
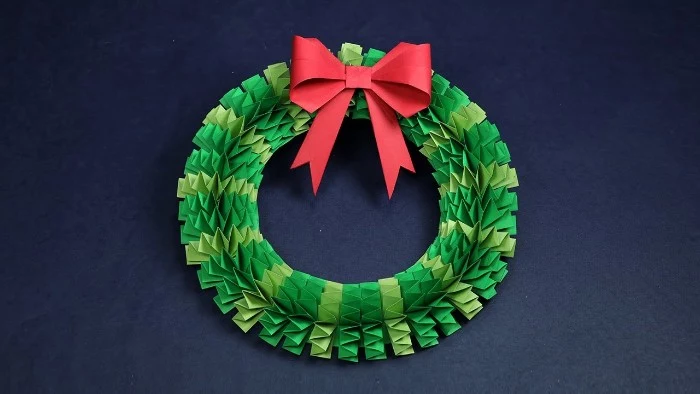
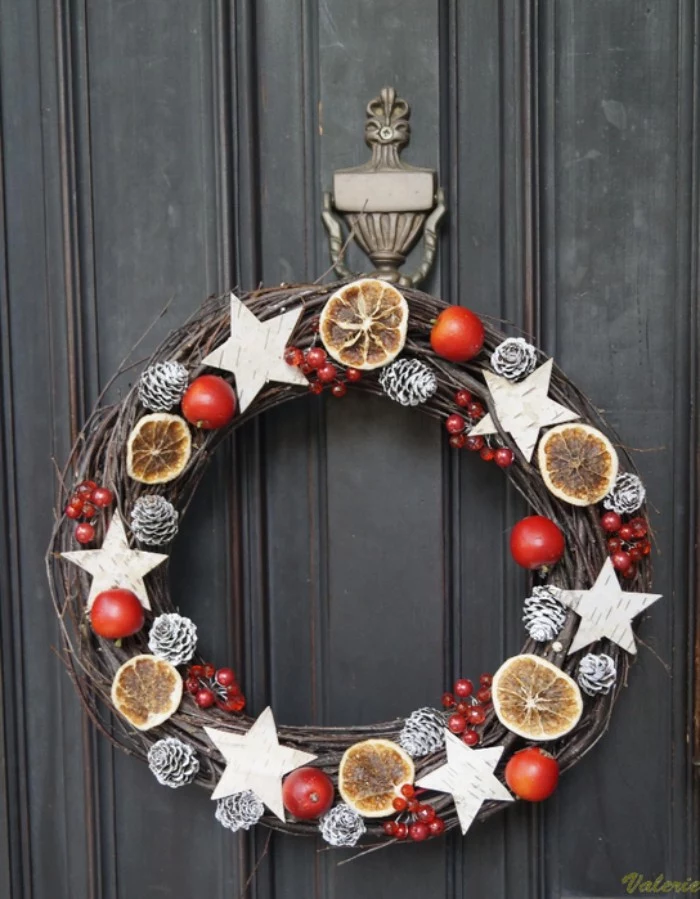
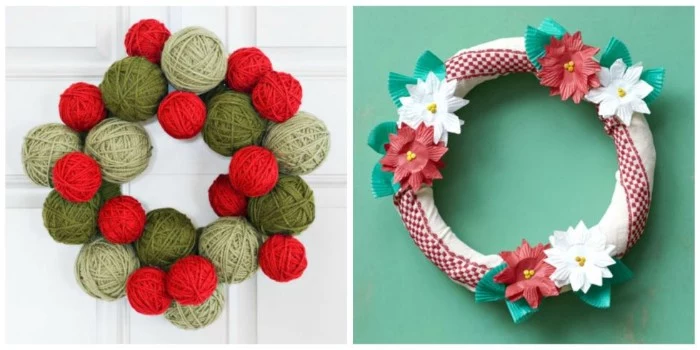
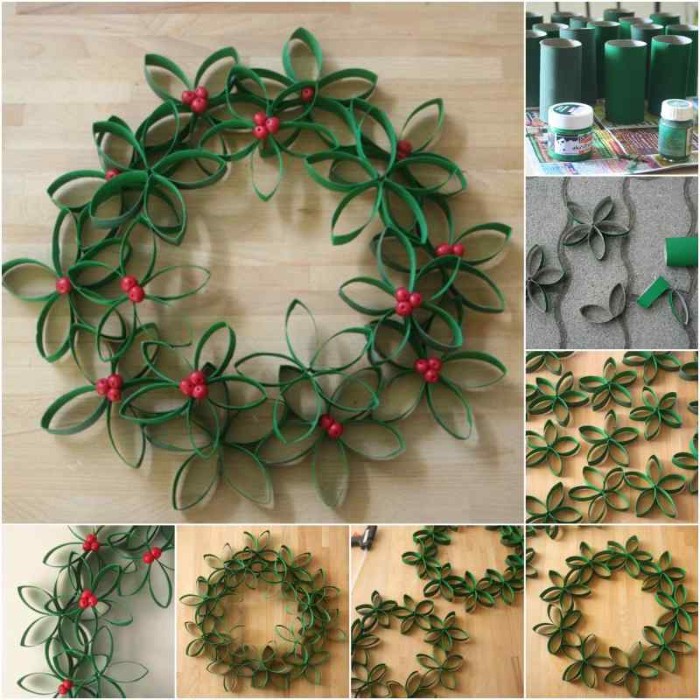
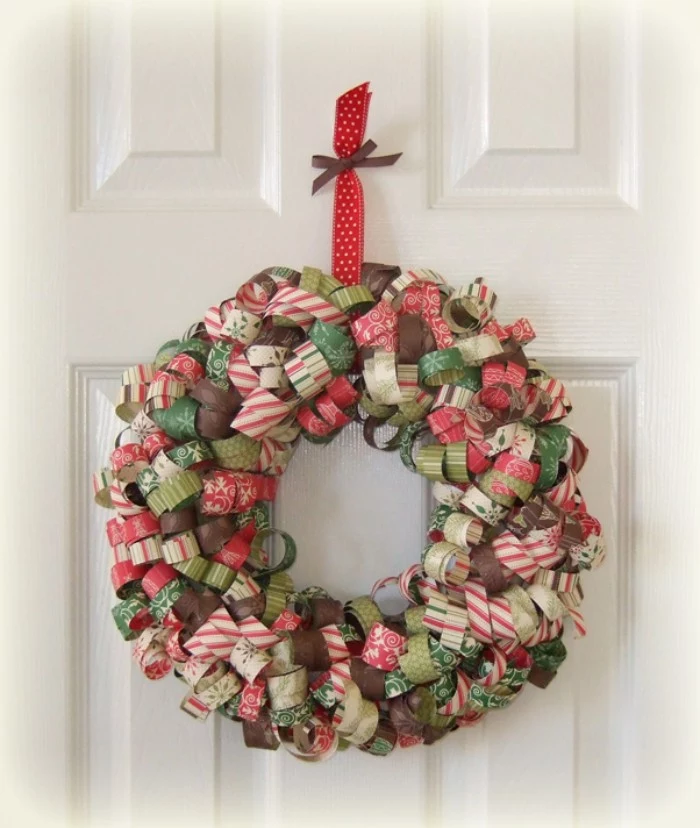
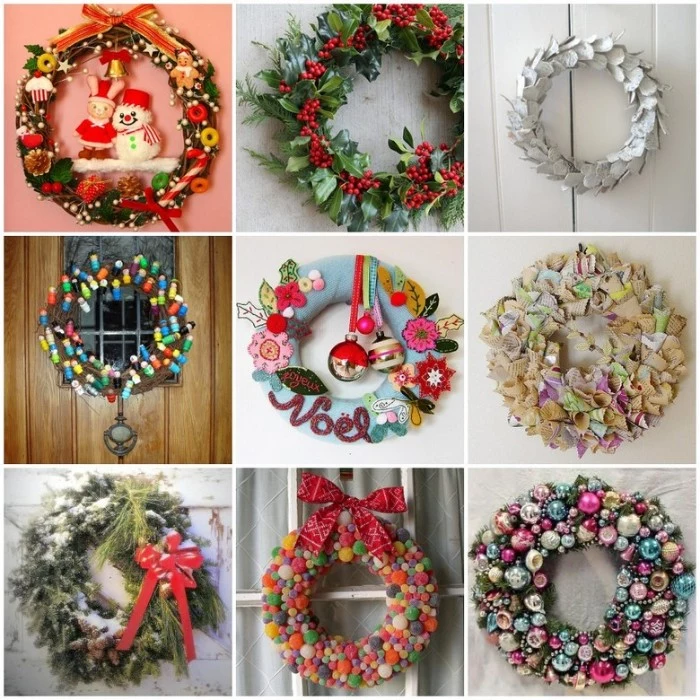
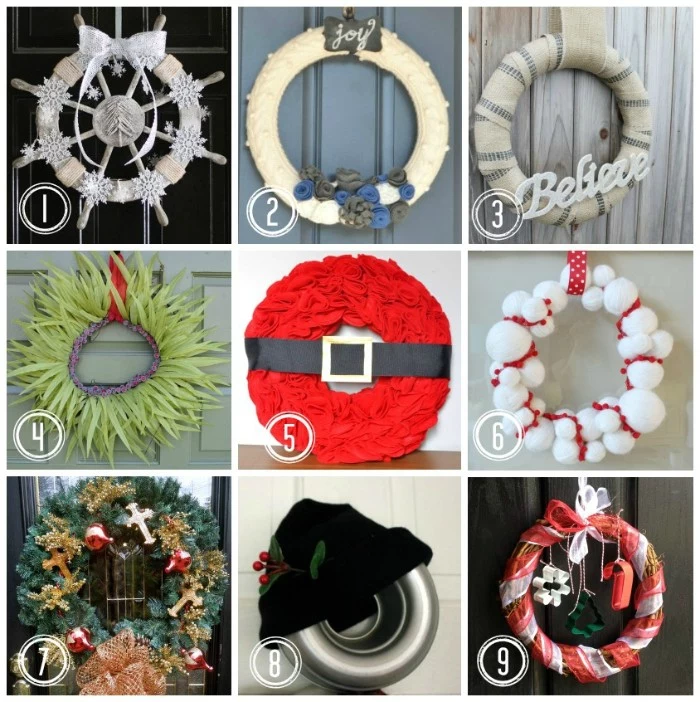
Inspiration Gallery


Beyond the visual appeal, a fresh wreath engages another powerful sense: smell. The crisp, resinous scent of pine, cedar, and fir is the true aroma of the holidays. For an extra fragrant boost, tuck in a few sprigs of eucalyptus, a cinnamon stick, or even a dried orange slice. It turns your front door into a multi-sensory welcome.

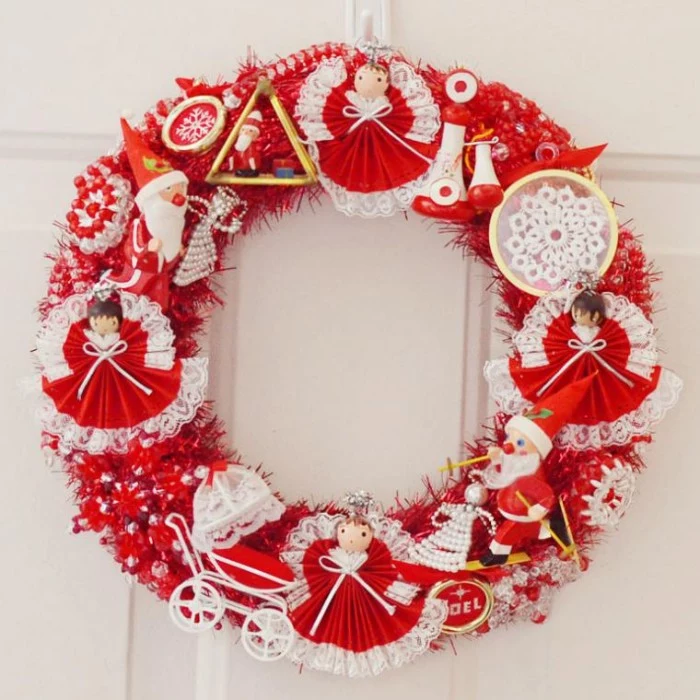
The tradition of the Advent wreath, with its four candles, dates back to 16th-century German Lutherans. The circular shape symbolizes eternal life, with no beginning and no end.
Want your live wreath to defy the elements? A quick spritz with an anti-desiccant spray like Wilt-Pruf can make all the difference. This clear coating seals the pores on the needles, locking in moisture and protecting them from drying winds and harsh winter sun. Apply it outdoors and let it dry completely before hanging.

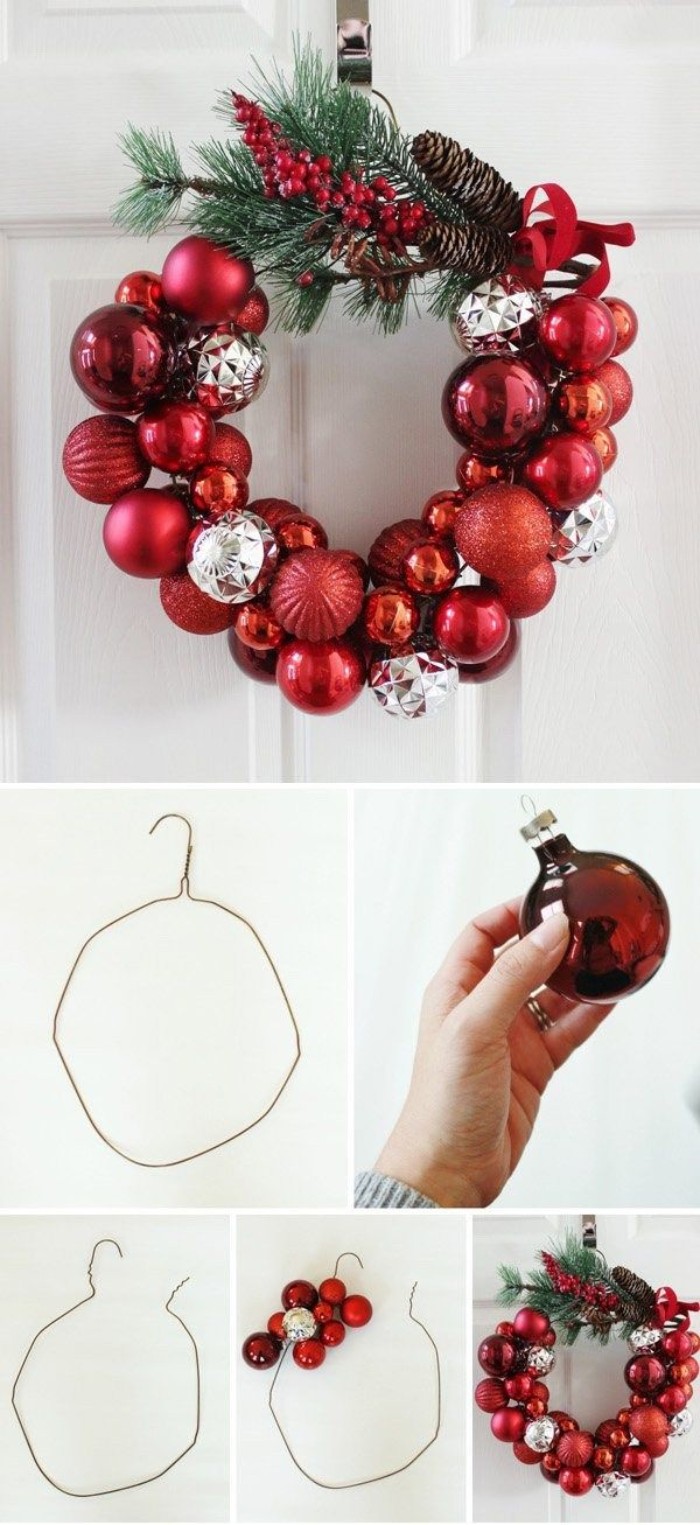
How do you attach heavier, non-traditional elements like fruit or large ornaments?
While hot glue works for light items, it can fail in cold weather. For something like an orange or a heavy glass bauble, the pro trick is to use a wooden floral pick. Pierce the base of the fruit with the sharpened wood end, then wrap the attached wire tightly around your wreath frame. This mechanical hold is far more secure and weather-resistant.

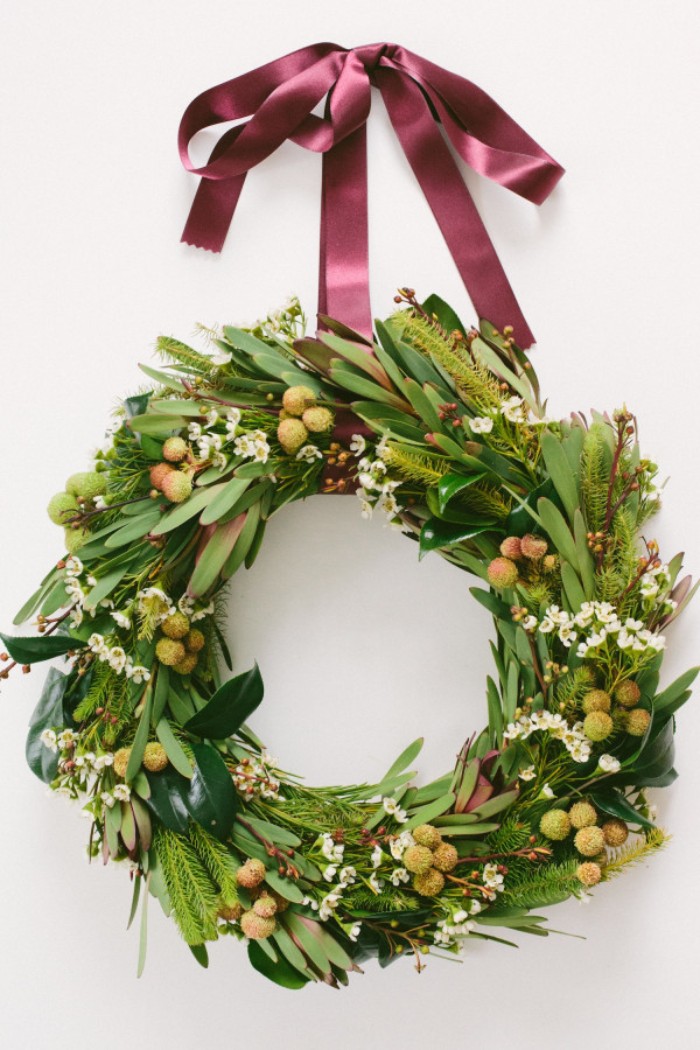
The secret to a truly lush, three-dimensional wreath isn’t just about packing in more greens. It’s about layering textures.
- Start with a base: Use sturdy, long-lasting greens like Fraser or Noble Fir.
- Add a wispy layer: Weave in delicate branches of Princess Pine or Cedar for movement.
- Introduce a third texture: Finish with highlights like silvery Eucalyptus, broad Magnolia leaves, or clusters of berries.

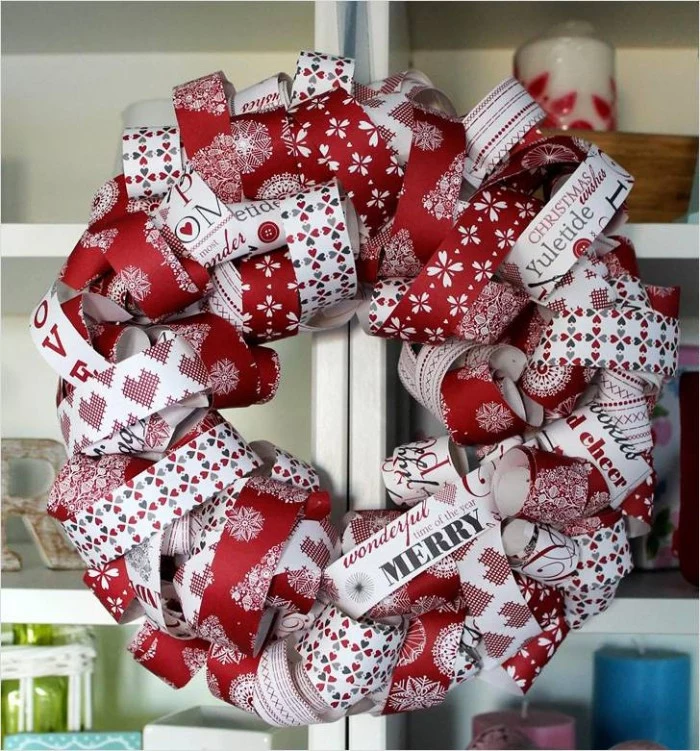
Important point: Your ribbon choice can make or break the final look. Avoid flimsy, thin plastic ribbons. Instead, invest in wired ribbon, which holds its shape beautifully for bows and loops. Brands like May Arts or d.stevens offer luxurious, durable options in velvet, burlap, or satin that you can reshape year after year.

Paddle Wire: This is your workhorse. Usually 22 or 24-gauge, it comes on a small paddle and is used for continuously wrapping bundles of greens onto your metal frame. It’s strong yet flexible.
Stem Wire: This comes in pre-cut lengths and is thicker. It’s used for wiring individual elements like pinecones, bows, or ornaments before attaching them to the wreath.
For a basic evergreen wreath, paddle wire is essential; for detailed decorating, you’ll want both.


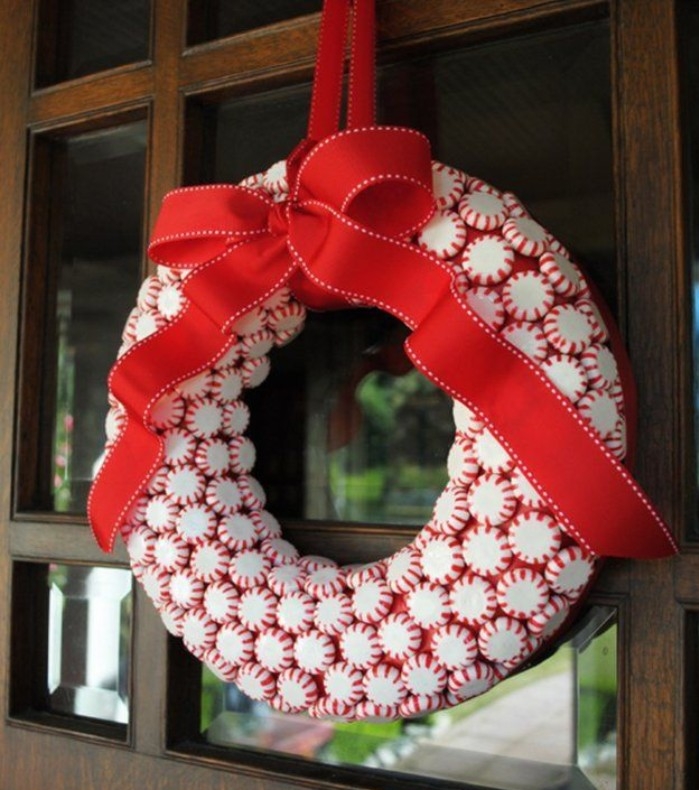
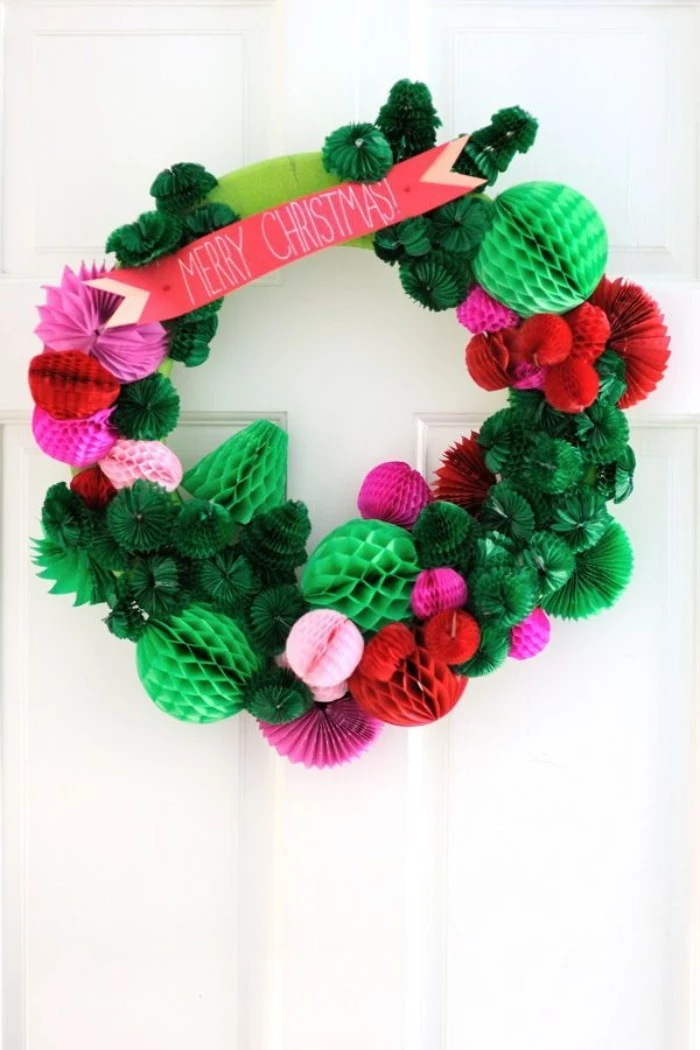
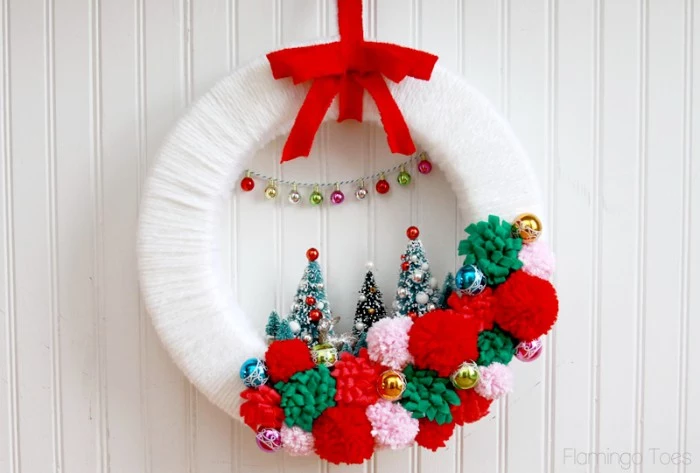
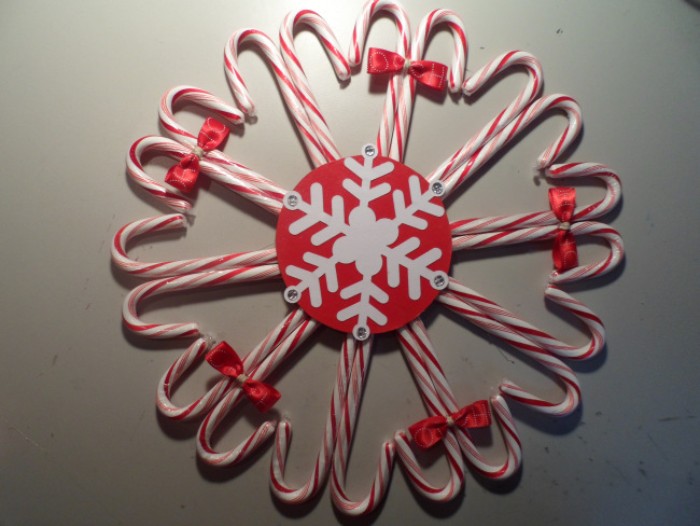
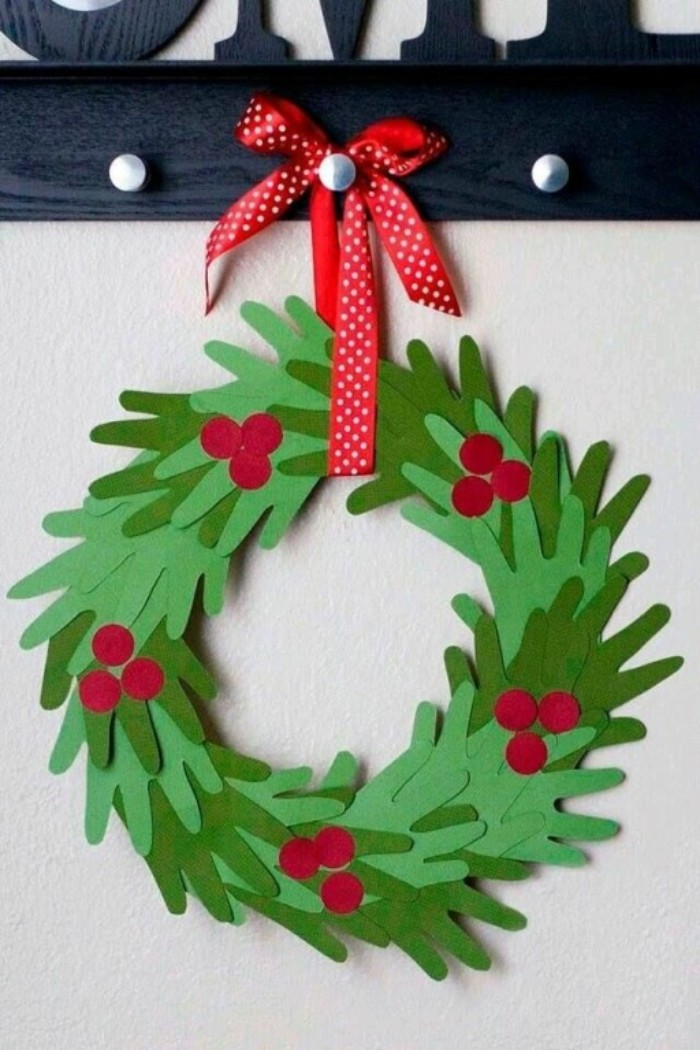
- A vibrant, festive focal point.
- A perfect use for holiday-themed cookie cutters.
- A delicious, interactive decoration for guests.
The secret? A cookie wreath. Simply bake your favorite gingerbread or sugar cookies, decorate with royal icing, and arrange them on a platter in a circular shape. It’s a centerpiece that’s meant to be dismantled and enjoyed.


Did you know that a fully decorated 24-inch fresh evergreen wreath can weigh between 10 and 15 pounds, and even more if it gets wet from rain or snow?
This is why a simple adhesive hook often fails. Always use a sturdy, dedicated metal or magnetic wreath hanger that goes over the top of the door. For brick or siding, a properly installed screw-in hook is the only truly secure option.

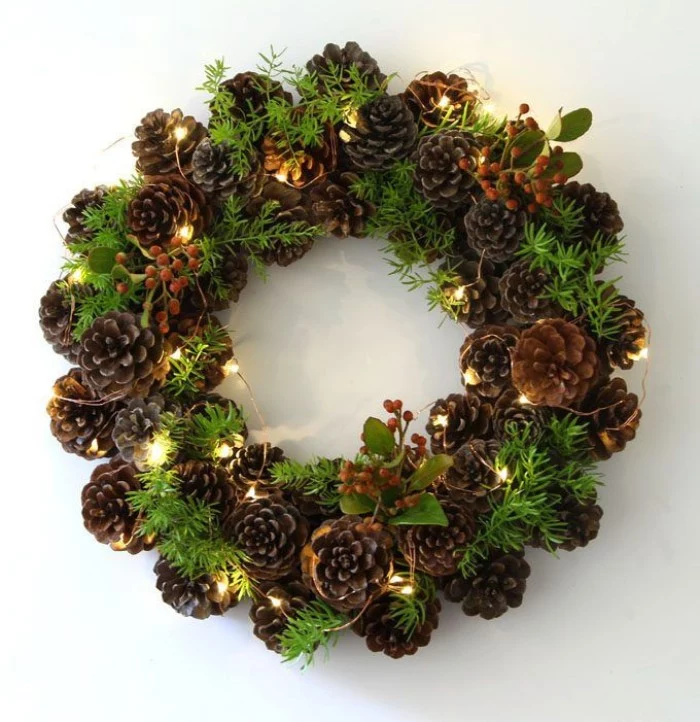
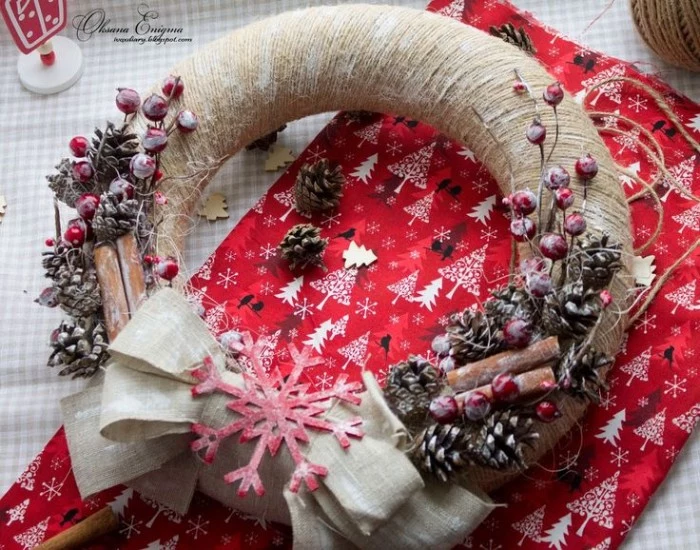
For a touch of rustic charm, consider foraging for some of your decorative elements. Fallen pinecones, shapely twigs, dried seed pods, or even teasel can add unique, natural texture. Just be sure to bake pinecones on a foil-lined sheet at 200°F (95°C) for about 30 minutes to eliminate any insects before adding them to your indoor or outdoor decor.
My finished wreath looks a bit flat and one-dimensional. What went wrong?
This often happens when all the green bundles are attached at the same angle. To create depth, slightly alter the direction of each bundle as you work your way around the frame. Some should point slightly towards the outside of the wreath, some towards the inside, and some straight ahead. This simple trick creates a much fuller, more professional-looking result.
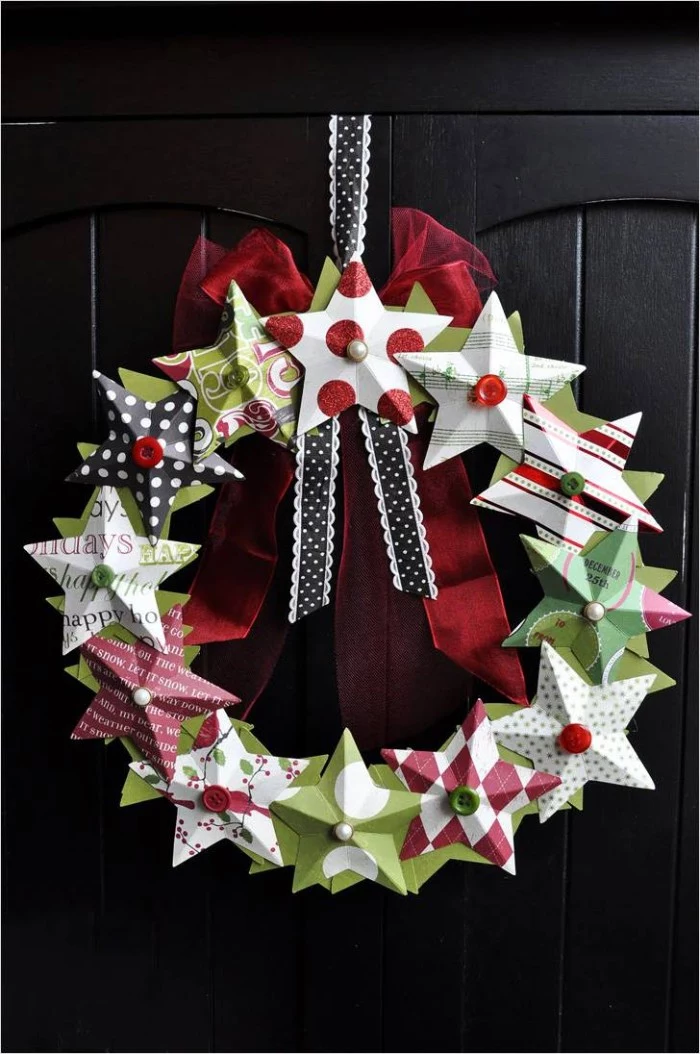
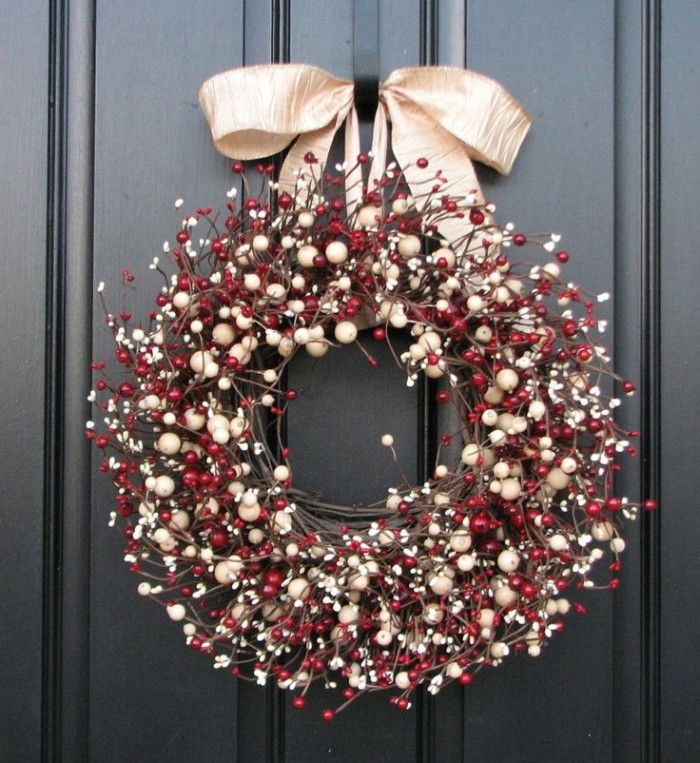
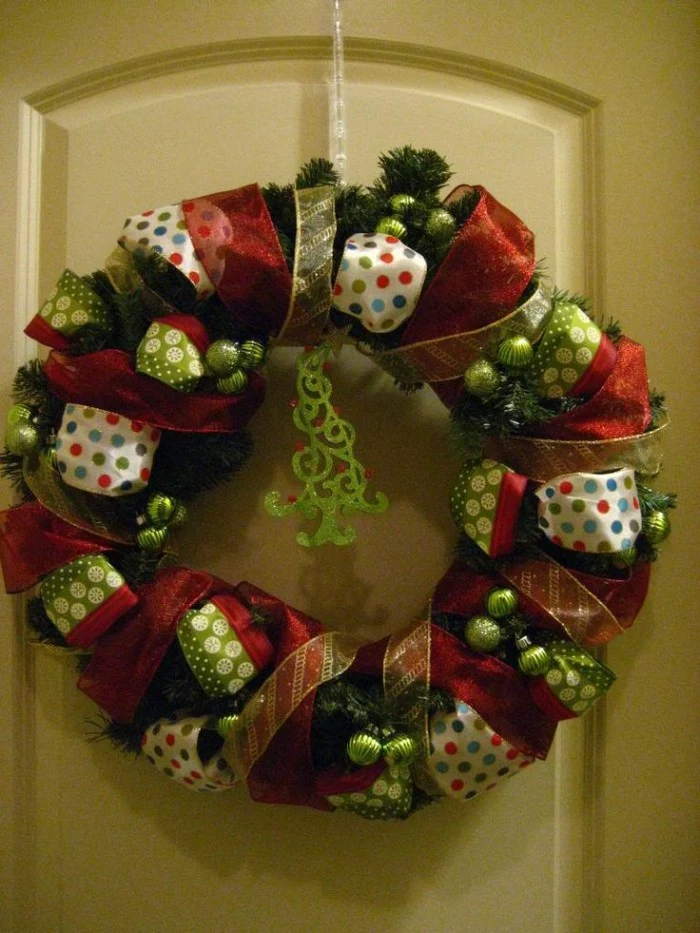
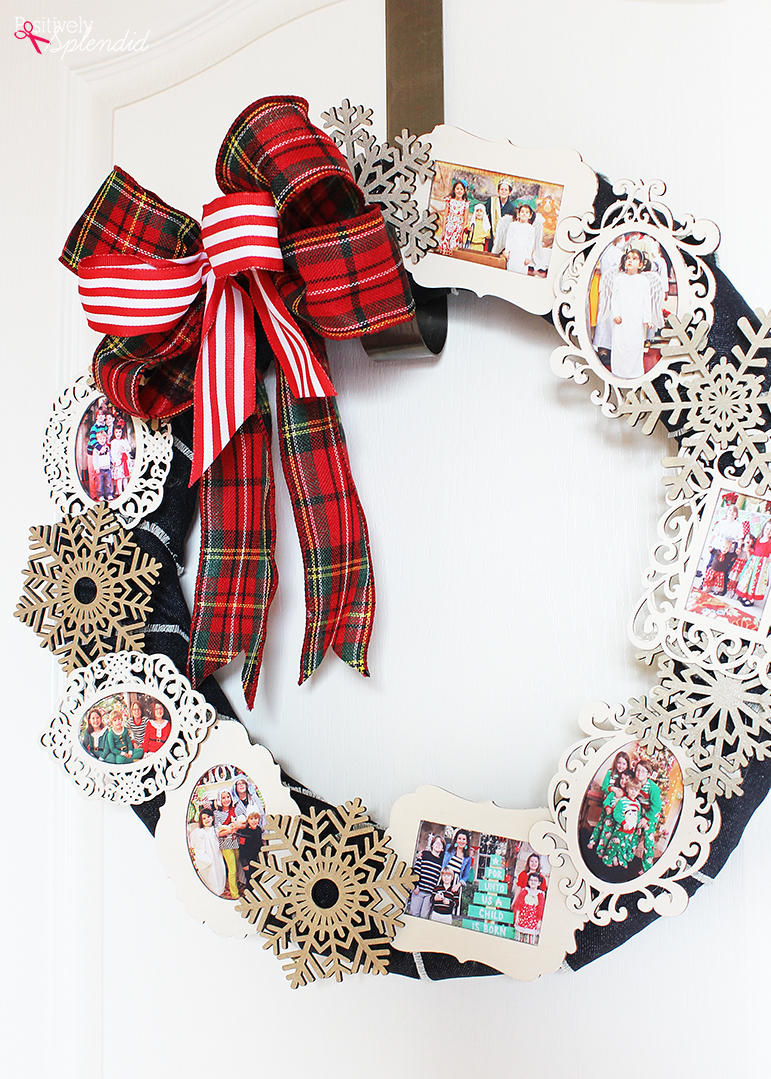
Symmetrical Design: This is the classic, balanced look where decorations are spaced evenly around the wreath. It feels formal, traditional, and orderly—perfect for a grand entrance.
Asymmetrical Design: A more modern approach where the visual weight is concentrated in one area, often the bottom left or right, leaving much of the base exposed. This style feels dynamic, artistic, and is especially beautiful on grapevine or minimalist hoop bases.
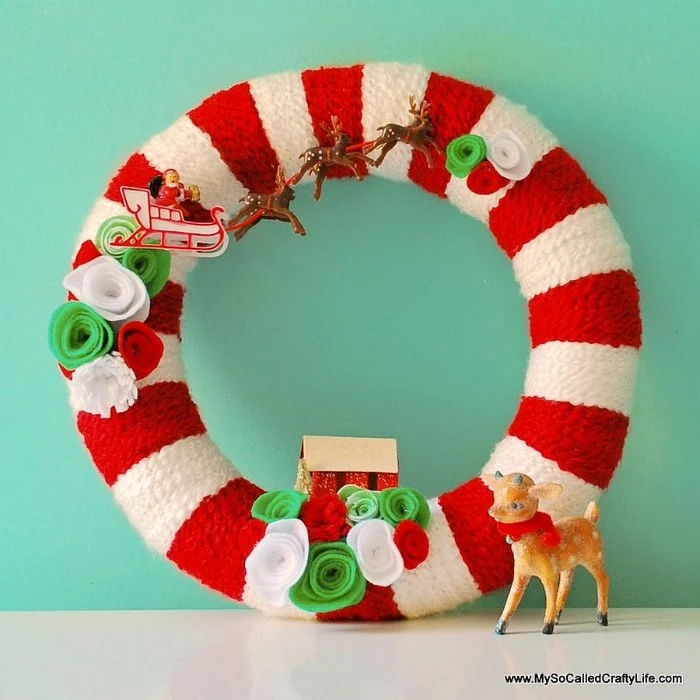

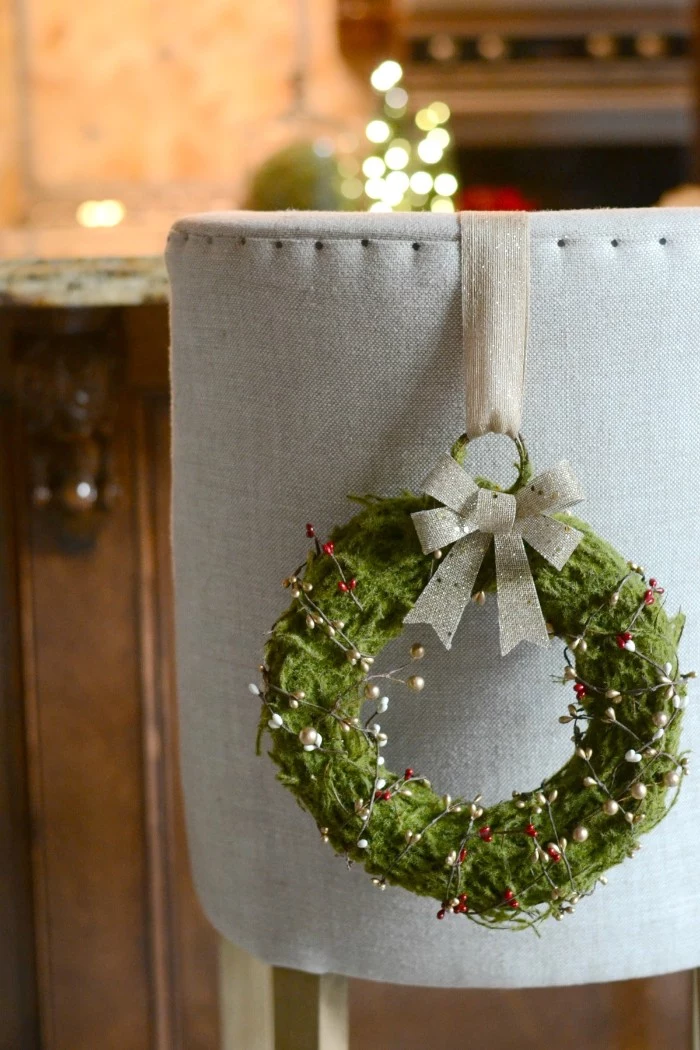
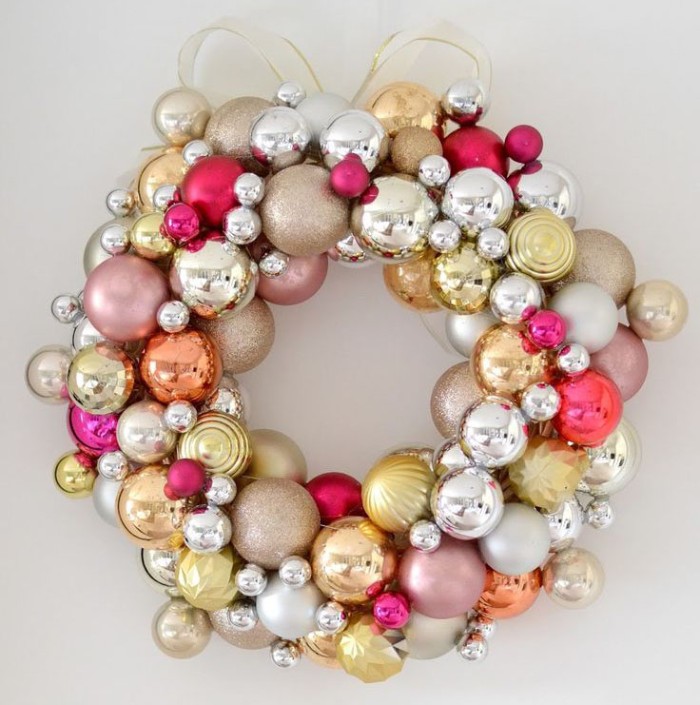
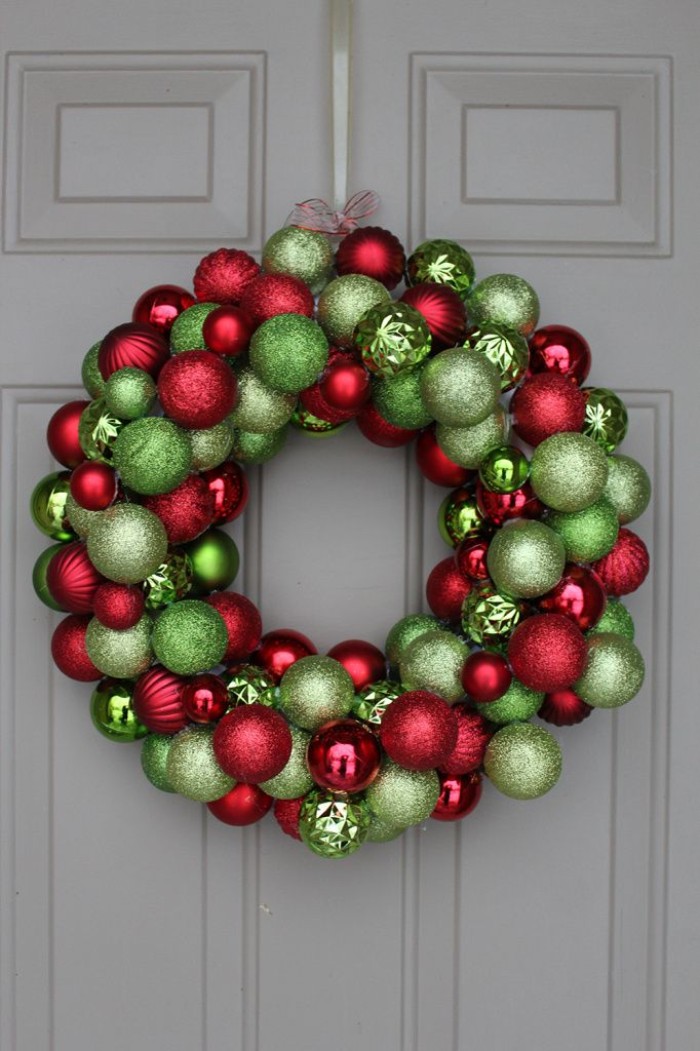
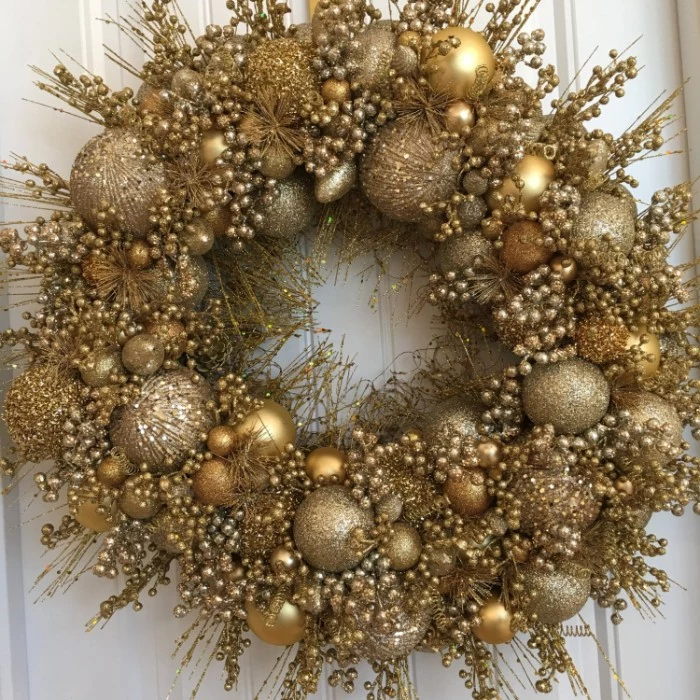
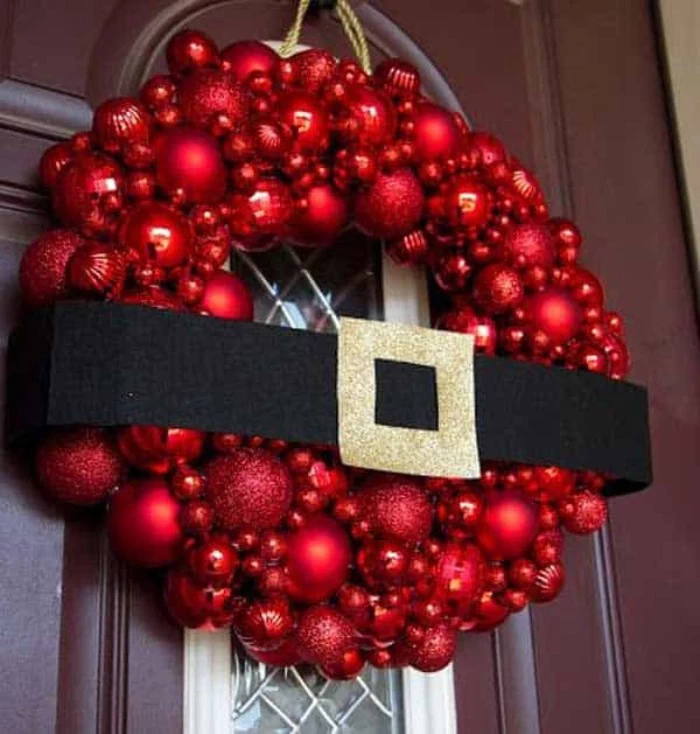
Don’t underestimate the power of a single, stunning color. A wreath made entirely of silver ornaments, like the ones from Balsam Hill’s collection, creates a striking, contemporary statement. Similarly, a monochromatic wreath using only green textures—fir, moss, eucalyptus, and hellebore—can be incredibly sophisticated and elegant.
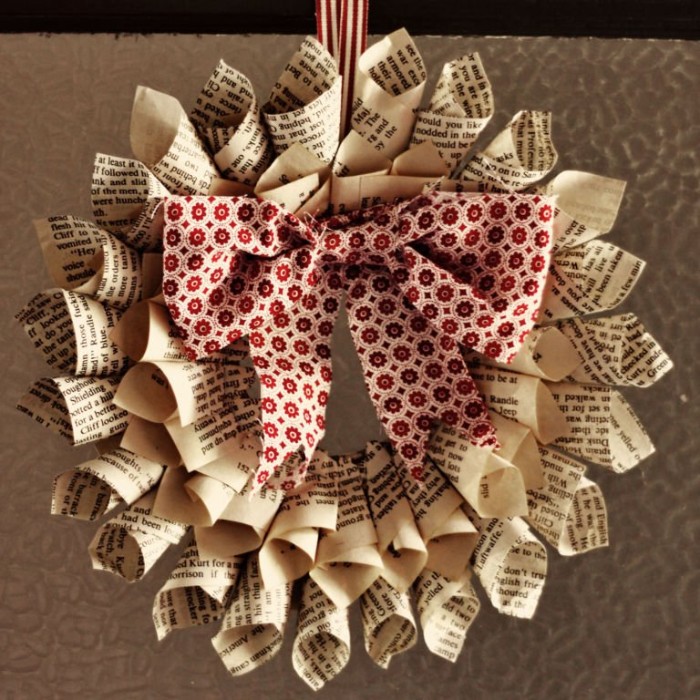


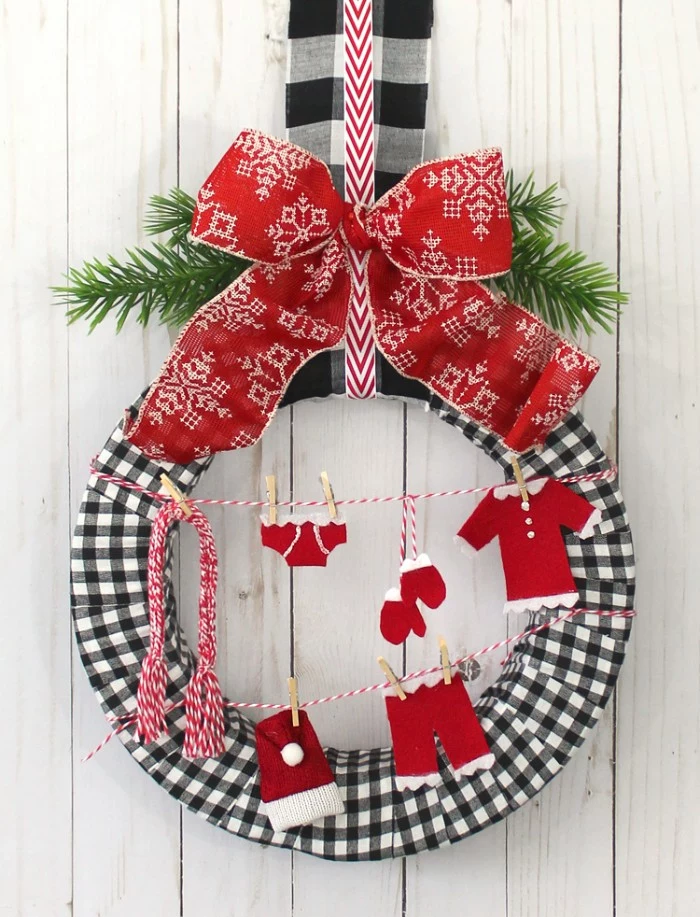
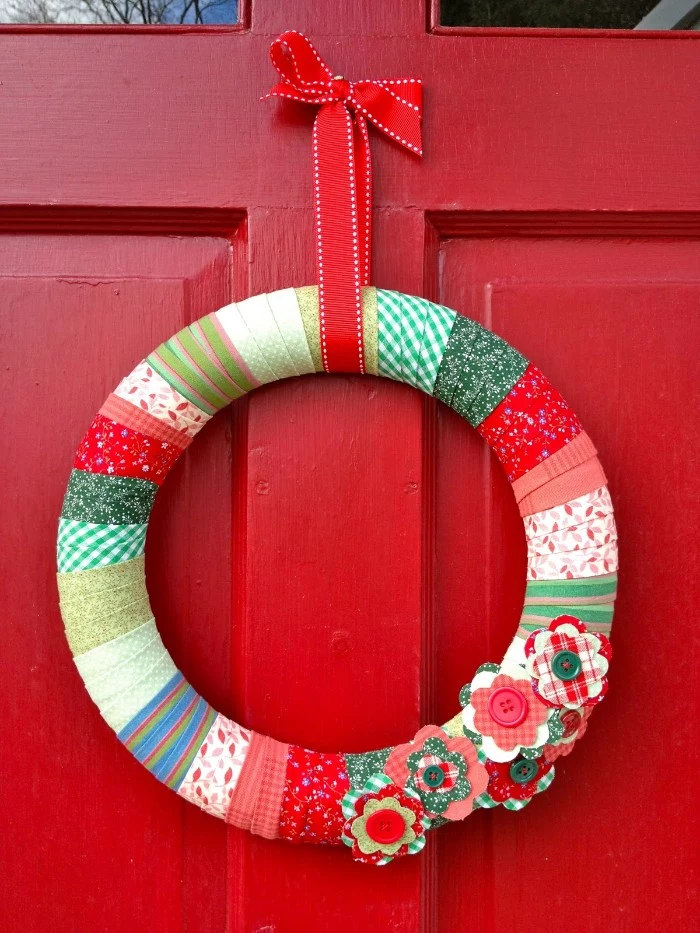
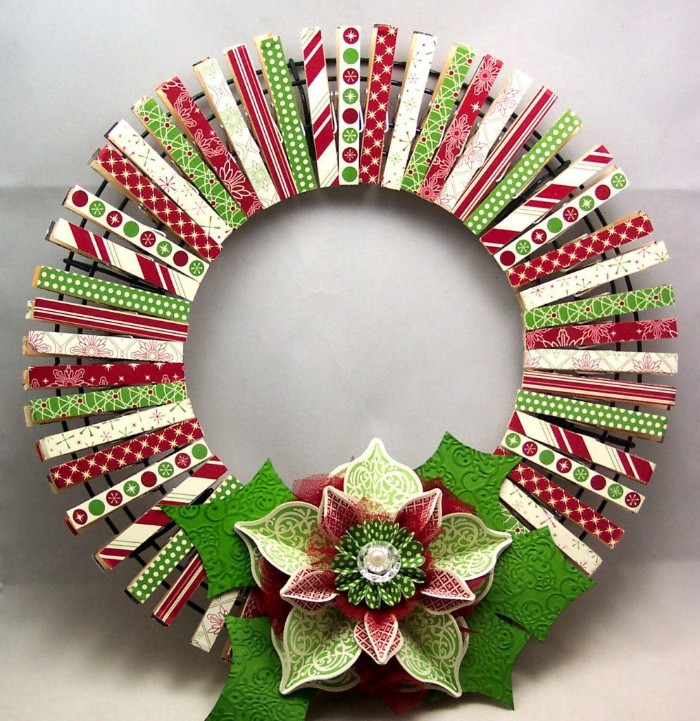
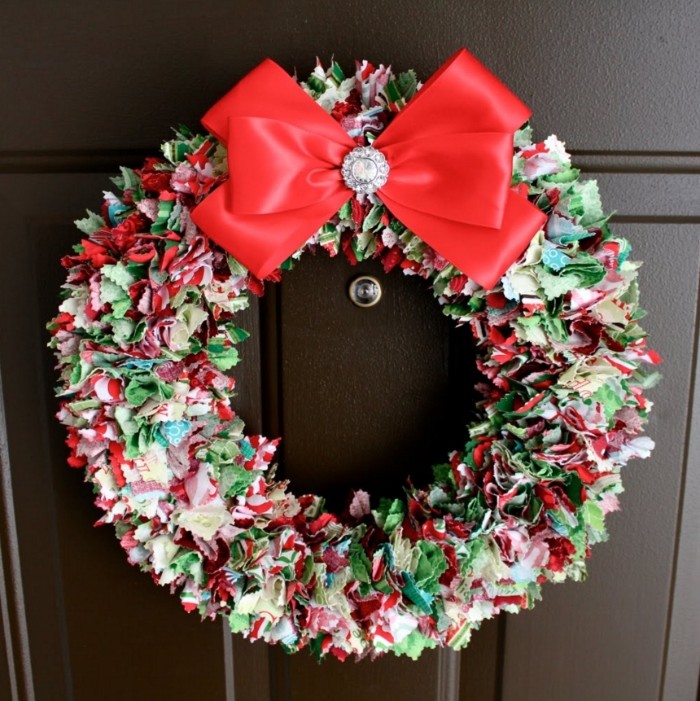
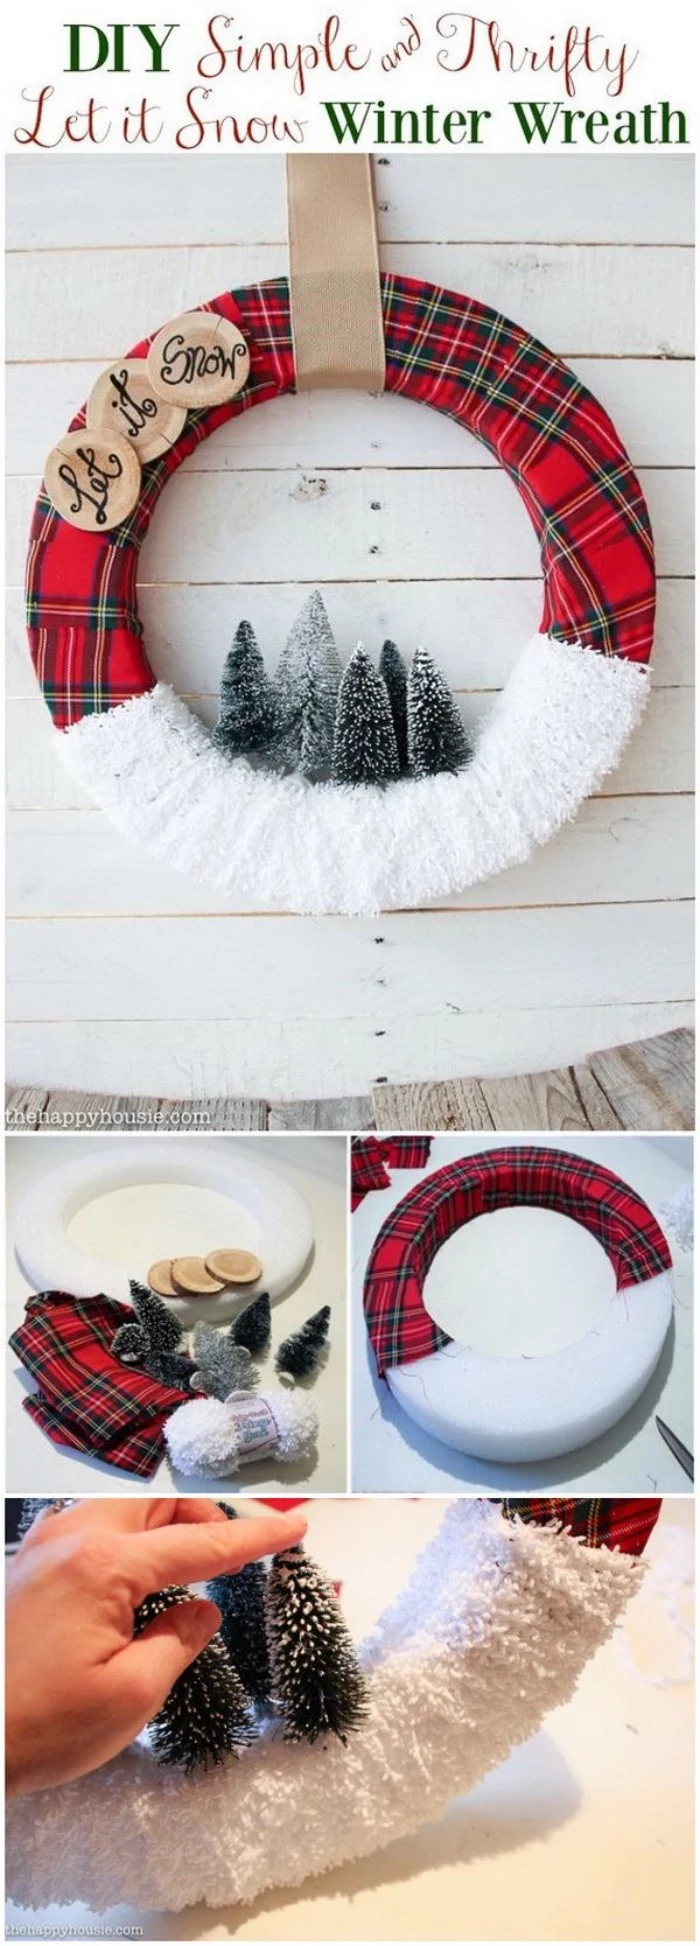
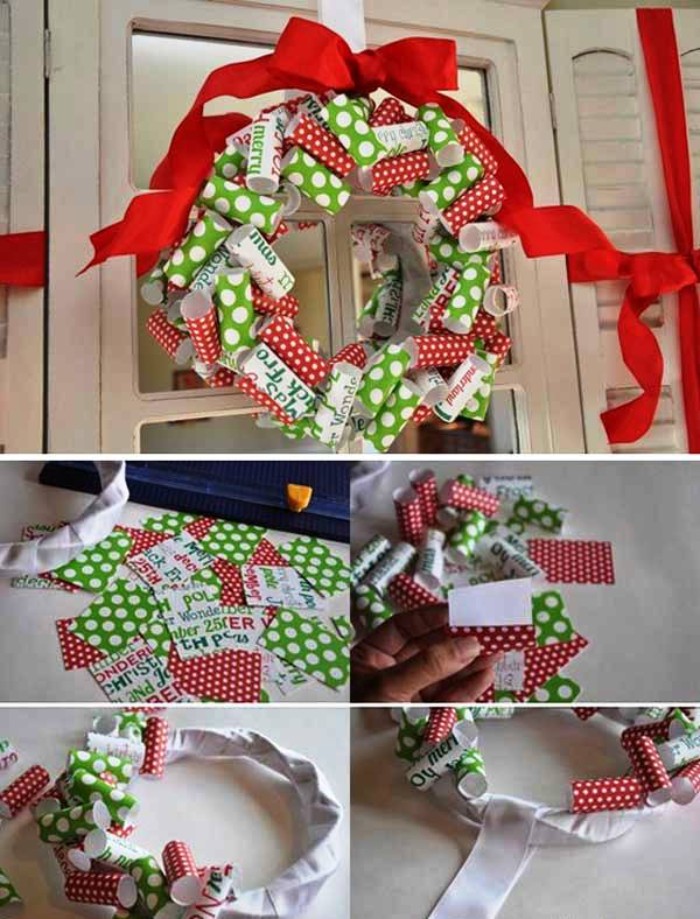
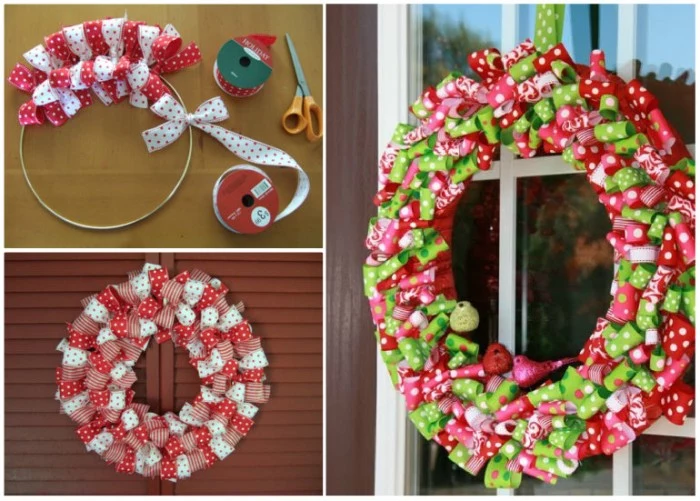
Give new life to old holiday linens or flannel shirts by turning them into a cozy fabric wreath. Here’s a simple no-sew method:
- Start with a foam wreath form (available at any craft store).
- Cut your fabric into strips about 2 inches wide and 6 inches long.
- Simply tie each strip around the foam form, scrunching them together tightly until the foam is completely covered.

A common mistake: Using the wrong glue. Standard craft hot glue is fine for indoor projects, but it can become brittle and fail in freezing temperatures. For outdoor wreaths, especially for securing heavy items, use a high-temp, heavy-duty glue like Gorilla Glue Hot Glue Sticks. For an even stronger, waterproof bond on non-porous items, a small dab of clear E6000 industrial adhesive is unbeatable.


- It won’t shed needles on your porch.
- It’s a one-time investment you can use for years.
- It can be stored easily without crumbling.
The secret? A high-quality faux wreath. Brands like Afloral or Frontgate offer incredibly realistic options made from molded PE plastic, mimicking the look and feel of real branches far better than old-fashioned PVC garlands.
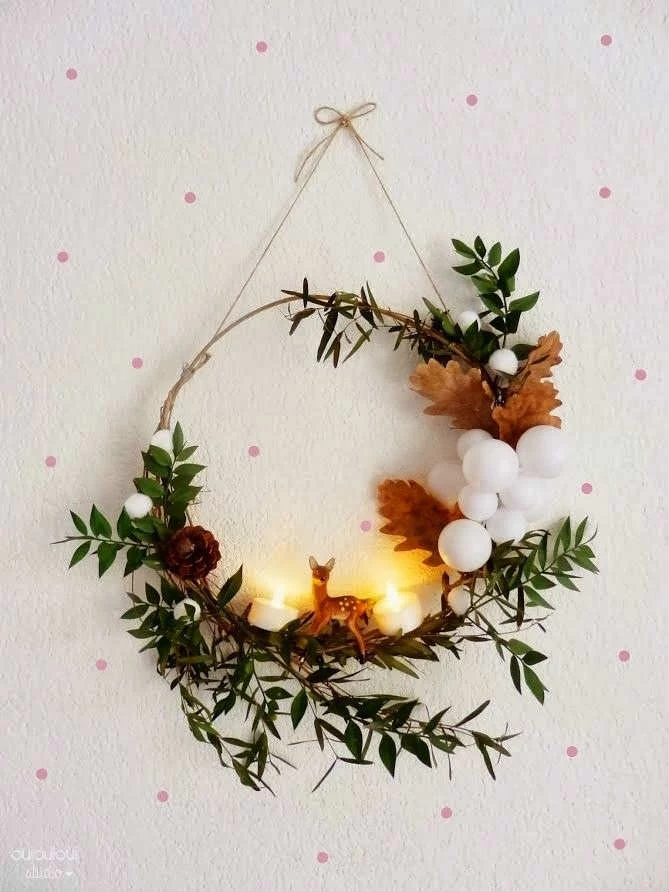
For a magical evening glow, weave in a string of micro LED lights. Opt for a battery-powered strand with a built-in timer, and choose wire that matches your greenery (green) or branches (copper/silver). The tiny bulbs disappear into the foliage, leaving just a delicate, starry sparkle.

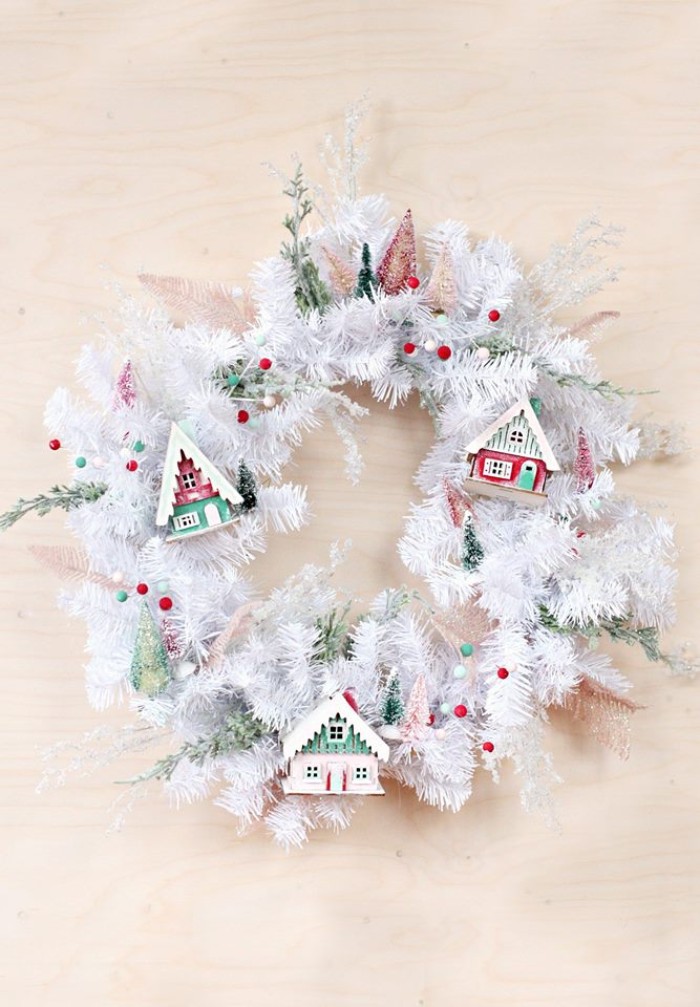
Embrace Scandinavian simplicity with a minimalist wreath. Start with a simple brass or black metal hoop. Attach just a single, elegant spray of seeded eucalyptus and a few sprigs of fir to one side, securing it with fine-gauge floral wire. The beauty lies in the negative space, creating a look that is both festive and effortlessly chic.

Noble Fir: Prized by pros for its stiff, well-spaced branches that are perfect for hanging ornaments. Its needles are a beautiful blue-green and have excellent needle retention.
Fraser Fir: Famous for its wonderful fragrance and dark green needles with a silvery underside. Its branches angle slightly upward, giving wreaths a full, dense appearance.
For durability and structure, Noble Fir is a winner, but for classic scent and color, Fraser Fir is hard to beat. Many professional florists use a mix of both.

Preservation is key: Before you pack it away, gently dust your wreath with a soft brush or a can of compressed air. If it’s a precious evergreen wreath you want to save, store it in a dedicated wreath storage bag or box to protect it from being crushed. Place it in a cool, dark, and dry place like a closet or under a bed, not in a hot attic where materials can warp or melt.


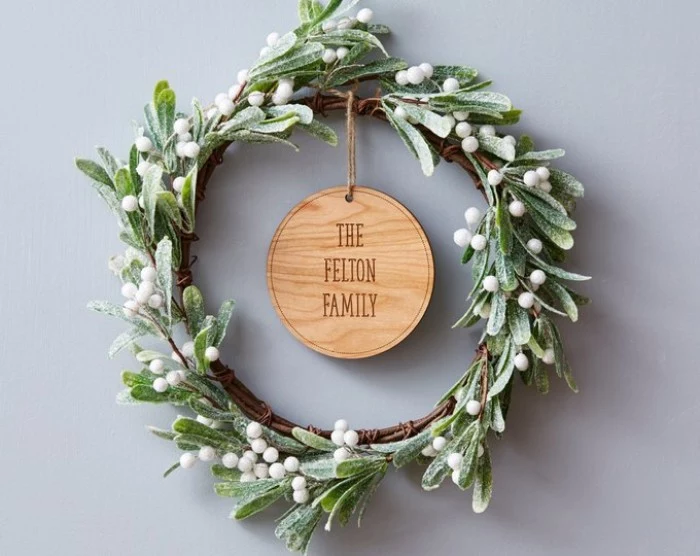
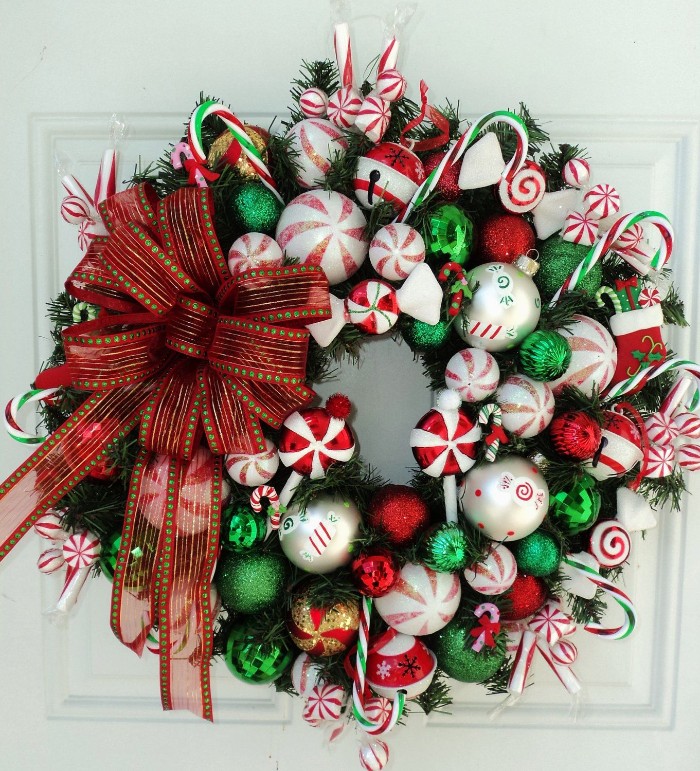
- Small, painted wooden letters to create a monogram.
- Clusters of jingle bells that chime when the door opens.
- Miniature, shatterproof ornaments in your home’s accent color.
- Dried wheat stalks for a rustic, harvest-gold touch.

Glycerin-preserved foliage, often found in craft stores, has been treated to replace its water content with glycerin. This keeps the leaves soft and pliable indefinitely.
While not suitable for a full wreath base, adding a few sprigs of preserved eucalyptus, boxwood, or fall leaves ensures those elements will look perfect for the entire season and beyond, without any risk of drying or crumbling.


The key to a big, beautiful bow is creating generous, even loops. For a classic florist bow, hold the ribbon tail, make a small center loop, then twist the ribbon and make your first large loop. Twist again in the center and make another large loop on the opposite side. Continue this process, stacking loops on each side, then secure the center tightly with a piece of floral wire, leaving a long tail to attach it to the wreath.
Don’t throw that natural wreath in the trash after the holidays! Clip off all the wires, ribbons, and non-organic decorations. The evergreen branches can be clipped into smaller pieces and added to your compost pile as a valuable ‘brown’ material, or laid over perennial beds as a light, protective winter mulch.


