DIY Advent Calendars: How to Craft a Tradition, Not Just a Decoration
You know, after countless projects, the things I’ve built that really stick with me are the ones that mark time and create memories. An advent calendar is at the top of that list. I still have the first one I made for my own family—it’s a bit rough around the edges, paint’s faded, and a few boxes are wobbly, but it holds so much more than little trinkets. It holds decades of holiday excitement.
In this article
- The Foundation: Picking Your Materials
- Core Crafting Techniques
- Project 1: The Simple Pouch Garland (Beginner)
- Project 2: The Reusable Wooden Box Calendar (Intermediate)
- Project 3: The Light-Up Paper Village (Advanced)
- Don’t Have Time for All That? The 30-Minute Version
- Quick Ideas for Fillers (That Aren’t Just Candy)
- Storing Your Creation for Next Year
- Inspiration Gallery
Making your own is about so much more than trying to save a few bucks. It’s about starting a tradition. It’s a chance to craft an heirloom that your family will genuinely look forward to seeing every single year. This isn’t about a disposable, one-season craft. We’re going to build something with care, using good materials and solid techniques that I’ve picked up over the years.
So, what’s the plan? First, we’ll dive into the materials, because choosing the right stuff is half the battle. Then, I’ll walk you through some core skills for cutting, building, and finishing. Finally, we’ll explore three different designs you can try, each with its own vibe.
Before you get started, it’s good to know what you’re getting into. We’ve got a few options here:
- The Simple Pouch Garland: This is your perfect weekend project. It’s beginner-friendly, super forgiving, and won’t break the bank—you can probably pull it off for about $25-$40. You’ll spend maybe 3-4 hours on it, and the result is wonderfully rustic and charming.
- The Reusable Wooden Box Calendar: Okay, this one’s a step up. It’s more of a small piece of furniture. It requires more precision and time, probably a full weekend and around $50-$75 in materials. But honestly, it’s a true heirloom that can last for generations.
- The Light-Up Paper Village: This is the showstopper. It demands patience and a steady hand, but the final effect is pure magic. Expect to spend 15-20 hours on this one, with a budget of about $40-$60, mostly for good quality cardstock and the lights.
The Foundation: Picking Your Materials
The quality of your calendar starts here. A brilliant design can fall flat if it’s made from flimsy materials. Trust me, a little knowledge goes a long way and is the difference between a calendar that sags after one Christmas and one that stands proud for years.
Paper, Cardstock, and Paperboard
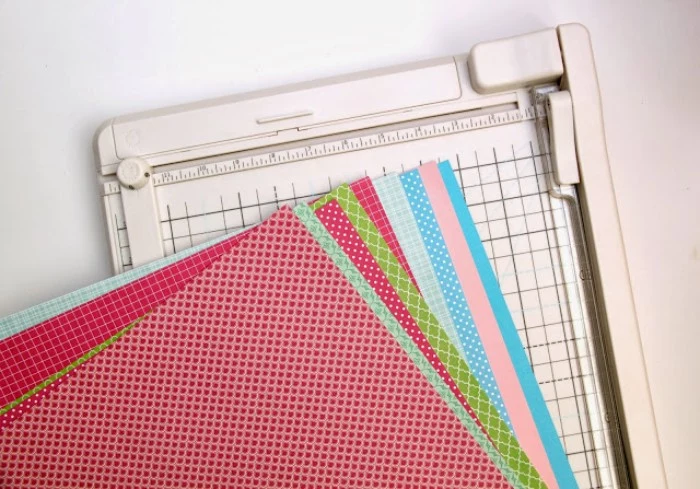
Paper is incredibly versatile, but you’ve got to pick the right kind. For something meant to last, weight and composition are everything.
Material Weight (GSM): Paper thickness is measured in grams per square meter (GSM). Your standard printer paper is about 80 GSM, which is way too thin for this. For small folded boxes or tags, I’d suggest a cardstock of at least 180-220 GSM. But for the structural parts of a project, like the little houses in a village scene, you need more muscle. Go for a 300 GSM cardstock or even a lightweight paperboard. It holds its shape and won’t buckle.
Acid-Free is a Must: For any project you want to keep, always use acid-free or archival-quality paper. Standard paper has acids that make it yellow and brittle over time (think old newspapers). You can find acid-free cardstock at any craft store like Michael’s or online, and it’s your secret weapon for longevity.
A Quick Note on Climate: Paper is a sponge for moisture. If you live somewhere humid, your paper calendar could warp. A quick tip: consider sealing your finished paper boxes with a matte acrylic spray sealer. It creates a moisture barrier and adds a ton of durability.
Wood and Plywood
A wooden advent calendar is a serious commitment, but the payoff is huge. There’s just something about the solid feel of the finished piece.
Solid Wood vs. Plywood: For a simple frame, pine is cheap and easy to find. But, solid wood can warp with changes in humidity. For projects with lots of small, precise parts like little drawers, my go-to is Baltic birch plywood. It’s made of many thin layers, making it incredibly stable. I use 1/4-inch (6mm) for small boxes and 1/2-inch (12mm) for the main frame. You can find it at specialty wood stores or sometimes at Home Depot. A 4’x4′ sheet might run you $30-$50, but you’ll have plenty for this project and more.
Sourcing and Prep: You don’t need a full workshop! Most big box hardware stores will cut larger sheets of plywood down to a more manageable size for you. Once you get it home, sanding is non-negotiable. Start with 120-grit sandpaper to smooth things out, then finish with 220-grit for a silky feel. Always sand with the grain to avoid ugly scratches.
Fabric and Felt
Fabric calendars have a soft, cozy charm and are incredibly forgiving for beginners.
Choosing Fabric: Cotton canvas is my top choice. It’s sturdy, sews beautifully, and holds its shape. A medium-weight canvas (around 7-9 oz.) is perfect for little pouches. Felt is another great option, especially for no-sew projects. Wool felt is pricier but feels amazing and lasts forever. The polyester craft felt you find everywhere is cheaper and works fine, but it can stretch or pill over time.
Heads up! Preparation is Key: If you’re using cotton or linen, you HAVE to wash and dry it before you cut anything. This pre-shrinks it. I learned this the hard way once when my perfectly sized pouches all puckered after the first wash. For extra stiffness, you can iron fusible interfacing onto the back of your fabric pieces before sewing. It gives them a crisp, pro look.

Core Crafting Techniques
Good materials are the start, but how you put them together is what really matters. Master these basics, and you’re set.
Precision Cutting
Clean cuts are crucial. Ragged edges just look sloppy and make assembly a nightmare.
For Paper: Ditch the scissors for straight lines. A sharp craft knife (like an X-Acto, which is about $5-$7) and a metal ruler are your best friends. Always cut on a self-healing mat to protect your table. Press firmly and make one or two smooth passes instead of trying to saw at it. Oh, and change your blade often. A dull blade tears paper instead of slicing it.
For Wood: For straight cuts in thin plywood, a fine-toothed handsaw and a miter box (a simple jig that costs about $15-$20) will give you perfect 90-degree and 45-degree angles. It’s a cheap tool that makes a huge difference. And please, always clamp your wood down securely before cutting.
Solid Assembly: Glues and Fasteners
The right adhesive is everything.
Wood Glue (PVA): For wood, nothing beats a good PVA wood glue. It creates a bond that’s literally stronger than the wood itself. Apply a thin, even layer, press the parts together, and clamp them for at least 30 minutes. Wipe off any excess glue with a damp cloth before it dries.
Craft Glue (Tacky Glue): For paper and fabric, a thick white craft glue is perfect. It grabs quickly but gives you a few seconds to reposition things.
The Hot Glue Gun: Hot glue has its place, but use it with caution. It’s great for sticking on decorative bits like pinecones or ribbon, but it is NOT a structural adhesive. A joint made with hot glue can fail under stress or in a warm room. By the way, the little scar on my left hand is a permanent reminder to respect a high-temp glue gun. The low-temp ones are safer, especially with kids, but the bond is much weaker.
Finishing and Numbering
These are the final touches that make your project look polished.
Painting: Acrylic craft paint works great on both wood and paper. Apply two thin coats instead of one thick one for a smoother finish. If you’re painting raw wood, a coat of primer first will help the color pop and stick better.
Numbering Techniques: There are lots of ways to get the numbers on there.
- Stencils: Easy and effective. Use a stencil brush with very little paint to prevent bleeding under the edges.
- Hand-Painting: For a personal touch. Lightly sketch the numbers in pencil first, then go over them with a fine-tipped paint pen.
- Wood Burning: A more advanced technique that gives a beautiful, rustic look. You’ll need a special tool and some practice on scrap wood first.
- Stamps: Rubber stamps and a good ink pad are a quick way to get uniform numbers. StazOn is a fantastic ink brand that works on wood, paper, and even fabric.
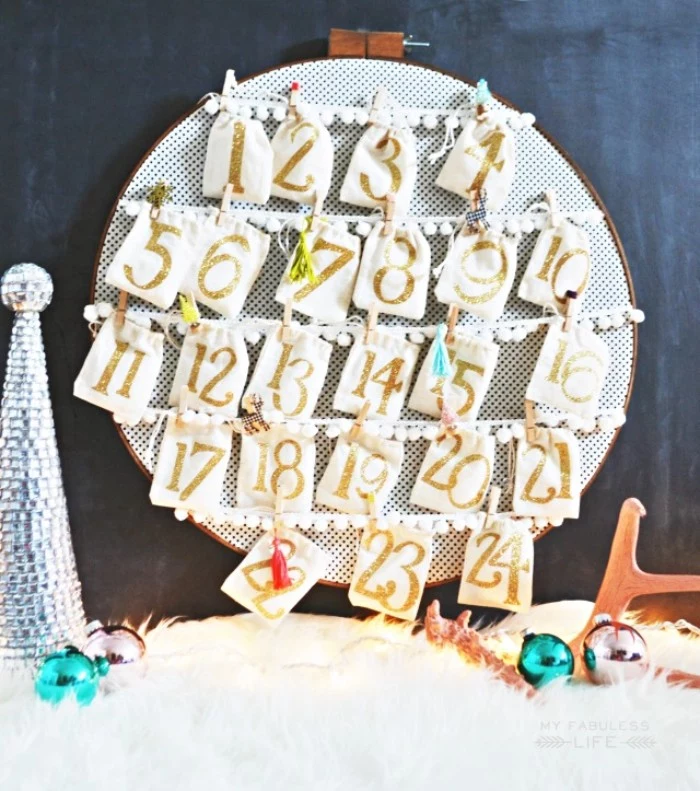
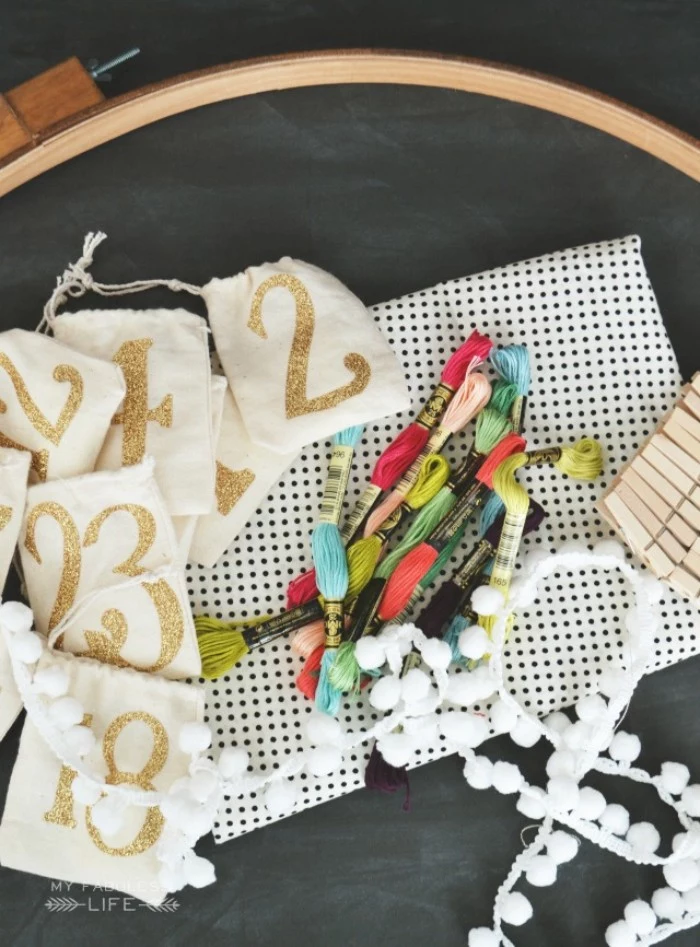
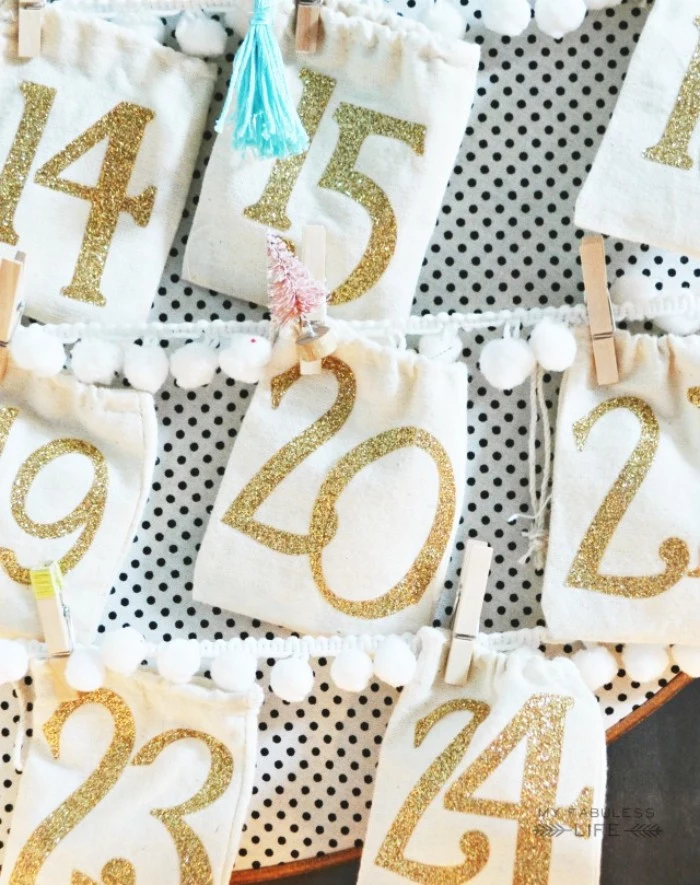
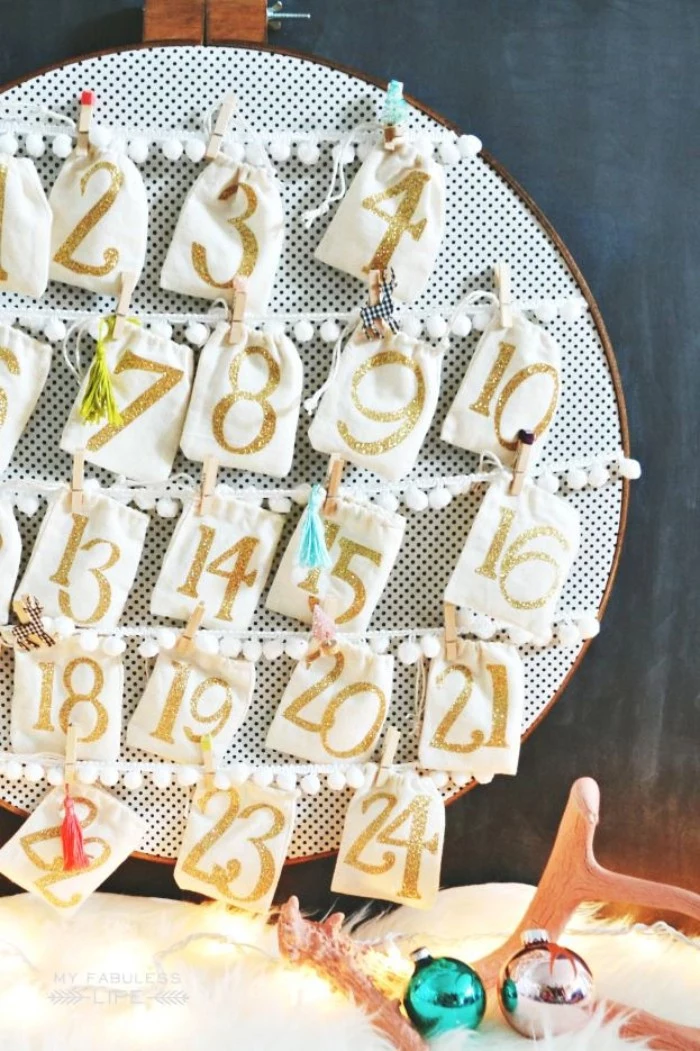
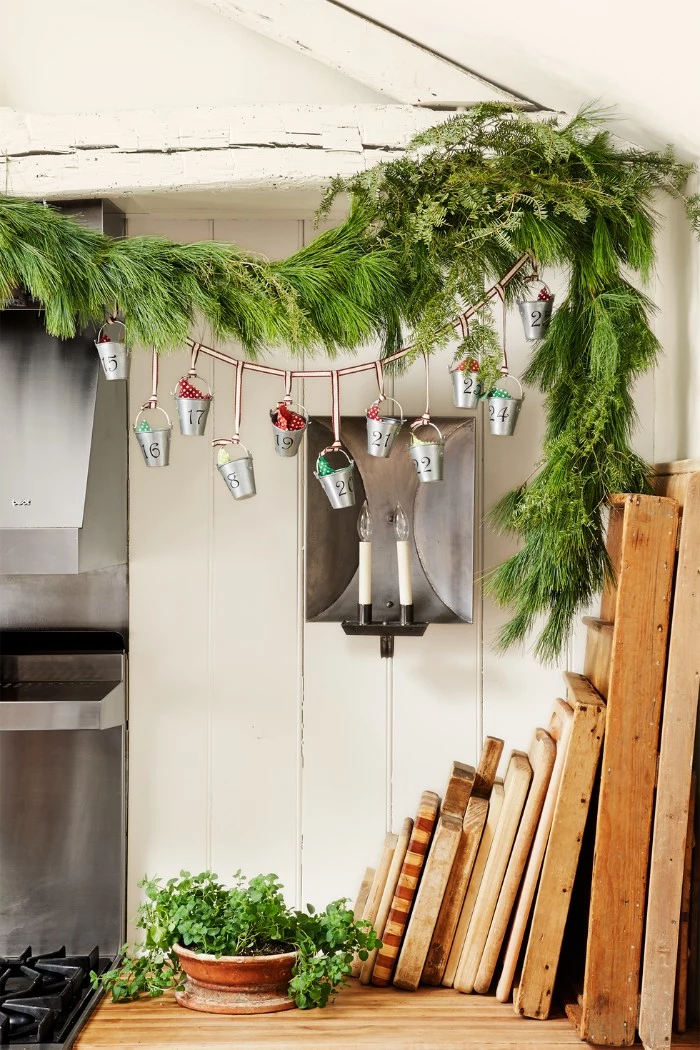
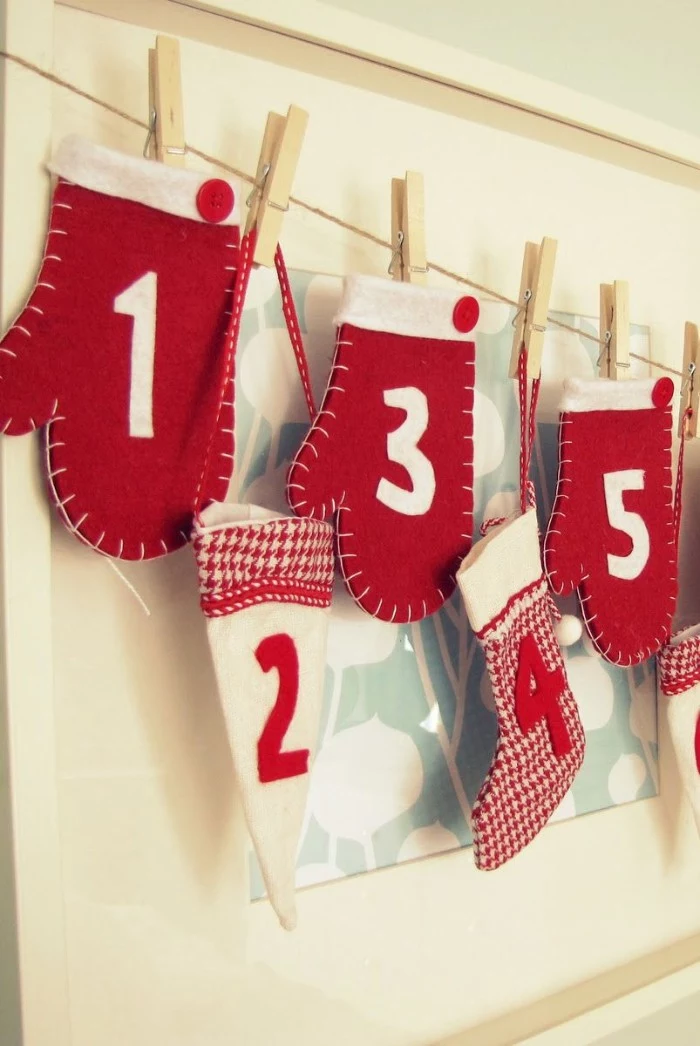
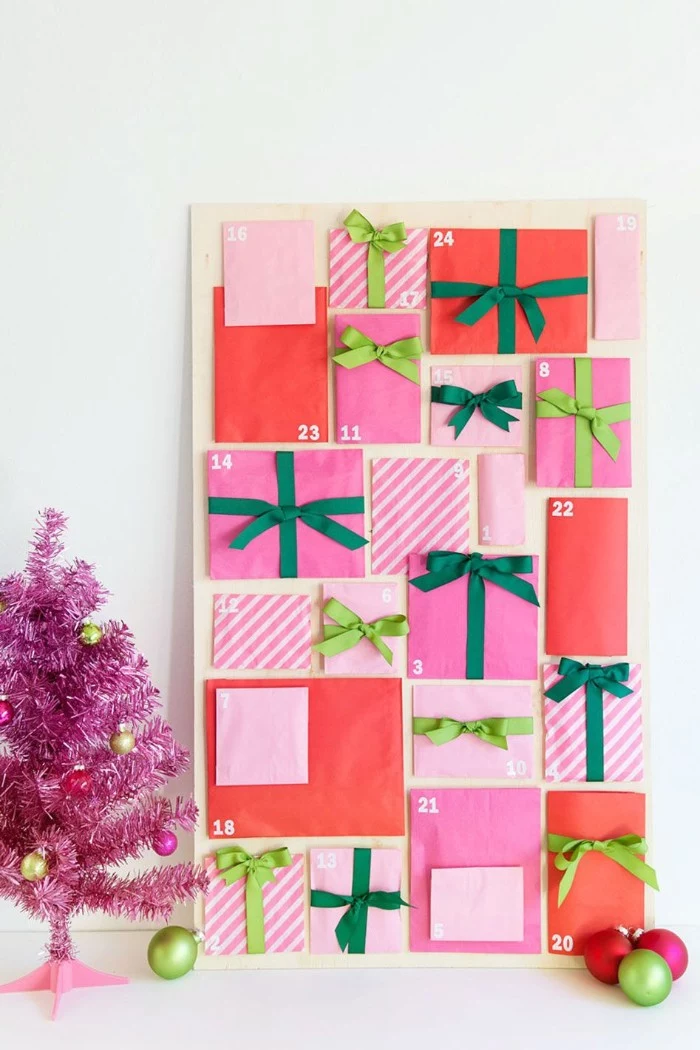
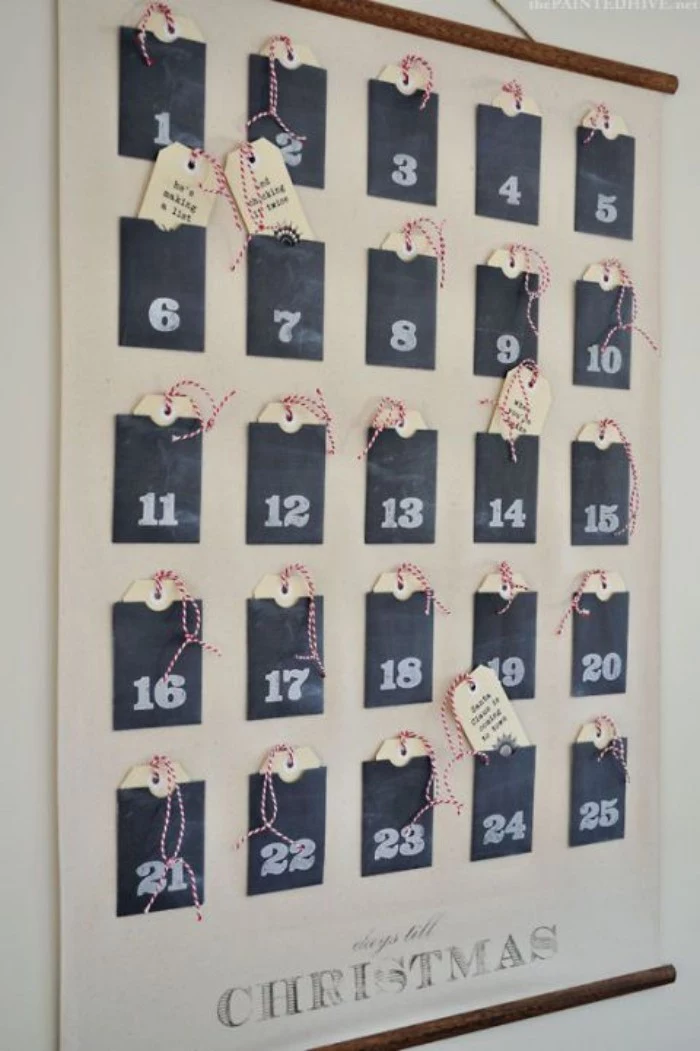
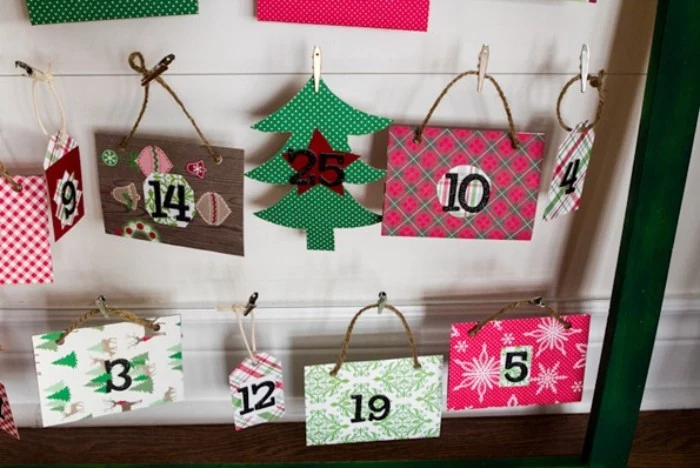
Project 1: The Simple Pouch Garland (Beginner)
This is a wonderful first project. It requires minimal tools and you can knock it out in an afternoon. It’s super easy to adapt to any style, too.
Time Estimate: 3-4 hours
Skill Level: Beginner
Total Estimated Cost: $25-$40
Materials List:
- 1 yard of 7 oz. cotton canvas or thick linen ($8-$12)
- 1 yard of iron-on fusible interfacing (optional, $5)
- Matching cotton thread ($3)
- 10-12 feet of jute twine or thick ribbon ($5)
- 24 small clothespins ($3-$5)
- Number stencils and black fabric paint ($10)
- Ruler, fabric scissors or rotary cutter, sewing machine (or needle for hand-sewing)
Step-by-Step:
- Prep Your Fabric: Wash, dry, and iron your fabric to pre-shrink it. If using interfacing, iron it onto the wrong side of the fabric now.
- Cut the Pouches: Cut 24 rectangles, each 4 inches wide by 10 inches long.
- Sew the Pouches: Fold one rectangle in half (right sides together) so it measures 4×5 inches. Sew up the two long sides with a 1/2-inch seam. Leave the top open.
- Finish the Pouch: Clip the bottom corners diagonally to reduce bulk, then turn it right-side out. Poke out the corners neatly with a chopstick. Fold the raw top edge down by 1/2 inch to the inside and iron it flat for a clean finish.
- Number Everything: Lay a pouch flat and stencil the number in the center. A common mistake I see is using too much paint, which causes it to bleed. The trick is to load your brush, then dab most of it off on a paper towel before touching the stencil. Repeat for all 24 pouches.
- Assemble: Hang your twine, fill each pouch with a little goodie, fold the top over, and clip it to the twine with a clothespin. Done!
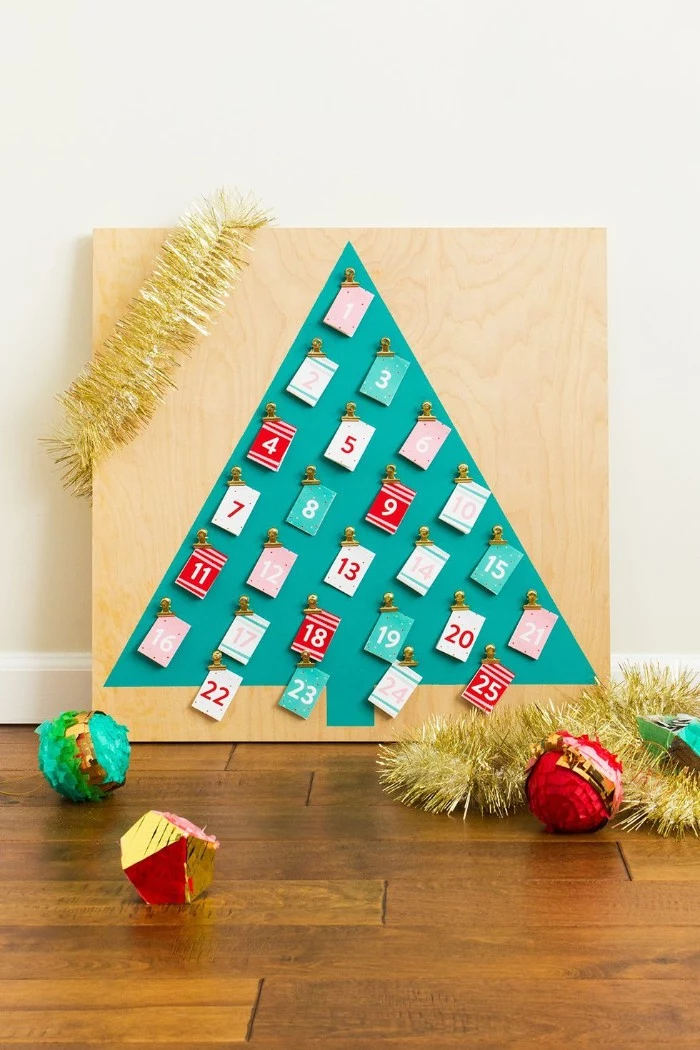
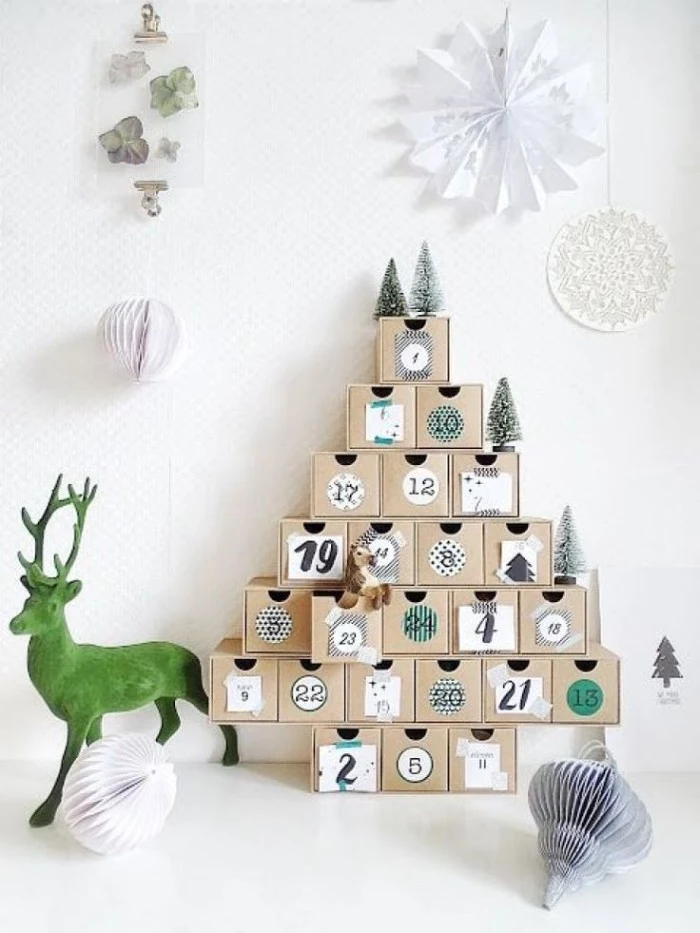
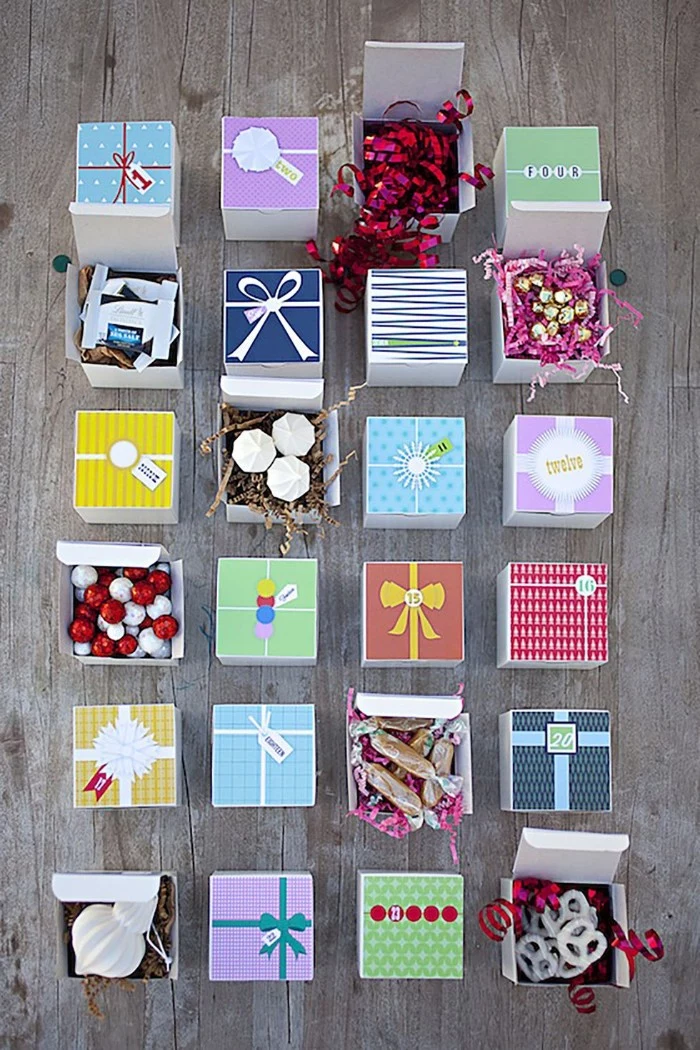
Project 2: The Reusable Wooden Box Calendar (Intermediate)
This design is a classic. It’s a solid little piece of holiday furniture that will become a focal point for years. It requires more precision but is so rewarding.
Time Estimate: 8-10 hours (over a weekend)
Skill Level: Intermediate
Total Estimated Cost: $50-$75
Materials List:
- One 4’x4′ sheet of 1/4-inch Baltic birch plywood (for boxes, about $30)
- One 1’x4′ piece of 1/2-inch Baltic birch plywood (for frame, about $15)
- Wood glue ($5)
- 1-inch brad nails ($4)
- 24 small wooden beads or knobs for handles ($10)
- Sandpaper (120 and 220 grit), primer, and acrylic paint
- Wood filler, ruler, pencil, handsaw, miter box, hammer
Step-by-Step:
- Cut the Pieces: Accuracy is everything here. From the 1/4-inch plywood, you’ll make 24 boxes. Good to know: for a 2.5″ wide box, the pieces aren’t all the same size! For each box, you need: one bottom piece (2.5″ x 2.5″) and four side walls (2.5″ x 2.25″). This accounts for the thickness of the bottom piece.
- Assemble the Boxes: Take a bottom piece. Run a thin bead of wood glue on an edge and press a side wall onto it. A couple of brad nails will hold it while the glue dries. Repeat for all four sides. Then repeat 23 more times!
- Build the Frame: From your 1/2-inch plywood, cut the frame. The inside dimensions need to fit your boxes. For four rows of six 2.5-inch boxes, the internal opening should be slightly larger, maybe 15.5 inches wide by 10.5 inches tall. Assemble the frame with glue and nails.
- Sand and Finish: After the glue dries (give it a few hours), fill any nail holes with wood filler. Let that dry, then sand everything smooth, starting with 120-grit and finishing with 220-grit. Wipe all the dust off.
- Paint: Prime everything first. Then apply two coats of your chosen acrylic paint color.
- Final Assembly: Add numbers to the front of each box and attach a small knob or bead as a handle. Slide the finished boxes into the frame. From my experience, you might find some boxes are a bit tight. Just keep a piece of sandpaper handy to lightly sand the sides until they slide smoothly. It’s that little bit of final fitting that makes it feel professional.
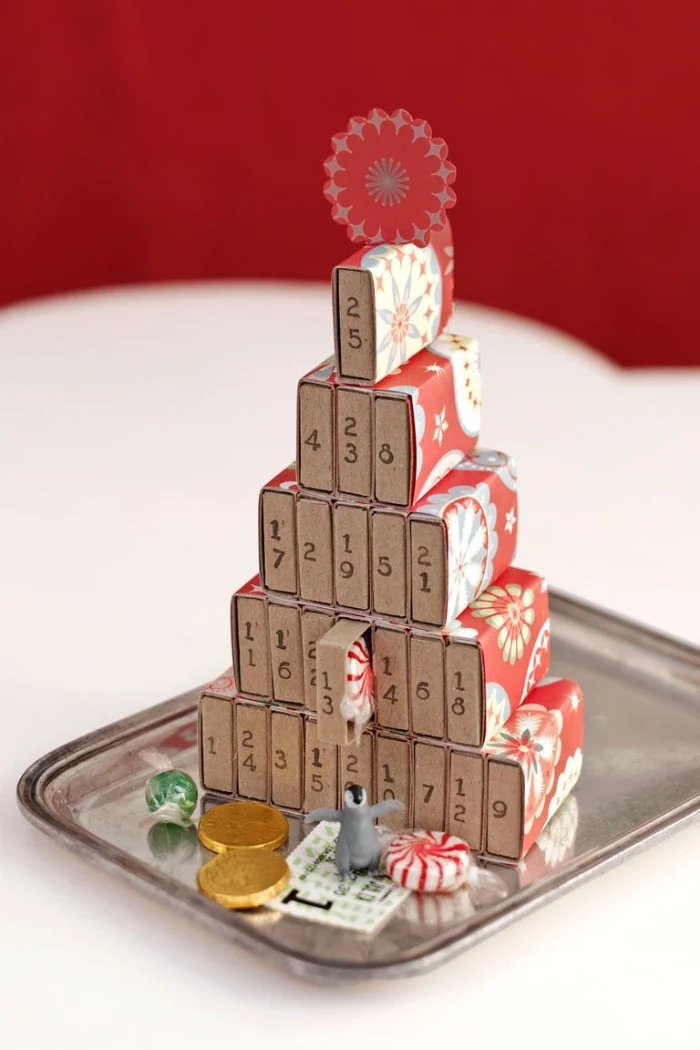
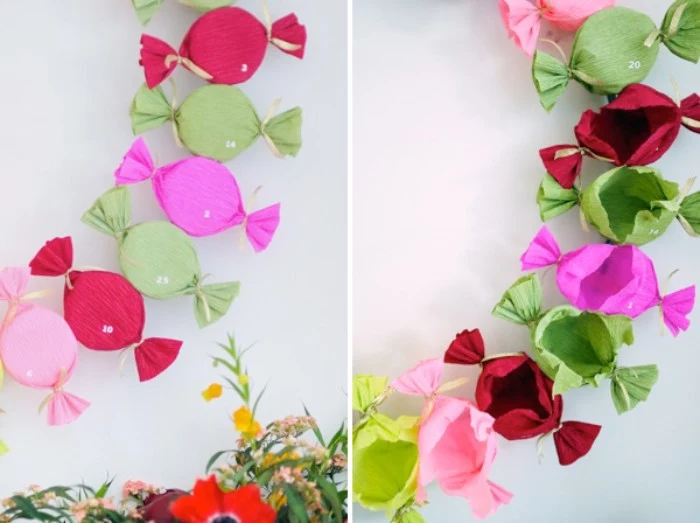
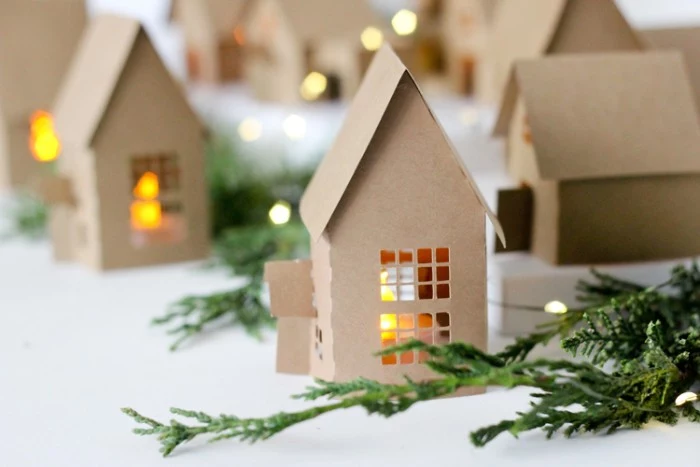
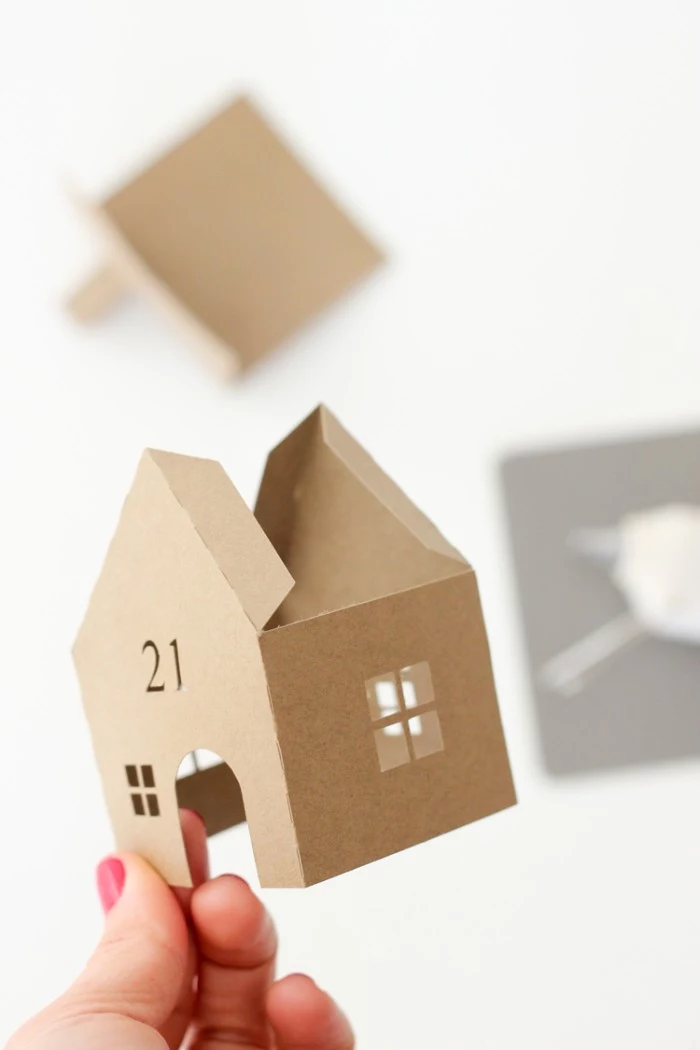
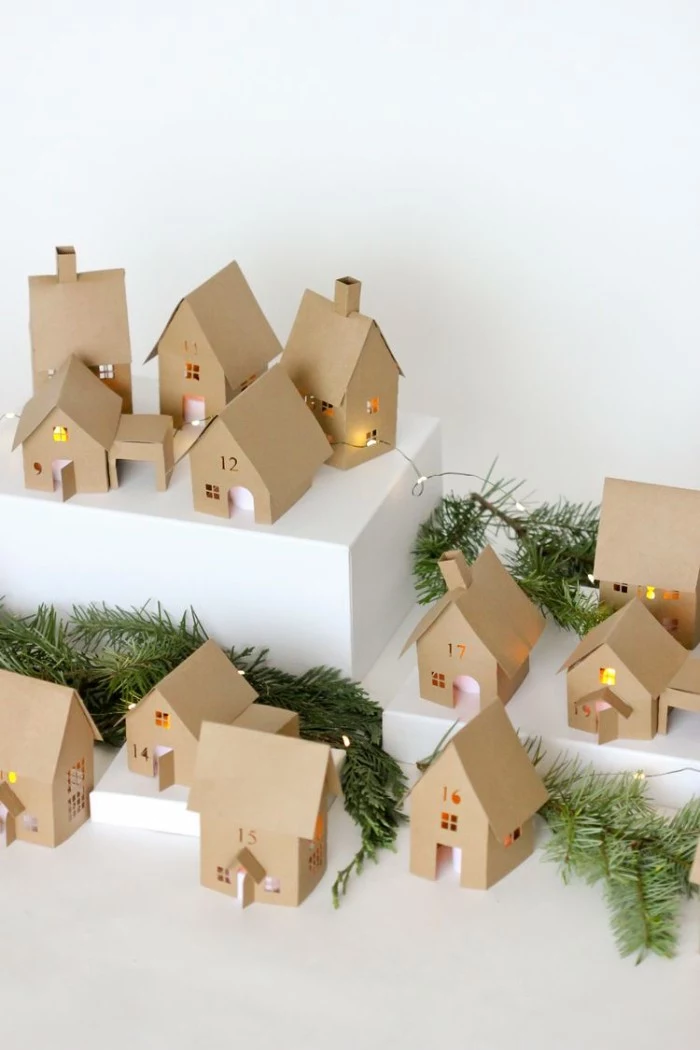
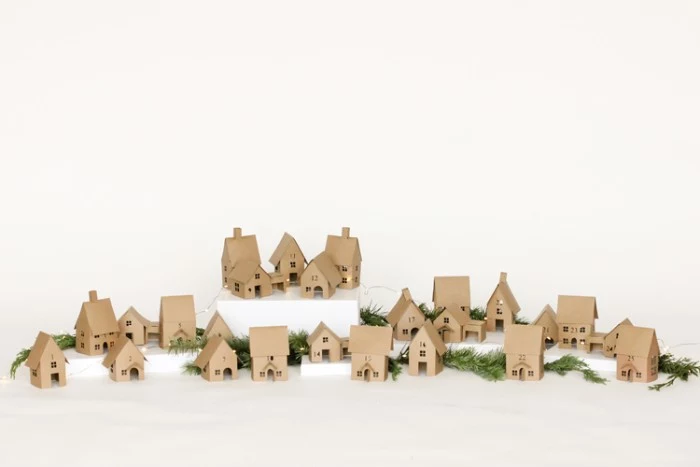
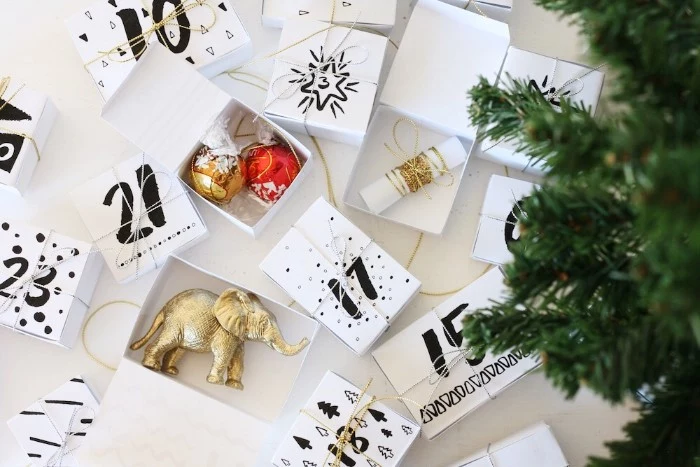
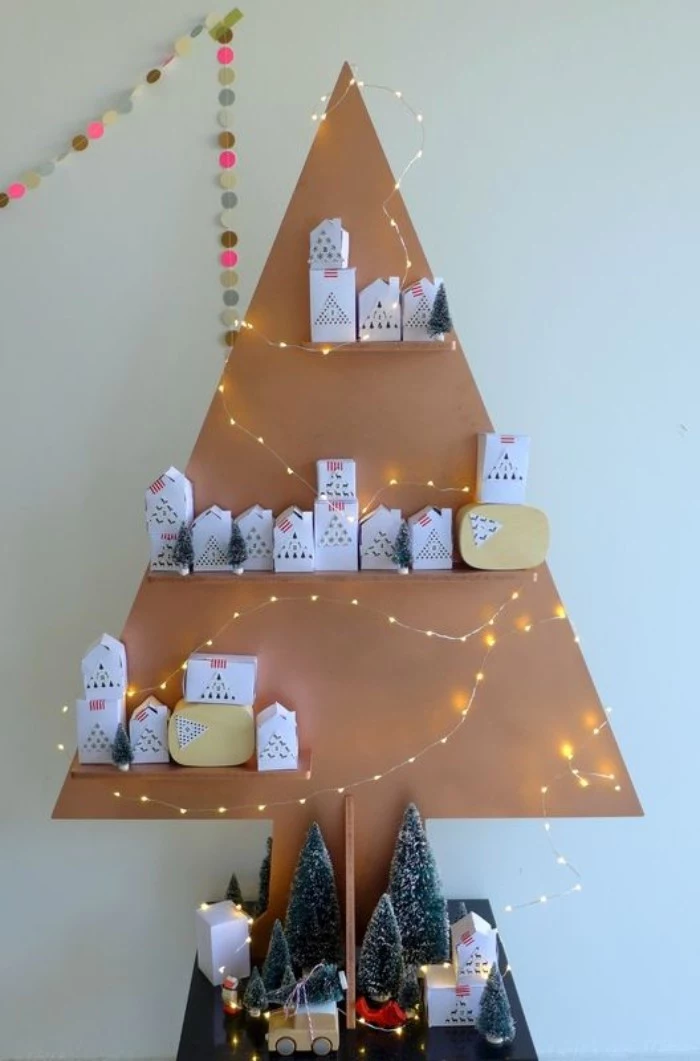
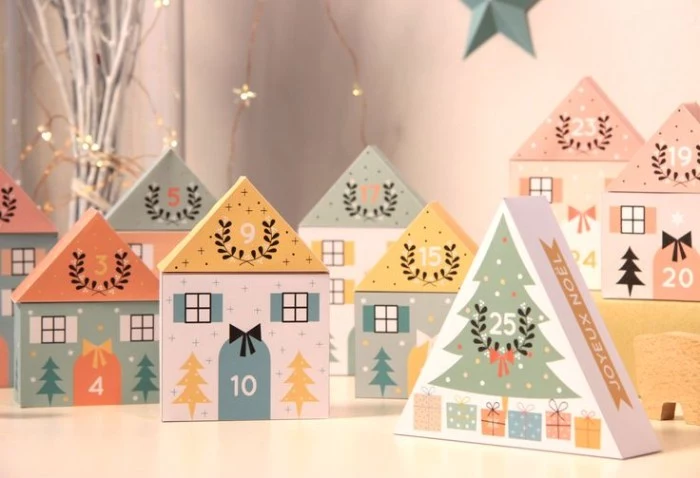
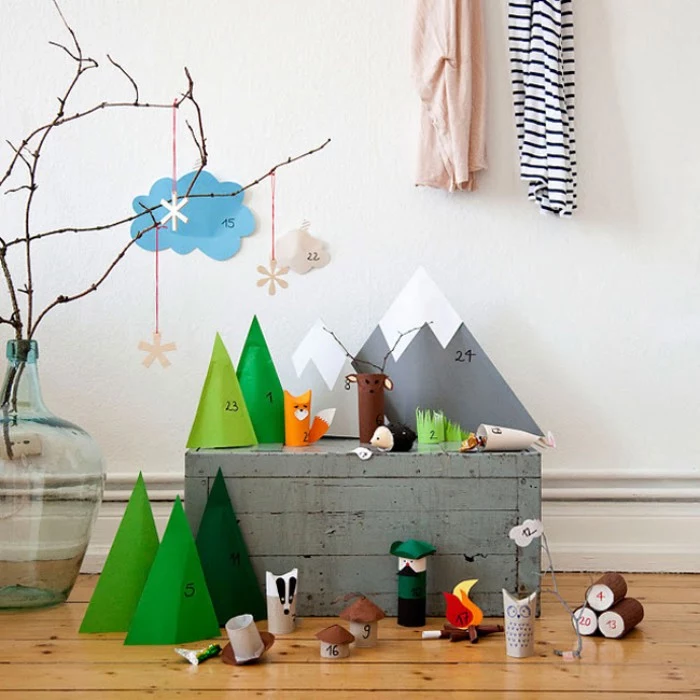
Project 3: The Light-Up Paper Village (Advanced)
This one is a showstopper, but it’s a marathon, not a sprint. The final result is magical, with a warm glow coming from each little house.
Time Estimate: 15-20 hours
Skill Level: Advanced
Total Estimated Cost: $40-$60
Materials List:
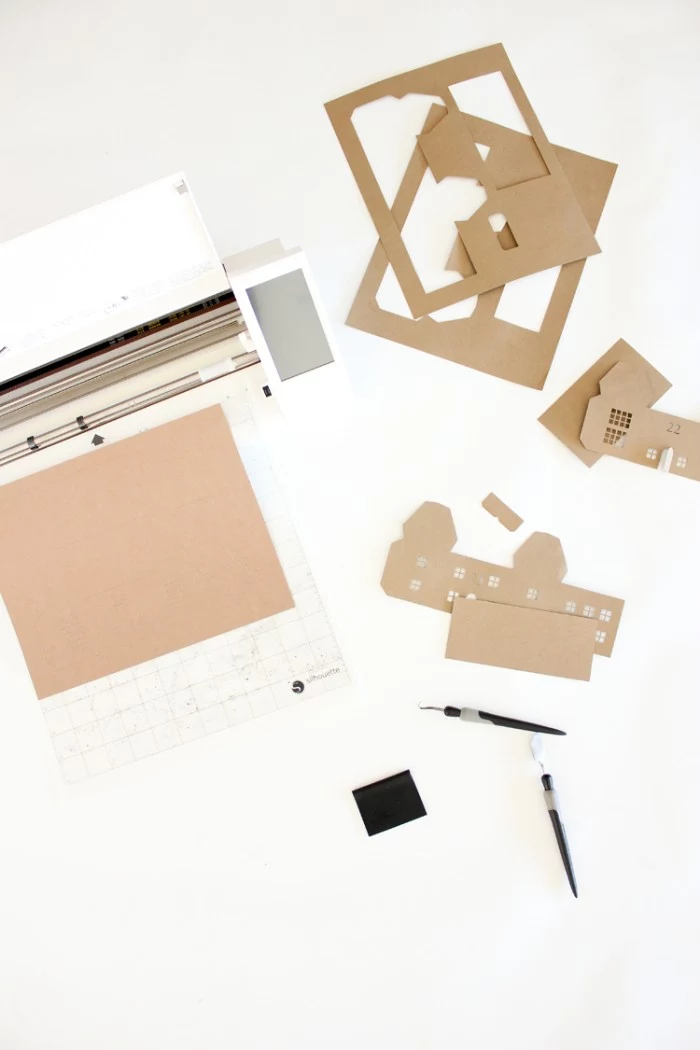
- 15-20 sheets of 300 GSM white cardstock ($20-$30)
- 5 sheets of vellum paper (for windows, about $5)
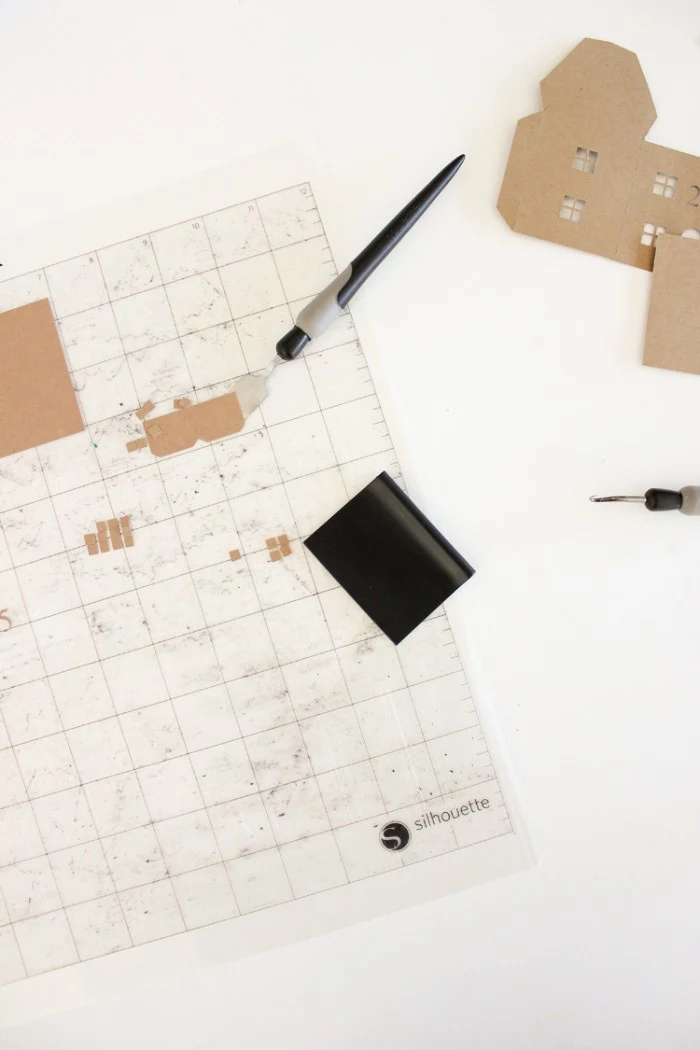
- Craft knife with extra blades, metal ruler, self-healing mat
- Scoring tool (or a dried-up ballpoint pen)
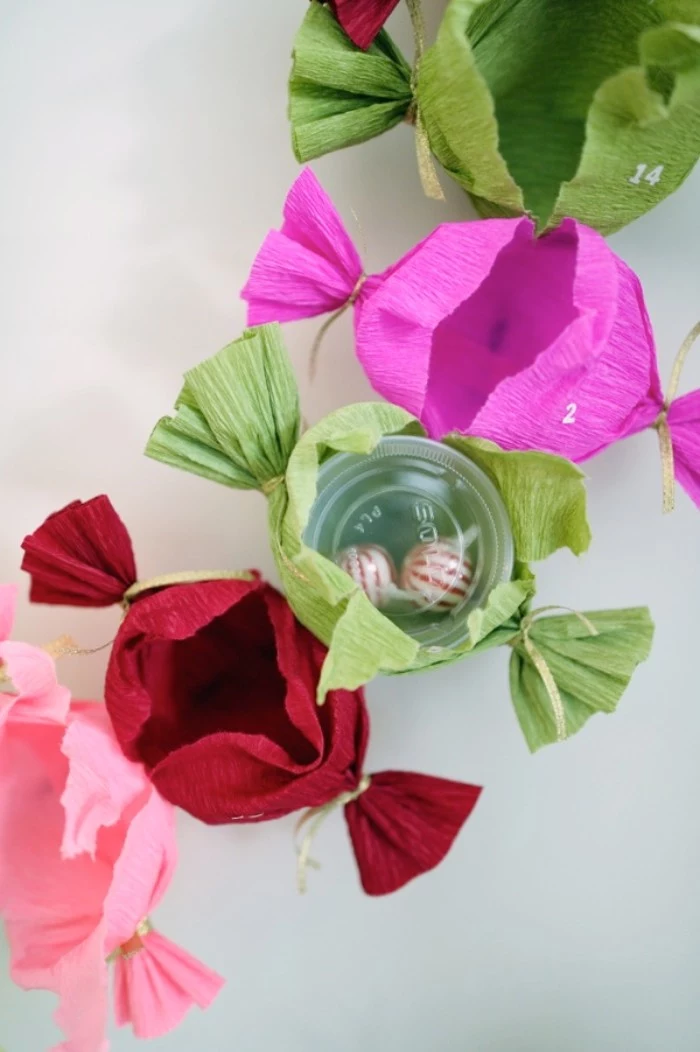
- Quick-drying craft glue with a fine tip ($5)
- 24 battery-operated LED tea lights ($10-$15)
A CRITICAL SAFETY WARNING: I can’t stress this enough. NEVER, EVER use real flame candles in a paper or wood project. The fire risk is incredibly high. Only use battery-operated LED tea lights. Even then, make sure they have ventilation and don’t leave them on unattended for long periods.
Step-by-Step:
- Find a Template: Don’t reinvent the wheel. You can find amazing templates online. Search for things like “3D paper house template” or check out sites like Etsy, where you can buy gorgeous, detailed templates for a few dollars.
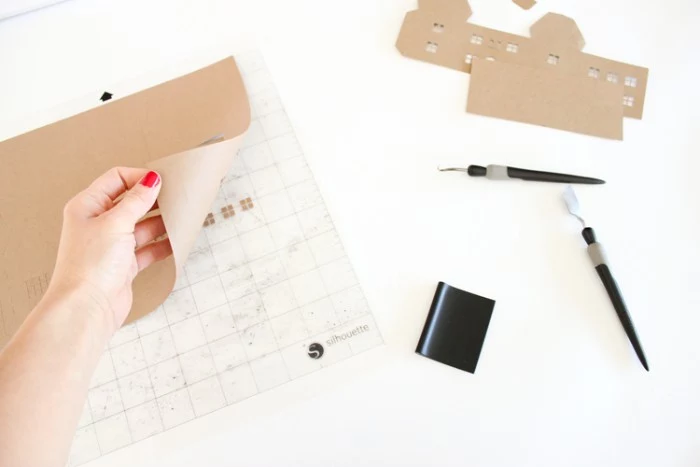
- Cut Everything Out: This is the most time-consuming part. Put on some music and get in the zone. Using your sharp craft knife, carefully cut out all the pieces for 24 houses. Change your blade every 5-6 houses to keep your cuts clean. My first paper village was a disaster because I used flimsy 180 GSM cardstock—the houses collapsed. The 300 GSM is a must for structural integrity.
- Score the Folds: Before folding, run a scoring tool along all the fold lines using a ruler. This creates a crisp, perfect fold.
- Add Windows: Glue small pieces of vellum paper to the inside of the house walls to cover the window openings. It diffuses the light beautifully.
- Assemble: Carefully fold along your scored lines and glue each house together. A precision-tip glue is essential to avoid a mess.
- Set the Scene: Arrange your village on a mantle or shelf. Place a treat and one LED tea light inside each house. Turn them on in the evening and watch your magical village come to life.
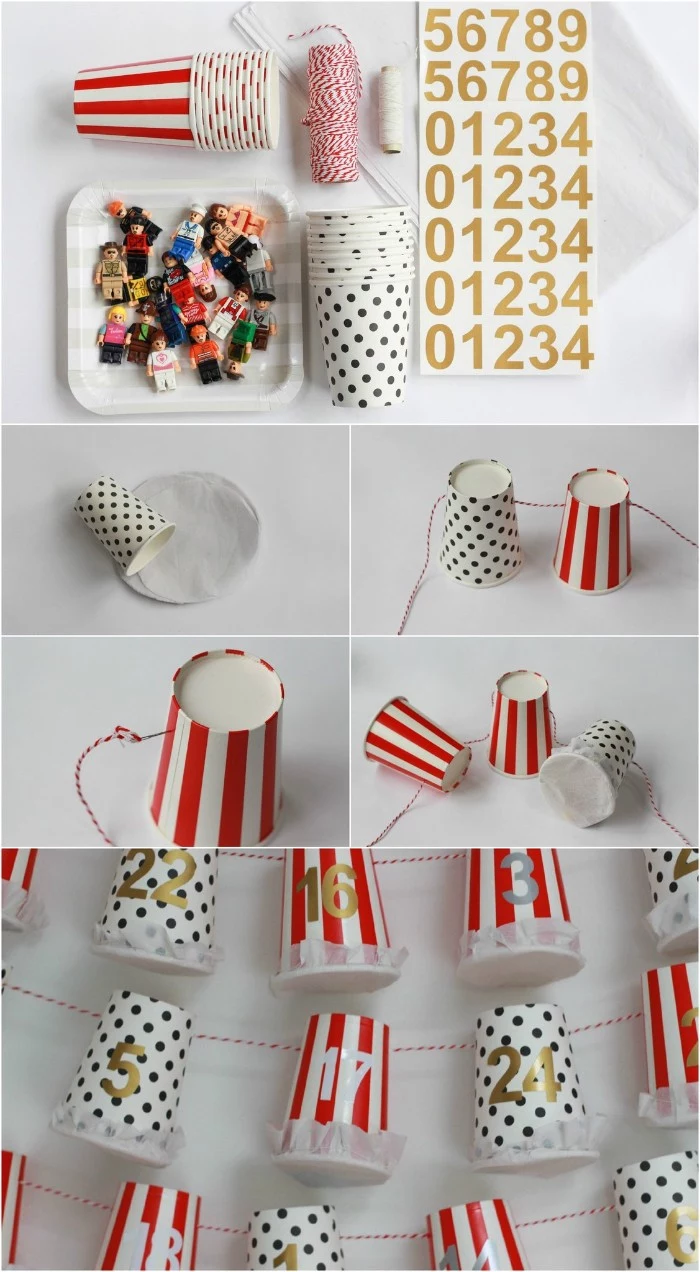
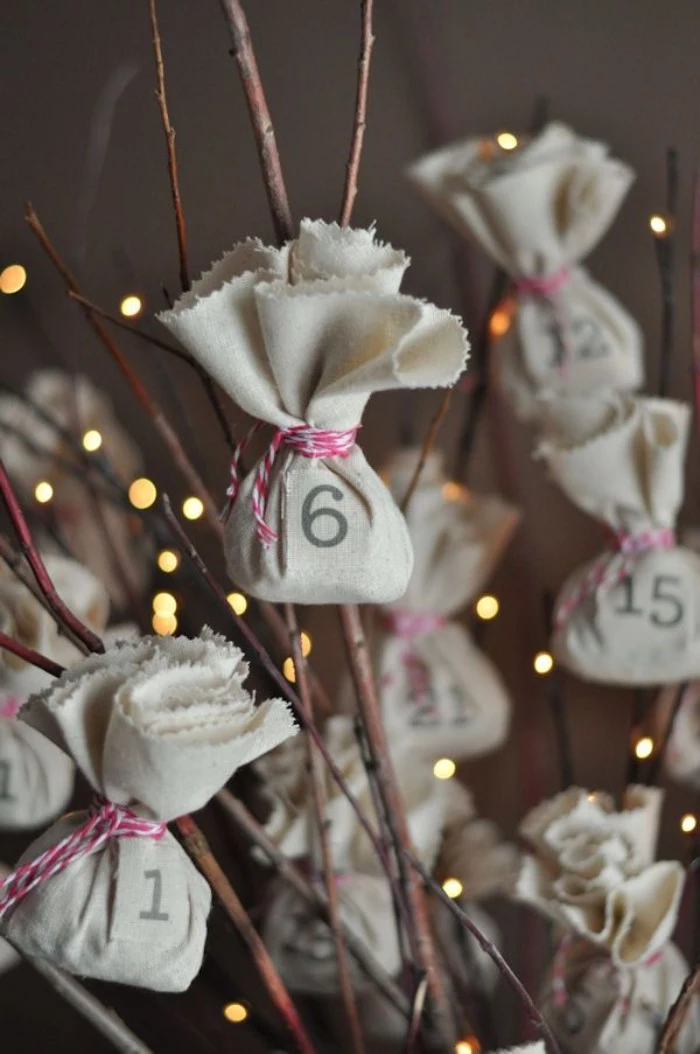
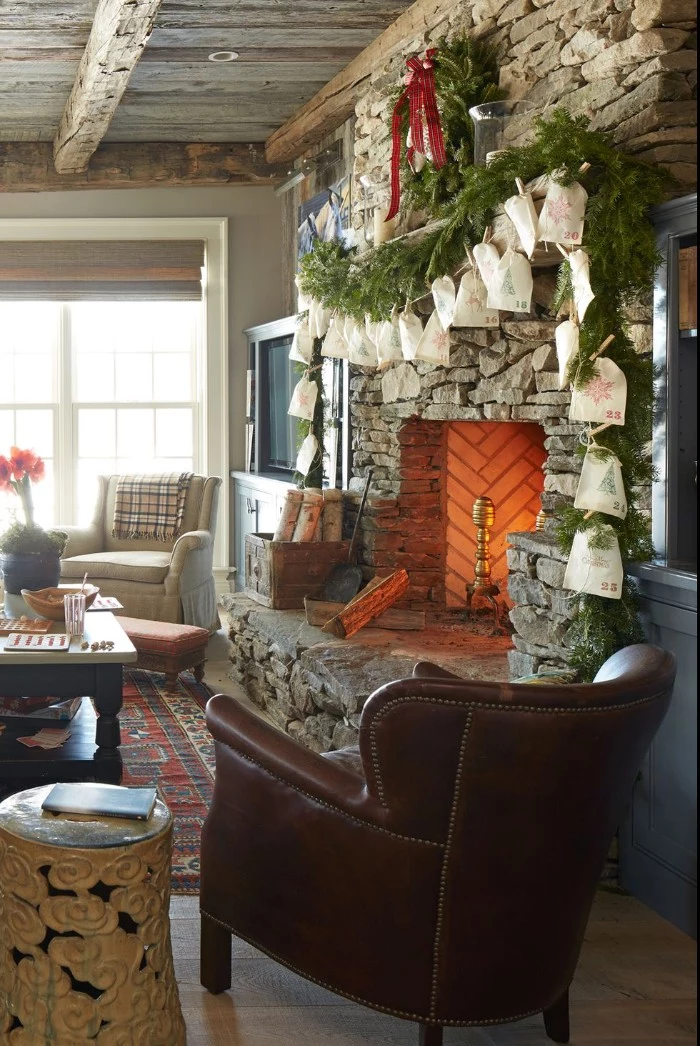
Don’t Have Time for All That? The 30-Minute Version
Inspired but totally overwhelmed? I get it. Here’s a quick win that still looks fantastic.
Go to a craft store or Amazon and buy 24 small muslin drawstring bags (around $10-$15) and a set of number stamps with an ink pad ($10). Stamp each bag, fill it with a treat, and hang them along a piece of twine. You get a beautiful, rustic advent calendar in under an hour. It’s a great solution when life is just too busy.
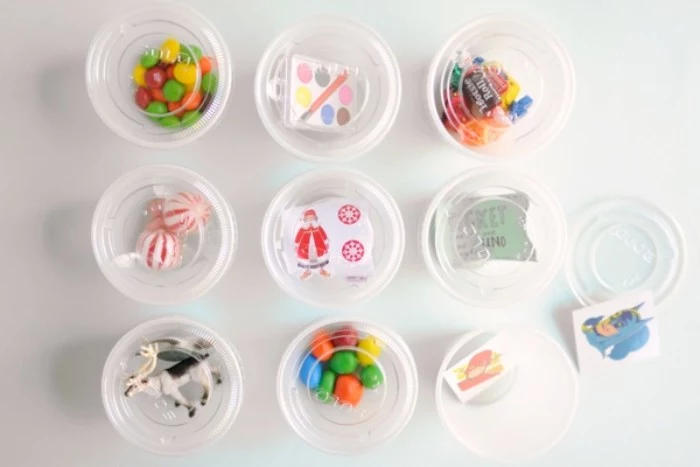
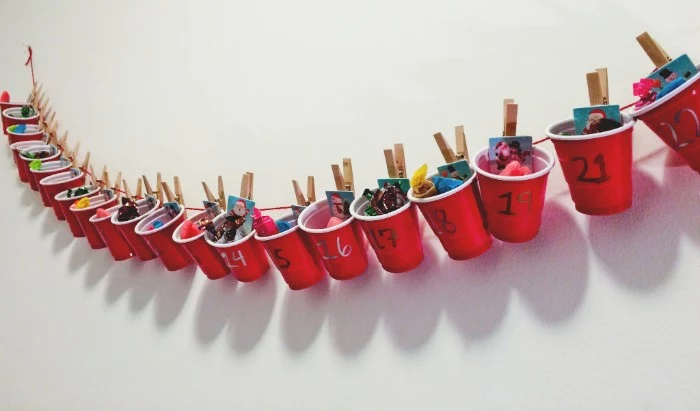
Quick Ideas for Fillers (That Aren’t Just Candy)
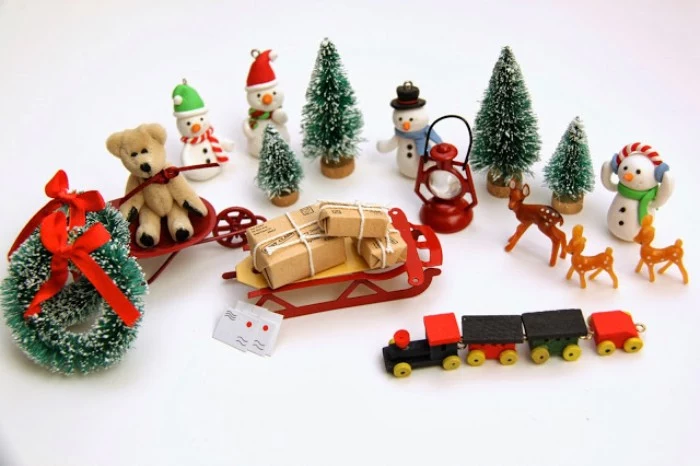
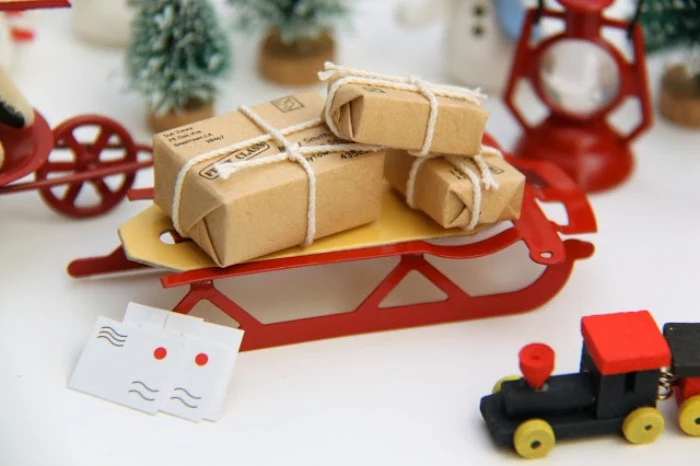
So you’ve built this beautiful calendar… now what do you put in it? Here are a few ideas beyond the usual chocolate coins:
- Experiences: A little slip of paper that says “Tonight we watch a holiday movie!” or “Let’s go look at Christmas lights.”
- Small Toys: Think LEGO minifigures, tiny animal figures, bouncy balls, or temporary tattoos.
- Craft Supplies: A new crayon, a special bead, a cool sticker, or a small pot of glitter.
- Jokes & Notes: A silly holiday-themed joke or a little note telling your kid something you love about them.

Storing Your Creation for Next Year
After the holidays, take a few minutes to store your calendar properly. For paper calendars, wrap each piece in acid-free tissue paper and keep them in a sturdy box. For wooden ones, wrap the whole thing in an old sheet or bubble wrap and store it somewhere with stable temperatures—a closet is better than an attic or basement, where temperature swings can warp wood and crack paint.
Building a family advent calendar is an investment. But every December when you bring it out, you’re unpacking a story. You’re unpacking a tradition. And that’s a craft that keeps on giving.
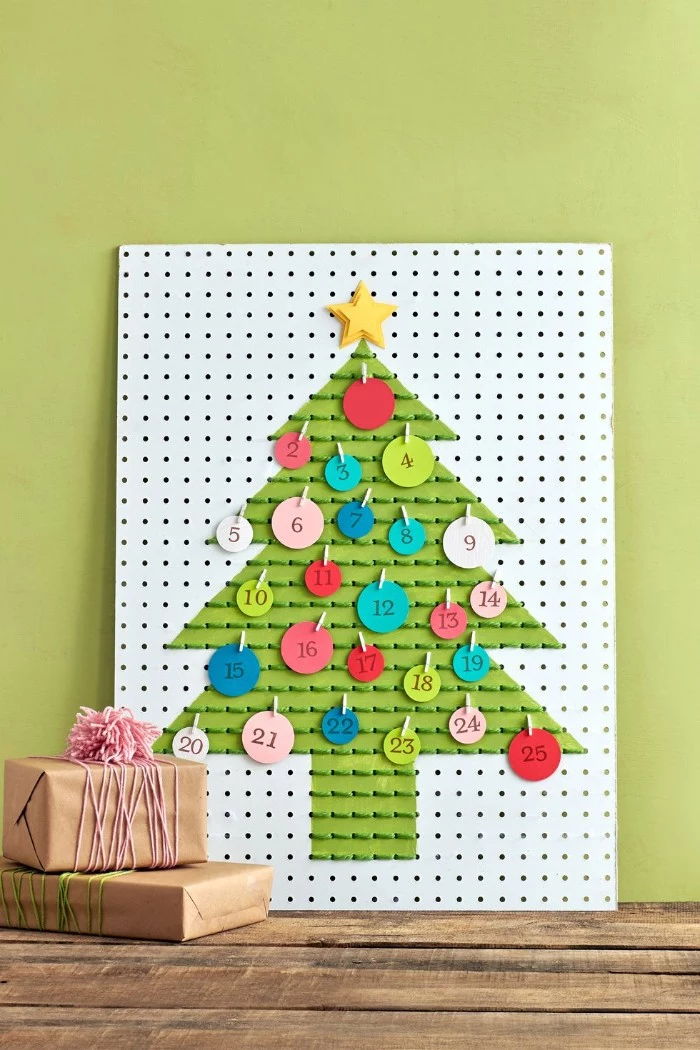
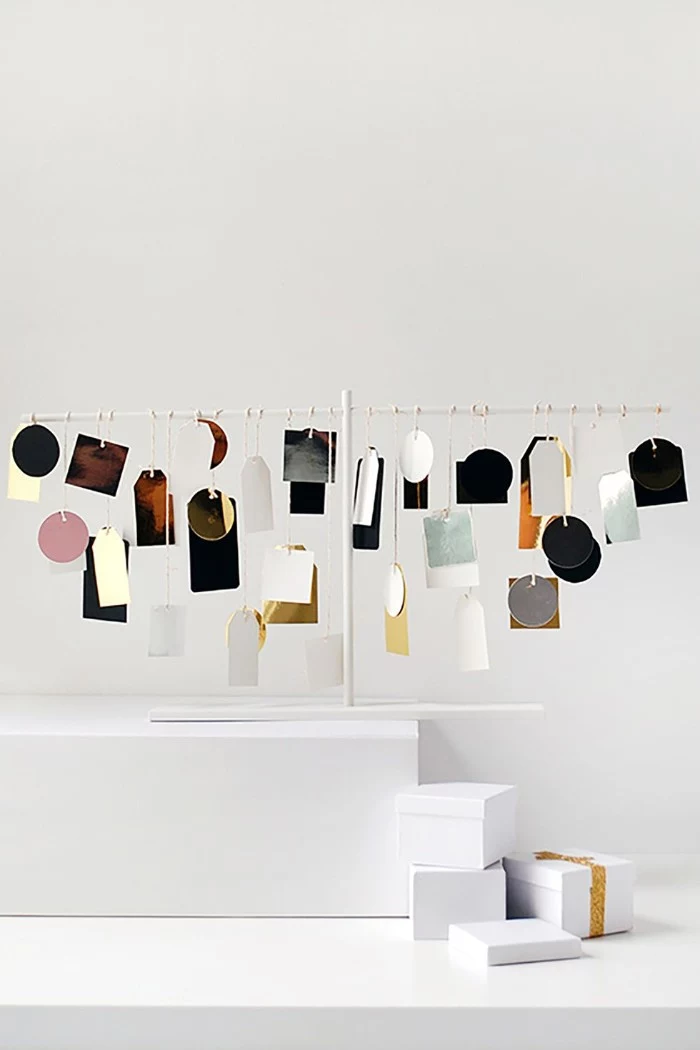
Inspiration Gallery
When crafting a wooden calendar destined to become an heirloom, the choice of wood is paramount. While pine is budget-friendly, consider hardwoods like poplar or basswood. They are lightweight, have a fine, uniform grain that’s perfect for painting, and are less prone to denting over the years, ensuring your creation withstands generations of excited little hands.

- Create a miniature scavenger hunt, with each day’s clue leading to the next.
- Write down a cherished family memory from the past year for each day.
- Make ‘activity coupons’ redeemable for baking cookies, a family movie night, or choosing the Christmas tree.
- For adults, consider specialty tea bags, coffee pods, or miniature bottles of craft spirits.
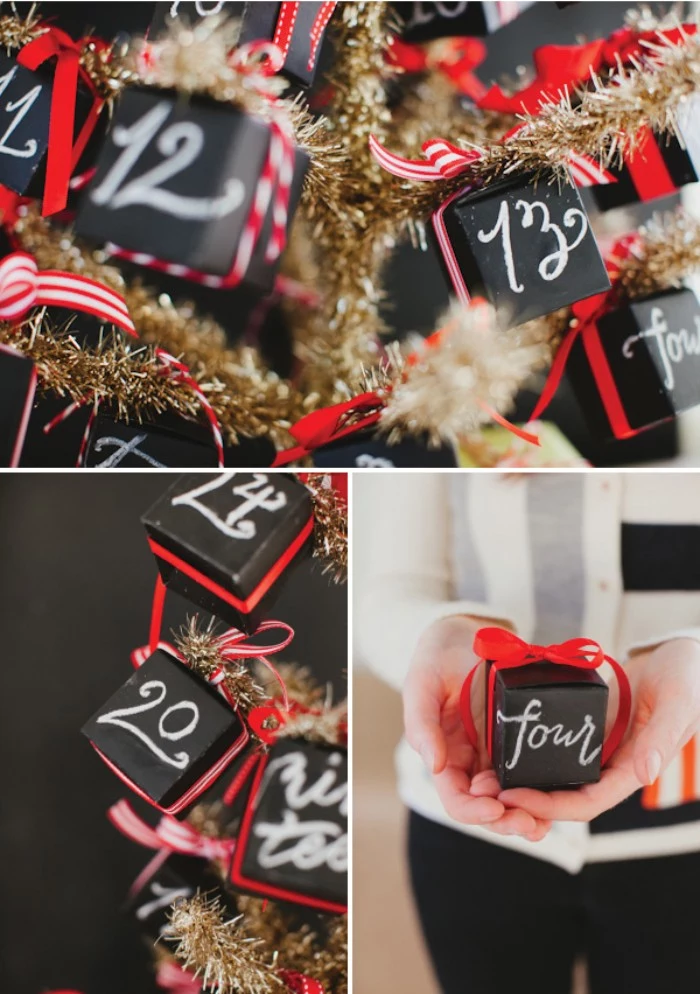
The first known handmade Advent calendar dates back to 1851 in Germany. It involved drawing a chalk line on the door for every day in December until Christmas Eve.
My paper houses or boxes look flimsy and buckle easily. What went wrong?
The culprit is likely your paper weight. For structural projects like villages or sturdy boxes, standard printer paper won’t do. You need cardstock. Look for paper that is at least 65 lb (176 gsm) for simple folds, but for a truly robust, lasting structure, 80 lb (216 gsm) or even 110 lb (300 gsm) cardstock is the professional’s choice. Brands like Neenah or Recollections offer excellent multi-color packs.
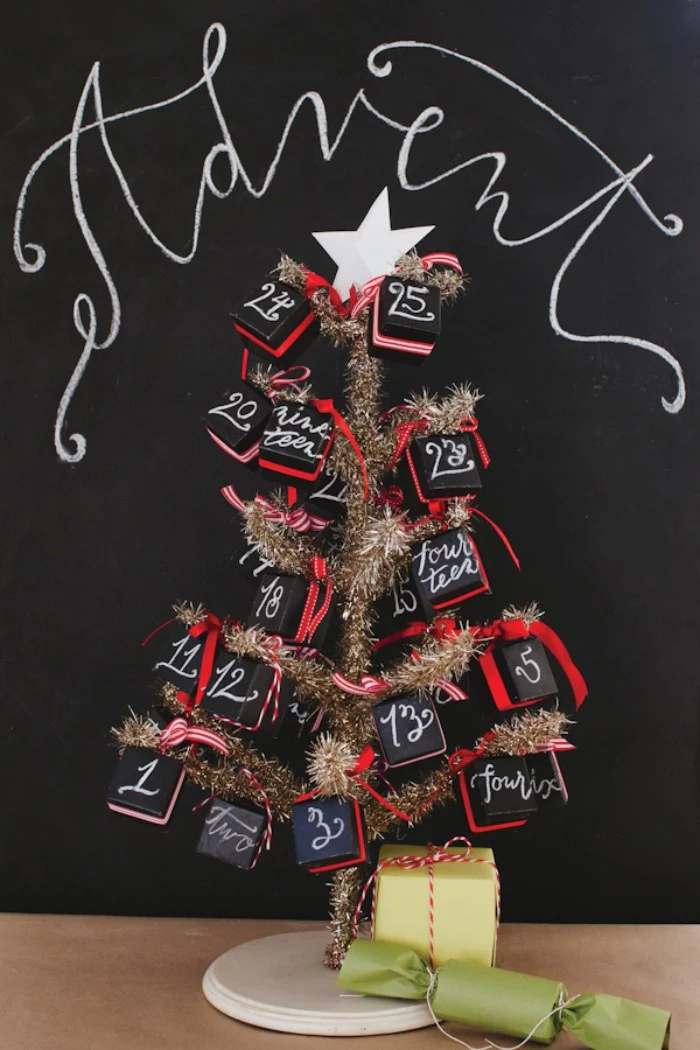
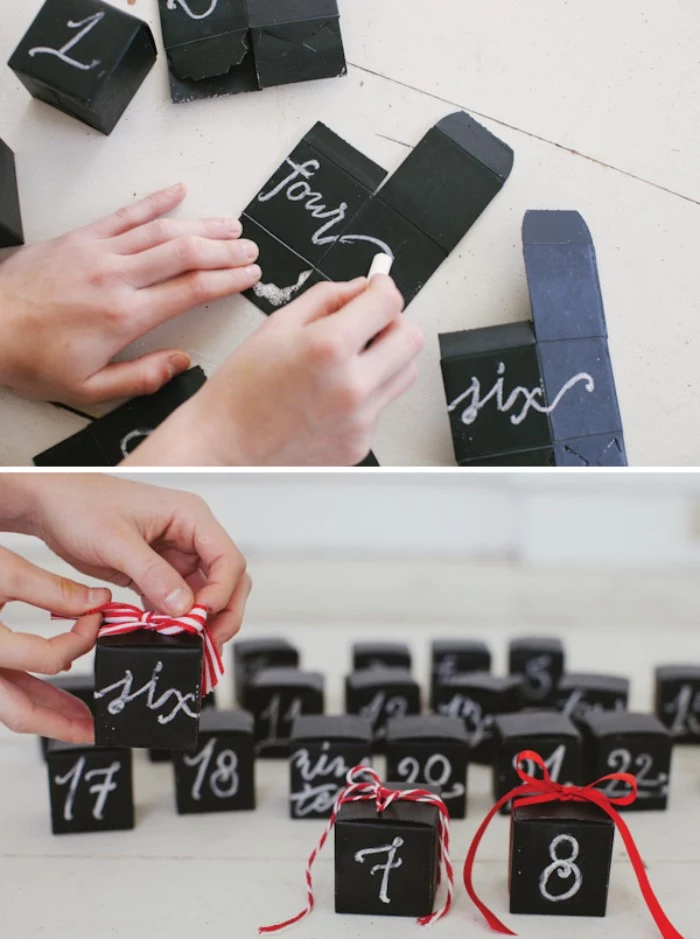
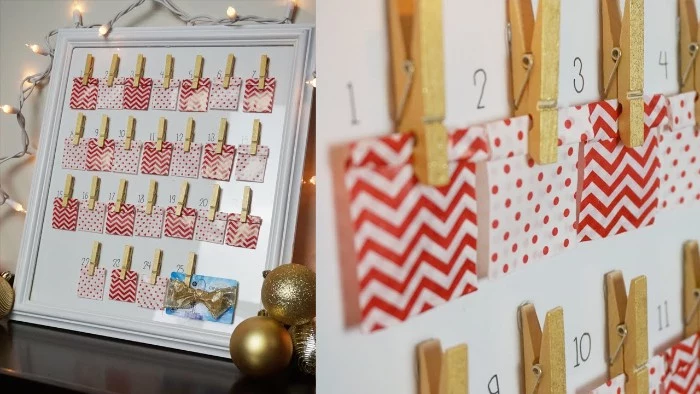
The numbers on your calendar are a key design element that sets the tone. Think of them as the typography of your tradition. Here are a few ways to apply them:
- Stamps: Classic rubber stamps with a quality ink pad like a VersaFine Clair give a sharp, artisanal look.
- Stencils: Perfect for achieving a uniform, modern font on wood or fabric.
- Die-cut numbers: Use a machine like a Sizzix Big Shot or Cricut to cut numbers from contrasting paper for a 3D effect.
- Woodburning: For a rustic, permanent finish on wooden blocks, a simple woodburning tool is incredibly effective.
The secret to professional-looking paper crafts: A scoring board. Instead of just folding paper by hand, pressing it into the measured grooves of a scoring board (like the one from Martha Stewart or We R Memory Keepers) creates a crisp, precise crease every time. This is non-negotiable for perfectly square boxes and neat house corners.
For Wood: Titebond II Premium Wood Glue creates a bond that is stronger than the wood itself. It’s ideal for structural integrity but requires clamping and drying time.
For Paper & Embellishments: Aleene’s Original Tacky Glue is the crafter’s best friend. It grabs quickly, dries clear, and stays flexible, perfect for attaching details to fabric or cardstock.
For a project combining wood and paper, use both for their specific purposes to ensure longevity.

- They reduce holiday waste significantly.
- They offer a unique, personal charm that store-bought versions lack.
- They’re practically free to make, saving your budget for the fillings.
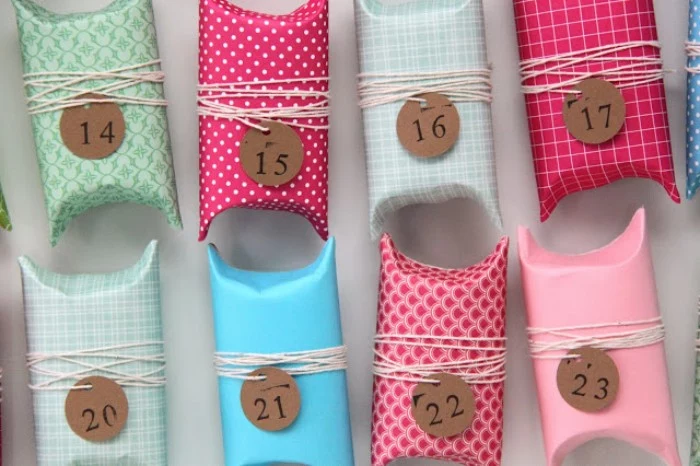
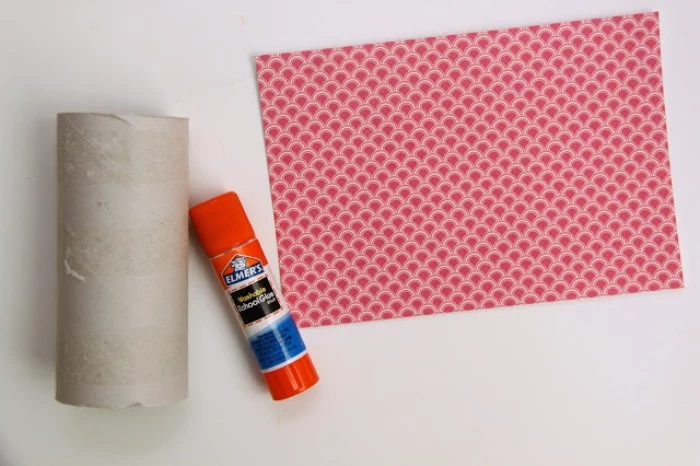
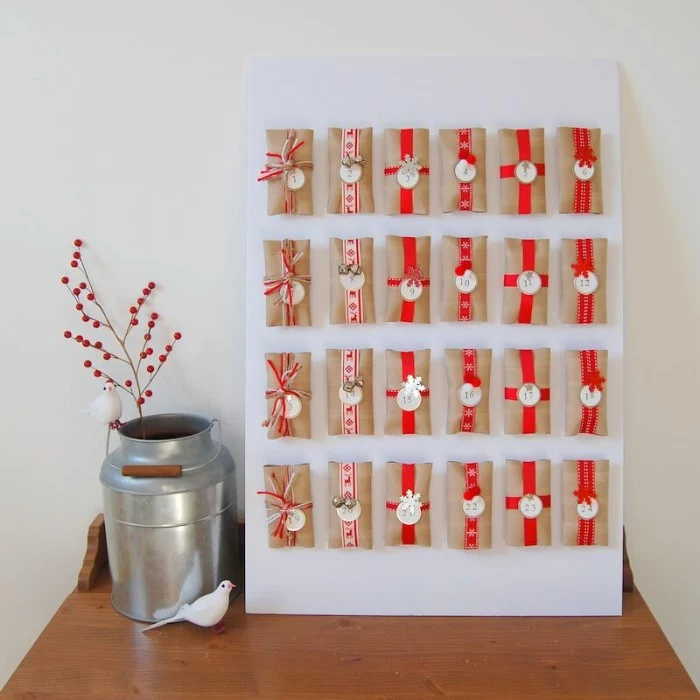
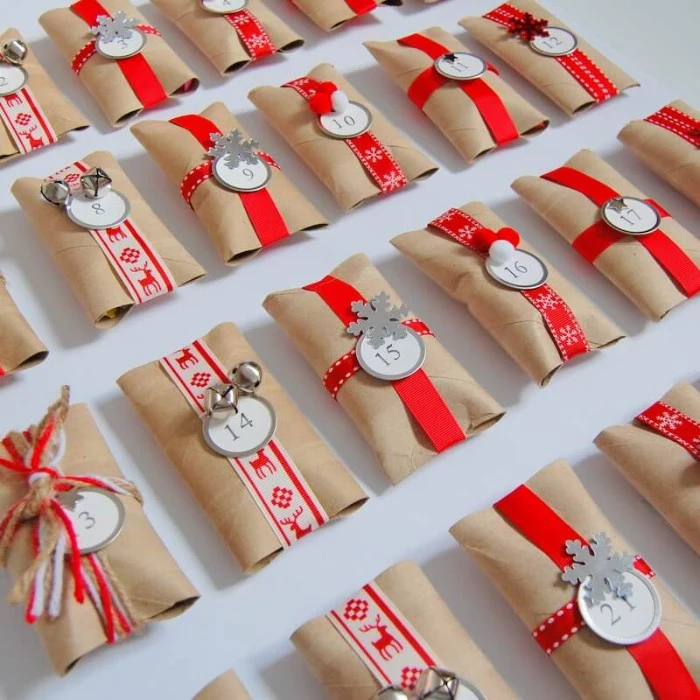
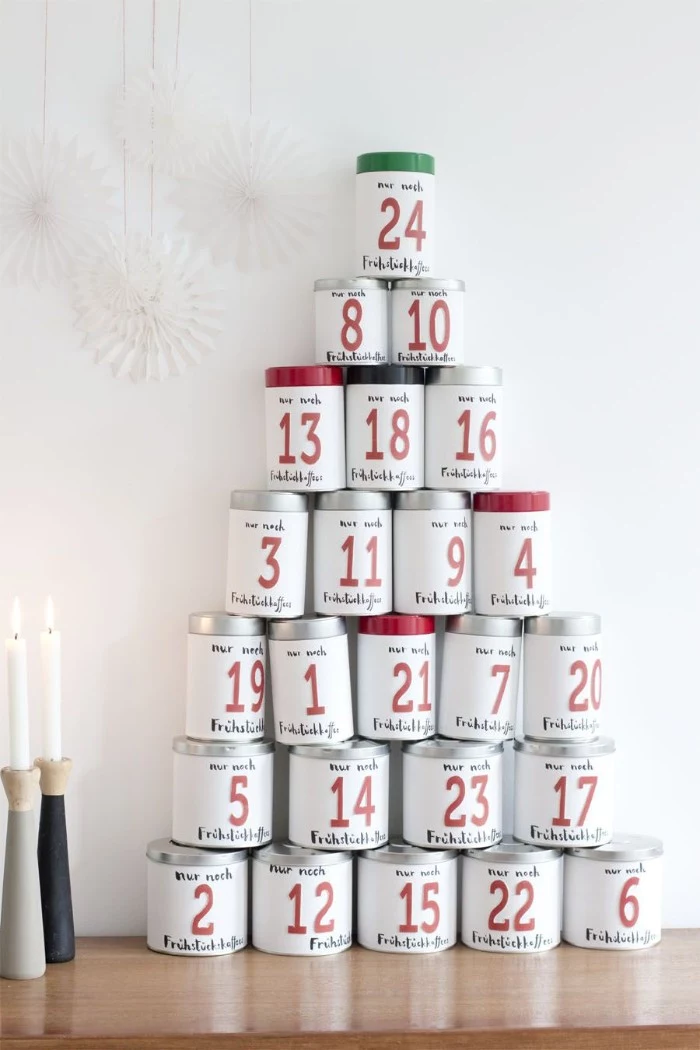
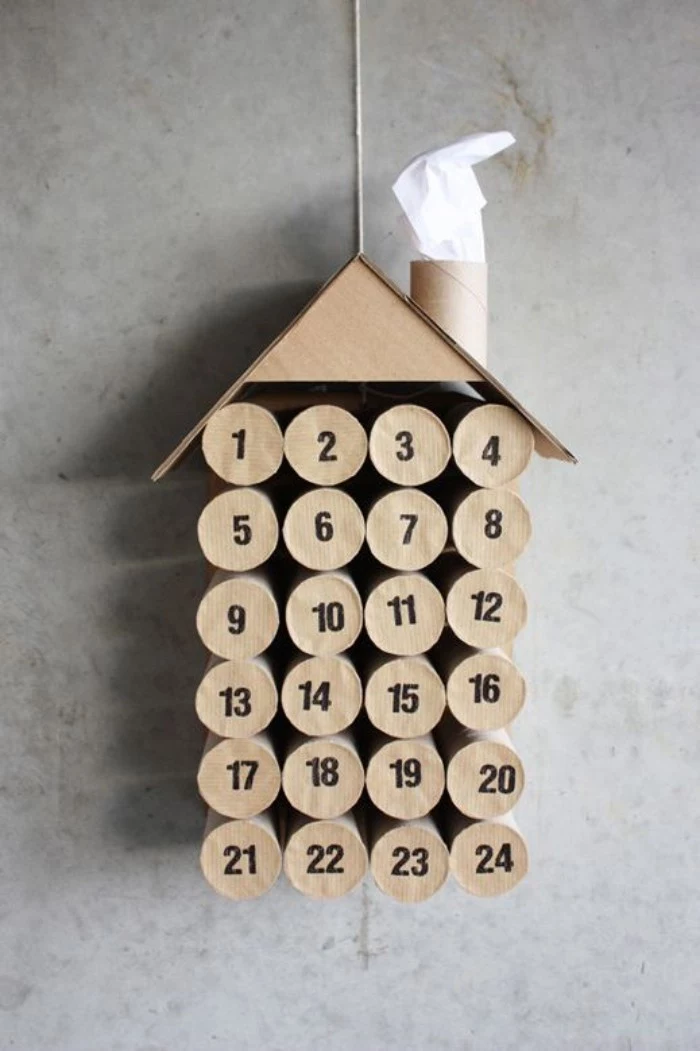
The secret? Upcycling! A collection of 24 toilet paper rolls, small jars, or even empty coffee pods can be painted and decorated to create an incredibly creative and sustainable advent calendar.
A study by Cornell University found that the anticipation of an experience can be more satisfying than the anticipation of a material possession.
This is the magic behind an ‘activity’ advent calendar. The daily reveal of a shared experience — like ‘Hot Chocolate Night’ or ‘Christmas Carol Karaoke’ — builds excitement and creates memories that last far longer than a small toy. The calendar becomes a roadmap for quality family time during a busy season.
Choosing a color scheme that complements your existing holiday decor will make your calendar feel like an integrated part of your home. For a sophisticated, muted look, consider a palette of chalk paints from the Farrow & Ball collection, like ‘Railings’ grey, ‘Inchyra Blue’, and a touch of ‘Fawn’. For a more vibrant, Scandinavian feel, combine bright reds and whites with natural wood tones.
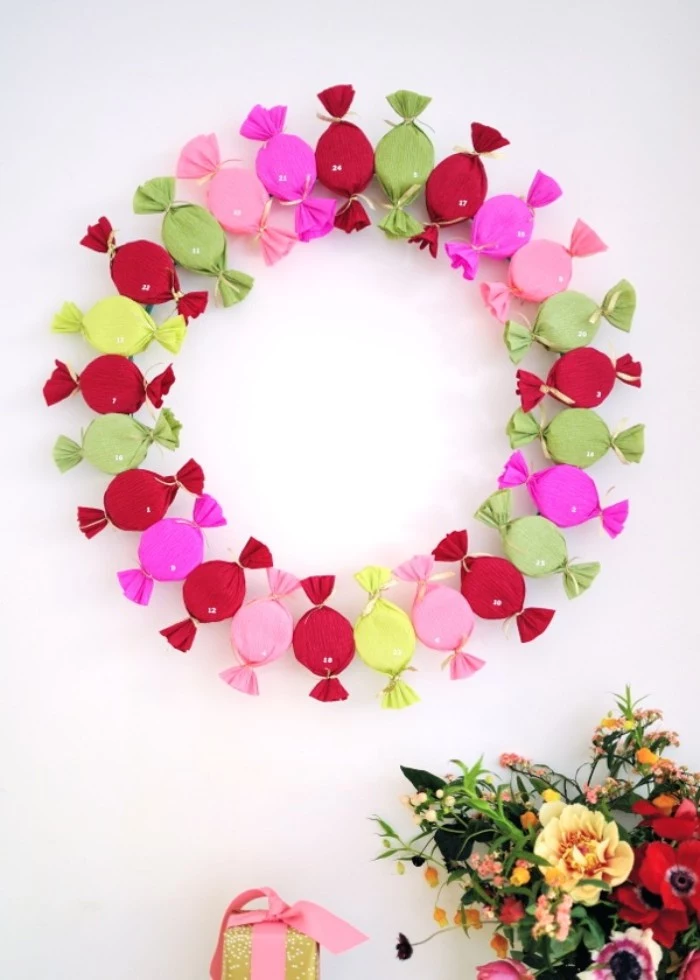
How do I safely store my delicate paper village or intricate wreath calendar?
The key is preventing crushing and moisture. Invest in a sturdy, acid-free archival box, often sold for wedding dress or photo storage. Wrap each paper house individually in acid-free tissue paper before placing it inside. For garland or wreath styles, gently coil them in the box. Store it in a dry, temperature-stable place, like a closet, not a damp basement or hot attic.
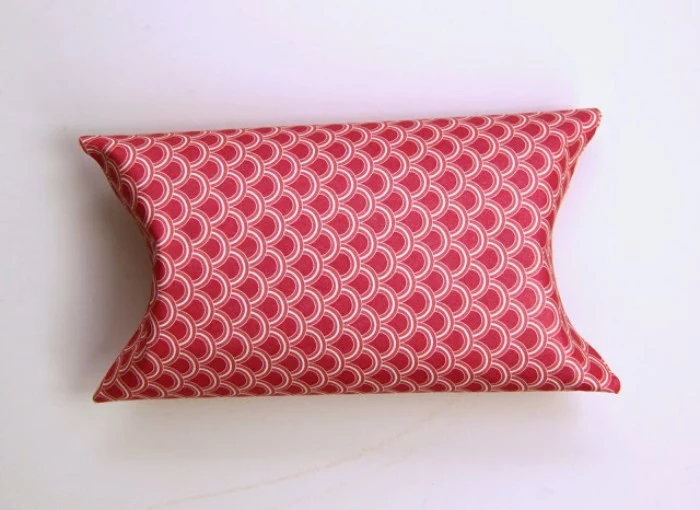
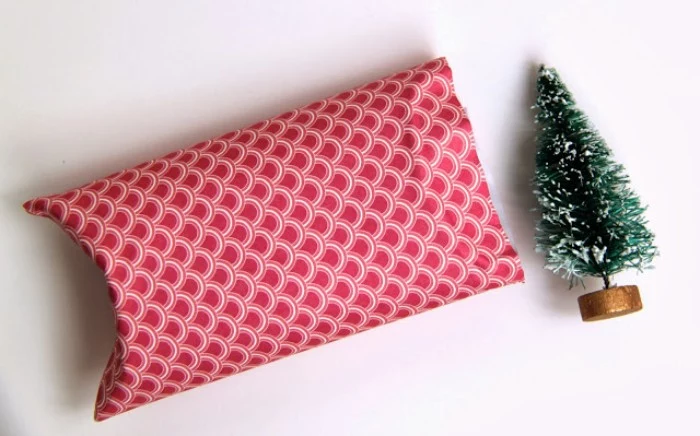
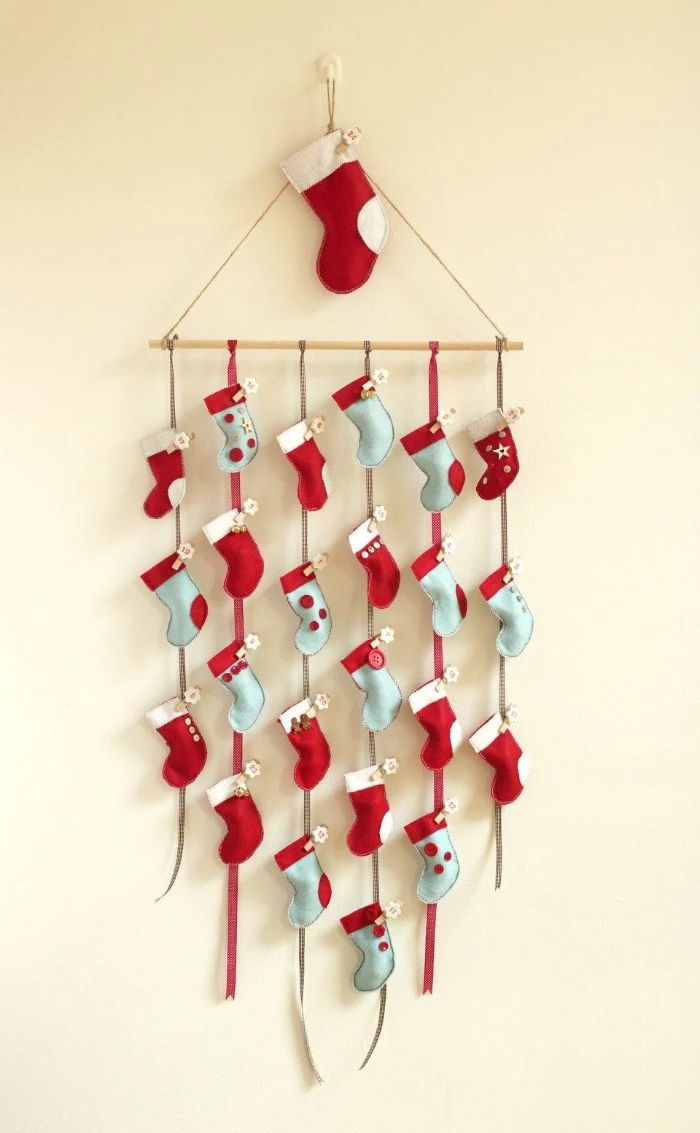
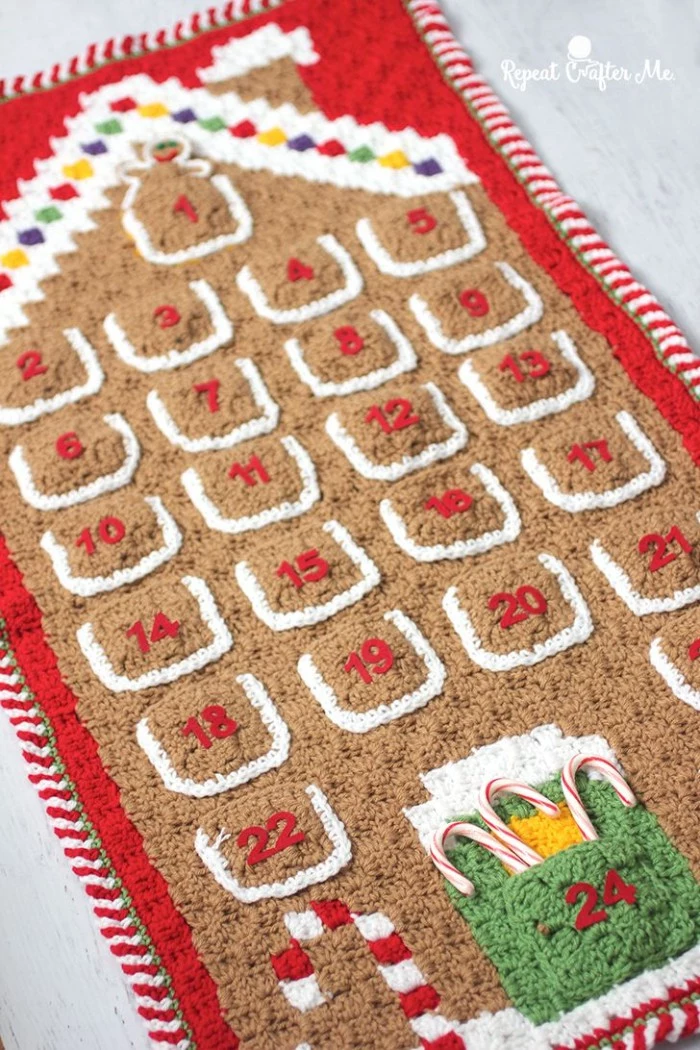
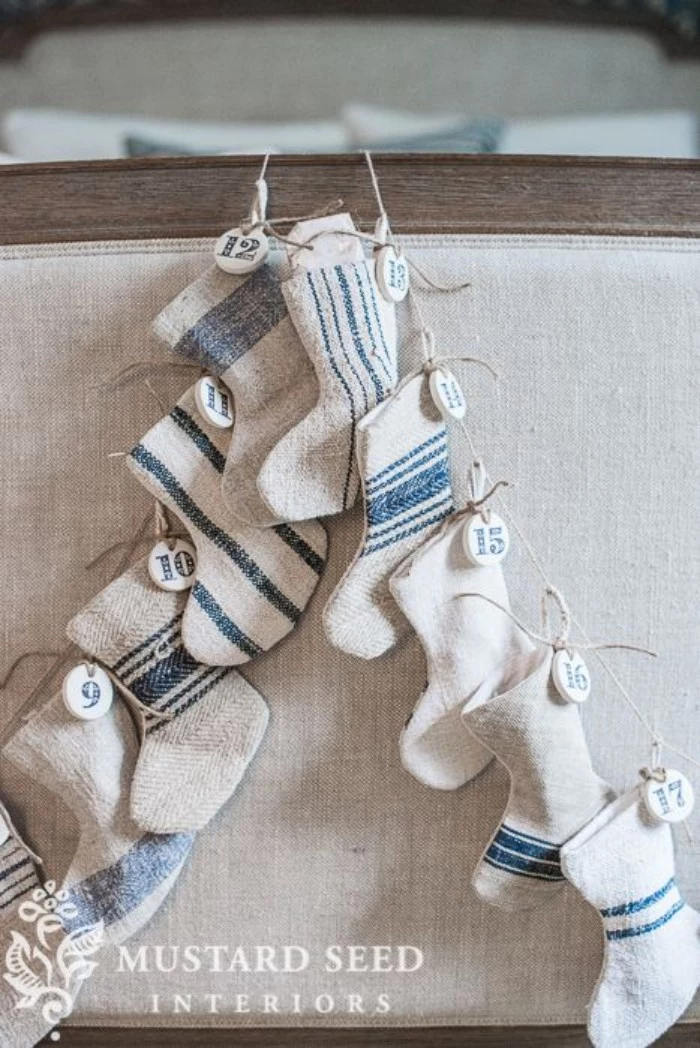
For a softer, more tactile tradition, fabric is a wonderful medium. You don’t need to be an expert seamstress to create a beautiful and durable calendar.
- Felt Pockets: Easy to work with as it doesn’t fray. Use craft felt and a simple running stitch or even fabric glue to create pockets on a large backing piece.
- Linen or Cotton Pouches: Sew or buy small drawstring bags. They can be screen-printed, stamped, or decorated with iron-on numbers and hung from a branch or string.
- Burlap Garland: Incredibly rustic and forgiving. Cut small squares, fold them over a string, and stitch the sides to form simple pockets.
The one thing to splurge on: High-quality paper or fabric. A beautiful, heavy-weight cardstock or pure linen fabric elevates the entire project from a simple craft to a treasured object. It feels better to the touch, holds its shape better, and signals that this is something meant to be kept. You can save money on embellishments, but the foundation material is worth the investment.
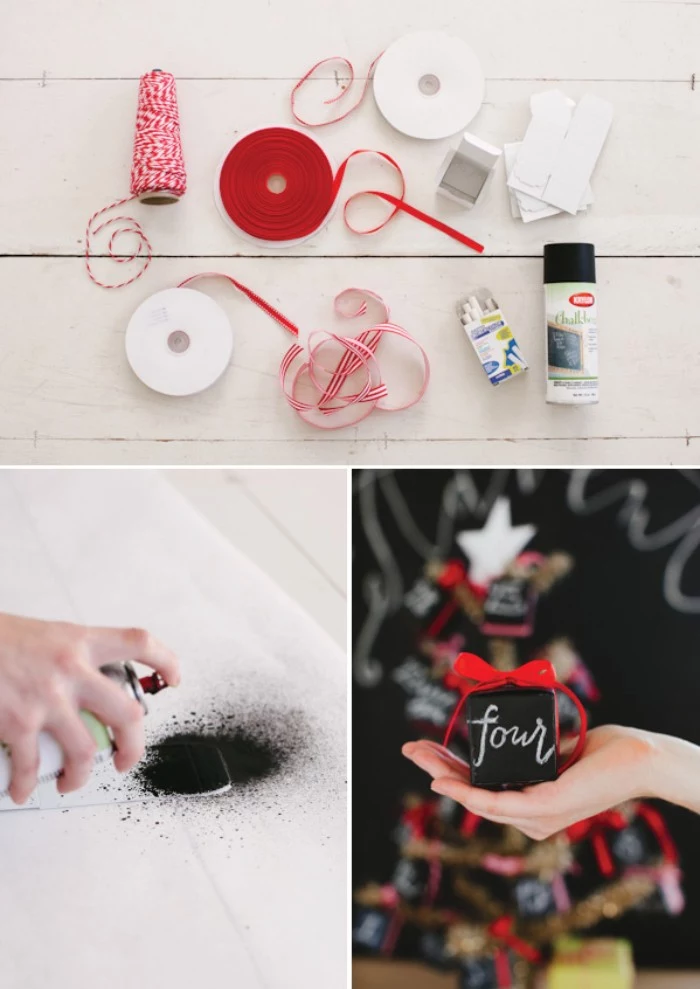
Matte Sealer: A finish like Mod Podge Matte provides a non-reflective, velvety surface. It’s perfect for rustic, farmhouse, or vintage styles, as it softens colors and hides minor imperfections.
Glossy Sealer: Mod Podge Gloss adds shine, vibrancy, and a durable, wipeable surface. It’s excellent for making colors pop on kids’ calendars or creating a more modern, polished look.
For paper village projects, a matte finish on the ‘walls’ and a gloss finish on ‘windows’ can create a subtle, realistic effect.
- It creates a sense of wonder and magic each evening.
- It transforms your calendar from a daytime decoration into a nighttime centerpiece.
- It highlights the intricate details of your paper-cutting or construction.
The secret? Micro LED fairy lights. A single strand of battery-powered warm-white fairy lights, carefully threaded through a paper village or wrapped around a branch garland, adds an instant ‘wow’ factor for very little cost.
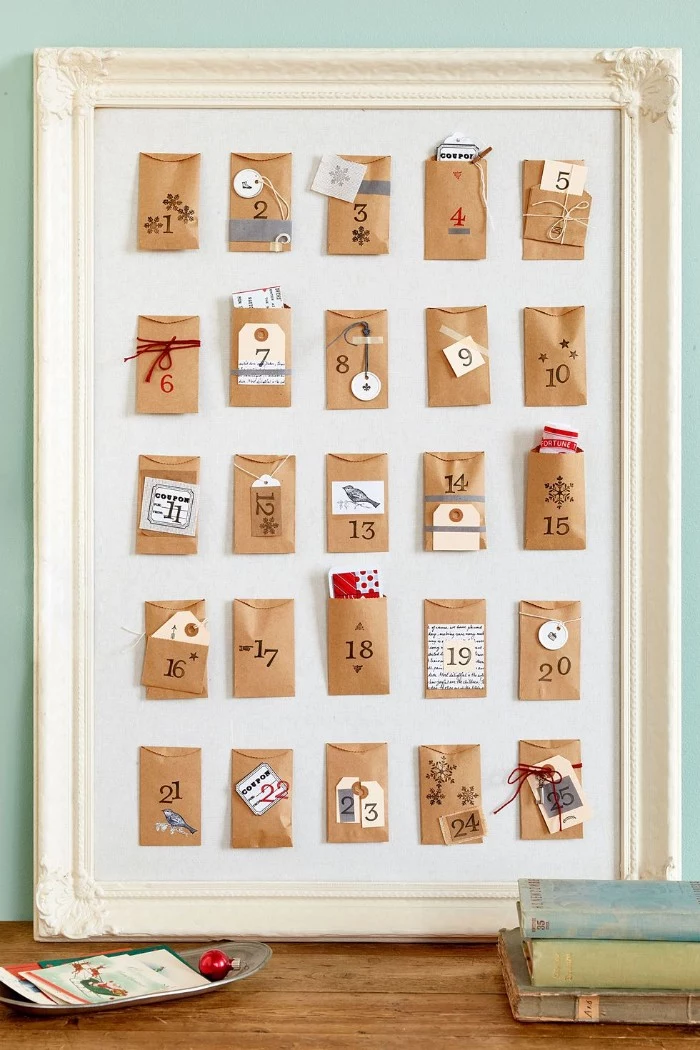
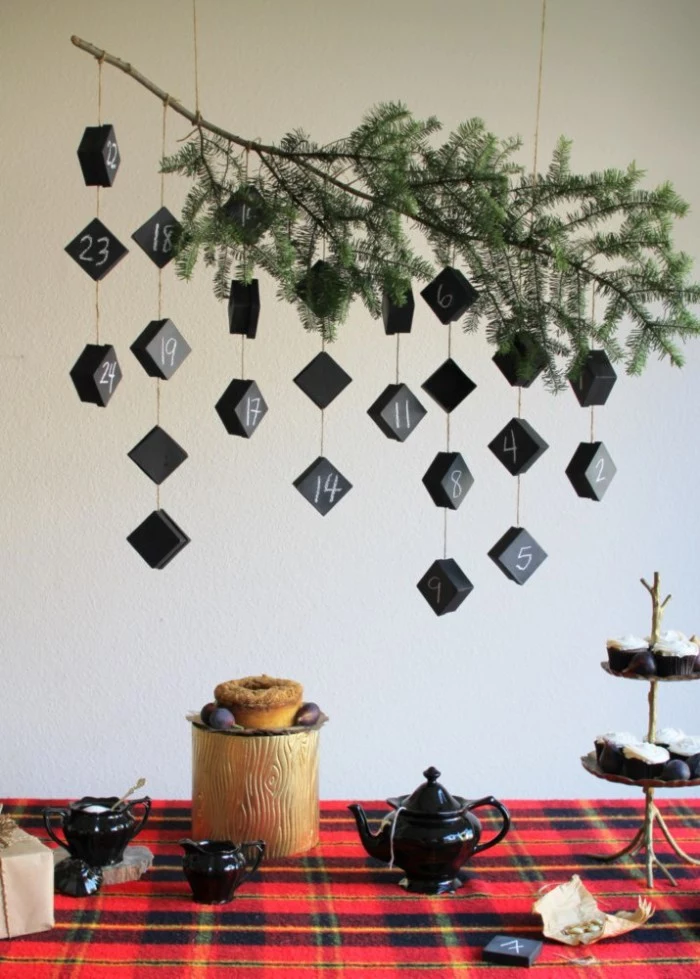
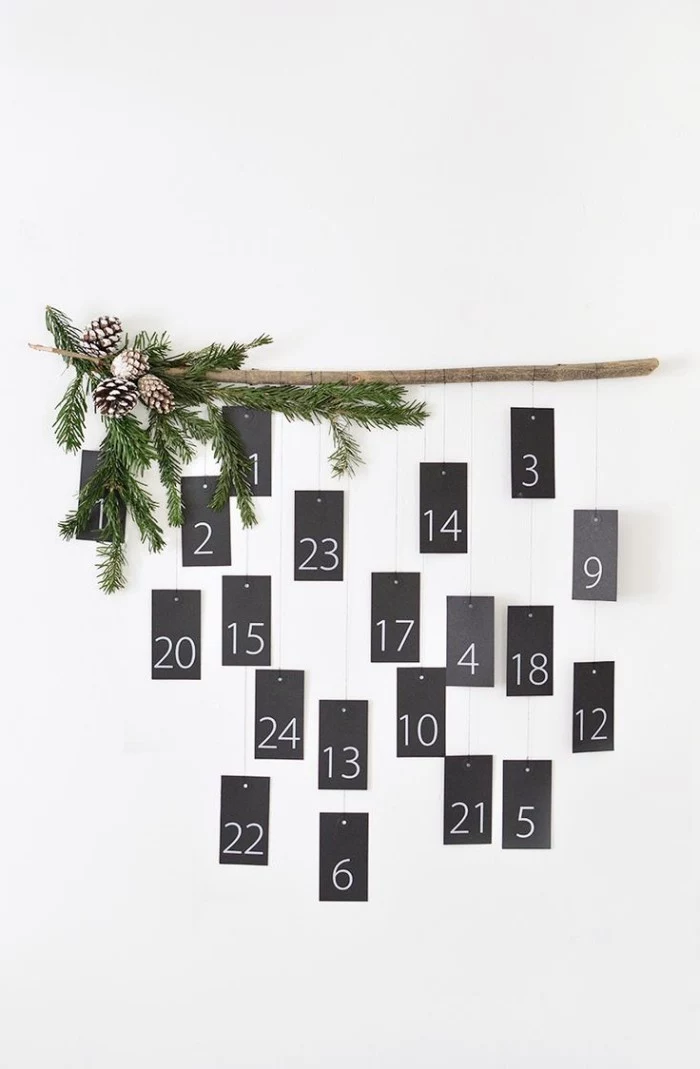
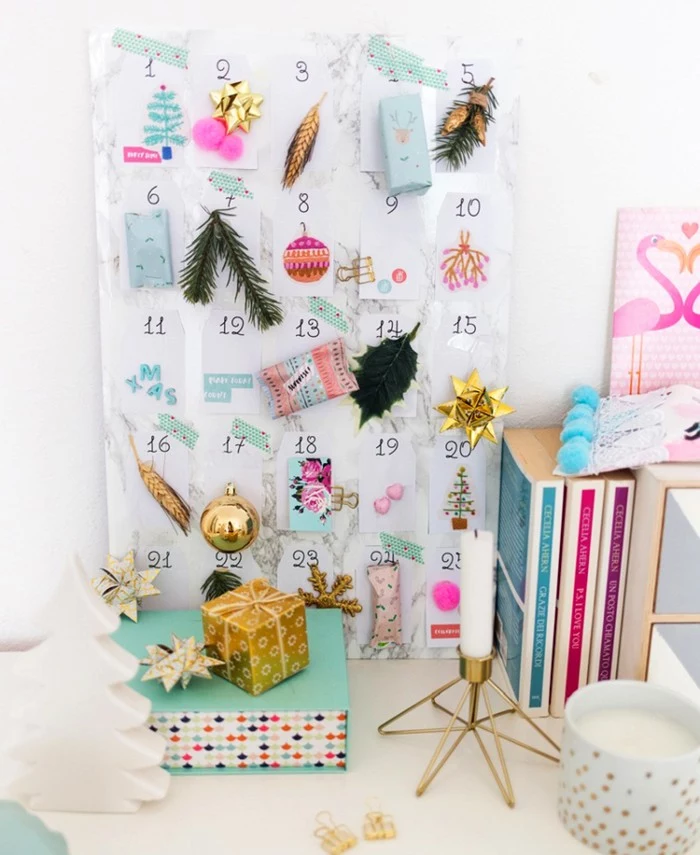
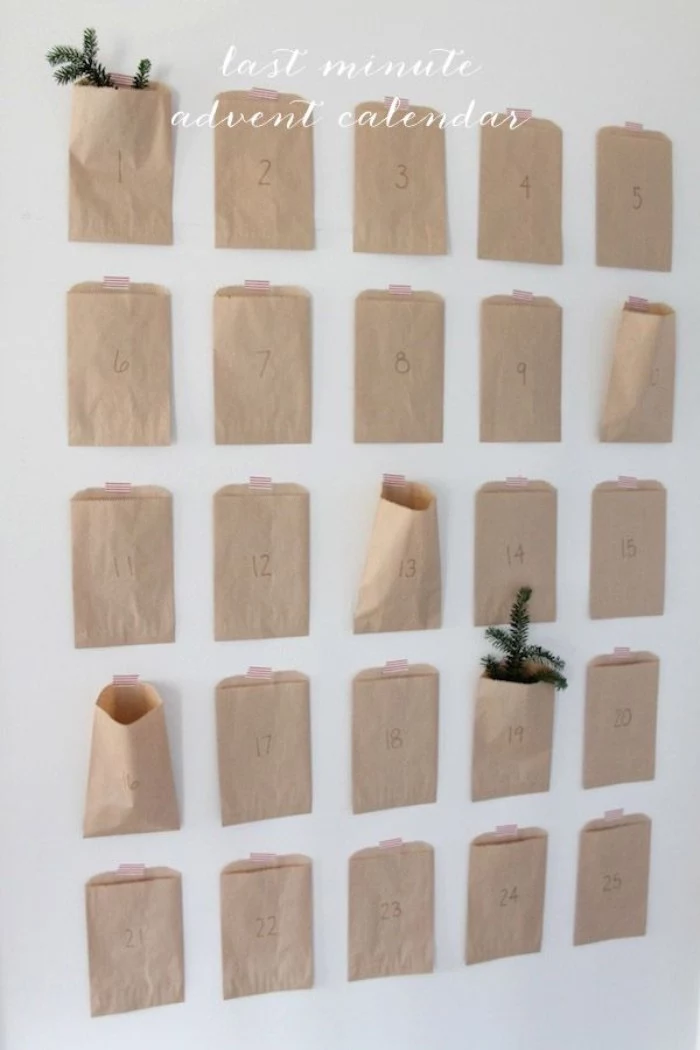
For a minimalist yet impactful calendar, embrace the Scandinavian design ethos. Think natural materials, clean lines, and a restrained color palette. Try hanging 24 simple kraft paper envelopes, sealed with a dot of red wax, from a bare birch branch. Number them with a simple, elegant sans-serif stamp for a design that is both festive and chic.
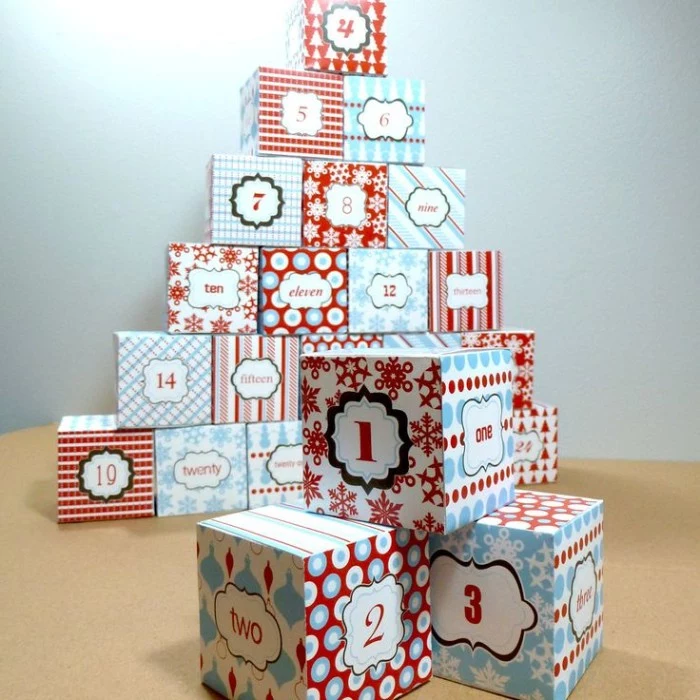
A common pitfall: Making all the boxes or pouches the exact same size. Some filler items, like a pair of festive socks or a small jar of jam, will inevitably be larger than others. Plan ahead by varying the sizes of a few containers or making the container for December 24th noticeably larger for a grand finale gift.
The word ‘Advent’ is derived from the Latin ‘adventus’, which means ‘coming’ or ‘arrival’. The season is a period of expectant waiting and preparation.
Your DIY calendar is a physical manifestation of this feeling. The daily act of opening a door or a pouch isn’t just about the trinket inside; it’s a ritual that builds anticipation and marks the joyful passage of time toward Christmas Day.
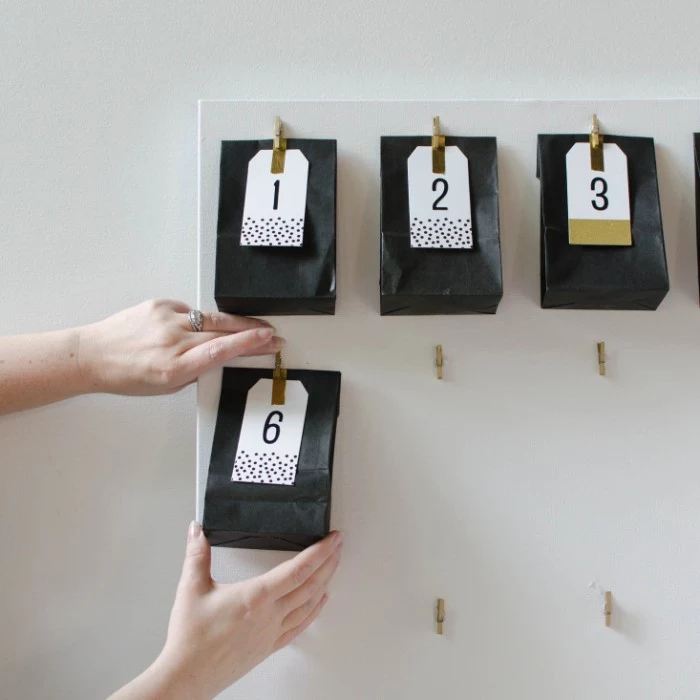
I’m not very crafty and have no time. Is there a super-simple but stylish option?
Absolutely. The ‘envelope wall’ is your answer. Purchase a set of 24 small, high-quality envelopes in a festive color like forest green or burgundy. Use a white or gold gel pen to number them. Inside, place a photo, a note, or a flat treat. Arrange them in a grid or tree shape on a wall or corkboard using decorative washi tape. It’s elegant, requires no cutting or gluing, and can be assembled in under an hour.
- A high-quality self-healing cutting mat protects your table and your blade.
- A steel ruler with a cork back prevents slipping during long cuts.
- A precision craft knife, like an X-Acto, with a fresh #11 blade for sharp corners.
- A bone folder for making paper creases exceptionally crisp.
Cricut Joy: A compact, affordable machine perfect for cutting out numbers, tags, and simple shapes from cardstock or vinyl. It’s a great entry point if your main goal is embellishment.
Cricut Maker: A more powerful and versatile machine. It can handle intricate paper village patterns, cut fabric for pouches, and even score and engrave thin wood, making it the ultimate tool for the serious advent calendar artisan.
For the ‘Light-Up Paper Village’ project mentioned in the article, a Maker would be a significant time-saver.
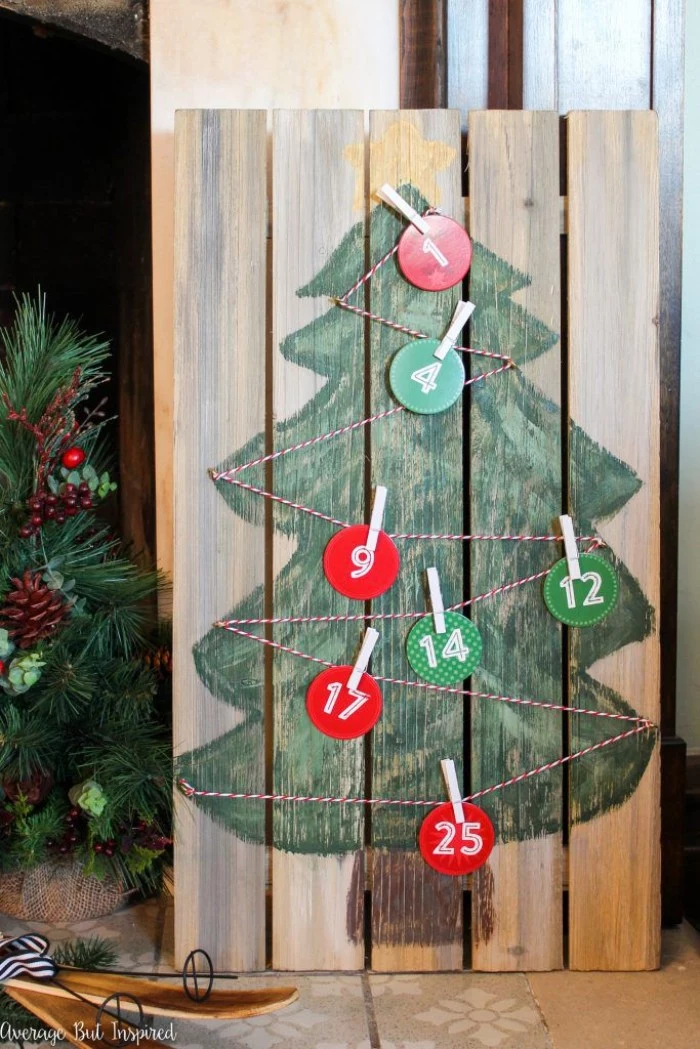
The Final Reveal: Make the 24th or 25th box special. It’s the culmination of a month of anticipation. Make it visibly different—perhaps larger, a contrasting color, or decorated with a special bow. The gift inside could be the final piece of a set you’ve been giving all month, or a clue that leads to a larger, hidden present. This elevates the final day from an ending to a climax.
Did you know the world’s largest advent calendar, according to Guinness World Records, was built in 2007 at St Pancras station in London? It measured 71 meters high and 23 meters wide.
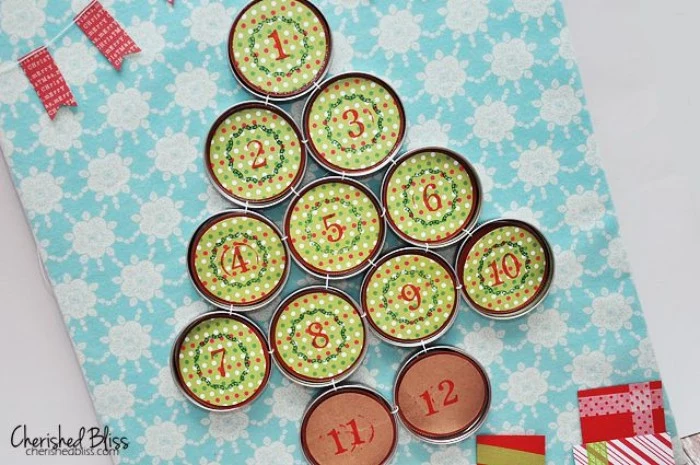
Don’t be afraid to think beyond the box—literally. A ‘jar calendar’ can be stunning. Collect 24 small glass jars (baby food or spice jars are perfect). Spray paint the lids in a uniform color like gold or silver, and apply number stickers. Fill them with treats and arrange them on a tiered tray or windowsill. The effect is charming, reusable, and wonderfully simple.
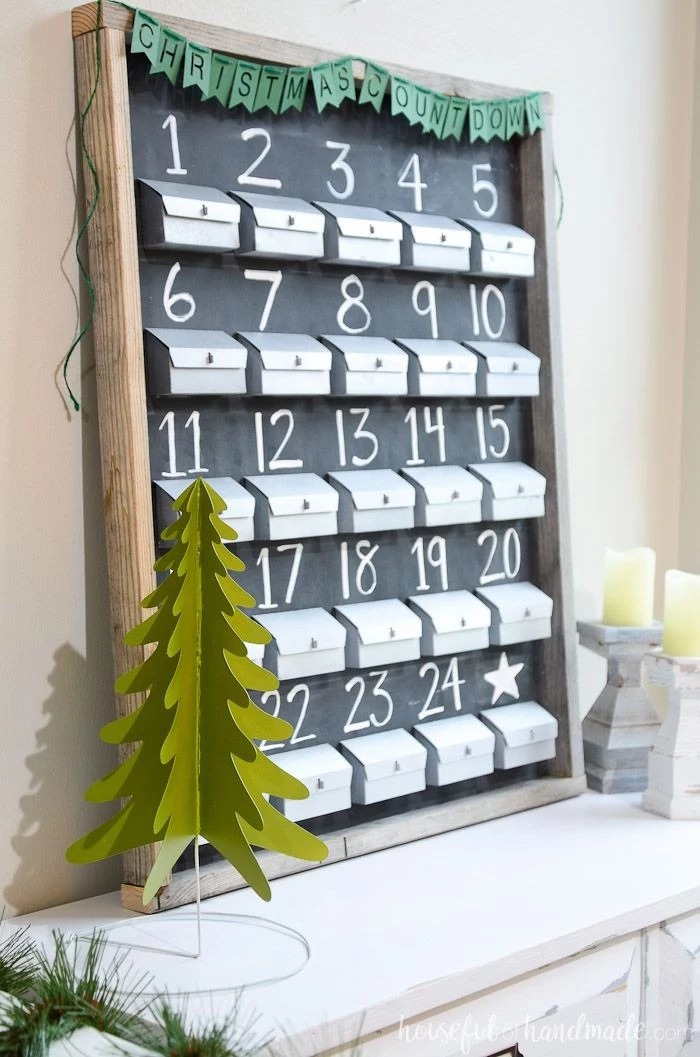
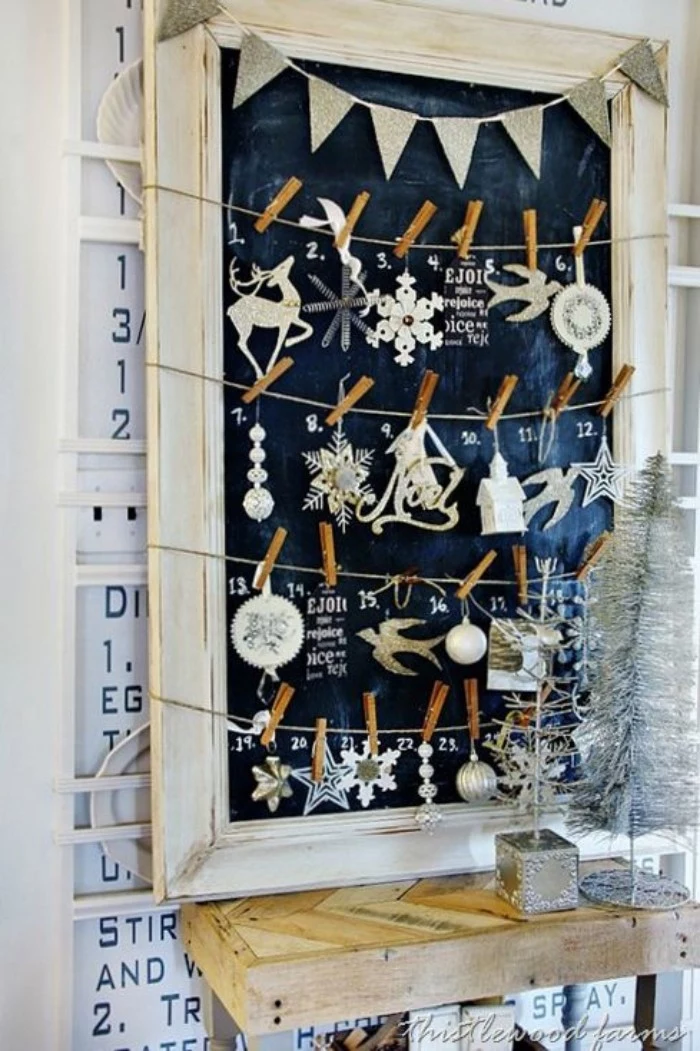
An overlooked detail: The hanging mechanism. How your calendar is displayed is part of its design. For garlands, don’t just use plain string. Consider a beautiful velvet ribbon, a rustic jute twine, or even a strand of wooden beads. For wall-hung box calendars, ensure you install a sturdy French cleat or D-rings on the back, rather than a single sawtooth hanger, to support the weight securely and keep it level year after year.


