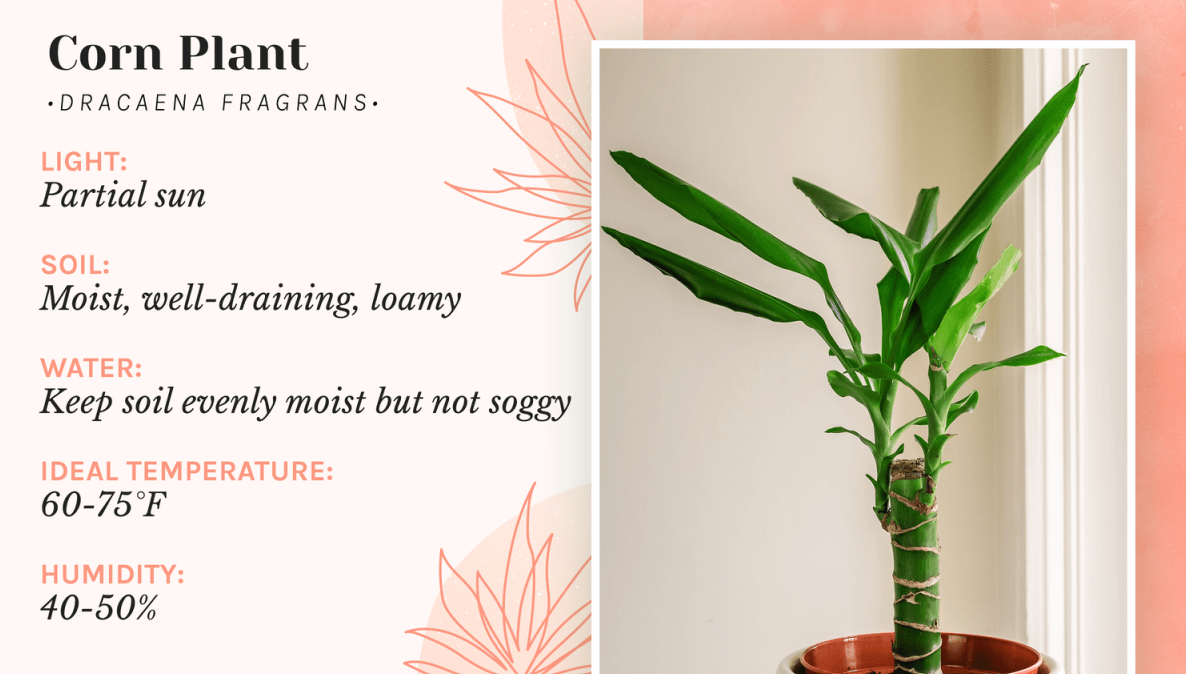
Your Corn Plant Could Be Happier. Here’s the Pro’s Guide.
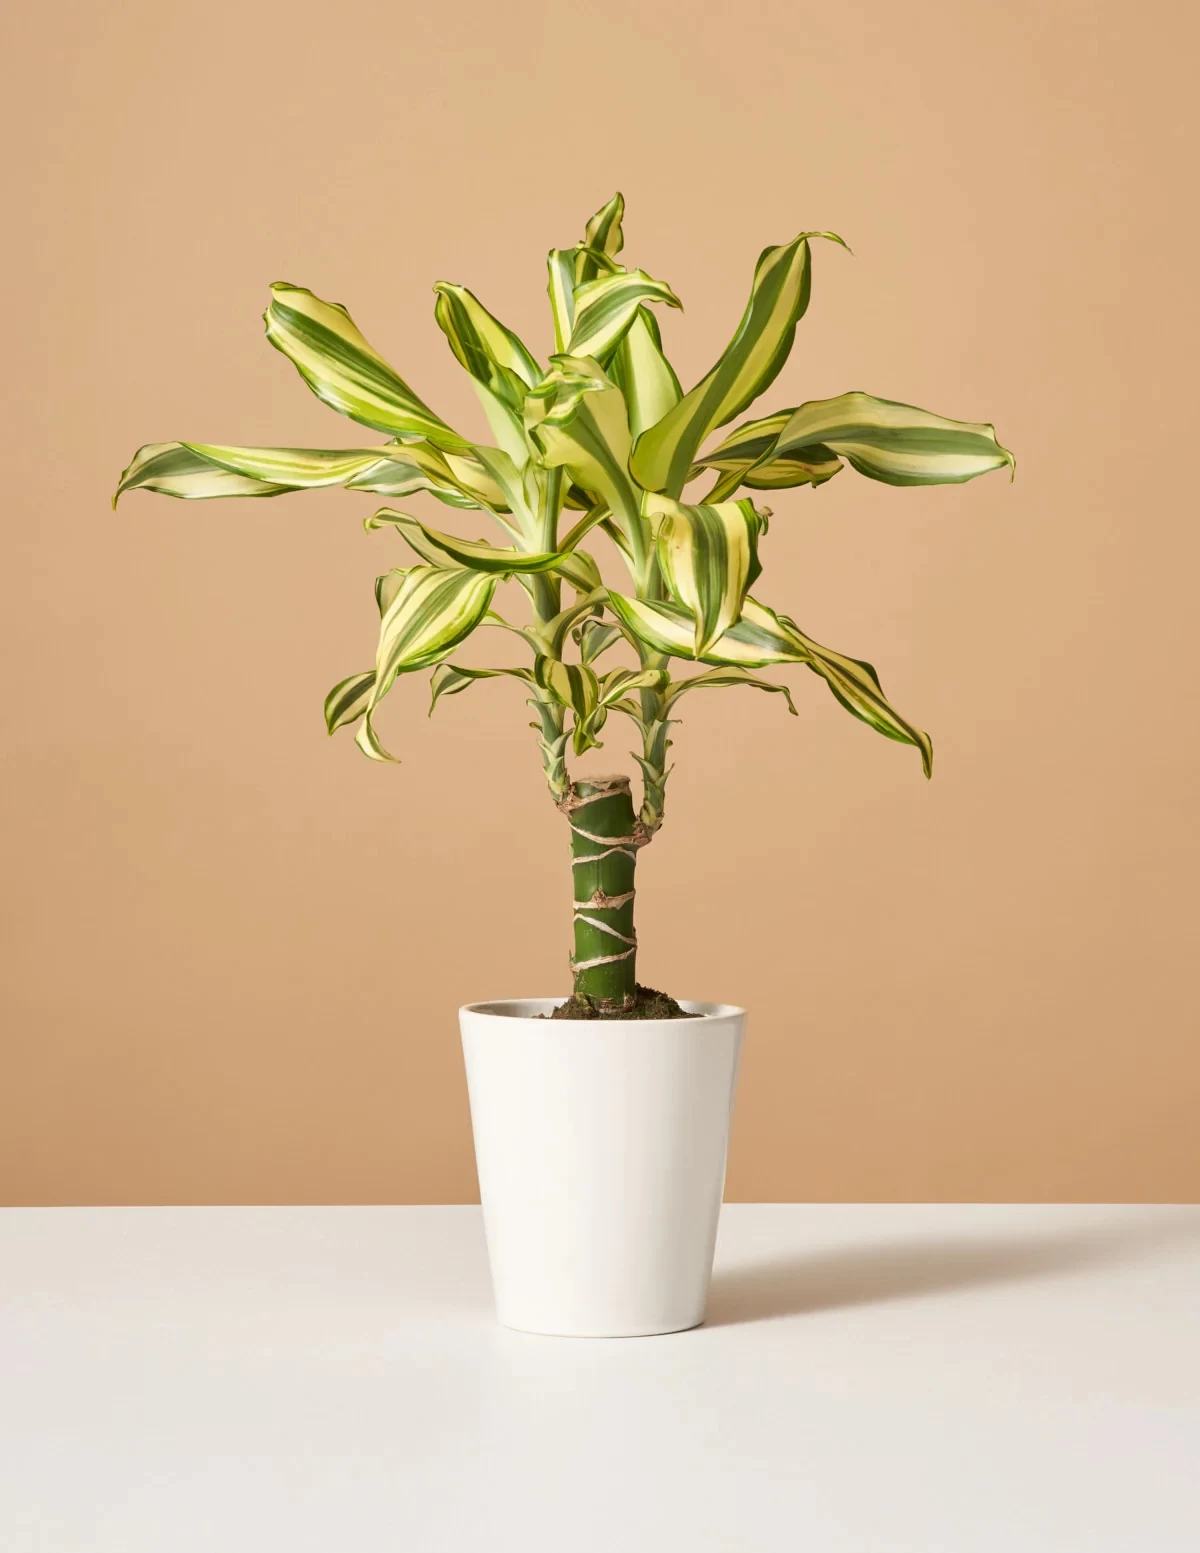
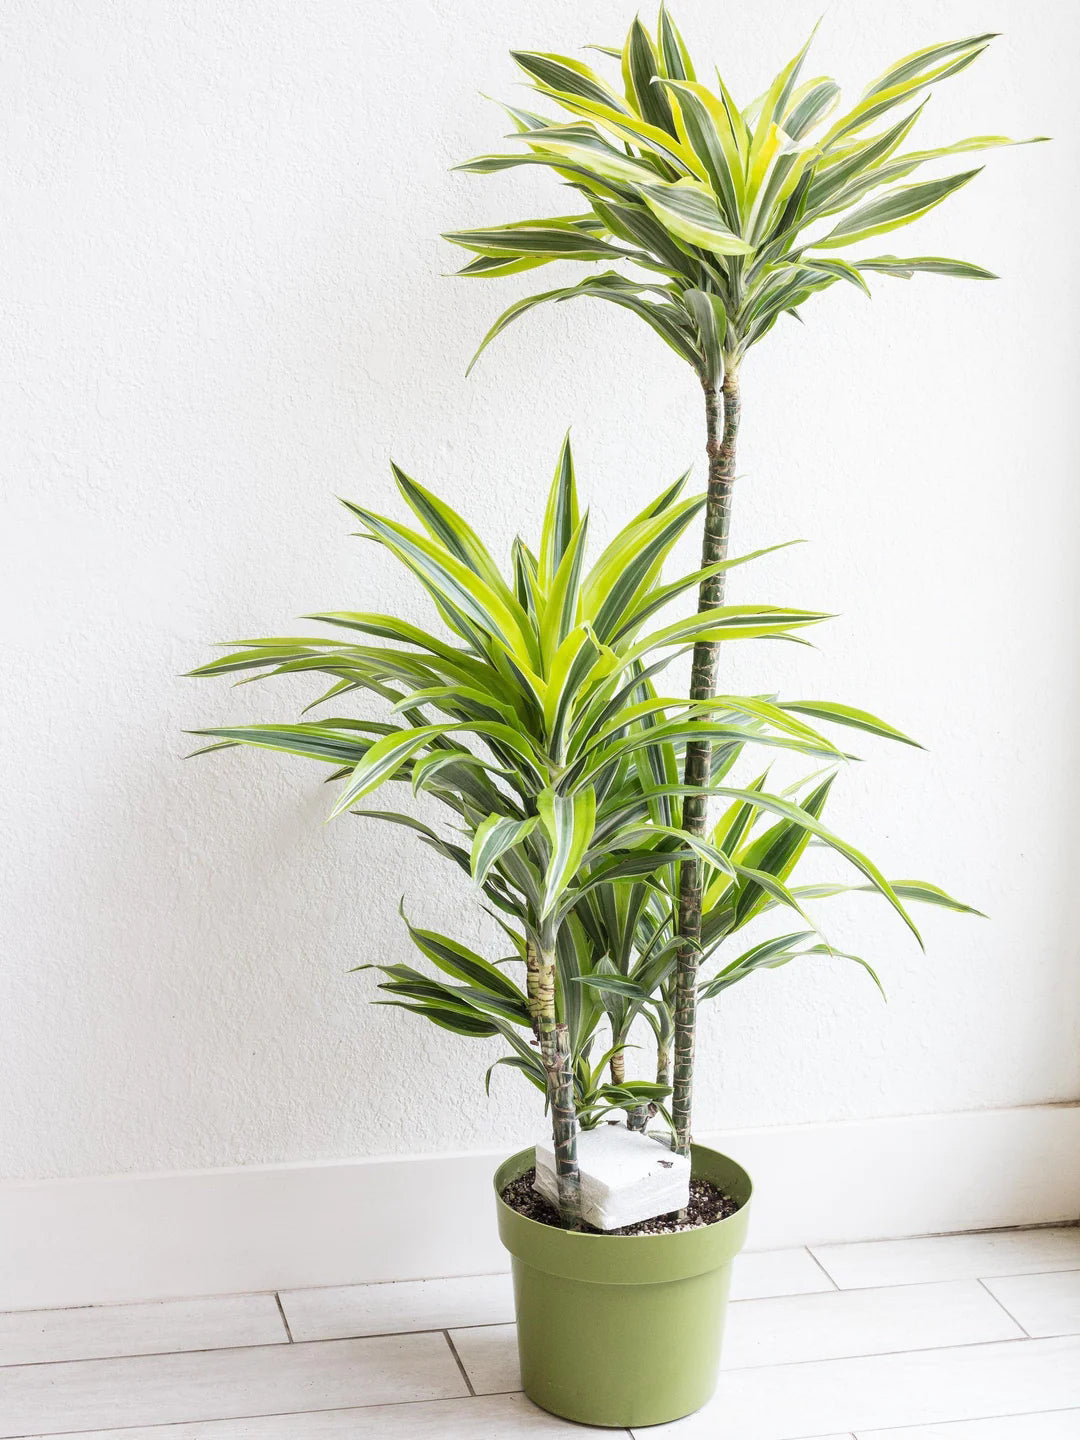
I’ve been working with houseplants for a long, long time, and I’ve seen fads come and go. But the Corn Plant—or Dracaena fragrans, if you want to get technical—is a true classic. It’s always around. I’ve cared for these guys in every situation imaginable, from tiny starters in a production greenhouse to massive, 12-foot specimens that basically defined a corporate lobby. It’s no wonder people love them; they’re tough and have this amazing tropical vibe.
In this article
- First Things First: A Crucial Pet Safety Warning
- Why Your Corn Plant Acts the Way It Does
- The Foundation: Getting the Soil and Pot Right
- How to Water (The Right Way)
- Light, Location, and Temperature
- Feeding: The ‘Less is More’ Rule
- Pruning and Making New Plants for Free
- Troubleshooting Common Problems
- Galerie d’inspiration
But here’s the thing. They’re often called a “beginner plant,” and while they are forgiving, that reputation has led to a ton of bad habits and myths. My goal here is to cut through the noise.
We’re going to go way beyond the little plastic tag that came with your plant. I want to share the practical, real-world knowledge that comes from handling thousands of these, so you can understand the ‘why’ behind the care. This is the stuff I teach my own team, and it’s how you get a plant that doesn’t just survive, but truly thrives.
First Things First: A Crucial Pet Safety Warning
Let’s get this out of the way immediately because it’s non-negotiable. Despite what some corners of the internet might say, Corn Plants are toxic to both cats and dogs. Please, take this seriously. The plant contains sharp, microscopic crystals that cause a world of pain and irritation when chewed. If a pet nibbles on it, you’re looking at drooling, vomiting, and a very unhappy animal. While it’s not usually fatal, it’s an awful experience for them.
As a responsible plant parent, you absolutely have to place this plant where your pets cannot get to it. If you can’t guarantee that, I strongly suggest choosing something else. It’s just not worth the risk.
Oh yeah, and if you’re now wondering, “Okay, so what can I get?” here are a few great, pet-safe alternatives that are also pretty easy to care for:
- Spider Plant: Super resilient, easy to multiply, and totally safe for furry friends.
- Calathea (Prayer Plant): Known for its stunning, decorative leaves that move up and down with the daylight.
- Parlor Palm: Gives you that classic tropical look without any of the worry.
Why Your Corn Plant Acts the Way It Does
To really get this right, you have to think about where the plant comes from. It’s native to the tropical parts of Africa, where it grows underneath the canopy of bigger trees. That one little fact tells you almost everything. It’s not a desert plant craving sun, and it’s not a swamp plant that wants to be wet all the time. It’s an understory plant that loves filtered light, steady warmth, and a good drink followed by a chance to dry out.
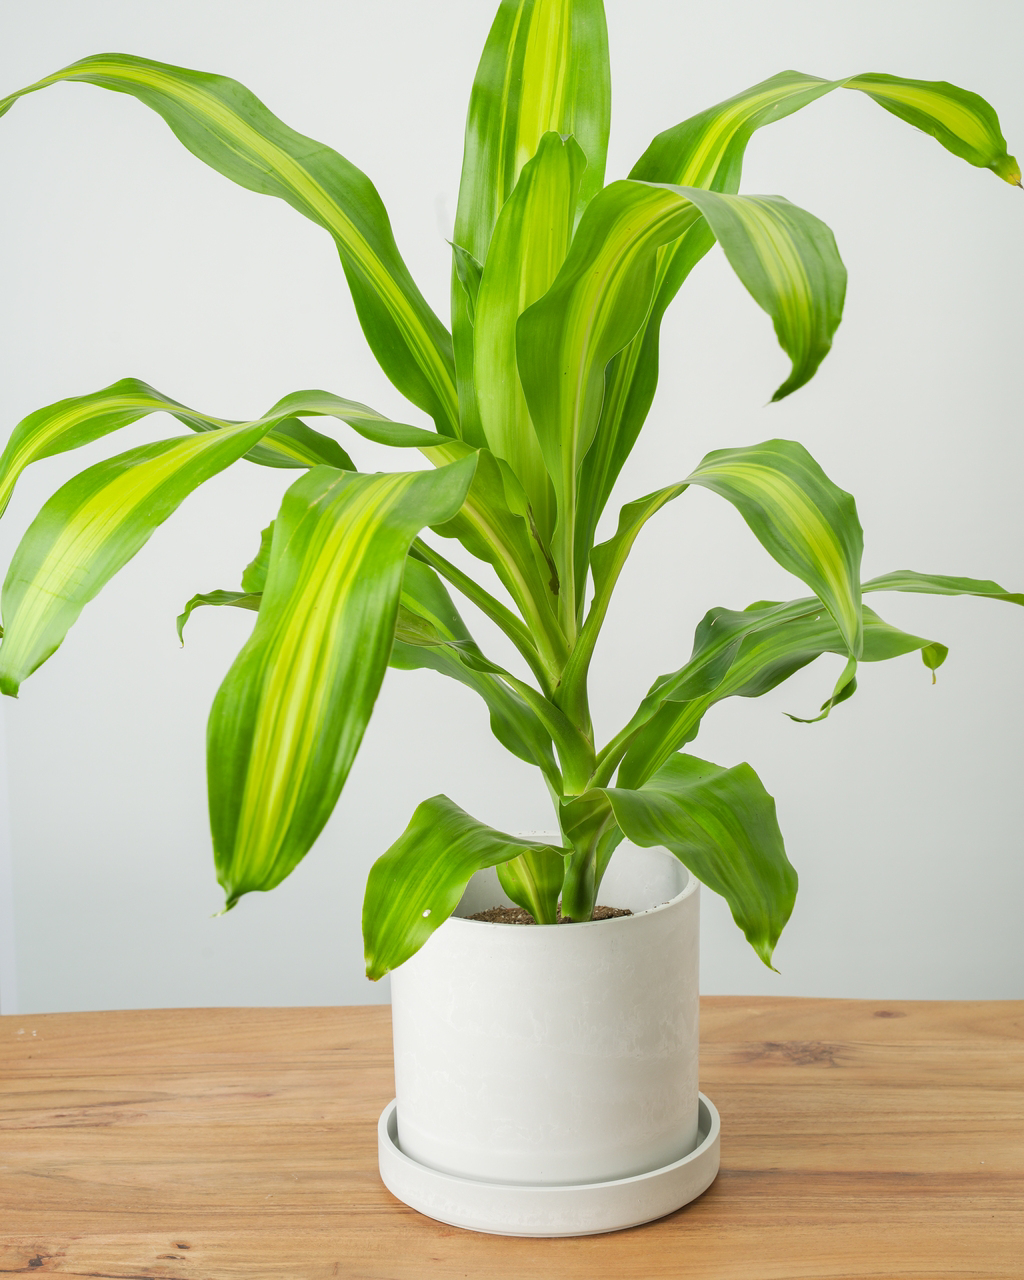
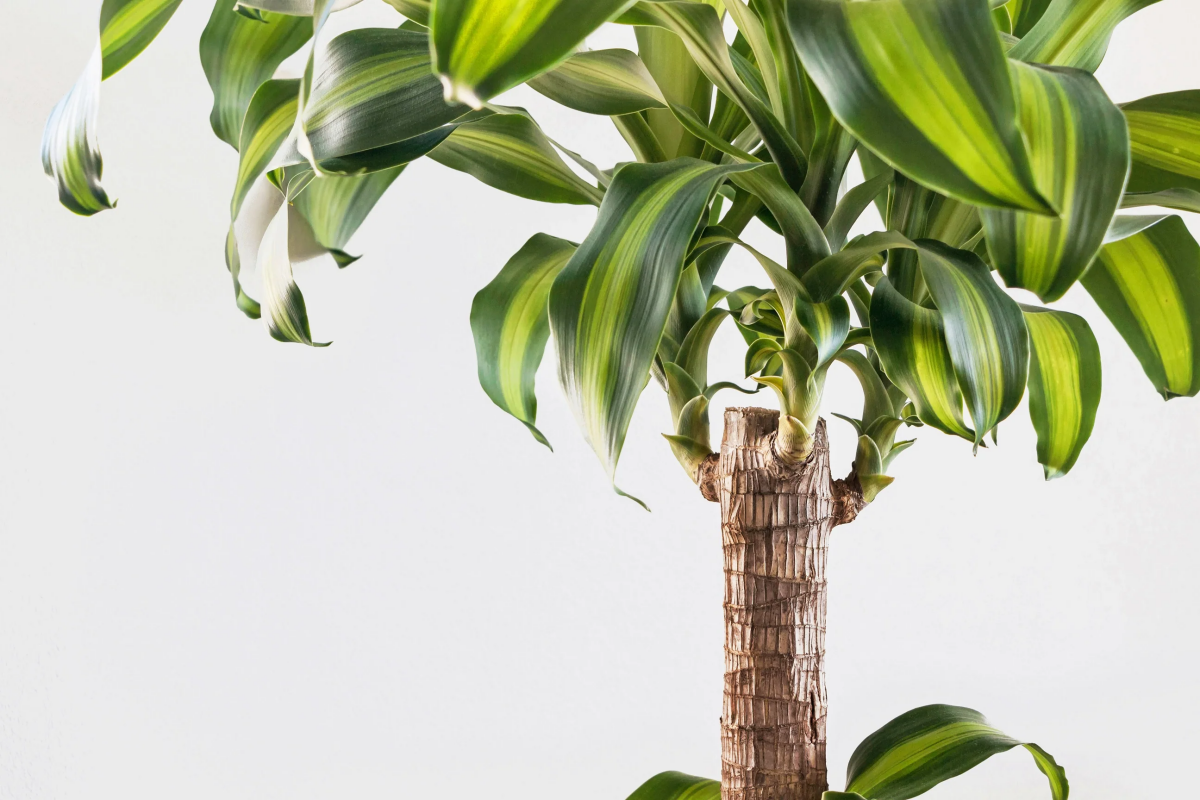
As it gets older, it will naturally drop its lower leaves. They’ll turn yellow and fall off, revealing that classic, woody cane. This is totally normal! It’s how it gets that tree-like shape. One of the most common mistakes I see is people panicking and overwatering the moment a single leaf turns yellow.
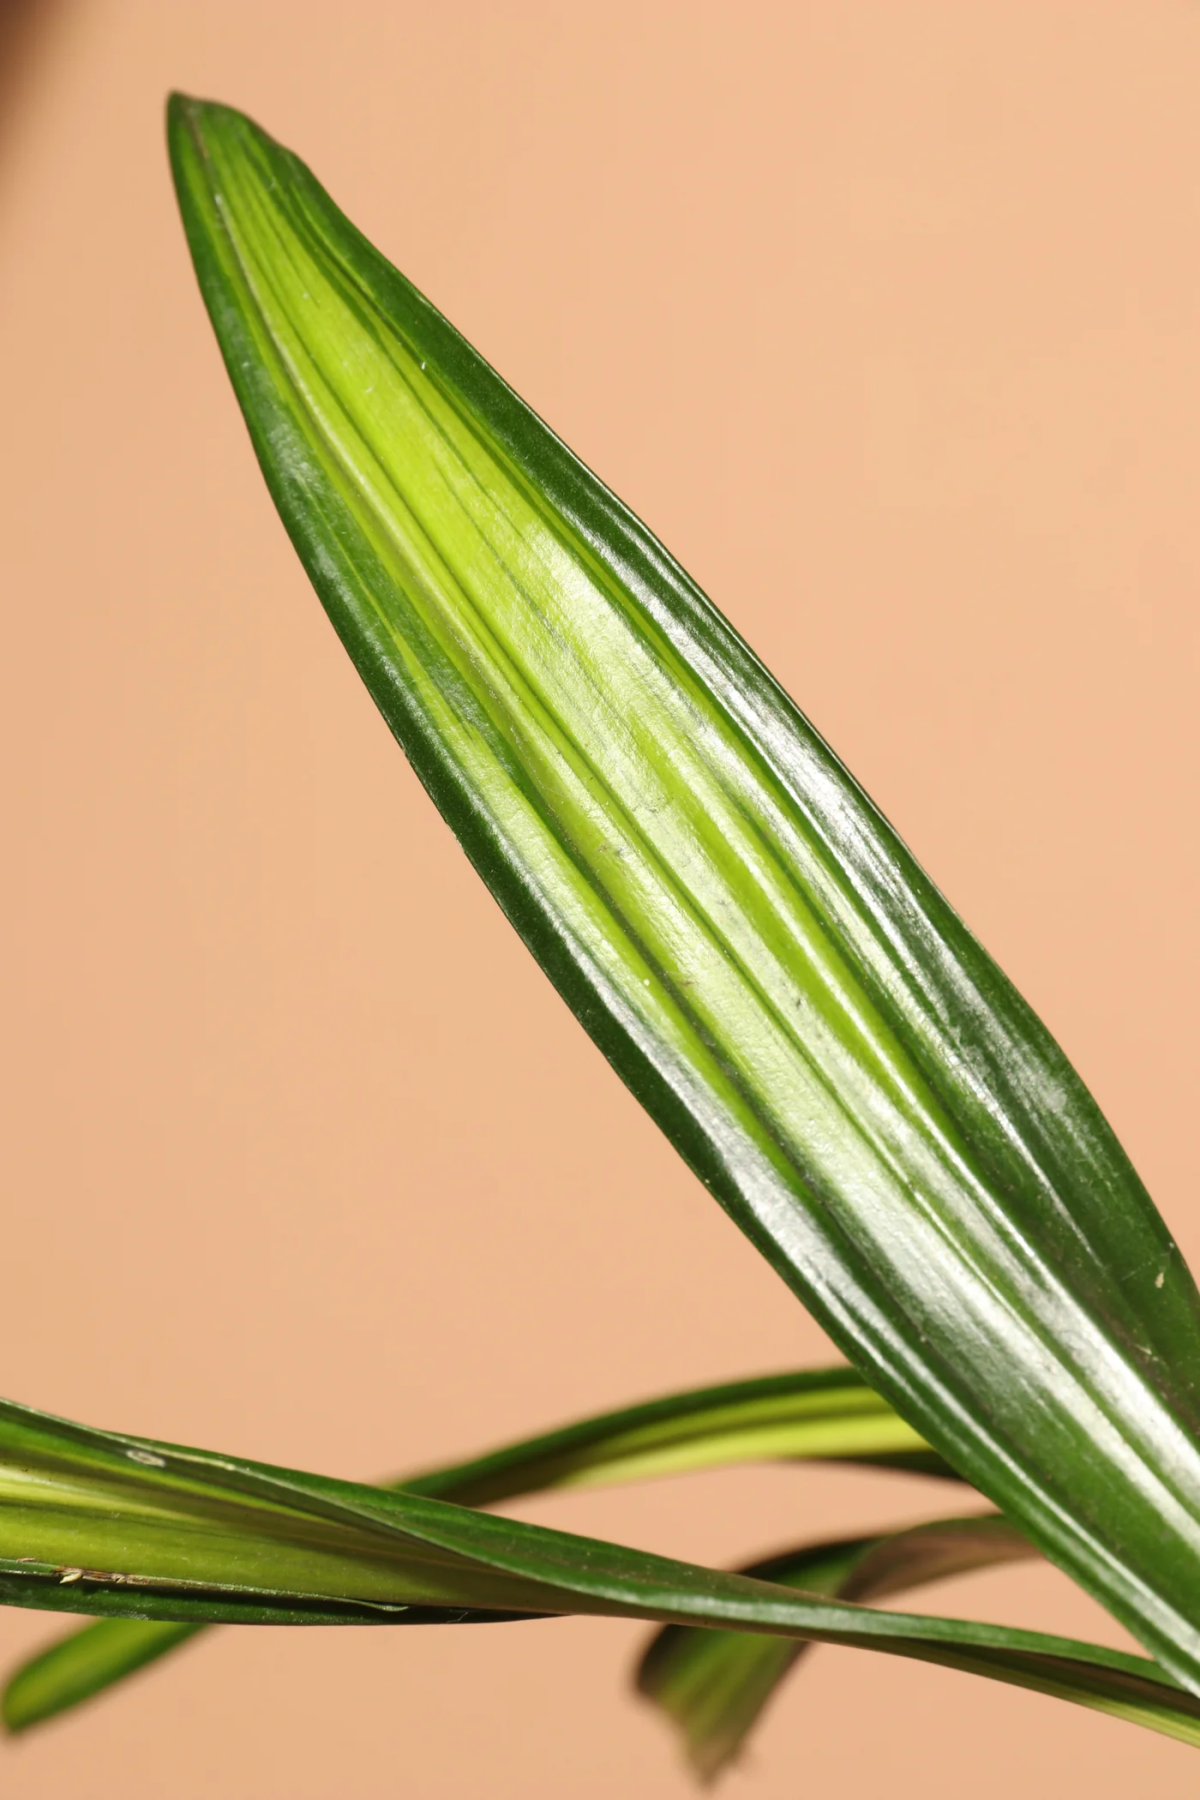
Here’s a key bit of biology: Corn Plants are extremely sensitive to chemicals like fluoride, which is often found in city tap water. The plant can’t process it, so it shunts it to the very tips of the leaves, where it builds up and kills the cells. This is the #1 cause of those dreaded brown, crispy tips. It’s not just about humidity—it’s about the water you’re using.
The Foundation: Getting the Soil and Pot Right
The right soil is everything. In a professional setting, we’d never just use soil straight out of the bag without thinking about it. For a Dracaena, you need a mix that can hold a bit of moisture but also drains incredibly well. Heavy, dense soil that stays soggy is a guaranteed death sentence from root rot.
My Pro-Level Soil Mix (It’s Easy!)
When I’m potting a high-value plant for a client, I mix my own soil. It’s the best way to control everything. Here’s a simple recipe that works wonders:
- 2 parts peat moss or coco coir: This is your base. It holds moisture and nutrients. Coco coir is a great, sustainable alternative to peat.
- 1 part perlite: Those little white crunchy bits. They are essential for creating air pockets so roots can breathe. They don’t hold water, which is the point!
- 1 part orchid bark: This is the secret ingredient many people miss. The larger chunks create big air gaps, boost drainage, and keep the soil from compacting over time.
You can find all these ingredients at places like Home Depot, a good local nursery, or online. A bag of each will probably set you back less than $30 total and will last you for ages. Just mix them up well, and you’ve got a soil mix that’s a hundred times better than most pre-bagged stuff.
Don’t want to mix your own? If you’re buying a bagged mix, grab one labeled for “Cacti & Succulents.” But even then, I’d recommend buying a small bag of perlite or orchid bark (about $8) and mixing a few extra handfuls in to improve it.
A Quick Shopping List to Get Started:
- The Plant: A healthy 6-inch plant usually costs between $15 and $30.
- A Good Pot (with drainage!): Expect to pay $15-$25 for a decent ceramic or terracotta pot.
- Soil Ingredients: A bag of quality potting mix ($10), a small bag of perlite ($8), and a small bag of orchid bark ($8).
- Water: A gallon of distilled water from the grocery store is about $1. Best dollar you’ll ever spend on your plant.
And speaking of pots, the most critical feature is a drainage hole. I’m serious—I will not plant anything in a pot without a drainage hole. It’s the best insurance policy against root rot. And when you do repot, only go up one size (about 1-2 inches wider). A giant pot holds too much wet soil, which is… you guessed it… a recipe for rot.

How to Water (The Right Way)
This is where most people go wrong. Watering is not about a schedule; it’s about checking the soil. Overwatering is the undisputed champion of killing houseplants.
Here’s the technique:
- Check First: Stick your finger about two inches into the soil. If you feel any moisture at all, walk away. Wait. If it feels dry, it’s time to water.
- Water Thoroughly: Take the plant to a sink or tub. Slowly pour water over the soil until it runs freely out the bottom. This flushes out mineral buildup and ensures the whole root ball gets a drink.
- Let it Drain: Let the pot sit in the sink for 15-20 minutes to drain completely. Never, ever let it sit in a saucer full of water.
- Wait Again: Don’t even think about watering again until the top 25-50% of the soil is dry. This could be a week, or it could be three weeks. The plant will tell you.
Remember what I said about fluoride? If you have perfect watering habits but still get brown tips, your tap water is the problem. Letting it sit out only removes chlorine, not fluoride. For pristine leaves, switch to rainwater, distilled water, or reverse osmosis water. It seems fussy, but it’s the single best thing you can do for this plant.
Light, Location, and Temperature
In its home environment, a Corn Plant gets dappled sunlight. Indoors, we call this “bright, indirect light,” which can be confusing. Basically, put it in a spot where it has a wide view of the sky but the sun isn’t blasting its leaves for hours.
- Good Spots: Near an east-facing window is perfect. Five to ten feet away from a hot south or west window is also great. A north-facing window works, too.
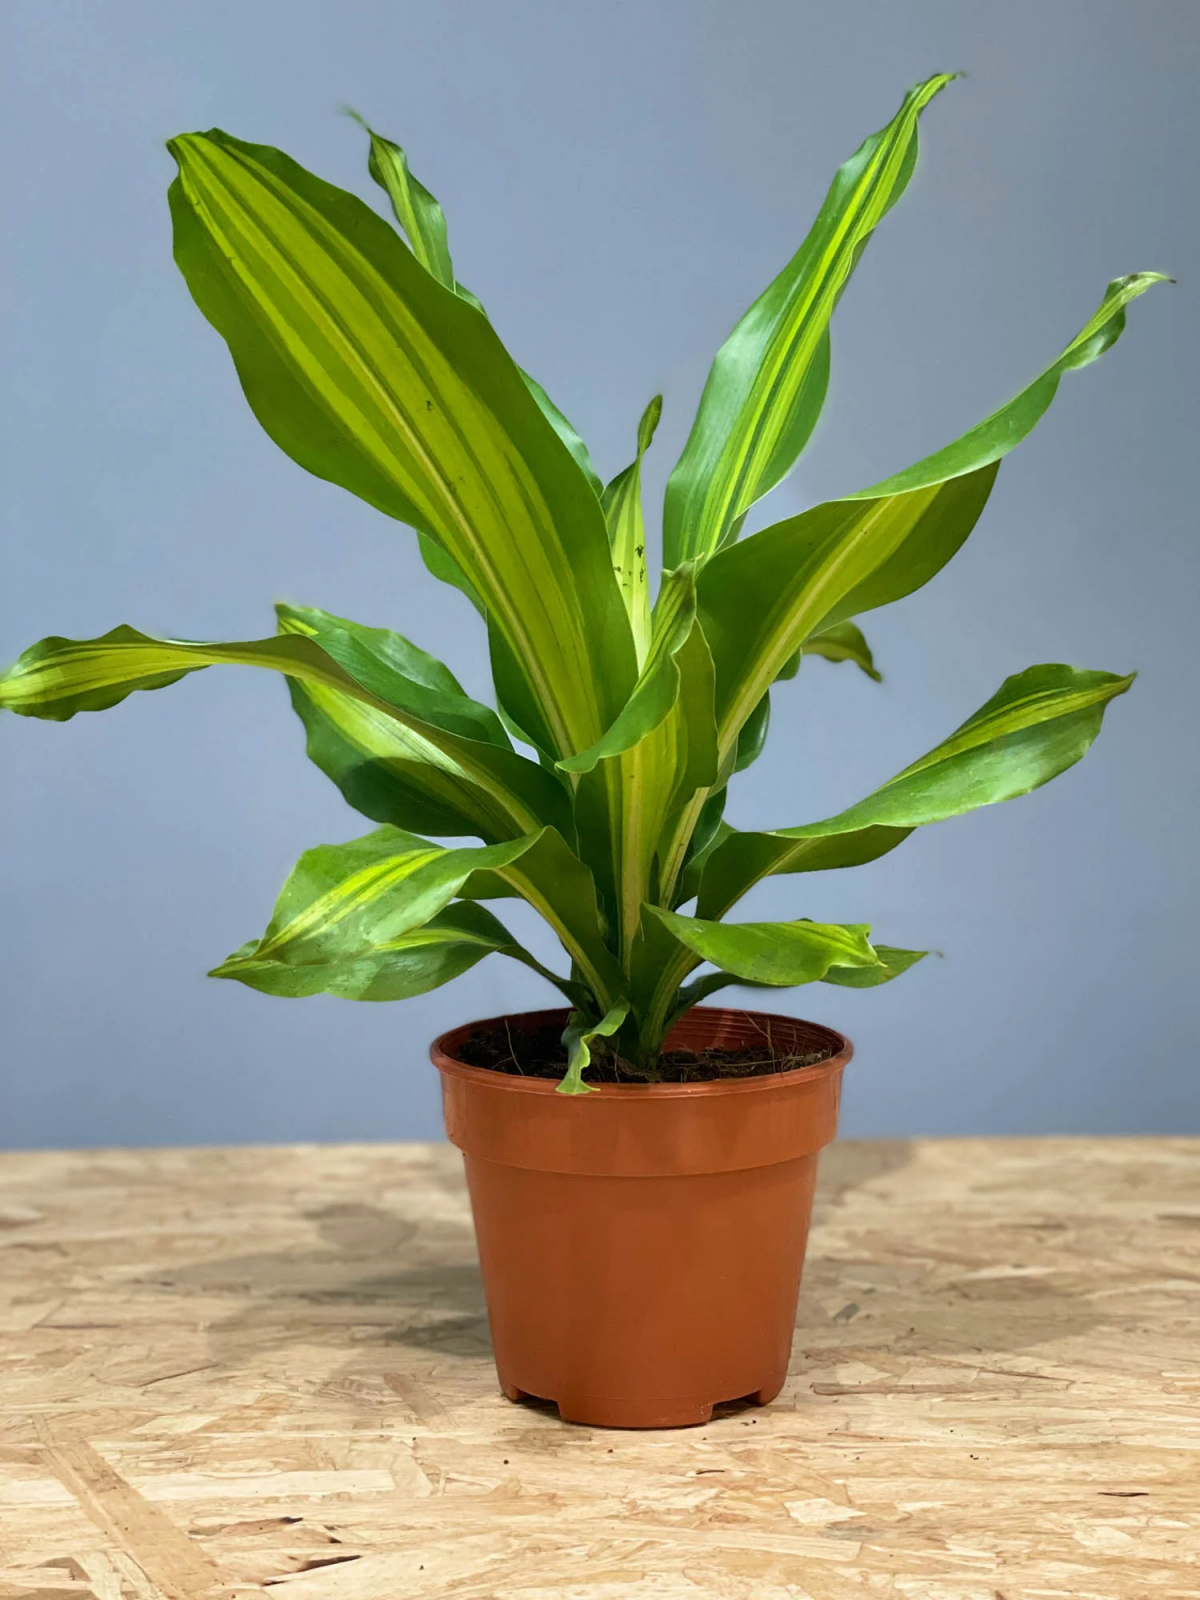
- Too Little Light? New leaves will be small, pale, and spindly. If you have the common variety with the yellow stripe, it might turn all green.
- Too Much Light? You’ll see faded, washed-out patches or even brown scorch marks on the leaves.
Quick Win: Don’t have time for anything else? Go rotate your plant a quarter turn right now. Seriously, I’ll wait. Doing this every time you water ensures it grows evenly instead of leaning desperately toward the window.
As for temperature, if you’re comfortable, your plant is comfortable. They like it between 65°F and 80°F. Just keep them away from cold drafts and direct blasts from heating vents.
Feeding: The ‘Less is More’ Rule
This is another area where good intentions can cause problems. Corn Plants are not heavy feeders. Over-fertilizing is way more common than under-fertilizing and leads to burnt roots and—you guessed it—more brown leaf tips.
- What to Use: A balanced liquid fertilizer works great. You can look for something specific like Dyna-Gro Foliage-Pro, or even a general-purpose houseplant food will do.
- How to Use It: This is the key. Dilute it to half or even a quarter of the strength recommended on the bottle.
- When to Use It: Only feed during spring and summer when the plant is actively growing. Once every 4-6 weeks is plenty. Do not fertilize in fall and winter.
Quick tip: Always water the plant with plain water before you add the fertilizer. Applying it to dry soil is a fast way to burn the roots. Once a year, it’s a good idea to flush the soil by letting a large amount of plain water—about two or three times the pot’s volume—run through the pot to wash away any built-up salts.
Pruning and Making New Plants for Free
Eventually, your plant will get tall and might need a haircut to control its size or encourage a fuller look. This can feel scary, but these plants are incredibly resilient.
You can cut the main cane at any height with a clean, sharp pair of pruners. Within a few weeks, you should see new growth buds forming just below the cut. Be patient here; it can sometimes take 4-8 weeks to see new green bumps, especially if it’s not peak growing season. Often, two or more new heads will sprout, making your plant look much fuller!
And don’t throw away the piece you cut off! You can easily make a new plant from it. Just take the leafy top section, remove the bottom few leaves to expose a couple of inches of bare stem, and stick it in a glass of water. Make sure at least two of the little bumps (nodes) where the leaves were are underwater, but don’t let any actual leaves sit in the water. Change the water every few days, and once you have a few inches of roots, you can pot it up in your new pro-level soil mix.
Troubleshooting Common Problems
Part of my job is being a plant detective. Here are the most common cases I solve.
Problem: Brown, Crispy Leaf Tips
The Fix, In Order of Likelihood: 1) Switch to distilled or rainwater. This is almost always the culprit. 2) If your water is pure, double-check your watering consistency—are you letting it get bone dry or keeping it too wet? 3) Only if 1 and 2 are perfect should you worry about low humidity.
Problem: Lots of Yellowing Lower Leaves
The Fix: One or two is normal aging. But if a bunch are yellowing and the soil feels damp, it’s a classic sign of overwatering. Stop watering immediately and let the soil dry out significantly. Make sure that drainage hole isn’t blocked.
Problem: The Cane is Soft and Brown, Leaves are Droopy
The Fix: This is an emergency, and it means severe root rot. Unpot the plant right away. Cut off any roots that are black and mushy. If the cane itself is soft, that part is a goner. Your best bet is to cut the top off above the rot and try to propagate it in water as a new plant.
Problem: Pests like Spider Mites or Mealybugs
The Fix: Isolate the plant immediately. For spider mites (look for fine webbing), give the plant a good shower and then treat it with insecticidal soap. For mealybugs (the white, cottony fluff), dab them with a cotton swab dipped in rubbing alcohol. Regular inspection is the best prevention.
Galerie d’inspiration
Are the tips of your Corn Plant turning brown and crispy?
Before you adjust your watering schedule, consider the water’s quality. Dracaena species are notoriously sensitive to fluoride and soluble salts, which are common in tap water. Over time, these minerals build up in the plant’s extremities—the leaf tips—causing them to burn and die back. For a healthier plant, try letting tap water sit out for 24 hours before use, or switch to filtered, distilled, or rainwater if you notice the problem persists.
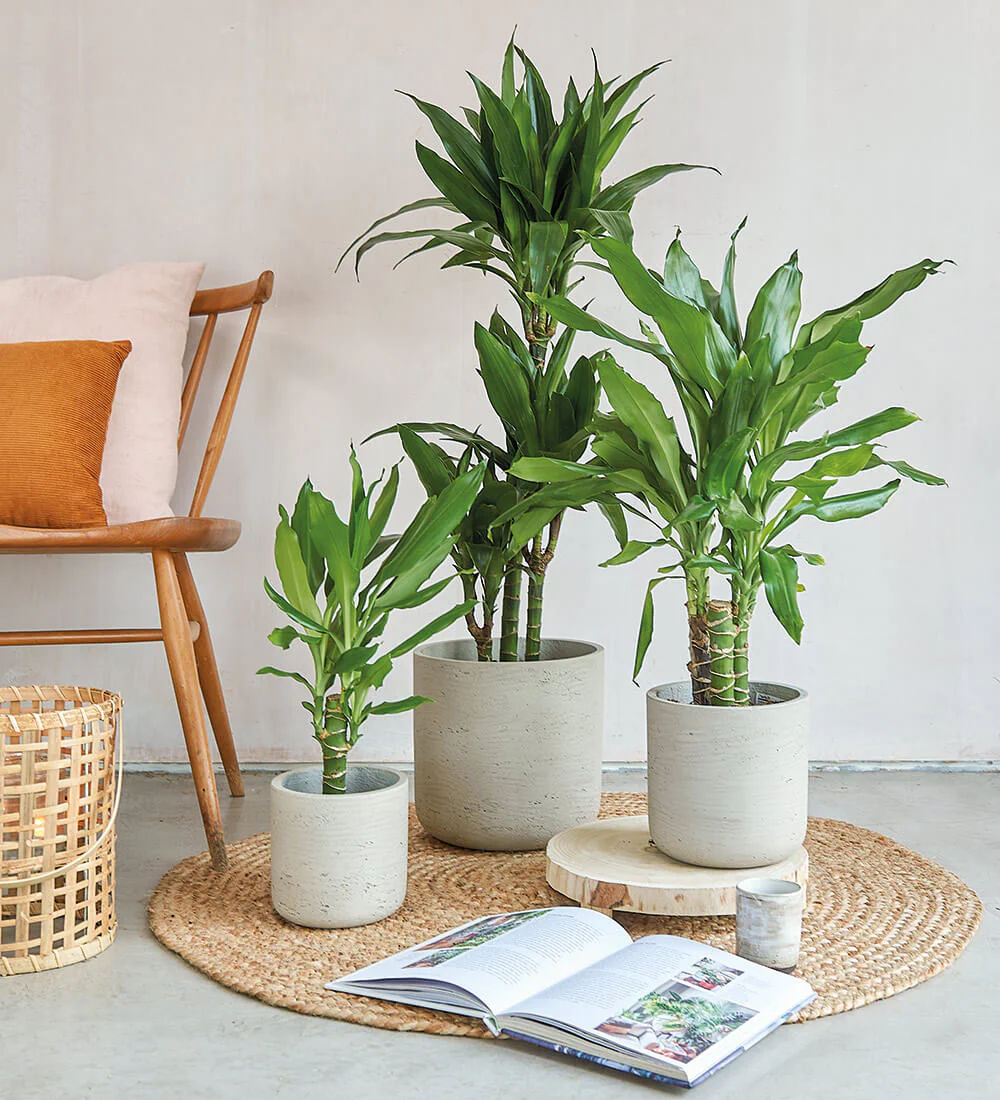
More than 95% of a Dracaena’s root mass is typically in the top 12 inches of soil, even for very large specimens.
This is why choosing the right pot depth is crucial. A pot that is too deep can hold excess water far below the roots, creating a soggy, airless zone that promotes root rot. When repotting, select a container that is only 1-2 inches wider in diameter and has a proportional depth to encourage a healthy, concentrated root system.
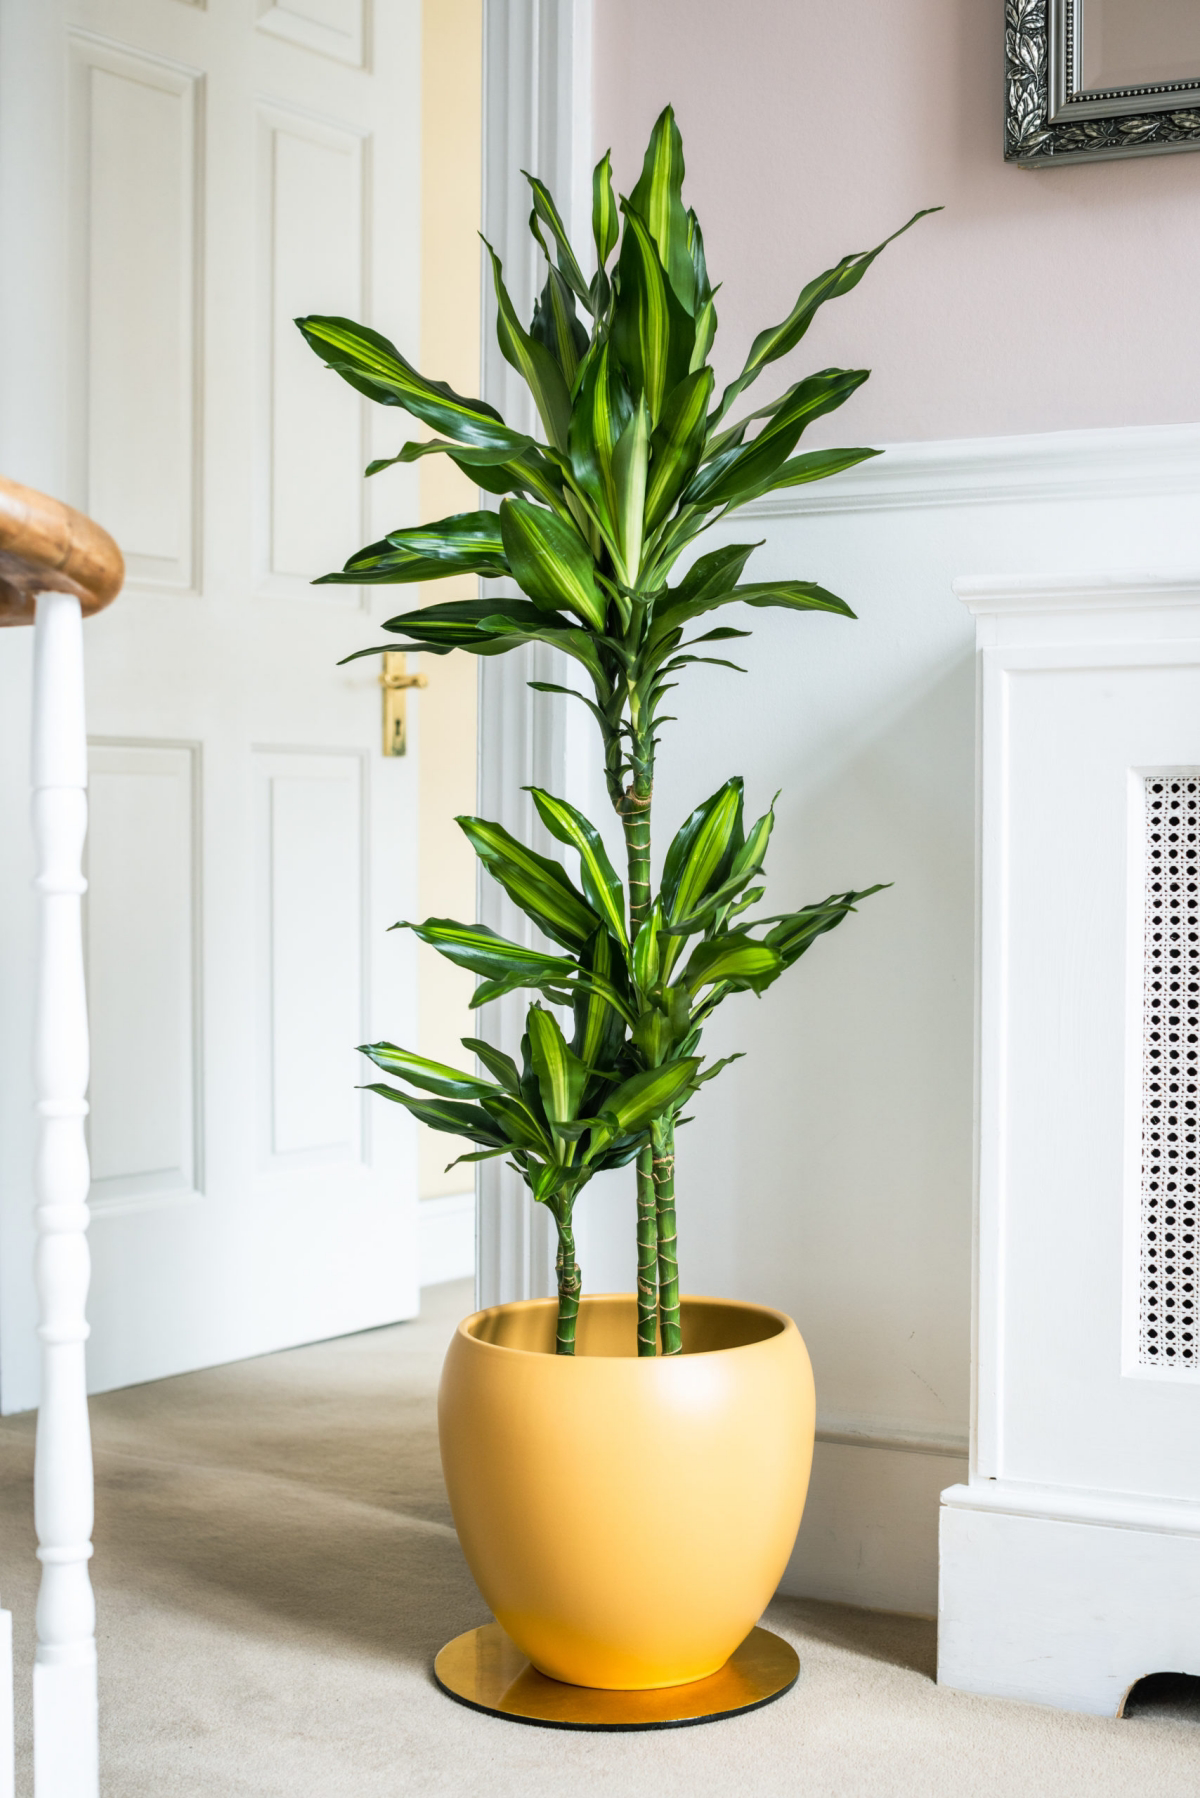
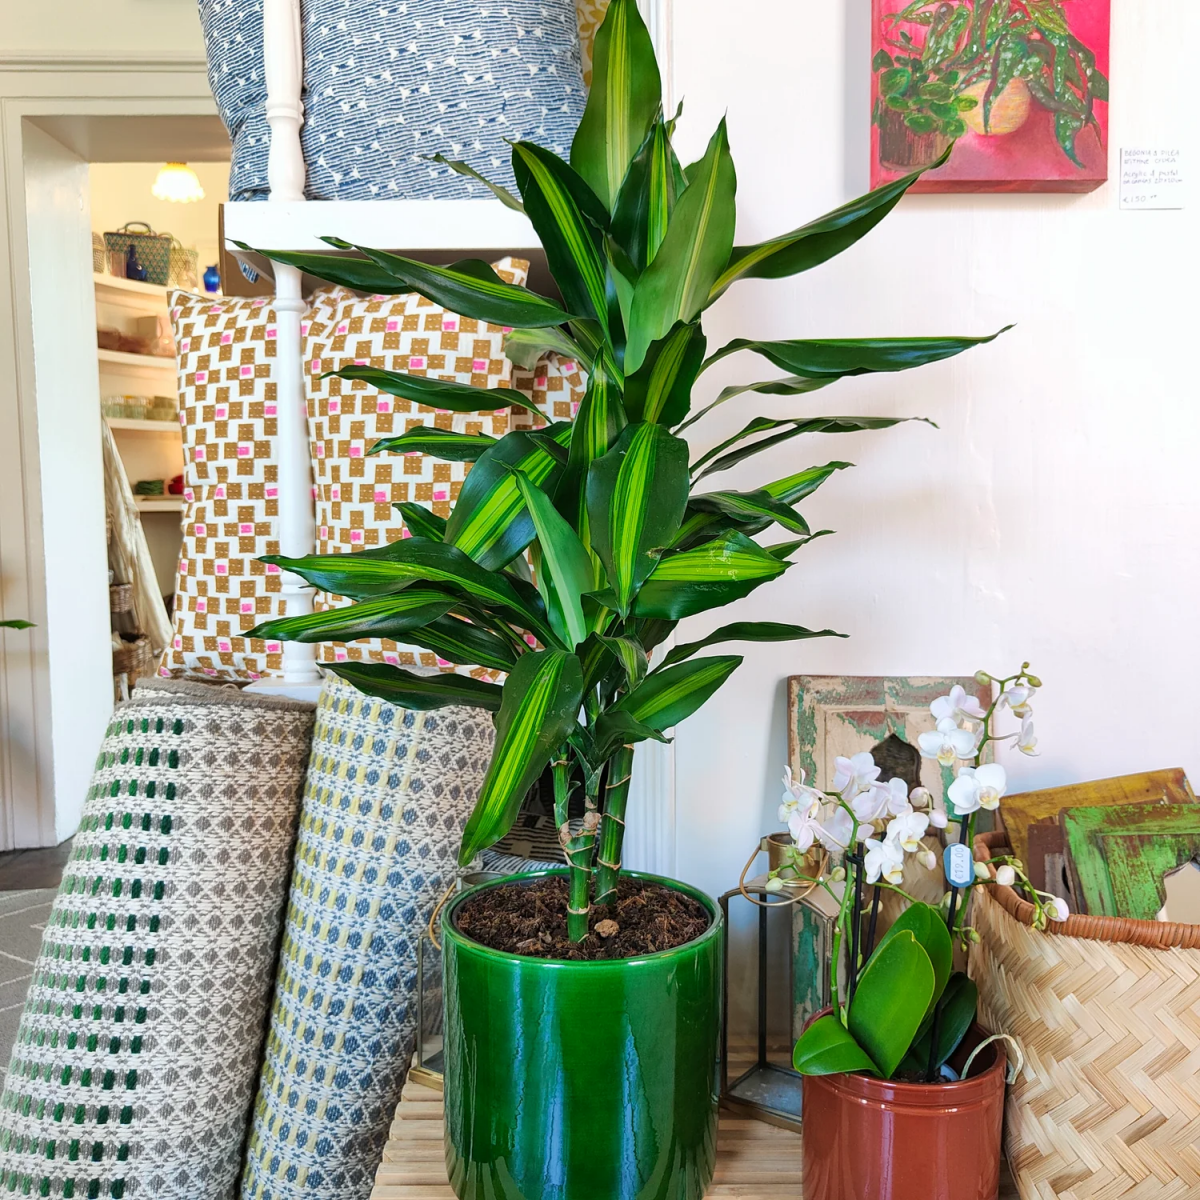
Terracotta Pot: Its porous clay wicks moisture away from the soil, allowing it to dry out faster. This is a great choice if you tend to overwater your plants, as it provides excellent aeration for the roots.
Glazed Ceramic Pot: Non-porous and available in endless designs, these pots retain moisture for much longer. They are ideal if you prefer a less frequent watering routine or live in a very dry climate.
Your choice depends on your care habits; both can work beautifully with a well-draining soil mix.
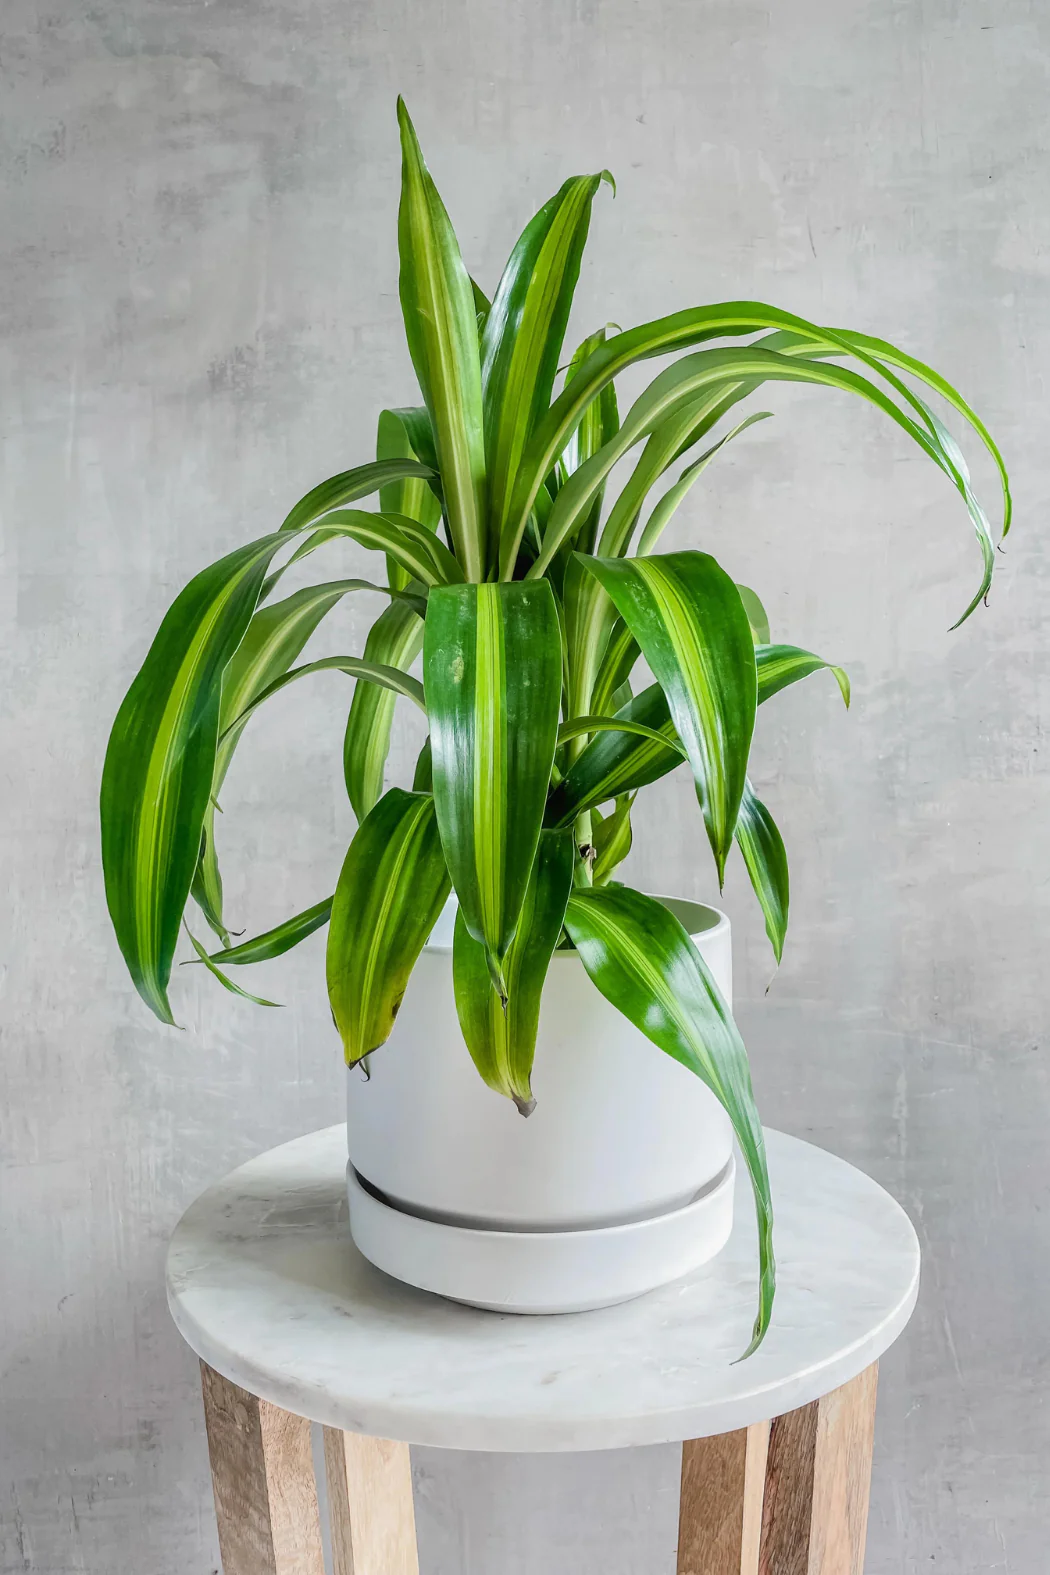
Dust isn’t just an aesthetic issue; it can genuinely harm your plant. The broad leaves of the Dracaena fragrans are prime real estate for dust and grime, which can block light and clog the plant’s stomata (its ‘pores’). Once a month, give your plant a gentle shower in the tub or wipe down each leaf with a soft, damp cloth. It’s a simple step that directly aids photosynthesis and keeps the foliage vibrant and efficient.
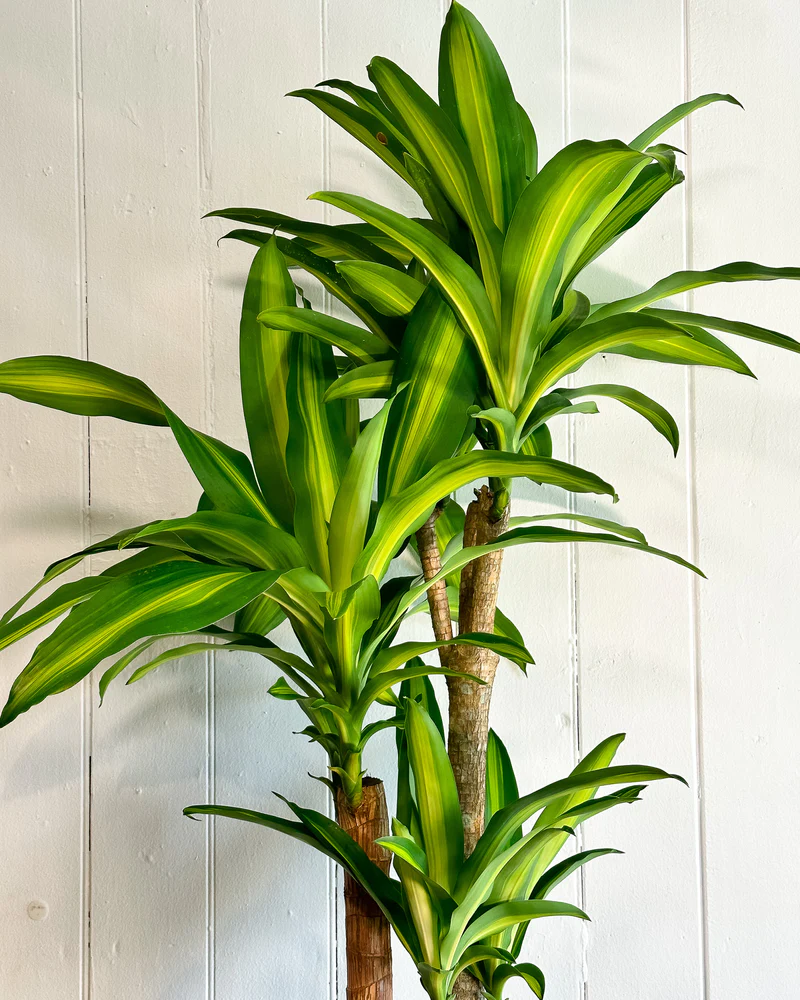
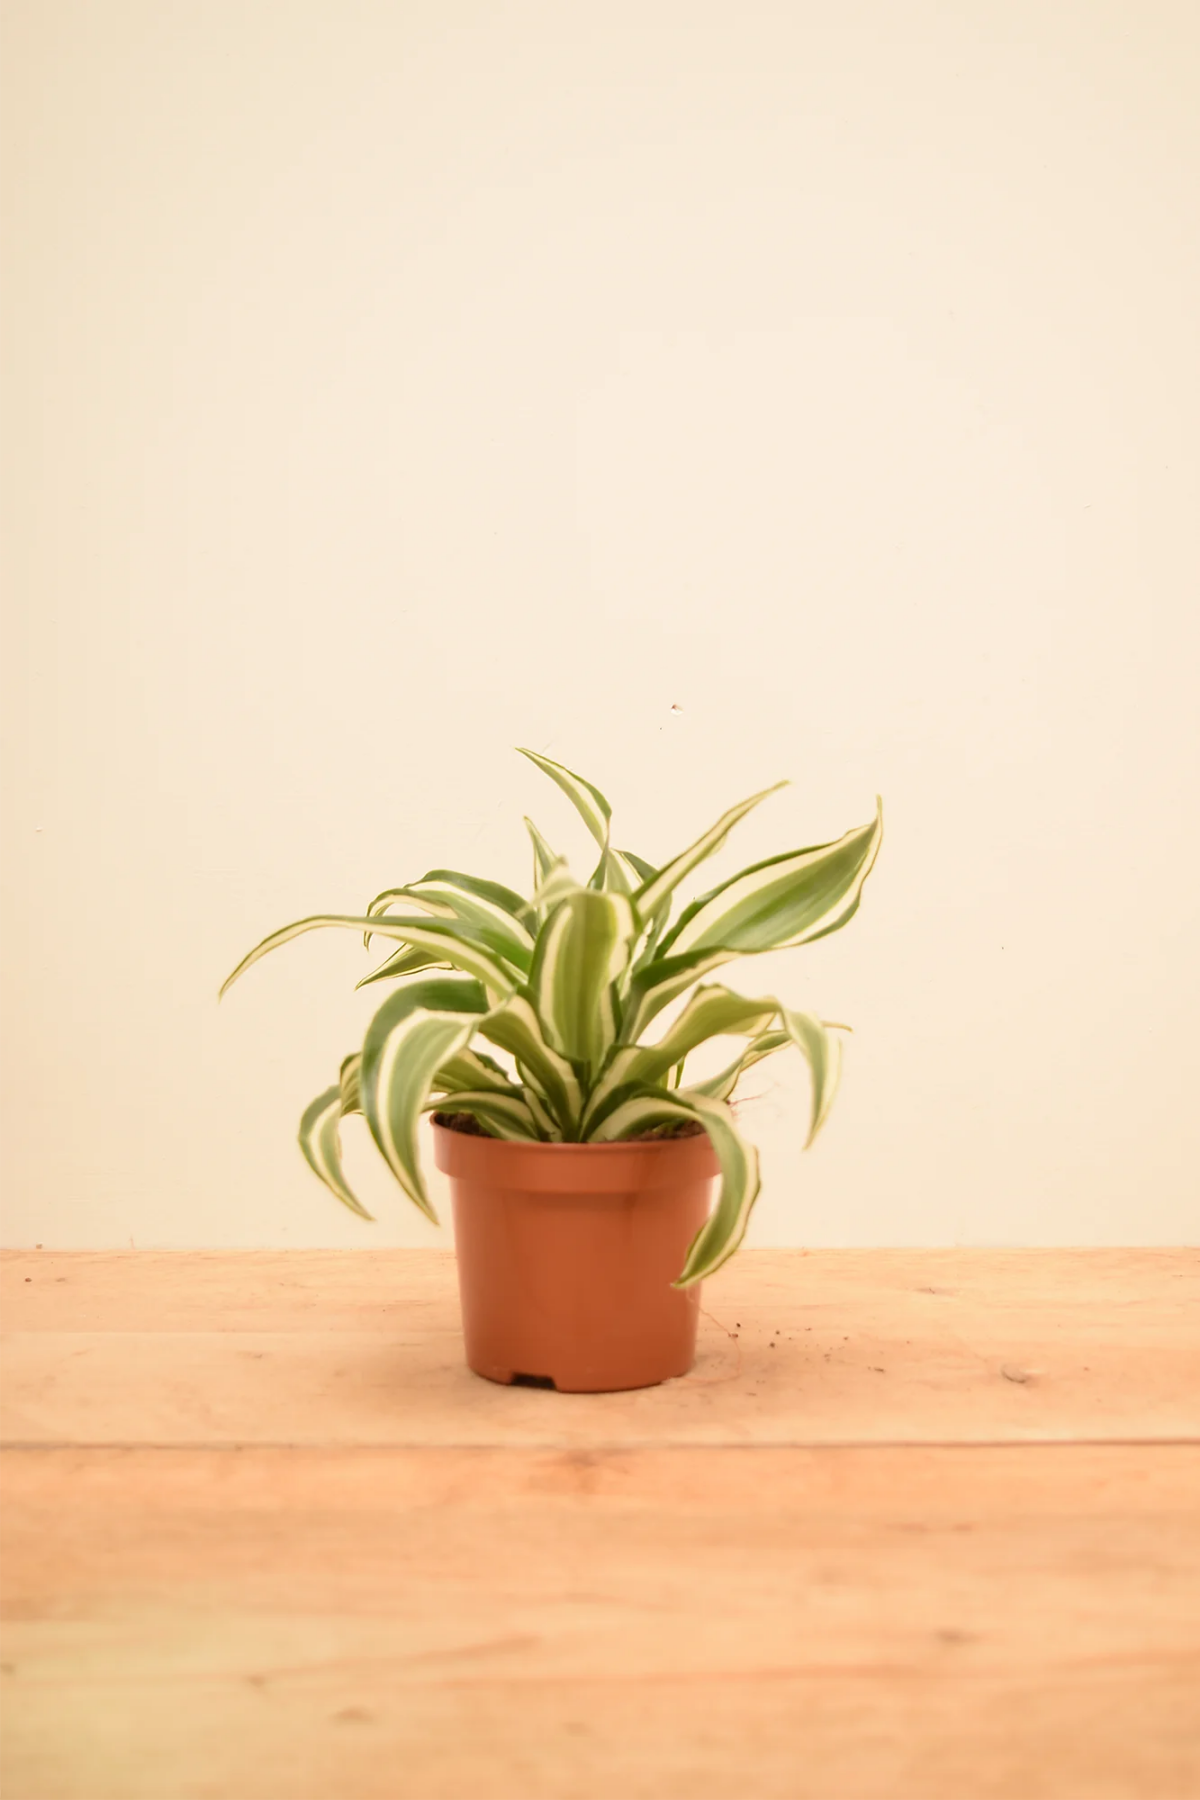
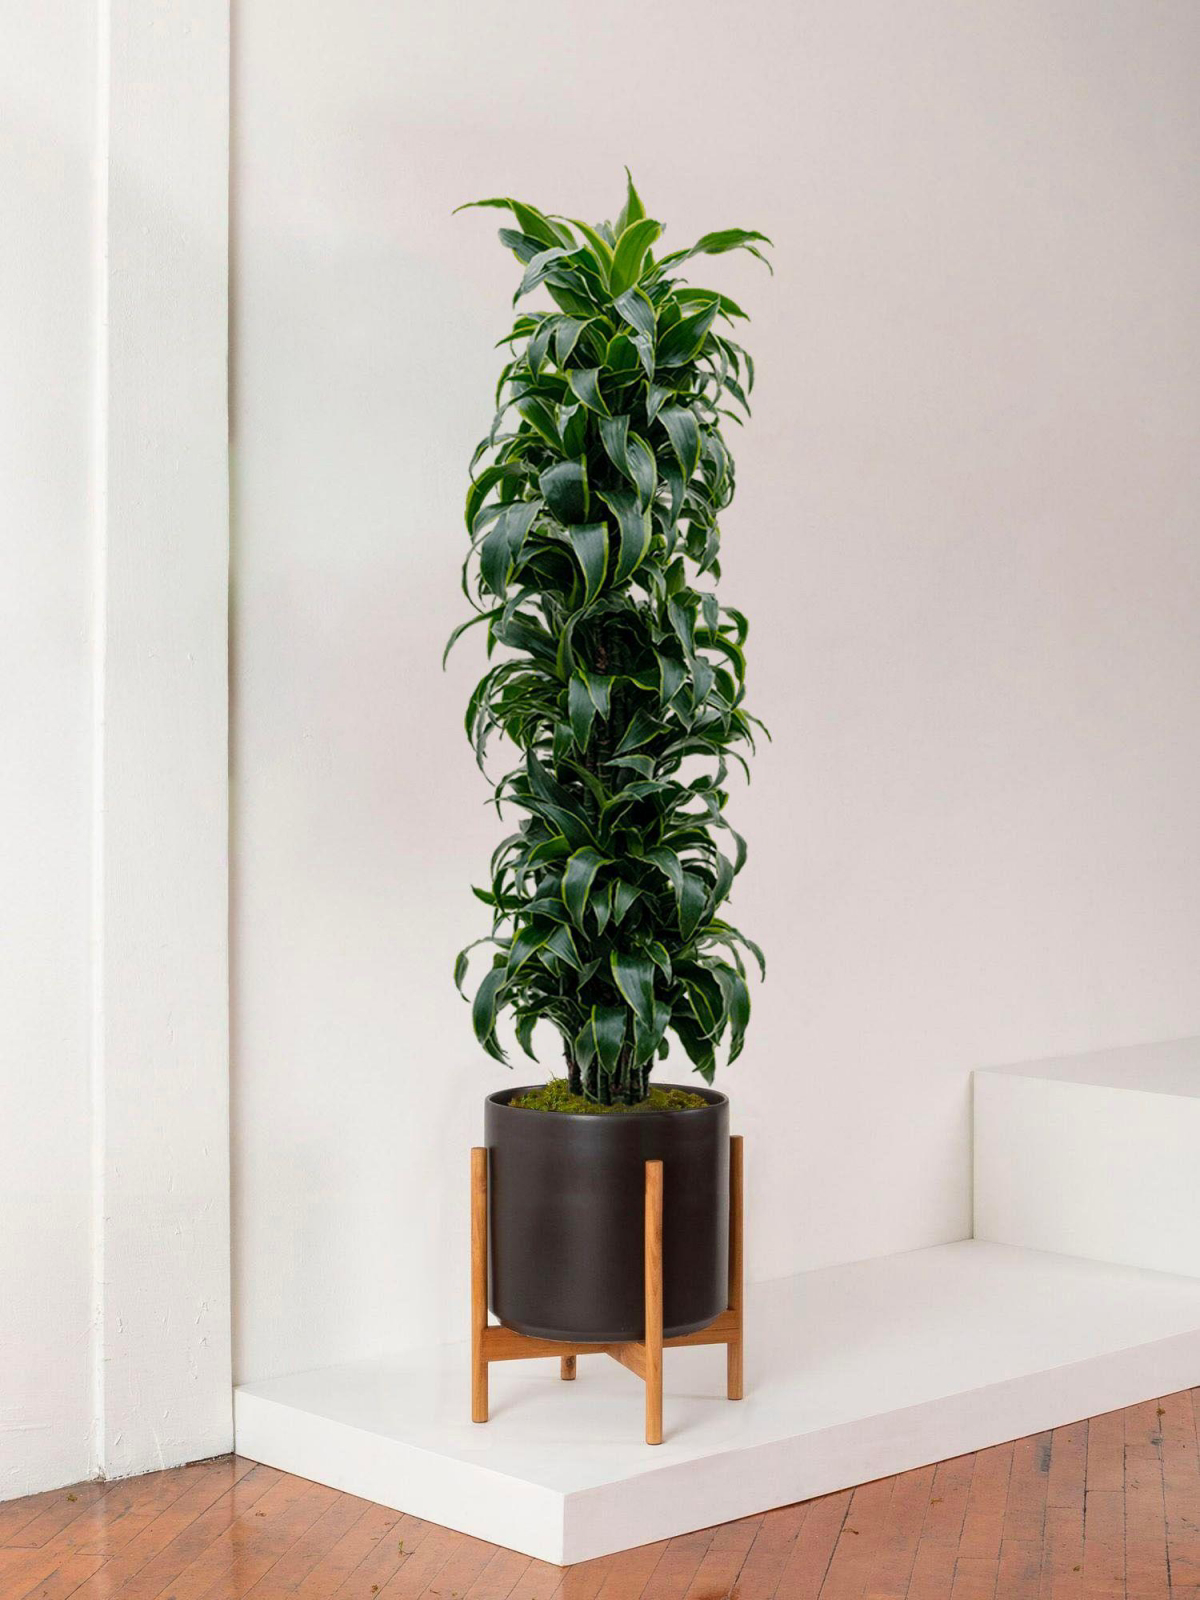
Want to add a little drama? Look for the ‘Janet Craig’ or its ‘Compacta’ variety. Unlike the variegated leaves of the common ‘Massangeana’, ‘Janet Craig’ features stunning, deep-green, glossy leaves that create a lush, uniform look. The Compacta form grows in a much tighter, denser rosette, making it a perfect choice for tabletops or shelves where a strong, architectural form is desired without the towering height.
You can easily create new plants from an old, leggy cane. It’s a great way to salvage a plant or simply multiply your collection.
- Using clean shears, cut a section of the woody cane at least 4-6 inches long.
- You can place the cutting directly into a glass of water, changing the water weekly. Roots should appear in about a month.
- Alternatively, you can plant the cane directly into a pot with moist, well-draining soil. Keep it warm and humid, and new leaf growth should sprout from the top.


